FREE DESIGNS AND ESTIMATES

10 Storage Solutions for Kitchens With Character

Article by: Joanna Simmons

Kitchens are all about storage, but it can become rather predictable: Think rows of built-in cupboards and wall cabinets, with an emphasis on practicality over personality. So how can your cooking space ingeniously accommodate everything you need while also looking original and exciting? These 10 great solutions offer some fresh ideas — not to mention storage eye-candy!


Cabinet Storage Solutions 1

Go full-size. Pantries are huge news in kitchen storage and for good reason. While a conventional base unit requires you to get down on your knees with a flashlight to find that last can of beans, anything stored in a tall pantry like this one is easily visible and accessible. 

Typically fitted with drawers, racks, baskets and even lighting — and performing valiantly even when ultra-slender — these modern beauties offer plenty to love.


Cabinet Storage Solutions 2

Create an island library. Passionate home chefs accumulate lots of cookbooks over the years, but not always the space to store them. Volumes kept near the stove can become scruffy and grease-spattered and perhaps don’t merit being displayed prominently. 

How about this, though: neat shelves on the end of an island? The books are visible — and add color — without being central to the design of the kitchen, and they’re easy to grab when you’re searching for a recipe.


Cabinet Storage Solutions 3

Scale up. A pantry that’s also a breakfast station is sure to set any storage fanatic’s pulse racing. This is perhaps the ultimate piece of kitchen furniture, one most of us can only dream about. 

It combines oodles of storage with a dedicated space where you can prepare your coffee and toast. You can then stand and gaze at your neatly arranged shelves while you eat. Life doesn’t get much better than that, does it?

Repurpose a hanger. Dish towels go on a cupboard or oven door handle, right? Wrong. You can hang them on a hanger that is hanging on the wall! Original, quirky, inexpensive storage.


Cabinet Storage Solutions 5

Carve out space for the unwieldy. Chopping boards and trays are sizable, often heavy pieces that benefit from a dedicated home like this compartment incorporated into a run of cabinets. It’s such a simple little storage detail, but so invaluable.


Cabinet Storage Solutions 6

Ditch convention. This pale and unpretentious kitchen may not be to a neat freak’s taste, but there’s something to be admired in its anything-goes approach to storage. 

Superficially cluttered though it may appear, I suspect its owner knows exactly where everything is and that all the essentials are within a quick grab from the stove.

Opt for a lovely long shelf. There’s a growing trend for long shelves that simply break up a run of units rather than provide workaday storage. They can become home to beautiful objects or the odd cookbook or plant, helping to personalize a built-in design and lighten its look.


StorageSolution8.JPG

Hang it high. Making use of vertical space is a smart move in a kitchen, where storage often has to be worked into a small footprint. This space features a metal rack that was probably never intended for a kitchen but works beautifully holding pans and utensils. 

It’s attached high on the wall to reduce the risk of banging a head against a frying pan!

Resist the sleek. Kitchen design often tends toward the sleek and efficient, but it can also rock a more edgy, homemade look while still packing in tons of practical storage. So think laterally and use old piping and boards to make some shelving — you’ll get storage and original style at the same time.

Add a twist to the typical.Kitchen storage needs to be well-designed and abundant enough to hold everything from mugs to marmalade. But really great kitchen storage does it while adding a twist of unique style. 

These glass-fronted cupboards are fairly basic, but the tiling on the interior adds detail and interest and contributes to the kitchen’s industrial feel.

10 Design Tips Learned From the Worst Advice Ever

Article by:

Bad advice is like a stomach flu in a small home. Sooner or later, everyone gets it. But when it comes to bad home design advice, unfortunately it’s not just a 48-hour ordeal — it can drag through a lifetime. 

Don’t get me wrong. It’s hard not to listen to your best friend, mother or uncle telling you what’s best for you and your home. Sometimes, though, you just have to take that advice in stride, kindly say, “Thank you” and then go with your gut. 

We asked Houzzers what was the worst home advice they’d ever been given and, ironically, a lot of great advice got unearthed. The most important takeaway? “Whatever the worst advice we’ve been given, kudos to all who said no.” 

1. Learn two valuable words: “Um, no.” When someone suggests something to you, you might find that what you really mean to respond gets buried in formality and politeness. “Well, that’s a good suggestion. I see your point; I guess I could consider painting my fireplace, but let’s hold off on that for a little bit …” 

Sometimes what you really need to say is flat-out, “Um, no. I don’t want that.” 

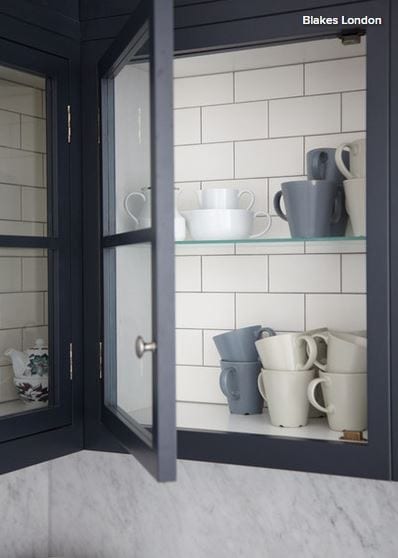
When a house inspector suggested to badlelly, “Sure, the parquet floors are in great condition, but if I were you, I’d replace them all with some nice laminate,” the response was simple: “Uh, no.”

Suedee spoke a couple of choice words when a builder’s consultant said there was no need to add insulation to the interior walls for sound absorption, even for the wall between the main bathroom and the family room: “Um, awkward.”


2. You definitely don’t have to listen to loved ones. Just like you have to find the strength to be curt, mastering the art of rejecting advice from the people you care about is key. Watch how it’s done. 

“Hi, Mom! Good to hear from you. What’s that? I should install blue carpet like we had in our kids’ rooms growing up? Ha! That’s a great idea. We could pretend it’s shark-filled water in the living room when guests are over. I’ll keep that in mind. Anyway, I’ve got to go. Thanks for the suggestion. Love you! Bye.” 

See how easy that is? The last thing you want is to be stuck with something you hate just because you wanted to please somebody else. 

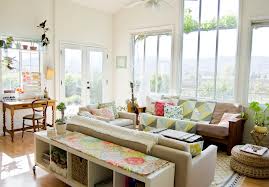
Take it from marthafish: “When house shopping, most of the houses I liked were near busy roads. The Realtor and my husband convinced me that I would get used to it and it wouldn’t bother me. And according to the Realtor, I wouldn’t hear it inside my house. Wrong! It drives me crazy. I can’t sit outside. New windows are on my list of home improvements.”

I’m sure indianpatti’s mom had the best intention when she phoned up to “express her extreme dislike for the drapes in my home. ‘Y
ou should get the European lace curtains like I have.’ OMG! Our home is modern. Lacy curtains? LOL!” writes indianpatti.

Jdingles learned the hard way. “Back in the ’80s, I had a gorgeous red velvet high-back chair. My friend said she hated it and that I should give it away. I did. Months later my chair was on the cover of an interior design magazine. The new owner described it exactly as mine and got it from my local goodwill for $10! She designed her entire room around the chair — just as I had imagined.”
 

3. In fact, you don’t have to listen to anybody at all. There will always be people around who want to offer their two cents. By all means listen and take the idea into consideration, but don’t be afraid to employ the “Um, no” strategy (see point No. 1). 

“An investor friend told us not to buy the home we were considering,” says LB Interiors.” It needed work, and most people could not see beyond what was not there. I saw its potential. We were young and were starting out with our first home. Wrong advice, as we live in one of the best areas and, with being artsy and creative, have made many worthy changes over the years. It was a great decision.”

A Realtor told jae_57 to list the house “at $40,000 less than what we wanted because the 180-degree view of the Sierra Nevada mountains wasn’t that big a deal. We didn’t do it. Sold in a matter of weeks for above asking.” 

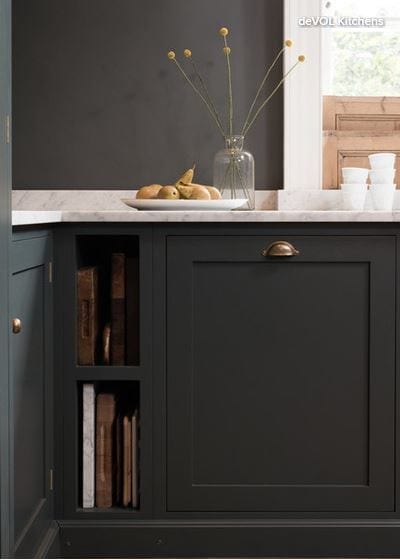
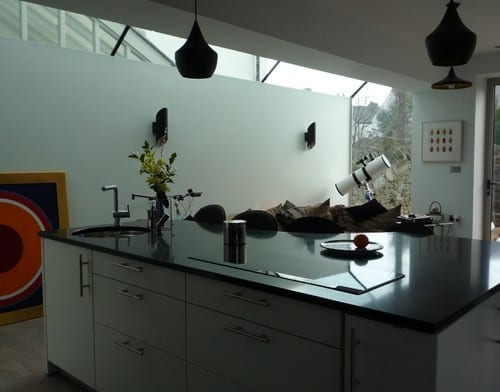
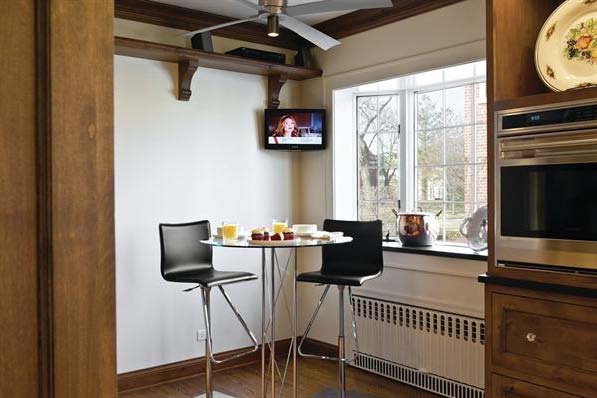
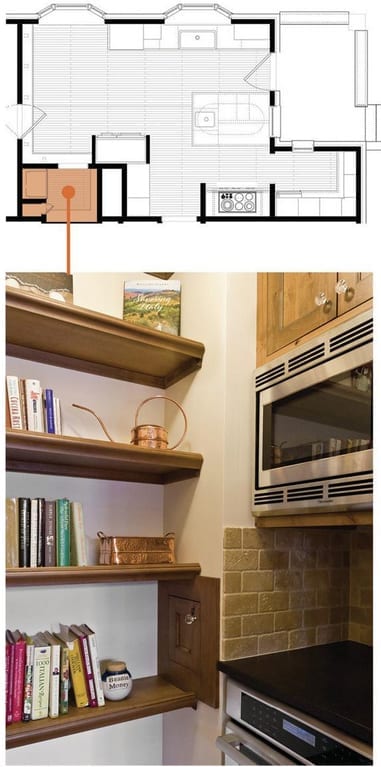
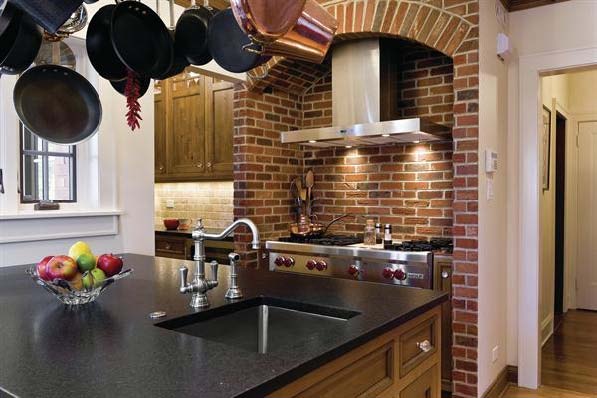
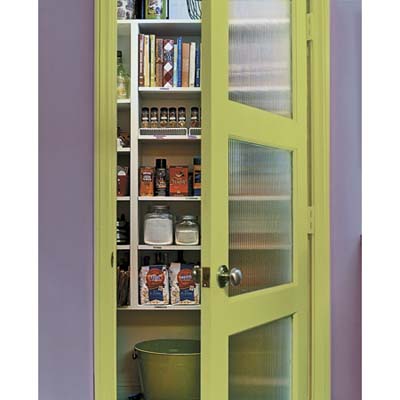
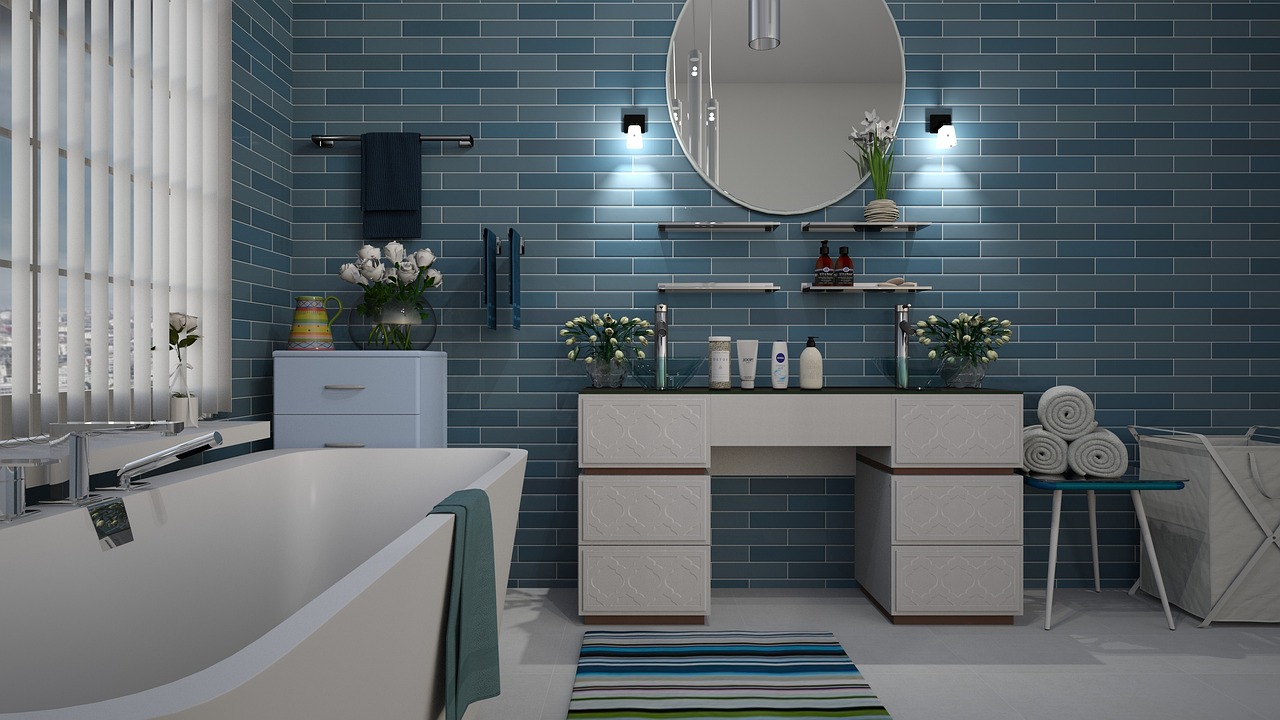
4. Pssst: You don’t have to like granite. No, really. You don’t. I swear. Do your own research on materials. You might find that quartz or butcher block (shown here) works best for your living needs. 

“I was told I must get granite counters,” says Darzy. “No, I don’t. I love the uniformity and no maintenance of quartz.”

Closet Classics of Andover says the worst advice received was to “get black granite countertops. They are so hard to keep up with and keep looking clean. Even the slightest fingerprint or smudge shows up. I wouldn’t do it again.”

Spurfnickety also deflected the peer pressure about granite countertops and was happy to do so. “I have always loved soapstone. We installed soapstone and after seven years have absolutely no regrets.”


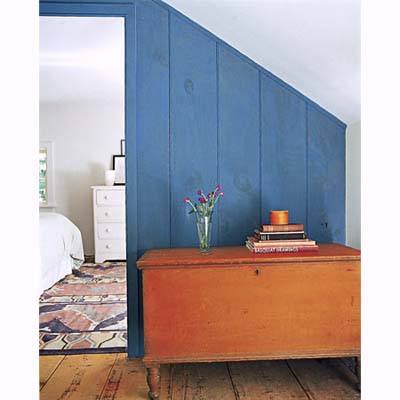
5. Newer isn’t always better. There will always be someone tempting you to rip up, pull out and replace with something newer and shinier. Trends come and go, but the past always has great character. Look at what you have, how it’s aged and how it has held up. You might find that what you have is the best you can get. 

Bungalowmo knows this firsthand. “Worst advice: ‘You should rip out those old drafty windows and put in vinyl.’ Anyone who knows me knows what I did with that advice. And yes, I jiggled the handle afterwards.”


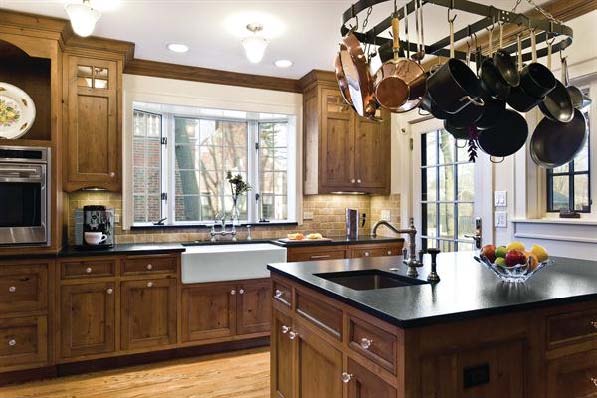
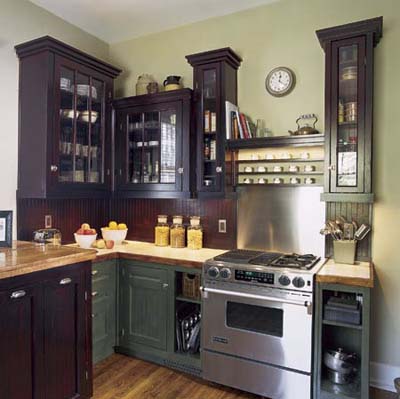
6. Don’t take the first no as your answer. There may be times when you’re told what you’re asking for just isn’t possible. But you might just have a contractor who doesn’t know how to do what you want, and instead of admitting this, will try to steer you in a different direction. In this day and age, almost anything can be done with the right professional and for the right price. 

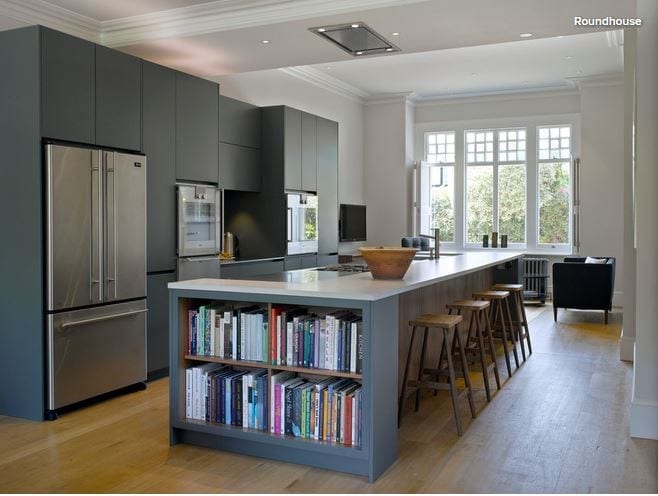
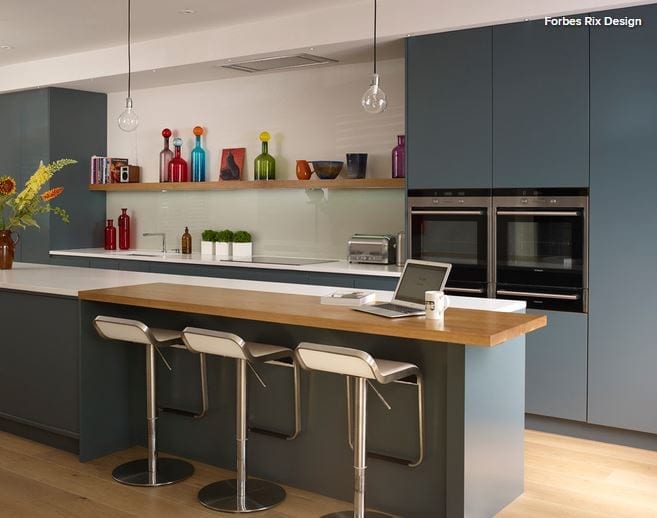
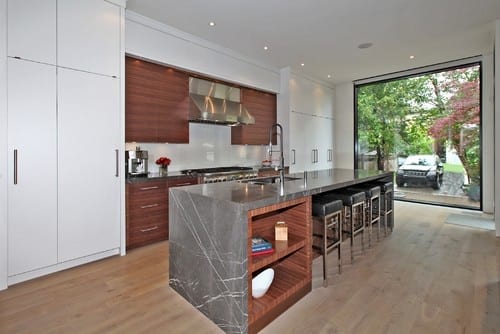
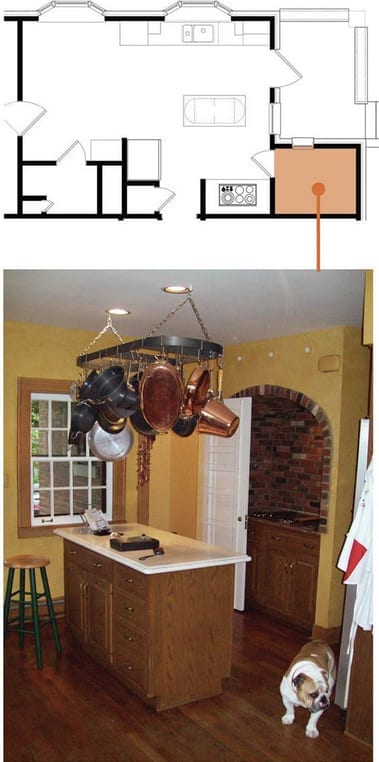
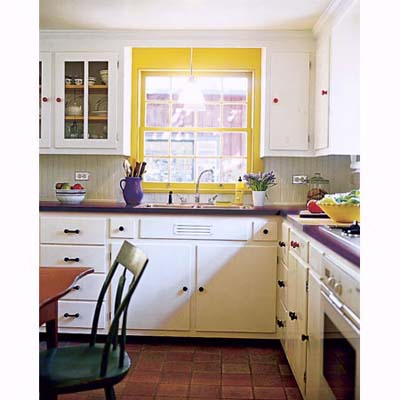
Luciana stuck with her dream and ended up with the kitchen she wanted (shown here). “The kitchen seller told me I couldn’t have a grand-piano shape for the island because most people like straight lines,” Luciana writes. “I couldn’t understand why he kept on refusing to even show me how it would look. I realized he actually didn’t know how to use his software to draw free lines. He only knew how to design a kitchen using the standard cabinets/appliances featured by his computer program. Luckily for us, a more computer-savvy colleague of his heard me insisting, realized the problem and showed him what to do.” 

7. Never, ever let anyone touch that. Whether it’s a great view, an old floor with character or an architectural wonder, don’t let anyone talk you into taking away what you love most about your home. 

ASVInteriors’ home has gorgeous views of a lake and mountains, but an architect suggested covering them up. “We detailed our plans carefully. He returned proudly with a plan that would have put up 2-meter by 3-meter glass panels in green, white and blue all around the sides and front of the house to effectively pen us in. That went nowhere,” ASVInteriors writes.

Take it from S. Thomas Kutch, too: “The worst advice ever was a kitchen remodel in a beautiful Craftsman-style cottage. The owners had contracted me to design and manage the construction. The finish carpenter they had brought on wanted to distress all the clear fir Craftsman woodwork in the house with a blowtorch to give it more ‘character.’ Hey, I was kind. I made sure he only hit his head once on the granite front steps as he tumbled down them.” 

8. Guess what? You may be able to leave that tree just where it is. Why do people hate trees so much? Linda was told hers was too close to the foundation. “The tree was probably a hundred years old when the house was built, and that was 83 years ago,” she writes. “I am not about to cut down a healthy tree just because it has huge leaves that have to be raked. Not to mention the thousands of dollars needed to remove the tree and the thousands to add central A/C to replace the value of a permanently shaded roof.”

Donnamay53’s husband insisted they remove the Japanese maple tree in the back because it was blocking the view to the backyard. She convinced him otherwise, and last year a family of birds moved in and nested there for a few weeks (shown). “Are we glad we kept the tree?” she says. “You bet!”

Fondag wasn’t so fortunate. “I was told to sprinkle weed blast around the edge of our new fence. The very next day, the leaves began to fall off our beautiful silver maple tree, and within a week it was dead,” Fondag writes. “I was just sick. And by the way, it didn’t kill the weeds.” 

9. Don’t you dare skimp on paint. It’s no secret that a fresh coat of paint is a rather inexpensive way to make a space look great. That’s why it’s not wise to skimp on it. 

Just ask Erin. A paint store employee convinced her to go with a cheaper paint. “Terrible advice!” she says. “The paint was horrible, and I was stuck with it because I already started using it. Never get cheap paint! Never!” 

10. Don’t think bigger is always better. You might think more space will solve all your clutter problems, but you might find that you’ll just fill more room with more junk. You might want to reconsider your lifestyle before you jump at the chance to upsize. 

For example, Amber was told she could never have enough bedrooms. If a three-bedroom house is good, then four, five or six must be amazing, right? “Yeah, I have used the extra rooms as guest rooms, sewing rooms, even a train room, but they end up as junk rooms!” she exclaims. “That extra box spring or old mattress? Broken chair that I should have thrown away? The boxes or art I am not currently using? They all go into those useless rooms that I pay to heat and cool. Now I’m moving into a three-bedroom. It’s just what we need, but I have a lot of junk to get rid of.”

6 Reasons to Hire a Home Design Professional

Article by:

Who hasn’t heard that regular trips to the dentist can prevent the spread of tooth decay? Even though sitting in that chair isn’t the most enjoyable way to spend time, most of us know that a dentist has the knowledge and expertise to check all aspects of our oral health. Similarly, residential designers (architects, interior designers and others) bring a wealth of knowledge and skills to make sure all aspects of remodeling and custom home projects go as smoothly as possible. 

Talk with almost anyone who’s ever tried to do a construction project without pro help, and you’ll likely hear one statement over and over again: “I wished I had hired a designer.” Even in smaller projects, like a one-room remodel, once you open up those walls, situations arise for which only an experienced professional can apply his or her creative problem solving to save time and money. 

Here’s why it’s worth it to hire a designer. 

1. You’ll save time. You may not know how structural choices can impact the installation of the mechanical system. Or about options for new materials or technologies that might be cheaper, better or more appropriate than what you are familiar with. Figuring those things out takes time, and lots of it. A skilled professional will have this information at the ready for you. 

Plus, with advances in technology, new building envelope techniques are coming on the market with increasing frequency, and new, tougher energy-efficiency requirements are transforming how walls are constructed and bringing an end to many traditional building practices. So it’s more crucial than ever to have someone on your team who understands how your building assembly meets current building code requirements. 

These codes are typically complex texts that are difficult for those outside the building industry to understand. When designers submit drawings to the building authority, a plans examiner reviews them and issues a revision notice to address any variances from the current codes and construction standards. 

A well-informed designer with up-to-date knowledge of building science can get building projects through with the minimum number of revisions. Since each revision takes time to be completed, having fewer revisions will allow you to get your permit faster. Low-quality or incomplete documents can delay your construction. Hiring a designer will help ensure that your project meets relevant codes so it can progress smoothly through your municipality’s process.

This could save you many sleepless nights and potentially weeks on your project trying to determine what is needed to satisfy the code requirements. 

2. You’ll get their expertise and understanding of the overall construction process. The basic function of a designer is interpreting your needs and coming up with a professional plan for any building project. Although you may hire him or her only for this task, the designer will also provide a wide variety of other resources to make sure the whole building process goes off without a hitch. 

Depending on your needs and budget, a designer can guide you through the relevant building application process, research planning legislation, assist in the hiring of surveyors and general contractors, recommend subcontractors and manage the construction phase of a project on your behalf to ensure that building plans are accurately followed.

Trying to do this yourself would mean hours and hours of research and potential delays. 

There are many types of designers working in the home building industry. Some are licensed professionals; others are builders who have expanded their services into design as well as construction of custom homes and home renovations. 

Design-builders and unlicensed designers make up a large contingent of the individuals working in the procurement of custom homes and renovations. They tend to be cost effective and can be the right fit for your project, so long as you find a reputable person to work with. 

Architects are generally more expensive to hire but bring to a project a broader set of skills 
and talent that can result in both an exceptional project and an exceptional experience. This 
results from the additional work an architect puts into coordinating everyone involved in your project, as well as the unique skills and knowledge related to current technology, materials and construction processes. 

That said, not every project requires an architect, and not every design-builder can deliver on your vision. The rule of thumb is that the more unique and challenging the project is, the better suited an architect is for it. 

3. They speak the language. Because so much information on your project is communicated using two-dimensional drawings, there are many conventions on how planssections and elevations are interpreted. Your project revolves around translating the 2-D drawing to 3-D construction using wood studs, insulation and other materials. 

There can be misinterpretations of these drawings, which gives rise to confusion about how building elements go together. Especially if the drawings show something that the contractor might not be familiar with. Or if the contractor is busy and hasn’t had the time to really look at certain parts of the drawings, critical elements of the details can be overlooked. A designer knows how to stay on top of this.

On a recent project a client who was supervising his own construction project found the contractors hadn’t correctly followed the detail drawings. They had inadvertently switched the location of the vapor barrier from the warm side of the building envelope to the cold side, where the wall meets the floor. Doesn’t sound like much, but most problems with mold and rot in building are cause by prolonged periods of condensation occurring within the wall and floor assembly. 

Over time the presence of moisture will give rise to the mold’s bacteria and fungus, which lead to rot and structural failure. The only way to fix this was to rip out several courses of brick all around the house, costing the client almost $10,000.

Having someone onboard who speaks the language can prevent these costly missteps. 

Modern Bedroom by Austin Architects & Designers Specht Harpman Architects 

4. They’ll be your advocate. If you’re having problems with contractors on your project, it might be tough for you to verify that they are properly carrying out the intent of the drawings, or even which contractor is actually responsible for the issue. 

It can be hard to know where the responsibility for one contractor ends and the other begins. Time and again we’ve seen things get overlooked or improperly constructed early in the process, which affects contractors later in the job. And if that earlier contractor has left to another job, it’s oftentimes difficult to get the person back onsite to fix those mistakes. Plus, it’s costly for new contractors to fix another’s mistakes. 

We had one client who didn’t elect to procure our construction management services. He had to bring in a second team of drywall contractors near the end of the project to fix the poor job done by the initial subcontractors, who wouldn’t come back to fix areas that weren’t up to standard. It cost the client an additional $3,500 out of his pocket to fix the mistakes that weren’t caught earlier.

Substandard drywalling can cause a whole host of problems at the finishing stage, not the least of which is uneven tile, because the tile contractors can’t get a straight line to adhere tile. Problems that may not be very apparent when looking at a whole wall of drywall under construction lighting are magnified when the tile is on and the pot lights are showing areas where the tile doesn’t meet properly or is uneven.

Contract administration can be accessed on a fixed fee or an hourly basis. Expect to budget 3½ to 4½ percent of your construction cost to this for a typical project. 

5. You’ll get their design sense and attention to detail. A designer translates your needs to functional spaces but also makes them beautiful. Good designers are consummate three-dimensional thinkers and can use their abilities to find special opportunities in a design that might not easily be understood in two-dimensional drawings. Additionally, they are always keeping up-to-date on trends in local and international design. 

If you want a space that has lasting appeal and adds to the value of your investment, you need to hire a designer. Designers have the skills to include the features that will maximize your house, while making sure your project runs smoothly. 

Not all architectural details are reflected in drawings. Architects can also specify plumbing fixtures, expected quality levels, finishes, electrical fixtures and other related information that’s communicated in drawings or in specifications written for the contractors working on the project. If the architect does not prepare written specifications, then you could be faced with change orders, which can slow down the process. 

Change orders are instructions to the contractor to make an onsite change from what’s specified in the contract documents. It can simplify construction based on site conditions, but it also can add costs when it requires redoing part of the construction due to oversights. 

6. You’ll get access to other skilled pros. Being in the design business means meeting lots of other pros who also work on residential projects. From structural engineers to painters, your designer probably has quite the network of skilled contractors who can get the job done within the given budget. 

And, again, the point here is that the additional cost for a quality design team can mean savings in the long run. I think one of the contractors we are working with said it best with a quote at the bottom of the company letterhead, which reads, “The bitterness of poor quality remains long after the sweetness of low price is forgotten.” 

Love Your Living Room | Make a Design Plan

Photo: American Cabinet & Flooring, Inc. | Designer Clay Bernard

Create a living room you and your guests will really enjoy spending time in by first setting up the right layout!

To get an idea of what you already have, make a list of everything in your living room: furniture, rugs, lights, curtains – even accessories. What pieces do you love? What pieces should be tossed? Do you have any other pieces that you’d like to integrate into your living room? Maybe you have an inherited table or chair that would  look perfect in your living room after you redo the layout. This also could be the right time to replace a few worn-out pieces or order new window coverings.

Decide What Your Living Room Can Do For You

How do you need to live in this room? Is the space for watching television only? Does it flow directly into your kitchen or dining room? Maybe you have small children and pets. Prioritize your needs so that the space can function effectively – you may not be able to get everything you want in one space.

Have a Focal Point

Identify your room’s best focal point. Our natural inclination is to visually focus on one object or area when we enter a room. If your living room doesn’t have a focus, a striking piece of art or built-in shelving may give you an anchor point to build your furniture around.

Maximize Your Seating

Try to design your living room to comfortably cater to six to eight people. Day to day you will have only immediate family to worry about, but don’t forget that your visitor’s comfort is equally important.

Occasional seating like a stool or ottoman takes up less space than a sofa or chair and will work hard for you. If you have more dining chairs than you use every day and the color scheme works, put one in a corner of your living room – this can be a nice way to link the decor in both rooms.

Lay Out the Living Room

Your list of furniture and accessories is made; how will everything fit?

An interior decorator or designer can work with you to get the look you’re after, and even come up with ideas you didn’t know you’d love. If you’re going the DIY route, start with a simple sketch of the room on paper. Measure the length and width of the room, including any windows or doors. Plain paper and a ruler are all you will need to draw up the room – 1 centimeter on the paper equals 1 foot (or 1 meter) of real space.

Then measure, draw and cut out paper to match all the pieces of furniture you want in the room, new and existing, including rugs. Don’t stress about trying to make them look professional; the basic shape is enough to get an idea. Make sure you use the same formula used for the room measurements.

Once you are happy with how it all looks on paper, you can start moving furniture around. Use masking tape to make an outline of any pieces you like but haven’t yet bought. This will help with scale and help you avoid any unwanted purchases.

If possible, arrange the furniture so it sits off the walls. This allows for airflow around the perimeter and actually makes the living room appear larger.

(You are reading an article originally posted on Houzz)

Kitchen Design: How to Avoid Standing Room Only

Photo Credit: Dennis Jourdan Photography via Remodeling Magazine

Room for Two: Alder cabinets, honed granite countertops and a tumbled marble backsplash give this kitchen a rustic feel.

The homeowners of this 1920s house (pictured above) had been planning a kitchen remodel for a long time. They went so far as to work on a design that would enclose the porch to expand the space, then got cold feet during the market downturn, and, worrying about the return on investment for an addition, put the project on hold.

By the time designer Diane Lawson, of Diane Lawson Designs in Nashville, TN; met the couple, they had revisited the project but had opted to stay within the existing footprint. However, they presented her with a long list of desires that included: good traffic flow for two cooks, separate cooking areas, an island, increased storage, and a rustic Italian design and details that would blend with the home’s Italianate style. 

Though most homeowners today want to open up the kitchen to the rest of the house, Lawson says this couple bucked the trend, choosing to maintain the separation from the living and dining rooms.

Fitting in the long list of the client’s wants required some compromise, including a peninsula rather than an island, but Lawson viewed the project as putting a puzzle together to set all the pieces neatly in to the outline. 

Photo Credit: Dennis Jourdan Photography via Remodeling Magazine

Window & Wall Upgrade: When the original windows were replaced with low-E units, insulation was also added to the exterior wall.

Puzzle Pieces

To help create a rustic Italian feel, the clients chose knotty alder cabinets. Lawson says that this species has increased in popularity during the last 10 years and that the wood – sometimes referred to as “poor man’s cherry” because of it’s similar grain and reddish tones – can cost 10% to 15% less than cherry.

Since not all manufacturers carry alder, Lawson opted for custom cabinetry. Going with a custom shop also had the advantage of enabling her to maximize storage and create a furniture look with cabinets that fit the age and style of the house. “[The choice] boils down to [the client’s] wish list and what they are looking to achieve,” Lawson explains. “And, of course, budget.”

The clients wanted to use the same finish throughout the kitchen – a rare choice these days, Lawson says. Currently, most of her clients are opting for a contrasting finish for the island. 

Lawson had known remodeler Michael Menn, of Michale Menn Ltd., in Chicago, for almost 20 years and brought him on to help her with the extensive remodel.  The ceiling above the sink had a soffit. Menn removed it to accommodate Lawson’s design, which took the cabinets to the ceiling to provide extra storage. 

One of Lawson’s biggest design challenges was the traffic pattern for the family’s two “heavy-duty chefs” and keeping them out of each other’s way. The original freestanding island really affected the pattern, so Lawson moved the island to abut a wall. “While you don’t have access on all four sides [of the island],” Lawson says, “it gave us more room in the busy aisle-way, which is the main entry into the kitchen and is where we needed as much space as possible” – especially when one of the cooks is standing at the island prep sink. 

The island has a small trash cabinet and a shelf for the client’s heavy stand-mixer.

Photo Credit: Dennis Jourdan (photo) | Nicole Babcock (floorplan) via Remodeling Magazine

Into the fold: Removing the door and adding upper and lower cabinets makes this former pantry feel like part of the main kitchen.

Photo Credit: Dennis Jourdan (photo) | Nicole Babcock (floorpan) via Remodeling Magazine

Cook Nook: The second pantry has a microwave and an oven. The existing laundry chute remains – but it has been reframed to match the cabinetry.

Separate Yet Cohesive

The existing 360-square-foot kitchen included two under-utilized pantries. Lawson thought the 18-square-foot closet next to the stove alcove would work better as a butler’s pantry, so Menn removed the door to make it part of the kitchen and replaced the wire-rack shelves with cabinets that match those in the main kitchen. The L-shaped run of cabinets has upper and lower cabinets and a countertop. An undercounter wine refrigerator is the only appliance. 

The other 24-square-foot closet is closer to the dining room. Lawson considered removing the walls to incorporate it into the dining space, but there were two obstacles to doing that: a laundry chute in the closet and a two-story chimney that runs adjacent to that pantry. “We were bound,” Menn says, but the team also thought that retaining the quaint “little pockets” of space matched the style of the 90-year-old home. As they had done with the other closet, the crew removed the door. The existing closet had some shelves, an outlet, and a hanging bulb. The new space contains an oven, counter space, and upper shelves with a microwave. The wife likes to bake, and this area gives her a space to work in while her husband prepares food in the main kitchen area.

Photo Credit: Dennis Jourdan Photography via Remodeling Magazine

Brick or Treat

The original cooking alcove was outlined with faux brick. The clients liked the idea of a brick alcove and felt that it fit well with the new design’s rustic feel. And, Lawson says, the material ties in with the brick porch outside the kitchen.

Menn and Lawson thought the alcove could be enhanced to make more of a statement, so Menn’s team created a taller, softer arch at the top of the opening and installed real brick – cut ¾-inch thick – on the entire wall, as well as on the wall adjacent to the butler’s pantry.

The alcove also has contemporary features, including a sleek stainless steel hood, a Wolf cooktop, and a stainless steel storage drawer custom-made by the cabinet shop. The hood is actually made for an above-island installation that the clients had considered for the addition version of the project. They liked the shape, so Menn installed it here. He made custom ductwork to meet local code and vented the hood through an exterior wall. Narrow base pull-out cabinets flank the stove and hold spices. 

(You’re reading ‘Standing Room Only’ originally posted on Remodeling)

Design 101: Common Kitchen Shapes That Blend Beauty and Function

We all want our kitchens to be both beautiful and functional. And while you may have an idea of how you want your new kitchen to look, balancing proportion and scale to achieve a harmonious whole is critical. However you’ll also want to understand the factors that impact how it feels to be in the space. Here, we’ve gathered some information on kitchen shapes, optimizing functionality and how to ensure a layout works for you and your family.

Your Lifestyle and Your Home Will Influence Your Kitchen’s Shape

Are you an aspiring cook? Do you like to entertain? Is counter space a premium? These are just some of the considerations that will determine which kitchen shape is right for you.

Photo Credit: Omega | MasterBrand Cabinets, Inc.

U-SHAPED

Popular with many cooks because of its efficiency, the U-shaped kitchen offers generous counter space and provides an efficient workflow by creating a compact work triangle. It can however make the cook feel apart from a group when entertaining, as most movement will be facing one of the three walls.

Photo Credit: Omega | MasterBrand Cabinets, Inc.

L-SHAPED

The L-shaped kitchen offers flexibility for both large and small homes. This shape utilizes only two kitchen walls, providing an open sensibility. The L-shape minimizes traffic through the kitchen and, typically, features larger expanses of countertops, allowing ease of preparation at mealtime.

L-SHAPED WITH AN ISLAND

An L-shaped kitchen with an island is ideal for entertaining. The ample counter space along the “L”of the kitchen becomes the primary work area, while the island allows guests or other family members to gather, to help prepare or just visit… AND to stay out of the way of the cook!

Photo Credit: Omega | MasterBrand Cabinets, Inc.

G-SHAPED

A modified “U” shape, the G shaped kitchen is very efficient. However, unless one or more of the walls are designed as half or “pony” walls, this kitchen shape can feel confining for today’s cook.

SINGLE WALL

This layout positions all of the appliances on a single wall, and would typically be found in a studio apartment or other very small space.

Photo Credit: Omega | MasterBrand Cabinets, Inc.

GALLEY

Open on both ends, the Galley requires a minimum corridor width of 48″ so that the cook can easily maneuver during meal preparation. Typically, appliances are near one another which is convenient, but due to the corridor shape of the kitchen, all of the household traffic will pass through the space.

Efficiency Has a Shape: The Triangle

The basic work triangle is comprised of an imaginary line drawn between the kitchen’s primary work areas:

  1. food storage (refrigerator)
  2. food preparation (stove)
  3. clean up (sink)

For maximum efficiency, the sum total of the triangle should be 26 linear feet, with the sink being the center point.

What You Can Expect From Your Designer

In addition to offering guidance on door style, wood type and color selections; a professional kitchen designer will typically prepare three types of documents for your review:

  1. floor plan
  2. elevations of all the wall that receive cabinetry
  3. perspective view from one of more vantage points within the room

Availability of these documents to the consumer is usually contingent on a contractual agreement and/or down payment.

FLOOR PLAN

A floor plan shows the wall layout from above, and an outline of all the components that will fill the space, such as base, wall and tall cabinetry. Sometimes lighting and electrical detailing are also shown on this plan.

Photo Credit: Omega | MasterBrand Cabinets, Inc.

ELEVATION

A “flat” drawing that shows each wall of cabinetry as if you were standing and facing it head on. The elevation view is good for seeing the detail of the cabinetry components that aren’t visible in the floor plan view. It is also good for establishing heights of components within the room.

Perspective

A perspective drawing is one that is “3D” or dimensional. It shows the room as it would be actually seen from the viewpoint of a person 5′-6″ in height. Perspective drawings provide details such as areas that are increased or reduced in depth, a dimensional quality that elevation drawings don’t offer.

Testing the Fit

It is a good idea to layout the proposed kitchen in the actual space. If the space is empty, this is easily accomplished a couple of different ways. Refer to the completed floor plan utilizing a tape measure and masking tape to indicate where cabinets and appliances will be located. Newspaper can be folded to adjust its size and then moved around within the space – perfect for determining just how big that island should be! If there is an existing kitchen in place, you’ll have to improvise a bit. Both tape and newspaper can be used to outline new cabinets or appliances, helping you visualize your new space.

The Four Things Home Buyers Really Want in Kitchen Cabinetry

kitchen cabinets

A great kitchen design can dramatically increase your property value – if you want to attract prospective buyers, your kitchen  is the perfect place to invest money. The trick is to get it to appeal to the majority of people by spending your money on what most of them really want.

Kitchen cabinetry can do much to attract the right buyers. There are four key factors to consider:

  1. Quality
  2. Symmetry
  3. Color
  4. Layout

If you can get these key elements right with your cabinetry, you’re bound to have a higher home value.

Quality

The number of cabinets you have is not as important as the quality of the cabinetry. The fewer cabinets you add to your kitchen renovation, the less expensive it will be. Choose quality over quantity.

DO: choose quality hinges and runners, including soft-close drawers and custom made cabinetry.

DON’T: go for large fillers and ill-fitted modular cabinetry.

Keep the cost down by keeping the cabinet count down. Design the kitchen layout to keep it light, bright and with an open plan, without using tons of cabinets. 

Note: Excessive internal organizers aren’t essential if you are planning on reselling your home. They are wonderful in adding value to your personal use of the kitchen but are not always a wise choice if you are renovating purely to sell. Internal drawer and cabinet fit-outs are often expensive, and the extra money you spend on these accessories may not come back to you when you’re selling your property.

Symmetry

The eye is naturally drawn to appreciate symmetry and repetition. When you’re renovating to sell, keep your kitchen cabinetry simple and appealing. Elegance has a way of being understated, and simplicity is key when you are trying to appeal to the majority of buyers.

DO: keep the wall cabinetry sizes the same where possible. Drawers look nice when they are large and expansive – if you have multiple sets, keep them the same size, with the same proportion of drawers.

DON’T: add multiple cabinets in varying sizes, try to keep the look and feel consistent in the whole space.

Light, Bright Spaces

Many buyers want an open, light and airy space. A kitchen that is white makes the space feel bigger. White is also a universally appealing color and leaves a blank slate so buyers can re-envision the space.

DO: keep the space open, bright and light with white cabinetry. If you want some contrast, go for a darker bench top. Backsplahes should be kept fairly neutral too – try to introduce texture instead of color into the backsplash. The more neutral and elegant the space is, the more potential buyers you will attract.

DON’T: use darker-color cabinetry which can make the space feel closed. While adding a strong color may suit your taste, it may not be to everybody’s liking. You want to attract as many potential buyers as possible, and while white may not be the most daring color for your cabinetry, it’s the most popular. 

An Open Layout

Designing your kitchen to have a sensible and open layout is pivotal to increasing property value when you’re renovating to sell. The trend is moving toward open-plan living and multifunctional spaces. 

DO: have a large open-plan space with a kitchen island if possible. Buyers often want to multi-task in the kitchen. They want to cook, have their kids do their homework and socialize in it.

DON’T: place your kitchen in a small and poky room, the kitchen is now often the hub of the house and buyers want to see a kitchen that is interactive and sociable.

Decorate With Intention: Nourish Your Creativity at Home


going home to roost.jpg

Photo: Going Home To Roost. Whether you knit, sew, paint, write or craft, chances are that you find it challenging to squeeze in as much creative time as you would like. It is all too easy to allow our schedules to be filled to the brim with obligations to others, but the fact remains that when we take the time to do the things that feed our creative spirits, we feel better. When fall approaches, and the coziness of home beckons once again, it’s the perfect time to take up your chosen craft (or try something new).

These 11 ideas and beautiful, inspiring spaces will help spark your creativity, get you out of any ruts and support your craft side.

No more excuses! Avoid distraction and make the most of limited time

Even if you can set aside only 10 or 15 minutes, if you make them count – and repeat daily – you will be amazed at what you can accomplish. While it’s true that some projects require a few longer dedicated work times, if we are being honest, mostly “I have no time” is just another way to procrastinate.

If creating is important to you, you probably can find the time. Set yourself up for success by avoiding easy access to the Internet and turning off all of your devices during dedicated creative work times – and let those you live with know how important this this time is to you.

If you need a big, open space, make it happen

If what you really need is an expansive surface to spread out on and you don’t have a dedicated place with one, don’t let that stop you. It’s perfectly all right to call dibs on the dining room or kitchen table between meals, provided you can clear your work to the side relatively easily. Keeping a cabinet or drawers nearby will make it easy to sweep things off the table in a hurry.

Feeling stuck? Take a time-out for exercise

The next time a creative block hits, try taking a brisk walk, settling into a few yoga poses or lifting weights – anything to get your blood pumping. Exercise gives your mind a rest from actively thinking about your creative problem while improving circulation (and likely your mood). The best ideas can bubble up spontaneously during these time-outs, pulling you out of your rut in a much shorter time than if you had been trying to force an idea to come. 

Find a corner to call your own

Whether it is a small table pulled up to a sunny window, a closet that can be curtained off from the rest of the space, a tiny unused nook or a cabinet with a work surface hidden inside, it is important to find somewhere that lets you fully commit to your creative practice. There will be times when you must leave your work in the middle of a project, and it is so helpful if you can leave some of your materials out rather than needing to clean up completely every time. Don’t fret if the only space you can find is a bit out of the way – sometimes a desk with a spectacular view is not as conductive to good work as a tiny nook, where you can focus your energy on the task at hand.

Make sure you have easy access to your materials

If you need to hunt and dig every time you want to work on your craft project, chances are that it’s not going to happen as often as you would like. It’s not necessary to keep every last item on display, but putting frequently used tools in an easy-to-grab spot is key. Fill an open-top bin or basket with your materials and store it in the room where you like to work.

Let your entire space reflect your creative passions

There is something to be said for having an entire studio devoted to your art (of course), but for most of us, finding creative space within the rest of our home is just how it goes. But that doesn’t mean you must confine your creativity to one zone – in fact, the more you can integrate mini creativity spots throughout your space, the more likely it is you’ll be tempted to make something. Try displaying your guitar on a stand in the living room, keeping pretty fabrics or luscious yarns in open cubbies, and stashing a stack of fresh notebooks and nice pens near your favorite chair.

Know when you need privacy

This tip is especially pertinent for those living with kids or roommates. Even if you have a large space, if others are constantly interrupting to ask you questions or chat, you need to find somewhere more private. Taking over part of your own bedroom with a worktable and an inspiration board could be the ideal solution. If you want to be really tricky, you can even pretend you are still sleeping – and squeeze in a little creative time first thing in the morning before anyone knows you are up.

Mood matters: Your creative space should inspire you

While it is true you should minimize distractions during creative time, that doesn’t necessarily mean you ought to work in a completely unadorned room, either. Tap into what fuels your creativity and bring more of that into your space. Consider a small stereo if you enjoy music while you work, textiles or vintage objects that spark your imagination, an inspiration board where you can collect your ideas, and book you love; even fun wallpaper or a vibrant wash of paint can enhance your mood and help juice your creative spirit.

Entice yourself with inspiring quotes

I am a big believer in the power of words, and an apt quote has helped me out of a creative rut many times. Keep a rotating selection of favorite quotes, says, song lyrics and lines of poetry on a chalkboard or pin board, or simply taped to your wall for a quick boost whenever you need it.

Know that moments of humor in your decor make creativity flow

Keep the mood light in your creative space with a cheeky, fun touch like a decorated or “dressed” sculpture, a cheapo vintage portrait that you have drawn a mustache on or any object that brings a smile to your face.

Be open to creativity in all areas of your life

Creativity permeates everything we do, from our conversations with friends to preparing dinner for our families. Approaching everyday tasks with a creative outlook makes our daily life richer and more satisfying.

Choose Paint Colors With a Color Wheel

Color Wheel Guide


Big-Wheel.jpg

Photo: The Color Wheel Co.

Picking out paint colors can be a confusing experience, leaving you racked with indecision as you peruse swatches from paint companies intent on re-creating all of the 7 million colors distinguishable to the human eye. Trying to figure out which of those colors will mix harmoniously on your living room wall is enough to make you turn straight to the ecru-and-eggshell-white family and never leave.

One way to go, however, is to use a complementary color scheme. Proving the rule that opposites attract, these pairings can always be found at opposite ends from each other on a paint color wheel. When put together, they bring out the best in each other, making both colors look cleaner and brighter than if either were mixed with, say, a neutral gray or a different shade of the same hue.

An essential tool for paint pros everywhere, the color wheel is constructed to help you see the relationships between different hues. The bases are thre primary colors: red, blue and yellow. These are then combined to make the three secondary colors: orange, green, and purple. Finally, the remaining six colors on the wheel are known as tertiary colors and are mixes of the secondary colors, including such hues as red-orange and blue-green.

Familiarizing yourself with the color wheel can help you understand how to best mix and match a cool color with a warm one, for a naturally balanced room. Here are some examples of how to use these color pairings effectively.


red-green.jpg

Photo: Deborah Whitlaw-Llewellyn

Complements: Red and Green

When considering paint colors, remember to figure in the finish of any woodwork in the room. In this rustic Colonial-style kitchen, the green hues brushed onto the walls and lower cabinets complement the red tones of the mahogany beadboard and upper cabinets. 


red-orange-blue-green.jpg

Photo: Mark Lund

Complements: Red-Orange and Blue-Green

The two colors you choose don’t have to have equal prominence in the room to work. You can use one as the main color as an accent, or bring small colored accessories into an already painted room to see how you feel about the pairing. Here, the energetically bright orange-red towel and glass pop against the cool, blue-green walls without overwhelming the soothing hue.


blue-orange.jpg

Photo: Laura Moss

Complements: Orange and Blue

Keep the furniture you already have in mind when considering a new paint color. The cool blue milk paint on this wall accentuates the bright burst of orange on the blank chest in front of it – a scheme echoed in a more muted fashion in the bedroom rug beyond the doorway.


yellow-orange-blue-violet.jpg

Photo: Laura Moss

Complements: Yellow-Orange and Blue-Violet

Bright colors can breathe new life into traditional woodwork and work especially well in casual living areas. Here, glossy violet-blue pantry doors in a mudroom pop against the yellow-orange of the adjacent wall. When working with more saturated hues, remember that the colors will often appear more intense on the walls than they do on the strip. 


yellow-violet.jpg

Photo: Laura Moss

Complements: Yellow and Violet

If you’re a bit timid about suddenly splashing a couple of cans of color onto your walls, consider using two complementary colors as accents in the same room. In this 1950s kitchen the yellow window casing and violet countertop show nicely against the neutral beadboard and white cabinets. 


yellow-green-red-violet.jpg

Photo: Gregg Segal

Complements: Yellow-Green and Red-Violet

Make sure the intensities of the tones you use are balanced. In this kitchen, the pale yellow-green trim and pantry door meet their match in the subdued reddish-violet paint on the walls. 

Bathroom Remodeling Tips

blue and white tile bathroom

A single bathroom remodeling tip could inspire fresh thinking for your entire remodeling project. Trends area always being updated, so it’s useful to know what’s new in home bathroom design. You’ll find bathroom remodeling advise and inspiration here.

Express Yourself

Choosing Colors: A fresh coat of paint is an easy way to give your room an instant face-lift. Single color schemes make small rooms larger and a neutral palette can expand your space more. Or, add drama with colors like deep reds, eggplant, ochre, and dark blues or greens. 

The Personal Touch: Collections and objects that express your personality or your family history will make your home interesting to your guests and more enjoyable for you. 

Imported Ideas: Consider letting a favorite hotel or restaurant, or an outdoor spot that you enjoy, provide the inspiration for your bedroom, dining room or bath. 

Planting Style: One beautiful plant can be a strong design statement. Your style sense will determine whether a dramatic green plant or a bright floral bouquet is best for you.

Dynamic Design

The Right Finish: Now more than ever, you have choices for kitchen and bath fixtures. While matte or polished chrome are always popular, homeowners are choosing darker finishes such as oil-rubbed bronze and wrought iron. Consider the look and feel you wish to create when deciding. 

Bright Ideas: Halogen downlights and scones provide whiter light and fresh designs. Visit the lighting section of your home improvement center to get a better idea of these styles.

Quick ‘n Easy: Multi-purpose rooms need to switch moods easily. Today’s high-tech dimmers let you fine-tune your lights – even dim or raise them with a remote. 

Mix It Up: Today’s larger kitchen has room for variety. Mix-and-match styles and wood types for an eclectic feel that adds a unique look, from baseboard to hanging cabinets.

Packs a Punch

High-Performance Shower: Today’s shower design offers unprecedented opportunities for adding deluxe features – massaging vertical spas, rain shower showerheads and luxurious materials such as glass, tile and stone. 

Organized Kitchen: Specialized storage systems, appliances and fixtures speed meal preparation and keep entertaining organized. Choose open shelving for quick access. Locate a faucet next to the range to fill big pots quickly and conveniently.

Design Focus: A single, dramatic focal point for a room you’re remodeling makes the improvements more obvious. Try a special piece of furniture, an interesting piece of art or one wall that’s boldly colored.

Double Duty: Lighting is a sculpture as well as illumination. Choose light fixtures in shapes that are pleasing to look at – whether they’re switched on or off.

Works for Me

Getaway Baths: The bath can be a relaxing, serene environment. Add massaging or rain showerheads, a deep Zen soaking tub and even music and candles to enhance the revitalizing experience. 

Counter Space: If your bathroom is being shared by the family, counter space is critical. Consider a vanity with cabinets for extra storage and organization.

Ageless Amenities: Features usually associated with older homeowners – easier access, brighter lighting and convenient handholds – are helpful at any age. Adding them with your remodel could improve your home’s resale value.

Bed and Breakfast: Adding a morning bar to a master bedroom with an elaborate, built-in countertop and sink is a great way to add luxury and functionality.

Practical Approach

Finding Your Design: Start a scrapbook of design ideas you find in magazines and online. This will help you establish a foundation for your remodeling project. 

Sketch Your Layout: This will help you understand how you would like your new room to look and help you change the little things that you don’t care for in your current design.

Set a Budget: By outlining how much you can spend on each phase of the project you will be able to see if you can splurge on the extras; like a contractor or if you need to cut and do it yourself.

Set a Timeline: This will help you keep on track and allow you to achieve your remodeling goals.