Don’t underestimate the power of a second sink in your kitchen. When installed in just the right spot, a secondary sink can be just as useful as a primary sink. The perfect sink location allows two users to cook and clean simultaneously, making everyday meals and special occasions easier to prep for and clean up after. Whether your kitchen is large or on the smaller side, the right extra sink in the right spot might make your life better.
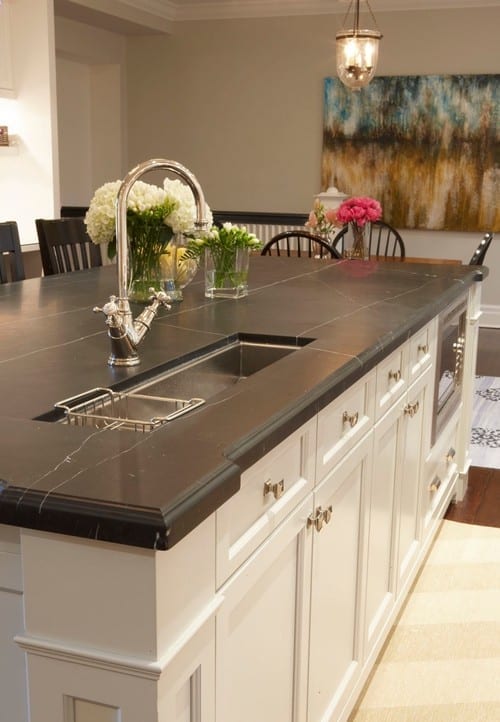
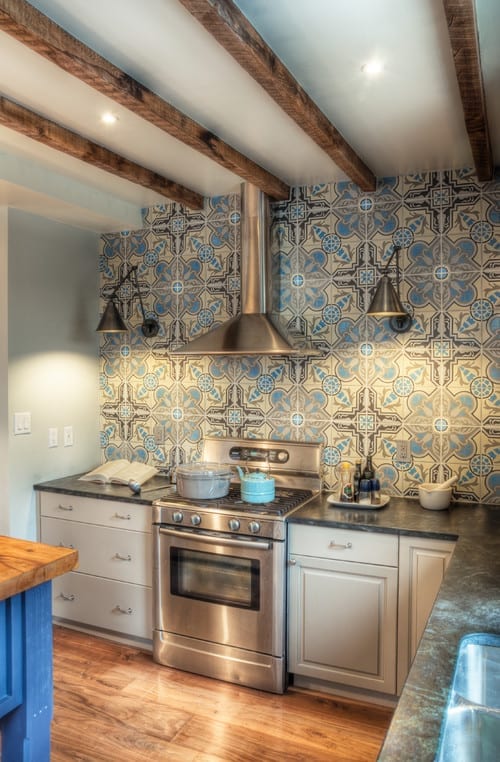
Island. Most designers put second sinks on kitchen islands, where they’re easy to use and access but out of the way of main prep areas. This sink makes cooking easier with chef number two on Christmas and Thanksgiving.
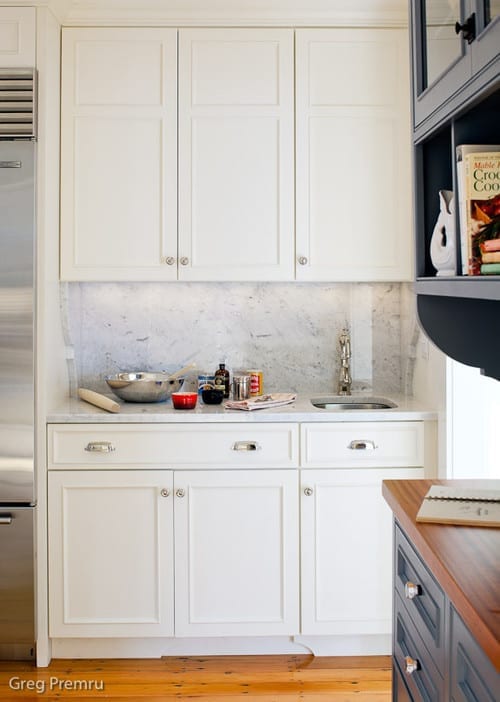
Baking center. If you are an avid baker, having a baking center with its own sink can help you confine your mess. This tidy countertop area keeps the mess contained, and it’s easy to wash the dishes and the countertop once everything’s in the oven.
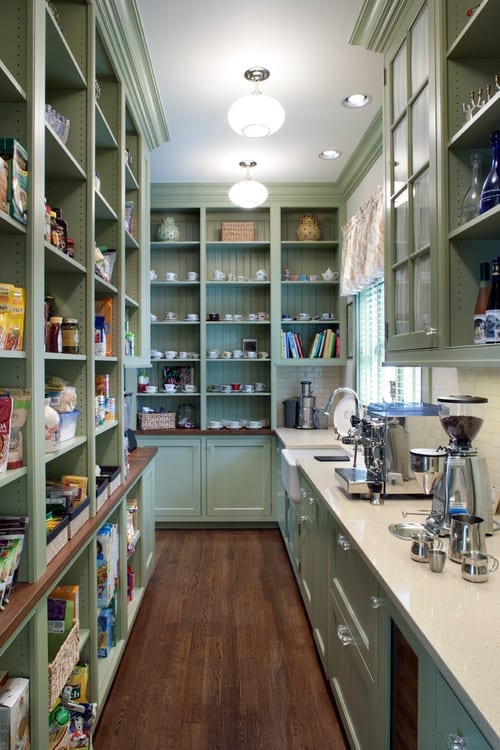
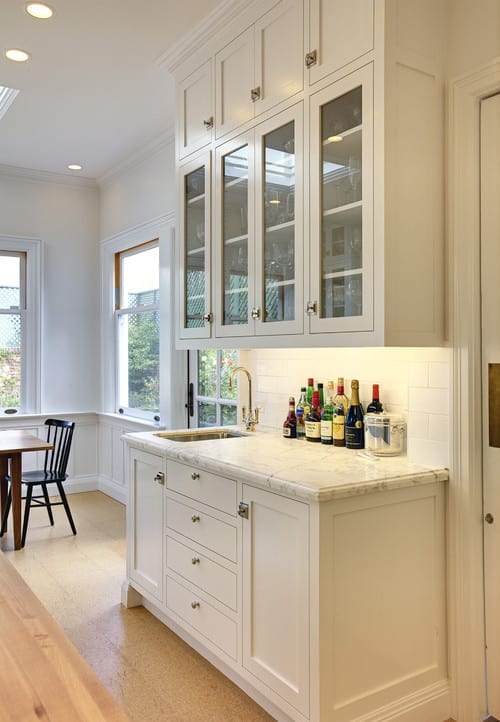
Butler’s pantry. A sink immediately upgrades the functionality of a butler’s pantry. Nothing’s easier than blending, mixing and stirring right near where ingredients are stored; you can prep appetizers and drinks for guests without traveling back and forth into the kitchen.
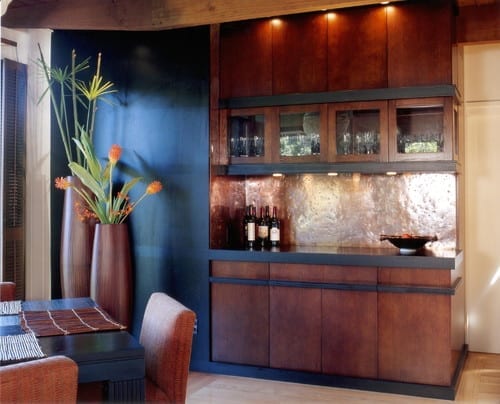
Wet bar. For those who love to host, a wet bar can make entertaining easier. A small sink like the one here is great for adding water to cocktails and doing light cleanup.
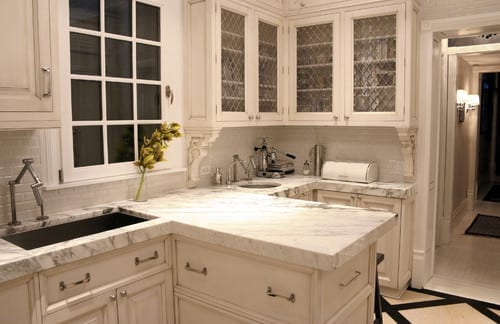
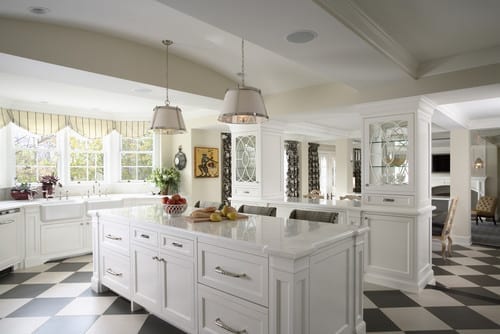
Peninsula. If you have a peninsula instead of an island, adding a sink can be a great solution for guests and homeowners. This particular sink can be accessed from the front or back for easy use.
Coffee station. Is coffee a beverage staple in your house? Imagine never having to travel to the main sink to fill the coffeepot (hey, everything’s difficult early in the morning). An additional sink by your coffee center would allow you to fill, pour and serve with ease.
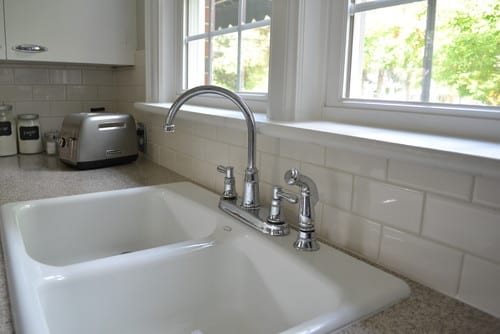
Right next to the main sink. Your secondary sink doesn’t have to be a smaller version of your primary sink — it can be the same size and even the exact same model. Just like double dishwashers, double sinks translate into a quicker cleanup.
A kitchen’s backsplash works much like jewelry. Simple or snazzy, it can bring a whole look together; the right backsplash helps your kitchen reach its potential. Our in-depth guides, rounded up here, can help you find the backsplash material and color that fit with your kitchen’s look, your cleaning style and budget.
The Kitchen of the Week series is great fodder for remodeling and renovation inspiration. Learn about the back-painted glass shown here and nine more favorite backsplashes from beautiful kitchens on Houzz.
Tile. The good news: You’ve finally settled on a tile backsplash. The bad news: The selection process has just begun. Cement, subway, mosaic, patterned or laser cut? This guide will give you the pros and cons for each one, along with styling tips.
Mirror. Additional visual space, a variety of styles and a relatively affordable cost make mirror a great backsplash choice. See how this flashy backsplash material can work in almost any kitchen design.
Recycled tile. Whether salvaged or containing recycled material, recycled tile can add a unique element to your kitchen that’s easy on your conscience.
Window. Planning on making some structural changes to your kitchen? Consider a different kind of backsplash: a new window. A beautiful view, more light and fresh air could improve your kitchen’s style and functionality.
Unique materials. Maybe you feel like your classic kitchen needs a different touch. Or maybe you’re just ready to embrace the unusual. Either way, one of these unique backsplash materials can help you get the statement-making look you want.
Installation Considerations
Half backsplash. If you have your heart set on a marble backsplash but can’t afford the counter-to-ceiling application you envisioned, don’t give up your dream just yet. Cut your backsplash in half — or more! — to reduce cost without sacrificing efficiency.
DIY. Think you’re ready to put in your own backsplash? If you have experience setting tile and want something simple in your kitchen, take a look at this guide. A DIY backsplash installation could help you save some serious money.
Photo Credit: Dennis Jourdan Photography via Remodeling Magazine
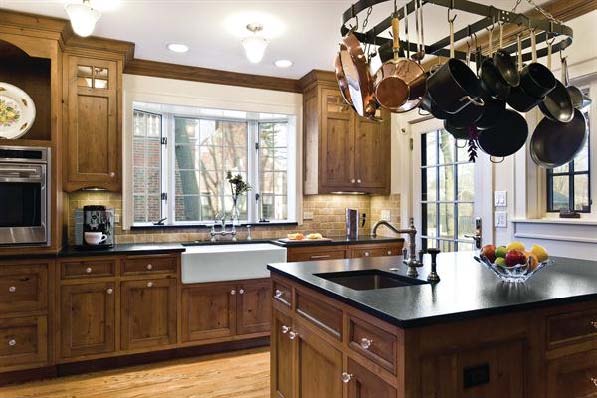
Room for Two: Alder cabinets, honed granite countertops and a tumbled marble backsplash give this kitchen a rustic feel.
The homeowners of this 1920s house (pictured above) had been planning a kitchen remodel for a long time. They went so far as to work on a design that would enclose the porch to expand the space, then got cold feet during the market downturn, and, worrying about the return on investment for an addition, put the project on hold.
By the time designer Diane Lawson, of Diane Lawson Designs in Nashville, TN; met the couple, they had revisited the project but had opted to stay within the existing footprint. However, they presented her with a long list of desires that included: good traffic flow for two cooks, separate cooking areas, an island, increased storage, and a rustic Italian design and details that would blend with the home’s Italianate style.
Though most homeowners today want to open up the kitchen to the rest of the house, Lawson says this couple bucked the trend, choosing to maintain the separation from the living and dining rooms.
Fitting in the long list of the client’s wants required some compromise, including a peninsula rather than an island, but Lawson viewed the project as putting a puzzle together to set all the pieces neatly in to the outline.
Photo Credit: Dennis Jourdan Photography via Remodeling Magazine
Window & Wall Upgrade: When the original windows were replaced with low-E units, insulation was also added to the exterior wall.
Puzzle Pieces
To help create a rustic Italian feel, the clients chose knotty alder cabinets. Lawson says that this species has increased in popularity during the last 10 years and that the wood – sometimes referred to as “poor man’s cherry” because of it’s similar grain and reddish tones – can cost 10% to 15% less than cherry.
Since not all manufacturers carry alder, Lawson opted for custom cabinetry. Going with a custom shop also had the advantage of enabling her to maximize storage and create a furniture look with cabinets that fit the age and style of the house. “[The choice] boils down to [the client’s] wish list and what they are looking to achieve,” Lawson explains. “And, of course, budget.”
The clients wanted to use the same finish throughout the kitchen – a rare choice these days, Lawson says. Currently, most of her clients are opting for a contrasting finish for the island.
Lawson had known remodeler Michael Menn, of Michale Menn Ltd., in Chicago, for almost 20 years and brought him on to help her with the extensive remodel. The ceiling above the sink had a soffit. Menn removed it to accommodate Lawson’s design, which took the cabinets to the ceiling to provide extra storage.
One of Lawson’s biggest design challenges was the traffic pattern for the family’s two “heavy-duty chefs” and keeping them out of each other’s way. The original freestanding island really affected the pattern, so Lawson moved the island to abut a wall. “While you don’t have access on all four sides [of the island],” Lawson says, “it gave us more room in the busy aisle-way, which is the main entry into the kitchen and is where we needed as much space as possible” – especially when one of the cooks is standing at the island prep sink.
The island has a small trash cabinet and a shelf for the client’s heavy stand-mixer.
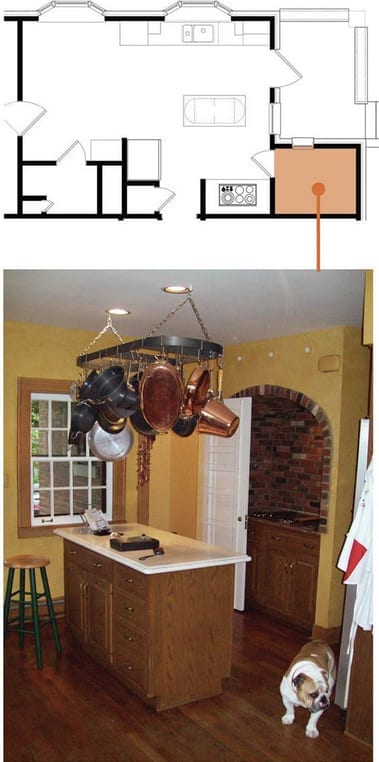
Photo Credit: Dennis Jourdan (photo) | Nicole Babcock (floorplan) via Remodeling Magazine
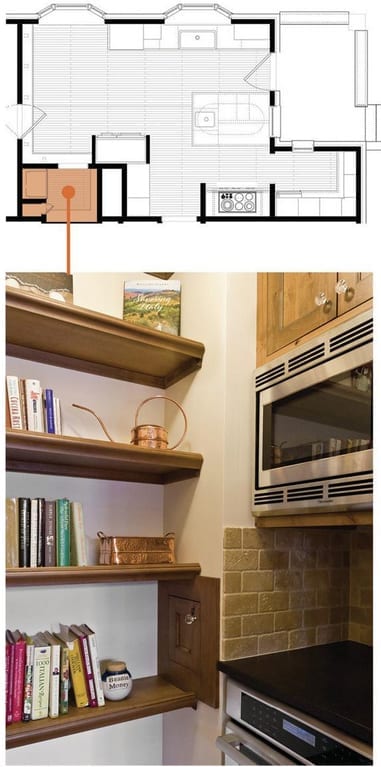
Into the fold: Removing the door and adding upper and lower cabinets makes this former pantry feel like part of the main kitchen.
Photo Credit: Dennis Jourdan (photo) | Nicole Babcock (floorpan) via Remodeling Magazine
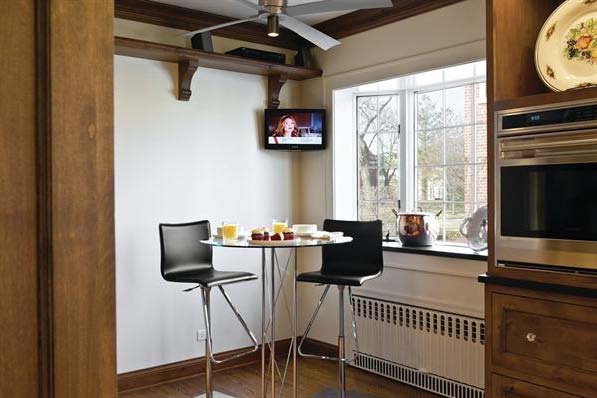
Cook Nook: The second pantry has a microwave and an oven. The existing laundry chute remains – but it has been reframed to match the cabinetry.
Separate Yet Cohesive
The existing 360-square-foot kitchen included two under-utilized pantries. Lawson thought the 18-square-foot closet next to the stove alcove would work better as a butler’s pantry, so Menn removed the door to make it part of the kitchen and replaced the wire-rack shelves with cabinets that match those in the main kitchen. The L-shaped run of cabinets has upper and lower cabinets and a countertop. An undercounter wine refrigerator is the only appliance.
The other 24-square-foot closet is closer to the dining room. Lawson considered removing the walls to incorporate it into the dining space, but there were two obstacles to doing that: a laundry chute in the closet and a two-story chimney that runs adjacent to that pantry. “We were bound,” Menn says, but the team also thought that retaining the quaint “little pockets” of space matched the style of the 90-year-old home. As they had done with the other closet, the crew removed the door. The existing closet had some shelves, an outlet, and a hanging bulb. The new space contains an oven, counter space, and upper shelves with a microwave. The wife likes to bake, and this area gives her a space to work in while her husband prepares food in the main kitchen area.
Photo Credit: Dennis Jourdan Photography via Remodeling Magazine
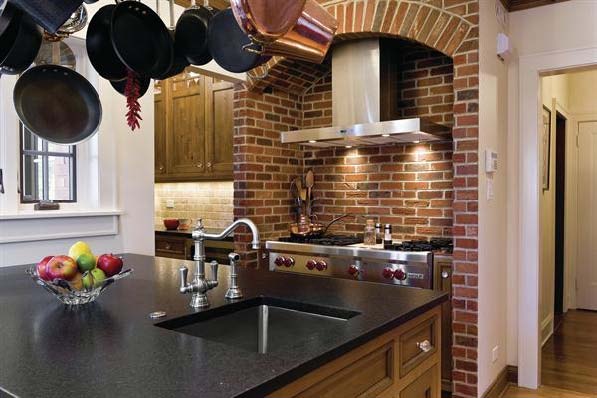
Brick or Treat
The original cooking alcove was outlined with faux brick. The clients liked the idea of a brick alcove and felt that it fit well with the new design’s rustic feel. And, Lawson says, the material ties in with the brick porch outside the kitchen.
Menn and Lawson thought the alcove could be enhanced to make more of a statement, so Menn’s team created a taller, softer arch at the top of the opening and installed real brick – cut ¾-inch thick – on the entire wall, as well as on the wall adjacent to the butler’s pantry.
The alcove also has contemporary features, including a sleek stainless steel hood, a Wolf cooktop, and a stainless steel storage drawer custom-made by the cabinet shop. The hood is actually made for an above-island installation that the clients had considered for the addition version of the project. They liked the shape, so Menn installed it here. He made custom ductwork to meet local code and vented the hood through an exterior wall. Narrow base pull-out cabinets flank the stove and hold spices.
(You’re reading ‘Standing Room Only’ originally posted on Remodeling)
Once upon a time, dovetail joints inside the drawers were practically all you needed to distinguish high-end cabinets. The distinction has blurred as more manufacturers offer premium features even on low-end lines. Indeed, we found you can have these and other once-exclusive features and still wind up with shoddy construction.
A little research beforehand can save you time at the store and the thousands you can lose on less-than-stellar cabinets. Start by checking online manufacturer and retail sites and catalogs and taking a good look at store displays; you’ll be able to tell the quality cabinets from the polished pretenders once you know where to look. And trust your taste; readers who chose cabinets solely on the basis of advice from contractors, designers, or architects were twice as likely to report a problem as those more involved in the selection, according to a survey by the Consumer Reports National Research Center.
Put Your Money Where it Counts
If you’re on a tight budget, skip the non essentials and focus on convenience. Work-savers include a lazy Susan, a pull-down soap and sponge holder, and deep drawers for pots. Glazing, while nice, typically adds 10 to 20 percent to the cost. Remember to factor labor into your budget, since installation can easily account for more than half of the cabinet’s cost.
Consider Renewing Your Old Cabinets
Replacing cabinets is typically the priciest part of a kitchen remodel. Readers who hired contractors paid on average more than $9,000 for new cabinets, and about a quarter of the readers paid more than $15,000, according to our survey. A couple of long weekends’ work can change your kitchen’s look for a tenth that cost. If your old cabinets are plumb, square, and sturdy, consider refinishing them with some simple sanding, painting or staining, and drilling. You can even dress them up with custom-built doors, possibly with glass panes, and still save a bundle over all-new cabinets. Even having a cabinetmaker reface old cabinets with veneer costs less than replacing them.
You can also make old cabinets work better than new by adding pull-out shelves, lazy Susans, and other inexpensive upgrades. The final touch: install several under-cabinet halogen, xenon, or fluorescent task lights wherever you or a family member will be dicing, doing homework, or reading a recipe.
Types of Cabinets
Cabinets can vary greatly in price. Here’s an overview of the three types of cabinets in broad price segments that you’ll find at stores.
Basic
Often called stock, these are inexpensive, off-the-shelf cabinets, ready to assemble and install. Many use frameless construction where the door has no lip or “reveal” around it.
Photo: Consumer Reports
PROS: These are a money-saving choice if you aren’t too picky about the style options or don’t demand a perfect fit. More have better drawers, sold-wood doors, and other once-pricey features. And we’ve found basic models that perform better in our wear tests than some more-expensive models.
CONS: Many basic boxes are thinly veneered particle board, rather than higher-quality plywood. Style and trim options, sizes, and accessories, are still limited. And figure on an hour or more of assembly time for each set of base and wall cabinets.
Midlevel
These semi-custom models are a sound choice for most kitchens. Many use face-framePhoto: Consumer Reports construction, where the solid-wood frame shows around the door and drawers.
PROS: Midlevel models offer many made-to-order custom options, including size, materials, finish, elaborate crown moldings and other trim, and accessories such as range-hood covers. That can make them the best-value option overall.
CONS: As with basic cabinets, features and quality can vary considerably. Boxes may be veneered particleboard rather than high-quality plywood.
Premium
Short of custom made-to-order cabinets, these semi-custom models offer the most style and storage options.
Photo: Consumer Reports
PROS: They generally come with plywood boxes and other premium materials and hardware. Widths may come in ¼-inch increments, rather than the typical 3-inches.
CONS: While generally less expensive than fully made-to-order custom units, models with the most features and highest quality can cost as much as some full-custom units.
Features
What separates a well-made cabinet from a cheap imitation? Here are the cabinet features to look for-and what to avoid.
Cabinet Box: Best is ½-to ¾-inch furniture-grade plywood. Medium-density fiberboard (MDF) is OK, but avoid ⅜-inch coated particleboard.
Doors: Most manufacturers offer a similar range of door-style options for all their price levels. Look for a solid-wood frame surrounding solid-wood or plywood panels. Veneered particleboard or an MDF panel is OK, but avoid laminate or thermofoil over particleboard.
Drawers: Well-built drawers are critical, because they get the most use. The best ones have solid-wood sides, dovetail joinery, and a plywood bottom that fits grooves on four sides. Avoid stapled particleboard.
Hardware: Full-extension drawer guides are better than integrated side rails or under mounted double-roller designs. Some premium models have a “soft close” feature that stops drawers from slamming shut. Many cabinet models allow you to upgrade the drawer guides. As for door hinges, we didn’t find any significant differences among the different types.
Shelves: Look for ¾-inch plywood of MDF. Lesser quality ⅝- or ½-inch particleboard shelves may sag.
Mounting Strips: Ask the contractor to use ¾-inch hardwood strips or metal strips with bolt holes. Thinner wood, MDF, or particlebard can be a concern with heavily loaded wall cabinets.