FREE DESIGNS AND ESTIMATES

5 Tips for Mixing Cabinet Colors

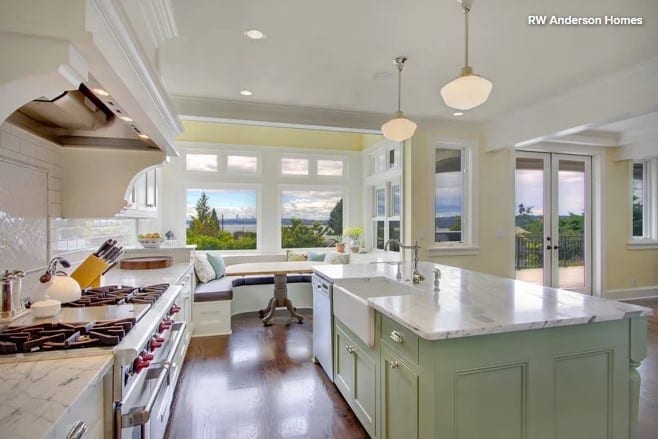
Colorful Kitchen Island Mixing Cabinet Colors

Can’t decide between natural wood and painted kitchen cabinets?  In today’s kitchens, it doesn’t have to be either/or. Similar to how matched furniture sets have fallen to the wayside, more and more designers are mixing cabinet colors rather than matching. Many homeowners settle on just one shade, but choosing multiple cabinet colors can give you some beautiful options.

Since cabinets are large financial AND design investments, here are a few tips to ensure your color choices look intentional rather than piecemeal. 

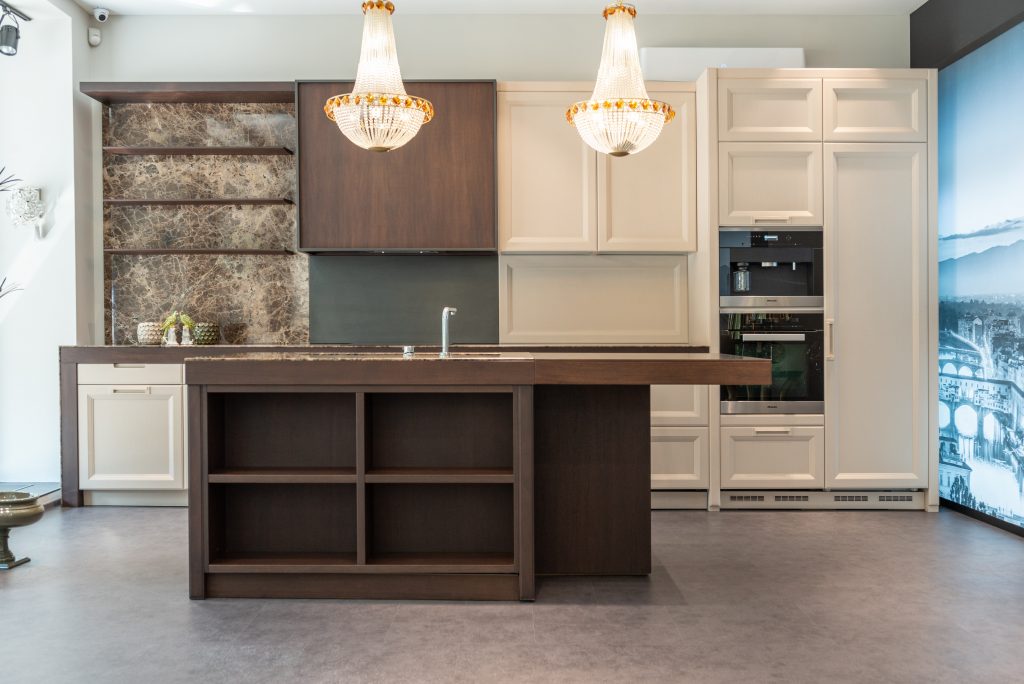
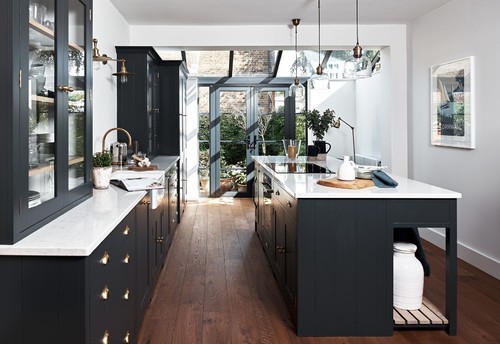
1. Choose consistent cabinetry styles (i.e. all contemporary, transitional, etc.).  

Multi-Color Cabinets
Photo by Max Vakhtbovych [Pexels]

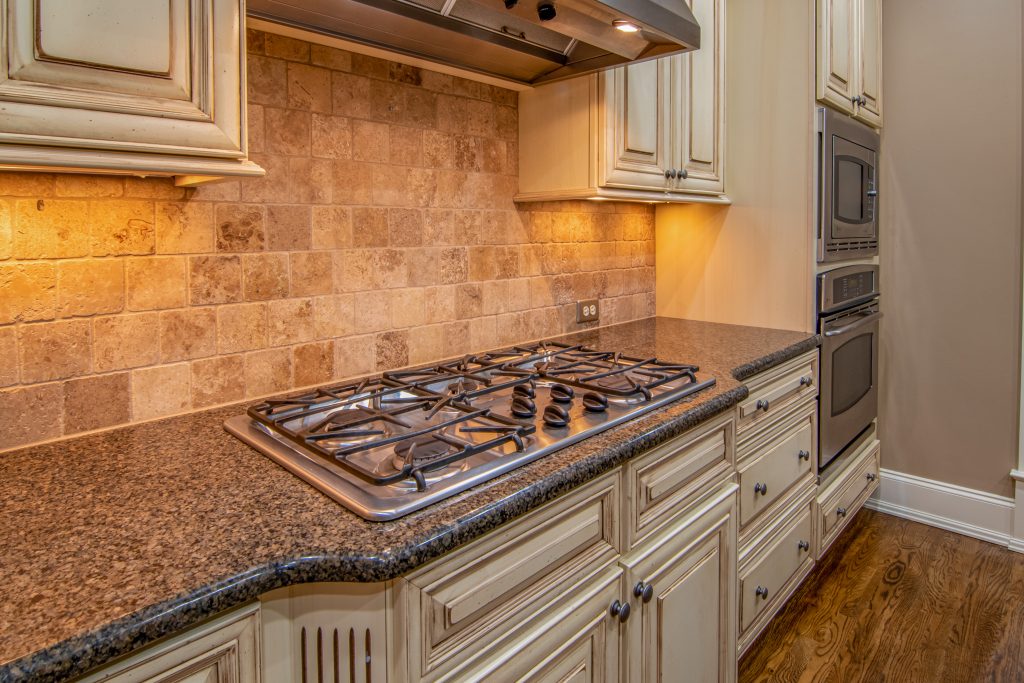
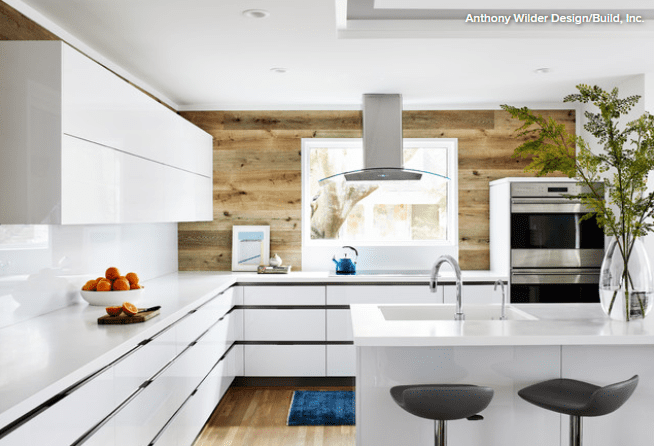
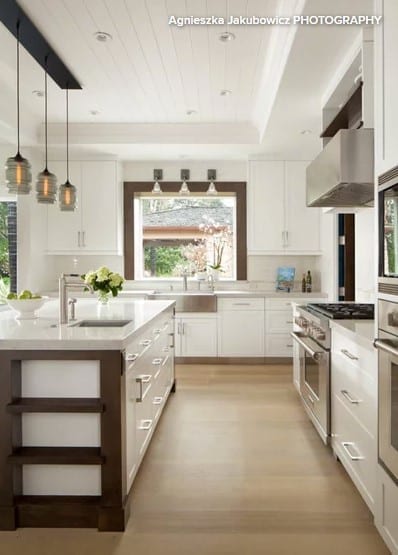
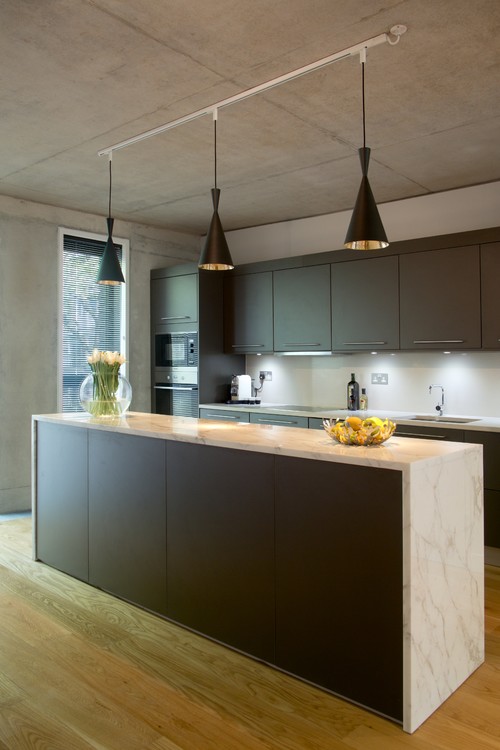
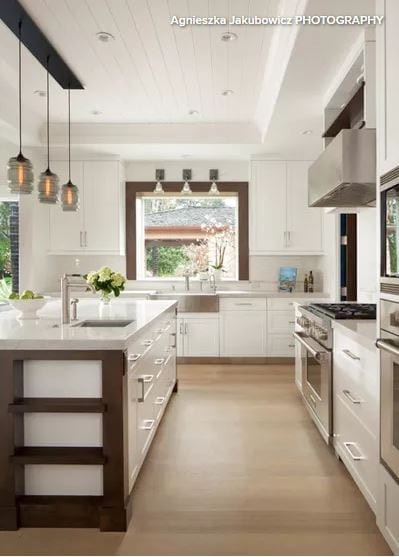
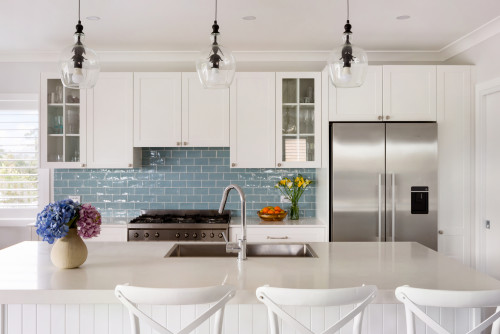
2. Painted cabinetry in light colors such as white and cream often mix well with darker wood tones.

White Mixed With Dark Wood Cabinets
Photo by Max Vakhtbovych [Pexels]

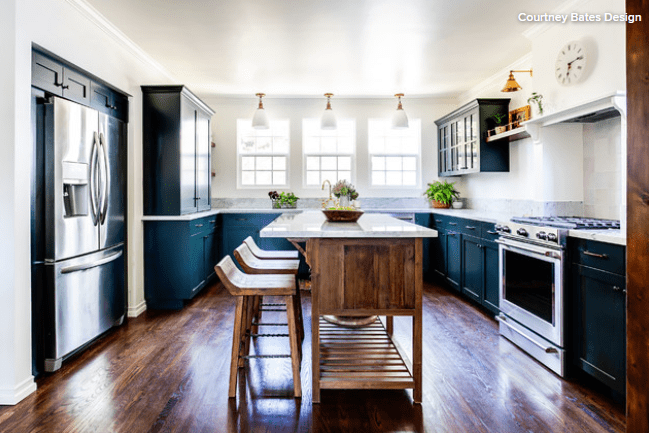
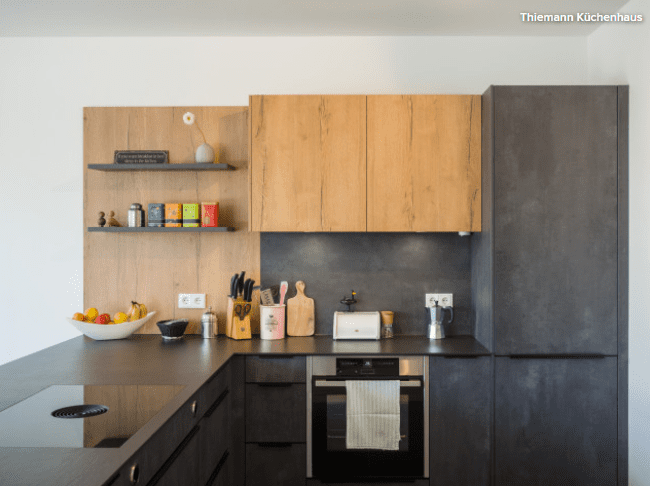
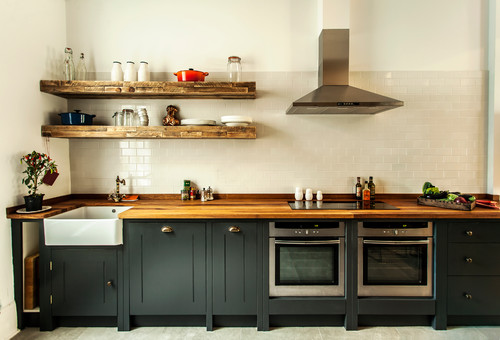
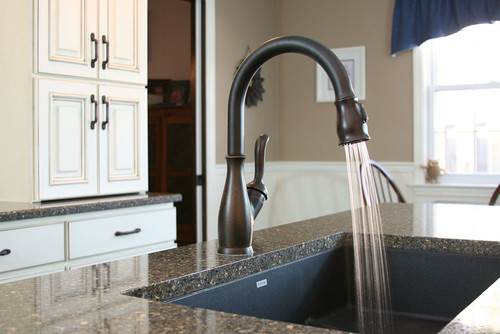
3. When mixing cabinet colors and woodgrains, keep tones consistent by using all warm or cool colors, or by pairing a warm or cool color with a neutral color.

Kitchen Cabinetry
Photo by Curtis Adams [Pexels]

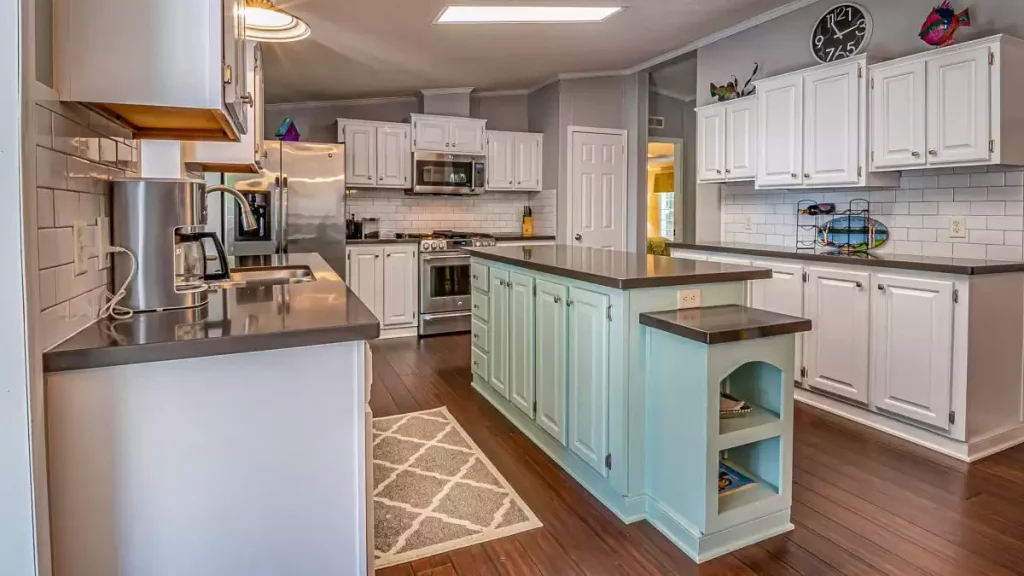
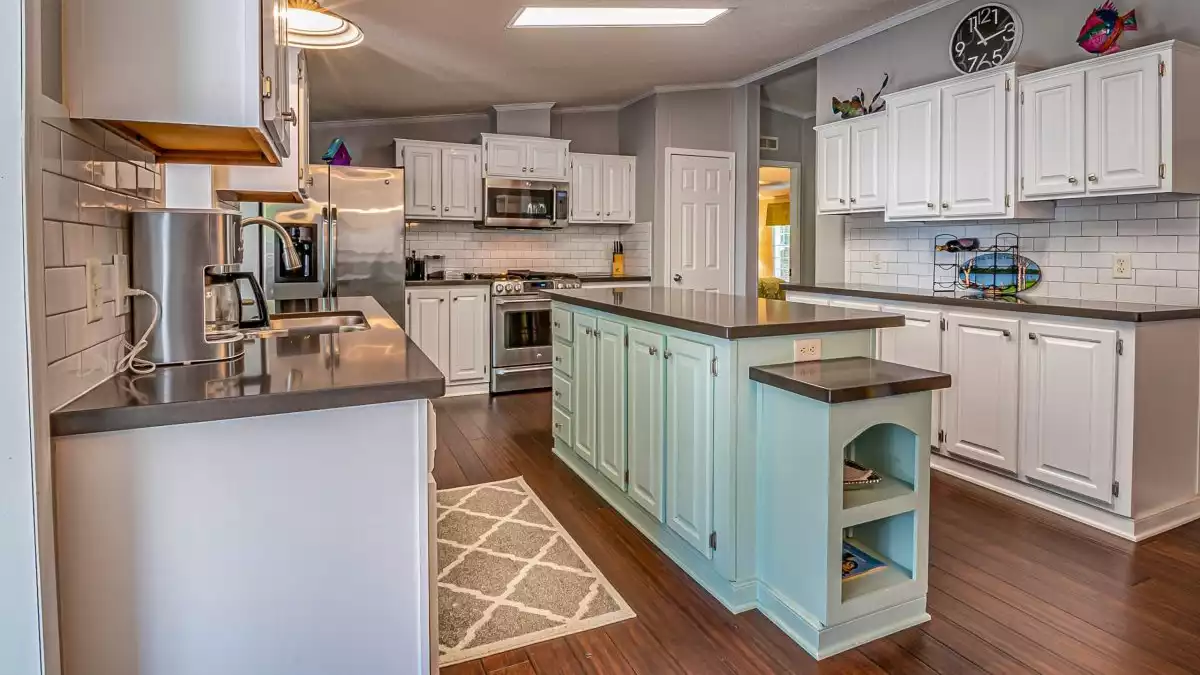
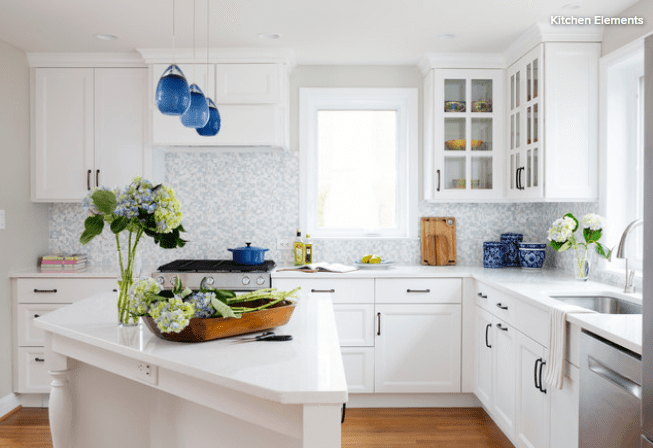
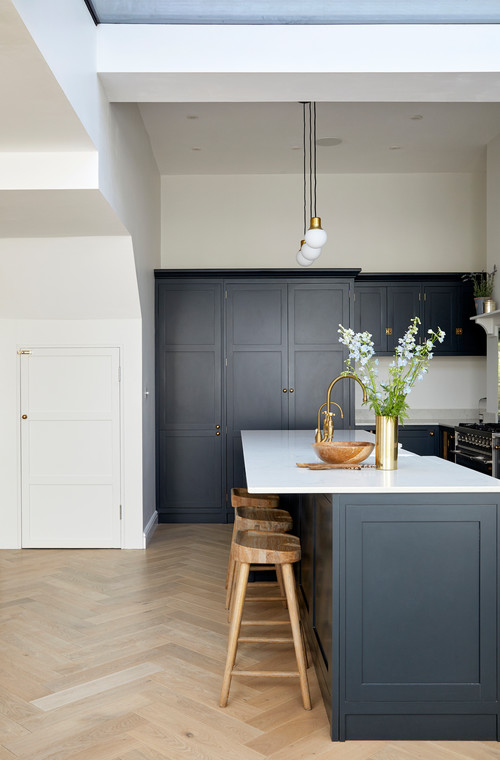
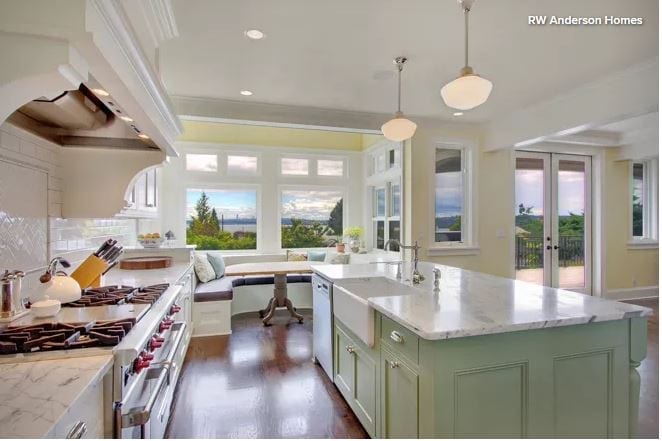
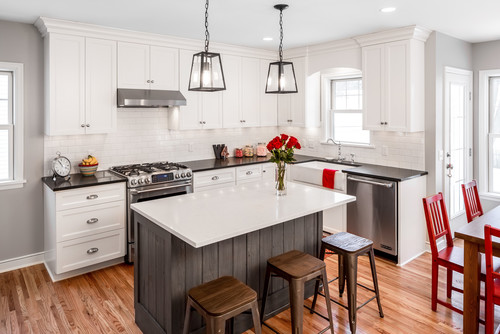
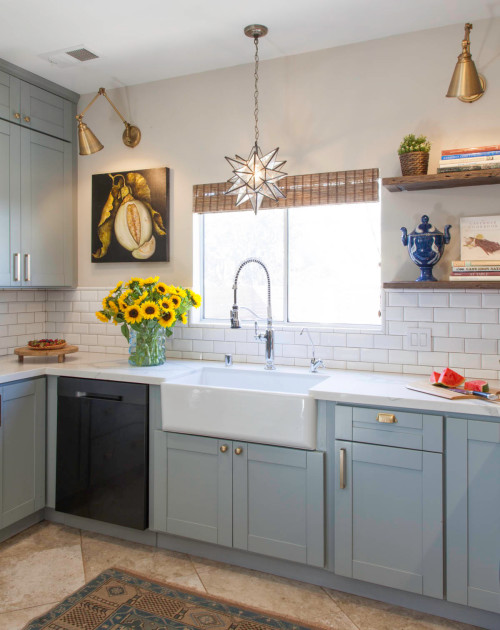
4. Use different cabinetry colors to designate zones. For example, use one color for the upper cabinetry and another for the bottom cabinetry. Or, keep the primary cabinets one color and choose a different color for the kitchen island base cabinets.  

Colorful Kitchen Island Mixing Cabinet Colors
Photo by Curtis Adams [Pexels]

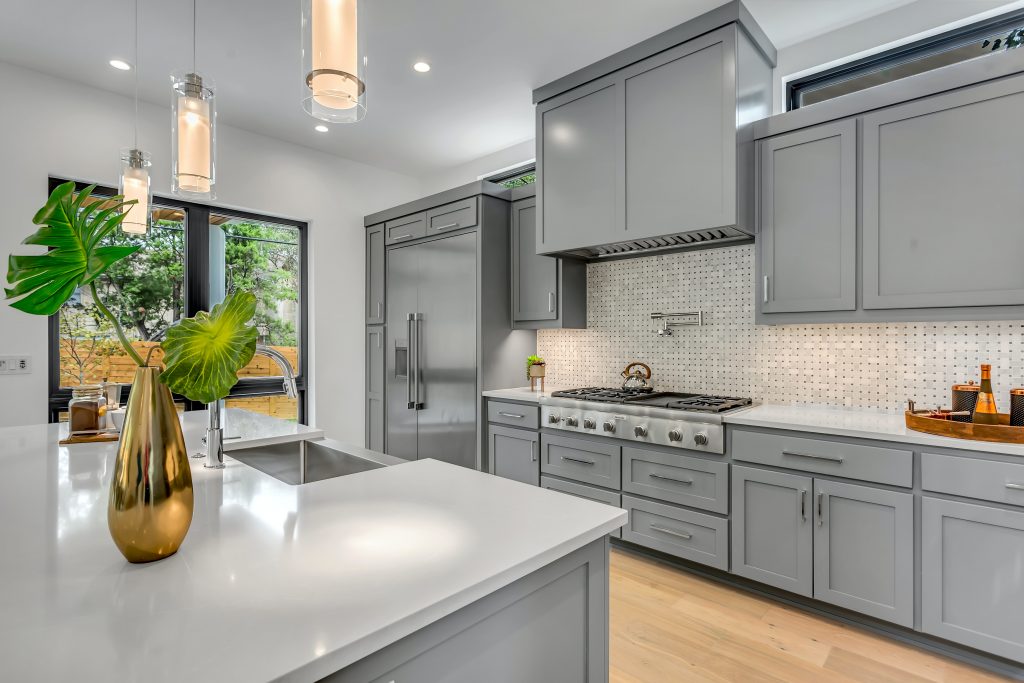
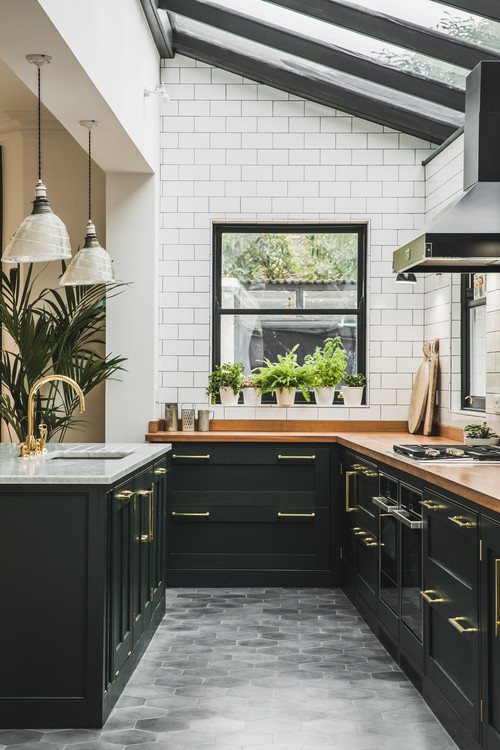
5. Unify the cabinetry colors by using the same family of cabinetry hardware.

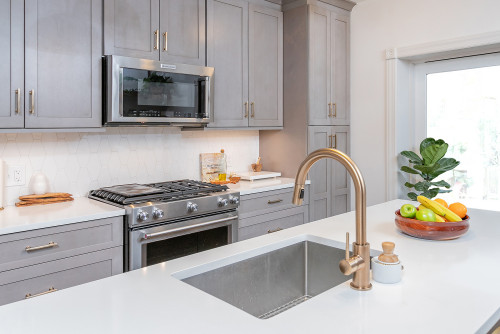
Gray Kitchen Cabinetry
Gray Kitchen Cabinetry – Photo by Tamil King [Pexels]

Want more? Here are 7 ways to mix and match cabinet colors from Houzz.

The Best Kitchen and Bath Cabinets in Denver

If you would like some help designing your new kitchen, our talented design team is here to help! We’ve been delivering the best kitchen and bath experience since 1999 for Denver and the front range. We always offer free design and estimates and we’ll help you choose the perfect cabinets, flooring, countertops for your space, while helping you stay within your budget.

How to Organize Kitchen Cabinets and Drawers for Good

First, empty your cabinets and lose what you don’t use. Then follow these steps to keep your kitchen organized

By Annie Thornton

Getting your kitchen storage organized and working well is very satisfying, but it can be hard to know where to begin — especially if you’ve been using your kitchen for a while and are used to its quirks. To help, here’s a quick guide to the best ways to organize your kitchen cabinets and drawers by grouping items by type, storing them near where you use them, and getting rid of what you’re not using.

How to Organize Kitchen Cabinets and Drawers

These are the basic steps to organizing your kitchen storage. We’ll go into each one in more detail:

  • Empty cabinets and drawers, including pantry food items.
  • Sort the cabinet contents by what you want to keep, what to throw away or recycle and what to donate.
  • Thoroughly clean all the surfaces of your cabinets and drawers.
  • Group all the items you’re going to store in your kitchen by category.
  • Plan to place items near where they’ll be used.
  • Add baskets, shelf inserts, cabinet racks and any new storage solutions you want to use to keep your kitchen cabinets organized.
  • Return everything to cabinets and drawers, prioritizing items by use.
  • Enjoy your clean, organized kitchen.

1. Empty Kitchen Cabinets and Drawers

Take everything out of your cabinets at once, or go cabinet by cabinet, and place the contents on a table or countertop.

“Physically handling each item forces you to make decisions about keeping, donating or discarding,” says Karen Duncan, a certified professional organizer out of Ponte Vedra Beach, Florida.

2. Decide What to Keep and What to Part With

The contents of your kitchen cabinets, like many storage cabinets around the house, are likely filled with items that you use often, but they’re also likely filled with even more items that you use rarely, if ever.

Give yourself permission to let go of those unused items. Donate or give away what you can, recycling or throwing out anything you can’t, such as expired pantry items.

3. Clean Cabinets and Drawers

Now that your cabinets are empty, spend some time getting them really clean before you fill them back up. Wash all surfaces thoroughly with gentle soap and water and allow them to dry completely before restocking. For an extra level of polish, and to make future cleaning easier, you can also add shelf or drawer liners, or replace old ones.

4. Group Items by Use

“Think of your kitchen as functional zones: washing, prepping, cooking on stovetop and baking,” Duncan says.

Group the items or tools you use for each of those tasks together for efficiency. In the pantry, this means grouping food types by category: cooking, baking, snacks and breakfast,or whichever grouping technique works best for your lifestyle.

5. Place Things Near Where They’re Used

Once you’ve grouped your items, plan to place them in cabinets or drawers close to where their function is performed.

In the panty, place the foods that you use most often in the easiest-to-reach places. (One possible exception: “If you think you eat too many snacks, put those up high so you don’t see them as often, and it’s more of a to-do to get them,” says Tori Cohen, an organizing and decluttering specialist in New York City.)

While you’re working out what to store in each cabinet or drawer, Duncan suggests placing temporary labels made of blue painter’s tape on the cabinet or drawer where each group is going. This will help you get a sense of how your storage plan is shaping up and simplify making adjustments as you go.

6. Consider New Kitchen Cabinet Organizers

Once you have determined where you’d like to store everything, look for places where your kitchen cabinets and drawers could benefit from additional organization and storage tools. Some ideas to consider:

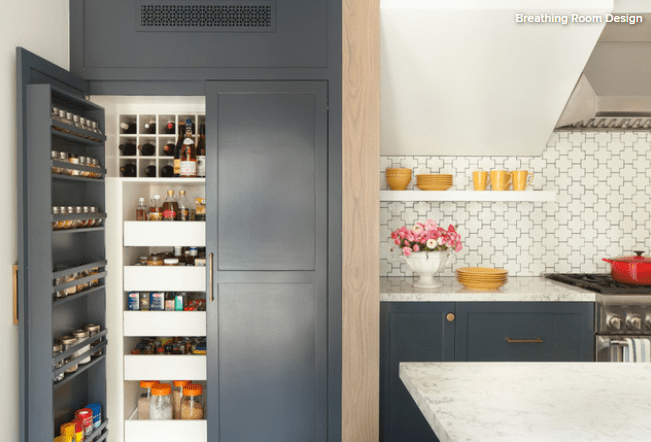
Roll-out shelves. 
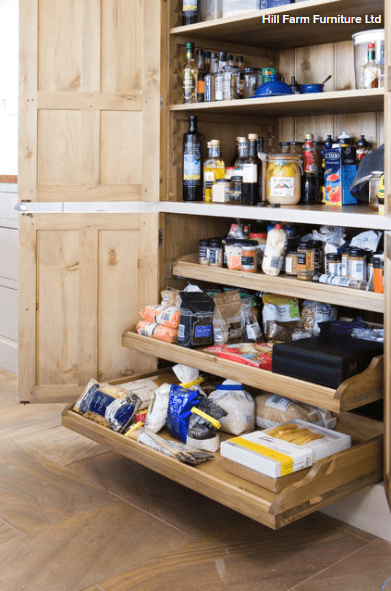
Extra-deep lower cabinets benefit from roll-out shelves, either custom-made or purchased from a kitchen or organizing store. The shelves will allow you to easily see the cabinet’s entire contents — even what’s at the very back.

Baskets and storage containers. Storage containers and open-topped baskets can be a great way to group like items, especially food.

Drawer pegboard. Pegboard systems, which feature adjustable screw-in dowels to keep plates in place, can be purchased for existing drawers.

The dowels can be moved to accommodate the size of whatever you want to store in the drawer. (Depending on your drawer’s construction, the bottom may need to be reinforced for heavy dishes.)

Cabinet risers and drop-downs. Freestanding cabinet shelves can double your storage by adding another shelf for storage without losing any accessibility.

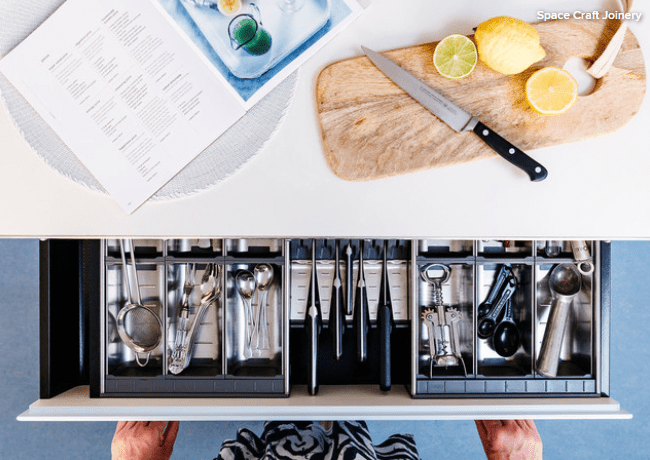
Drawer dividers for kitchen tools. Standard drawer tray inserts work great for silverware, but kitchen tools can be a little more challenging to corral; they’re not uniform in size and not everyone has the same kind. “My best suggestion is [a set of] drawer dividers, and not a tray. That way you can create the sizes of spaces you need,” Cohen says.

Look for adjustable dividers, which can be expanded to fit your kitchen drawers. As you have done with the rest of your organizing, group kitchen tools by type before placing them in drawers.

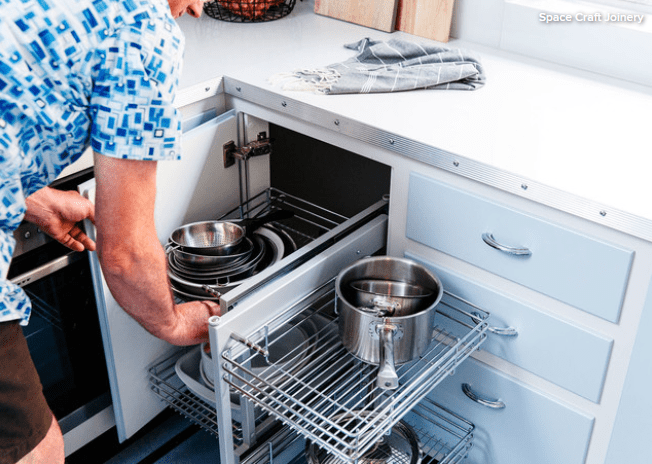
Pan organizer racks. Consider a pan organizer rack, which can be added into an existing cabinet. “That way none of the pans need to sit in one another, and they’re easily accessible,” Cohen says.

7. Put Everything Away

Put the contents of your kitchen cabinets and drawers in their new homes, prioritizing what you plan to use most in the most accessible spots and placing rarely used items, such as seasonal platters, out of the way. “This is what the top shelves are for,” Cohen says.

8. Maintain Organized Cabinets

To maintain the organizing system, and to help you or guests quickly identify what is stored where, consider putting a label on the inside of each cabinet indicating the cabinet’s contents. “When you’re running around the kitchen trying to figure out where your roasting pan is, all you should need to do is read these labels,” Cohen says.

Other Considerations for Organizing Kitchen Cabinets and Drawers

Cabinets versus drawers.

“Shelves are great for taller and odd-shaped items, since shelves tend to be adjustable,” Duncan says. Drawers can be useful for everyday items, including kitchen tools and cutlery. Deep drawers can also be used for baking supplies and pots and pans.

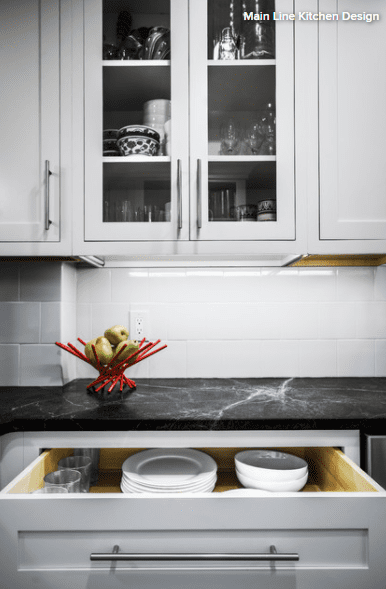
Glass-front cabinets and open shelves. Glass-front cabinets and open shelves provide an opportunity to create an attractive kitchen display. Store your most attractive plates, cups and pots where they can be seen, and try not to stuff the cabinets too full.

If you’d rather not display your kitchenware, peel-and-stick window film can turn transparent cabinet doors translucent. Decorative bins can sit on open shelves, with items stored inside.

Corner cabinets. In areas where items always get pushed to the back and are hard to reach, install turntables, which make it easier to see and access the cabinet’s entire contents.

Alternatively, Cohen suggests using these blind corners for rarely used items, like holiday serveware, or for storing bulk items, like paper towels, that you don’t necessarily need to see in order to grab.

Small kitchens. Duncan and Cohen shared their tips for keeping a small kitchen organized:

  • Buy only what you really need.
  • Declutter frequently.
  • Purchase multi-use items, rather than specialty tools.
  • Designate an alternate closet for overflow items.
  • Consider a portable prep cart with storage underneath.

5 Trade-Offs to Consider When Remodeling Your Kitchen

It would be great to have an unlimited budget for a kitchen renovation. But the fact is most of us do not. And that’s OK. Compromises of one form or another are part of the process, even for the rare homeowner who enjoys a bottomless budget and expansive square footage. 

But how, exactly, do you decide between two compelling options with different pros and cons? The most critical tool to have on hand to help you make tough choices is a clear picture of your remodel goals. To get clarity on what matters most to you, read about some key trade-offs you and your kitchen designer will consider during your project.


Kitchen_Cabinet_Tradeoffs_1.jpg

How Will You Use Your Kitchen? 

When planning a kitchen remodel, you want to be very clear on how you want to use your new kitchen. Here is one example: I want to have people over more often. I want to feel relaxed when I entertain. In order to feel relaxed, I need to make sure that no one is in my way while I cook. I also want my kitchen to stay neat during the cooking process and be laid out so that cleaning up will be efficient.

Clear goals can help homeowners make decisions and, as the budget nears its limit, ultimately choose the options that will best support their goals. What matters most to you in a kitchen?


Kitchen_Cabinet_Tradeoffs_2.jpg

1. Daily Use vs. Special Events
This area of consideration has to do with how many people your kitchen will serve. From refrigerator storage to seats at the dining table, the number of people you want to accommodate will affect your design choices. You’ll want to consider not only how many people live in the home now, but — if this is your forever home — how many will live in it 10 years from now. Also, how often do you entertain and for how many people? 

I had a client who was retired and cooked only for herself and her husband most days. She entertained just four times a year, on holidays. At first, I was a bit baffled by her choice of a 36-inch range, double ovens and a 48-inch-wide refrigerator. But for her, these choices made sense. 

As the matriarch of a large family, on those four holidays she cooked for 25 to 30 people and had at least two or three people helping her in the kitchen. It was important to her that we designed a flexible space that worked just as well when cooking for two as for 30. 

That approach is a good one: Whenever possible, I recommend that clients design with their maximum capacity needs in mind.


Kitchen_Cabinet_Tradeoffs_3.jpg

2. Cost vs. Value
As you may have discovered if you’re considering a remodel (or in the midst of one), everything from cabinets to sinks to appliances comes at a variety of price points. How do you decide when it’s worth it to splurge for a high-quality item and when it’s best to save your dollars? Here are some questions to ask yourself:

  • Will the investment improve your everyday life?

  • Will the product solve a pet peeve?

  • Will the addition of this element make your house feel like a home?

  • Will the purchase increase the value of your home?

In each of these cases, you may decide that the cost of a feature for your new kitchen is worth it because of the value it brings. For example, a better dishwasher might eliminate the need to prerinse dishes. 

Perhaps you hate scrubbing dishes, can afford an upgrade and would cherish any minute of spare time away from the sink. Or perhaps you feel quite the opposite: You don’t mind scrubbing dishes at all, and this investment wouldn’t be worth the pennies spent. 

Framing your choices as cost vs. value — in terms of your experience in your kitchen, and possibly the resale value of your home — can help you get clarity on what’s worth the extra money.


Kitchen_Cabinet_Tradeoffs_4.jpg

One helpful way to prioritize your desires is to analyze the frequency and duration of a given task. Tasks you do frequently or spend more time on should get more weight as you consider what is worth investing in. 

For example, most people use the burners to cook 80 percent of the time, the oven 20 percent of the time. If this applies to you, I recommend prioritizing the cooktop as opposed to the wall oven, both in terms of placement in your kitchen and quality of product. You wouldn’t want to give up a great burner feature to get a fancier oven. 

On the other hand, if you are a frequent baker but rarely use the stovetop, you may prefer to invest in wall ovens rather than spend your budget on a fancy range. For you, it would be better to make sure that reaching into the oven is more ergonomic — done while standing upright, rather than bending over.


Kitchen_Cabinet_Tradeoffs_5.jpg

3. Function vs. Aesthetics
Ideally a kitchen redesign brings both beauty and function, but when we are dealing with limited funds, trade-offs between functionality and aesthetics may be necessary. By function, I mean not only the kinds of bells and whistles you get with high-end appliances, but also the kitchen’s layout and the choice of whether to have one sink or two. 

Aesthetics, of course, are the expensive but gorgeous finishes and customized detailing that bring a high-end look to a kitchen. Quite often, a budget may force you to make choices on what matters most to you — the functionality or the look. 

This area of trade-off is deeply personal and has a lot to do with your lifestyle. When weighing aesthetics vs. function, you’ll want to consider everything I mentioned before: how many people you cook for daily, how often you entertain, the kind of entertaining you do (backyard barbecues vs. sit-down dinners), the style of cooking you prefer and how many people work in the kitchen at one time. 

For example, a client who doesn’t do a lot of cooking and is more concerned with the kitchen’s look than its function might really want a beautiful built-in fridge with custom panels but be willing to use a less expensive range or counter material to have that pricey, beautiful fridge. 

On the other hand, I have had several clients (including the owners of the kitchen in this photo) who chose a free-standing fridge and put their budget into the plumbing and construction work required to add a second sink. To me, this is a significant functional improvement and, for those who enjoy cooking and entertaining, worth scaling back on some of the aesthetic details. 

There are many ways you can cut back on aesthetics to create room in your budget for what’s important to you functionally. You might consider a simpler, less expensive door style on the cabinets, or a ceramic backsplash tile instead of glass, or quartz counters instead of granite.

I even had one client use a very inexpensive laminate counter so that she could put more money into the remodel work necessary to get the layout just right. Since she was in her forever home, she replaced the laminate with a beautiful stone two years later when finances allowed.


Kitchen_Cabinet_Tradeoffs_6.jpg

4. Speed vs. Patience
Any home improvement project takes time — that’s just part of the process. And once the kitchen is demolished and construction is underway, any delay can be difficult, particularly if you are living in the home and dealing with the mess. When you are in that situation, the risk is that you will be tempted to say yes to anything just to get the project done and your home back to normal. 

This happened with one of my clients, who decided to use a second-choice backsplash because it was in stock, whereas her first choice had a month lead time. On the other hand, a different client had trouble finding a backsplash tile she liked, so she finished her kitchen and skipped the backsplash altogether. Three months later, she found the perfect tile and brought the tile installer back. I am sure you can guess which homeowner was more happy with her kitchen remodel.

When making a large financial investment that you are going to live with a long time, I recommend that you go slowly, taking the time to find the right people to help and weighing your decisions carefully. 

That being said, speed can be a necessary evil. Perhaps you are remodeling for a special event, such as a backyard wedding. Or maybe you are planning to sell the house and just want a quick face-lift to get the most out of your investment. 

As a guide when weighing the need for speed vs. the need to exercise your patience muscles, I recommend you consider how long you plan to live in your home. If you’re going to sell within five years, keep in mind that everything doesn’t have to be perfect — you simply want to be sure you will get your investment back when you sell. However, if you plan to live in the home for 10 years or more, it’s worth slowing down and investing in your quality of life. Take the time to find the right solution, not the quick one.


Kitchen_Cabinet_Tradeoffs_7.jpg

5. The Ideal Me vs. the Real Me
This one isn’t so much a trade-off as a reality check. It’s worth mentioning that some clients have fantasies that a remodel can change their habits — or even their personalities. But my observation has been that if you are already a messy cook, the chances of a new kitchen transforming you into a clean-as-you-go type are pretty slim. 

Rather than plan a kitchen for the person you wish you were, focus on solutions that take your true habits into account. For example, a messy cook who is embarrassed when guests are around might want to add a separate cleanup sink where he can hide dirty dishes while making a meal. 

Or, if clutter is a constant problem, a homeowner might want to create a hidden drop zone for papers, cellphones, pens and other detritus that kitchen counters tend to attract.  

7 Reasons to Choose Dark Kitchen Cabinets

Article by Amanda Pollard

Dark and dramatic or light and bright? When it comes to choosing kitchen cabinets, it can be hard to decide. Here we look at the benefits of crossing over to the dark side.

1. Add Ambiance

If you’re looking to design a kitchen that’s both contemporary and cozy, dark cabinets could be the way to go. Inky surfaces, like the ones in this elegant kitchen, help enclose the space slightly to create an intimate feel.

Position your lighting strategically, so it casts an atmospheric glow over the dark finishes.

2. Bump Up the Style 

For a dose of sophistication, you can’t beat dark cabinetry. Moody colors give a grown-up feel that can make a space feel seriously chic. 

In this kitchen, the classic white wall tiles and the pale gray flooring highlight the dark gray cabinets and the black architectural features beautifully. Brass handles, meanwhile, bring out the richness of the charcoal hue.

3. Hide the Knocks

All kitchens get their fair share of wear and tear, but some show it less than others. A kitchen with dark cabinets, such as this one by Compass & Rose, is a good choice if you think your cabinets are going to need to stand up to frequent spillages and dings. 

A dark surface can be more forgiving than a light one and won’t instantly show scuffs and stains. If you’re painting your cabinets, make sure you apply a few coats, so the dark undercoats hide any scratches in the topcoat.

4. Contrast With White

If you’re going for a white countertop, contrasting it with a dark shade will have the most striking effect. The gleaming marbled surface here looks stunning against the deep-hued cabinets. The House of Beulah designers embraced the contrast, mixing white walls with dark gray features. To warm up the room, they added a wooden floor and some soft foliage.

5. Highlight Bold Colors

Just as dark cabinets set off a white countertop, they also can form a dramatic backdrop for other vivid colors. Take a look at this kitchen designed by Roundhouse, for example. The dark gray cabinets are neat and practical, but it’s the accents of green and red that really make the space. The cabinetry works as a moody canvas to showcase those bright bursts of color.

6. Embrace Luxury

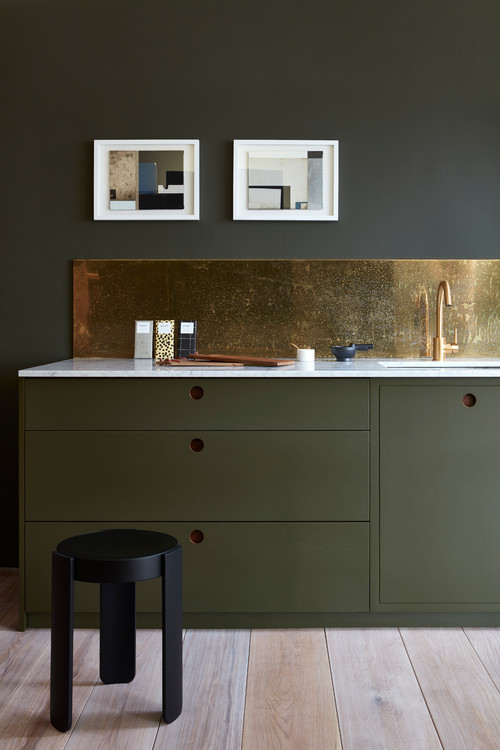
Dark colors look beautiful with metallic finishes, such as brass and copper, as this space by Naked Kitchens illustrates. The green cabinets complement, rather than clash with, the brass faucet and backsplash.

The two surfaces are wonderfully balanced, giving this room a feeling of understated luxury.

7. Zone the Space

In an open plan, it’s a good idea to use color to zone different areas. By using a dark shade on your cabinets, you can make your kitchen appear grounded in its spot.

The dark cabinets in this kitchen by Hannah Gooch contrast with the white walls around them, helpfully marking out the kitchen from the rest of the room.

Tell us: Have you dared to go dark with your kitchen, or do you prefer a lighter color scheme? 

[Houzz – March 2019]

5 Trade-Offs to Consider When Remodeling Your Kitchen

By: Moorea Hoffman 

It would be great to have an unlimited budget for a kitchen renovation. But the fact is most of us do not. And that’s OK. Compromises of one form or another are part of the process, even for the rare homeowner who enjoys a bottomless budget and expansive square footage. 

But how, exactly, do you decide between two compelling options with different pros and cons? The most critical tool to have on hand to help you make tough choices is a clear picture of your remodel goals. To get clarity on what matters most to you, read about some key trade-offs you and your kitchen designer will consider during your project.


5_Trade_Offs_1.JPG

How Will You Use Your Kitchen? 

When planning a kitchen remodel yourself or with a kitchen designer, you want to be very clear on how you want to use your new kitchen. Here is one example: I want to have people over more often. I want to feel relaxed when I entertain. In order to feel relaxed, I need to make sure that no one is in my way while I cook. I also want my kitchen to stay neat during the cooking process and be laid out so that cleaning up will be efficient.

Clear goals can help homeowners make decisions and, as the budget nears its limit, ultimately choose the options that will best support their goals. What matters most to you in a kitchen?


5_Trade_Offs_2.JPG

1. Daily Use vs. Special Events

This area of consideration has to do with how many people your kitchen will serve. From refrigerator storage to seats at the dining table, the number of people you want to accommodate will affect your design choices. You’ll want to consider not only how many people live in the home now, but — if this is your forever home — how many will live in it 10 years from now. Also, how often do you entertain and for how many people? 

I had a client who was retired and cooked only for herself and her husband most days. She entertained just four times a year, on holidays. At first, I was a bit baffled by her choice of a 36-inch range, double ovens and a 48-inch-wide refrigerator. But for her, these choices made sense. 

As the matriarch of a large family, on those four holidays she cooked for 25 to 30 people and had at least two or three people helping her in the kitchen. It was important to her that we designed a flexible space that worked just as well when cooking for two as for 30. 

That approach is a good one: Whenever possible, I recommend that clients design with their maximum capacity needs in mind.


5_Trade_Offs_3.JPG

2. Cost vs. Value

As you may have discovered if you’re considering a remodel (or in the midst of one), everything from cabinets to sinks to appliances comes at a variety of price points. How do you decide when it’s worth it to splurge for a high-quality item and when it’s best to save your dollars? Here are some questions to ask yourself:

  • Will the investment improve your everyday life?

  • Will the product solve a pet peeve?

  • Will the addition of this element make your house feel like a home?

  • Will the purchase increase the value of your home?

In each of these cases, you may decide that the cost of a feature for your new kitchen is worth it because of the value it brings. For example, a better dishwasher might eliminate the need to prerinse dishes. 

Perhaps you hate scrubbing dishes, can afford an upgrade and would cherish any minute of spare time away from the sink. Or perhaps you feel quite the opposite: You don’t mind scrubbing dishes at all, and this investment wouldn’t be worth the pennies spent. 

Framing your choices as cost vs. value — in terms of your experience in your kitchen, and possibly the resale value of your home — can help you get clarity on what’s worth the extra money.


5_Trade_Offs_4.JPG

One helpful way to prioritize your desires is to analyze the frequency and duration of a given task. Tasks you do frequently or spend more time on should get more weight as you consider what is worth investing in. 

For example, most people use the burners to cook 80 percent of the time, the oven 20 percent of the time. If this applies to you, I recommend prioritizing the cooktop as opposed to the wall oven, both in terms of placement in your kitchen and quality of product. You wouldn’t want to give up a great burner feature to get a fancier oven. 

On the other hand, if you are a frequent baker but rarely use the stovetop, you may prefer to invest in wall ovens rather than spend your budget on a fancy range. For you, it would be better to make sure that reaching into the oven is more ergonomic — done while standing upright, rather than bending over.


5_Trade_Offs_5.JPG

3. Function vs. Aesthetics
Ideally a kitchen redesign brings both beauty and function, but when we are dealing with limited funds, trade-offs between functionality and aesthetics may be necessary. By function, I mean not only the kinds of bells and whistles you get with high-end appliances, but also the kitchen’s layout and the choice of whether to have one sink or two. 

Aesthetics, of course, are the expensive but gorgeous finishes and customized detailing that bring a high-end look to a kitchen. Quite often, a budget may force you to make choices on what matters most to you — the functionality or the look. 

This area of trade-off is deeply personal and has a lot to do with your lifestyle. When weighing aesthetics vs. function, you’ll want to consider everything I mentioned before: how many people you cook for daily, how often you entertain, the kind of entertaining you do (backyard barbecues vs. sit-down dinners), the style of cooking you prefer and how many people work in the kitchen at one time. 

For example, a client who doesn’t do a lot of cooking and is more concerned with the kitchen’s look than its function might really want a beautiful built-in fridge with custom panels but be willing to use a less expensive range or counter material to have that pricey, beautiful fridge. 

On the other hand, I have had several clients (including the owners of the kitchen in this photo) who chose a free-standing fridge and put their budget into the plumbing and construction work required to add a second sink. To me, this is a significant functional improvement and, for those who enjoy cooking and entertaining, worth scaling back on some of the aesthetic details. 

There are many ways you can cut back on aesthetics to create room in your budget for what’s important to you functionally. You might consider a simpler, less expensive door style on the cabinets, or a ceramic backsplash tile instead of glass, or quartz counters instead of granite. 

I even had one client use a very inexpensive laminate counter so that she could put more money into the remodel work necessary to get the layout just right. Since she was in her forever home, she replaced the laminate with a beautiful stone two years later when finances allowed.


4. Speed vs. Patience

Any home improvement project takes time — that’s just part of the process. And once the kitchen is demolished and construction is underway, any delay can be difficult, particularly if you are living in the home and dealing with the mess. When you are in that situation, the risk is that you will be tempted to say yes to anything just to get the project done and your home back to normal. 

This happened with one of my clients, who decided to use a second-choice backsplash because it was in stock, whereas her first choice had a month lead time. On the other hand, a different client had trouble finding a backsplash tile she liked, so she finished her kitchen and skipped the backsplash altogether. Three months later, she found the perfect tile and brought the tile installer back. I am sure you can guess which homeowner was more happy with her kitchen remodel.

When making a large financial investment that you are going to live with a long time, I recommend that you go slowly, taking the time to find the right people to help and weighing your decisions carefully. 

That being said, speed can be a necessary evil. Perhaps you are remodeling for a special event, such as a backyard wedding. Or maybe you are planning to sell the house and just want a quick face-lift to get the most out of your investment. 

As a guide when weighing the need for speed vs. the need to exercise your patience muscles, I recommend you consider how long you plan to live in your home. If you’re going to sell within five years, keep in mind that everything doesn’t have to be perfect — you simply want to be sure you will get your investment back when you sell. However, if you plan to live in the home for 10 years or more, it’s worth slowing down and investing in your quality of life. Take the time to find the right solution, not the quick one. 


5_Trade_Offs_7.JPG

5. The Ideal Me vs. the Real Me
This one isn’t so much a trade-off as a reality check. It’s worth mentioning that some clients have fantasies that a remodel can change their habits — or even their personalities. But my observation has been that if you are already a messy cook, the chances of a new kitchen transforming you into a clean-as-you-go type are pretty slim. 

Rather than plan a kitchen for the person you wish you were, focus on solutions that take your true habits into account. For example, a messy cook who is embarrassed when guests are around might want to add a separate cleanup sink where he can hide dirty dishes while making a meal. 

Or, if clutter is a constant problem, a homeowner might want to create a hidden drop zone for papers, cellphones, pens and other detritus that kitchen counters tend to attract.


5_Trade_Offs_8.JPG

8 Elements of Classic Kitchen Style

By: Rebekah Zaveloff

Many people are at a loss when it comes to defining their style. Some people know what they like but are afraid of getting the terms wrong, or they’re afraid of being pigeon-holed into one style when they feel like they’re in between a few different ones. The truth is, most spaces have elements of different styles and aren’t all one way. 

To sort all this out, join me on a tour of kitchen styles and sub-styles, from Classic to Modern, Industrial to Cottage, and lots in between. Today we’ll start with the most approachable of styles, classic style. 

Read more

Post-KonMari: How to Organize Your Pantry

By: Laura Gaskil

So you’ve tossed the old, unloved and expired food and spices. What’s next? After decluttering the pantry, it’s time to get organized. But with so many organizing products to choose from, it can be hard to know which are worth buying and which will end up gathering dust (or worse: making your pantry even more cluttered). 

To help you bring order to this hardworking part of your kitchen, we’ll divide your things into three categories: stuff you reach for every day, meal building blocks and staples, and occasionally called-for ingredients.


Pantry_Storage1.JPG

Stuff You Reach for Every Day

A tray or platter beside the stove. Your true everyday essentials (think olive oil, salt and pepper) should live within arm’s reach of where you use them. A tray, platter or slab gives these items a defined space to prevent straying, and is easy to move and wipe down. 

Check your own cupboards to see if there’s a platter or tray you can use for this purpose. You may not need to buy anything!


Pantry_Storage2.JPG

A dedicated shelf (or two) for essentials. Beyond salt and pepper, you can probably think of a handful of other ingredients you reach for nearly every day. These items would take up too much room on the counter, so aim for a shelf or cupboard near the stove, or above the counter where you like to chop vegetables. If your pantry is already near the cooking zone, dedicate an eye-level shelf to your essentials. 


Add one or more of these tools to make ingredients easy to spot at a glance:

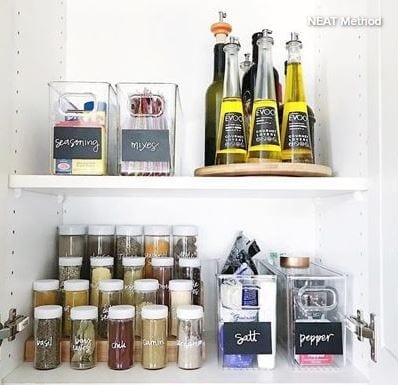
  • Lazy Susan. A small turntable lets you circulate bottles of oil with ease.
  • Risers for spices. See what’s in the back row without having to rummage.
  • Clear bins. Corral little packets of this and that.


Meal Building Blocks and Staples

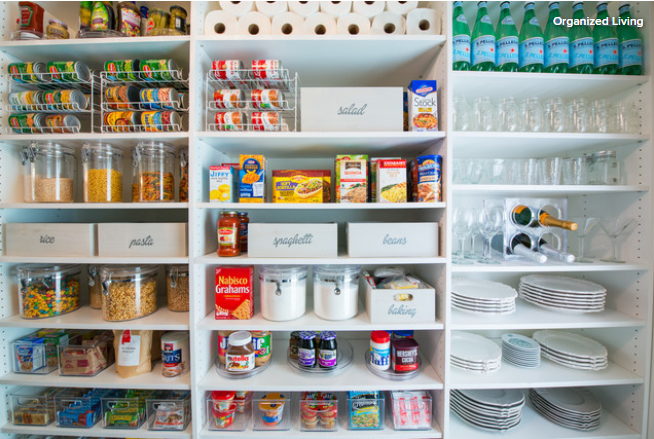
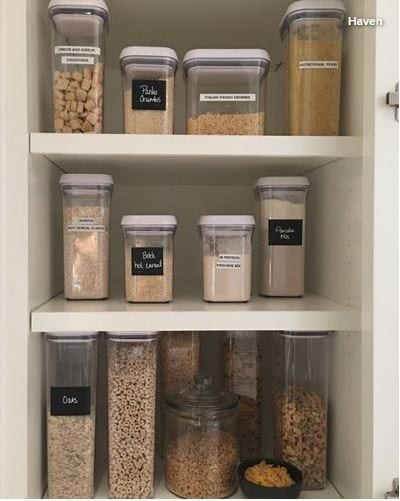
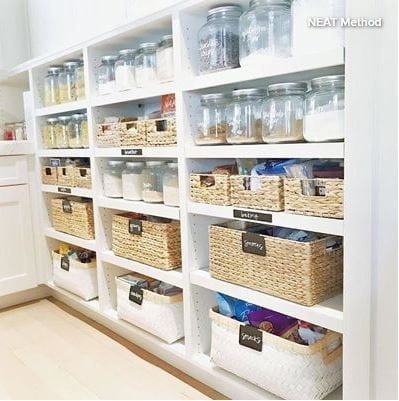
Clear, airtight containers for bulk goods. Buying grains, flours and other items from the bulk bins in the grocery store is economical and reduces packaging waste. Once you get home, transferring these items into a good set of canisters will help them stay fresh longer and keep critters out.

Tip: If you like to change up your ingredients frequently, use wipeable chalkboard labels. Then, when you fill the container with something new, you can simply wipe off the old info and write what’s in it now.


Pantry_Storage4.JPG

Risers for cans and jars. Slightly larger than spice risers, these stairstep-like organizers are especially helpful if you have deep pantry shelves and lots of canned goods (or jars filled with homemade goodies). 

DIY: To create your own risers, borrow a few wooden blocks from a child’s set (or get them from the hardware store) and stack in the back of a cupboard to give cans a lift. If the cans are sliding around, top the blocks with a layer of anti-slip tape (available at hardware stores or online).


Pantry_Storage5.JPG

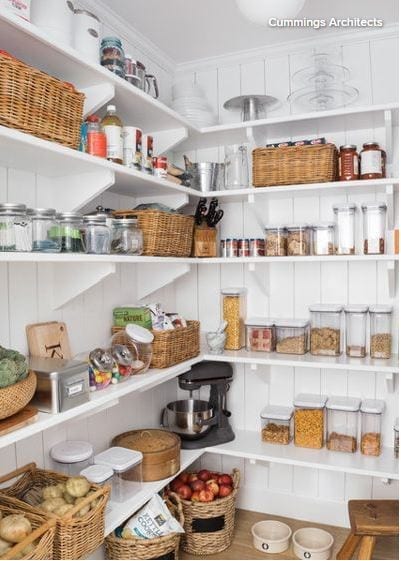
Baskets for potatoes and onions. If you have a walk-in pantry that stays cool and dark, this can be a great place to store potatoes, onions and other produce that doesn’t require refrigeration, such as apples and squash. Pick baskets that will allow air to flow around the produce, and store each type in its own basket. 

Tip: Keep apples in a different section of the pantry since they produce ethylene gas, which can speed spoiling of nearby veggies.


Pantry_Storage6.JPG

Occasionally Called-For Ingredients

“Project cooking” baskets or bins. Project cooking is the kind of cooking you may sometimes love to do, but it’s certainly not part of your everyday get-dinner-on-the-table cooking life. In other words, it’s a project. Think baking birthday cakes, decorating Christmas cookies, making homemade pasta or canning your own jam. 

Instead of mixing the special tools and ingredients required for these projects in with the rest of your pantry items, gather them in a project basket. The size of the basket or bin will depend on how much stuff you need to store, so gather the ingredients together before you go basket shopping!

Tip: Project cooking bins can certainly live on high shelves. Just be sure to label them clearly, and keep a stepladder nearby, if needed, to reach them.


Pantry_Storage7.JPG

Bulk supply bin or crate. If you like to stock up on certain supplies or ingredients, you’ll want to find a convenient yet out-of-the-way spot in which to keep them. The shelves from waist to shoulder height are best reserved for more frequently used items, so use the floor or a high shelf to store your extra goods. 

Bulky but light items (like paper towels) can go on a high shelf, while big and heavy stuff (like bags of dog food) should go on the floor. One or two large bins or crates can keep everything contained.

How to Keep Your Kitchen Sink Looking Great
By Erin Carlyle, Houzz

A new sink can give your kitchen a fresh look. But sinks get a lot of use, and they’re not made of Teflon, so over time they’re bound to show some wear and tear. Here are tips for keeping 10 popular kitchen sink materials looking great. 

1. Stainless Steel

Basics to know. Easy-to-maintain stainless steel is the most popular choice for a kitchen sink, according to the majority of the designers I interviewed — and with good reason. “A stainless sink is very hygienic,” says Andrew Williams of Andrew Williams Designs in Boulder, Colorado. “There’s not anything in there where bacteria can grow.” 

Stainless steel isn’t indestructible, but it’s about as close to that as a sink can get. Still, stainless is prone to scratching through daily use. Hard water also can be a problem, with marks showing more on mirror-finished stainless, seen with very high-end sinks, than on brushed, or satin, finish, which is the more common finish for these sinks. Also, if something extremely hot touches a dry stainless sink, the material can become discolored in a process known as “blueing,” Williams says.

Cleaning regimen. To keep stainless sparkling, wash the sink regularly with mild dish soap and a sponge or soft rag — that’s it. “You don’t have to worry yourself with a lot of daily maintenance,” Williams says. Alternatively, manufacturers recommend using a stainless steel cleaner or polish about once a week. 

When you clean your sink, avoid using steel wool, wire brushes or abrasive sponge pads, as they can cause the material to scratch. Also avoid cleaners that contain bleach, as they can corrode the sink. And if you do for some reason use a cleaner with bleach, be sure to rinse the stainless surface immediately to prevent corroding.

How to protect it. To keep stainless looking great, you may want to keep a grid on the bottom to protect it from scratching during daily use. If your sink gets water marks from hard water, a mixture of vinegar and water may work to remove the marks. Don’t allow water to evaporate on the sink, or this may lead to more water
marks. Instead, after you use your sink, wipe it dry with a soft cloth to prevent water stains. And to prevent blueing, be sure to always add water to the sink before putting a hot pan in — never put a hot, dry pan directly in the sink.

How to repair it. If your stainless steel sink does get scratched, you can buff out the scratch with steel wool. But do keep in mind that buffing doesn’t actually remove a scratch; it smooths the sink’s surface so the scratch is not in dramatic relief but instead blended into a larger buffed area. This works best on satin or brushed finishes. A buffed area will stand out more on some of the higher-end stainless sinks that come with a shiny, mirror-like finish.

If you dent your stainless sink — something that might occur if you bump a cast iron pan against its side, for instance, or drop a heavy object on the sink bottom — there’s pretty much nothing you can do, and your sink will have a dent, Williams says. But to put this potential problem into perspective, consider that a ceramic or enamel sink placed under the same pressures would chip.

2. Granite Composite

Basics to know. Granite composite sinks are typically made of 80 percent granite and 20 percent acrylic resin, which makes them an extremely durable material. They are resistant to heat, stains, scratches and chips. This material comes in a range of colors (though only in matte finishes), but be aware that lighter composites can stain, while darker colors camouflage food scum best. Granite composite doesn’t show scratches the way stainless steel does and the colors don’t fade when exposed to high heat. But these sinks are prone to stains from waterborne minerals, which can dull the finish over time. These sinks can work with a range of kitchen styles, “from cottage to more contemporary,” says Heather Kirk, of Kirk Riley Design in Seattle, Washington.

Cleaning regimen. You can clean daily with a mixture of mild soap and warm water, Kirk says. Alternatively, you can use a non-abrasive cleaner like Bar Keepers Friend, Soft Scrub or Soft Scrub with bleach. Simply scrub any marks or stains with the sponge and soap or cleaner, then rinse with water. After cleaning and each use, be sure to dry the sink with a towel. Kirk recommends microfiber, which is more absorbent than a regular towel. “Yes, this is an additional step, but it will help prevent water stains or limescale from building up on the surface,” she says.

Despite your cleaning, over time the matte finish of a granite composite sink may dull and begin to look as though it is coated in a hazy film, due to buildup of dirt from daily use, or mineral deposits from hard water. A white ring of calcium deposits may appear around the bottom of the sink. To remove these blemishes, use a cleaner targeted at stains from hard water and mineral deposits, such as Lime-A-Way or CLR.

To help prevent this buildup as well as to rid the sink of stubborn stains, some sink manufacturers recommend deep cleaning monthly by sprinkling a mild household cleaning product around the sink bowl and adding hot water (140 degrees Fahrenheit). Let the water stand at least two hours and up to overnight. Drain, clean the sink with a sponge and wipe dry. “This should remove any discoloring from food or limescale residue,” Kirk says. Alternatively, you could leave a solution of half bleach, half water in the bottom of the sink for an hour, then scrub and rinse well. 

How to protect it. Follow your sink manufacturer’s recommendations when it comes to deep cleaning. Straight bleach or products that contain ammonia are typically not recommended. For daily cleaning, avoid using steel wool or abrasive scrub pads, as these can scratch the sink. 

How to repair it. Granite composite sinks are resistant to stains, chips, scratches and burns. Marks from metal pans can be removed using the rough side of a sponge along with a mild cleaner — dish soap or a household cleaner should be fine in most cases, but check the sink manufacturer’s recommendations first.

3. Fireclay

Basics to know. Fireclay sinks are made from a mixture of clay and glaze fired at temperatures of at least 1,600 degrees Fahrenheit, resulting in the clay and glaze fusing together to create a durable, ceramic-like finish. This material is non-porous and highly resistant to scratching or chipping. Though they are generally stain-resistant, designer Lauren Davenport, of Davenport Designs in Atlanta, recommends rinsing a sink thoroughly after placing red wine, coffee or tea bags in it, as they can leave a mark on the sink. You can place hot pans and dishes in the sink without fear of damaging the material. These sinks are often apron-front and found in farmhouse-style kitchens. 

Cleaning regimen. Use mild dish soap and a soft cloth or sponge to clean fireclay sinks of daily messes. For heavier, crusted-on messes, apply baking soda or a mild abrasive cleaner to a sponge or soft cloth and clean off the gunk. Rinse thoroughly and dry with a soft cloth to prevent water spots.

These sinks often have flat bottoms and food can accumulate in the sink’s corners. When this happens, you can use a plastic spatula or a soft scrubbing sponge to scrape off this food muck. Applying a liquid wax to the sink once a month will help with proper drainage, particularly useful for flat-bottomed sinks. “It can help with water flow and helping prevent the water from pooling in the corners of the sink,” Davenport says.

How to protect it. Using a sink grid can help prevent scuff marks that may come from pots and pans. Take care with heavy cast iron pans; if you whack the sink hard enough with cast iron, the sink body could crack.

How to repair it. These sinks will not scratch, burn or crack during daily use. If you do see what looks like a scratch in a fireclay sink, it may be a metal mark left from silverware; these can be cleaned with a scrubber. Chips are rare, but if they do happen, you can get a repair kit from your manufacturer. Davenport says you should follow the instructions on the kit precisely, then avoid using the sink for a week so the compound can fully cure.

Also important: “When comparing fireclay sinks to other sinks, know that the only available finish is in white,” Davenport says. “While these sinks are very durable, dishes and glasses that are dropped into these sinks tend to shatter more easily.” Also, fireclay sinks are very heavy and will require extra reinforcement to accommodate their weight.

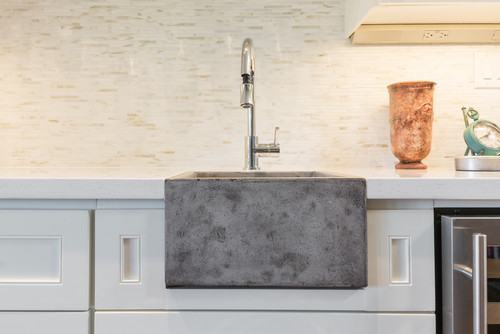
4. Concrete

Basics to know. The most important thing to know about concrete is that it’s fairly porous, and although these sinks will have a sealer, they’ll still show use with time. “When you go with concrete you have to like that worn look, because the material will change,” says Ellinor Ellefson of Elle Interiors in Chandler, Arizona. But you can have a concrete sink custom-made and get it in custom colors. Often used in industrial-style kitchens, these sinks can go with all sorts of countertops. “I have used it with both quartz countertops and granite,” Ellefson says.

Cleaning regimen. Wipe down once or twice daily using a mild dish soap, Ellefsen recommends. Stay away from any abrasive cleaner, as this can wear down the sink’s sealer. Once or twice a week, clean the soap with a household cleaner that is not too abrasive — she recommends checking to make sure that the cleaner is OK to use on natural stone. If not, don’t use it on a concrete sink because it will seep in and start dulling the concrete’s surface.

How to protect it. Avoid placing hot pots and pans directly in the sink; instead, run water into the sink first. The concrete itself won’t be damaged by heat, but the temperature could damage the concrete sealer. You should expect some minor white scratches to appear in your concrete over time; applying Pledge periodically can help fill them in and give your concrete a nice sheen, according to manufacturer Trueform concrete.

Don’t let acidic foods or liquids — lemon juice, mustard, vinegar, wine, soda, tomatoes — sit on your concrete, as they can eat through the sealer and possibly stain the exposed concrete beneath. Similarly, don’t use cleansers that contain ammonia, citric acid, vinegar or bleach. 

To keep it looking good, reseal a concrete sink using a special concrete sealer or a concrete wax, Ellefson advises. When the sink is first installed, she recommends waxing frequently the first month, then re-waxing about every six months. Similarly, if a concrete sealer is used, she suggests resealing every six months. 

How to repair it. Again, if you choose a concrete sink, you should be prepared to accept some scratches as part of the character of this material. But if they build up and are bothering you, you could have a handyperson skim coat the sink with a fresh layer of concrete, which would effectively give it a new finish. You’d just have to avoid using the sink until it is completely dry and has been sealed. Chips in a concrete sink can be repaired with polyester resin and a putty knife — you can follow the manufacturer’s instructions and do it yourself or contact a concrete fabricator.

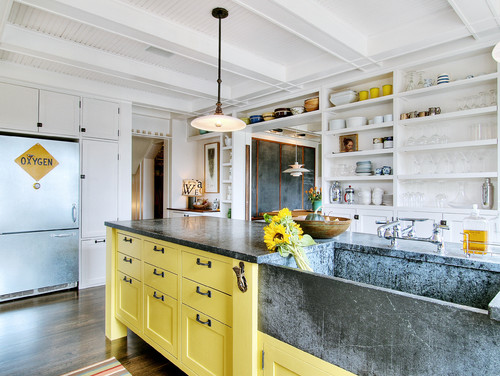
5. Natural Stone

Basics to know. Natural stone can bring a gorgeous organic note to your kitchen sink, but it is not as durable a material as granite composite or stainless steel. While there is a wide variety of natural stones to choose from — including black granite, green or gray granite, limestone, marble, travertine, sandstone, onyx, quartzite and soapstone — some stones are better suited for kitchen sinks than others. Natural stone may scratch or chip, and many stones are susceptible to staining since they are porous. Proper sealant is critical to maintaining the look of these sinks. “A general rule of thumb is that the lighter the stone is, the more porous it is,” says Ellefson, the Arizona designer. 

Cleaning regimen. Natural stone can be cleaned with warm water and a soft brush, or mild dish soap and a soft cloth. Alternatively, you could clean with a product recommended for countertops of the same stone material — check with the manufacturer to get a list of such products. With either method, be sure to wipe your sink dry after use or cleaning to help prevent water marks. If your sink does develop stains, try using a non-abrasive household cleaner like Soft Scrub, a dishwasher soap or a professional stone cleaner to remove them. 

Your kitchen sink will frequently have contact with water, which can remove the protective sealer, so you’ll want to regularly reseal natural stone with wax or a stone sealant to protect the porous stone from damage or stains. Most tile or hardware stores will carry a variety of stone-sealing products. Check with your manufacturer for recommendations on how frequently you should seal the particular stone you have; once or twice per year is often the recommendation. If you prefer to use wax, you’ll want to apply it at least once per month.

How to protect it. Don’t use acidic or abrasive cleaners, like tub or tile cleaners and toilet bowl cleaners, on the sink. Also don’t use ammonia, vinegar, alcohol, window cleaners or lemon juice on a natural stone sink. Avoid abrasive cleaning tools like steel wool and metal brushes. 

How to repair it. If you get a scratch in your natural stone sink, call a repair person. If your sink gets stained, follow the manufacturer’s guidelines to remove a stain.

Also important: Natural stone can be hard on dishes and stemware. “Avoid throwing dishes and glasses into the sink, as they [will] have a tendency to chip and break easier than [in], say, a stainless steel sink,” Davenport says. These sinks are also quite heavy and will need extra reinforcement to accommodate their weight.

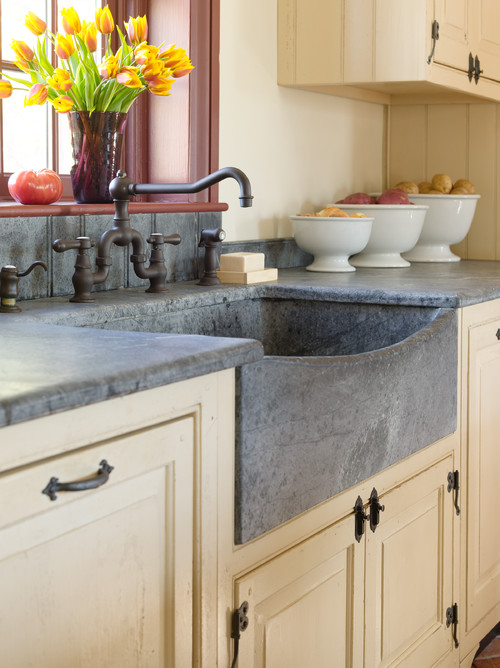
Soapstone

Basics to know. Soapstone is distinct from other natural stones because it is not porous, which makes it very stain-resistant. While this stone is known for a rich, dark look, it’s actually light gray in color when it comes from the quarry; the charcoal tone comes from exposure to water, grease or oils that cause the stone to oxidize. “What people like the most about soapstone is the way it looks when it’s oiled,” says Erika Couture of Inspire Kitchen and Bath Design in Colchester, Vermont. Typically, mineral oil is used. But since the water used in a kitchen sink on a daily basis rinses away the oiled finish, maintaining that oiled look in a sink can take some elbow grease. If you don’t keep up the oiling, your sink can end up looking streaky, Couture says.

Cleaning regimen. To keep the sink clean, scrub it with soap or a household cleaner like Ajax or Comet. You can use a small brush to keep the corners of the sink clean. 

How to protect it. If the sink is new, you’ll need to treat it regularly with mineral oil to keep it looking good — at least once a month is recommended, but the choice is up to the individual homeowner. A general rule of thumb is to apply mineral oil when water begins to leave a noticeable dark spot, according to Vermont Soapstone in Perkinsville, Vermont. Over time, the soapstone should absorb the mineral oil and you won’t need to continue coating it. 
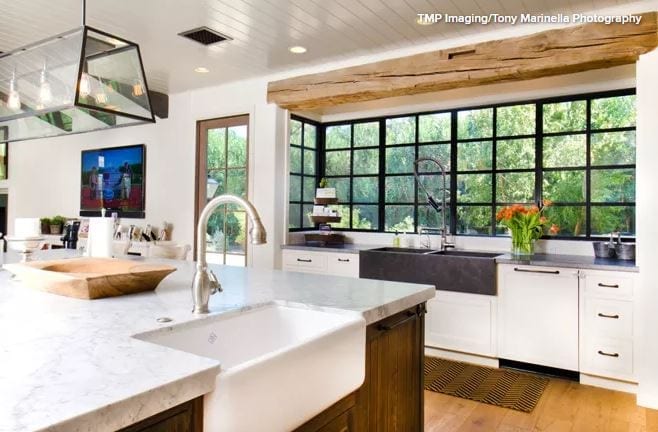
How to repair it. A soapstone sink is not likely to stain because the stone is not porous, and it won’t burn, Couture says. If you gouge or scrape the sink, you can buff out the damage with fine sandpaper. If the sink chips around the edges or corners — perhaps you hit it with heavy dishes — use fine sandpaper to smooth down the edges.

6. Cast Iron

Basics to know. Cast iron sinks have an enamel finish that is fired at 1,200 degrees Fahrenheit. The polished enamel is nonporous, and if the quality is high this material is very durable. However, be wary of lower-quality enamel finishes that may be more prone to chipping. This type of sink can be hard on dishes and glassware, so be careful how you place these items into the sink. 

Cleaning regimen. Rinse the sink after use and wipe it down with a soft cloth. You can also use a mild dish soap and a soft cloth or sponge for cleaning. Avoid abrasive cleaners, which can cause the enamel finish of the sink to wear off. 

How to protect it. Use a sink grid to protect the sink bottom from scuff marks from pots and pans. Don’t leave dirty dishes, coffee grounds, tea bags or other materials that may stain in the sink for long periods of time. 

How to repair it. If you do chip the enamel on your sink, the underlying cast iron may be exposed and subject to tarnishing or rusting. Acidic foods like orange juice can start to damage the sink. Rather than spot-repair chipped enamel, Davenport recommends having the entire sink professionally resurfaced or re-enameled.

Also important: Cast iron sinks are sometimes used in place of fireclay sinks, which tend to be more expensive. But these sinks get mixed reviews from designers. Davenport prefers to use them in bathrooms, where pots and pans won’t damage their enamel finish. On the other hand, Kirk, the Seattle-based designer who specializes in restoring vintage homes, uses cast iron sinks often and finds them easier to repair than fireclay, arguing that if you hit cast iron hard with a pan, it will damage the enamel but not the cast iron, while if you hit fireclay hard enough, you could crack the actual sink body.

7. Copper

Basics to know. Raw copper is rust-resistant and anti-microbial, and a just-bought copper sink will have a glorious glow to it. Raw copper will naturally develop a patina over time. “It’s like a penny: It’s going to be bright and shiny, and then it’s not,” Kirk says. Keep in mind that there are a few types of copper sinks on the market: those that are raw, and therefore designed to patinate; as well as lacquered copper, designed to preserve its bright look; and finally pre-patinated copper sinks, which have patination before you buy them. The care instructions for these types of sinks are essentially the same. 

If you’re buying a sink, be sure to choose one that is at least 99 percent pure copper — otherwise you lose the benefits of using copper, “namely its anti-microbial properties as well as its malleable-yet-tough quality,” says designer Jennifer Ott of Jennifer Ott Design in San Francisco.

Cleaning regimen. Clean your copper sink daily with mild soap, warm water and a soft cloth or sponge, then dry with a cloth to prevent water spots. It’s best not to use abrasive cleaners or tools like steel wool.

The development of patina is a natural process with copper, but if you want to try to intervene in the look of your sink, there are some steps you can take — you will just need to be ready to take on some work. You may want to apply a product that can help prevent water spots, especially if you have hard water that could leave mineral deposits. One option for protecting the sink from such spots is a spray wax applied once per month.

Too much moisture can lead to green spots in your copper sink’s patina; this is a mineral buildup that you can remove with your fingernail or a soft cloth, or with warm water and a sponge. Some soaps may also cause green spotting if they sit on the sink’s surface for too long. Sometimes these sinks can also get a brown film; similarly, it can be wiped off with a cloth or scratched off with a fingernail. For some people, none of this is really a big deal — others will find staying on top of the development of patina an annoyance. 

How to protect it. Don’t leave a rubber mat, sink grid or sponge inside the sink, and don’t leave food or dishes in the sink for a long period of time, as all of these items can stain the sink. Don’t let bleach touch the sink; it will remove the patina. Acidic foods like citrus, tomatoes, ketchup and soda also can strip the patina from your copper sink. So can cosmetics and toiletries like toothpaste, makeup or shaving cream, as well as abrasive chemicals like bleach or drain unclogger. Even oil from your fingertips can affect the patina on copper. Some manufacturers make sink grids that work specifically with copper and don’t take off its patina; consider one of these to protect the sink.

8. Porcelain

Basics to know. A white porcelain sink can look great with a farmhouse style, especially when it’s new. But the look of these sinks will degrade over time. “No matter what you do, a porcelain sink will become scratched and the finish will get dull,” says Ellefson. “You can try to be careful, but there’s really no way to keep it looking as pristine [as it was] in the beginning.” Porcelain sinks can chip, and metal pans can leave black marks or scuffs that can be difficult to remove. Porcelain isn’t as durable as fireclay, and it isn’t as popular a sink material as it once was. “It’s still used, but mostly when farm sinks are in play,” says Angie Keyes, a kitchen and bath designer in Naples, Florida. These days, porcelain is more commonly seen in bathrooms. 
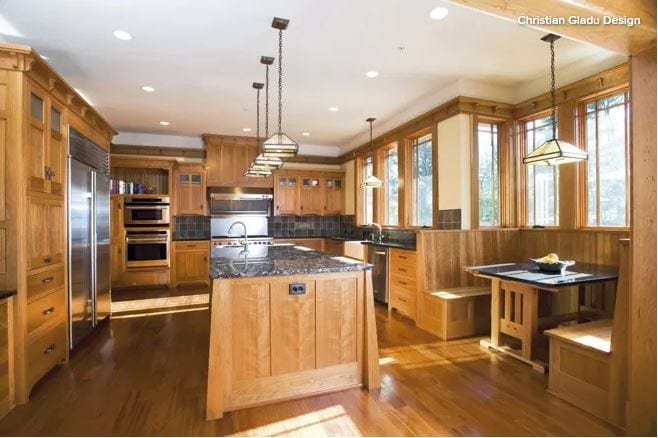

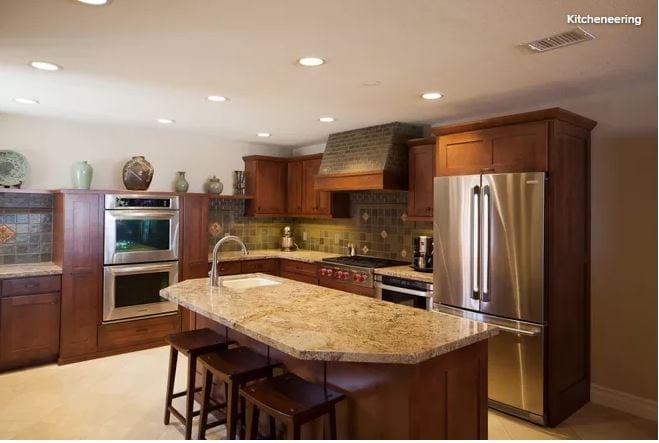
Cleaning regimen. Wash your sink on a daily basis with warm water and dish soap, and use a semi-soft brush to scrub it. Wipe your sink dry to prevent water stains. If the porcelain starts looking dull or dirty, sprinkle a little Borax laundry detergent in it, then rinse that with water. The Borax will help take off mineral deposits that build up and dull the sink’s finish. For a deeper fix, you can get the porcelain sink refinished — hire a professional to do this. 

How to protect it. Ellefson advises keeping a rubber mat at the bottom of your porcelain sink to prevent scratches. 

How to repair it. To repair a chipped or cracked porcelain sink, you can purchase a porcelain repair kit and follow the directions — but the look may not be completely smooth. Alternatively, you can have your porcelain sink professionally refinished.

9. Solid Surface

Basics to know. Solid surface sinks are man-made, synthetic material composed of acrylic or polyester resins, powdered fillers and pigments — Corian is one brand name. Sometimes people also refer to engineered quartz as solid surface, but engineered quartz is a distinct material made of naturally occurring quartz chopped up and mixed with a resin-like material, similar to the process for forming composite granite (see next sink description). Solid surface sinks are supposed to be stain-free, but they do actually stain, says Couture, the Vermont designer. Dark cast iron pans, blueberries and anything that sits on the sink for a while can leave a mark. 

Cleaning regimen. Rinse thoroughly and wipe dry with a soft cloth after each use. Alternatively, wash the sink with soapy water before drying. Mild abrasive cleaners like Comet or Bon Ami can be used occasionally to scrub down the sink, and stains can be sanded down with fine sandpaper. “Be careful not to do it in just one area” or the sink will show a depression in that area, Couture says. 

How to protect it. Don’t leave dirty dishes, coffee grounds, tea bags or other items that could stain in contact with the sink for a long time. Use a basin rack to protect the sink’s bottom from scratching. 

How to repair it. Solid surface sinks can be damaged by heat. If you pour boiling water in without first warming the sink up by running hot water on it, the bottom of the sink might drop out, Couture says. You also want to make sure you avoid placing anything very hot straight out of the oven and onto the sink, or the hot item could melt the material, Couture says. If your sink has a crack or burn that needs to be repaired, call a professional. Synthetic solid surface sinks can be lightly sanded with very fine sandpaper to remove stains or scratches, Couture says. “But because it is soft, you don’t want to oversand in one spot or you will create a depression in that one area.”

Also important: Avoid using window cleaners on the sink, as they can leave a waxy buildup that may dull the sink’s finish.

10. Engineered Quartz

Basics to know. Engineered quartz, also called quartz composite, is a blend of ground quartz and resin. Similar to granite composite in terms of the way it is made, engineered quartz is non-porous and resistant to scratches and heat. This material comes in a variety of colors and, like most sinks, can show hard-water marks if not properly maintained. Force or pressure from heavy objects can damage its surface. On the downside, engineered quartz is not quite as strong or scratch-resistant as granite composite. “Until recently, quartz [composite] sinks were only available as a custom integral sink in a quartz [composite] countertop,” says designer Barbra Bright, of Barbra Bright Design in San Francisco. However, these sinks are now available as standalone products. 

Cleaning regimen. Wipe clean with soap and water, and the scrubber side of a sponge. To clean off tougher spots and dirt, use a non-abrasive household cleaner like Soft Scrub Liquid Gel. To remove food or other items that may stick to the sink, scrape with a putty knife and then clean the sink’s surface with a damp cloth. As with many sinks, wipe dry after use to avoid developing mineral deposits from hard water. For tougher stains on lighter-colored engineered quartz, use a product such as Bar Keepers Friend, Bright suggests. Also, you’ll want to be sure to clean the sink on a regular basis to avoid developing a haze from everyday cooking greases and oils. “Some of the designers say they use Magic Eraser on them daily,” says Cindy Aplanalp-Yates of Chairma Design Group in Houston.

How to protect it. Though this material is heat-resistant, it can be damaged by sudden, dramatic changes in temperature, so avoid transferring hot pans directly into the sink. Instead, run warm water to acclimate the sink first. 

How to repair it. An engineered quartz sink that gets a crack or divot in it could be repaired by filling the damage with epoxy, Bright says, but the patch method might be visible, depending on the color of the sink. The best course of action would be to call a professional — either the fabricator who initially installed the engineered quartz or a stone repair company. 

Originally published on Houzz: How to Keep Your Kitchen Sink Looking Great