For tile fans such as myself, the more tile, the better. But though I’d happily cover every surface with it, there are certain things to consider when combining tiles of various sizes, shapes and patterns on walls and floors. Because tiling large areas requires a sizable investment, it’s worth getting samples and experimenting with how tiles work together. These nine tips offer guidance on how to combine tiles for the best look.
Often praised for its durability and variety, ceramic tile is a popular choice for bathroom finishes. If you’re drawn to color and texture, this material can deliver on both fronts. But the sheer variety of ceramic tiles is endless, which can make finding just the right tile very difficult.
Because ceramic tends to cost less than porcelain and is much lighter, it’s often used for wall and ceiling installations. However, there are some major cons to this material, too: It’s not as strong as porcelain, so it doesn’t make the best walking surface. It can be very cold underfoot in the winter, and heavy tile can be difficult to install.
Curious if ceramic tile will work in your bathroom? Here’s what you should know before making the purchase.
The basics: Ceramic tiles are wide ranging; all are generally made from red or white clay that’s been fired in a kiln and glazed or finished. If you’re a tile nerd like me, ceramic tile technically includes porcelain tile too, but for this ideabook we’ll exclude that category.
Cost: Ceramic tile is often priced below $2 per square foot. Higher-end tiles can easily run $20 to $40 and more per square foot. The average tends to be around $7 to $9 per square foot.
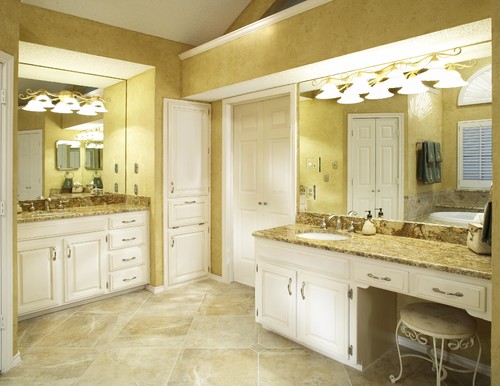
Pros: Ceramic tile can be incredibly affordable, and there’s a ton of variety in styles, colors, finishes and textures. It’s also easy to customize it for details like chair rails, soap dishes and special edging and nosing, as in this bathroom.
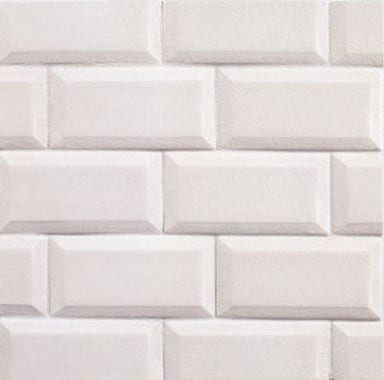
Special considerations: Since ceramic tiles often have texture, you may want to consider this to add dimension to your bathroom. The eased edge on this tile adds a little extra something to a bathroom wall, but can make it difficult to figure out how to cut end tile. Consider using a tile edge profile, like a Schluter strip, to make the transition less awkward.
However, today’s ceramic tile offers much more than an eased edge. This wavy tile from Porcelanosa is just one example of the texture and detail available today.
This type of tile can make for a great accent in a bathroom, but I’d avoid using too much texture in a shower , since it can make for difficult cleaning. Try using it for a feature wall or feature corner instead.
Maintenance: Make sure you choose a ceramic tile with a durable finish. How can you tell? Buy a sample, take it home and clean it to death.
I recommend cleaning ceramic tile with a white nylon scrub brush and a little soap. You shouldn’t need much more than that. Ceramic is very durable, but it’s best to stick to mild household detergents and to spot test before using anything new.
Installation: Installing ceramic tile is pretty straightforward; it could even be a DIY project if you have some experience working with tile. Many of today’s ceramic tile actually has directional arrows on the back side; make sure you keep them lined up the same way so you get the correct look.
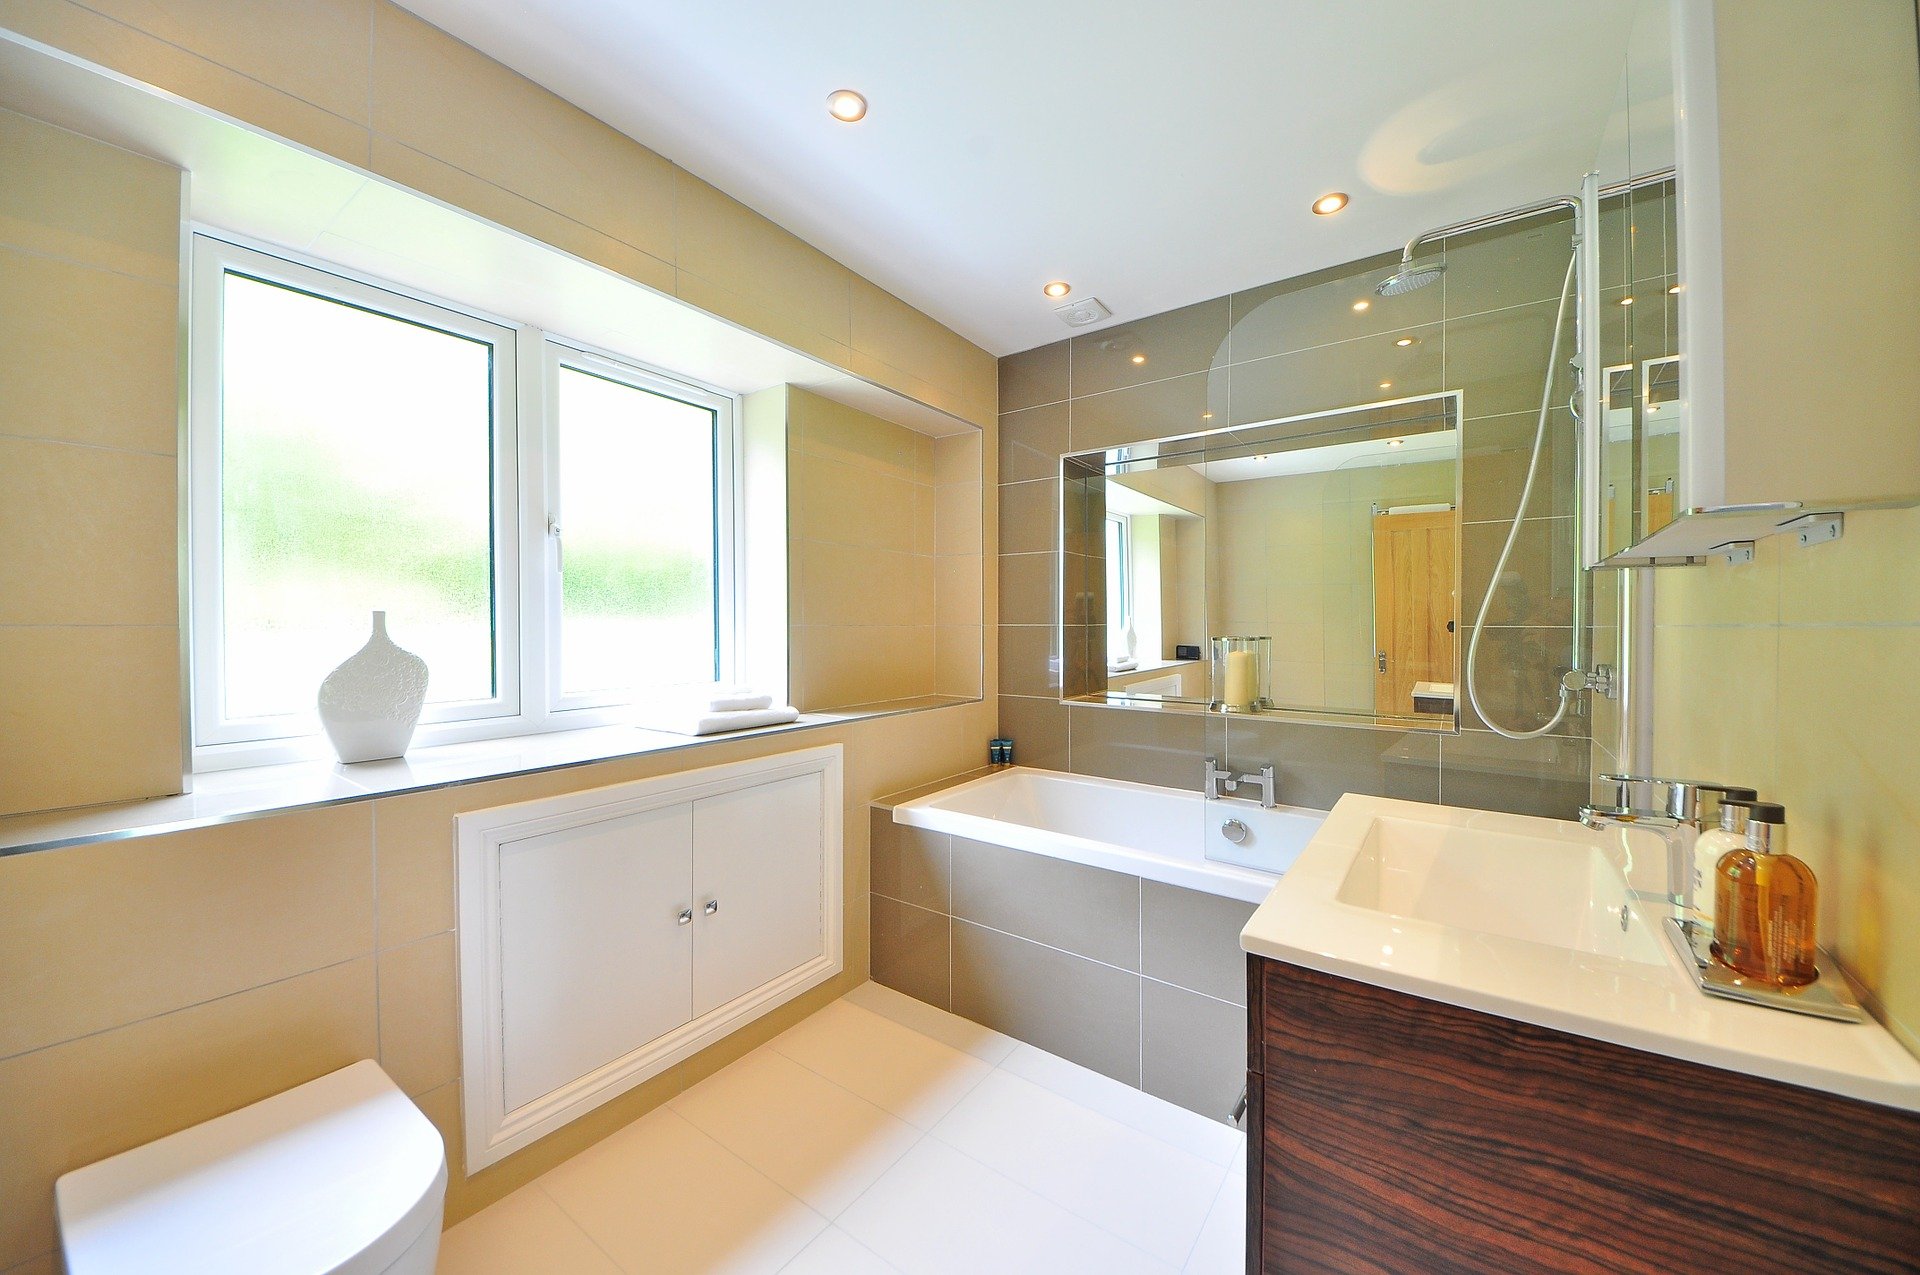
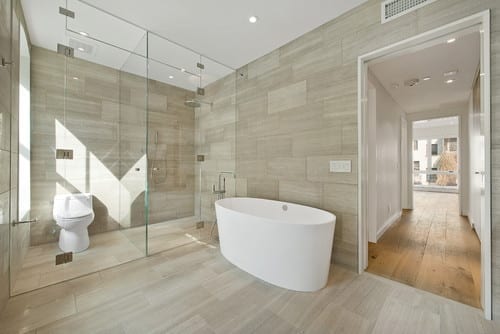
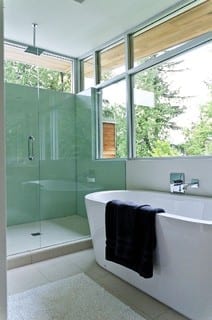
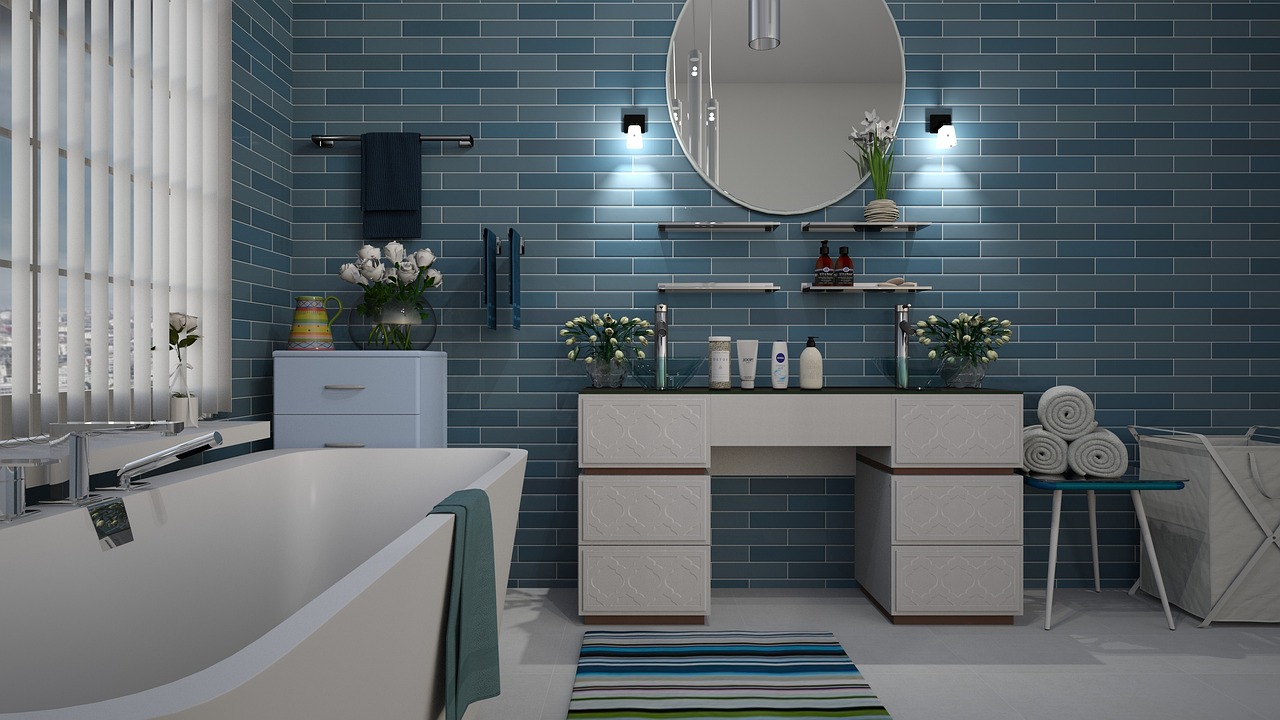
Tiling under your new vanity or custom cabinets can prevent shower or sink water from finding its way into your house. Extending tile all the way under freestanding or floating vanities can make a room look and feel larger, too. These vanities are popular choices in today’s bathrooms, so it’s important to understand the pros and cons of bringing tile all the way under your bathroom storage.
See how these bathrooms combine vanities and floor tiles, and learn what you should specify when working with your bathroom contractor.
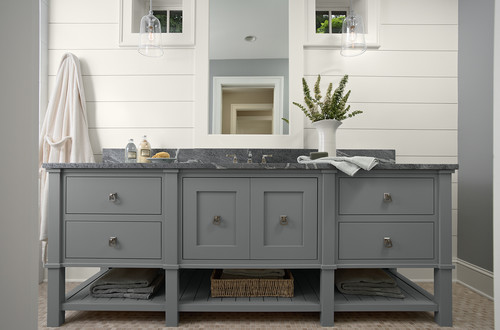
Making sure the floor is perfectly level is an important step for a vanity like this. Trying to level a vanity after tile installation can be a real chore. If you’re having a vanity custom built, designing adjustable legs can help get your vanity and vanity top perfectly level.
Tip: Consider omitting extra legs in custom vanity designs and securing the vanity to the wall if needed. Getting eight legs to sit perfectly flat is much harder than four!
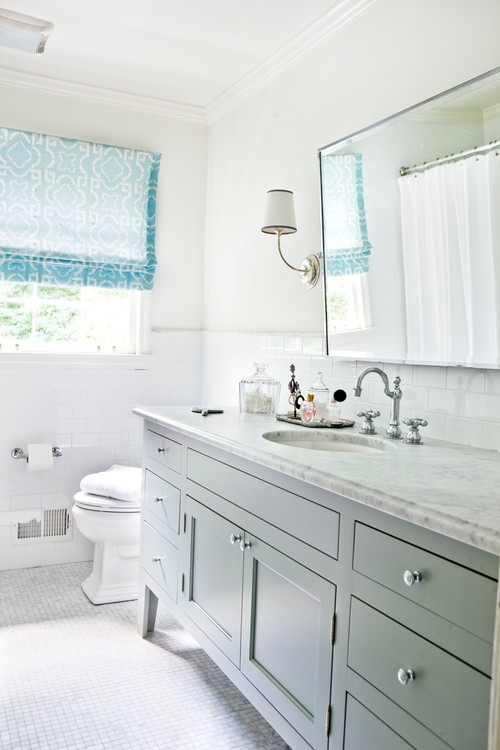
If your bathroom floor is a little unlevel and you don’t want to spend the money or time making it perfectly level, a little shoe molding (the small strip of molding at the bottom of the vanity toe kick in this photo) on your vanity can visually even things up. Shoe moldings add a lot of charm to a vanity’s look and help protect the vanity from water damage.
Tip: If you are going to use a shoe molding, plan to shim the vanity off the ground by about ⅛ inch or so, so that the only wood in contact with the floor is the shoe molding. If there’s ever a leak in your bathroom, the shoe molding, rather than the bottom of your vanity, will absorb the damage. It’s much easier (and more affordable) to replace shoe than the entire vanity.
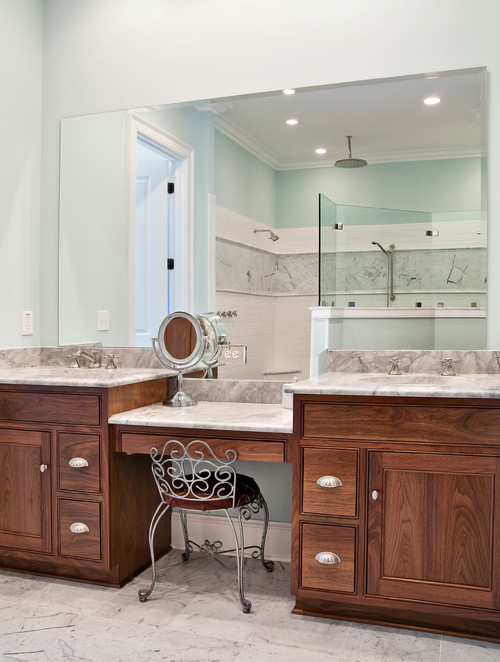
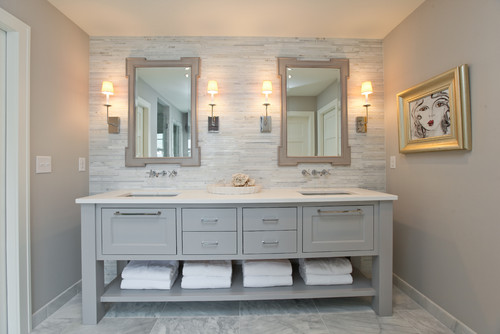
I love how this vanity has higher legs and extra foot room. Traditional bathroom and kitchen cabinets often have a smaller kick space (the little recess below the bottom drawers) with little to no room for your toes. If you like to get up close to your vanity and lean toward the mirror when getting ready, a freestanding vanity with extra leg height is a great idea.
Tip: If you’re installing radiant floor heating, you’ll want it to go all the way under your vanity with a design like this. That way your feet will still stay warm when you’re up close to the mirror. We prefer cable heating systems rather than heating maps for this very reason; they allow for greater heat placement control.
If you love open space, a floating vanity can help visually expand your room. Sometimes a vanity needs to float due to a room’s heating needs. In-floor heating requires a freestanding or floating vanity (rather than a fixed vanity) to avoid overheating.
Tiling under your vanity can help seal up any voids that might collect water and harm your home’s construction. Sink and drain lines can leak if not properly installed or prepared, and often this leak runs down the back side of a vanity and into the floor.
Tip: Make sure all your water supply lines have trim collars inside the vanity. These collars act like little water deflectors and can keep water from running back along a pipe and into the wall.
In a larger bathroom, the high cost of tile could be a big factor when you’re deciding whether or not to tile under a vanity. Usually we order a 10 percent overage in bathrooms, but for some large bathrooms I’ll just order 5 percent and use the off cuts under the vanity. This allows the client to get the benefits of tile under their vanity without added cost.
Tip: If your tile is crazy expensive, consider using a cheaper, similar tile under the vanity. No one will know but you.
Larger vanities with a solid countertop like this can add a lot of weight to a tiled floor. If you’re aiming for a similar look and style, considered the added weight your vanity will bring to the room and make sure your contractor prepares the floor for this kind of installation.
Tip: Curious if your floor is strong enough? Try this simple test for excessive floor deflection: Fill a drinking glass to the top with water, place it in the room before tiling and walk around the room. Move the glass to a few different locations and walk around each time. If the water spills from the glass anywhere, the floor most likely has too much bounce and might not be suitable for a heavier vanity.
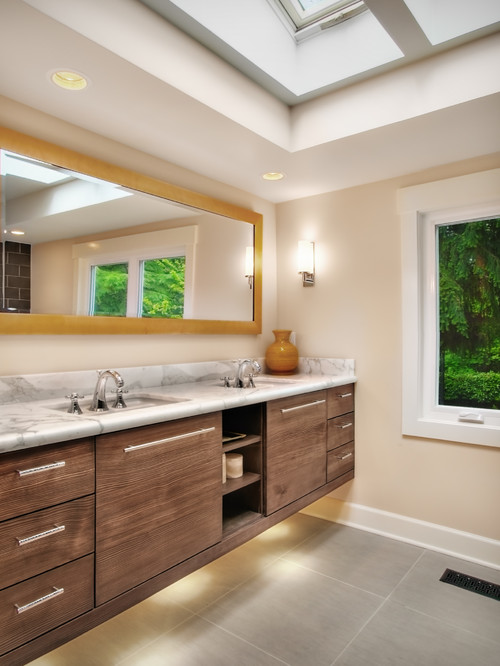
Adding some light under a vanity makes for a great night feature and brings another layer of lighting to the room. Some tile is so shiny that it acts like a mirror under the vanity, so make sure that the bottom of your vanity is not littered with job tags, addresses or overspray from finishing.
Tip: If you want a more even glow from the lighting, consider shining the light toward the back wall instead of straight down. This creates a little less light but a more even glow.
“Tenting” is a terrible word to a tile professional. When a bathroom floor has been installed incorrectly, tiles can press against one another and pop up off the floor, creating a tent shape. It’s not just tile that does this — almost every material in a home expands and contracts with time, including the plywood subfloor, which can develop popped tiles or cracked grout joints.
These professional pointers for preparation and installation techniques can help keep your bathroom floor from tenting.
Avoid large-format tile. More grout joints allow for minor movement and spreading out.
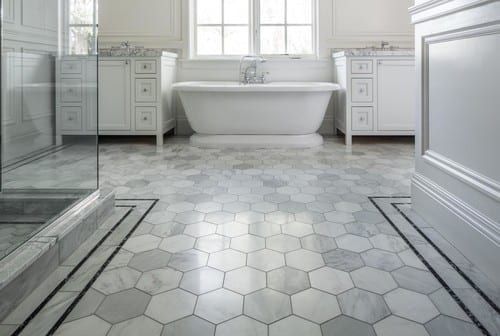
If you have a large bathroom — like this beautiful space — with loads of natural sunlight, a smaller and lighter tile is definitely a safer option. Darker tile absorbs heat and expands and contracts more than lighter tile.
All of a home’s building materials expand and contract; the hardwood floor, the tile and even the countertops all move over time. Any good pro should know how to account for these size changes and prevent expansion from wreaking havoc in a home.
Tip: Make sure your tongue and groove subfloor does not get filled with dust, debris or adhesive mortar (thinset). This subfloor needs the ability to move, and the joints should not be too tight.
This photo shows some great tile work. The beautiful tile is nicely lined up, but I especially appreciate how there’s no mortar or thinset where the tile meets the wall. Using mortar here can lead to tenting issues, since it prevents the tile floor from moving and expanding. This clean finish is exactly what you want to see in your bathroom. Make sure your tile contractor understands that you don’t want your installation done with thinset on the edges that meet the wall.
If you drive over bridges frequently — like I do every day — you’ll notice that bridges have expansion strips. During the summer the bridge is quiet, since summer’s heat has expanded the bridge’s concrete and the expansion strips are pressed tight. But in the winter, driving over the same bridge sounds quite different; the expansion strips are wider, and they click-clack as your tires hit them.
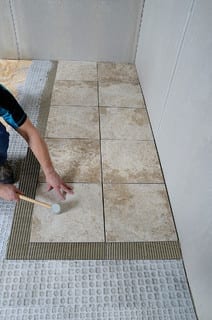
Designing tile floors to expand and contract follows some of these same principles. Uncoupling membranes underneath floor tile can improve your floor’s flexibility. This photo shows a professional installing a Strata Mat uncoupling membrane to account for minor floor movement.
Hearing a hollow noise when you’re walking across newly tiled floors could be the early signs of tile bond failure. This sound results from poor thinset coverage.
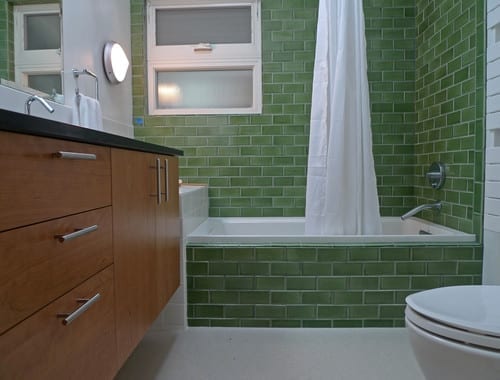
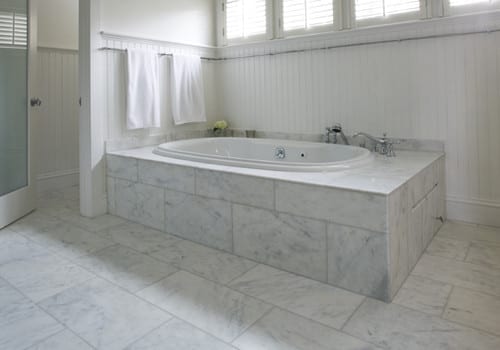
In this photo the floor tile goes underneath the tub skirt. This is a solid design that allows for movement on the floor tile.
Tip: Gently tapping set tiles with the wooden handle of a rubber mallet can help you find the hollow noise where poor thinset coverage has occurred.
All steam showers have a modified thinset to account for quick thermal expansion. The powerful steam and heat in steam showers require a thinset that can accommodate immediate expansion and contraction.
Glass expands more than many other building materials. Large panels like these let in lots of sunshine and quickly heat up the bathroom, increasing thermal expansion.
For an installation like this, I’d make sure that the corners of the shower stall had two layers of a waterproofing membrane. Products like NobleSeal TShave a thicker membrane that can take some compression in the corners.
With extremely large bathrooms, expansion strips inlayed into the tile assembly are a must. In my opinion, any room larger than 15 feet in one direction should be using some kind of expansion strip and specialty thinsets and grouts to increase expansion and combat mortar fatigue.
Tile – whether it’s used as flooring, in the kitchen as a backsplash or for counters, or in the bathroom – has one great downfall: grout. Since grout is porous in nature, unsealed grout absorbs all kinds of stains, from mildew to coffee and everything in between. To say it’s a headache to keep grout clean is an understatement.
NOTE: Be wary of using too much lemon juice with marble, since it can etch or damage the stone if left on too long. Hydrogen peroxide can be a safe alternative.
We inherited marble tile counters when we purchased our home. It’s pretty clear that the grout was never properly sealed, so it soaks up stains like crazy. It makes our kitchen feel gross and grimy, even if it was just cleaned. While I’d love to replace the counters with a solid surface like quartz, it’s just not in out budget – plus, we just can’t justify getting rid of something that’s perfectly fine otherwise.
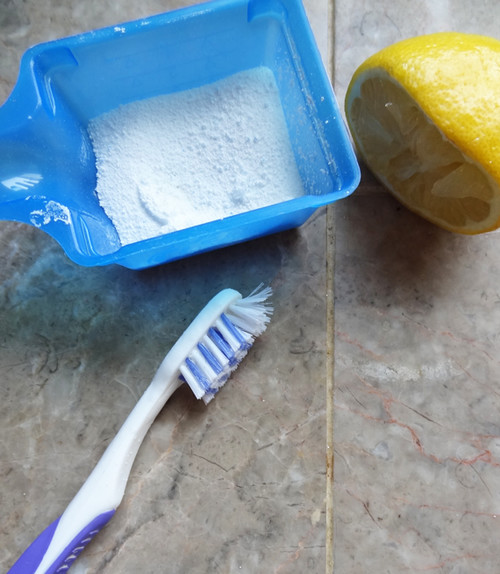
Luckily, I have a foolproof method that will lift most household stains from that pesky grout.
TIP: Cleaning colored grout should be done with special care. Bleaching agents (like chlorine bleach) can discolor and harm the colored grout. Fortunately, oxygenated bleach does not contain corrosive chemicals and is safe to use on all grout.
1). Clean the surface thoroughly, removing any surface residue or debris. Let the grout dry fully.
2). Dissolve 2 tablespoons of oxygenated bleach in 2 cups of warm water. Wet the brush in the mixture and apply it to the grout. Let is soak in, then scrub the grout in a circular motion, which will loosen the stain more effectively than a front-and-back motion. If needed, dip the wet brush into the oxygenated bleach to make a paste. Wipe clean, then let dry.
TIP: To lift extra dark stains, squeeze lemon juice onto the stain, let it soak in, then scrub, wipe clean and let the grout dry. Use lemon juice sparingly, since it can damage some tile finishes.
3). Spray the tiles and grout with an ecofriendly cleaning spray and wipe them clean. Let the grout dry fully before making a final decision on whether your hard work paid off – damp grout looks darker than dry grout.
4). Apply grout sealer after the grout has fully dried to avoid any future stains. Be sure to reapply it each year.
Still having trouble getting that grout clean? For those impossible-to-remove stains, you might want to consider:
A commercial tile and grout cleaner
A coarser brush (avoid using metal bristles, though, as they can erode the grout)
Grout Renew
If after you’ve tried all three, the stain is still hanging strong, you may have to resort to removing the old grout and replacing it with new.
TIP: An electric multitool, like the Dremel Mult-Max, helps to make quick and safe work of removing the old grout.
A single bathroom remodeling tip could inspire fresh thinking for your entire remodeling project. Trends area always being updated, so it’s useful to know what’s new in home bathroom design. You’ll find bathroom remodeling advise and inspiration here.
Express Yourself
Choosing Colors: A fresh coat of paint is an easy way to give your room an instant face-lift. Single color schemes make small rooms larger and a neutral palette can expand your space more. Or, add drama with colors like deep reds, eggplant, ochre, and dark blues or greens.
The Personal Touch: Collections and objects that express your personality or your family history will make your home interesting to your guests and more enjoyable for you.
Imported Ideas: Consider letting a favorite hotel or restaurant, or an outdoor spot that you enjoy, provide the inspiration for your bedroom, dining room or bath.
Planting Style: One beautiful plant can be a strong design statement. Your style sense will determine whether a dramatic green plant or a bright floral bouquet is best for you.
Dynamic Design
The Right Finish: Now more than ever, you have choices for kitchen and bath fixtures. While matte or polished chrome are always popular, homeowners are choosing darker finishes such as oil-rubbed bronze and wrought iron. Consider the look and feel you wish to create when deciding.
Bright Ideas: Halogen downlights and scones provide whiter light and fresh designs. Visit the lighting section of your home improvement center to get a better idea of these styles.
Quick ‘n Easy: Multi-purpose rooms need to switch moods easily. Today’s high-tech dimmers let you fine-tune your lights – even dim or raise them with a remote.
Mix It Up: Today’s larger kitchen has room for variety. Mix-and-match styles and wood types for an eclectic feel that adds a unique look, from baseboard to hanging cabinets.
Packs a Punch
High-Performance Shower: Today’s shower design offers unprecedented opportunities for adding deluxe features – massaging vertical spas, rain shower showerheads and luxurious materials such as glass, tile and stone.
Organized Kitchen: Specialized storage systems, appliances and fixtures speed meal preparation and keep entertaining organized. Choose open shelving for quick access. Locate a faucet next to the range to fill big pots quickly and conveniently.
Design Focus: A single, dramatic focal point for a room you’re remodeling makes the improvements more obvious. Try a special piece of furniture, an interesting piece of art or one wall that’s boldly colored.
Double Duty: Lighting is a sculpture as well as illumination. Choose light fixtures in shapes that are pleasing to look at – whether they’re switched on or off.
Works for Me
Getaway Baths: The bath can be a relaxing, serene environment. Add massaging or rain showerheads, a deep Zen soaking tub and even music and candles to enhance the revitalizing experience.
Counter Space: If your bathroom is being shared by the family, counter space is critical. Consider a vanity with cabinets for extra storage and organization.
Ageless Amenities: Features usually associated with older homeowners – easier access, brighter lighting and convenient handholds – are helpful at any age. Adding them with your remodel could improve your home’s resale value.
Bed and Breakfast: Adding a morning bar to a master bedroom with an elaborate, built-in countertop and sink is a great way to add luxury and functionality.
Practical Approach
Finding Your Design: Start a scrapbook of design ideas you find in magazines and online. This will help you establish a foundation for your remodeling project.
Sketch Your Layout: This will help you understand how you would like your new room to look and help you change the little things that you don’t care for in your current design.
Set a Budget: By outlining how much you can spend on each phase of the project you will be able to see if you can splurge on the extras; like a contractor or if you need to cut and do it yourself.
Set a Timeline: This will help you keep on track and allow you to achieve your remodeling goals.