FREE DESIGNS AND ESTIMATES

Kitchen Ideas: How to Choose the Perfect Backsplash

Article by: Sophie Baylis

The humble backsplash has come a long way. Once upon a time, its purpose was purely functional: a tiled area behind the stove and sink to protect kitchen walls from stains and splashes. Today the availability of all manner of materials in a wide array of finishes means your backsplash can make more of a statement. To help you decide which material would work best for you, we offer expert advice on the 10 most popular backsplash materials.

Read more

Big Ideas for Compact Kitchens

Article by: Sara Emslie

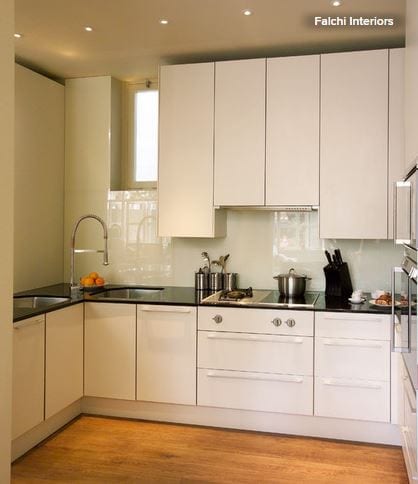
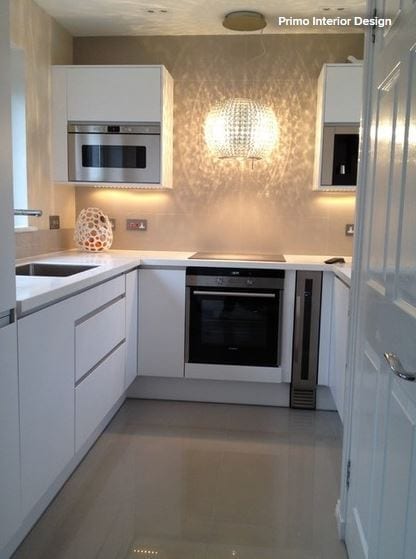
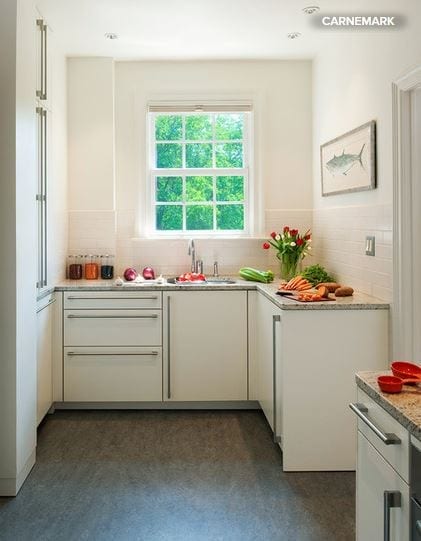
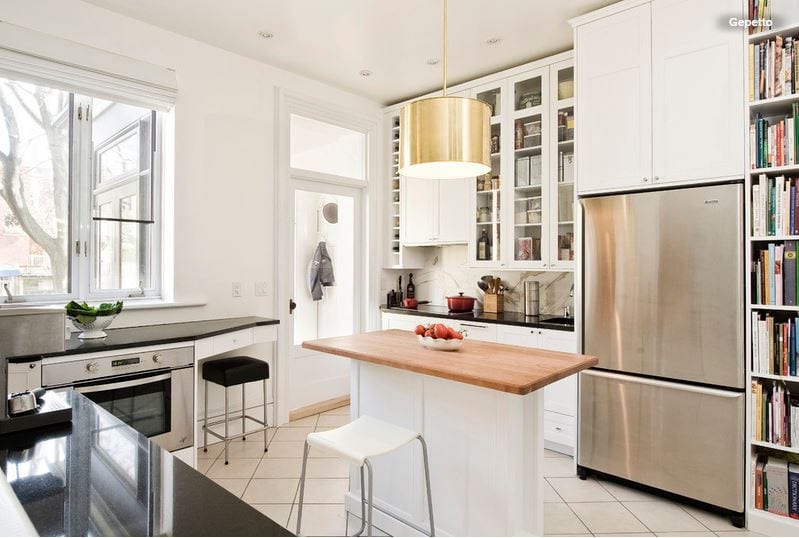
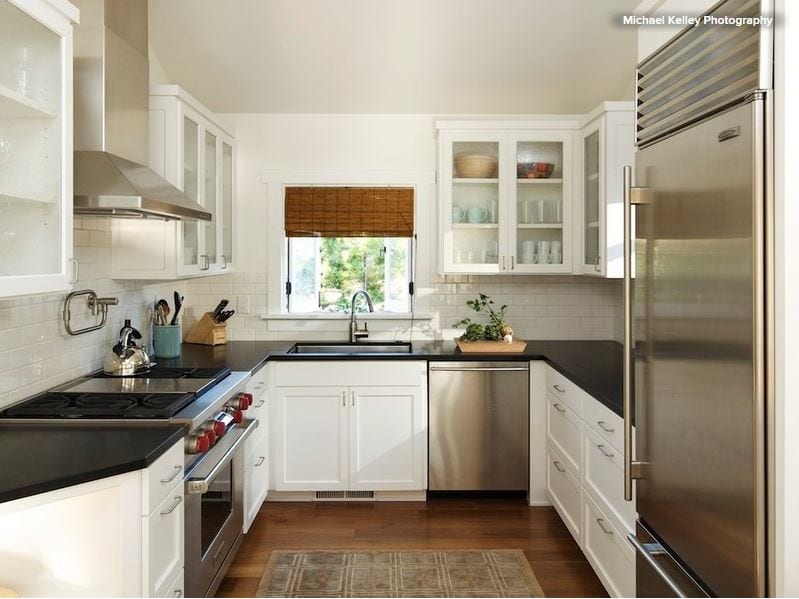
Even the smallest of kitchen spaces needs to deliver big when it comes to form and function. No matter how awkwardly shaped or compact your cooking space, design tricks can help make even tiny corners work hard and look good too. These kitchens offer ideas for getting more from less and giving a high-function space a clean, uncluttered appearance.

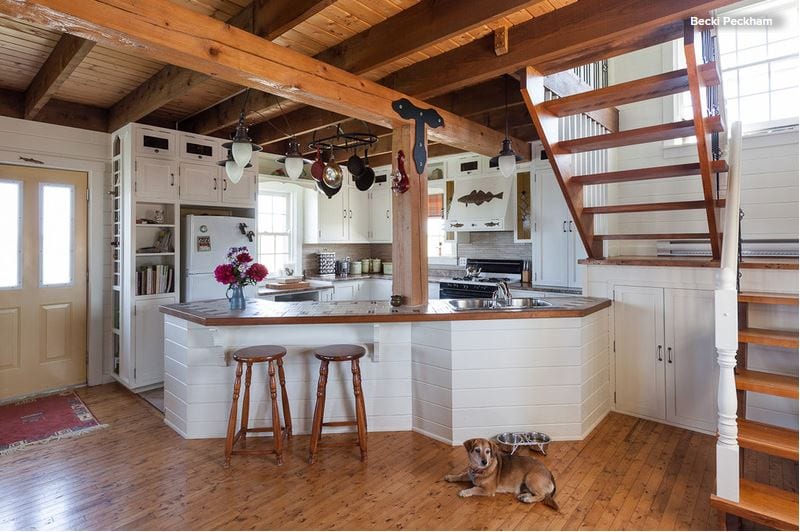
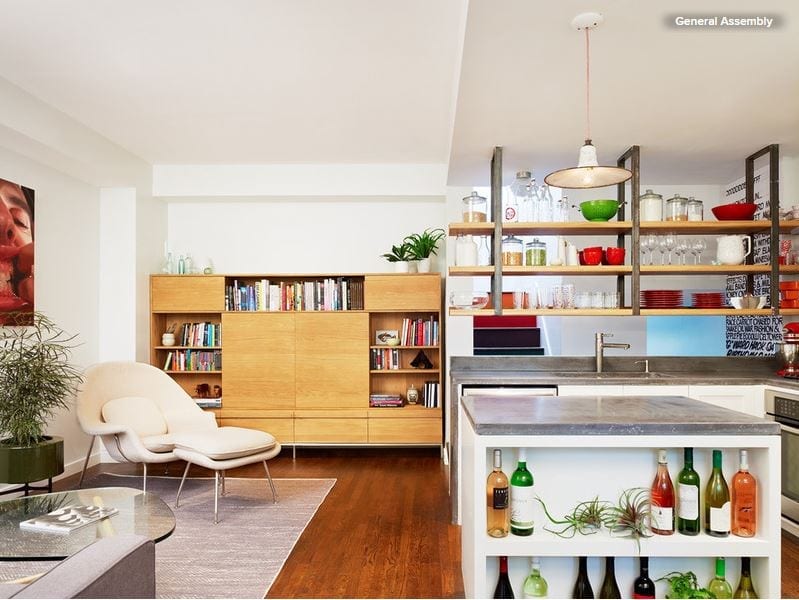
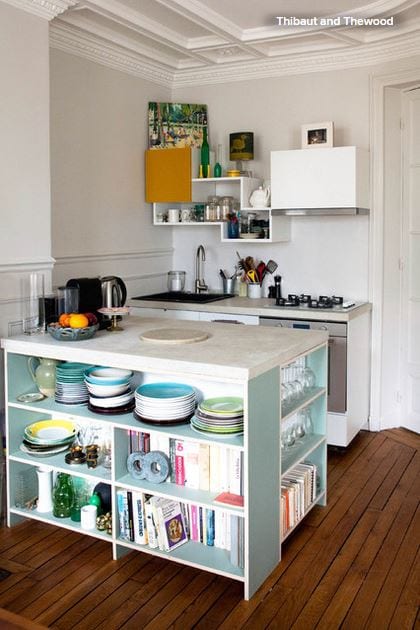
Use open storage as display. If your tiny kitchen is part of a larger open-plan space, consider an island with built-in open shelves. This will add storage and display space and help separate food prep, cooking and clean-up areas from those for other living functions. 

Use attractive tableware, accessories and cookbooks to create a pleasing display.

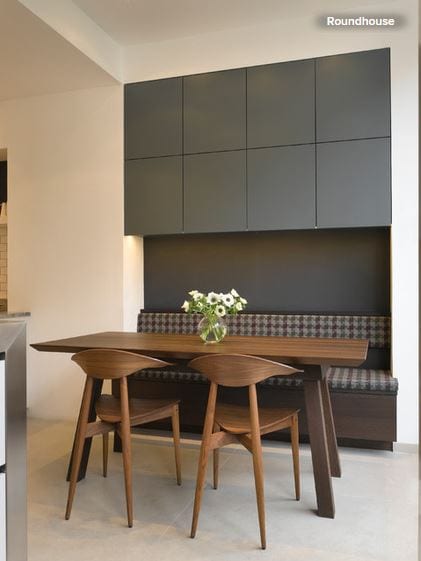
Store high (and seamlessly). A clever way to add storage in a tiny kitchen is to position it high up the wall. Installing storage above seating, such as a built-in bench, can be a particularly smart use of space. 

For a clean, contemporary feel, fit the cupboards with push latches, removing the need for a door handle and creating a seamless finish that gives the impression of more space. A ladder stored away — perhaps inside a bench seat — can be used to access high cupboards.

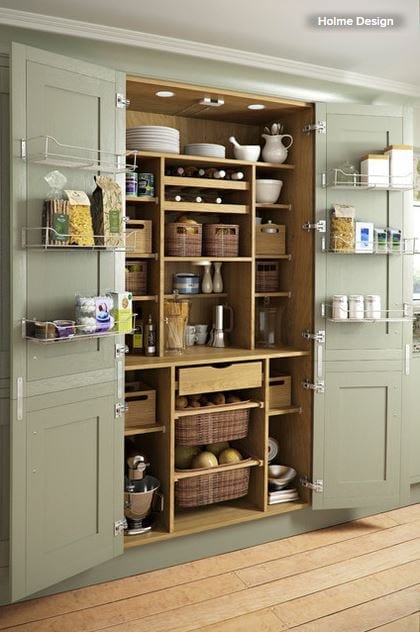
Custom build a pantry cupboard. Well-planned storage makes efficient use of space and can help keep your kitchen organized. Consider a custom all-in-one pantry cupboard if you’re designing a kitchen from scratch. Install custom storage baskets for shelves and rail bars and baskets for cupboard doors to make the most of the space inside. 

A cupboard pantry can be used to store everything from food to china and kitchen equipment. And when the doors are closed, it’s all neatly out of sight.

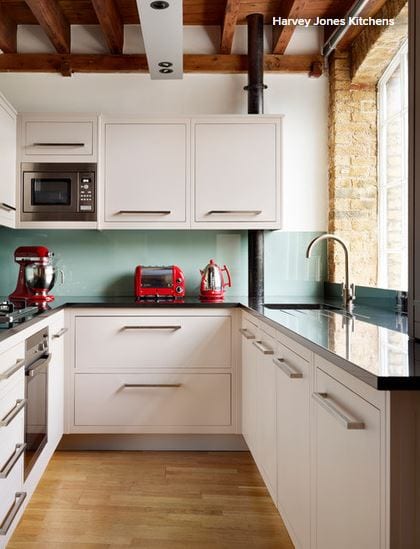
Integrate built-in appliances. Shop around for appliances that will work in compact spaces and consider integrating them into your kitchen design. The framework needed for integrated designs eats up a little more lateral space, but the result will be a neater look. 

Think laterally, too — dishwashers are available as pullout drawers and can be paired with a storage drawer with the same front for a fuss-free finish. Microwaves and ovens can be fitted into a bank of wall cupboards, freeing up counter space for other kitchen essentials.

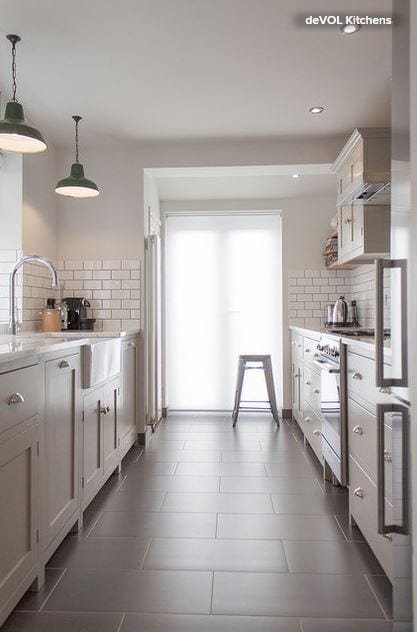
Think industrial. Utilitarian styling is ideal for making the most of a compact kitchen. It echoes the kitchens of days gone by, and its robust aesthetic says it means business, despite being a tiny space. Look for subway tiles, industrial factory lighting and Shaker-style units that combine beauty with utility.

Squeeze in an eating space. Having a space for sitting and eating in a kitchen, no matter how small, doubles the room’s functionality, making it feel more substantial. 

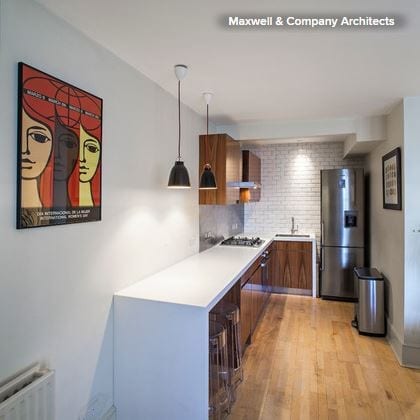
A compact breakfast bar, for example, can be both a dining area and an additional work surface for food preparation. To save space, choose bar stools that can be tucked under the counter when not in use. Try giving this tiny tabletop a separate visual identity with bold accessories, such as bright artwork and standout lighting. 

A fold-out, wall-mounted table is another option for a small kitchen.

Highlight character with color. Flashes of vivid color are ideal for adding a wow factor to a tiny space. It might be small, but it can still have presence. 

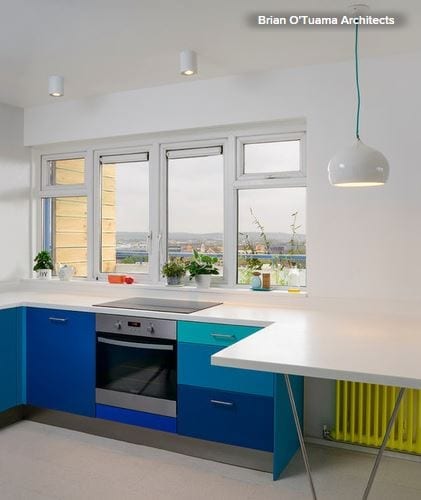
Against a pure white background, neon shades really stand out, so use these to emphasize any design features that have character and style. Maximize the different sizes and configurations of drawer and cupboard fronts to create eye-catching color combinations and design appeal.

Stick to a restricted palette, though, and keep clutter stored so as not to overcrowd your little kitchen.

Go for top of the line. Being small on space doesn’t mean a kitchen can’t be big on style. Adopt a high-end approach for fixtures and hardware in an otherwise minimal space to give a compact kitchen a designer look. 

Smart handles, inset lighting, state-of-the-art integrated appliances, contemporary faucets and molded draining boards are all design features often found in larger, more expensive kitchen designs, but they can add a big style hit to a tiny kitchen too.

A Laundry Room With Bunk Beds and a Shower for Muddy Dogs

Article by: Mitchell Parker

Tom and Jamie Pumpelly’s four dogs like to get dirty. A lot. The couple and their dogs — two blonde Labs, a bichon and a rat terrier–Chihuahua mix — live on acreage along the Occoquan and Potomac Rivers in northern Virginia, and the dogs are always showing up at the side entrance wet and muddy. 

So during an extensive remodel of their home, the couple incorporated plenty of functional space for washing and drying their animals, and for containing them when guests arrive. Using a former bedroom suite vacated once their kids moved away from home, the couple worked with Leroy Johnson of Four Brothers to create a dog-washing station, laundry room, mudroom and dog-bed area.

Read more

10 Countertop Mashups for the Kitchen

Article by: Katie Pegler

Mixing materials for kitchen countertops has many benefits. For one, you can save money by using a less expensive material for your perimeter countertops while splurging on something more luxurious for an island top. Plus, mixing materials is a great way to add visual interest to your kitchen and avoid the overabundance of one color or material. With that in mind, designers are pairing marble with walnut, granite with reclaimed wood, engineered quartz with maple butcher block and more to create diverse surfaces for working, eating and gathering.

Marble Island With Wenge Bar

“Our overall design was form meets function throughout this kitchen design,” says Ashley Luberger, design associate at Osborne Cabinets and Millwork. “The island is the key focal point of this space, so we wanted to add interest combining heights and different materials to create a cohesive space.” 

Osborne designed and fabricated the island cabinets and wood top, made out of African wenge wood. “The wood has a really dark natural color along with a really tight grain pattern, creating a contemporary feel,” Luberger says. Collaborative Design Group chose the marble top.

The wood top was selected for the lower eating area because it is more durable than marble, which was used only on the island to avoid stain concerns. 

Marble Perimeter With Walnut Island

A white kitchen was a must for the owners of this Minneapolis home. However, both the husband and wife grew up in houses with wood countertops and were keen to incorporate wood. Nicole Bostman, owner and lead designer at Dezaar Interiors, found a happy medium by pairing a white marble countertop and oversize walnut island. “We wanted to introduce the warmth of wood to balance all the white, which can sometimes look a little cold and clinical,” Bostman says.

Walnut Countertops With Marble Island Top

In this Nunica, Michigan, kitchen by Meiste Homes, the perimeter countertops are oiled walnut, while the custom island is topped with a 10-foot slab of Arabescato marble with a built-up ogee edge. 

Be sure to follow proper maintenance routines for each material. Wood can chip and warp, especially in wet areas, such as near the sink. And marble can stain and chip. 

Quartz Perimeter With Maple Butcher Block Island

Before the remodel of this Los Angeles contemporary home, the owners had white marble countertops. Gabriel Abikasis, president of Kasis Construction, recommended engineered quartz as a durable alternative.

To add depth, texture and contrast to the white cabinets, Abikasis used 2-inch-thick maple butcher block in a clear satin finish for the island. 

Granite Perimeter With Reclaimed-Wood Island

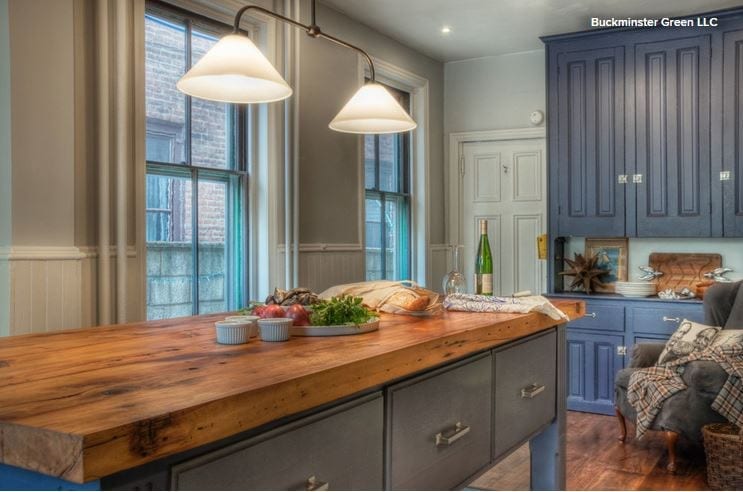
This design of this kitchen reflects the homeowners’ desire to retain the old elements of the 1930s cabin.The main countertop is Jet Mist honed granite, while the island has a reclaimed-wood top fabricated by Grothouse Lumber. The wood island is sealed and cannot be used for cutting directly on. “The contrasting wood counter warms up the kitchen and makes it feel more cabin-like than if everything was dark granite,” says Kelly Ennis, principal at Ennis Nehez

Photo by Colin Cadle Photography – Discover kitchen design ideas

Granite Island With Walnut Chopping Block Extension

Much thought was put into this kitchen, because it’s in the “forever home” of its owners, in Dartmouth, England. They wanted to make the most of the new space and were meticulous in defining their kitchen right down to listing what items each cabinet would need to store, so that Distinctive Living Kitchens could plan for the correct cabinet sizes and functionality.

The inspiration for the granite came from an existing granite countertop in the laundry room, which Distinctive Living Kitchens matched to the Shivakashi granite counters that are paired with the end-grain walnut chopping block island extension. 

Granite Island With Walnut Butcher Block Extension 

This Ottawa, Canada, home was built for a couple who wanted an environment conducive to entertaining large groups of family and friends, so a large, functional kitchen with good flow was key. “In addressing the functionality, I wanted to create a space that looked aesthetically balanced with functional and decorative elements,” says Nathan Kyle, senior interior designer at Astro Design Centre.

The island counters have silver wave granite surrounding the prep area mixed with walnut butcher block for the eating area. The inclusion of two materials was necessary to create the length that was required without having a seam in the countertop, and created a length that was ideal for entertaining. The butcher block also allows for a warmer touch on the area where people can rest elbows, versus a cold surface. 

“Using a two-toned kitchen allows for the back wall, which is utilitarian in nature, to stand on its own and juxtapose itself with a more detailed decorative island,” Kyle says. 

Concrete Island With Wood Inlay

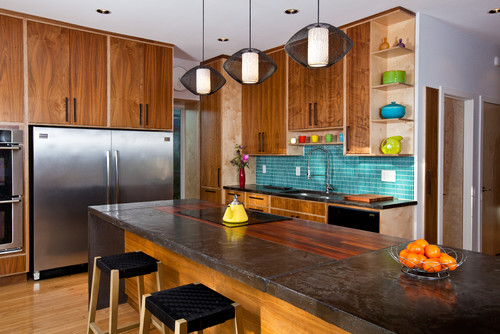
For this contemporary Kansas City, Missouri, kitchen, Studiobuild blended poured concrete for the majority of the island and juxtaposed it with a wood inlay surrounding the cooktop on the same plane. Not only does this look have more visual interest, but a large island for eating and working eliminated the need for an eating nook.

Pietra Cardosa Stone Perimeter With Maple Island

For this center kitchen island, Brooks Custom used a 2-inch-thick premium wide-plank maple top. The light-colored wood contrasts with the dark Pietra Cardosa stone countertop along the perimeter of the kitchen. The seemingly simple finish on the island ties the modern farmhouse look together. 

Basaltina Perimeter With Walnut Island

Here a walnut island surface warms the basaltina perimeter and helps add contrast to the white kitchen. It offers the perfect fusion of natural materials and lower maintenance. “There is always a balance to strike between durability offered by manufactured options and the beauty and soul of living materials,” says interior designer Joelle Nesen of Maison.

9 Ways to Save on Your Kitchen Remodel

Article by: Kelli Kaufer

When you’re investing in a home remodeling project, you want to make sure that the results not only please you but add value to your home and save you money. Never is that more true than in a kitchen remodel, where costs can added up so quickly that your budget can all of a sudden seem like pennies in a jar. To avoid that and keep costs in line, and yet still get the kitchen of your dreams, here are a few of my favorite ways of getting the most out of a tight budget.

1. Go with ready-to-assemble cabinets. The biggest cost in a kitchen remodel is new cabinets. The most expensive option is going custom, for which the cabinetry is designed, built and installed to specifically fit your space. Exotic woods, ornate details and period styles will add to the cost and delivery time but result in a one-of-a-kind kitchen. Custom cabinets can cost $10,000 to $60,000, as cabinets can range from $250 to $1,500 per linear foot.

If your budget doesn’t allow for custom, but you need new cabinets, ready-to-assemble (RTA) is a good option. Ready-to-assemble or semicustom cabinets can sometimes be half the cost, from around $125 to $900 per linear foot depending on the material, style and cost of installation. If you are a do-it-yourselfer, you can assemble these yourself; if not you will need to hire a contractor. Semicustom cabinets are selected from existing designs and are prefabricated offsite in standard sizes, with limited options in terms of sizing, styles, materials and finishes.

In-stock cabinets are for customers who want to grab their cabinets right off the shelf and get going. These stock cabinets come in standard sizes, shapes and colors. Since the cabinet dimensions are not based on your kitchen, space-wasting fillers may be required to make the cabinets fit. These cabinets are very affordable for remodelers on a budget. Cabinets can range from $75 to $400 per linear foot.

Keep in mind, though, that costs will vary by location.

2. Keep existing cabinets if possible. If your cabinets are good quality and you like the style, resurfacing is a great option. It’s amazing how color can transform a kitchen and a few coats of paint can give life to a once-drab space. Resurfacing and painting make for the most cost-effective option, but ensure that you take the steps needed to get a beautiful finish. 

A simple paint job might cost a few hundred dollars. But for a more extensive refacing job, $5,000 to $15,000 is likely if new veneer is added to the face of the cabinets.

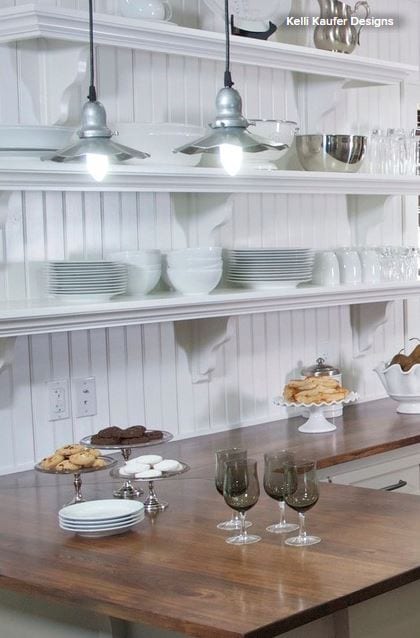
3. Choose open shelving where possible.Open shelving creates interest in the space as well as saves money. Using salvaged wood or painted planks from your local hardware store for shelving is a cost-effective and functional option to display everyday dishes (items that don’t spend enough time on the shelf to accumulate dust).

Open shelving can save a few thousand dollars, but while it may be tempting to do away with fitted cabinets altogether, they’re still valuable and efficient for storage, particularly if you have a small kitchen and a lot to pack into it.

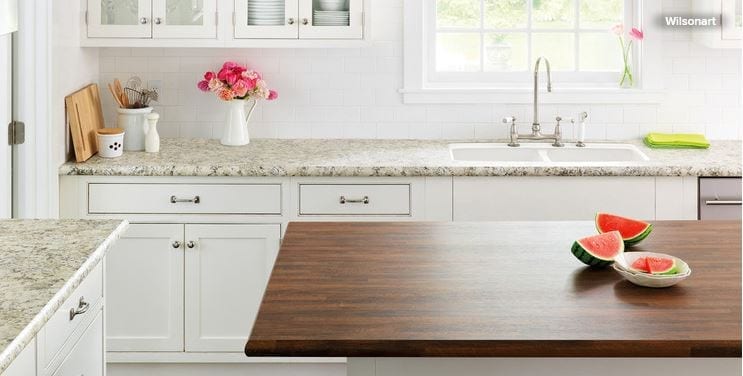
4. Consider alternative countertop materials. There is a wide range of countertops to choose from — solid surfaces, recyclable products, concrete, tile, stone and more. Granite is still a popular choice for countertops, but at $50 to $100 or more per square foot installed, it can push any budget over the top. Consider using two different surfaces instead, such as making the outside perimeter butcher block and the island granite. This can cut the cost in half.

If granite is not in the budget but you like the look of stone, consider laminate, an inexpensive alternative. The costs ranges from $8 to $20 per square foot, including installation. Laminate has come a long way with its high-definition selections and new cut-edge profiles. The new laminates look so much like stone, you could be easily fooled. 

5. Keep appliances where they are. If your plan is to get new cabinets, think about keeping your appliances where they are. Moving the mechanics and electrical for appliances can be costly, not to mention the ceiling on the floor below and the walls may need to be cut into to expose the mechanicals. These are costs that many homeowners don’t think about when planning a kitchen remodel.

Keeping the appliances where they are will save you thousands of dollars. More often than not, moving an appliance 1 foot costs as much as moving it 6 feet, depending on where the mechanicals are located.

6. Look at different options for islands. A 6-foot island with new cabinets can run $800 and up. Instead of using cabinets for your kitchen island, think of repurposing a piece of furniture. An old table or a dresser is a great alternative to bring unique character into the space. Keep an eye on Craigslist, the Houzz Shop, salvage stores, estate sales and garage sales. Depending on how resourceful you are, you can save yourself hundreds of dollars.

Tip: When looking for a piece, make sure it is countertop height (36 inches).

7. Opt for a cutout rather than removing a wall. Many homeowners want to open the space between the kitchen and their family room to create an open floor plan. When removing a wall there are many things to consider. Is it load bearing? Does it have venting, water pipes or electrical running through it, which will need to be rerouted? After removing a wall, the ceiling, other walls and floor may need to be cut into and repaired.

A less expensive option to consider is a cutout. Not only does it open a room, but it can provide extra countertop space and an area for additional seating. You will still need to check for mechanics and plumbing, but the floor and ceiling will not need to be repaired, which will save you money.

8. Try track lighting instead of recessed lighting. Adding recessed lighting can become a bigger project than planned. Holes need to be cut into the ceiling, electrical wiring needs to be added, and there may be hidden costs in repairing the ceiling. The overall cost for a single recessed light is $100 to $150, including the costs for materials and an electrician. This can add up quickly.

To keep costs down, think about track lighting. There are many styles, shapes and finishes. They give off plenty of light for tasks in the kitchen and, when placed on a dimmer, give off a nice ambient light.
Everything You Need to Know About Farmhouse Sinks

Farmhouse sink kitchen

Article by: Anne Ellard [Houzz]

They’re charming, homey, durable, elegant, functional and nostalgic. Those are just a few of the reasons they’re so popular.

Being from Ireland and having included the beautiful Belfast farmhouse sink in many traditional country and farmhouse kitchen designs, I have a bit of a soft spot for farmhouse-style sinks. The farmhouse sink originated in a time when there was no running water. The idea behind the sink was that it was a place to hold large amounts of water, which was fetched by hand from nearby wells, lakes and rivers. 

Read more

How to Plan a Kitchen That Extends Outside

Article by: Sarah Nolen

My clients are always asking me how to create that mysterious seamless connection between an indoor and outdoor kitchen, and vice versa. You may be thinking, “What on earth does that even mean? Does it mean I always leave my doors open? Or fill my kitchen with potted plants?” 

Creating a true connection between indoor and outdoor areas goes a step further than those two ideas and enters the realm of clever design, especially when it comes to the kitchen. If planned correctly, a kitchen can be opened to untapped entertaining (and cooking) space. What is created is a larger kitchen area — and if planned carefully, an all-weather entertaining space.

When deciding to connect your indoor space with your outdoor space, especially in terms of kitchen design, it is a good idea to make a list of what you want to achieve aesthetically and how you want the space to function. Do you want to have a space you can use all year round? How will you integrate the two spaces into one? What are the key aspects of the spaces you want to change, and what do you want to remain the same?

Here are a few points to consider when connecting your indoor and outdoor space with a kitchen.

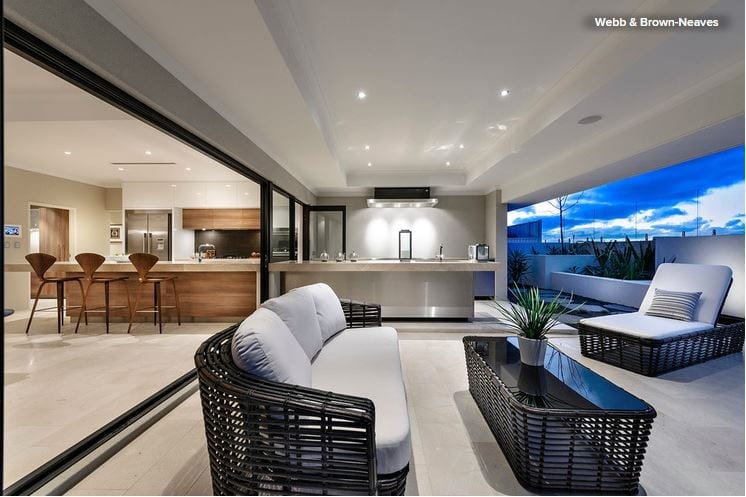
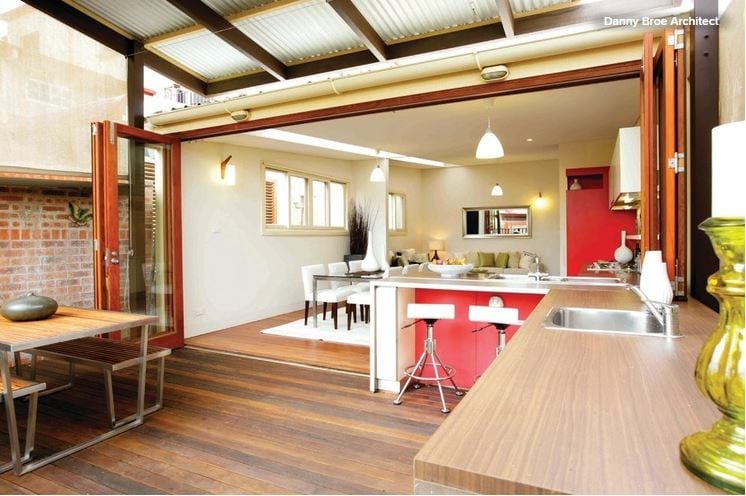
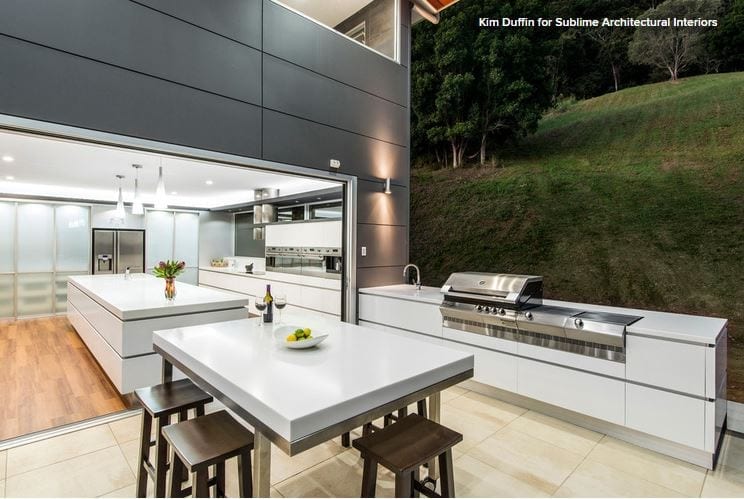
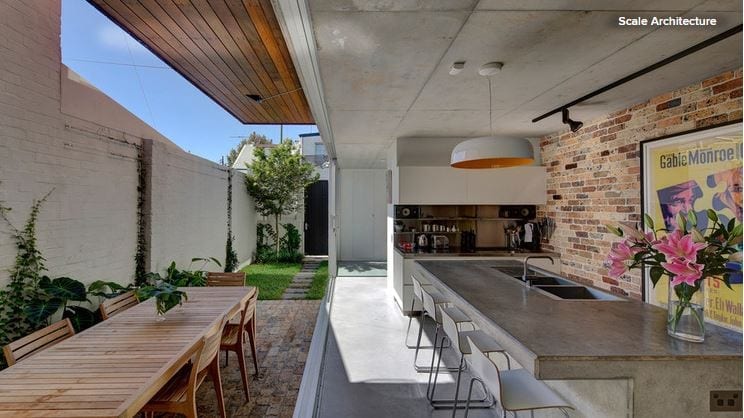
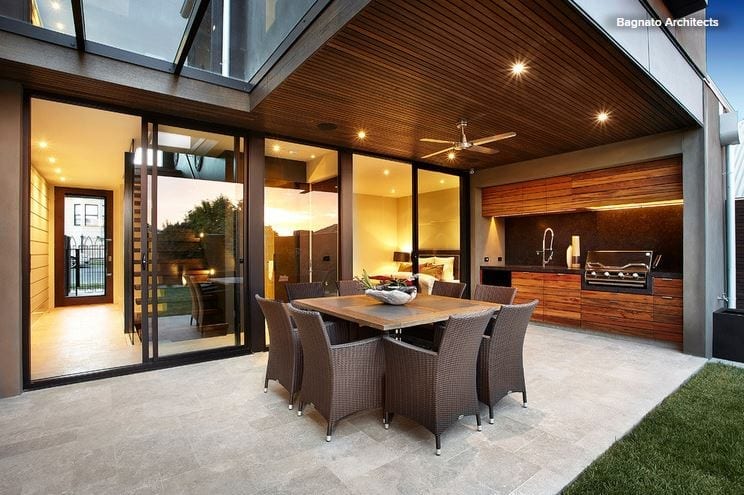
Let your kitchen counter cross boundaries. A kitchen counter is a place where we prepare, cook and serve food and mingle. So let’s consider continuing it into both spaces, blurring the line between indoors and outdoors, which creates an immediate connection to both spaces. There are a number of ways to ensure that your kitchen counter in your outdoor area will also be functional.

You have the option to use your bench as a bar space when you are entertaining.

Or how about incorporating a fully decked-out kitchen with built-in barbecue, sink and wine fridge? Your countertop could continue out from an indoor island or along a shared wall.

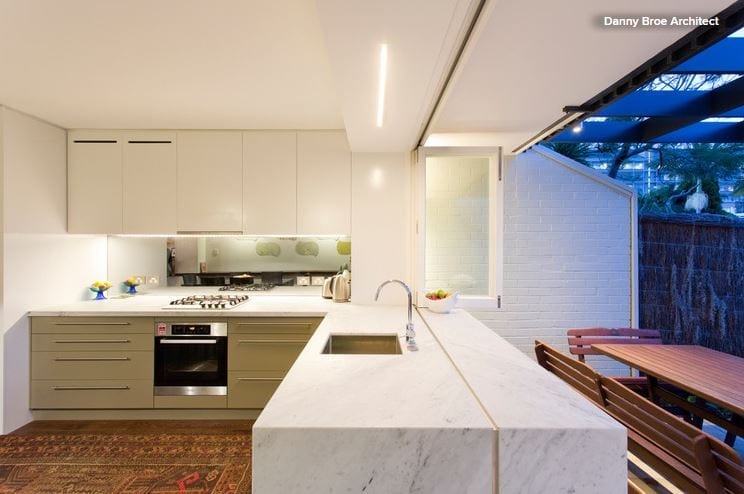
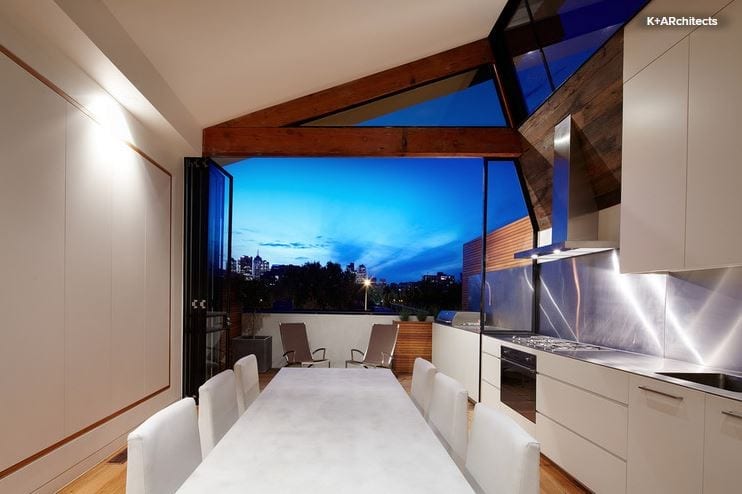
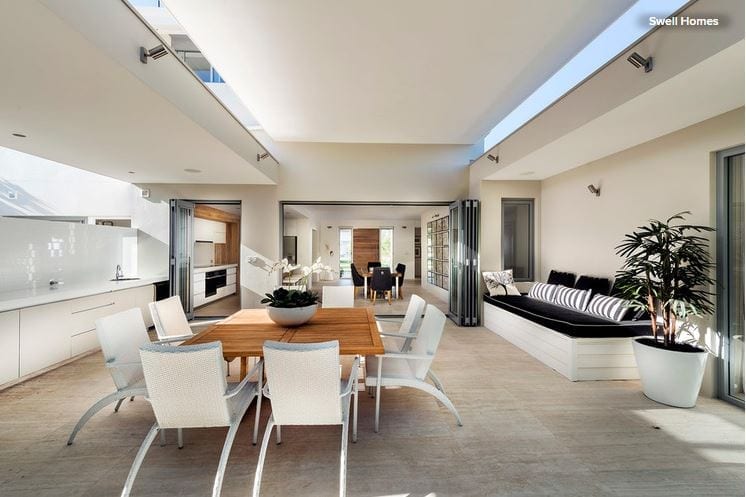
Create invisible glass connections. Installing bifold, sliding or stacking doors and windows in your indoor kitchen will open up the spaces to each other whether they are closed or open. Even when the openings are closed, the clear glazing will create a visual connection between both areas. And when the weather is warm, the glass can be completely pushed back, allowing for the kitchen counter to be used outside.

Slim frames for windows and doors will help them visually disappear. You want the main focus to be the flow between the areas, not the framework. In return, be prepared for bountiful amounts of natural light and airflow that will take over the interior of your home. Summer, here we come!

Blend materials to create flow. It’s preferable from a visual perspective to have the kitchen counter constructed from one material, which means if it continues outside, you’ll need to think about weather-appropriate surfaces. Engineered materials like Caesarstone and Quantum Quartz are suitable choices, as are concrete and stainless steel.

The connection between materials doesn’t have to be only via the countertop. Think about your floor finish, which is the largest finish in both areas. Using the same tile but in different finishes is a perfect example of continuous material selection throughout. The indoor tile will need to be indoor-rated, whereas the outdoor one will need to be suitable for external application — though the color and pattern can still look the same.
Make it a comfort zone. When it’s cold outside, you’ll need some form of heating. This can be portable gas heaters, which are perfect for entertaining outdoors; when not in use, they can be stored in the garden shed or garage. Or perhaps you could try a more permanent feature, like ceiling radiator panels, which are turned on and off with a switch and can stay in place all year round.

For the summer consider ceiling fans for a cooling breeze. Set these over the areas where you’ll spend the most time, such as the dining table.

10 Design Moves From Tricked-Out Bathrooms

Article by: Natasha Saroca

Seemingly standard cupboards with smart, unique or high-tech elements and accessories behind their doors can make a world of difference when it comes to making a bath zone more organized and user friendly.Cases in point: The 10 bathroom cabinet ideas you’ll find here. While they may look fairly basic upon first glance, take a closer look and you’ll find that the beauty (and benefits) of these bathroom storage units go well beyond the surface.

Read more

Smart Ways to Make the Most of a Compact Kitchen

Article by: Joanna Simmons

We might all dream of a huge family kitchen, but most of us have to make do with something smaller. That said, whatever the size of our kitchen, the demands we place on it tend to be the same. We want it to function well for preparing and cooking meals. We might also like to be able to sit and eat in there, even if just perched at a breakfast bar. And we need space for a lot of different objects, from chunky appliances to silverware, dishes and food. The good news is, with some clever planning and great design, it is possible to have all these functions in one tiny space, as these inspiring spaces demonstrate.

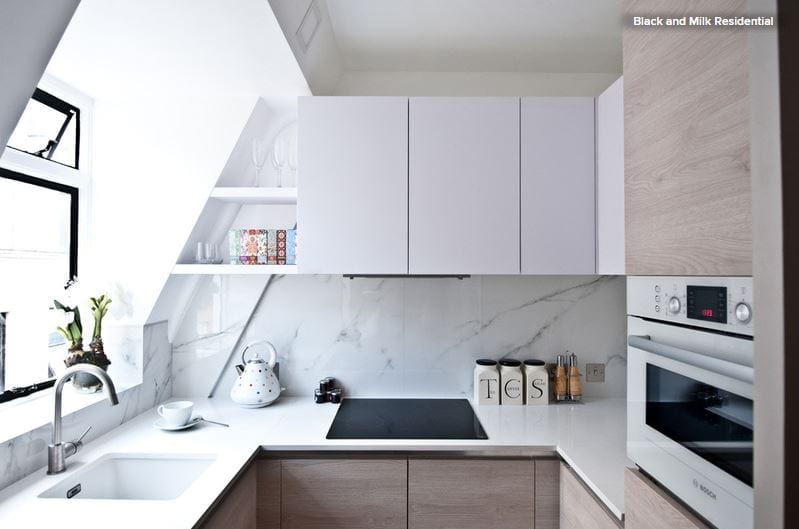
Use every nook and cranny. It sounds obvious, but where space is tight, it’s essential to make use of all of it. This might mean commissioning custom units. Shelves or cupboards designed for your space, rather than bought off the shelf, can exploit even the most awkward corners or weirdly angled rooflines. Luckily, since the number of units you will be able to fit is limited by the small size of the room, a custom design often will be reasonably economical, too.

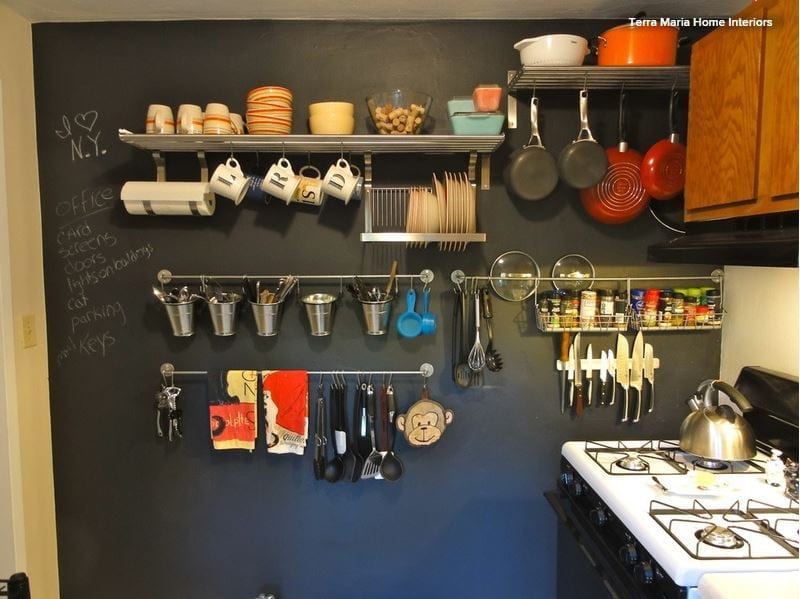
Enjoy a little rack n’ rail. Wall cupboards can eat into the space in a very small kitchen, but you can still make any wall work for you by adding racks, rails and slim shelves. These can hold things like saucepans, strung up on S hooks, mugs and pots holding cutlery, and even utensils. Covering the wall in blackboard paint helps it to multitask even more, as a place where you could write shopping lists and messages.

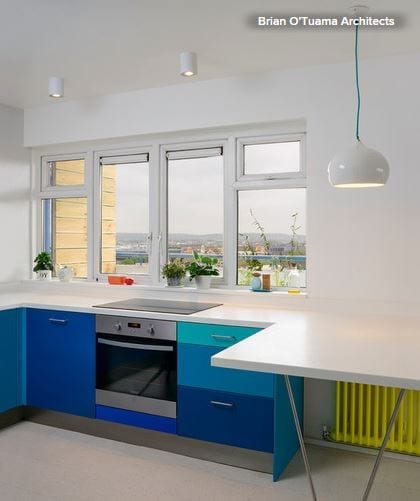
Make it streamlined. Chunky and mismatched pieces would eat into the space and make a tiny kitchen feel cluttered. Instead, opt for units with a minimalist look and, as here, a countertop that flows over all the base units and even extends to become a breakfast bar. The minimalist metal legs seen here keep sight lines open. This kitchen is flooded with natural light, so the color on the unit doors invigorates the space without encroaching on it.

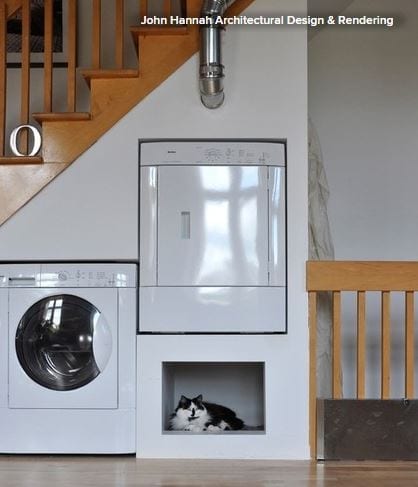
Find another home for laundry appliances. It’s not uncommon to find washing machines and dryers installed in the kitchen, but, when space is limited, it’s a good idea to find an alternative home for them. A nook under some stairs can be a good place. Or consider putting a dryer — and perhaps a freezer — in the garage, if you have one.

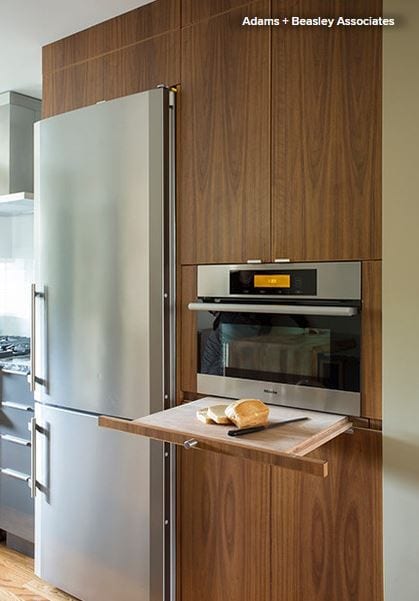
Choose clever details. There are heaps of clever space-saving elements that can be built into a new kitchen, so if you’re starting from scratch, look for things like slim spice jar storage, knife drawers,toe-kick drawers and integrated chopping boards that can be slid over a sink or pulled out from the wall.

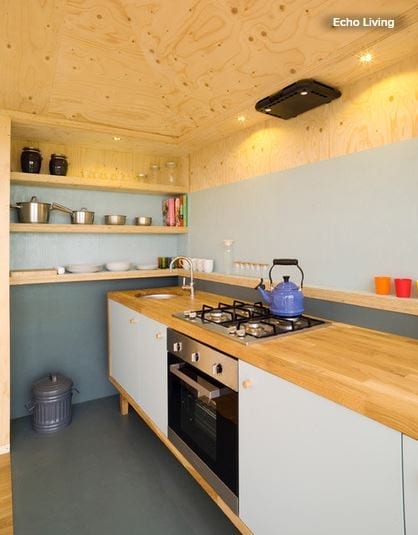
Try freestanding pieces. Freestanding furniture has its benefits in a small kitchen too. If you take the view that where room is tight, it’s important to make every item you place in it shine, then suddenly there is a logic to not building everything in. A freestanding piece containing an oven, sink and cupboards, like this one, looks like a beautiful piece of furniture that fits elegantly into the space.

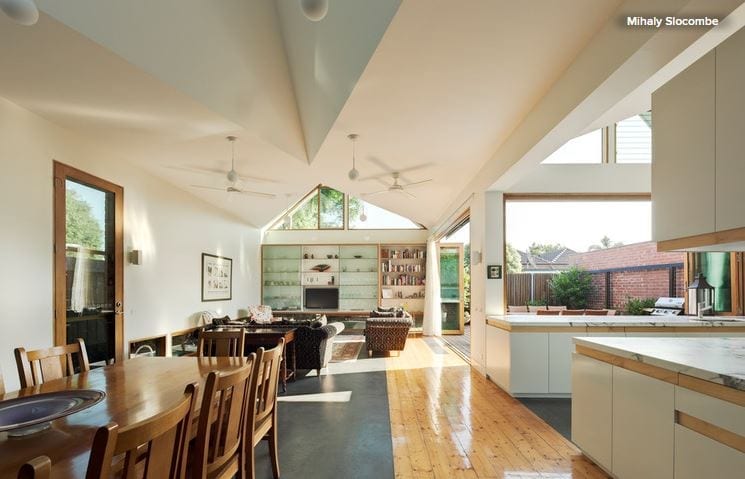
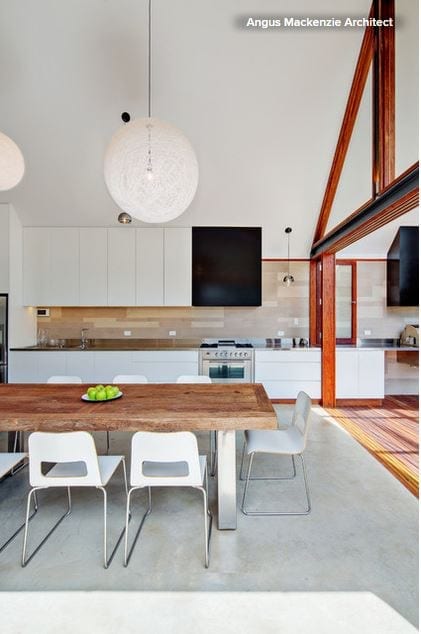
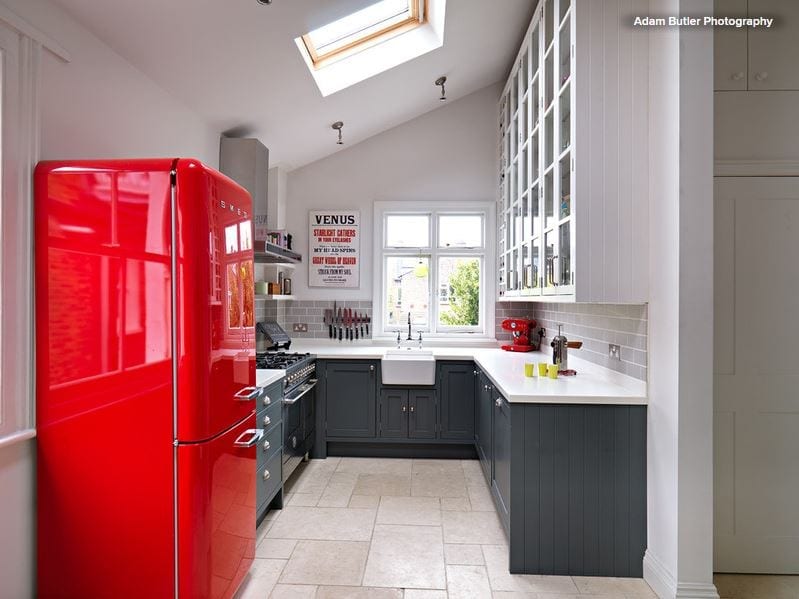
Raise the ceiling. Rethinking the dimensions of the room and having some architectural work done can make a huge difference to a small kitchen. If yours is in a single-story space, raising the ceiling to expose a sloping roofline would add a huge sense of light and airiness. It also would offer the opportunity to install skylights, which pull in more light than vertical windows. Plus it would create a tall wall against which you can fit cupboards or shelves for maximum storage.

Build up to the ceiling. Floor space may be limited, but vertical space is often the same in a tiny kitchen as in a huge one. So make the most of it by building units that stretch right up to the ceiling — or just nearly. A small gap above tall cabinets can offer just enough breathing room to help keep the room from feeling cramped. Keep infrequently used items on the upper shelves and try using sleek handle-less doors, so the units look streamlined and seamless and don’t dominate the room.

Integrate appliances. You may yearn for a huge, freestanding range complete with five burners, but a small-scale kitchen is not the place to install one. Instead, integrate your appliances for a more streamlined look and a space-savvy solution. Building the microwave into a cupboard will free up countertop space, and why not go for a boiling-water tap to dispense with the need for a kettle?

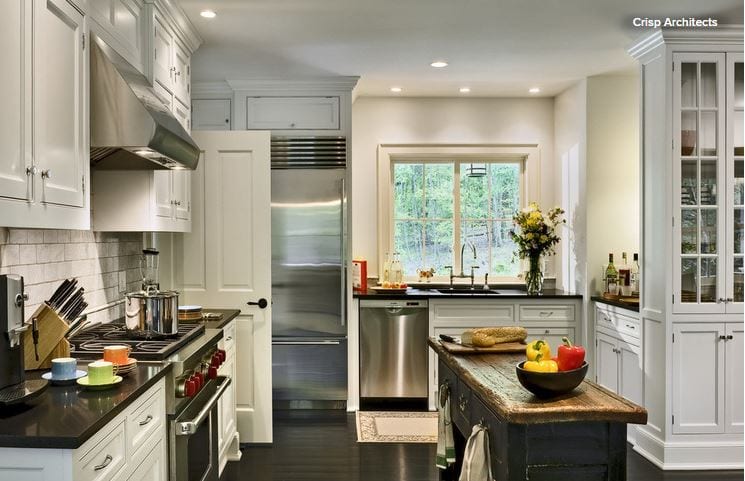
Work in a portable mini island. In addition to built-in units, a small, movable butcher’s block with shelves, like this one, can prove incredibly useful. It would take up very little room while supplying additional storage and prep space. It would also create the relaxed, freestanding look you may have been craving but thought you couldn’t pull off in a small kitchen.

Open vs. Closed Kitchens — Which Style Works Best for You?

Article by: Vanessa Brunner

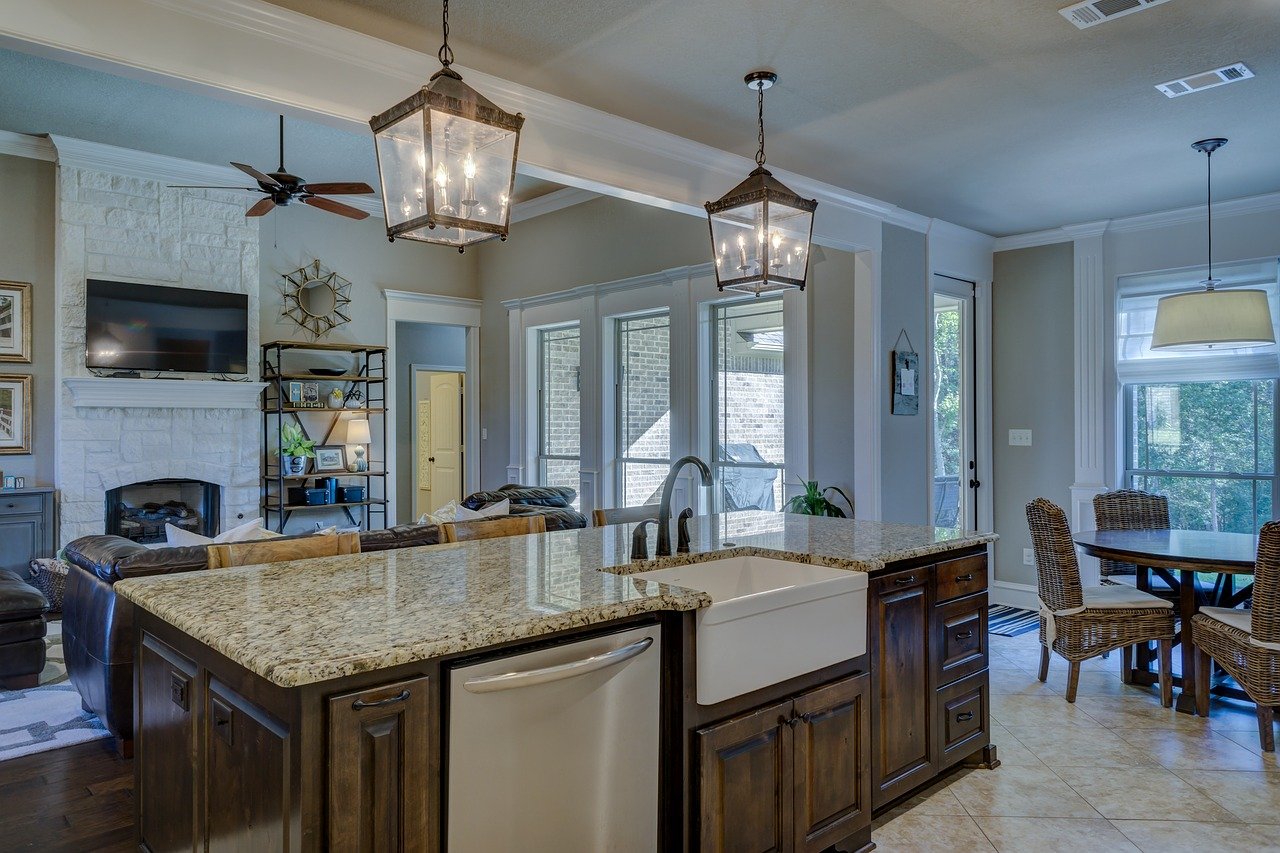
For centuries the kitchen was strictly a workspace. Often tucked in the back of the house, it had room for just the bare essentials. But a peek at many new kitchens today reveals a very different approach: the open-concept kitchen at the heart of the home. 

“The kitchen was really a closed-off spot for a long time,” says John Petrie, president-elect of the National Kitchen & Bath Association. “Now people want the kitchen to be an active part of the family home.” Although open-concept kitchens are by far the more popular choice today, some homeowners are embracing elements of the past — namely a separate, more closed-off layout. Could we be shifting back to the kitchens of yesteryear? 

We asked three kitchen experts for their thoughts on the two kitchen styles, and how you can decide which one is right for you.

How the Walls Came Down

Twenty years ago the term “cocooning” arose in the home design world. Home life shifted as people spent more time at home. “Home was a safe place, a refuge and where you wanted to be,” says Petrie.

The desire for a cocoon fueled the open-concept kitchen, allowing homeowners to spend more time with family and friends while cooking and cleaning. “It also showcased a shift to a more casual lifestyle,” says Andrea Dixon of Fiddlehead Design Group. “People weren’t afraid to expose reality — i.e., a messy kitchen.” 

“When the walls came down, the kitchen became an integral part of the home,” says Petrie. Kitchens soon became the center of the house — the room that everything else revolved around. 

Today this layout has become the go-to kitchen style, particularly for families. The combined layout allows for optimum multitasking — parents can prepare dinner, watch the news and help with homework at the same time. “I’m a huge open-concept-kitchen fan,” says Anthony Carrino of Brunelleschi Construction. “I find that the benefits far outweigh those of throwing the kitchen into another room. Ninety-nine percent of our clients ask for an open-concept kitchen.”

The Case for a Closed Kitchen

The kitchen is already the most expensive room in the house to remodel, and turning a closed kitchen into an open plan can add to the cost. Tearing down walls means dealing with plumbing, electrical and structural work on a huge scale. Sometimes the added expense means compromising in other areas. 

For homeowners who’d rather invest in other parts of their kitchen — appliances, materials or cabinetry — reworking the layout may not be worth it. “You have to think about what’s best for you,” says Petrie. When it comes to allocating your kitchen budget, which is more important, he asks, “an efficient, functional kitchen with better appliances? Or an open layout that connects to the rest of your home?”

While most of Dixon’s clients ask for open-concept kitchens, some prefer a closed-off space. “There will always be some people who are uncomfortable with letting guests see their ‘unmentionables,'” she says. “It’s definitely a more formal layout, but it ultimately comes down to personal preference.” 

If you want to leave your smells and mess behind when serving meals, a closed layout could be for you.


“You can get creative with a closed kitchen, too,” says Carrino. If space allows, a small booth, fold-down table or rolling bar can make a closed kitchen more of a social space.

Cons of a Closed Layout

Of course, a closed-off kitchen’s isolation also can be its main downfall. This layout doesn’t allow for direct access from the kitchen to the dining table, or vice versa. And it’s difficult to interact with friends and family while whipping up meals, since most of the room is reserved for the work triangle.

Choosing What’s Right for You

There’s no set formula that can tell you which kitchen layout will work better in your home. Part of having a conversation with a designer is trying to figure out what’s best for you. Start with a list of needs and wants, and go from there. “You’ve got to consider the way you live in your home and the way you use your home,” says Carrino. “How do you use your kitchen? How do you foresee using your new kitchen?” 

Everyone’s needs are different, so don’t let yourself sway with trends. “A family with kids that need supervision might decide to do an open-concept plan with a large multifunctional island,” says Dixon. “But a couple who loves to entertain might opt for a closed-concept space so they can prep courses ahead of time and not spoil the surprise. It totally depends on your lifestyle.”