FREE DESIGNS AND ESTIMATES

ConsumerReports.org Buying Guide: Kitchen Cabinets

kitchen cabinets

Getting Started

Once upon a time, dovetail joints inside the drawers were practically all you needed to distinguish high-end cabinets. The distinction has blurred as more manufacturers offer premium features even on low-end lines. Indeed, we found you can have these and other once-exclusive features and still wind up with shoddy construction.

A little research beforehand can save you time at the store and the thousands you can lose on less-than-stellar cabinets. Start by checking online manufacturer and retail sites and catalogs and taking a good look at store displays; you’ll be able to tell the quality cabinets from the polished pretenders once you know where to look. And trust your taste; readers who chose cabinets solely on the basis of advice from contractors, designers, or architects were twice as likely to report a problem as those more involved in the selection, according to a survey by the Consumer Reports National Research Center. 

Put Your Money Where it Counts

If you’re on a tight budget, skip the non essentials and focus on convenience. Work-savers include a lazy Susan, a pull-down soap and sponge holder, and deep drawers for pots. Glazing, while nice, typically adds 10 to 20 percent to the cost. Remember to factor labor into your budget, since installation can easily account for more than half of the cabinet’s cost. 

Consider Renewing Your Old Cabinets

Replacing cabinets is typically the priciest part of a kitchen remodel. Readers who hired contractors paid on average more than $9,000 for new cabinets, and about a quarter of the readers paid more than $15,000, according to our survey. A couple of long weekends’ work can change your kitchen’s look for a tenth that cost. If your old cabinets are plumb, square, and sturdy, consider refinishing them with some simple sanding, painting or staining, and drilling. You can even dress them up with custom-built doors, possibly with glass panes, and still save a bundle over all-new cabinets. Even having a cabinetmaker reface old cabinets with veneer costs less than replacing them. 

You can also make old cabinets work better than new by adding pull-out shelves, lazy Susans, and other inexpensive upgrades. The final touch: install several under-cabinet halogen, xenon, or fluorescent task lights wherever you or a family member will be dicing, doing homework, or reading a recipe. 

Types of Cabinets

Cabinets can vary greatly in price. Here’s an overview of the three types of cabinets in broad price segments that you’ll find at stores. 

Basic

Often called stock, these are inexpensive, off-the-shelf cabinets, ready to assemble and install. Many use frameless construction where the door has no lip or “reveal” around it.

Photo: Consumer Reports

PROS: These are a money-saving choice if you aren’t too picky about the style options or don’t demand a perfect fit. More have better drawers, sold-wood doors, and other once-pricey features. And we’ve found basic models that perform better in our wear tests than some more-expensive models. 

CONS: Many basic boxes are thinly veneered particle board, rather than higher-quality plywood. Style and trim options, sizes, and accessories, are still limited. And figure on an hour or more of assembly time for each set of base and wall cabinets. 

Midlevel

These semi-custom models are a sound choice for most kitchens. Many use face-framePhoto: Consumer Reports construction, where the solid-wood frame shows around the door and drawers.

PROS: Midlevel models offer many made-to-order custom options, including size, materials, finish, elaborate crown moldings and other trim, and accessories such as range-hood covers. That can make them the best-value option overall.

CONS: As with basic cabinets, features and quality can vary considerably. Boxes may be veneered particleboard rather than high-quality plywood. 
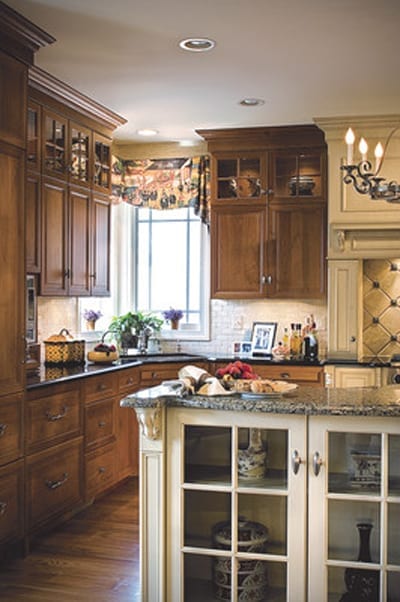
Premium

Short of custom made-to-order cabinets, these semi-custom models offer the most style and storage options.

Photo: Consumer Reports

PROS: They generally come with plywood boxes and other premium materials and hardware. Widths may come in ¼-inch increments, rather than the typical 3-inches.

CONS: While generally less expensive than fully made-to-order custom units, models with the most features and highest quality can cost as much as some full-custom units. 

Features

What separates a well-made cabinet from a cheap imitation? Here are the cabinet features to look for-and what to avoid. 

Cabinet Box: Best is ½-to ¾-inch furniture-grade plywood. Medium-density fiberboard (MDF) is OK, but avoid ⅜-inch coated particleboard.

Doors: Most manufacturers offer a similar range of door-style options for all their price levels. Look for a solid-wood frame surrounding solid-wood or plywood panels. Veneered particleboard or an MDF panel is OK, but avoid laminate or thermofoil over particleboard.

Drawers: Well-built drawers are critical, because they get the most use. The best ones have solid-wood sides, dovetail joinery, and a plywood bottom that fits grooves on four sides. Avoid stapled particleboard.

Hardware: Full-extension drawer guides are better than integrated side rails or under mounted double-roller designs. Some premium models have a “soft close” feature that stops drawers from slamming shut. Many cabinet models allow you to upgrade the drawer guides. As for door hinges, we didn’t find any significant differences among the different types. 

Shelves: Look for ¾-inch plywood of MDF. Lesser quality ⅝- or ½-inch particleboard shelves may sag.

Mounting Strips: Ask the contractor to use ¾-inch hardwood strips or metal strips with bolt holes. Thinner wood, MDF, or particlebard can be a concern with heavily loaded wall cabinets. 

Copyright © 2006-2012 Consumers Union of U.S., Inc.

Green Remodeling Ideas That Will Save You Money

“Going green” is more than just a passing phase – being environmentally thoughtful has become a way of life for many Americans, not to mention businesses that serve their needs. From recycling bottles and cans to investing in a do-it-yourself composter, homeowners all over the country are doing their part to help reduce emissions and protect the planet for future generations. 

There are plenty of small things you can do to make your home more energy efficient, but what if you want to go a step further? Whether you’re building a new home or renovating your current place, these green remodeling ideas will save you money over that long haul and make your home more appealing to buyers when you’re ready to sell – while saving the earth in the process. 


Solar-Panels-on-Houses.jpg

Solar Panels

They’re expensive to install, but solar panels are worth the investment. Last April, the Lawrence Berkley National Laboratory released its findings of an eight-and-half-year study of the California real estate market. According to the report, existing homes that were retrofitted with solar panels sold for an average of $17,000 more than comparable homes without them.

They’ll also save you a lot of money over time. For example, a homeowner in Chicago who pays an average of $200 per month on electricity would spend more than $43,000 to have solar panels installed. After tax credits and rebates, the total cost would be just over $30,000. However, after just one year, that homeowner would save anywhere between $1,200 to $2,778 on electric bills. After 25 years, that savings could be as high as $116,560.

To find out how much solar panels could save you, visit: Solar-Estimate.org


CompositeDecking.jpg

Composite Decking

In addition to saving trees by using composite decking instead of wood, you’ll save yourself a big hassle. Wooden decks need to be sealed every couple years to keep water out, and eventually the elements will cause at least a few boards to rot and splinter. 

Composite decking, made from a blend of wood waste and plastic, doesn’t require the same upkeep as traditional wood deck boards. You won’t need to seal it, which eliminates the time and money you’d spend resealing plus fewer chemicals will be released into the air. And since the deck won’t rot, no trees will be cut down and used to replace it after a few years. 

The average cost of a composite deck addition is $15,579, according to Remodeling Magazine, but you can expect to recoup more than 60% of your cost when you sell your home – more than if you replaced your roof or added a master suite. 


synthetic grass.jpg

Synthetic Grass

It sounds crazy, but using fake grass in your yard is a real thing. It looks surprisingly real, and is great for homes in dry climates where it requires a lot of extra effort – and water – to grow the real thing. According to online retailer Artificial Turf Supply, the synthetic stuff costs about twice as much to install as sod. In a 1,500 square-foot yard, ground prep, sod and a sprinkler system would cost $4,750 a year while artificial grass would run just over $10,000. 

But over an eight-year period (the warranty period of the synthetic grass listed on the site), the cost of maintaining a sod lawn would cost more than $14,500. During that same period, there would be no additional costs to maintain the fake stuff, which means a savings of more than $4,000. After 15 years, the savings skyrockets to $13,000. Basically, artifical turf pays for itself completely.

And you’re doing more than putting money in your pocket. You may still “rinse” the lawn from time to time, but you won’t waste gallons of water saturating the ground to keep the grass alive. It doesn’t need mowing, either, which means lower gasoline emissions polluting the air. 

No matter what green home remodeling project you want to pursue, make sure you find yourself a like-minded contractor. Look for a pro who has some experience in green building, or is at least open-minded and eager to get an eco-friendly project under his or her belt. 

Copyright © 2012 Yahoo! Inc.

Bathroom Remodeling Tips

blue and white tile bathroom

A single bathroom remodeling tip could inspire fresh thinking for your entire remodeling project. Trends area always being updated, so it’s useful to know what’s new in home bathroom design. You’ll find bathroom remodeling advise and inspiration here.

Express Yourself

Choosing Colors: A fresh coat of paint is an easy way to give your room an instant face-lift. Single color schemes make small rooms larger and a neutral palette can expand your space more. Or, add drama with colors like deep reds, eggplant, ochre, and dark blues or greens. 

The Personal Touch: Collections and objects that express your personality or your family history will make your home interesting to your guests and more enjoyable for you. 

Imported Ideas: Consider letting a favorite hotel or restaurant, or an outdoor spot that you enjoy, provide the inspiration for your bedroom, dining room or bath. 

Planting Style: One beautiful plant can be a strong design statement. Your style sense will determine whether a dramatic green plant or a bright floral bouquet is best for you.

Dynamic Design

The Right Finish: Now more than ever, you have choices for kitchen and bath fixtures. While matte or polished chrome are always popular, homeowners are choosing darker finishes such as oil-rubbed bronze and wrought iron. Consider the look and feel you wish to create when deciding. 

Bright Ideas: Halogen downlights and scones provide whiter light and fresh designs. Visit the lighting section of your home improvement center to get a better idea of these styles.

Quick ‘n Easy: Multi-purpose rooms need to switch moods easily. Today’s high-tech dimmers let you fine-tune your lights – even dim or raise them with a remote. 

Mix It Up: Today’s larger kitchen has room for variety. Mix-and-match styles and wood types for an eclectic feel that adds a unique look, from baseboard to hanging cabinets.

Packs a Punch

High-Performance Shower: Today’s shower design offers unprecedented opportunities for adding deluxe features – massaging vertical spas, rain shower showerheads and luxurious materials such as glass, tile and stone. 

Organized Kitchen: Specialized storage systems, appliances and fixtures speed meal preparation and keep entertaining organized. Choose open shelving for quick access. Locate a faucet next to the range to fill big pots quickly and conveniently.

Design Focus: A single, dramatic focal point for a room you’re remodeling makes the improvements more obvious. Try a special piece of furniture, an interesting piece of art or one wall that’s boldly colored.

Double Duty: Lighting is a sculpture as well as illumination. Choose light fixtures in shapes that are pleasing to look at – whether they’re switched on or off.

Works for Me

Getaway Baths: The bath can be a relaxing, serene environment. Add massaging or rain showerheads, a deep Zen soaking tub and even music and candles to enhance the revitalizing experience. 

Counter Space: If your bathroom is being shared by the family, counter space is critical. Consider a vanity with cabinets for extra storage and organization.

Ageless Amenities: Features usually associated with older homeowners – easier access, brighter lighting and convenient handholds – are helpful at any age. Adding them with your remodel could improve your home’s resale value.

Bed and Breakfast: Adding a morning bar to a master bedroom with an elaborate, built-in countertop and sink is a great way to add luxury and functionality.

Practical Approach

Finding Your Design: Start a scrapbook of design ideas you find in magazines and online. This will help you establish a foundation for your remodeling project. 

Sketch Your Layout: This will help you understand how you would like your new room to look and help you change the little things that you don’t care for in your current design.

Set a Budget: By outlining how much you can spend on each phase of the project you will be able to see if you can splurge on the extras; like a contractor or if you need to cut and do it yourself.

Set a Timeline: This will help you keep on track and allow you to achieve your remodeling goals. 

Planning Multicook Kitchens

There Are Ways to Accommodate Multiple Cooks Without Causing Accidents


multicook kitchen.jpg

Pictured Above: This kitchen has a third prep area visible beyond the island with access to the prep sink, microwave and island.We have been crowding into kitchens to enjoy the camaraderie of friends and family since house parties were invented. Candice Olson, in the the introduction to her book, Candice Olson Kitchens and Baths, puts it this way: “Today’s kitchen is all about a well-planned space that makes cooking a completely interactive experience between family and friends.”

Regardless of a kitchen’s size, there are ways we can modify spaces to encourage socializing and helping.

Average – to smaller – sized kitchens can be enhanced by incorporating a pass-through opening into the kitchen. An extended counter will encourage conversation and can hold hors d’oeuvres. A slight adjustment in the positioning of the available counter space adjacent to the sink or cooking surface could provide enough space to act as a secondary prep area.

Duality or redundancy of appliances can be beneficial in medium to large kitchens by creating additional activity centers. Still, each work center should have its own work triangle if possible. The primary work triangle is defined by the large refrigerator, corner sink/cleanup area and the range top. Microwaves, drawer dishwashers and refrigerators can anchor the work triangle along with a hospitality sink. Sharing a major appliance also works well as long as individual work triangles do not cross paths.

Islands and opposing countertops should be a minimum of 48-inches apart to allow for crossing traffic. The perfectly designed multicook kitchen will have very few occasions when preparers would need to cross paths. However, this minimum spacing will accommodate persons crossing paths while carrying plates or trays. 

Avoid positioning major appliances directly across a walkway from each other. A secondary sink should be far enough from the primary sink so it defines a discrete work center, and the addition of an under-counter refrigerator and the extra countertop space it provides will make an excellent salad or baking prep area. 

Not all multicook kitchens will be this inclusive while some might duplicate each appliance – specifically, an additional cooking surface. Two-burner cooktops, fastcook ovens, steam ovens or another secondary device might be incorporated. 

Getting the Most Out of a Kitchen Remodel

remodeled kitchen

Hey, have you heard the one about the 36-inch pro-style range that ripped the molding off the back door on its way into the house? Or the poured-on-site concrete countertop that cracked three months after installation? Or maybe it was the contractor who was paid in advance, promptly skipped town, and was never heard from again.

Well, misery may love company, but what we all crave is a happy ending – a smart – looking, functional workspace that is a source of comfort and efficiency. To help you get there, we’ve complied this handy guide to some common kitchen-remodeling disasters and offer expert strategies for steering clear of them. 

For each major phase of the job: – hiring, planning, budgeting, and living through it – we’ve got an easy plan to follow. Take our advice, and your biggest regret when your dream kitchen is complete will be that you didn’t do it sooner. 

Finding the Best Pros

Kitchen remodeling is at the top of homeowner’s wish lists. It is also, according to attorneys general across the country, a leading source of consumer complaints. Recommendations from friends are the best place to start your search for a qualified contractor. But before you make a decision, keep these caveats in mind:

  • They’re only as good as their last job. “General contractors often win jobs based on their good reputations,” explains architect Dennis Wedlick, author of “Good House Hunting: 20 Steps to Your Dream Home.” “But circumstances can change. When the contractor switches subcontractors or laborers, quality can be affected.” Ask your top three candidates to supply references, and follow up with the most recent ones.
  • What you see is what you get. In addition to completed renovations, try to visit a job in progress. You can learn a lot about a contractor’s commitment to quality and safety by seeing for yourself how clean the site is and how carefully the drywall is hung and taped.
  • The best ones are worth waiting for. The best contractors tend to be the busiest ones. Build your schedule around the GC of your dreams, not vice versa. Keep the crew happy by following the three R’s:

    • Refreshments – you don’t have to cater three squares a day, but at least offer a thermos of coffee or a cooler with soft drinks and some snacks. They’ll appreciate it.
    • Responsibility – the crew can’t work efficiently if you’re in the way. Ask questions, but don’t overwhelm them with your TOH-taught (This Old House) smarts. And teach kids and pets the meaning of KEEP OUT.
    • Respect – say good morning, good night, and good job when appropriate. And please: don’t ask if they’ve met any desperate housewives lately. The appliances can be top-of-the-line, the finishes the most expensive around, but if the space doesn’t work, it’s money down the brand-new In-Sink-Erator.

Plan, Plan, Plan the Smartest Layout

An experienced designer can save you time and money by heading off potential problems. Kitchen planners know all the tricks: how to maximize storage, smart substitutions for high-end materials, even the best local contractors for the job. But first, they need a few things from you. Here are a few things that’ll help on your first meeting. 

20/20 Design Proposal Drawing by Designer Ed Sheats

  • An architectural rendering or to-scale drawing of your existing kitchen, showing the location of windows, doors, heating, plumbing lines, and electrical outlets. If you’re not working with an architect, you can do it yourself with 3-D kitchen design software.
  • A detailed wish list indicating your goals for remodeling. Do you want more space? More storage? More style? A built-in dog bed? Organize by priority, from the “must haves” to the “in our dreams.”
  • An idea folder: pictures of rooms, products, materials, and architectural details that appeal to you; notes on what you like about friend’s kitchens (and hate about your own); and general concepts translated from other areas of your life. Are you a neat freak? Glass-front cabinets are sleek, but you may be happier with painted doors that conceal clutter.

Cut Costs Without Cutting Corners

One of the surest ways to shave costs is to do more with what you’ve got. So before taking the sledgehammer to your existing kitchen, try this: empty every drawer and cupboard. Revisit where you’ve been putting things. Is there an organizational scheme that makes more sense? Think in zones, storing items closest to where they are used. 

“In the end,” says architect Dennis Wedlick, “you may like the reconfiguration so well that you’ll decide to just paint and stick with the kitchen you’ve got.” And if you do go forward, you’ll have a clearer sense of how you really use the kitchen, which will help save time and money on the redesign. But if you kind of need to cut corners, here are a few budget-balancing scenarios:

Problem #1: You really need more storage space, but you plan to move in a few years and would rather not invest in custom cabinets. Custom-crafting every nook and cranny for the way you cook may not be the most economical use of your dollars when someone else – with different cooking and lifestyle habits – will be living in your kitchen before the home-equity loan is paid off. 

Affordable alternative: Consider working a walk-in pantry into your plan. It’s a remarkably economical way to upgrade your kitchen – a pantry can supply as much storage as a wall or more of custom built-ins.

Problem #2: You want granite countertops, but they’ll bust the budget. Granite’s resistance to moisture, scratching, and high heat makes it a perennially popular (if pricey) choice.  

Affordable alternative: If you love the look of granite – or soapstone or marble or handcrafted tile for that matter – work it into your plan. But instead of using it for every countertop, try limiting it to a high-visibility island or to the areas flanking the range. Elsewhere, use less expensive options like plastic laminate or ceramic tile. Mixing also adds visual interest. 

Problem #3: You want a lighter, brighter kitchen, but knocking down walls just isn’t an option. The space may be drab and dingy, but it gets the job done, and a major overhaul isn’t in the budget right now. 

Affordable alternative: Sometimes a well-planned lighting scheme is all it takes to brighten a kitchen. Spend the bucks for the services of a professional planner or lighting designer. That plus simple cosmetic upgrades, such as a fresh paint job, new cabinet hardware, upgraded countertops or flooring, and a couple of new appliances can totally transform the space. Save untold thousands by sticking to the original layout. 

Increase Your Home’s Value

coins next to wooden home

Three Remodeling Projects That Will Increase Your Home’s Value

Most people start a remodeling project to improve an area of their home, but they also hope the finished project will add real value.

Remodeling your house can vary from small improvements to the addition of an entirely new room. But not all remodels will create the same amount of value.

For example, the installation of a sauna might improve the quality of life for a homeowner, but it’s not going to have a big effect on the home’s overall value. On the other hand, adding a brand-new kitchen or master bath could increase a home’s value by thousands of dollars. 

If you’re planning a home remodel with the intention of adding value to your home, you should consult with a highly rated remodeling company and talk to local realtors or appraisers to see if your project will meet your perceived goals.

“I like to always say that you want to concentrate on what people like to look for the most,” says Alessandro Ferreguetti, owner of the highly rated United Remodeling in Brighton, Mass. “It’s usually the areas of comfort and areas where people hangout the most.”

Ferreguetti says those areas usually include kitchens and bathrooms because they are the places where people envision they will spend the most time. 

Nick Reynolds, owner of Eye 4 Design and Renovation in Eagle Rock, CA., offers his top three remodeling projects to add value to a home:

  1. The #1 value project is definitely the bathroom. A bathroom can be remodeled for less than a kitchen and give added value to the same extent.
  2. A kitchen is the first place people go when they are looking to buy a house. The trick with the kitchen is to not go overboard because a $20,000 remodel might get you the same value as a $75,000 remodel.
  3. Exterior improvements and landscaping. The exterior of the house is as crucial as the kitchen. A new fence and exterior paint are relatively inexpensive and both and immediate value. Similarly, a well-designed landscape will have the same result.

Plan Functional Outdoor Kitchens

Outdoor Kitchen

Careful Selection of Grilling Equipment, Appliances and Cabinets is Critical to Designing a Successful Outdoor Kitchen

The popularity of outdoor kitchens continues to skyrocket, and with it the availability of products and techniques that make them affordable and functional also is increasing. If a client’s desire is to go beyond the standard grill, then an outdoor kitchen can provide all the conveniences to rival any indoor kitchen. Equipment selection remains the primary consideration. The second most critical consideration pertains to cabinetry. 

Equipment

With its various features, the grill entices the novie and expert. Therefore, careful assessment of a client’s grilling style or desire is in order. 

Natural or propane gas and the accompanying storage/gas/electrical line placement is crucial. If built-in (versus freestanding), the 3/4-inch gas line needs to have a shutoff and quick disconnect for an emergency or season change. If using propane, there needs to be room for the tank that is easily accessible for replacement. If using natural gas, room for the line with a pressure  regulator is needed. All grills usually need an insulating surround (some come from the grill maker) to protect any material surrounding it, such as wood, particleboard or combustible materials. 

Attached lighting and electrical lines for igniters are a must with a shutoff if possible. All of these connections need to be sealed against water. A grill design element not usually considered is the placement of wind protection (a 10 – to 12-inch backsplash, if not in the design of the hood). When not considered, the hot air forced down from the back of the grill could melt plastic knobs. 

If you specify an icemaker and refrigerator, UL approved for outdoor use is necessary. A manufacturer’s warranty usually is only for temperatures down to 32 F. This requires more consideration in colder climates for a complete disconnect. Ice machines and sinks require a couple quarts of marine-grade antifreeze be placed in the drains in off months. Water lines need a bleed-port through which water can be depleted so lines don’t freeze. Ice machines should have a gravity drain; pump models are too prone to freezing. 

Cabinetry

With introductions of teak, cypress and other waterproof woods, outdoor-grade laminates and man-made materials, the aesthetics of cabinertry can be enhanced beyond stainless steel. Select cabinets made with marine-grade materials, such as plywood, that have weep holes for water to drain out of in cabinets and drawers. Doors and drawers need rubber gasket seals. The flashing on any grill insulation kit installed around the perimeter of the grill should protect the cabinet on each side, as well as from any heat below. 

Drawer glide systems should be of the highest stainless/nickel content to protect against moisture/dust infiltration. Hinges need to have a tighter tension to prevent wind from opening them; otherwise a lock may be needed. 

Equipment and cabinetry are the most important components of an outdoor kitchen. Once they are designed, selected and installed well, they will provide optimum pleasure. Ensure your design/construction team understands some of these practical but sometimes overlooked aspects of an outdoor kitchen.

Design an Entertainment Space

The Armstrong Bar Area

The Armstrong Bar Area – Project Manager: Randy WilsonWet Bars and Kitchenettes Have Evolved Well Beyond a Sink and Mini-fridge

A room with a sofa, a few chairs and possibly a television that kept the late 20th century family happy must now include all the latest electronic devices, including a flat-screen or 3-D TV with the latest built-in speakers that re-create the original recorded tones. To complete the package, wet bars, kitchenettes and conversation areas dominate. 

Friends gather to watch sporting events, movies, and catch up on each other’s lives. Often, food and beverages become staples that foster a cohesive atmosphere. The kitchen historically has been the favorite gathering place during food and beverage preparation, but entertainment areas now must assume many of those duties to relieve the hosts from continually traveling to the main kitchen to refresh drinks and bring more snacks to the pantry.

Bars and entertainment spaces will vary in size and scope. Look to your first client interview to gain an in-depth understanding of the home owner’s concept. The initial interview should include a discussion of the the cost factors for all the clients’ desires. It is difficult and embarrassing to miss budget expectations by a large amount because we did not properly conduct the initial interview. We need their investment target and their prioritization of the desired features for the space.

Rarely do wet bars include a cooktop, but many might include a dishwasher, microwave, sink and some type of refrigeration. Planning for each of these items will require knowledge of how the owners intend to use this space, as well as the amount of dishes, glassware and flatware they intend to store there.

When starting the design process, keep in mind the spacing of appliances, countertop area and walkways should mimic a well-designed kitchen. Consider enlarging the landing space for a microwave from the recommended 15-inches wide by 16-inches deep to 24-inches wide times the entire depth of the countertop. This additional surface area will help tremendously when preparing hors d’oeuvres and snacks for a gathering.

When planning for seating and converstation areas, assume audio and video will probably be playing in the background. Traffic from the converstaion area to the bar or other conveniences should not cross paths with the seating for TV viewing. This presupposes the space available is adequate for such a design. 

Lighting is an important consideration and requires the attention of a lighting professional. Providing proper direct and indirect light levels with appropriate switching and dimming is vital to a successful space plan. Many well-designed projects fail because of poor lighting. Nowhere in the home is this more true than in the rooms most often remodeled–kitchens, baths, and entertainment areas. 

Keep in mind the three-legged stool test for excellent design. First, develop an efficient layout–one that accomplishes the “needs” first and as many of the “wants” as the budget permits. Here is where options can help the prospects increase their budget to capture their dream project. Second, be sure the decor is aesthetically pleasing. Third, the lighting should be designed to accentuate, enhance, and provide the moods desired at various times and in various areas of the room. 

Following these guidelines will help to create a well-designed and enjoyable entertainment space.