FREE DESIGNS AND ESTIMATES

10 Design Tips for Planning a Family Kitchen

white kitchen cabinets quartz countertop

When planning a new kitchen, it’s important to consider the requirements of everyone who’ll be using it. For family homes, this means having an adaptable space that can meet your needs and those of your children, both while they’re young and as they grow into teenagers. This is just as important for anyone planning a kitchen who hopes to have children in the future.

A kitchen is not just a place for cooking and eating, it’s also a sociable space for gathering, doing homework and simply spending time together as a family. So, with that in mind, here are 10 design tips to help you plan your ideal family kitchen.

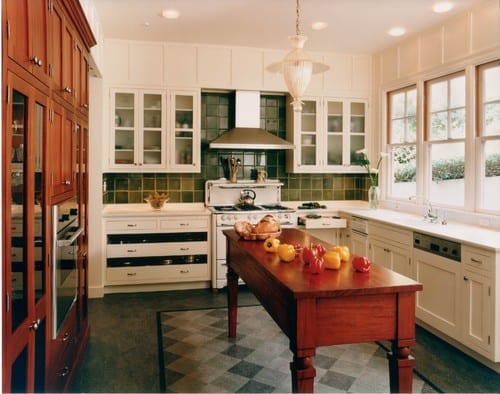
1. Choose the Right Layout

Getting the right layout is essential for any kitchen, but your best possible layout depends on whether you have (or intend to have) children.

The ideal layout also hinges on what sort of environment you want for your kitchen. If you want to create a child-free zone, a peninsula or U-shaped kitchen that closes off access at one end is ideal. This will keep family members clear of the area and out from under your feet. In a busy household, restricting passage in and out of the kitchen in this way can be safer during cooking.

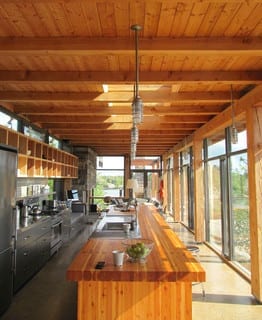
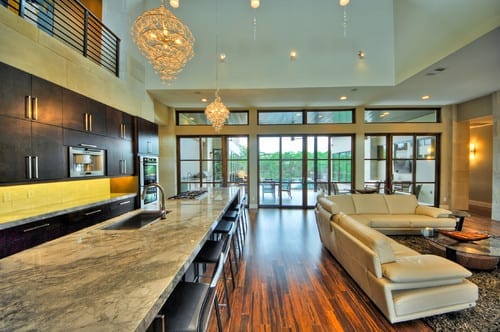
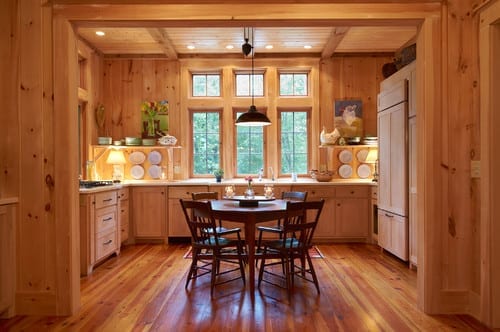
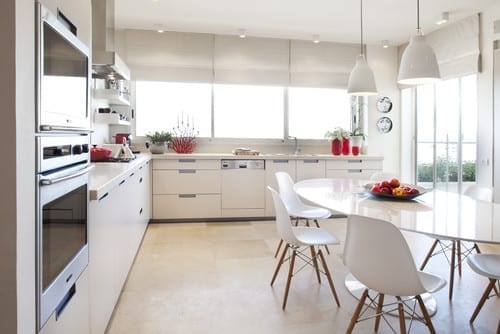
If you prefer to have a bustling, family-centered space, an open-plan arrangement with an L-shaped or island layout that flows into a living area is the best option. With this type of layout, the family can freely access the kitchen, creating a welcoming feel.

2. Create a Safe Prep and Cook Area

Many families prefer an open-plan kitchen. If your does, it’s important to let your designer know this, along with details such as how many people live in your household, the ages of any children, your family’s preferred cooking styles and who typically cooks. This will help them plan a safe and comfortable working environment that accommodates everyone.

For example, if you want a kitchen that allows teenagers to access the fridge or microwave, it’s better to have these appliances on the periphery of the kitchen, so they’re within easy reach but safely away from the cooking zone.

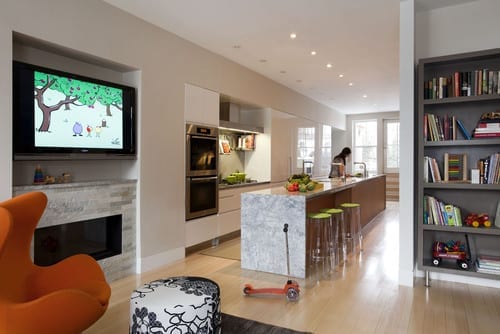
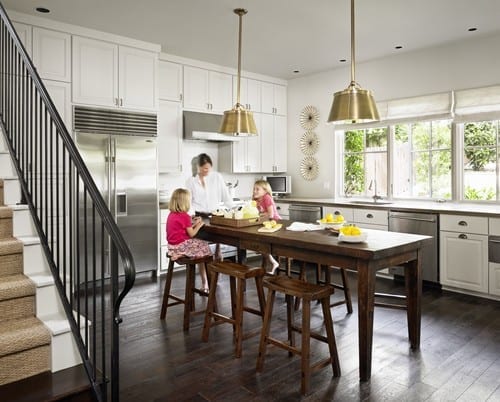
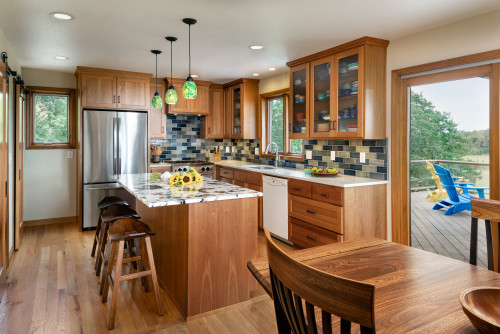
Similarly, a kitchen island with seating at the far end will let you keep an eye on young kids during cooking, but it also safely separates them from the hazards of the food prep and cooking area.

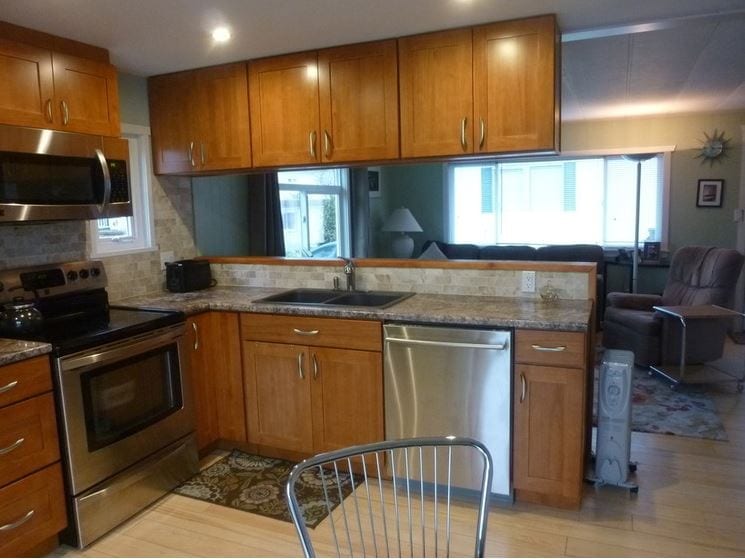
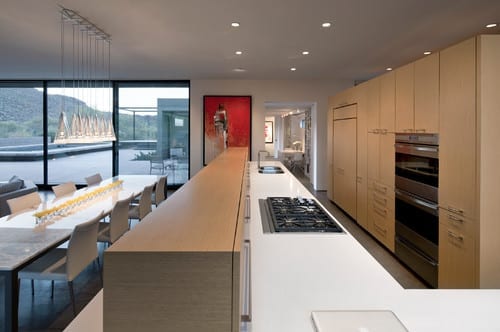
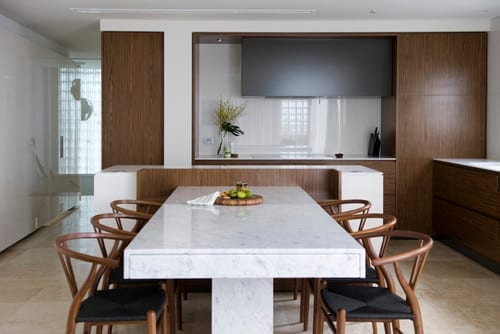
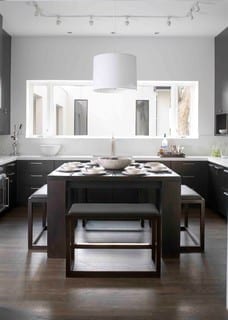
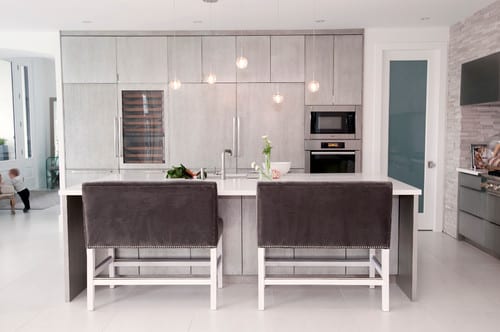
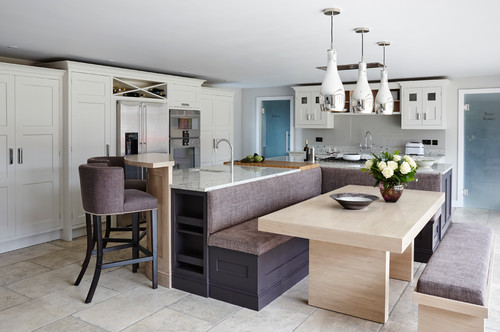
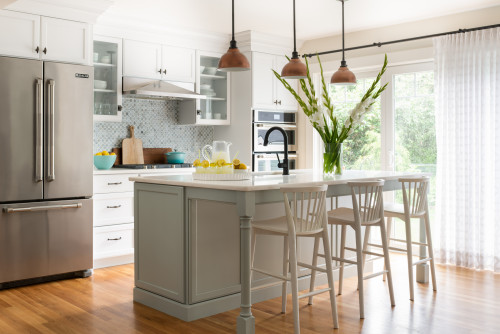
3. Decide How You’ll Use an Island

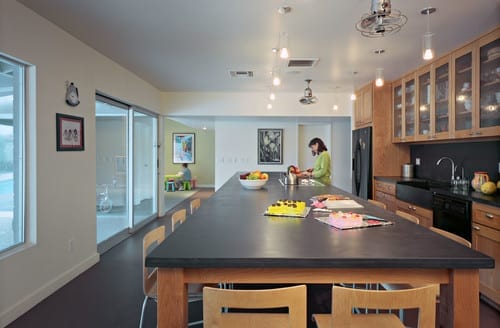
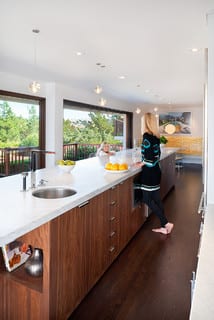
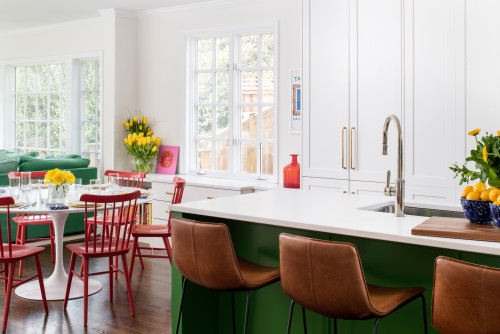
If you have space for an island, think about the ways you want to use it. An island with seating, for example, makes the kitchen more multipurpose. It becomes a place to eat, study, do homework or relax with a glass of wine once the kids have gone to bed.

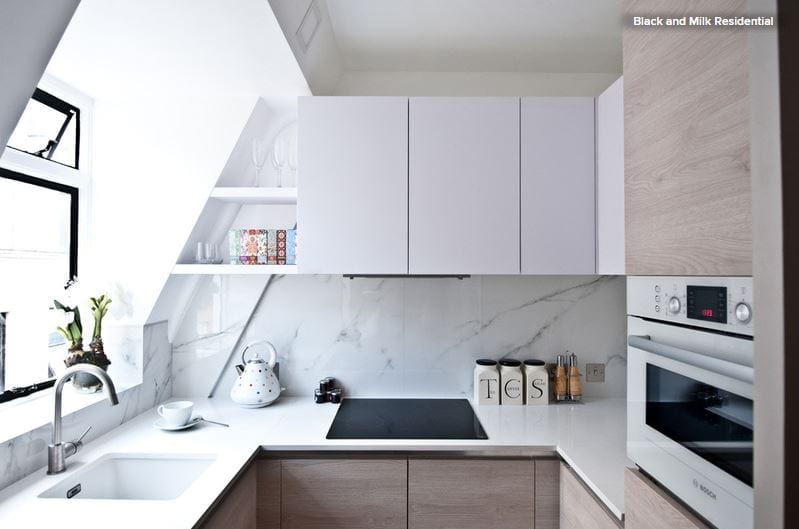
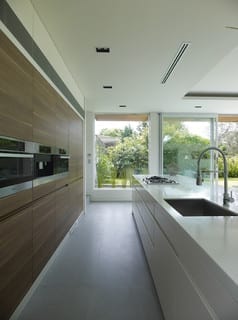
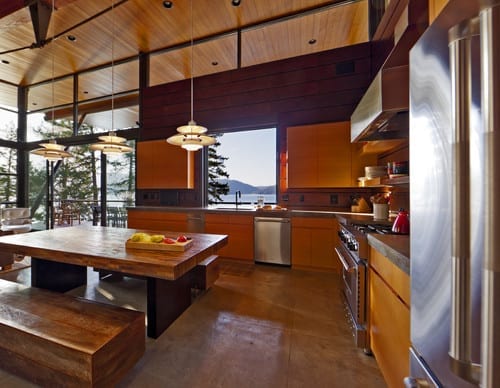
An induction cooktop on the island makes it more sociable and enables children to watch and learn as the parents cook. In this kitchen, the sink is on the perimeter behind the cooktop, but it’s staggered to the right rather than directly behind. This staggering means you can check that it’s clear before turning toward it, which is important if you’re carrying a knife or a pan of boiling water, especially if there are children or pets present.

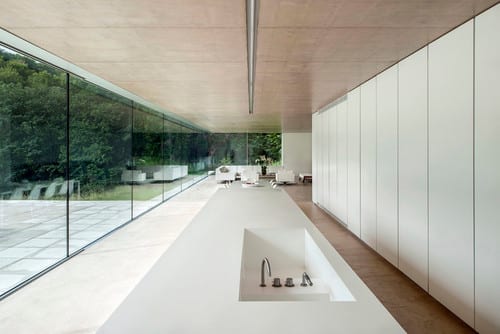
Alternatively, having a sink on the island itself allows easy cleaning up of splashes and spills.

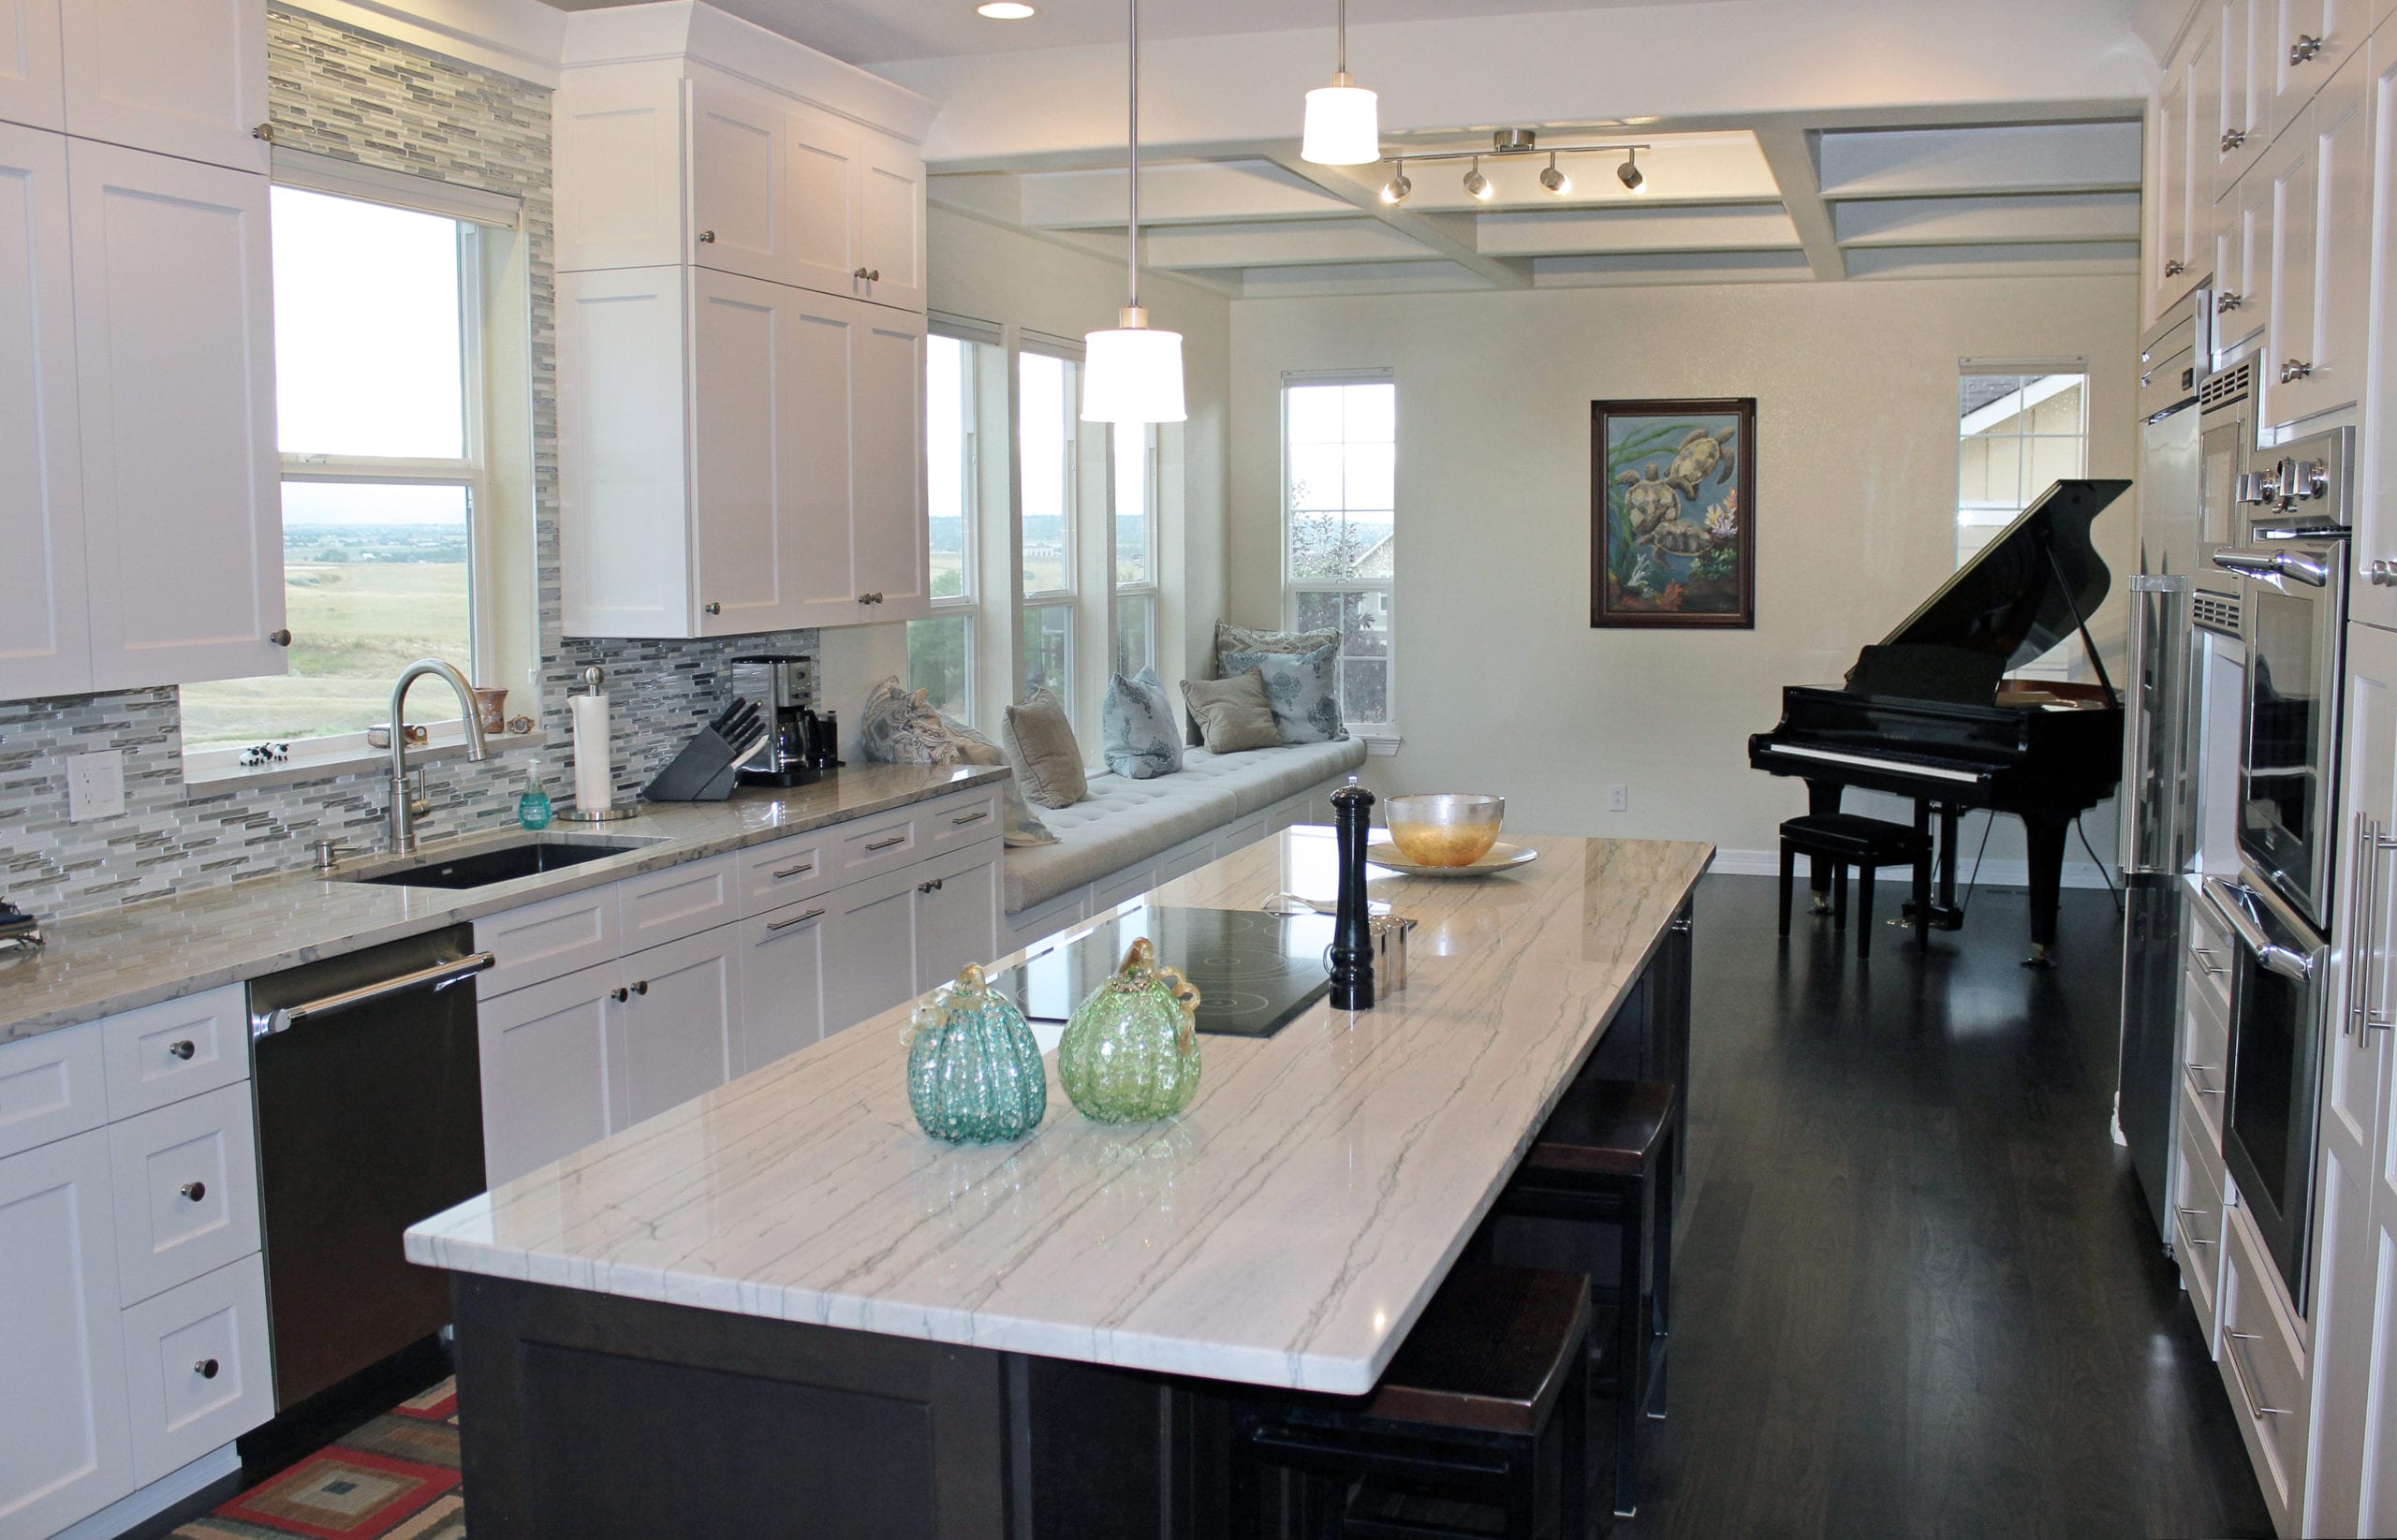
4. Include Work Surfaces at Different Heights

In a food prep zone, it’s best to choose a work surface at a height that’s best for the person who does most of the cooking, but it pays to include work surfaces at different heights too.

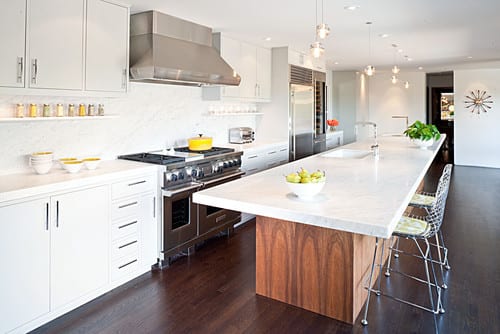
For example, an island countertop would be too low to tuck a baby’s high chair under, whereas a breakfast bar might be the perfect height. A breakfast bar could also accommodate older children on stools and be used for doing homework. If there’s space, an adjoining part of the island could also be at a lower level to accommodate a more formal family dining area.

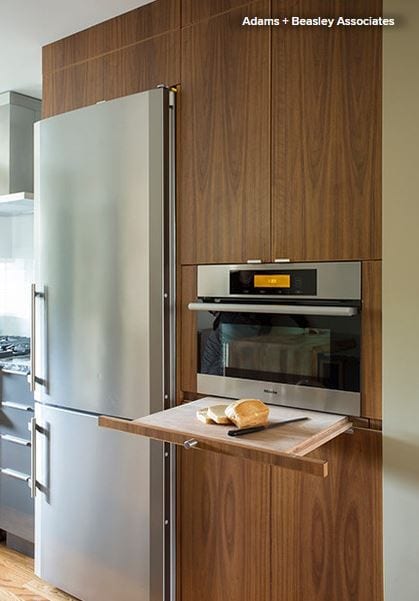
5. Consider Appliance Safety

Safety is key for a family kitchen and care is needed when children and appliances come together.

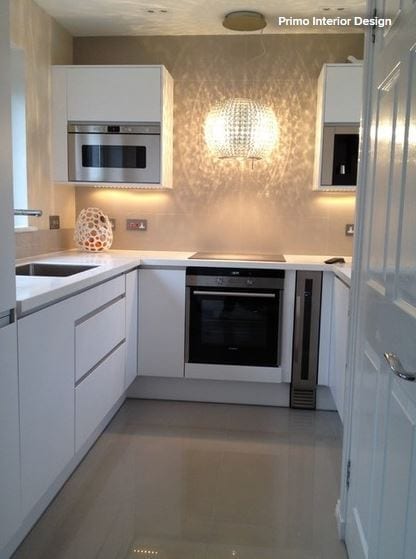
Some types of appliances are safer than others. Induction ranges are ideal for families because, unlike a gas stove, they have no flame and the surface remains cool during cooking. They also have essential safety locks.

It also pays to raise ovens to eye level so they’re out of reach of small fingers. This can work well for adults too as it saves them from bending down.

Wine fridges and cupboard doors can be locked, while sink cupboards especially should be secured, preventing access to hazardous cleaning fluids.

6. Let Appliances Make Life Easier

Opt for appliances that are designed for convenience to ease the pressures of family life. Choose a dishwasher that sanitizes, thus eliminating the need for a separate baby bottle sterilizer. Similarly, go for a hot water dispenser and a fast-cook oven to save time. An induction range is faster at cooking than a gas one.

Look into the different types of washers and dryers, too — many have features and programs designed to cope with a high turnover of laundry.

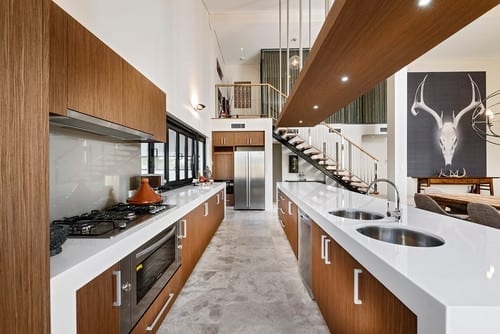
7. Opt for Fuss-Free Surfaces

Sticky handprints can be a constant problem with young children, so opt for surfaces and finishes that are less likely to show up smudges. Fingermarks are less visible on a matte surface than a gloss one, and even less so on a textured stone or wood door, so consider this when choosing door and drawer fronts.

When it comes to countertops, look out for materials such as Corian or quartz, which are stain-resistant and durable (but can also be repaired if broken). Similarly, Silestone is non-porous but also antibacterial, making it a popular choice for parents of very young children.

Go for easy-maintenance flooring, too, especially if you have pets as well as children. Ceramic, concrete or porcelain are popular, hard-wearing choices.

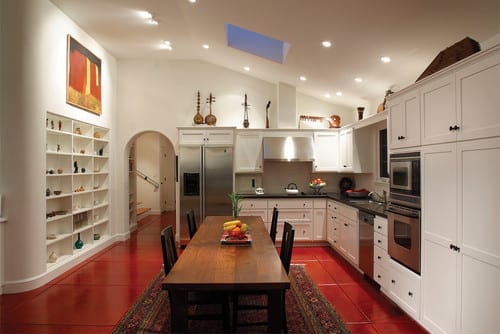
8. Ensure Generous Storage

Storage is especially important in a family kitchen, where a place has to be found for child-related items, such as bottles, sterilizers, baby food and bibs, as well as any additional cooking utensils. As your family grows, you’ll also need more food storage, especially if children start to develop a preference for a greater variety of foods.

Plan your storage so that anything dangerous, such as knives, are safely locked away. Similarly, breakables, such as glassware and delicate dishware, should be stored high out of reach.

As children get older, you might want to assign them their own low-level cupboard that they can access. For example, their plastic cups, glasses and plates could be stored in kitchen drawers. Not only will this help your children feel independent, it’s also safer than them trying to climb onto countertops to reach these items in a wall unit. Plus it means they don’t have to rely on you to fetch things on demand.

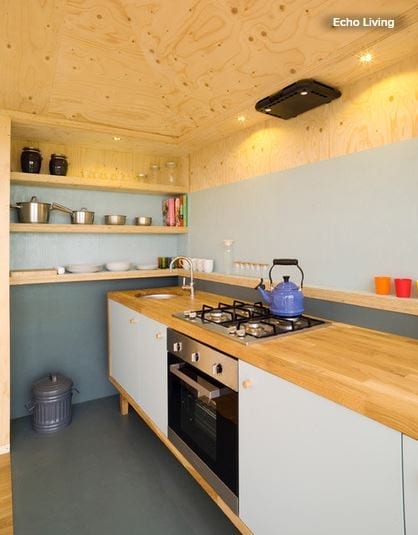
9. Look to the Future

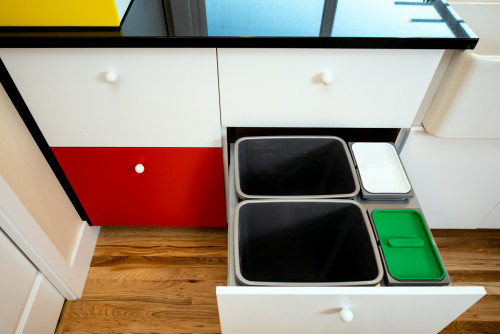
Plan your kitchen so it accommodates the changing needs of your family. A growing family generates more garbage, so include sufficient bin space in your kitchen plan that’s easily accessible. Also, if you’re eager to teach your children to recycle and compost, install a system like this one to encourage it.

Opt for a fridge and oven that’s large enough to accommodate food for a family of four or more. And factor in enough seating and a big enough table for your growing family, along with space for future school friends or other house guests.

10. Enjoy Your Kitchen

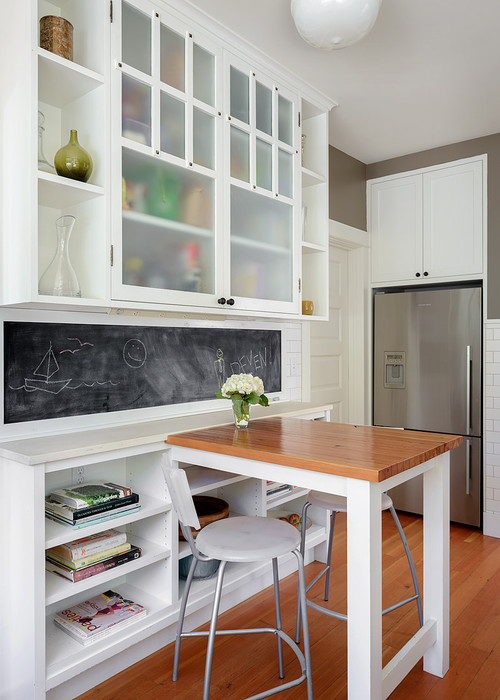
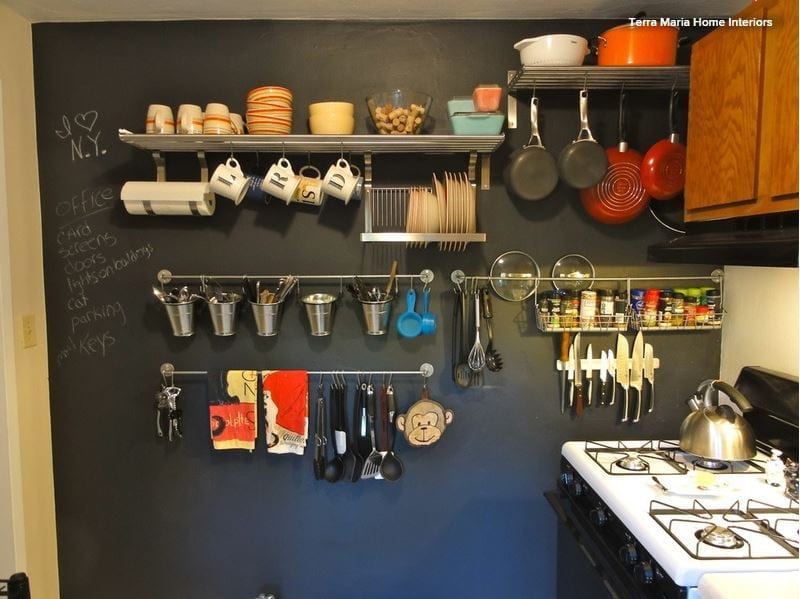
Make sure the kitchen is a fun place where your family enjoys spending time. Include casual seating areas, such as a breakfast bar or adjoining bench, to encourage people to linger. Add in some eye-catching accessories to provide bursts of color, or try a blackboard wall, which is handy for shopping lists, reminders or kids’ art. It might even keep them entertained while you’re cooking.

[Houzz: 10 Design Tips for Planning a Family Kitchen]

See a Complete Kitchen Remodel for $11,000

Article by: Mitchell Parker

Norma Rushton and her partner, Randy Dyke, really wanted a waterfront property in the Vancouver area but were quickly priced out of most places. When they lucked into a mobile home on the Stave River about an hour east of downtown Vancouver, they were thrilled at the great location right on the water at a good price. But that’s where their excitement ended. The home was in bad shape and needed major repairs.

BEFORE: Recently they started adding more storage and function to the original kitchen (shown here), which had been picked apart since it was built in 1970. For example, the backless cabinets had been cut up by previous owners to make room for a larger refrigerator and stove, leaving little storage. “The cabinets were starting to get useless,” Rushton says.

AFTER: Determined, Rushton, a high school theater teacher, spearheaded a complete gut and remodel, choosing all the materials, fixtures and appliances, while Dyke, a retired water taxi driver, did a lot of the work, including installing the drywall, molding, trim, backsplash (twice) and new window and patching the floor. The couple painted everything together. Professionals installed the cabinets and countertops. 

But best of all, the couple got discounted help from their contractor neighbor, Milan Vaclavik of Milan’s Home Renos, who took care of the plumbing, framing and electrical work at a friendly rate. 

Though the homeowners considered getting granite countertops, they ended up going with Formica instead. “Granite is too hard of a surface,” Rushton says. “I wanted something a little more forgiving.”

BEFORE: A bank of upper cabinets and a floor-to-ceiling cabinet made things a bit claustrophobic and blocked views between the kitchen and living room. “I wanted to be able to sit in the living room and see out the windows of the kitchen to the water,” Rushton says.

AFTER: They reduced the size of the upper cabinets and did away with the tall cabinet altogether, opening up the sightline between the two spaces. “Now you can actually chat with whoever’s in the kitchen,” Rushton says. 

The couple had a couple of remodeling disasters along the way. Rushton had found solid oak cabinets at a discounted price that she really liked, but when they arrived, they were the wrong model. With the renovation already under way, she had to make a tough decision and went with the different cabinets, which ended up throwing off all their measurements. 

The backsplash was another compromise. The first one that Rushton put up was “a horrible mistake,” she says. She had found peachy-taupey-colored porcelain tiles that looked great lying on the counter. But as soon as she installed them vertically on the wall, the angle of the light turned them green. A local tile guy informed her that artificial colors tend to do that and suggested a natural stone product instead. “It was either I live with it or let the money go,” she says. “I let it go and went and got marble tile instead.”

BEFORE: The washer and dryer were shoved into a storage closet in the kitchen, while an old cabinet did the work of storing bowls, platters and mail. 

AFTER: The homeowners replaced them with a stacking washer and dryer unit, an Ikea unit of sliding drawers for a pantry and a place for the vacuum cleaner. “It was all about getting what I need for putting things away,” Rushton says.

Sliding doors nicely seal off the laundry and pantry area, freeing up clutter near the pristine river view. 

Rushton says they budgeted about U.S.$8,000 but the actual cost came in at just over $11,000. 

Here’s some of the breakdown: 

Cabinets: $2,300
Cabinet handles: $170
Countertops: $675
Closet doors: $250
Washer, dryer, microwave: $2,000

Lighting: $335
New flooring (closet): $85
Wood: $85
Paint: $170
Backsplash: $335 
Sink: $250
Window: $60
Labor: $1,000

Ikea shelving: $300
Drywall, insulation, plumbing fixtures, electrical wiring, switches, plugs, power tools, screws and brackets, taxes and other miscellaneous expenses: around $3,200

Smart Ways to Make the Most of a Compact Kitchen

Article by: Joanna Simmons

We might all dream of a huge family kitchen, but most of us have to make do with something smaller. That said, whatever the size of our kitchen, the demands we place on it tend to be the same. We want it to function well for preparing and cooking meals. We might also like to be able to sit and eat in there, even if just perched at a breakfast bar. And we need space for a lot of different objects, from chunky appliances to silverware, dishes and food. The good news is, with some clever planning and great design, it is possible to have all these functions in one tiny space, as these inspiring spaces demonstrate.

Use every nook and cranny. It sounds obvious, but where space is tight, it’s essential to make use of all of it. This might mean commissioning custom units. Shelves or cupboards designed for your space, rather than bought off the shelf, can exploit even the most awkward corners or weirdly angled rooflines. Luckily, since the number of units you will be able to fit is limited by the small size of the room, a custom design often will be reasonably economical, too.

Enjoy a little rack n’ rail. Wall cupboards can eat into the space in a very small kitchen, but you can still make any wall work for you by adding racks, rails and slim shelves. These can hold things like saucepans, strung up on S hooks, mugs and pots holding cutlery, and even utensils. Covering the wall in blackboard paint helps it to multitask even more, as a place where you could write shopping lists and messages.

Make it streamlined. Chunky and mismatched pieces would eat into the space and make a tiny kitchen feel cluttered. Instead, opt for units with a minimalist look and, as here, a countertop that flows over all the base units and even extends to become a breakfast bar. The minimalist metal legs seen here keep sight lines open. This kitchen is flooded with natural light, so the color on the unit doors invigorates the space without encroaching on it.

Find another home for laundry appliances. It’s not uncommon to find washing machines and dryers installed in the kitchen, but, when space is limited, it’s a good idea to find an alternative home for them. A nook under some stairs can be a good place. Or consider putting a dryer — and perhaps a freezer — in the garage, if you have one.

Choose clever details. There are heaps of clever space-saving elements that can be built into a new kitchen, so if you’re starting from scratch, look for things like slim spice jar storage, knife drawers,toe-kick drawers and integrated chopping boards that can be slid over a sink or pulled out from the wall.

Try freestanding pieces. Freestanding furniture has its benefits in a small kitchen too. If you take the view that where room is tight, it’s important to make every item you place in it shine, then suddenly there is a logic to not building everything in. A freestanding piece containing an oven, sink and cupboards, like this one, looks like a beautiful piece of furniture that fits elegantly into the space.

Raise the ceiling. Rethinking the dimensions of the room and having some architectural work done can make a huge difference to a small kitchen. If yours is in a single-story space, raising the ceiling to expose a sloping roofline would add a huge sense of light and airiness. It also would offer the opportunity to install skylights, which pull in more light than vertical windows. Plus it would create a tall wall against which you can fit cupboards or shelves for maximum storage.

Build up to the ceiling. Floor space may be limited, but vertical space is often the same in a tiny kitchen as in a huge one. So make the most of it by building units that stretch right up to the ceiling — or just nearly. A small gap above tall cabinets can offer just enough breathing room to help keep the room from feeling cramped. Keep infrequently used items on the upper shelves and try using sleek handle-less doors, so the units look streamlined and seamless and don’t dominate the room.

Integrate appliances. You may yearn for a huge, freestanding range complete with five burners, but a small-scale kitchen is not the place to install one. Instead, integrate your appliances for a more streamlined look and a space-savvy solution. Building the microwave into a cupboard will free up countertop space, and why not go for a boiling-water tap to dispense with the need for a kettle?

Work in a portable mini island. In addition to built-in units, a small, movable butcher’s block with shelves, like this one, can prove incredibly useful. It would take up very little room while supplying additional storage and prep space. It would also create the relaxed, freestanding look you may have been craving but thought you couldn’t pull off in a small kitchen.

Get More From Your Kitchen Island

Article by:

Many kitchen islands open directly into another room. If you don’t require seating on that other side of your island, it’s a great opportunity to make the island serve purposes other than cooking and eating. When planning for an island, consider how it can be used to your advantage, whether it’s incorporating additional display space, extra storage or even strategically separating — or connecting — other spaces. Here’s how you can make your island work harder for you.

Get More Display and Storage

These open shelves wrap around the island to create display space on two sides. This makes for a much more eye-catching addition in an open floor plan. Can you imagine staring at solid planes of material here? Meanwhile, a small countertop at the opposite end still accommodates some island seating. 

Although this island also has shelves below, the real eye catcher is the ceiling-hung shelves, which create a bright, casual cookware display. What a visual feast for diners! 

Where seating is not required, think about incorporating bookshelves along the length of your island — perfect for all those cookbooks. 

Full-height cabinets block kitchen messes, provide storage and hold a TV here. 

Get a Divider or Transition

A simple, narrow dividing wall, which seemingly arises from the island, partially hides the cooking area and creates a stunning art wall. Notice how the sculpture niche is finished to match the cabinetry, creating the transition from kitchen to the living-dining area. 

This island does double duty with a working kitchen side and a buffet dining side, but it doesn’t stop there: The beautifully detailed end wall hides any mess and creates a lovely focal point. 

In this very open space, the island ends in a fabulous display area that looks like furniture. This concept blurs the line between cooking and living areas. 

Want to hide your dirty dishes but still converse with the guests? Use meticulously detailed cabinetry as a horizontal backdrop to your dining area — much more interesting than drywall. A narrow continuation of the countertop even serves as a buffet space. 

In the same space seen from the kitchen side, small cabinets actually form the top of the dining “wall” and provide storage — bonus! 

Get Table Seating

In this kitchen a working island is paired with a built-in banquette, making an attractive, handy spot for dining. This would work equally well with a rectangular island. 

Ease a Level Change

Many homes have a step or two from the kitchen to a living area, typically with a railing of some sort. Why not create a casual dining area as a buffer between the two instead, utilizing some great cabinetry?

What to Consider With an Extra-Long Kitchen Island

Article by: Eric Reinholdt

Unlike its isolated geographic cousin in an ocean, an island in the kitchen serves as a central gathering space. As our kitchens have become more and more connected to our living spaces, they’ve changed from being solely utilitarian to being social gathering hubs. The island is often a central player in having a whole host of functions now, and the longer it is, the more function you can pack into it. 

Typical kitchen islands range between 7 and 10 feet; the long islands in this ideabook begin at 12 feet. The long island has definite advantages; however, it’s not without a few special planning challenges. Let’s review what you’ll need to know to chart the course to your own long island.

Flexibility

The more our homes can accommodate the many functions of everyday life, the better the chance they’ll meet our long-term needs, because needs invariably change over time. Long islands serve this idea well by acting as flexible workstations. Today’s kitchens must accommodate serving, cooking, seating, gathering, display and even work tasks. 

The underlying design idea for the modern extension seen here was deference to the landscape. The interior spaces are arranged to orient the occupants’ focus toward the exterior. This was done, in part, by minimizing interior obstructions to this view. And this long island seamlessly complements that vision. Its length accommodates gathering, storage and much of the function of the kitchen in one single move. 

The architects have carried the clean, minimalist aesthetic to every last detail, taking care to recess even the faucet controls. By stripping this long object of any visual ornamentation, they’ve left multiple functions open to interpretation and whim.

Focus

One undeniable advantage of the long island is that it allows for a change in the traditional orientation of kitchen tasks. It does this by creating a workspace large enough to allow for all of the kitchen work — preparation, cooking and cleanup — to occur in and around the island, allowing the cooks to face their guests and family gathered in the kitchen.

This island’s design lends a laboratory vibe to the space. It’s freestanding and furniture-like, permitting dining for the entire family at one end, open and closed storage at the opposite end, and preparation, cooking and serving in between. It’s also proof that even a large island can feel light and open. Being proportional to the space is key here, and I love how this one functions as a communal worktable.

Function

The longer the island, the more roles it can play. In this kitchen the island is the clear focal point, and it houses much of its functional components. By extending the island, the architects were able to incorporate storage, a sink and multiple cooking appliances. By building in the long bank of storage, they eliminated the need for upper cabinetry; paired with the skylight above, this reinforces the open, loft-like feel of the space.

Long islands naturally come with broad expanses of counter space, something every kitchen can benefit from. Meeting both cooking and cleanup needs and dressed in hand-hewn walnut, this island was designed as a piece of bespoke furniture that measures 42 inches wide and 146 inches long.

Spatial Definition

Often our kitchens are cluttered with what we need to actually cook in the kitchen. While we’re eating, most of us aren’t interested in staring at the cooking mess we’ve left behind. 

Many modern spaces are interconnected and feel larger because of that openness. Walling off the kitchen to hide the clutter is not only impractical but unnecessarily confining. The architects here solved that by elongating the island to almost the entire width of the room and elevating the backsplash. 

Treating the island the same way as the wall of cabinetry at the rear of the kitchen clearly defines the kitchen as its own space, but still enables the cooks to be a part of the activity of the larger space. The backsplash here also functions as an appliance garage, with lift-up doors that conceal the appliances.

The thick divider can serve both sides of the kitchen. Facing the kitchen side above the counter and facing the dining area below the counter, it can function as storage cabinetry.

Spatial definition has been punctuated above this long island by an overhead plane clad in wood sized to match the island dimensions. This doubles as a place to locate task lighting for the counter.

Positioning the cleanup area of the kitchen closest to the dining space creates an efficient layout. And, while locating the sink across from the cooking zone in such a long kitchen may seem counterintuitive, it makes good design sense; it frees up more counter space. Because the cleanup area will be used after the cooking, placing these zones back to back isn’t the problem it may seem at first.

Seating and Dining

A popular choice for many islands is integrated seating. With a long island, the seating area can accommodate the entire family alongside guests. Diner-like in its configuration, this island comfortably seats eight or nine guests.

A good standard for counter seating is 2 linear feet per person. This will prevent elbow conflicts and be comfortable for most people. In smaller kitchens or spaces where a dining room isn’t possible, the long island can fill the role of a dining table. Here again this island’s proportion mirrors the proportion of the space.

Note the undercounter refrigerator at the end. This clever arrangement allows people to access beverages without having to cross into the kitchen and disrupt cooking tasks there. Long islands permit this kind of thoughtful kitchen zoning.

Clearances

It’s important that your kitchen island fit comfortably within the confines of your kitchen, and clearances are an essential consideration. A basic rule of thumb is to provide a minimum of 42 inches of working space around the island, even if you’ll be including seating. 

It is possible to push these recommended minimums. In this example the architects reduced the working space to 36 inches surrounding the island, maintaining a functional balance, given the narrow footprint of the row house.

Cabinetry and seating depths are also part of the size equation. Typical base cabinets are 24 inches deep; seating areas can be as shallow as 12 inches but are more comfortable at 18 inches. So for a two-sided island with seating, a minimum comfortable dimension would be 42 inches deep.

Materials

Choosing to match or contrast the island to the materials of the room is a critical decision. Choosing a fine hardwood will make it more furniture-like. Matching the surrounding cabinetry will clearly say it’s a part of the kitchen, while choosing an altogether different material will make it more of a table and something clearly distinct.

The island here contrasts the cabinetry but draws on a similar tonal palette. The black counter and hardware accents along with the pendant fixture tie this composition together without relying on one single material. It’s a more complex dialogue that adds richness to the kitchen. This island is 16 feet long with 40 inches of clearance around it and an amazing cantilevered seating area measuring 78 by 40 inches.

Just because they’re massive doesn’t mean long islands have to dominate a space. The focal point in this kitchen is the natural wood facing on the wall of cabinetry at the rear. 

In a walled kitchen such as this, a long island can be an obvious complementary design device. The cooking and storage wall requires counter space nearby, and the long island fits the bill with a horizontal surface for every inch of wall cabinet. Here again, note the cooking and cleanup zones.

Special Considerations

The benefits of a long island don’t come without a few pitfalls. Pay particular attention to:

Traffic Flow

Long islands mean long travel distances to get to the other side. It’s important to consider this when settling on an overall length and to understand how the circulation or flow of traffic will work. 

Storing items that need frequent loading and unloading from a dishwasher on the other side of an 18-foot island will mean lots of traveling back and forth. Establishing clear zones within the island is one way of mitigating this. So too is limiting the width of the island. This will mean loading the functional components of the kitchen on the kitchen side and keeping the seating areas on the opposite side or end.

Linear spaces pair well with long island configurations. Two obvious patterns of circulation exist here, and because of the narrow room dimension, the entire kitchen feels a part of the outdoors. This long island is the central spine of activity; with different functions pinwheeling off of it, it’s hard to tell where the kitchen ends and the living begins. In this way the long island becomes the Swiss Army knife of architectural space makers, humbly serving a multitude of functions.

Counter Seams

If your island extends beyond the typical 7 to 8 feet in length, you’ll face a more limited selection of seamless countertop materials. This island is 42 inches wide and 20 feet long. At these extreme dimensions, the architect certainly had to contend with seams.

Natural stone can be the most limiting material choice for long countertops, with the selection of slabs trailing off quickly when you reach 8 feet or longer. Manufactured surfaces (Corian, Richlite, Caesarstone etc.) can be had up to 10 feet in length and close to 5 feet in width. If it’s wood or stainless steel you’re after, your options are greater.

Seams aren’t as bad as you might think, though, as long you plan for them. This counter is 15 feet long and 4 feet wide, with a mitered edge giving it the appearance of a 4-inch-thick slab. See if you can identify the seams (there are two). 

Natural stone slabs can be book matched so the natural veining meets up at the seam, or a more even-toned slab can be selected to minimize the appearance of the seaming. It’s also possible to simply acknowledge that a seam exists, which highlights that it’s a natural material limited by industrial extraction and handling limitations. 

Manufactured counter surfaces can be welded together and are typically more uniformly colored, allowing seams to virtually disappear.

Which Is for You — Kitchen Table or Island?

Article By: Tiffany Carboni

The eat-at kitchen island has become as de rigueur as energy-efficient appliances. It has revolutionized the kitchen experience, joining chef and diners in one space. We couldn’t possibly live without the island. Or could we? 

While the kitchen island isn’t going away anytime soon, there’s been renewed interest in bringing back the humble kitchen table. If you’re considering one yourself, the team at HartmanBaldwin Design/Build and others have some great tips for making it work.  

While most of HartmanBaldwin’s clients still prefer to have a kitchen island if they have room for it, some families are bucking the trend. These homeowners “are artists and wanted a long dining table within the kitchen where they could enjoy large dinner parties as well as a space to work on their art projects,” says Karla Rodriguez, HartmanBaldwin’s marketing director.

Kitchen tables double as prep space. Islands obviously provide great prep space, as they often include a sink, dishwasher and trash disposal. But if you can find room for those features along the perimeter of your kitchen, you might be able to eschew the island for a central dining table that can double as a superb workstation. “For this kitchen we knew the clients would have enough workspace, thanks to the size of the table and its proximity to the cooking triangle, which gives them all the benefits of an island without an actual island,” says Rodriguez. 

“With today’s modern family, we find that more and more homeowners are requesting that their new kitchen design incorporate a workstation for everyone,” says Tim Campos,HartmanBaldwin’s marketing coordinator. “The simple reason: The kitchen has now become the general hub for the family, and clients want a space that also accommodates everyday tasks such as homework, crafts etc.”

While eat-at islands surely offer a suitable platform, some folks prefer the warm homeyness of a central table. 

Completing the look. This 11- by 22-foot kitchen in Los Angeles needed an air of formality for dinner parties, so the HartmanBaldwin design team gave it a refined elegance — including room for art — while addressing the family’s comfort. A colorful concrete floor balances the art-filled walls. “Since our clients walk around barefoot in their home, smooth concrete was the ideal choice for looks while being cool on the feet,” Rodriguez says. “We added the rug to soften the space and warm the feet when they’re sitting at the table.” 

Will you have enough storage? “Most people request an island to replace a kitchen table because they need the additional storage that an island offers,” Campos notes. If you want a table instead of an island, “make sure the rest of the kitchen cabinetry has ample space for supplies and tools,” he advises.

This kitchen is centered on a custom table by Terra Amico made of salvaged wood. The table is matched with six black chairs from Pottery Barn. A furniture-like black cupboard holds glasses and tableware, freeing up space in the perimeter cabinets for items that might otherwise have been stored in an island.  

The absence of an island allows the kitchen’s length to be appreciated from every angle while letting the entertaining area take center stage. 

A sole dining table is a great way to incorporate a workspace that seamlessly switches over to a dining space, but it’s also a place where people face one another — instead of the cook — for a type of gathering most islands don’t provide. 

Here an antique table set with antique chairs breathes an old-fashion feel into this otherwise white kitchen by Sage Kitchens. A small rolling island in the background can act as an additional workstation when needed. 

How big should your kitchen table be? This is an important detail to work out. “Avoid any piece that will overpower the space,” advises Rodriguez. “The keyword to a design of this nature is ‘balance.’”

Many dining tables extend to accommodate larger groups — that’s something most fixed islands can’t do. 


What’s the right shape? Round tables with pedestal bases allow a comfortable exchange between diners. Their shape allows many people to squeeze in close without anyone having to straddle a corner spot. However, in a wide galley-style kitchen such as this one, a rectangular or oval table can fit more people without anyone’s getting awkwardly close to the cabinetry. 

This countertop-height table is 3 feet wide and 7½ feet long, providing seating for six people to connect comfortably with one another in the heart of the kitchen. When the table’s not in use as a dining area, the chairs can be pulled away to create easy access to the spacious workstation.

Tip: When you’re adding a table to your kitchen, extendable or not, carefully consider how cabinets and appliances with doors — namely, refrigerators and dishwashers, will interact with the dining table and chairs when the doors are fully open. A table’s dimensions (including its extensions and chairs when occupied by guests) should never compete for space with open appliances or cabinets.

Lighting the kitchen table. “Lighting is something to pay close attention to when working on a tablecentric design,” says Campos. Just like lighting over an island, a central table’s lighting design needs to provide good task lighting as well as warm ambience to set the right mood for entertaining.


6 Ways to Rethink the Kitchen Island

The hardworking kitchen island can be a very functional and beautiful centerpiece of a kitchen design, and it’s one of the most popular features of a modern kitchen. But it’s not the only way to go. In some spaces an island can feel more cumbersome than useful. If you are feeling the urge to break away from the island-centric kitchen, check out our bevy of inspiring ideas below. 

Save space with an island and table in one. The innovative kitchen in this Sydney home features an island counter on one side, with built-in seating and a marble-topped, extendable table on the other end. Combining a table with an island is a great space saver, and an extendable table can seat a crowd without taking up too much space on a daily basis. 

Another great island-table hybrid, this set works extra hard — the stools are comfy enough to sit on through dinner, yet they can be tucked completely under the table to free up kitchen workspace during prep time.


Encourage cozy suppers with a kitchen table. With an ample-size rustic wood table in the center of your kitchen, family and friends are sure to gather around it night and day. It’s so much warmer and friendlier than a big, blocky kitchen island, and it’s perfect for spreading school projects out on as well. 

Streamline your kitchen with a modern dining set. If you have counter space covered and appliances tucked against the walls, as in the L-shaped kitchen shown here, why bulk up your kitchen with an island at all? A marble-topped Saarinen dining table and Eames chairs (as shown here) are a highly covetable pairing among modern design enthusiasts and enhance the light, airy feel of a white kitchen. 

Get the best of both worlds with a working-height table. When you need more kitchen prep space but don’t want a giant island with to-the-floor storage, a tall table is a good solution. You can still comfortably do prep work, but this type of table takes up far less visual space than a built-in island. 

Taller kitchen tables are also great for narrow spaces. A slender table like the one shown here doesn’t take up too much space but allows ample room to work. If you wanted to sneak in a bit of extra storage, you could track down a table with drawers or an open shelf, or have a knife rack built into the side. 

Enhance flow in an open-plan space with a kitchen table. When your living, dining and cooking spaces are visually linked, a gigantic kitchen island in the middle of everything can look out of place. Choosing a table instead, whether counter height or dining height, will give your entire space a more relaxed, comfortable feel. 

An old wooden table with a rich patina warms up any kitchen but works especially well when the kitchen opens to a wider living space. Add a soft rug underfoot to boost the comfort factor even more. 

Cozy up a contemporary island with plush seats. You can also work with an existing island by choosing ultraplush upholstered tall benches, instead of the typical bar stools. These are extra wide and have a shape that makes them look more like mini settees than stools, and they look supremely comfortable.