FREE DESIGNS AND ESTIMATES

New Kitchen: 7 Questions You Didn’t Know You’d Ask

Some of the questions you ask when planning a new kitchen are obvious, such as, “Do I want white cabinets or wood?” and “Do I want stainless steel appliances?”

But there are many design decisions that you might not even know to consider until the project is well underway. To help you avoid surprises and unfortunate mistakes, here are seven questions you should ask yourself before you begin your kitchen design.

Read more

10 Storage Solutions for Kitchens With Character

Article by: Joanna Simmons

Kitchens are all about storage, but it can become rather predictable: Think rows of built-in cupboards and wall cabinets, with an emphasis on practicality over personality. So how can your cooking space ingeniously accommodate everything you need while also looking original and exciting? These 10 great solutions offer some fresh ideas — not to mention storage eye-candy!


Cabinet Storage Solutions 1

Go full-size. Pantries are huge news in kitchen storage and for good reason. While a conventional base unit requires you to get down on your knees with a flashlight to find that last can of beans, anything stored in a tall pantry like this one is easily visible and accessible. 

Typically fitted with drawers, racks, baskets and even lighting — and performing valiantly even when ultra-slender — these modern beauties offer plenty to love.


Cabinet Storage Solutions 2

Create an island library. Passionate home chefs accumulate lots of cookbooks over the years, but not always the space to store them. Volumes kept near the stove can become scruffy and grease-spattered and perhaps don’t merit being displayed prominently. 

How about this, though: neat shelves on the end of an island? The books are visible — and add color — without being central to the design of the kitchen, and they’re easy to grab when you’re searching for a recipe.


Cabinet Storage Solutions 3

Scale up. A pantry that’s also a breakfast station is sure to set any storage fanatic’s pulse racing. This is perhaps the ultimate piece of kitchen furniture, one most of us can only dream about. 

It combines oodles of storage with a dedicated space where you can prepare your coffee and toast. You can then stand and gaze at your neatly arranged shelves while you eat. Life doesn’t get much better than that, does it?

Repurpose a hanger. Dish towels go on a cupboard or oven door handle, right? Wrong. You can hang them on a hanger that is hanging on the wall! Original, quirky, inexpensive storage.


Cabinet Storage Solutions 5

Carve out space for the unwieldy. Chopping boards and trays are sizable, often heavy pieces that benefit from a dedicated home like this compartment incorporated into a run of cabinets. It’s such a simple little storage detail, but so invaluable.


Cabinet Storage Solutions 6

Ditch convention. This pale and unpretentious kitchen may not be to a neat freak’s taste, but there’s something to be admired in its anything-goes approach to storage. 

Superficially cluttered though it may appear, I suspect its owner knows exactly where everything is and that all the essentials are within a quick grab from the stove.

Opt for a lovely long shelf. There’s a growing trend for long shelves that simply break up a run of units rather than provide workaday storage. They can become home to beautiful objects or the odd cookbook or plant, helping to personalize a built-in design and lighten its look.


StorageSolution8.JPG

Hang it high. Making use of vertical space is a smart move in a kitchen, where storage often has to be worked into a small footprint. This space features a metal rack that was probably never intended for a kitchen but works beautifully holding pans and utensils. 

It’s attached high on the wall to reduce the risk of banging a head against a frying pan!

Resist the sleek. Kitchen design often tends toward the sleek and efficient, but it can also rock a more edgy, homemade look while still packing in tons of practical storage. So think laterally and use old piping and boards to make some shelving — you’ll get storage and original style at the same time.

Add a twist to the typical.Kitchen storage needs to be well-designed and abundant enough to hold everything from mugs to marmalade. But really great kitchen storage does it while adding a twist of unique style. 

These glass-fronted cupboards are fairly basic, but the tiling on the interior adds detail and interest and contributes to the kitchen’s industrial feel.

10 Things to Consider Before Remodeling Your Bathroom

Article by:  Gillian Lazanik, Houzz

Whether you have a simple powder room or a master en suite, functionality should be at the heart of your bathroom remodel. Read on to learn tricks for gaining storage, improving lighting and drainage, and more to ensure that your renovated bathroom stands the test of time.

Read more

How to Work With Cabinet Designers and Cabinetmakers

Article by: Matt Clawson

When selecting cabinets for your home, there are questions to ask your cabinet designer and questions to ask yourself. Today we take you through that process, helping you define and communicate your vision while sharing tips on working with design professionals.

In the first two installments of this series, we reviewed cabinet basics. We determined the purpose of your cabinet project and its scope, and provided an overview of your cabinet options. You should at least have a cursory grasp of these concepts before you proceed to the next step: choosing your cabinet designer and beginning work.

Once you have a basic understanding of the cabinet possibilities, you’re ready to firm up your cabinet vision. If stock, ready-to-install cabinets work for you, you may not need a cabinet designer, and you will probably save considerable time and money. But for most projects, and certainly all custom and semicustom cabinet installations, the cabinet design and construction processes should be thoroughly planned and examined.


Finding Inspiration

This goes beyond the scope of your project, and cuts more to the picture in your mind of how the installed cabinets should look and operate. You do not need to have all the answers, but you should at least conceptualize what your finished picture might look like. Be prepared for this vision to morph a bit as you get into the design phase, but take the time to form a picture in your mind. 

Is style important to you? If so, find inspiration among the plenitude of cabinet ideas available on Houzz, or you can emulate something you saw at a friend’s home, on television or in a magazine. The point is, find a specific example that shows a cabinet style that attracts you.

Also, it’s important to decide the primary function. Is it display, storage or improved day-to-day efficiency and livability? 

And if you have to prioritize one over the other, is your primary concern style, or is it simply maximizing cabinet function? You should weigh your priorities, though the hope is, with a good designer and proper preparation, you won’t have to totally settle on one element over the other.

Defining the Details

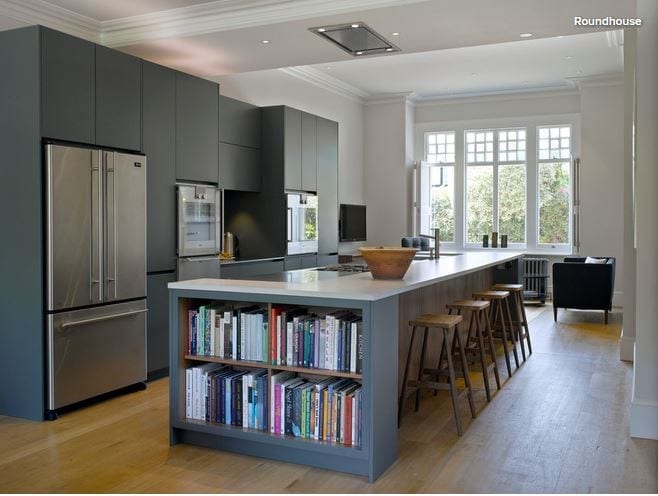
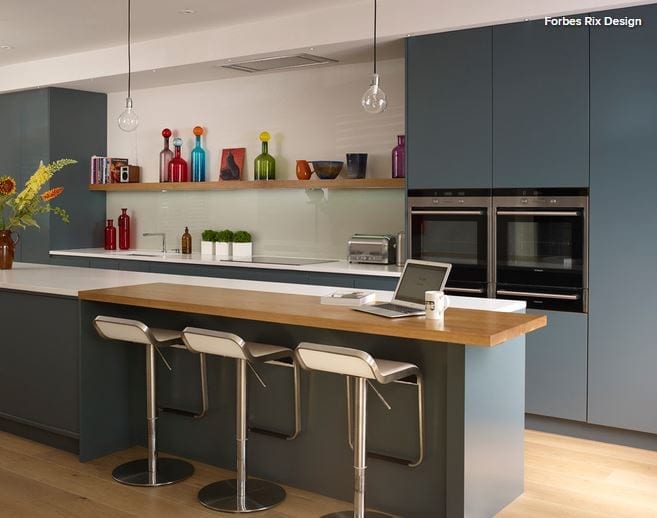
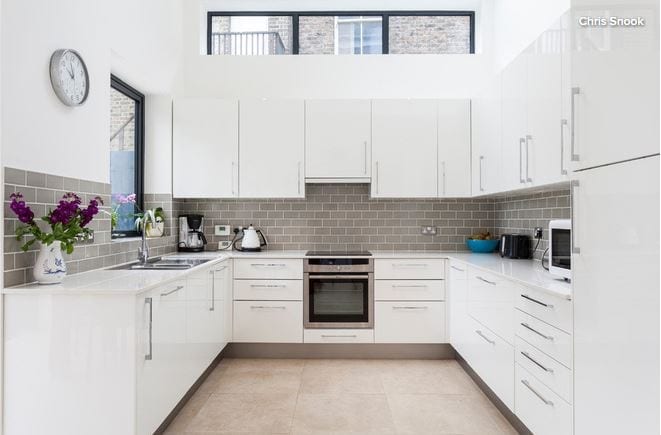
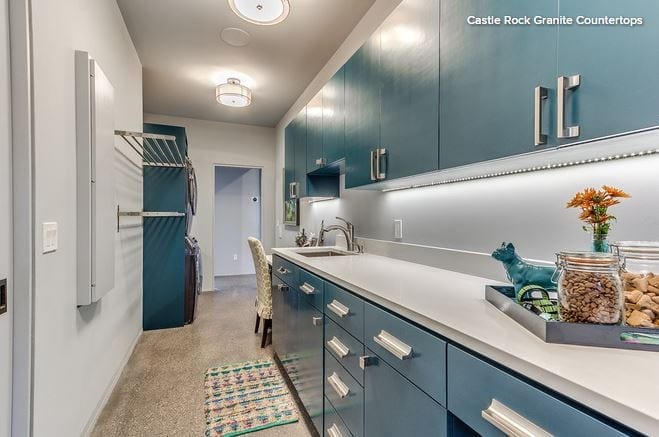
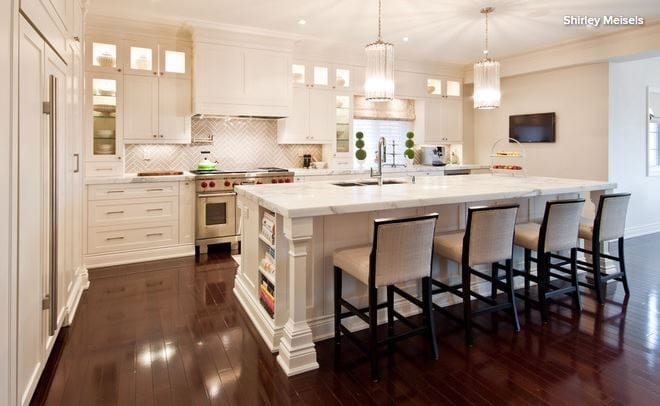
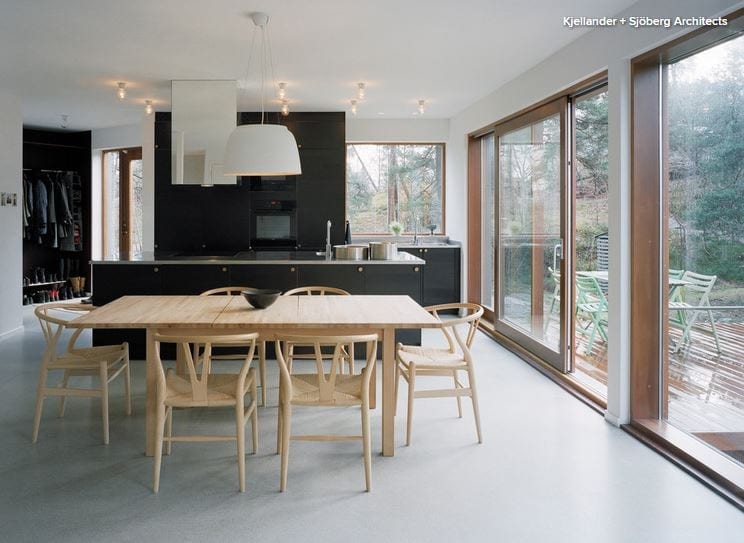
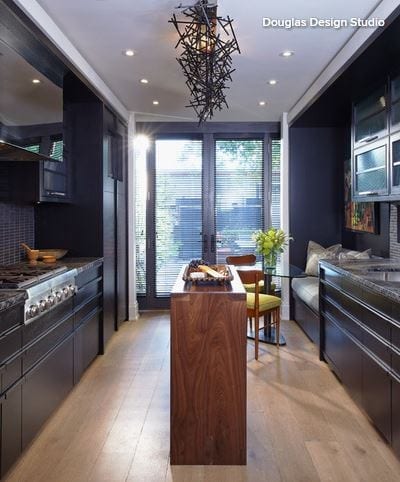
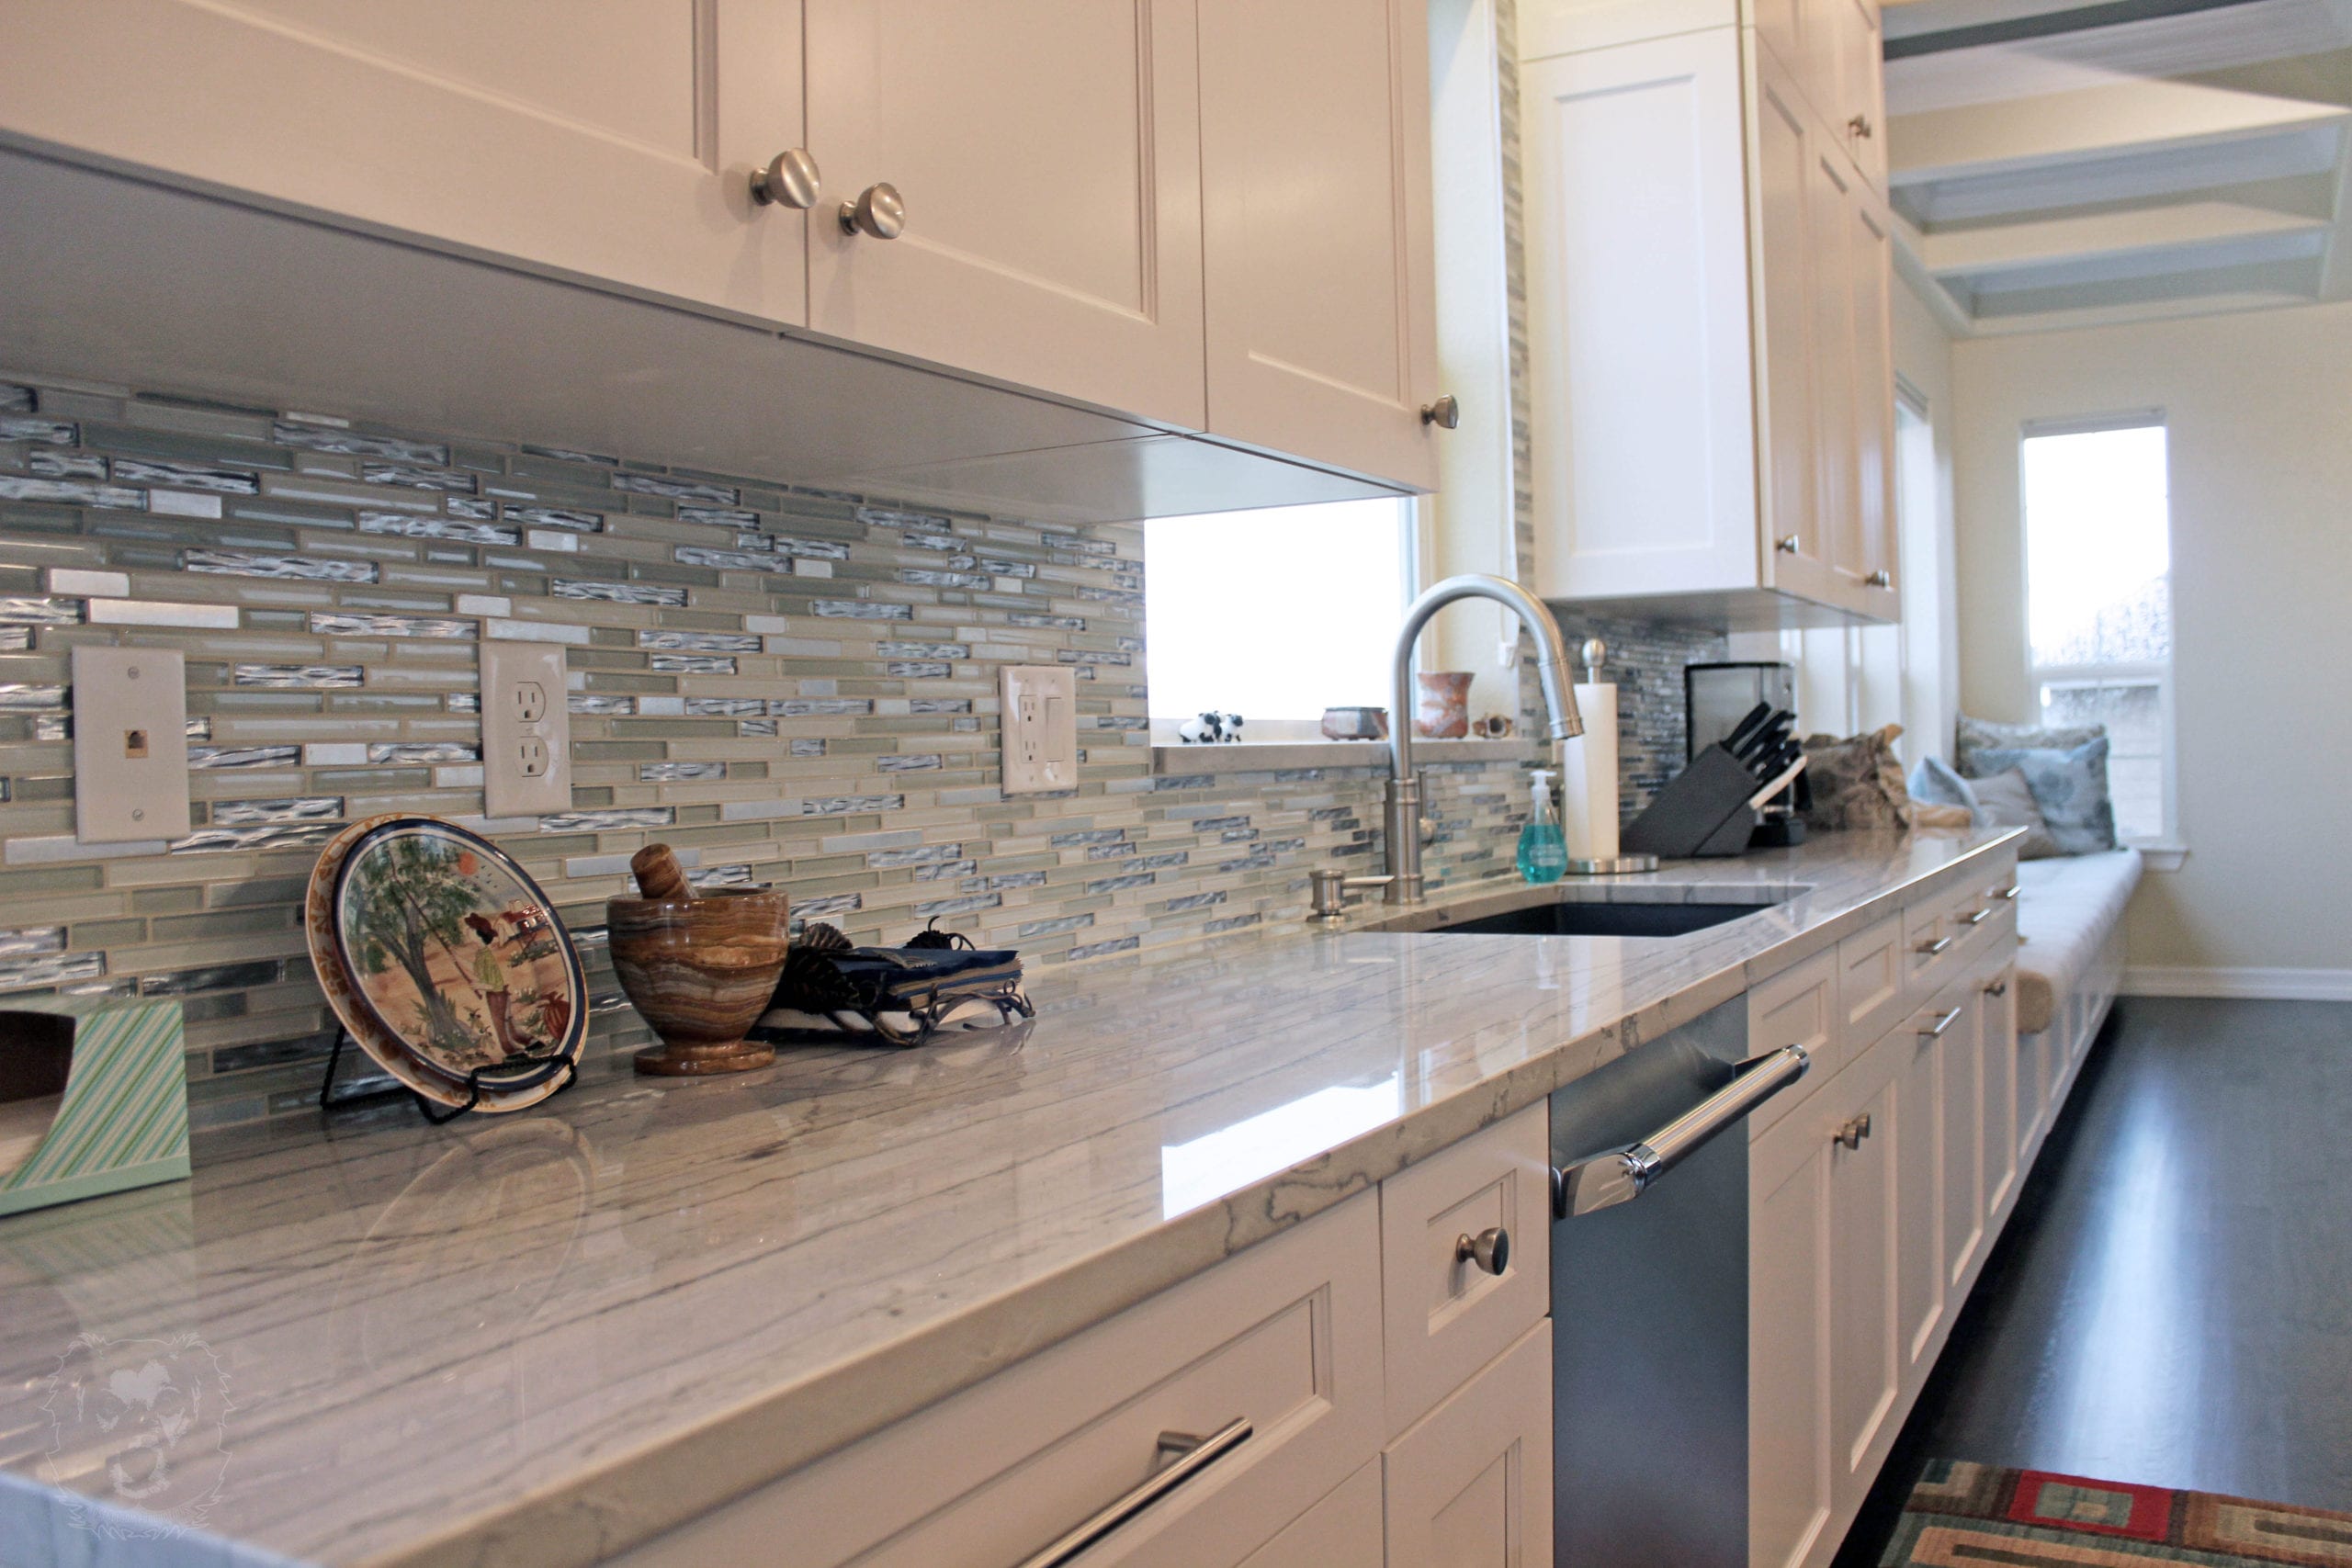
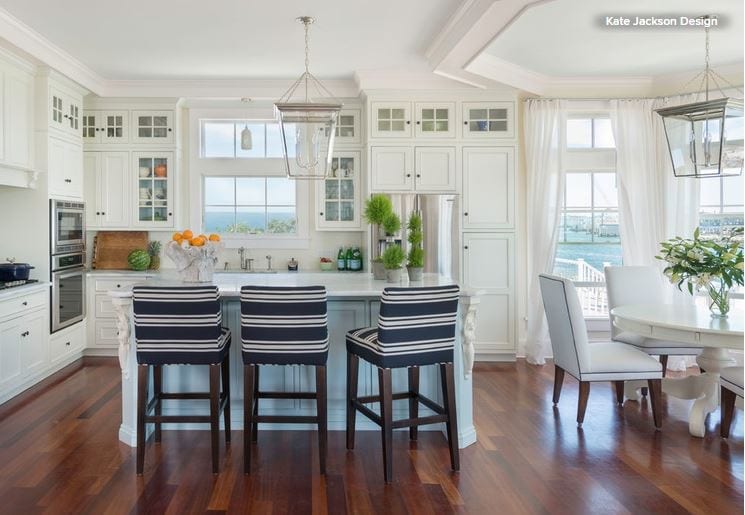
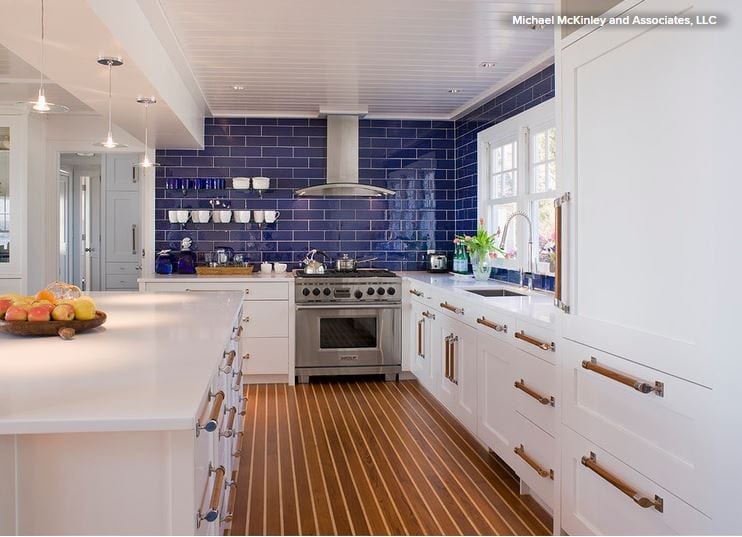
Now let’s take a look at that picture of your project. For the sake of our little exercise, say the photo above is the one you picked. The first question to answer is, why did you pick this one? 

Make sure what you love about this room is in fact the cabinets themselves. These are some of the simplest cabinets you will ever see. There is no display space and there are no visible frills, like crown molding or paneled ends. The cabinets possess a nice high gloss and a stark white finish, and are Euro style (with no visible face frame). They have flat-panel doors and drawer panels, and oversized chrome hardware pulls. They are modern and spartan. 

Do you like all of that? Perhaps what really attracted you to this space was its utilitarian, U-shaped layout, with a full backsplash of uniform beige subway tiles. Maybe you admire the lofty ceiling with a high-set, horizontal window. These parts of the picture relate, of course, only if you too can achieve those elements in your space. Try to look closely just at the cabinets themselves and determine why you like them and what, if any, element you might want to change.

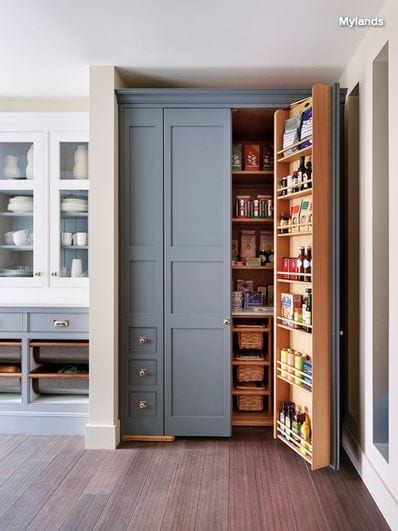
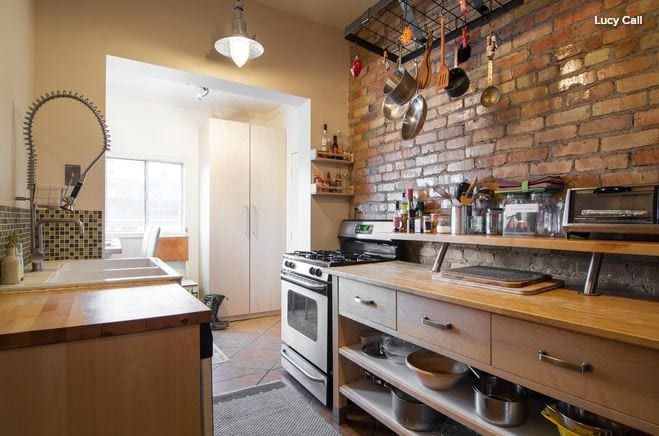
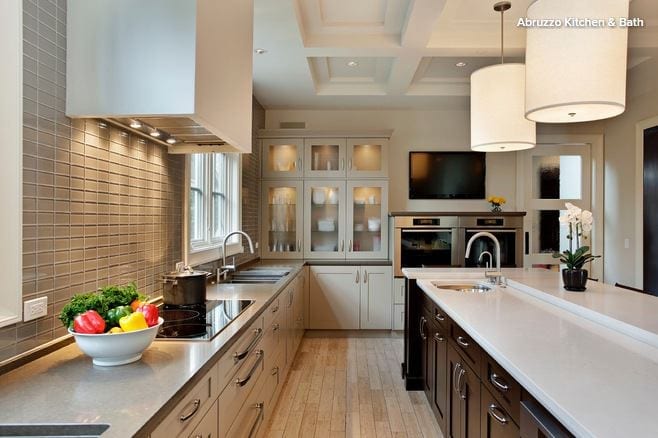
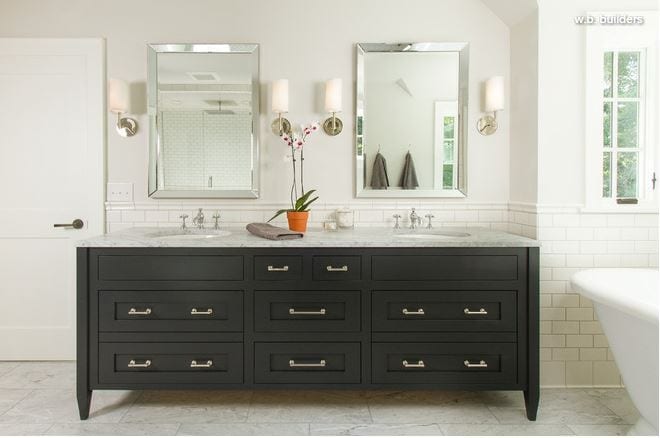
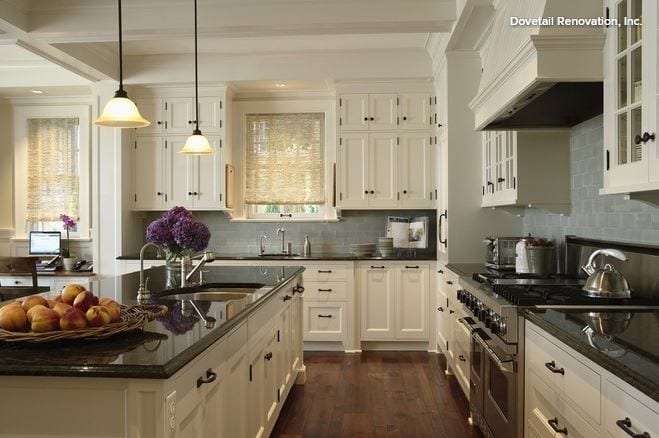
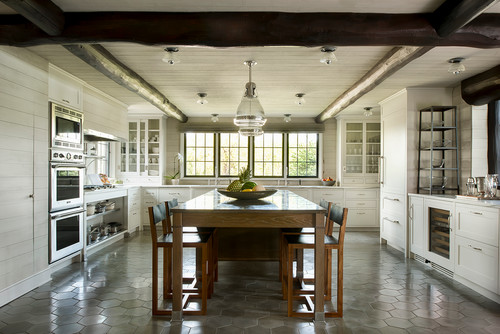
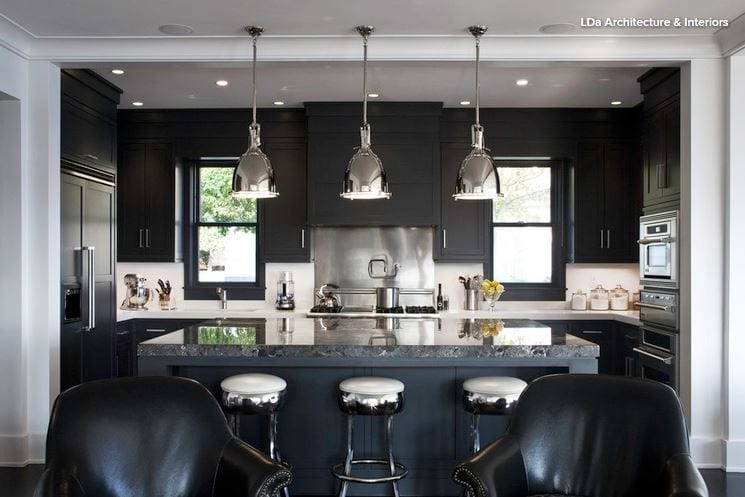
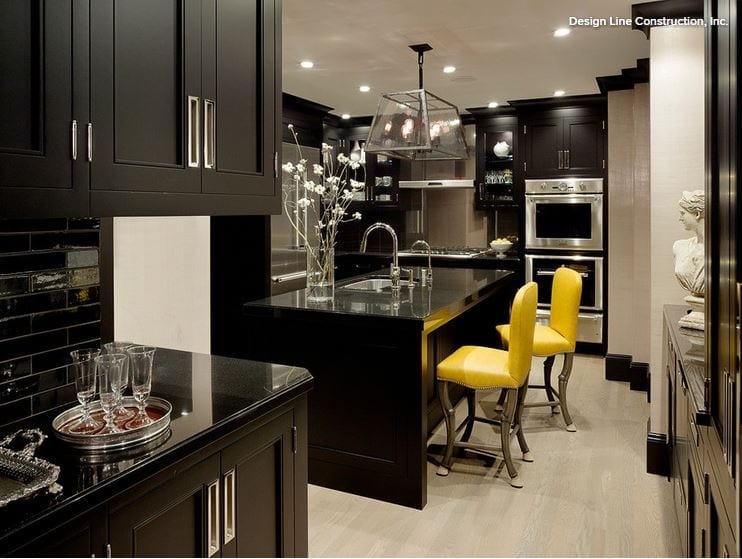
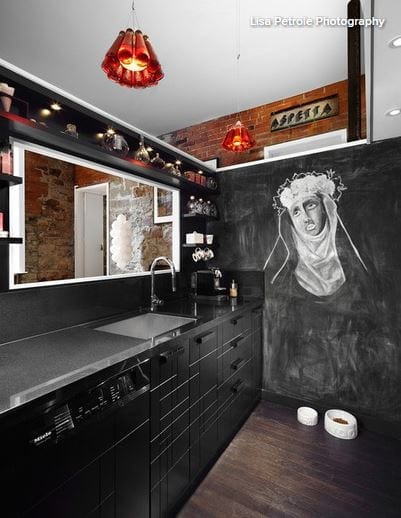
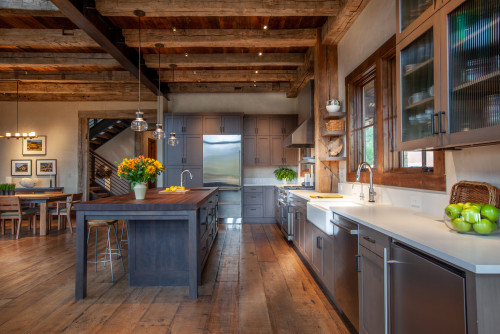
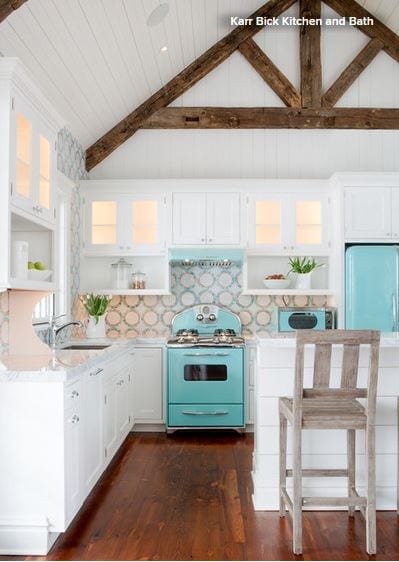
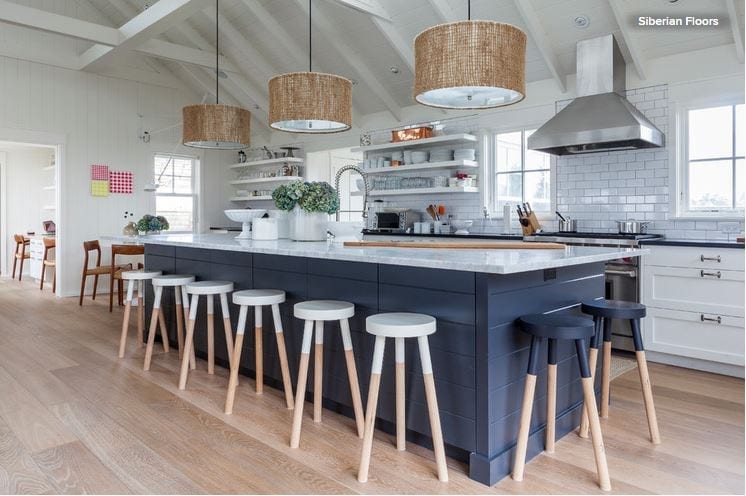
We can also closely examine the more traditional kitchen cabinets seen here, providing another possible example of your vision.

These cabinets are certainly custom-built, constructed with inset construction and using some well-thought-out design techniques to make the space unique. For instance, the drawer banks have two types of drawers. Note the look of the two upper drawers in each base-drawer section — they are not paneled, while the lower drawer beneath them is paneled. This technique produces a freshly elegant effect.

There are also barn-style doors on the island, upper display cabinets flanking the sink and fully paneled cabinet ends. The paneled range hood mirrors the beadboard ceiling and backsplash treatment, and the green painted cabinet finish nicely contrasts the gray-white granite top.

If this look is the one that strikes your fancy, be sure to really investigate each of these features, and try to specifically determine why the cabinets themselves suit you. Do you like the way the corbel details below the upper cabinets precisely relate to the backsplash transition between slab and wood paneling? Do you like the dark floors and the white paneled ceiling? Do you appreciate the brass hardware and fixtures, which might be a resurgent finish choice? Every specific feature of the design that is your inspiration must be examined carefully, so you can properly communicate to your designer exactly what you like about just the cabinets themselves.

Picking Your Cabinet Designer

When it comes to designing cabinets, the usual suspects are architects, designers, builders, specialty cabinet designers and cabinetmakers. Any of these folks might be the right person to design your cabinets, but how do you know which one to choose?

Job title is not really the critical criteria here — expertise is. You need to find out from the person you are considering how many projects he or she has designed. You need to see examples of his or her work. You need to determine if those examples closely match the vision you have for your own project. You need to interview past clients about their satisfaction with both the working experience and the final product. 

You should ask all potential designers to explain the process of working with them. Be sure they expect plenty of communication, and expect to give you the opportunity to review plans and make changes or comments.

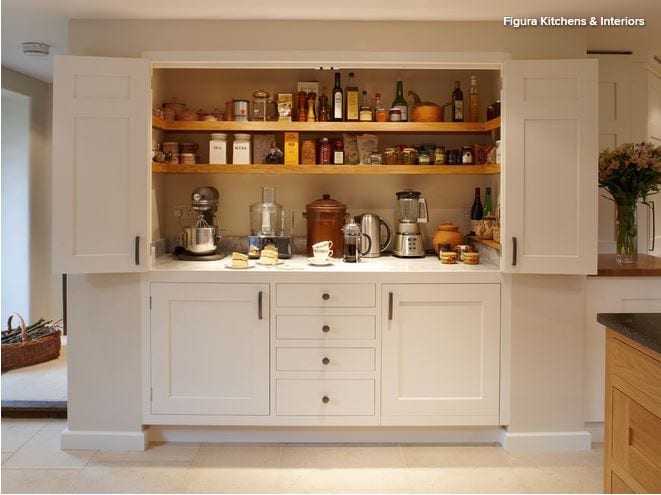
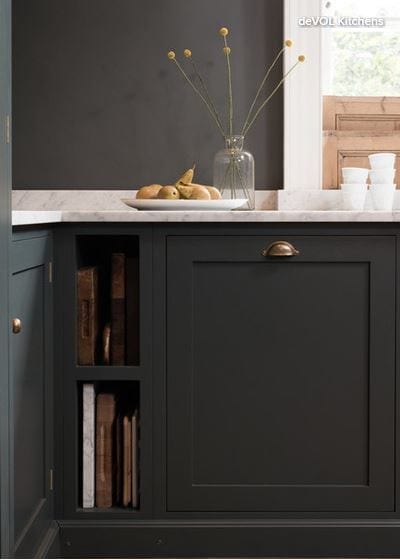
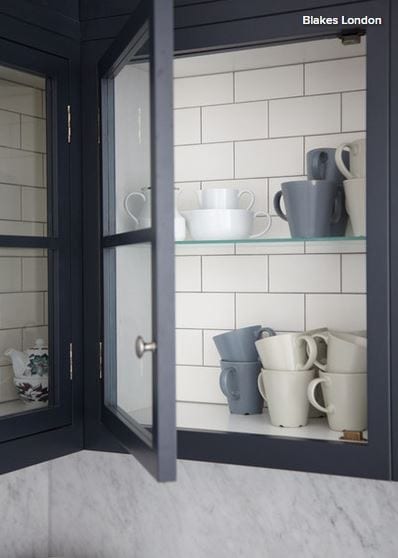
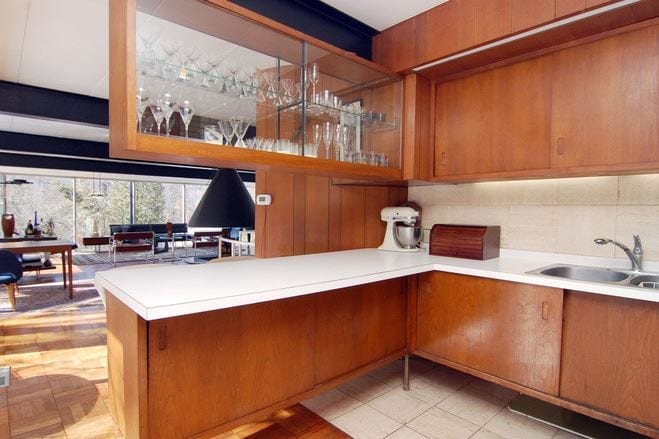
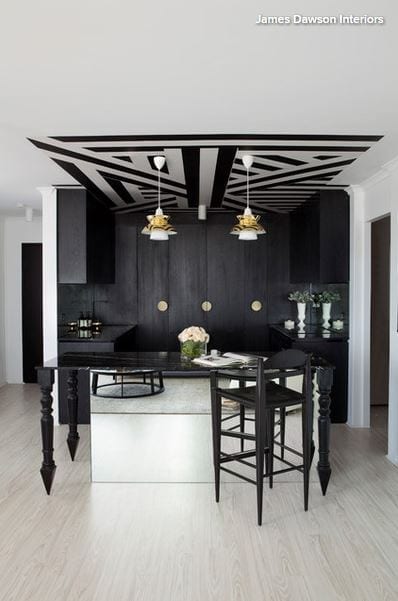
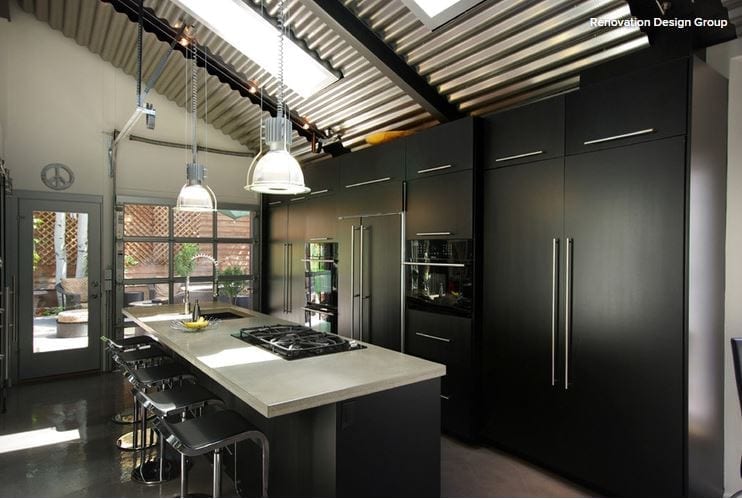
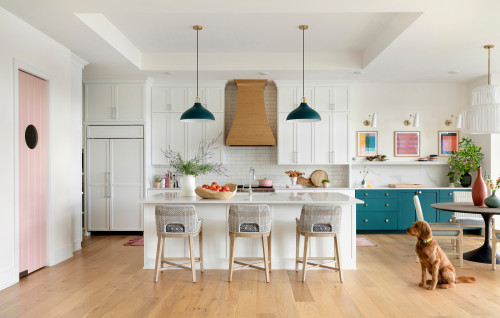
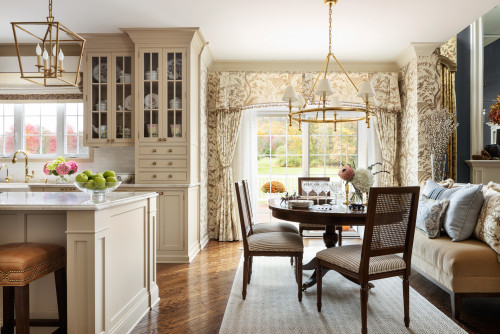
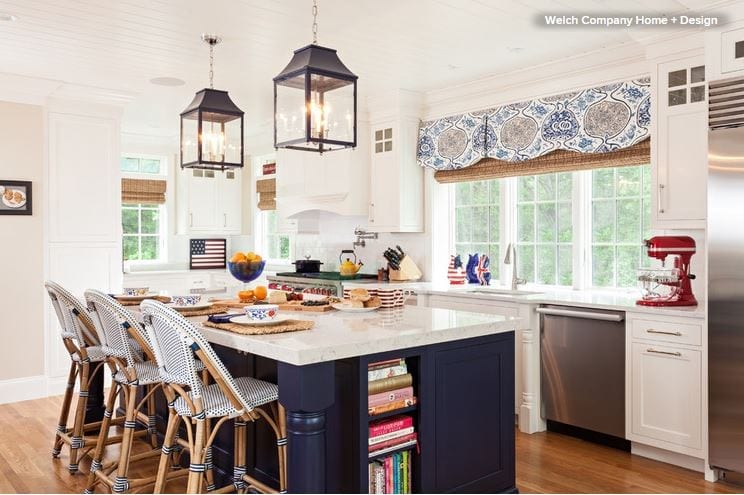
When you’re reviewing past work, unique design ideas can show that a designer is willing to give your project the time it deserves. In the photo shown here, the display cabinetry with wine storage above is a nice example of a small cabinet that maximizes its potential. 

When you share your vision with a prospective designer, how receptive does he or she seem? Do you feel like the designer strikes the right balance between giving advice and listening to your ideas?

Listen. Once you have selected your designer and shared your vision, it is time to listen hard to his or her ideas. All of that experience is worth something, and it’s possible that some of your ideas are flawed in some manner. That’s where a designer can help.

Ask for your designer’s advice, given what he or she knows about your vision and your needs. A good designer will have a method, and you need to be willing to let him or her take the lead, and to listen to this pro on the path to creation. Given your basic understanding of cabinets after reading this series, you will have a head start understanding the decision-making process, and in conceptualizing all the options your designer is sure to present.

Take Your Time Reviewing the Design

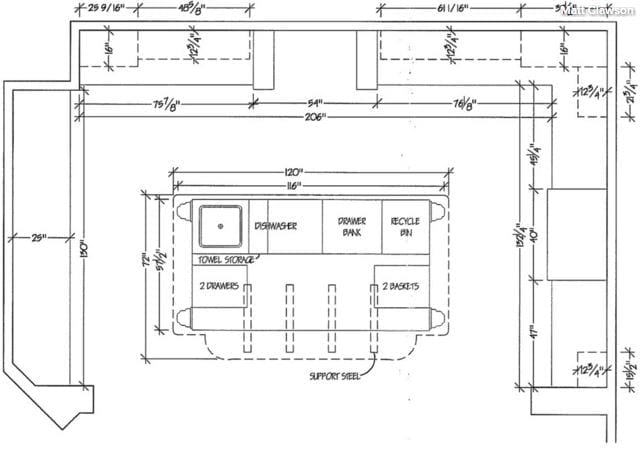
A common mistake customers make is not taking the necessary time to thoroughly review the design before signing an approval. In most cases, your cabinet designer will take a week or more to complete the first design draft after meeting with you. Once you’ve received a set of drawings for sign-off, you should spend time studying each cabinet section. At the very least, the design will include a floor plan (layout), as shown here, and elevations (the cabinet view from straight on). Some designers will also provide a 3-D rendering, which can help you visualize the way the cabinets relate to your space.

If possible, you should walk the room with a tape measure and try to visualize each section. You should make sure nothing is left off that you might have discussed, and you should try to get a feel for how the cabinets will affect your space functionally and aesthetically. Don’t just assume your designer got it right. Your satisfaction matters most, and it is you who must take the time to confirm that the design really is all you want it to be.

Communicate Concerns

You may come up with some concerns, and some of those concerns are likely to be well-founded while others are not. If your designer deviated from some of your expectations, find out why. There may be good reason, or it may be an oversight. Take the time to explain anything that seems amiss to you, and give your designer a chance to explain his or her thoughts before you get worked up.

After the first draft, there are supposed to be changes. A good designer will expect this and be prepared to offer insight while listening to your thoughts.

If, heaven forbid, you find yourself working with a designer who resists changes or does not seem to really hear you, then you may need to get another party involved in the discussion. Sometimes it can be a good idea to involve the builder or architect more actively to smooth out the process.

Compromise

I don’t mean this as a bad thing, but almost all designs are a compromise among competing elements, such as cost, a spouse with different opinions than yours (who knew?) or the style-versus-function dilemma. There almost certainly needs to be some sort of compromise in your plan, and if you have a clear understanding of your priorities, you can properly weigh the few hard choices that are sure to arise.

Get 2 Recommendations and 2 Bids From Cabinetmakers

When working with a cabinetmaker, my advice is to trust your designer and builder. Good builders and designers, who have completed hundreds of jobs for satisfied clients, want to satisfy you too. They know good cabinetmakers, and they have probably developed a good working rapport with more than one. I recommend getting two recommendations, and then two bids for the cabinet construction once the designs are completed.

Your job is to pick the bid that’s best for you. Consider price as well as the advice of your designer and builder. Ultimately it’s a gut decision, but as long as both bids come from reputable cabinetmakers your builder knows and trusts, you have done all you can to ensure a quality finished project.

Patience

Custom cabinets can take two months or more to construct, plus a week or more to install. Once you have made all your design and finish choices, you will have to wait. The installation process can be an exciting time, when you actually see the tangible shapes you painstakingly pored over fill your room. 

Don’t panic during this period. It seems like a long time, and worries can fester, but if you took the time to study this and the other cabinet stories in this series, and found an experienced designer and cabinetmaker to work with, you have done all you can.

3 Kitchens With Hardworking Storage Walls

Article by: Mitchell Parker

Storage is on everyone’s mind when creating a kitchen. But when smartly planned, storage can do a lot more than store your dishes, cookware and food. A multipurpose storage wall can free up room for an airier design that allows for a large island with plenty of work and eating space. These three kitchens show how it’s done.

Read more

New This Week: 2 Ways to Rethink Kitchen Seating

Article by: Mitchell Parker, Houzz

Kitchen seating seems simple enough. Scoot in a few bar stools around an island or a peninsula and you’re done. But when you’re trying to create something flexible for small and large gatherings, accommodate a view or make the most of a compact layout, it’s time for something a little more outside the box. Here, two designers explain how they rethought mealtime in the kitchen.

Read more

10 Smashing Black Kitchens

Article by: Becky Harris

White kitchens have reigned for several years now, but black kitchens are gaining ground. They can add a sleek touch, put the focus on a view and contrast materials like nobody’s business. Whether it’s used in an industrial space in Brooklyn, a fashionable apartment in Australia, a villa surrounded by forest in Sweden or a library-turned-home in Oregon, there are good arguments for going dark in the kitchen in all kinds of homes.

1. In this Oregon library-turned-home, the interior designers at Jessica Helgerson Interior Design let the kitchen recede into the background and put the focus on the fantastic windows, which were painstakingly replicated from the originals. Black was used on the trim and built-ins throughout the open plan. Between the open shelves full of cookbooks and the rolling ladder, one can see the library spirit is still alive and well in the home. 

2. In this flawlessly chic Miami, Queensland, Australia, apartment, interior designer James Dawson had the freedom to go graphic. When facing in the opposite direction from the view here, you have a full view of a marina. When facing the kitchen, the eye goes up to an op-art “wallpaper” treatment on the ceiling. (Dawson drew the pattern, then had the wallpaper crew cut and apply the shapes.) 

Sleek black wood-veneer cabinets and black marble countertops keep a streamlined look, while mirrored backsplashes on either side bounce the light around. Using the black created a strong contrast that doesn’t compete with the view. 

3. This black kitchen also opens to much lighter rooms with coastal views, so it recedes into the background in a sleek, sophisticated way. The designers at LDa Architecture & Interiors were inspired by the rocky Massachusetts coastline right outside the home when choosing the countertop. This large slab creates a stunning middle ground between the black and white. 

4. This villa perched in the forest outside of Stockholm, Sweden, emphasizes different views, that of trees and moss. (In fact, it is named Villa Vy, and vy is Swedish for view.) Suitably, the designers at Kjellander + Sjöberg Architects put the focus beyond the glass on the trees and the moss by creating a black kitchen. The color also helps the space look less like a kitchen within the open plan.

5. The Aussies certainly have the black kitchen thing down. Auhaus Architecture chose a matte black finish for the laminate cabinets here. The finish is just the right complement for all of the natural wood, which includes spotted gum flooring in a Bona Natural finish and an island top of grey box (a highly durable hardwood). Both the woods and the black laminate take a backseat to the stunning graphic Moroccan tile cement tile backsplash.

6. Jeffrey Douglas of Douglas Design Studio recommends making sure that a kitchen has good light showing through from different angles before going black. This kitchen gets plenty from the large windows and doors and another window in the backsplash (not shown). This is also a story of wood — the cabinets are Canadian red oak with a charcoal stain. Engineered white oak flooring, a light ceiling and a rich wood island add warmth. 

7. Interior designer Candace Cavanaugh specified black-brown when coming up with a custom color for these cabinets. The hue adds an unexpected warmth to the dark room. She then custom designed taxicab-yellow counter stools to add a playful dash of color. The overall look is glamorous and unexpected.

8. Renovation Design Group gave this bungalow the contemporary loft-like feel that the owner preferred. The black cabinets fit right in with the industrial-style corrugated ceiling, glass garage door, concrete countertops and stainless steel accents.

9. This industrial kitchen in Brooklyn, New York, used to be an industrial woodshop. Appropriately, the island is a well-worn vintage workbench. Dark cabinetry and appliances put the focus on items that homeowner Alina Preciado has collected on her worldwide travels, including spices and unique teapots. 

10. In this creative Toronto loft, the galley kitchen’s appliances and cabinets have a sleek, streamlined look, putting the focus on the exposed brick and unusual light fixtures. And, of course, on the chalkboard wall, which invites clever artwork (in fact, this made our chalkboard art hall of fame). Note the way the lighting helps highlight the objects along the top shelf. 

CREATING ECO SUSTAINABILITY IN COUNTERTOP FABRICATION

Granite Countertop in Denver Kitchen

When it comes to construction of any kind, environmental concerns are more important than ever. This is why The Top Shop Inc (AC&F) partnering with VT Industries, is committed to providing sustainable products and using environmentally friendly manufacturing methods.

Our production facility located in Denver, Colorado works hard to keep emissions and waste to a minimum, conserve natural resources, and protect local ecosystems. This strategically located facility, allows The Top Shop Inc. (AC&F) to provide the shortest lead times available but more importantly, reduce harmful vehicle emissions that contribute to air pollution and ozone depletion.

Every post form countertop we offer is GREENGUARD Indoor Air Quality Certified®. The Top Shop Inc. (AC&F) partnering with VT Industries, is the first and only laminate countertop product to receive this low-emitting certification, ensuring our product will contribute to healthy indoor air and building occupant wellness.

With EQcountertops, The Top Shop Inc. (AC&F) takes the sustainability of our countertops to the next level. Manufactured using 100% pre-consumer recycled particleboard, water-based adhesives and GREENGUARD Certified laminate, EQcountertops meet multiple green building standards, including Leadership in Energy and Environmental Design (LEED®) and NAHB’s green building guidelines.

Best of all at The Top Shop Inc. (AC&F), we’re continually adapting our manufacturing techniques and providing innovative products to ensure environmental responsibility. All employees—from production to accounting—are involved and encouraged to find innovative ways to make our business efficient and effective.

How to Clean Your Hardwood Floors

Mopping Clean Hardwood Floor

Article by: Bonnie McCarthy [Houzz]

Although installing hardwood flooring is usually more expensive than rolling out new carpet, it’s an investment worth considering, according to data from the National Association of Realtors. Surveys show that 54 percent of home buyers are willing to pay more for a house with hardwood floors. The question now: What’s the best way to clean and care for that popular flooring and keep that natural beauty (and value) shining through? Here’s how.

It’s not the wood — oak, maple, mesquite, bamboo, engineered hardwood or something more exotic — that determines how the floors should be cleaned, but rather the finish.

Surface finishes, often referred to as urethanes or polyurethanes, are among the most popular treatments today and are usually applied to hardwood floors after installation to protect them and make them more durable and water resistant. These finishes create a protective barrier. There are four types of surface finishes, according to the American Hardwood Information Center: water based, oil based, acid cured and moisture cured.

Homes built before 1970, including historic residences, may have original wood floors that were sealed with varnish, wax or shellac. These require a different approach to cleaning. The American Hardwood Information Center says these types of finishes work by penetrating the wood to color the planks and form a protective shield. Using a wax coating after staining provides a barrier against wear and tear and gives the floor a beautiful low-gloss satin sheen. The classic look requires a little extra TLC, however, since water-based products and mopping can damage the finish.

How to Determine Your Wood Floor Finish

To figure out whether or not your wood floors are finished with a polyurethane, shellac, wax or varnish, or have a finish that has worn away and is no longer providing coverage, the American Hardwood Information Center suggests these tests:

  • Run your hand over the wood. If you can feel the texture of the grain, the floor has a “penetrating” finish (usually a combination of a natural oil, such as linseed or tung oil, mixed with additives for drying) topped with wax.
  • In an out-of-the-way spot, dab on a little paint remover. If the finish bubbles up, it is a surface finish, like polyurethane, which coats the floor in a protective layer.
  • In an out-of-the-way area, place a few drops of water. If the water beads up and does not soak into the wood, the finish on the floor is intact. If the water is absorbed into the floor or leaves a dark spot, the wood is unfinished or the protective layer has worn away.
  • If you sprinkle on a few drops of water and white spots form beneath the droplets after about 10 to 15 minutes, the floors are sealed with wax. To remove the white spots, use a piece of fine steel wool lightly dampened with wax and rub gently.
  • If you suspect a varnish or shellac, take a coin and scratch the surface of the floor in an inconspicuous corner. If the floor has been sealed with one of the older finishing methods, it will flake off.

Preventing Dirty Wood Floors

Not wearing shoes in the house is one of the best ways to significantly reduce dirt, scuffs and daily wear and tear, and lessen cleaning time.

The National Wood Floor Association, or NWFA, is more specific and warns against walking on wood floors with cleats, sports shoes and high heels. It also offers this cautionary example: A 125-pound woman walking in high heels has an impact of 2,000 pounds per square inch. Furthermore, an exposed heel nail can exert up to 8,000 pounds of force per square inch. 

Whether you got out your calculator or not, the possibility of impact and denting appears to be undeniable. However, while you can’t always ask guests to shed shoes at the door, it might be a policy worth considering for family members.

What Not to Do

No matter what type of wood flooring you have, the NWFA advises against using cleaning products meant for vinyl or tile flooring. Their take: Self-polishing acrylic waxes cause wood to become slippery and appear dull quickly. 

Another no-no: wet-mopping wood floors, since standing water can dull the finish, damage the wood and leave a discoloring residue. Along the same lines, avoid overwaxing unfinished wood floors in an attempt to restore luster. If a waxed floor has become dull, try buffing the surface instead.

Photo by User – Browse kitchen photos

Regular Wood Floor Cleaning

Cleaning floors with contemporary polyurethane wood finishes (for floors installed after 1970) starts with vacuuming, sweeping or dust-mopping the surface.

Vacuuming. Vacuum wood floors daily, or at least once a week with a vacuum fitted with an attachment for wood floors. For regular machines, the American Hardwood Information Center advises turning off interior rotating brushes or beater bars if possible.

Regular vacuuming helps remove dust and dirt particles that play a leading role in scratching and dulling the surface of the floor.

Sweeping. The American Hardwood Information Center says choosing a broom with “exploded tips,” also known as synthetic fiber ends, is step one.

Damp mopping. Damp mopping should be done with a simple solution of pH-neutral soap (like dishwashing soap) and water; or one capful of a mild cleanser such as Murphy Oil Soap in a bucket of water; or a solution using products specially formulated for wood floors, such as Eco Mist Colloid W, Dr. Bonner’s or Method.

In conscientious cleaning circles, controversy swirls around whether to use a mixture of vinegar and water for damp-mopping wood floors. Ultimately, everyone has to do what works best; however, within the past 10 years this method has lost favor, and popular belief now holds that the solution causes floors to dull more quickly and is not as effective as simple soap and water.

To begin mopping, dampen the mop in the prepared solution, wring it out completely, and mop in the direction of the wood grain. Repeat as necessary. As the water in the bucket becomes dirty, dump it out and refill. Many experts (including Martha Stewart) believe scrubbing wood floors with a damp cloth by hand is the ultimate cleaning strategy — unless abundant square footage or protesting knees prove problematic.

But avoid cloths or mops dripping with water. If your floors do get wet or worse, dry them immediately!

Another technique: After the floor has been swept or vacuumed, put your cleaning solution of choice in a spray bottle and mist the floor, then use a dry microfiber mop or cloth and mop in direction of the wood grain. 

It’s important to note that just because a floor is clean doesn’t necessarily mean it will be shiny. If the floor has lost its luster, it may be time to have it refinished professionally. Whatever you do, don’t wax a polyurethaned finish.

Unfinished or Waxed Floors

Unfinished or waxed floors, like those in older and historic homes, as well as floors in which the protective seal has worn away, should never be treated with water or liquid cleansers, which may penetrate, stain or warp the wood. Instead, according to cleaning experts, sweeping with a soft-bristled broom and vacuuming should be done as the primary line of defense. The NWFA says to step away from the mop: Never damp-mop a waxed floor.

Beyond basic care, buffing and waxing the floors once or twice a year should maintain the shine. 

Old-fashioned shellacked floors are not common in most homes. However, if you find yourself the proud owner of this vintage flooring, regular care should include sweeping and vacuuming often. Avoid water and liquid cleansers.

Engineered Wood Floors

Engineered wood flooring is created with a thin veneer of hardwood fused atop a plywood base. The material is stronger and more durable than regular hardwoods, and as a result has become a popular choice.

The cleaning procedure for this type of wood is the same as for hardwood floors with urethane finishes. Keep clean on a daily basis by sweeping and vacuuming and use a slightly damp mop as needed.

Painted Wood Floors

Painted wood floors make a strong style statement and are a clever way to disguise wood flooring in less than perfect shape. To clean them, sweep, vacuum or dust-mop regularly. Avoid scratching or damaging the painted surface by staying away from abrasive cleansers and opting for a simple soap and water solution for damp mopping. Experts suggest drying the surface immediately by hand to avoid streaking and unnecessary moisture.

More cleaning tips from Houzz…

10 Ideas for a Breezy Coastal Kitchen

Article by: Laura Gaskill

Whether you live at the coast or just love beach style, this fresh-as-a-summer-breeze look can make just about any kitchen feel a bit closer to the sea. From remodeling projects (hello, aqua appliances!) to smaller accents (striped bar stools) see which of these 10 ideas would be at home in your kitchen.

1. Striped stools. You can’t get much more classic coastal than blue and white stripes — pull up to your island a set of bar stools upholstered in striped fabric for a quick kitchen update. If you’re worried about spills and stains in this high-traffic zone, choose a stain-resistant indoor-outdoor fabric for easier cleanup.

2. Aqua appliances. Who says appliances have to be boring? Colorful vintage-inspired new appliances make a bold (and very fun) statement. Aqua and turquoise are beachy hues that look great in a crisp white kitchen. 

3. Shiplap or tongue and groove paneling.Covering plain drywall with shiplap or tongue and groove paneling (either horizontal or vertical) is a clever way to bring character to a newer build that lacks architectural detail. Continue the shiplap on the ceiling and cabinetry, and paint it all fresh white for a seamless look.

4. Iridescent tile. The shimmer of an iridescent tile backsplash calls to mind the glint of sun on crystal-clear water and pearly shells beneath the waves. Even a small tiled area can make a big impact when it’s this gorgeous, so consider splurging on the tile you really want, even if it must be in a smaller area.

5. Painted floors. If the wood floors in your kitchen have seen better days, a painted finish can revive them and give your room a fresh beach-house look at the same time. If you’re concerned about wear and tear, consider using marine paint — the type made for boat decks. It’s designed to stand up to saltwater, so it can certainly handle a few cooking spills. 

6. Textured pendant lights. Using natural-fiber textiles in the kitchen brings an earthy, casual vibe perfect for a beach-style space. Using pendant lights, like the ones shown here, is more practical in the kitchen than using a natural-fiber rug, since crumbs and spills can be nearly impossible to completely remove from a textured rug. For the best ambience, choose pendants with a filter to diffuse the light on the bottom.

7. Bicolor stools. Color blocking brings to mind nautical flags — navy and white is a classic (and more subdued) combo, or go bolder with yellow or red. If you can’t find counter stools already painted, buy plain ones and paint just the upper (or lower) third yourself.

8. Bistro stools. For a French Riviera take on the coastal look, go for counter-height versions of classic navy and white bistro chairs. They are chic, comfortable, lightweight and easy to clean.

9. Navy island. White may be the standard for a beachy kitchen, but navy isn’t far behind. For a moderate kitchen makeover, consider painting just the base of your island a rich navy blue — it’s a small area, so it won’t take too long or cost too much, but the impact can be huge.

10. Yacht-inspired details. Inspired by the boats in the harbor outside their coastal Connecticut home, these homeowners went with holly and teak flooring reminiscent of a ship deck. The cabinet hardware is custom made from boat handrail stanchions and teak dowels, creating a designer look at a fraction of the cost.