Floor Care
Regular care and maintenance of your new flooring is a simple way to extend the life and performance of your investment and keep it looking like new for years. Here are some general guidelines to follow for the different flooring types.
Regular care and maintenance of your new flooring is a simple way to extend the life and performance of your investment and keep it looking like new for years. Here are some general guidelines to follow for the different flooring types.
Article by: Bonnie McCarthy [Houzz]
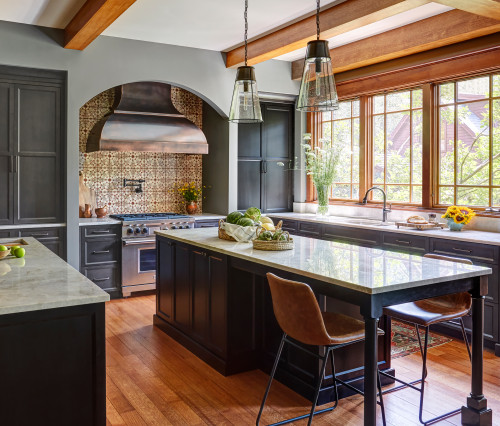
Although installing hardwood flooring is usually more expensive than rolling out new carpet, it’s an investment worth considering, according to data from the National Association of Realtors. Surveys show that 54 percent of home buyers are willing to pay more for a house with hardwood floors. The question now: What’s the best way to clean and care for that popular flooring and keep that natural beauty (and value) shining through? Here’s how.
It’s not the wood — oak, maple, mesquite, bamboo, engineered hardwood or something more exotic — that determines how the floors should be cleaned, but rather the finish.
Surface finishes, often referred to as urethanes or polyurethanes, are among the most popular treatments today and are usually applied to hardwood floors after installation to protect them and make them more durable and water resistant. These finishes create a protective barrier. There are four types of surface finishes, according to the American Hardwood Information Center: water based, oil based, acid cured and moisture cured.
Homes built before 1970, including historic residences, may have original wood floors that were sealed with varnish, wax or shellac. These require a different approach to cleaning. The American Hardwood Information Center says these types of finishes work by penetrating the wood to color the planks and form a protective shield. Using a wax coating after staining provides a barrier against wear and tear and gives the floor a beautiful low-gloss satin sheen. The classic look requires a little extra TLC, however, since water-based products and mopping can damage the finish.
How to Determine Your Wood Floor Finish
To figure out whether or not your wood floors are finished with a polyurethane, shellac, wax or varnish, or have a finish that has worn away and is no longer providing coverage, the American Hardwood Information Center suggests these tests:
Preventing Dirty Wood Floors
Not wearing shoes in the house is one of the best ways to significantly reduce dirt, scuffs and daily wear and tear, and lessen cleaning time.
The National Wood Floor Association, or NWFA, is more specific and warns against walking on wood floors with cleats, sports shoes and high heels. It also offers this cautionary example: A 125-pound woman walking in high heels has an impact of 2,000 pounds per square inch. Furthermore, an exposed heel nail can exert up to 8,000 pounds of force per square inch.
Whether you got out your calculator or not, the possibility of impact and denting appears to be undeniable. However, while you can’t always ask guests to shed shoes at the door, it might be a policy worth considering for family members.
What Not to Do
No matter what type of wood flooring you have, the NWFA advises against using cleaning products meant for vinyl or tile flooring. Their take: Self-polishing acrylic waxes cause wood to become slippery and appear dull quickly.
Another no-no: wet-mopping wood floors, since standing water can dull the finish, damage the wood and leave a discoloring residue. Along the same lines, avoid overwaxing unfinished wood floors in an attempt to restore luster. If a waxed floor has become dull, try buffing the surface instead.
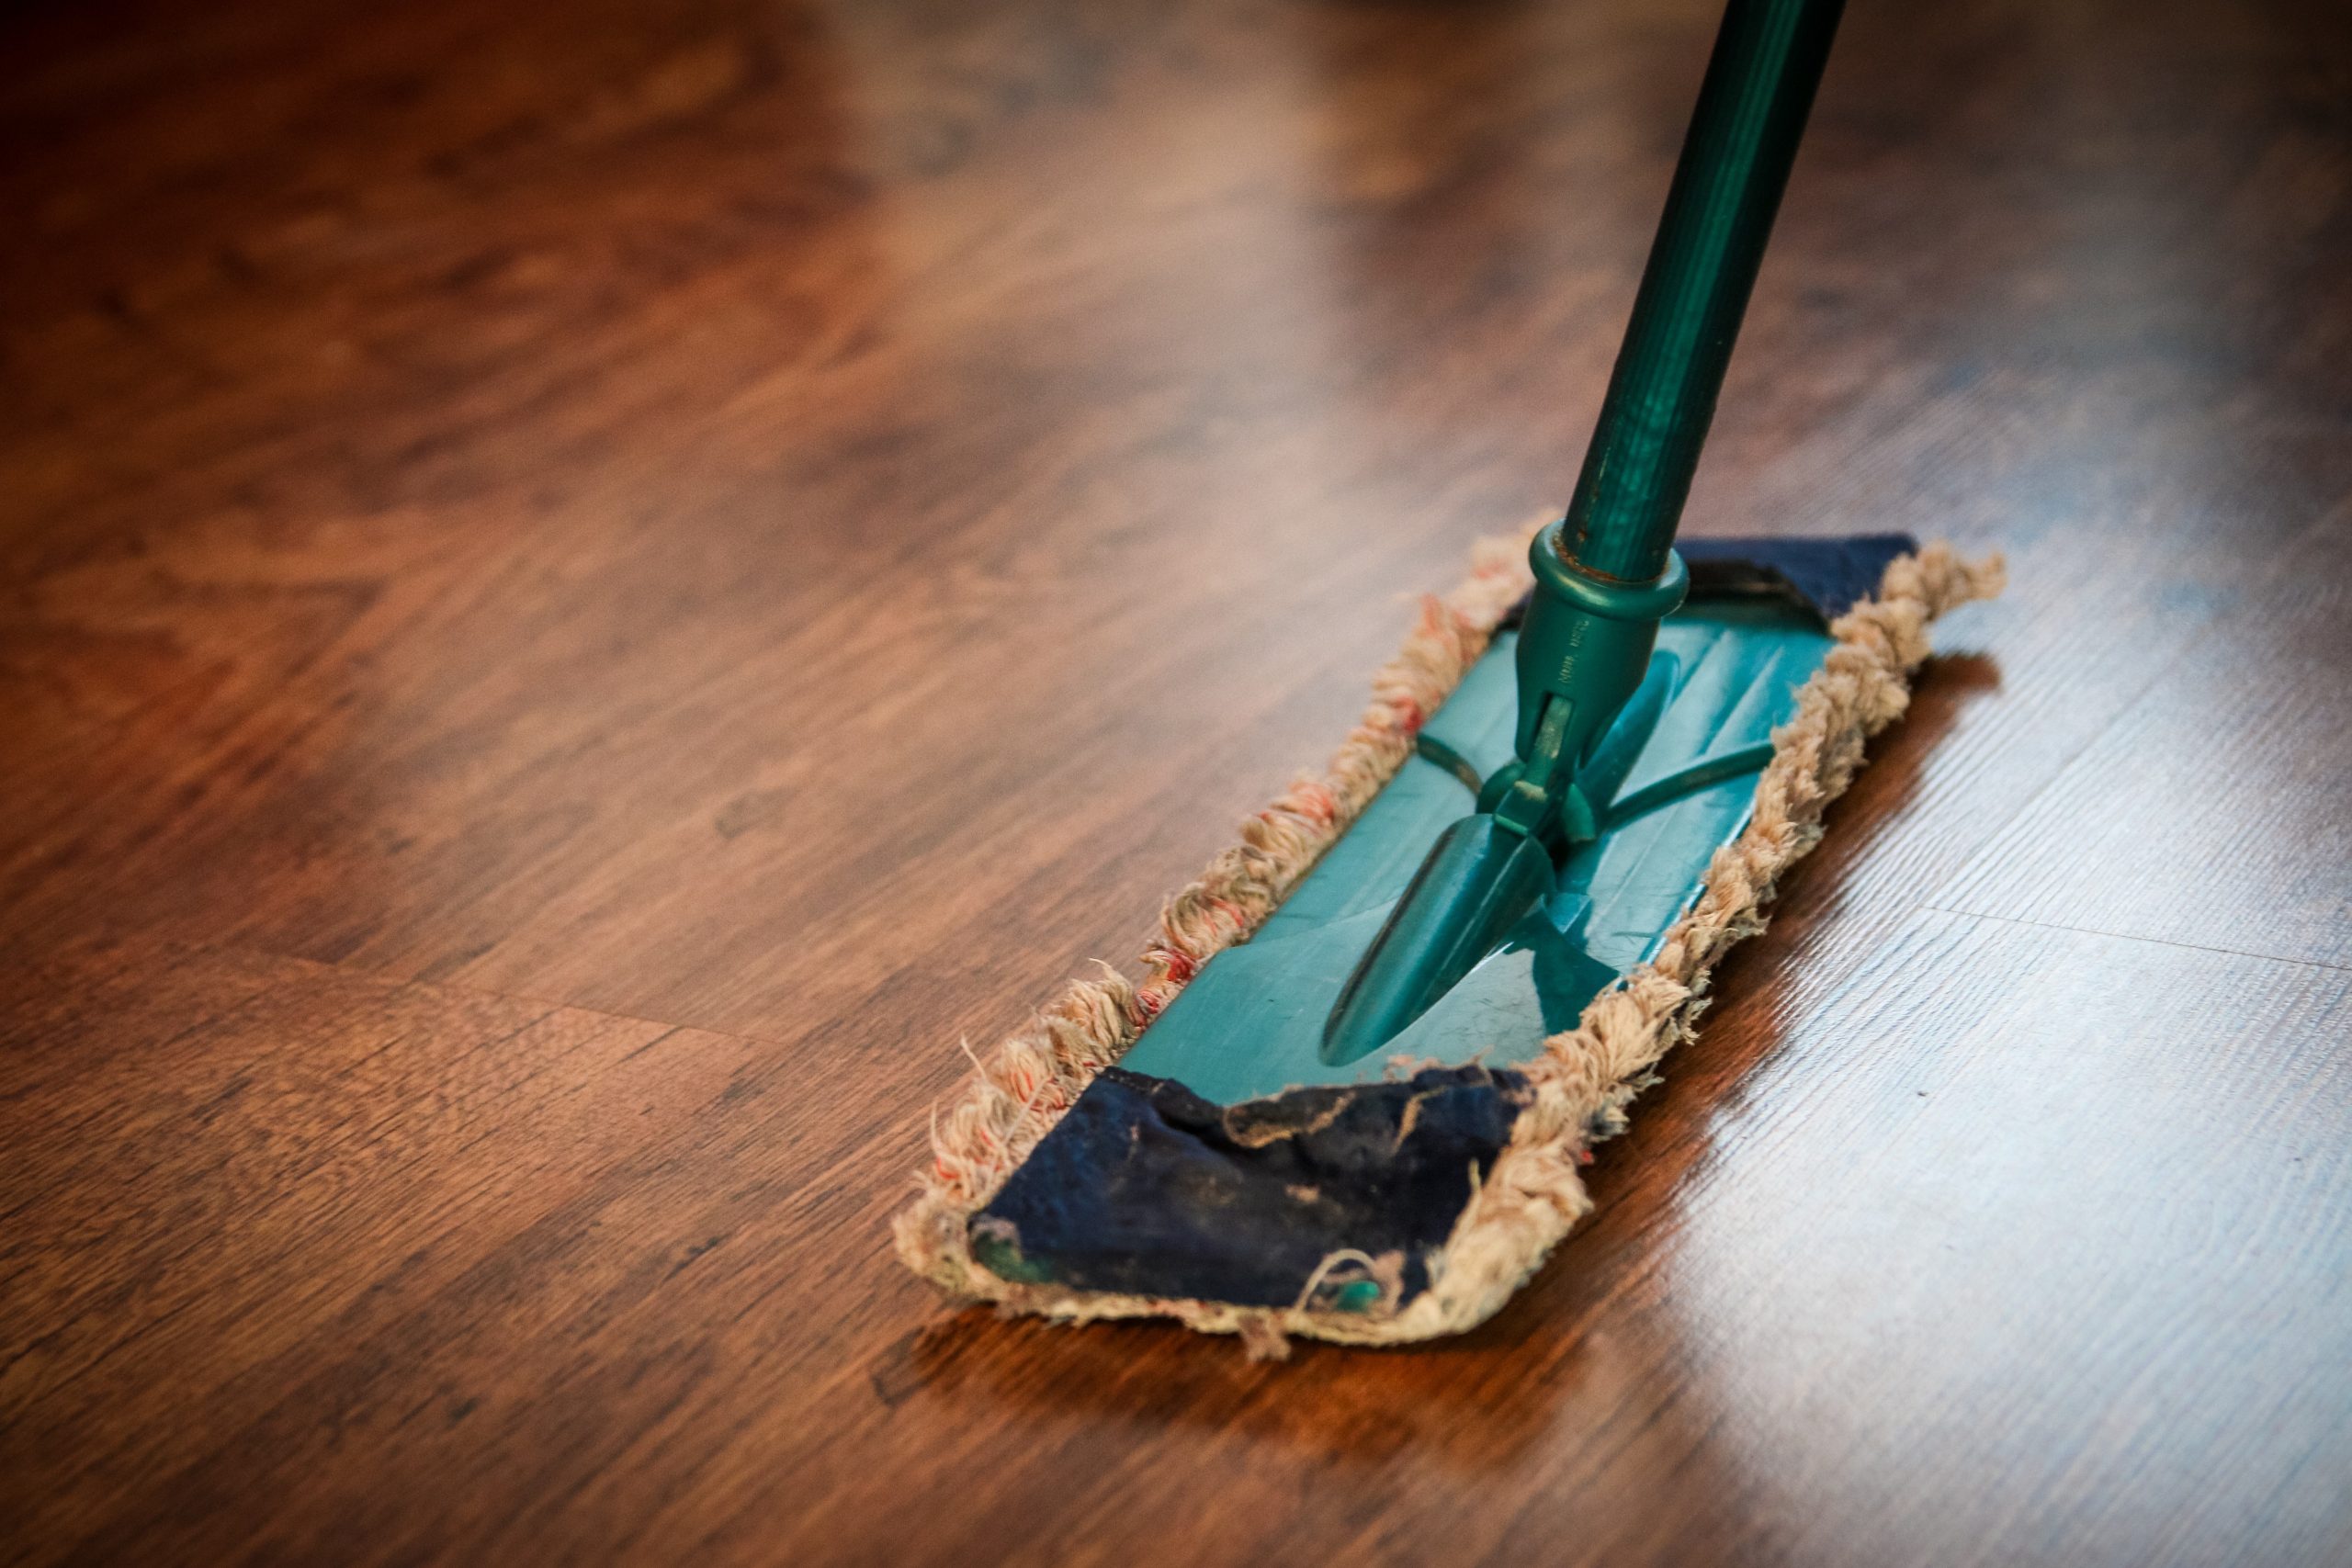
Regular Wood Floor Cleaning
Cleaning floors with contemporary polyurethane wood finishes (for floors installed after 1970) starts with vacuuming, sweeping or dust-mopping the surface.
Vacuuming. Vacuum wood floors daily, or at least once a week with a vacuum fitted with an attachment for wood floors. For regular machines, the American Hardwood Information Center advises turning off interior rotating brushes or beater bars if possible.
Regular vacuuming helps remove dust and dirt particles that play a leading role in scratching and dulling the surface of the floor.

Sweeping. The American Hardwood Information Center says choosing a broom with “exploded tips,” also known as synthetic fiber ends, is step one.
Damp mopping. Damp mopping should be done with a simple solution of pH-neutral soap (like dishwashing soap) and water; or one capful of a mild cleanser such as Murphy Oil Soap in a bucket of water; or a solution using products specially formulated for wood floors, such as Eco Mist Colloid W, Dr. Bonner’s or Method.
In conscientious cleaning circles, controversy swirls around whether to use a mixture of vinegar and water for damp-mopping wood floors. Ultimately, everyone has to do what works best; however, within the past 10 years this method has lost favor, and popular belief now holds that the solution causes floors to dull more quickly and is not as effective as simple soap and water.
To begin mopping, dampen the mop in the prepared solution, wring it out completely, and mop in the direction of the wood grain. Repeat as necessary. As the water in the bucket becomes dirty, dump it out and refill. Many experts (including Martha Stewart) believe scrubbing wood floors with a damp cloth by hand is the ultimate cleaning strategy — unless abundant square footage or protesting knees prove problematic.
But avoid cloths or mops dripping with water. If your floors do get wet or worse, dry them immediately!
Another technique: After the floor has been swept or vacuumed, put your cleaning solution of choice in a spray bottle and mist the floor, then use a dry microfiber mop or cloth and mop in direction of the wood grain.
It’s important to note that just because a floor is clean doesn’t necessarily mean it will be shiny. If the floor has lost its luster, it may be time to have it refinished professionally. Whatever you do, don’t wax a polyurethaned finish.

Unfinished or Waxed Floors
Unfinished or waxed floors, like those in older and historic homes, as well as floors in which the protective seal has worn away, should never be treated with water or liquid cleansers, which may penetrate, stain or warp the wood. Instead, according to cleaning experts, sweeping with a soft-bristled broom and vacuuming should be done as the primary line of defense. The NWFA says to step away from the mop: Never damp-mop a waxed floor.
Beyond basic care, buffing and waxing the floors once or twice a year should maintain the shine.
Old-fashioned shellacked floors are not common in most homes. However, if you find yourself the proud owner of this vintage flooring, regular care should include sweeping and vacuuming often. Avoid water and liquid cleansers.

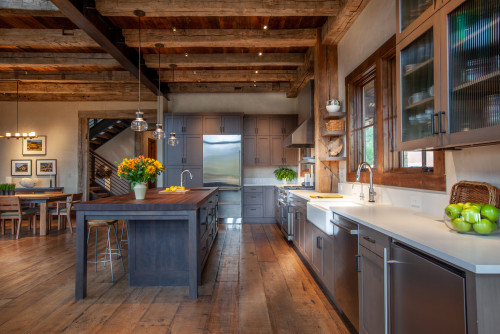
Engineered Wood Floors
Engineered wood flooring is created with a thin veneer of hardwood fused atop a plywood base. The material is stronger and more durable than regular hardwoods, and as a result has become a popular choice.
The cleaning procedure for this type of wood is the same as for hardwood floors with urethane finishes. Keep clean on a daily basis by sweeping and vacuuming and use a slightly damp mop as needed.
Painted Wood Floors
Painted wood floors make a strong style statement and are a clever way to disguise wood flooring in less than perfect shape. To clean them, sweep, vacuum or dust-mop regularly. Avoid scratching or damaging the painted surface by staying away from abrasive cleansers and opting for a simple soap and water solution for damp mopping. Experts suggest drying the surface immediately by hand to avoid streaking and unnecessary moisture.
by Meg Padgett, Houzz
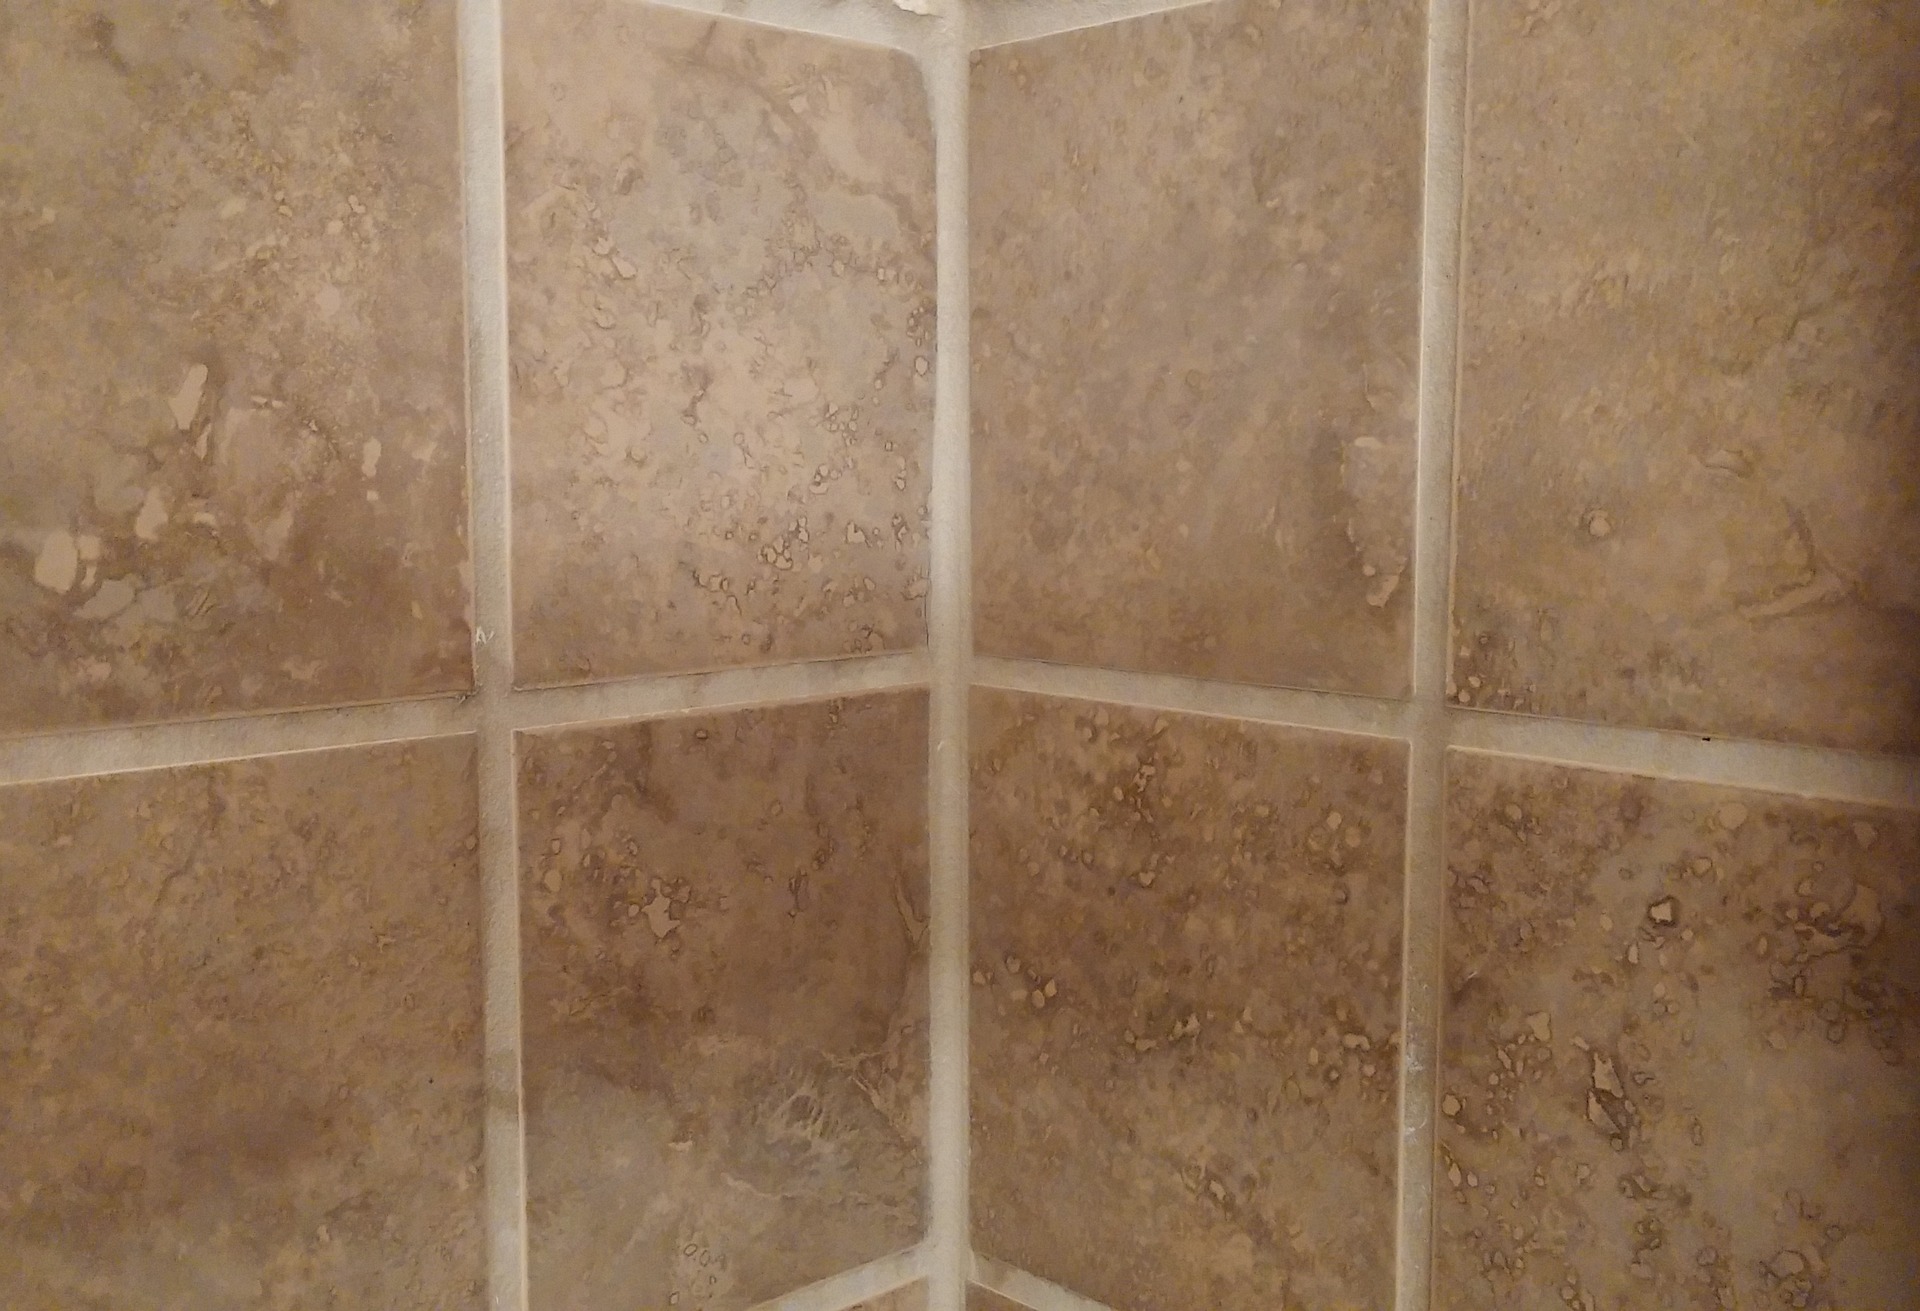
Tile – whether it’s used as flooring, in the kitchen as a backsplash or for counters, or in the bathroom – has one great downfall: grout. Since grout is porous in nature, unsealed grout absorbs all kinds of stains, from mildew to coffee and everything in between. To say it’s a headache to keep grout clean is an understatement.
NOTE: Be wary of using too much lemon juice with marble, since it can etch or damage the stone if left on too long. Hydrogen peroxide can be a safe alternative.
We inherited marble tile counters when we purchased our home. It’s pretty clear that the grout was never properly sealed, so it soaks up stains like crazy. It makes our kitchen feel gross and grimy, even if it was just cleaned. While I’d love to replace the counters with a solid surface like quartz, it’s just not in out budget – plus, we just can’t justify getting rid of something that’s perfectly fine otherwise.
Luckily, I have a foolproof method that will lift most household stains from that pesky grout.
What you’ll need:
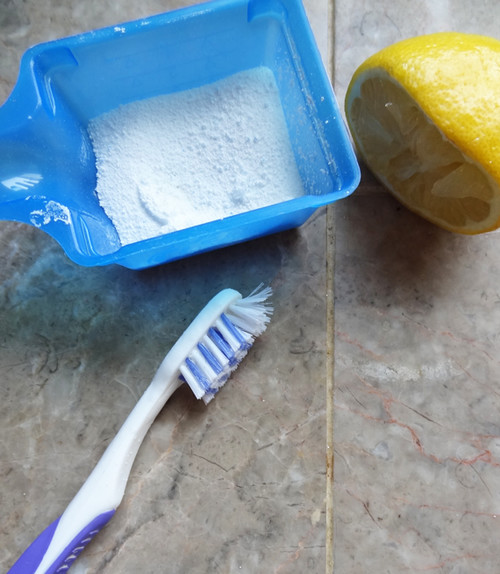
TIP: Cleaning colored grout should be done with special care. Bleaching agents (like chlorine bleach) can discolor and harm the colored grout. Fortunately, oxygenated bleach does not contain corrosive chemicals and is safe to use on all grout.
1). Clean the surface thoroughly, removing any surface residue or debris. Let the grout dry fully.
2). Dissolve 2 tablespoons of oxygenated bleach in 2 cups of warm water. Wet the brush in the mixture and apply it to the grout. Let is soak in, then scrub the grout in a circular motion, which will loosen the stain more effectively than a front-and-back motion. If needed, dip the wet brush into the oxygenated bleach to make a paste. Wipe clean, then let dry.
TIP: To lift extra dark stains, squeeze lemon juice onto the stain, let it soak in, then scrub, wipe clean and let the grout dry. Use lemon juice sparingly, since it can damage some tile finishes.
3). Spray the tiles and grout with an ecofriendly cleaning spray and wipe them clean. Let the grout dry fully before making a final decision on whether your hard work paid off – damp grout looks darker than dry grout.
4). Apply grout sealer after the grout has fully dried to avoid any future stains. Be sure to reapply it each year.
Still having trouble getting that grout clean? For those impossible-to-remove stains, you might want to consider:
If after you’ve tried all three, the stain is still hanging strong, you may have to resort to removing the old grout and replacing it with new.
TIP: An electric multitool, like the Dremel Mult-Max, helps to make quick and safe work of removing the old grout.
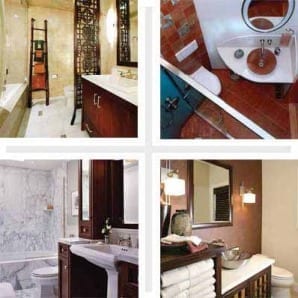
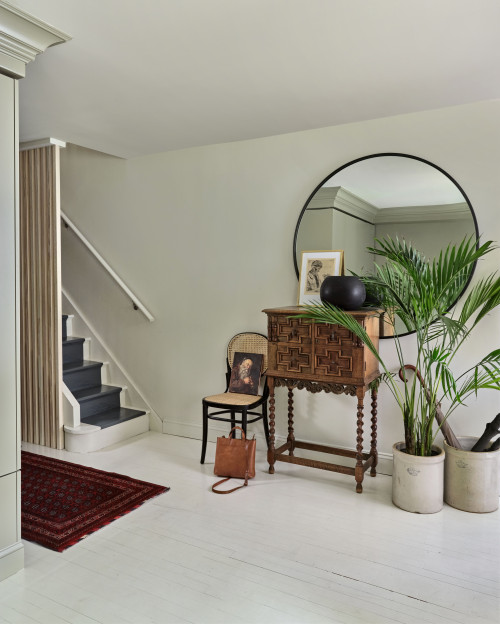
Photo: via TOH. A few things all old house lovers are familiar with: drafty windows, less-than-perfect plumbing, squeaky floors – and small bathrooms. While new home baths have nearly doubled in size over the past 30 years, old home bathrooms average about 5- by 8-feet.
Not to worry, though: you can combat the claustrophobia by scaling down to physically save space. (Pedestal sink, anyone?) And, with the right colors and lighting, you can create the illusion of a roomy bath
Here, we dig into the National Kitchen & Bath Association (NKBA) Design Competition archives to deliver great ideas from Certified Kitchen Designers that you can use in your next remodel.
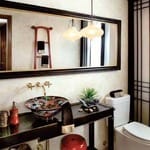
Photo: via TOH | Designer: Debbie R. Gualco, California
This homeowner wanted to bring her home out of the 1980s with contemporary Asian design, so the powder room vanity was inspired by a Japanese kaidantansu (stepped chest), which contributes fluidity of design in the cramped quarters. The use of rich and dark colors makes the walls of the small space recede.
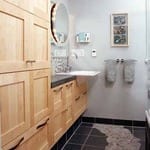
Photo: via TOH | Designer: Erica S. Westeroth, Ontario
These homeowners opened up their space by getting rid of two small closets and adding task and ambient lighting to help create the illusion of a larger room. Little width remained after incorporating the tub and toilet, so a shallow cabinet was incorporated. Our favorite detail? The playful “dry riverbed” of stones in the floor.
Photo: via TOH | Designer: Gary Hentges, Illionis
The use of continuing horizontal lines, a large, frameless mirror, and well-placed task lighting helps to create the illusion of a larger space. The marble-clad dividing wall lends modesty to the toilet area, while creating a recessed storage opportunity. A must in every small bath, the shower has a curbless entry to eliminate demarcation of the limited footprint.
Photo: via TOH | Designer: Gary Henteges, Illionis
These homeowners wanted to “keep it simple and do it well.” This cherry and limestone bath replaced a tiny, cluttered space meant for guest use. The curved-front vanity maximizes usable space with two deep drawers on double extension drawer slides.
Photo: via TOH | Designer: Holly Rickert, New Jersey
The size of this room called attention to an eyesore: an off-center, aluminum-framed window. A floor-to-ceiling Shoji screen took care of that by concealing the flaw, while letting light through. A 7-foot framed mirror, hung horizontally, spans the entire length of the room and reflects the ladder towel rack, which adds storage without taking up floor space.
Photo: via TOH | Designer: Keri Davis, Oregon
This bathroom was constrained by bedrooms on either side, so it wasn’t possible to increase square footage. To make the space feel roomier, white marble tile and several mirrored surfaces wrap the room. Floor-to-ceiling cabinets add height, while a glass shower wall eliminates the visual barrier of a shower curtain or doors. Rich wood tones add warmth and create balance.
Photo: via TOH | Designer: Leslie Ann Cohen, California
This guest bath features a custom miniature sideboard topped with a rich red travertine counter and copper vessel sink. Rich shower draperies and handmade tiles add to the charm of this space, showing that patterns used selectively as accents will not overwhelm a small room.
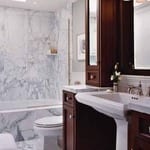
Photo: via TOH | Designer: Lori Carroll, Arizona
It’s not uncommon to create attention-commanding focal points in compact spaces. This powder room vanity is crafted with smooth, flaxen veneer and is topped with a cast bronze basin and patina counter. Recessed lighting around the large mirror illuminates any reflection.
Photo: via TOH | Designer: Leslie Thompson, Florida
This vanity continues the lesson of creating a bold focal point in a small space. The upper walls of this ultra-feminine retreat are upholstered in padded silk, but the stainless steel backsplash adds a rugged accent.
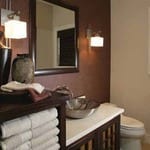
Photo: via TOH | Designer: Margie Little
This teeny, tiny full bath features a wall hung toilet; the tank is hidden inside the 2×6 stud wall, allowing for 9 inches of extra space in the center of the room. Clear glass shower doors eliminate visual barriers and a skylight floods the space with natural light.
Photo: via TOH | Designer: MaryLou Kalmus
A curved glass countertop provides a sense of spaciousness, while hand-applied 1-inch Bizazza glass tiles mimic the swooping curves of the fixtures. The high ceiling features a deep amethyst color wash to visually lower the height of the room, which felt “like a tunnel” to the homeowers.
Photo: via TOH | Designer: Sheila K. Tilander, Washington
This homeowner wanted a nostalgic style with a contemporary twist. Trumpet-shaped sconces flank an oval mirror that conceals a medicine cabinet. A frameless shower door extends the visual expanse of the space, while allowing unobstructed views of oversized subway and amber glass tilework.
Photo: via TOH | Designer: Tiffany De Tomasi, California
A freestanding vanity with elongated fixtures, a custom bamboo mirror, and ladder towel rack create the illusion of vertical space in this small guest bath. A soft color palette accented with dark woods, balances the space. Artistic relief panels add visual interest without completely walling off light.
(You are reading an article originally posted on This Old House)
Begin by considering where the flooring will go and how much traffic, sunlight, and other wear and tear it will get. Vinyl proved tops in our moisture tests and most linoleum. Plastic laminates, and solid wood fared nearly as well. But many engineered woods, as well as some solid woods, and a linoleum product we tested flubbed that test – a serious drawback in a busy kitchen. And while the best vinyls and plastic-laminates fended off wear better than solid wood, they can’t be refinished when worn.
Before settling on a product, spend a few dollars on two or three samples. That can be a lot less expensive than winding up with flooring that looks great in a catalog or on a website and then awful in your home. Manufacturers generally match most wood or engineered-wood flooring for color or grain. But variations can occur from one batch to the next, so buy the flooring you’ll need all at once. All the plastic-laminate floorboards in a package often have a similar pattern, so you may want to pull from multiple packages to avoid repetition.
To determine how much flooring you’ll need, measure the room’s square footage by multiplying its length times its width. (Divide an irregularly shaped room into smaller rectangles, calculate the square footage of each rectangle, and then add them together.) Then buy 7 to 10 percent extra to allow for mistakes, bad samples, and waste. You might also want to invest in an extra box of flooring for future repairs or additions.
One way to save is on overstocks. Also, take advantage of mistakes. You can often save on opened or damaged boxes or on flooring with minor flaws that no one will notice.
Hiring a pro to do the installation? You can trim hundreds of dollars off the job by doing the time-consuming prep work like prying up the old flooring, leveling or filling the subfloor, and removing any baseboard that’s in the way.
Bamboo is considered renewable because it’s a fast-growing grass. The best bamboo floorings we tested area stranded products such as the EcoTimber solid and Teragren engineered flooring, which are made of fibers that are shredded and compressed for strength. Cork floors are made of tree bark in a process that doesn’t kill trees.
The best products in every category were also the best overall in our simulated foot-traffic tests. For less busy kitchens, you may want to consider the top engineered wood or bamboo, with its blend of natural veneer and easy installation.
Prefinished wood and bamboo floors cost about 40 percent more than unfinished products. But you’re likely to save overall because a factory finish tends to last longer-and paying a pro to apply the finish adds costs, mess, and hassle. Factory finishes are also warranted by the manufacturer.
Vinyl floors with the industry’s FloorScore certification emit relatively low levels of volatile organic compounds, substances linked to health problems and pollution. All vinyl we recommend has that certification. For wood flooring, certification by the Forest Stewardship Council and the Sustainable Forestry Initiative offers some assurance that it comes from responsibly managed forests, a plus for the planet. The product and manufacturer must be certified; check the packaging.
Before installing wood or laminate flooring, unpack it and let it sit for one to three days in the space where it will be installed so that its temperature and moisture match the levels in the room.
If you need to heat the room soon after installation, raise the temperature gradually over the course of a week – especially if you have radiant heat – to allow the flooring to adjust. Sweep or vacuum floors with a soft broom or brush, and clean with a damp but not overly wet mop. Check the manufacturer’s guidelines for recommended cleaning products. And put felt pads under furniture to prevent scratching.
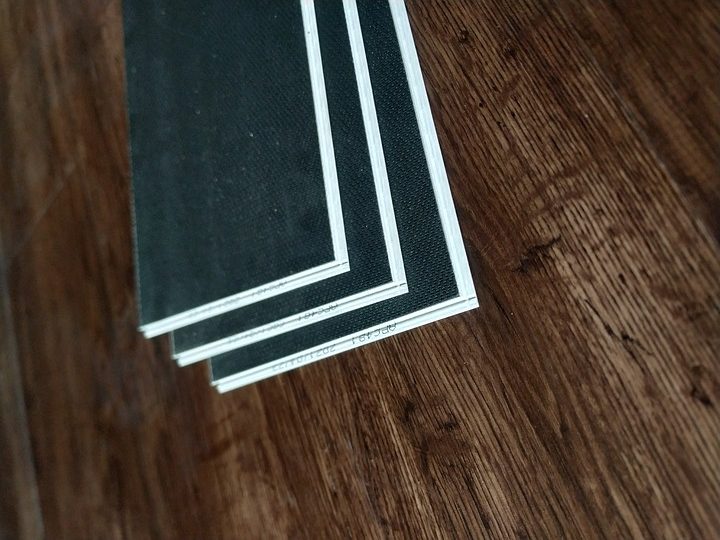
Though you’ll find a growing array of styles, most flooring falls into one of these six types. The type of flooring you choose will depend on your taste, needs, and budget.
Different flooring materials require different installation techniques. Homeowners install about half of all flooring. Floated floors that go down without glue or fasteners are easiest. In the case of vinyl, planks or tiles; they are easier to install than sheets.
Copyright © 2006-2012 Consumers Union of U.S., Inc.
Hey, have you heard the one about the 36-inch pro-style range that ripped the molding off the back door on its way into the house? Or the poured-on-site concrete countertop that cracked three months after installation? Or maybe it was the contractor who was paid in advance, promptly skipped town, and was never heard from again.
Well, misery may love company, but what we all crave is a happy ending – a smart – looking, functional workspace that is a source of comfort and efficiency. To help you get there, we’ve complied this handy guide to some common kitchen-remodeling disasters and offer expert strategies for steering clear of them.
For each major phase of the job: – hiring, planning, budgeting, and living through it – we’ve got an easy plan to follow. Take our advice, and your biggest regret when your dream kitchen is complete will be that you didn’t do it sooner.
Kitchen remodeling is at the top of homeowner’s wish lists. It is also, according to attorneys general across the country, a leading source of consumer complaints. Recommendations from friends are the best place to start your search for a qualified contractor. But before you make a decision, keep these caveats in mind:
The best ones are worth waiting for. The best contractors tend to be the busiest ones. Build your schedule around the GC of your dreams, not vice versa. Keep the crew happy by following the three R’s:
An experienced designer can save you time and money by heading off potential problems. Kitchen planners know all the tricks: how to maximize storage, smart substitutions for high-end materials, even the best local contractors for the job. But first, they need a few things from you. Here are a few things that’ll help on your first meeting.
20/20 Design Proposal Drawing by Designer Ed Sheats
One of the surest ways to shave costs is to do more with what you’ve got. So before taking the sledgehammer to your existing kitchen, try this: empty every drawer and cupboard. Revisit where you’ve been putting things. Is there an organizational scheme that makes more sense? Think in zones, storing items closest to where they are used.
“In the end,” says architect Dennis Wedlick, “you may like the reconfiguration so well that you’ll decide to just paint and stick with the kitchen you’ve got.” And if you do go forward, you’ll have a clearer sense of how you really use the kitchen, which will help save time and money on the redesign. But if you kind of need to cut corners, here are a few budget-balancing scenarios:
Problem #1: You really need more storage space, but you plan to move in a few years and would rather not invest in custom cabinets. Custom-crafting every nook and cranny for the way you cook may not be the most economical use of your dollars when someone else – with different cooking and lifestyle habits – will be living in your kitchen before the home-equity loan is paid off.
Affordable alternative: Consider working a walk-in pantry into your plan. It’s a remarkably economical way to upgrade your kitchen – a pantry can supply as much storage as a wall or more of custom built-ins.
Problem #2: You want granite countertops, but they’ll bust the budget. Granite’s resistance to moisture, scratching, and high heat makes it a perennially popular (if pricey) choice.
Affordable alternative: If you love the look of granite – or soapstone or marble or handcrafted tile for that matter – work it into your plan. But instead of using it for every countertop, try limiting it to a high-visibility island or to the areas flanking the range. Elsewhere, use less expensive options like plastic laminate or ceramic tile. Mixing also adds visual interest.
Problem #3: You want a lighter, brighter kitchen, but knocking down walls just isn’t an option. The space may be drab and dingy, but it gets the job done, and a major overhaul isn’t in the budget right now.
Affordable alternative: Sometimes a well-planned lighting scheme is all it takes to brighten a kitchen. Spend the bucks for the services of a professional planner or lighting designer. That plus simple cosmetic upgrades, such as a fresh paint job, new cabinet hardware, upgraded countertops or flooring, and a couple of new appliances can totally transform the space. Save untold thousands by sticking to the original layout.