FREE DESIGNS AND ESTIMATES

Kitchen Counters: Quartzite Offers Strength and Beauty

Natural Quartzite Countertop

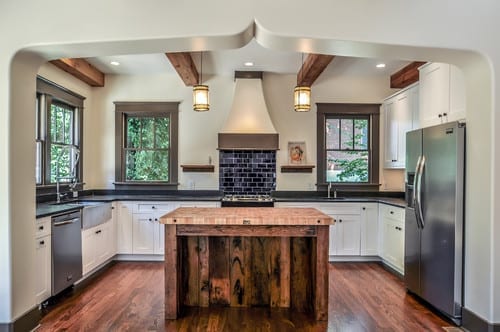
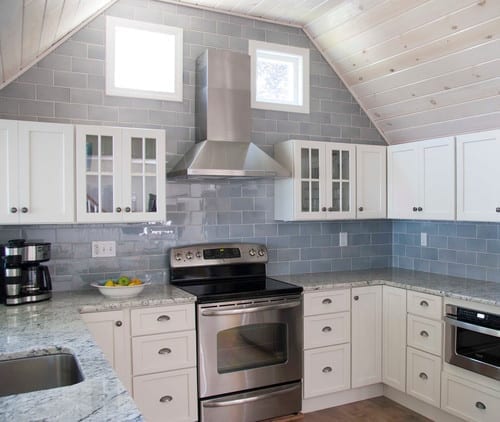
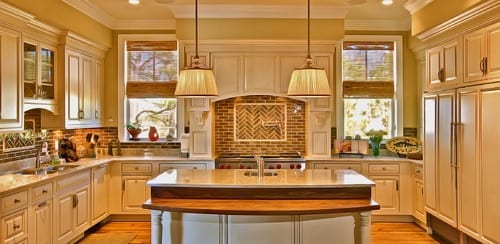
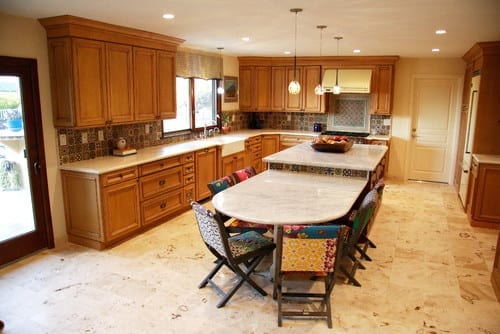
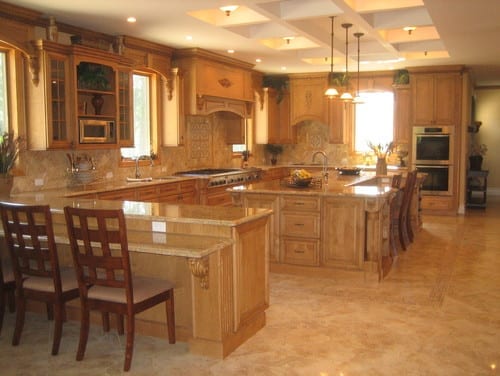
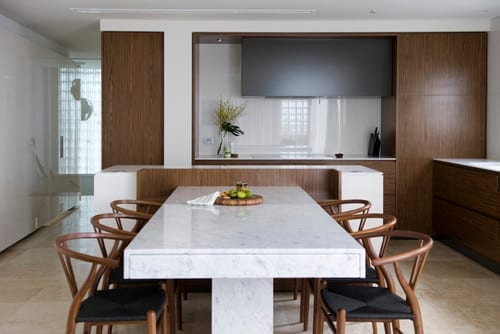
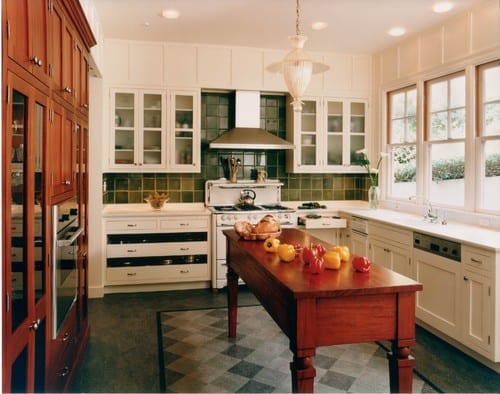
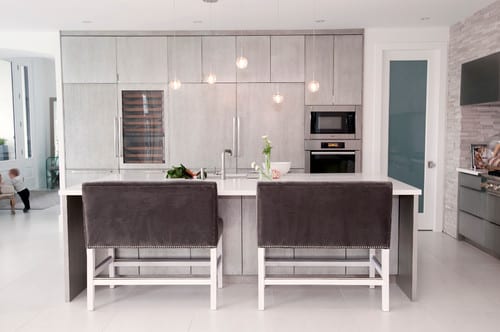
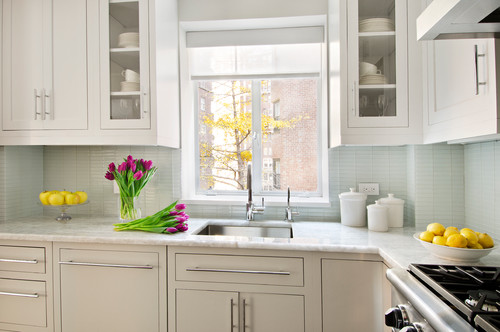
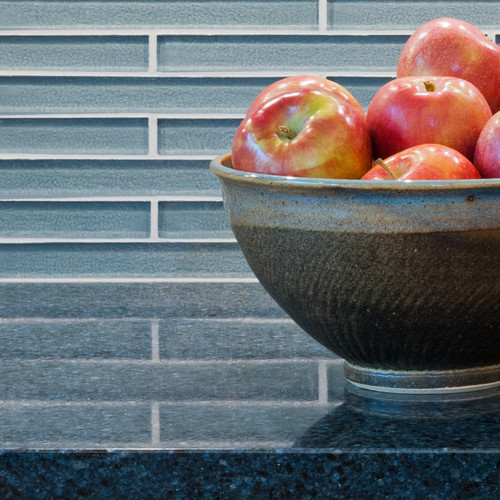
When choosing a kitchen countertop material, many homeowners who might have gone with granite or marble are giving quartzite a second look. Before you bring this material into your kitchen, take the time to learn the pros, cons and special considerations to see if it’s right for you. 

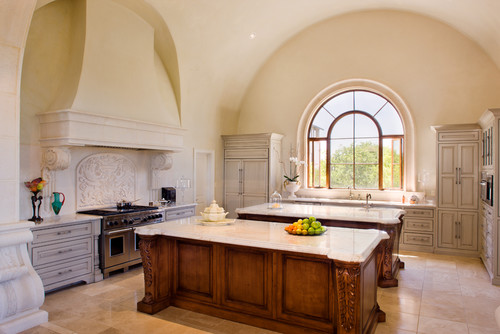
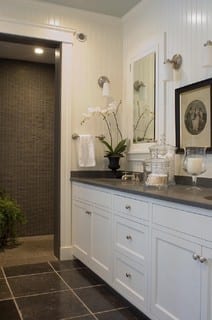
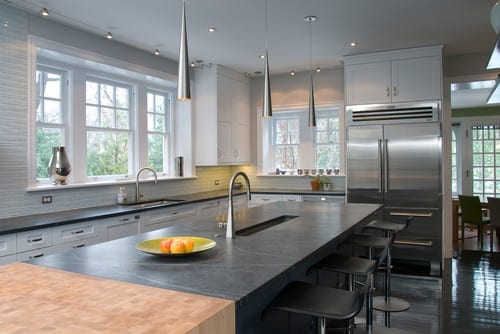
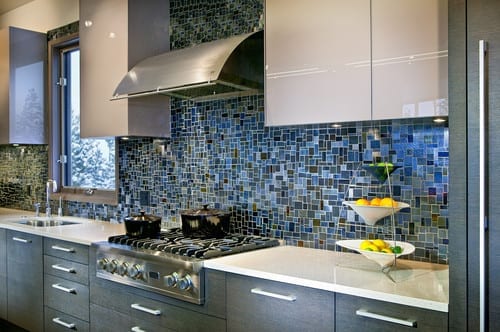
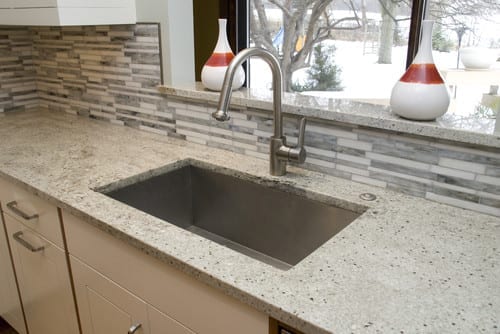
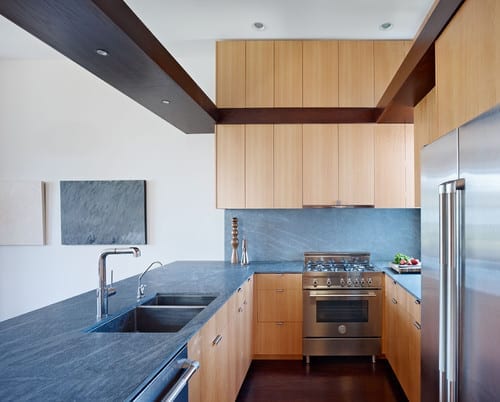
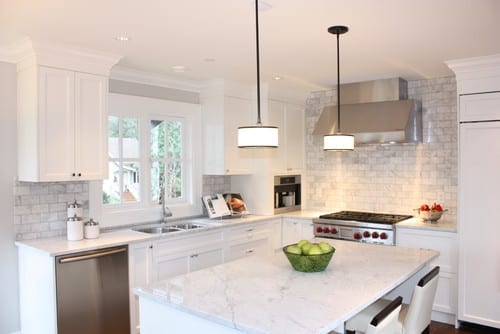
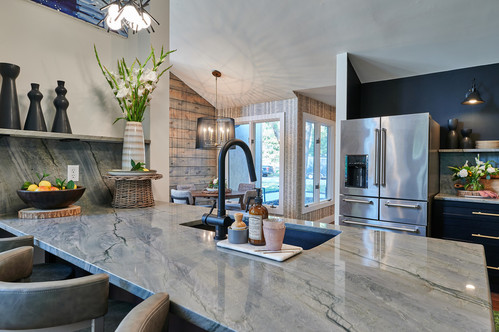
The basics: Quartzite is a metamorphic rock formed from sandstone. The transformation happens when sandstone is heated within the earth’s crust and shifting tectonic plates supply pressure. The resulting stone has pleasing streaks, rich colors and eye-catching patterns. Colors range from white to black, with shades of blue, green, yellow and brown. 

Popular quartzite varieties include:

  • White Macaubas (has an elegant translucent gray or white background with darker gray or blue veining)
  • Mother of Pearl (has a similar look to marble, with gold, green and gray veining)
  • Taj Mahal (a natural-toned stone often described as having a translucent quality)
  • La Dolce Vita (a popular beige stone with moderate movement)

But be aware that the industry is loose about names and what is categorized as quartzite. “There are many varieties,” says stone fabricator Alex DiPietro. “You want to distinguish between the soft and hard quartzites. Ask your fabricator if they have worked with the specific stone before, and they will tell you their experience.”

And don’t confuse quartzite with quartz (also known as quartz composite), a manufactured product crafted from resin and quartz chips tinted with various colors.

Cost: Around $80 to $200 per square foot installed.

Advantages: “To me the greatest advantage is that it’s a beautiful stone with wonderful tone and variety,” says designer Sarah Robertson. “A vein-cut quartzite will have streaks that are very linear and have a contemporary vibe, while a cross-cut quartzite has diagonal lines with a more organic look to it.”

Quartzite stands up to heat, but prolonged heat exposure can cause problems. Using trivets for hot pots and pans is a smart way to protect your quartzite counters.

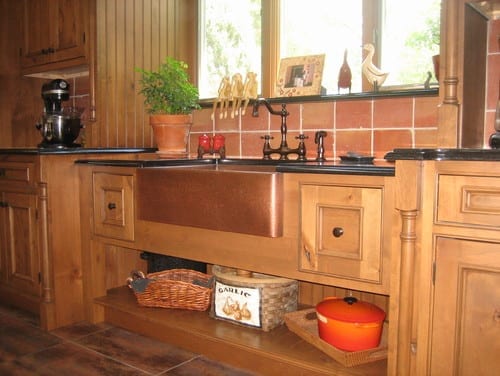
Disadvantages: While very strong, quartzite counters are costly and not indestructible. The quality of quartzite varies, and heavy use can cause etching, staining or scratching.

Maintenance: This varies depending on the type of quartzite you choose. There are varieties of quartzite that don’t have to be sealed every year, some that don’t have to be sealed at all and others that require regular sealing. Check with your stone fabricator for information on the quartzite of your choice. 

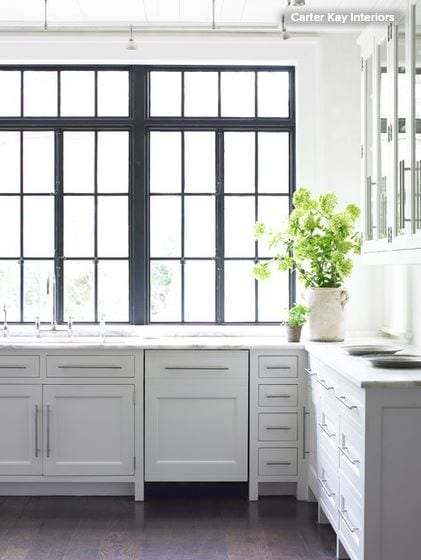
To keep your quartzite counters in top shape, clean up spills quickly and be careful with grease and acidic foods. You can use a damp, soft cloth to regularly clean the surface and use a mild spray disinfectant when needed. When in doubt, check with your stone fabricator for the best cleanser for your particular quartzite.  

Special considerations: Quartzite is a very heavy stone that requires professional installation by a licensed contractor. Looks vary from stone to stone, and since varieties often go by more than one name, make sure to examine and view each stone slab carefully. 

And consider asking for samples, says Robertson. “You can get a chunk of the stone from a fabricator and do the stain testing yourself at home. If you’re really concerned about what vinegar or lemon juice will do to the counter, try it out yourself.”

Get More From Your Kitchen Island

Article by:

Many kitchen islands open directly into another room. If you don’t require seating on that other side of your island, it’s a great opportunity to make the island serve purposes other than cooking and eating. When planning for an island, consider how it can be used to your advantage, whether it’s incorporating additional display space, extra storage or even strategically separating — or connecting — other spaces. Here’s how you can make your island work harder for you.

Get More Display and Storage

These open shelves wrap around the island to create display space on two sides. This makes for a much more eye-catching addition in an open floor plan. Can you imagine staring at solid planes of material here? Meanwhile, a small countertop at the opposite end still accommodates some island seating. 

Although this island also has shelves below, the real eye catcher is the ceiling-hung shelves, which create a bright, casual cookware display. What a visual feast for diners! 

Where seating is not required, think about incorporating bookshelves along the length of your island — perfect for all those cookbooks. 

Full-height cabinets block kitchen messes, provide storage and hold a TV here. 

Get a Divider or Transition

A simple, narrow dividing wall, which seemingly arises from the island, partially hides the cooking area and creates a stunning art wall. Notice how the sculpture niche is finished to match the cabinetry, creating the transition from kitchen to the living-dining area. 

This island does double duty with a working kitchen side and a buffet dining side, but it doesn’t stop there: The beautifully detailed end wall hides any mess and creates a lovely focal point. 

In this very open space, the island ends in a fabulous display area that looks like furniture. This concept blurs the line between cooking and living areas. 

Want to hide your dirty dishes but still converse with the guests? Use meticulously detailed cabinetry as a horizontal backdrop to your dining area — much more interesting than drywall. A narrow continuation of the countertop even serves as a buffet space. 

In the same space seen from the kitchen side, small cabinets actually form the top of the dining “wall” and provide storage — bonus! 

Get Table Seating

In this kitchen a working island is paired with a built-in banquette, making an attractive, handy spot for dining. This would work equally well with a rectangular island. 

Ease a Level Change

Many homes have a step or two from the kitchen to a living area, typically with a railing of some sort. Why not create a casual dining area as a buffer between the two instead, utilizing some great cabinetry?

Key Measurements to Help You Design Your Kitchen

Article by:

Whether you are moving into an existing kitchen, remodeling the one you have or building a new one, understanding a few key measurements and organizational guidelines can help your culinary life run more smoothly. 

Kitchens provide storage for your food and cookware, give you room for prep and cleanup, and of course also provide a place where you can cook and bake. When it’s thoughtfully arranged, these functions operate logically, making work in your kitchen a better experience. Here’s how to get the ideal setup.

Ideally, refrigeration and dry-goods storage should be located nearest to the kitchen’s entry point. The cooking area should be located toward the dining spaces, and the sink is best positioned between those two functions. This creates what’s called a work triangle. The best work triangle is less than 21 linear feet (6.4 meters). Work triangles that exceed 26 feet (7.9 meters) make moving from one function to another inefficient in most cases.

This cutaway plan illustrates arrangements and dimensions for a modest-size kitchen. Note that the preparation area is split between the island with the sink and the corner of the kitchen. The work triangle is compact. There will always be a few tradeoffs in any space. 

Let’s take a look at the three main functions of a kitchen:

1. Storage
2. Preparation
3. Cooking

Everyone has personal preferences for what works best, so consider this a guide and not a rulebook.


Storage. As noted, designers recommend putting refrigeration and dry-goods storage at the kitchen entry point. Putting your pantry on one side and a countertop that’s 15 to 24 inches (38 to 61 centimeters) on the other is a good idea. This will allow you to easily set down items that have been taken out of the freezer and refrigerator.

The pantry can hold dry goods plus brooms and supplies like paper towels. Use drawers in this area to hold plastic bags, foil and anything that can contain food to be stored. For the cabinets in this area, you will want to have mixing bowls, cake pans, measuring utensils and any other items that aid in assembling meals.

Preparation. Ideally, prep and cleaning space is best located around the sink. Within these areas will be everyday glasses and dishes, along with trash receptacles and the dishwasher. Allow 18 to 36 inches (45 to 92 centimeters) of countertop space on one or both sides of your sink.

Preparation areas are best kept clear of other items, since you will always be taking out bowls, plates and utensils there. Allow at least 36 inches (92 centimeters) of uncluttered countertop space for preparation in a small kitchen. Larger kitchens will have much more. This is one reason that islands are so popular. They provide broad and well-lit surfaces on which to perform the majority of kitchen tasks.

Cooking. The cooking centers should be arranged around the range, cooktop and wall ovens. Place pots, frying pans and baking sheets in the vicinity around your burners and ovens. It is a good idea to place small appliances such as toasters and coffeemakers in this area also, as it will leave your preparation areas unobstructed.

Allow 21 to 36 inches (53 to 92 centimeters) of countertop on either side of your cooktop. If possible, place wall ovens with a free countertop immediately next to them so that you can set down hot food immediately. Place seasonings, breadboards and potholders in nearby drawers and cupboards. Keep serveware toward the dining area.

Recommended Dimensions of Kitchen Elements

The dimensions of all the pieces in your kitchen are important to get right to make the best use of your space. A common refrigerator width is slightly less than 36 inches (92 centimeters). The problem is often the depth. In recent years some manufacturers have designed them to be much deeper than a 24-inch (61-centimeter) base cabinet. You can still buy shallower freestanding refrigerators, but you have to pay close attention to the dimensions listed in its specifications to be certain. The other option is built-in configurations, but they are significantly more expensive. 

Look for a depth of 30 inches (76 centimeters) or less, excluding handles, unless you can design your kitchen space to accept a deeper unit. Another thing to consider is the swing of the refrigerator door. Always examine the swing direction to see if it will meet an obstruction.


Here you can see how the height of the cabinets plays an important part in the configuration. Upper cabinets are normally positioned at 18 inches (46 centimeters) above the countertop and are 30 to 42 inches (76 to 107 centimeters) in height. Consider that your average maximum reach over and into an upper cabinet is 70 to 80 inches (178 to 203 centimeters) above the floor. Cabinets set at above 7 feet will likely need to be accessed with a step ladder. Cabinets above 8 feet are not practical for the majority of people; however, they may serve as storage for seasonal or decorative items, to be reached with step stools and ladders. 

The standard dimensions for base cabinets are 24 inches (61 centimeters) deep and 36 inches (92 centimeters) high. In general people are getting taller, so some homeowners are bumping up the counter height to 38 inches (97 centimeters).


Another important dimension to consider is the distance between cabinets. Entry points can be as little as 36 inches (92 centimeters) when there is a cabinet on only one side. Stay at least 42 inches (107 centimeters) from the face of a cabinet to the one on the other side; 48 inches (122 centimeters) is even better, but going beyond 60 inches (152 centimeters) is too wide in most cases. However, if it is a U-shaped kitchen, you could get away with up to 96 inches (244 centimeters).

Bathroom Remodel: A Survey Reveals Homeowners’ Plans

Article by: Mitchell Parker

Older and younger generations often have widely differing viewpoints. But who knew bathrooms could be so divisive? In a recent Houzz survey, we asked homeowners planning a bathroom remodel or already in the process of one about their needs and desires. Of the 7,645 people who responded, young and old homeowners tended to fall into two clear groups.

Contemporary Bathroom

by

Glen Ellyn Kitchen & Bath Remodelers

Drury Design

Homeowners 65 and older are more likely to skip adding a bathtub than those under 35. This could be for any number of reasons, but it’s likely that younger homeowners may have or expect to have children, who would be more likely to use a tub. Plus, those 65 and older likely choose showers because they’re more accessible for aging in place.

Bathtubs have traditionally boosted resale value (which 31 percent of the respondents said was the driving factor for their bathroom remodel), but older people may be planning to hang on to their homes longer, so resale isn’t as much of an issue.

Traditional Bathroom

by

Atlanta General Contractors

Cablik Enterprises

For those adding tubs, freestanding models top the list, with 33 percent of respondents preferring them over drop-ins, undermounts and other styles. 

Contemporary Bathroom

by

Bethesda Design-Build Firms

ART Design Build

Young and old are also split on how they like their showers. If you’re under 45, you’re more likely to choose a rain shower and multiple showerheads. If you’re over 55, you likely prefer hand showers and sliding bars.

Rustic Bathroom

by

Toronto Photographers

Peter A. Sellar – Architectural Photographer

Meanwhile, there are two camps when it comes to, er, No. 2. The survey found an even split when it comes to toilet exposure: 52 percent of people want an open toilet versus one behind a closed door. Younger homeowners (25 to 34 years old) prefer tankless or wall-mounted models over the traditional two-piece ones.

Traditional Bathroom

by

Fort Washington General Contractors

HomeTech Renovations, Inc.

Upgrading features and fixtures was the main reason cited for remodeling a bathroom (49 percent). Frameless glass is one of the more popular choices. About 79 percent of people will choose all-glass enclosures for their main shower, and 54 percent will chose frameless glass.

Traditional Bathroom

by

Duxbury Design-Build Firms

ARCHIA HOMES

Lighting is important too, whether it’s bringing in the natural sunshine with skylights or adding more LED lights. New windows top the list too, with 48 percent of respondents saying they plan to add a window and 41 percent a lighted vanity mirror. And if that’s not enough, 7 percent say they’ll add a showerhead with LED lights.

Transitional Bathroom

by

Victoria Architects & Designers

The Sky is the Limit Design

Also, 42 percent of all respondents are planning to add a shower seat. I think it was Winston Churchill who said, “Why stand when you can sit?”

Traditional Bathroom

by

Larkspur Architects & Designers

McCoppin Studios

White cabinets are the preferred color choice, with 32 percent of homeowners saying they’ll choose this ultimate neutral hue.

Contemporary Bathroom

by

Portland Kitchen & Bath Designers

Kirstin Havnaer, Hearthstone Interior Design, LLC

Brushed nickel (26 percent) and polished chrome (24 percent) are the front-runners for faucet finishes.

Bathroom Remodel Insight: A Houzz Survey Reveals Homeowners’ Plans

Article by:

Older and younger generations often have widely differing viewpoints. But who knew bathrooms could be so divisive? In a recent Houzz survey, we asked homeowners planning a bathroom remodel or already in the process of one about their needs and desires. Of the 7,645 people who responded, young and old homeowners tended to fall into two clear groups. 

Homeowners 65 and older are more likely to skip adding a bathtub than those under 35. This could be for any number of reasons, but it’s likely that younger homeowners may have or expect to have children, who would be more likely to use a tub. Plus, those 65 and older likely choose showers because they’re more accessible for aging in place.

Bathtubs have traditionally boosted resale value (which 31 percent of the respondents said was the driving factor for their bathroom remodel), but older people may be planning to hang on to their homes longer, so resale isn’t as much of an issue.


For those adding tubs, freestanding models top the list, with 33 percent of respondents preferring them over drop-ins, undermounts and other styles. 


Young and old are also split on how they like their showers. If you’re under 45, you’re more likely to choose a rain shower and multiple showerheads. If you’re over 55, you likely prefer hand showers and sliding bars.


Meanwhile, there are two camps when it comes to, er, No. 2. The survey found an even split when it comes to toilet exposure: 52 percent of people want an open toilet versus one behind a closed door. Younger homeowners (25 to 34 years old) prefer tankless or wall-mounted models over the traditional two-piece ones. 

Upgrading features and fixtures was the main reason cited for remodeling a bathroom (49 percent). Frameless glass is one of the more popular choices. About 79 percent of people will choose all-glass enclosures for their main shower, and 54 percent will chose frameless glass.


Lighting is important too, whether it’s bringing in the natural sunshine with skylights or adding more LED lights. New windows top the list too, with 48 percent of respondents saying they plan to add a window and 41 percent a lighted vanity mirror. And if that’s not enough, 7 percent say they’ll add a showerhead with LED lights.


Also, 42 percent of all respondents are planning to add a shower seat. I think it was Winston Churchill who said, “Why stand when you can sit?”


White cabinets are the preferred color choice, with 32 percent of homeowners saying they’ll choose this ultimate neutral hue.


Contemporary Bathroom by Portland Kitchen & Bath Designers Kirstin Havnaer, Hearthstone Interior Design, LLC 

Brushed nickel (26 percent) and polished chrome (24 percent) are the front-runners for faucet finishes.

9 Hard Questions to Ask When Shopping for Stone

Article by: Anne Higuera CGR, CAPS

Deciding to use stone and choosing the kind to use are more complicated than just picking a finish you like. Because stone is a natural material, its appearance, durability and production can vary from one quarry to another, and from one batch to another, causing problems (or in some cases, providing benefits) you might not have anticipated. 

Here are nine questions you should consider before buying stone.

Read more

Countertop + Backsplash: Making the Perfect Match

Article By:

Which do you select first — kitchen counter or backsplash? How do you coordinate colors? Is it OK to mix patterns? The seemingly unlimited countertop and backsplash choices can feel overwhelming.

I’ve had homeowners approach me after weeks or months of looking at and collecting samples of materials that they love separately but just don’t love together. Some settle on a combination that looks good together, but they don’t actually like either material on its own. 

Here are 10 examples of stunning and successful countertop and backsplash combinations to help you plan your own mix of kitchen finishes, along with tips to ease your selection process. 

Approach 1: Select the Countertop First

If you feel overwhelmed by the countertop and backsplash options, try focusing on countertop selection first. Your countertop is the workhorse in your kitchen and can constitute a good chunk of your budget, so you’ll want to get it right. Your budget and the way you use your kitchen will narrow things down. Plus, there are generally fewer color and pattern options for countertop materials, whereas backsplash options are practically unlimited. Countertops will also be installed before the backsplash, so you definitely need to decide on them first if construction has already begun.

Browse the Houzz photo database for countertop materials that appeal to you and the compare pros and cons in the Houzz guides to countertops. If you want to see something in person, check out what’s available at your local stone yard, kitchen and bathroom design showrooms, and home improvement stores.

Shown: Soapstone and butcher block counter; linear glass tile mosaic backsplash 

Once you’ve homed in on your countertop of choice (congratulations!), you have immediately narrowed the field of options for the backsplash. Trust me, this makes your life easier. 

Now, you don’t necessarily need to exactly match the color or pattern of your countertop to that of your backsplash, especially if you go for an unusual hue or a countertop material with a lot of movement in it. In these cases a simple and neutral-hued backsplash is a good choice, so that the countertop takes center stage and does not fight with the backsplash for attention.

Shown: Orange quartz counter (get the look withOne Quartz from Daltile); Oceanside Glasstile’sTessera mosaic blend in Veil backsplash


If you want to go bold with both your countertop and backsplash, bring a sample of your chosen countertop material with you as you shop for backsplash tile. You will be able to instantly limit your backsplash options to those that work with your countertop material. If you are struggling with finding the right backsplash to work with your countertop selection, consider hiring a pro, even if it’s for just a few hours, to help you nail the selections. Or enlist the help of a color- or design-savvy friend.

Shown: Green quartz counter (get the look with Silestone); mosaic glass tile backsplash 

Approach 2: Select the Backsplash First

Of course, if you happen to find a backsplash you absolutely love before you’ve even looked at countertops, I say go for it. Making this selection will absolutely help you narrow down the options for the countertop. If you go for a statement-making backsplash such as the one here, find a quiet, subtler countertop material so it doesn’t fight with the backsplash.

Shown: Pietra del Cardoso stone counter; Stone & Pewter Accents mosaic glass tile backsplash


I prefer that either the countertop or the backsplash be the star of the show, with the other material playing a supporting role. This stunning backsplash has lots of color and movement and, in my opinion, should not have to compete with an equally attention-grabbing countertop.

Shown: Caesarstone counter; glass mosaic Waterworks backsplash 

That’s not to say you shouldn’t consider a mix of colors and patterns for both your countertop and backsplash. But if both of your materials feature multiple hues and have different patterns, aggregates or movement, stick to one overriding color palette for both materials. This will give the materials a nice cohesiveness, so they don’t fight with each other.

Shown: Bianco Romano granite counter; stained glass mosaic tile backsplash 

Approach 3: Use the Same Material for Both Counter and Backsplash

Love your countertop selection and want to keep this process simple? Consider running your countertop material up onto the wall as the backsplash. This is an especially smart option if you are required to purchase entire slabs of your chosen countertop material and you happen to have enough material left over to use the remainder as the backsplash.

Shown: Get the look with a Pietra del Cardoso stone counter and backsplash. 

You can also use the same or similar countertop material for your backsplash but break it up by selecting a tile format for your backsplash rather than a slab. This can be a budget-friendlier option than purchasing extra slabs to create a backsplash.

Shown: Get the look with a Carrara marble counter or, for a more durable option, check out Misty Carrera from Caesarstone; Carrara marble subway tile backsplash 

Another cost-effective approach is to run your countertop 4 to 6 inches up the wall as a short splash. It will give you a nice finished edge where the countertop meets the wall, and it will also provide protection to the part of the wall most likely to get wet or dirty. Just be sure to check your local building code requirements regarding the minimum height of noncombustible materials on the wall area above the range or cooktop.

Shown: Uba Tuba granite counter; colbalt-blue Daltile subway tile backsplash 

Approach 4: Hire an Expert

Some homeowners just have a difficult time visualizing their finished kitchen, which is why material selection can prove so challenging. And all too often you are asked to make too many decisions in too short a time period. If you know you are prone to analysis paralysis, do yourself a favor and give yourself enough time to weigh your options, but with a firm deadline to make the decision. Engage the assistance of a friend whose taste you admire, or hire a design professional to help guide you or bless your selections.

Shown: Gray and white granite counter; oversize ceramic tile backsplash


8 Ideas for High-Functioning Mudrooms

Mudrooms help us transition from our adventures in the great outdoors to the comforts inside our homes. But when packed with clever built-ins, space-maximizing storage and nifty organizers, a mudroom can also become a high-functioning, double-duty space that can accommodate anything from folding laundry to making crafts. 

Don’t believe me? Check out these fantastic mudrooms and my space-saving mudroom organization tips to see how you can make the entry to your home attractive, functional and clutter free.

Office space. Transform your mudroom into a double-function space with a built-in desk and file storage. One wall is all you need if you plan it right. The cubbies and hooks help keep outdoor gear and clutter separated from the desk area. 

Mediterranean Entry by Portland Interior Designers & Decorators Jessica Helgerson Interior Design 

Helpful hooks. Turn an awkward or a dead space into something you’ll actually use. A row of simple hooks around the perimeter and a few well-placed wire baskets have turned this once-empty nook into a valuable drop zone near the home’s entry. 


Neat and clean. Not all of us like to have our jackets and coats on display. These floor-to-ceiling cabinet doors keep clutter out of sight and add an architectural statement.


Laundry time. If you have a spacious mudroom at the back of your house, take advantage of all that room. Consider including a laundry section to make life a little easier. A washer, dryer and small sink mean you can throw dirty clothes right into the wash as soon as you get home. 

Pet station. If you share your home with furry friends, your mudroom is the perfect place for a doggie stop. This pet-friendly mudroom’s special space for cleaning pets means the owners will never see a muddy paw print in their house again. A sophisticated palette of durable materials makes it feel sleek, despite its practical purpose.


Seasonal storage. Mudrooms can be the perfect place in which to store outdoor sports gear for all four seasons, with the right organizational techniques. This ski-loving family came up with a great solution to keep their winter gear under control: Cubbies for gloves and hats up top, spots for boots below the bench and custom ski racks keep everything neat and tidy.

Personalized. Clever and colorful solutions help bring this mudroom to life. Let your little ones choose a favorite color to make their special space in your mudroom more fun. Color-coordinated baskets add a little personality to an all-white space with minimal cost and effort.


Get crafty. If you have the room, incorporate a workstation into your mudroom. Wrap a gift, help your child with a school project or prepare a package for the mail on your way out the door. Having everything in one spot will make multitasking much easier. 

The Kitchen Counter Goes to New Heights

Article By: 

Traditional counter heights are useful. They allow us to enter any kitchen and, even with our eyes closed, find the counter where we expect it to be. Despite this significant convenience, industry standard counter heights don’t work for everybody, because there’s no such thing as industry-standard human beings. 

You don’t have to stand for the one-size-fits-all mentality. I spoke with numerous designers who are bucking the norm to offer clients custom features that won’t hurt (and might actually help) resale value. 

The benefits of multiheight kitchen counters. Do you feel overexerted every time you prepare a meal? Architect and universal design expert Carol Sundstrom explains why this might be. “If you are short, reaching up and extending forward to chop on a standard-height countertop contributes to shoulder strain,” she notes. “If you are tall and constantly bending forward to see the food you’re prepping better, or extending your arms fully to reach a countertop that is too low for you, that contributes to both back and shoulder strain.” 

Having multiple counter heights is a great solution for multiple users. “I prefer to see more than one height of countertop in a kitchen, rather than all the counters raised up because the owners are tall, or all the counters lowered because the owners are petite,” Sundstrom continues. “Aside from making friends and family who may not share your same proportions feel comfortable when they are helping you, you also preserve your resale value.” 

A good height. Though there is no industry standard to such custom features, Sundstrom suggests raising and lowering counter heights in 2-inch increments when mocking up a kitchen, then fine-tuning them. 

Features that can be stepped up or down in a kitchen. Eat-at counters offer great benefits, as this one by Yvonne Randolph shows. The 12-foot island was divided in half to form a table-height eat-at counter. “The clients, who are in their 60s and entertain a lot, didn’t want the clunky effect of sitting at bar stools,” Randolph says. “They have a deaf son and daughter-in-law, so they decided to round the edge. It’s much easier to sign around a table without corners.”


You don’t need to communicate through sign language to appreciate such a feature.
 

Counters that work for every preference and body. This kitchen, designed by Toni Sabatino, offers a lowered sink area, the height of which is 31½ inches, as opposed to the standard 34½ inches. The motive was purely aesthetic. “We chose to make the copper sink the focal point and felt the break in the counter would draw the eye.” 

In another of Sabatino’s designs, two stepped-down eating areas bring the food and conversation down to a comfortable seated level, rather than forcing bodies to climb up to the action. 

The idea for this kitchen design, by M.J. Lanphier, was to have standard dining-table-height seating for the clients’ children. The homeowners didn’t want any chairs to be too tall for them, especially in light of the island’s above-standard height of 36½ inches. 

A bonus of varying heights. This lowered table also provides a physical separation between the children’s clean homework area and the food prep station. 

Though this table purposely can fit only two chairs for the two children, your own stepped feature can just as easily fit more with judicious leg placement. 

“A center pedestal leg on a table allows people to pull up at the counter anywhere without straddling a leg or bumping into one as you get into place,” Sundstrom says. “It also offers the ability of fitting more people around comfortably without triggering the need for table leaves.” 

Aside from dining counters and prep counters, baking centers and cooktops can also have stepped features.


Dishwashers, too, can be taken to new heights — either in their conventional form, as shown here, or as drawers. “Two separate dishwasher drawers, each mounted right under the counter, can ease back strain,” Sundstrom says. “This also enables a dishwasher to be installed in a lower-than-standard countertop height.”


6 Ways to Rethink the Kitchen Island

The hardworking kitchen island can be a very functional and beautiful centerpiece of a kitchen design, and it’s one of the most popular features of a modern kitchen. But it’s not the only way to go. In some spaces an island can feel more cumbersome than useful. If you are feeling the urge to break away from the island-centric kitchen, check out our bevy of inspiring ideas below. 

Save space with an island and table in one. The innovative kitchen in this Sydney home features an island counter on one side, with built-in seating and a marble-topped, extendable table on the other end. Combining a table with an island is a great space saver, and an extendable table can seat a crowd without taking up too much space on a daily basis. 

Another great island-table hybrid, this set works extra hard — the stools are comfy enough to sit on through dinner, yet they can be tucked completely under the table to free up kitchen workspace during prep time.


Encourage cozy suppers with a kitchen table. With an ample-size rustic wood table in the center of your kitchen, family and friends are sure to gather around it night and day. It’s so much warmer and friendlier than a big, blocky kitchen island, and it’s perfect for spreading school projects out on as well. 

Streamline your kitchen with a modern dining set. If you have counter space covered and appliances tucked against the walls, as in the L-shaped kitchen shown here, why bulk up your kitchen with an island at all? A marble-topped Saarinen dining table and Eames chairs (as shown here) are a highly covetable pairing among modern design enthusiasts and enhance the light, airy feel of a white kitchen. 

Get the best of both worlds with a working-height table. When you need more kitchen prep space but don’t want a giant island with to-the-floor storage, a tall table is a good solution. You can still comfortably do prep work, but this type of table takes up far less visual space than a built-in island. 

Taller kitchen tables are also great for narrow spaces. A slender table like the one shown here doesn’t take up too much space but allows ample room to work. If you wanted to sneak in a bit of extra storage, you could track down a table with drawers or an open shelf, or have a knife rack built into the side. 

Enhance flow in an open-plan space with a kitchen table. When your living, dining and cooking spaces are visually linked, a gigantic kitchen island in the middle of everything can look out of place. Choosing a table instead, whether counter height or dining height, will give your entire space a more relaxed, comfortable feel. 

An old wooden table with a rich patina warms up any kitchen but works especially well when the kitchen opens to a wider living space. Add a soft rug underfoot to boost the comfort factor even more. 

Cozy up a contemporary island with plush seats. You can also work with an existing island by choosing ultraplush upholstered tall benches, instead of the typical bar stools. These are extra wide and have a shape that makes them look more like mini settees than stools, and they look supremely comfortable.