FREE DESIGNS AND ESTIMATES

5 Favorite Granites for Gorgeous Kitchen Countertops

Article By: Charmean Neithart, Houzz
Selecting a countertop material for your kitchen remodel or new build is a big decision. I often encounter clients with a mental block when it comes to making a decision on the numerous considerations, like color and edge detail. Additionally, once the countertop hurdle is over, then there is cabinet selection.

I like granite and use it often for its durability and its earthy colors that add great texture to a kitchen. I have a few favorites that I have worked with over the years. These granite selections get my stamp of approval because of color, movement and their flexibility in complementing different cabinet styles. Take a look at these countertop selections and how they seamlessly blend with either painted or stain-grade cabinets to make winning combinations.

Read more

8 Good Places for a Second Kitchen Sink

Article By: Shane Inman

Don’t underestimate the power of a second sink in your kitchen. When installed in just the right spot, a secondary sink can be just as useful as a primary sink. The perfect sink location allows two users to cook and clean simultaneously, making everyday meals and special occasions easier to prep for and clean up after. Whether your kitchen is large or on the smaller side, the right extra sink in the right spot might make your life better.

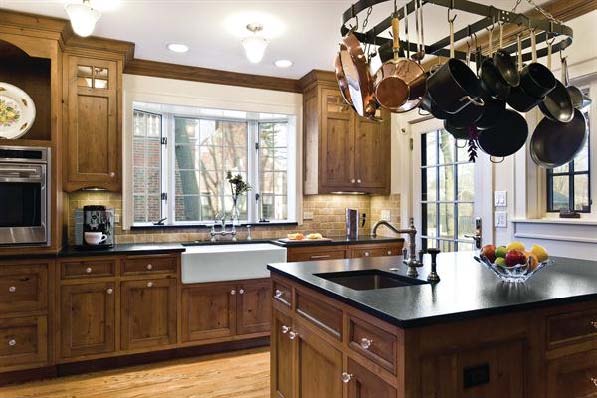
Island. Most designers put second sinks on kitchen islands, where they’re easy to use and access but out of the way of main prep areas. This sink makes cooking easier with chef number two on Christmas and Thanksgiving.


Workstation. Create an out-of-the-way workstation in your kitchen by adding a niche for your second sink. 

The layout of this kitchen allows for a second person in the kitchen to have water access while staying out of the chef’s way. What a great idea!


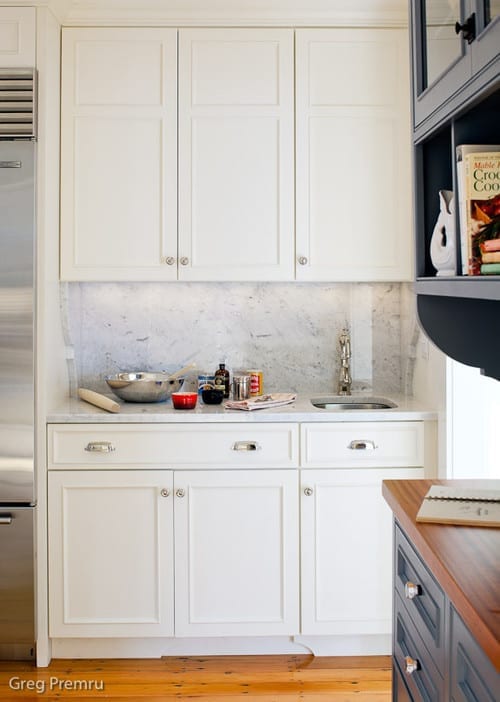
Baking center. If you are an avid baker, having a baking center with its own sink can help you confine your mess. This tidy countertop area keeps the mess contained, and it’s easy to wash the dishes and the countertop once everything’s in the oven.


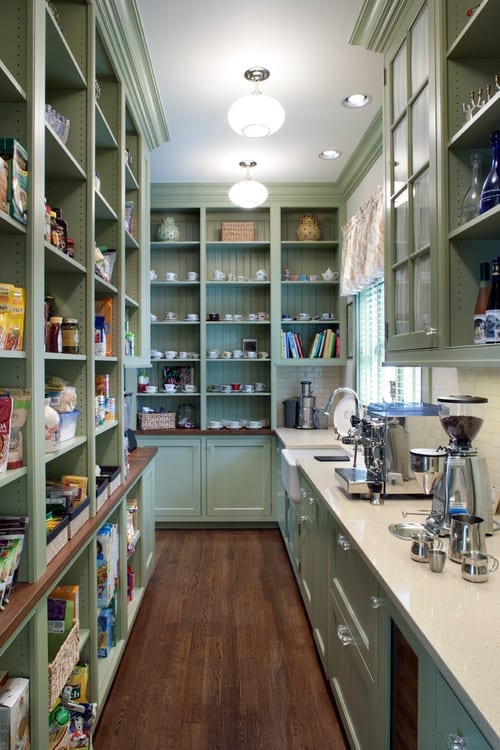
Butler’s pantry. A sink immediately upgrades the functionality of a butler’s pantry. Nothing’s easier than blending, mixing and stirring right near where ingredients are stored; you can prep appetizers and drinks for guests without traveling back and forth into the kitchen.


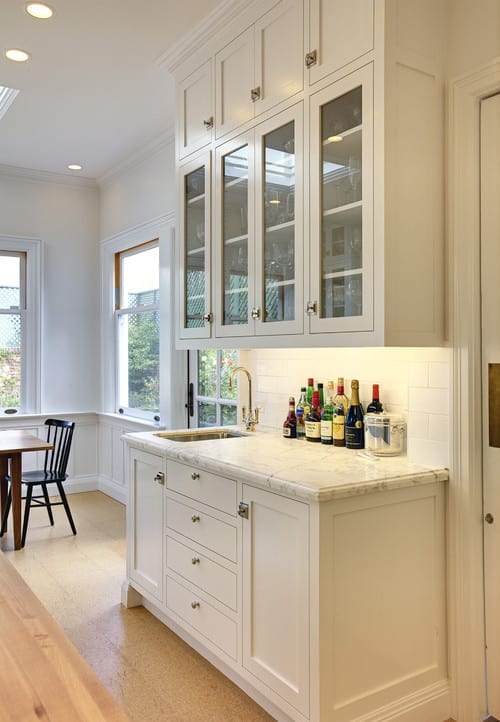
Wet bar. For those who love to host, a wet bar can make entertaining easier. A small sink like the one here is great for adding water to cocktails and doing light cleanup.


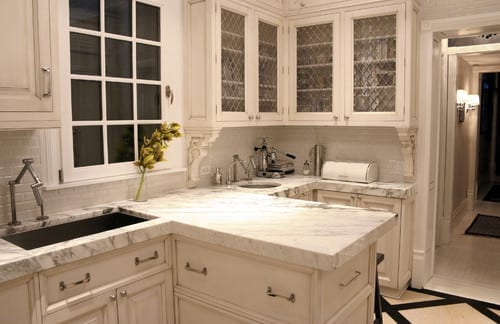
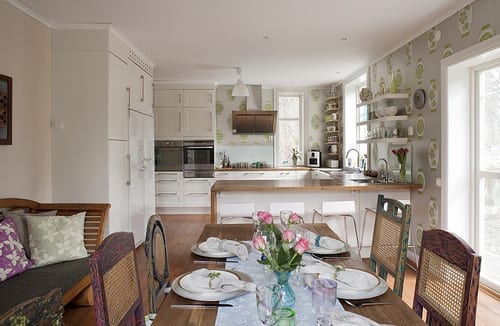
Peninsula. If you have a peninsula instead of an island, adding a sink can be a great solution for guests and homeowners. This particular sink can be accessed from the front or back for easy use.


Eclectic Kitchen by Other Metro Photographers Fotograf Lisbet Spörndly


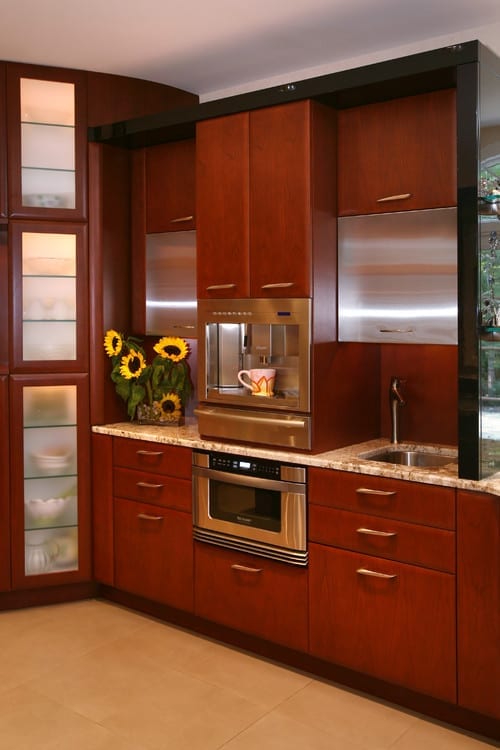
Coffee station. Is coffee a beverage staple in your house? Imagine never having to travel to the main sink to fill the coffeepot (hey, everything’s difficult early in the morning). An additional sink by your coffee center would allow you to fill, pour and serve with ease.


Contemporary Kitchen by Newark Kitchen & Bath Designers Tim Kriebel – KRIEBELDESIGN


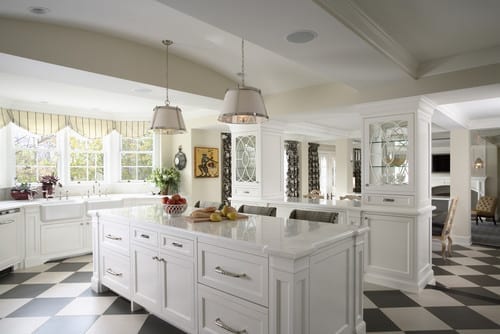
Right next to the main sink. Your secondary sink doesn’t have to be a smaller version of your primary sink — it can be the same size and even the exact same model. Just like double dishwashers, double sinks translate into a quicker cleanup.


Architects, interior designers, and more ∨

Ideas for your living spaces, lighting and landscape design.
Work with a home decorator when choosing area rugs or hanging new window blinds in your home.


Kitchen Design: How to Avoid Standing Room Only

Photo Credit: Dennis Jourdan Photography via Remodeling Magazine

Room for Two: Alder cabinets, honed granite countertops and a tumbled marble backsplash give this kitchen a rustic feel.

The homeowners of this 1920s house (pictured above) had been planning a kitchen remodel for a long time. They went so far as to work on a design that would enclose the porch to expand the space, then got cold feet during the market downturn, and, worrying about the return on investment for an addition, put the project on hold.

By the time designer Diane Lawson, of Diane Lawson Designs in Nashville, TN; met the couple, they had revisited the project but had opted to stay within the existing footprint. However, they presented her with a long list of desires that included: good traffic flow for two cooks, separate cooking areas, an island, increased storage, and a rustic Italian design and details that would blend with the home’s Italianate style. 

Though most homeowners today want to open up the kitchen to the rest of the house, Lawson says this couple bucked the trend, choosing to maintain the separation from the living and dining rooms.

Fitting in the long list of the client’s wants required some compromise, including a peninsula rather than an island, but Lawson viewed the project as putting a puzzle together to set all the pieces neatly in to the outline. 

Photo Credit: Dennis Jourdan Photography via Remodeling Magazine

Window & Wall Upgrade: When the original windows were replaced with low-E units, insulation was also added to the exterior wall.

Puzzle Pieces

To help create a rustic Italian feel, the clients chose knotty alder cabinets. Lawson says that this species has increased in popularity during the last 10 years and that the wood – sometimes referred to as “poor man’s cherry” because of it’s similar grain and reddish tones – can cost 10% to 15% less than cherry.

Since not all manufacturers carry alder, Lawson opted for custom cabinetry. Going with a custom shop also had the advantage of enabling her to maximize storage and create a furniture look with cabinets that fit the age and style of the house. “[The choice] boils down to [the client’s] wish list and what they are looking to achieve,” Lawson explains. “And, of course, budget.”

The clients wanted to use the same finish throughout the kitchen – a rare choice these days, Lawson says. Currently, most of her clients are opting for a contrasting finish for the island. 

Lawson had known remodeler Michael Menn, of Michale Menn Ltd., in Chicago, for almost 20 years and brought him on to help her with the extensive remodel.  The ceiling above the sink had a soffit. Menn removed it to accommodate Lawson’s design, which took the cabinets to the ceiling to provide extra storage. 

One of Lawson’s biggest design challenges was the traffic pattern for the family’s two “heavy-duty chefs” and keeping them out of each other’s way. The original freestanding island really affected the pattern, so Lawson moved the island to abut a wall. “While you don’t have access on all four sides [of the island],” Lawson says, “it gave us more room in the busy aisle-way, which is the main entry into the kitchen and is where we needed as much space as possible” – especially when one of the cooks is standing at the island prep sink. 

The island has a small trash cabinet and a shelf for the client’s heavy stand-mixer.

Photo Credit: Dennis Jourdan (photo) | Nicole Babcock (floorplan) via Remodeling Magazine

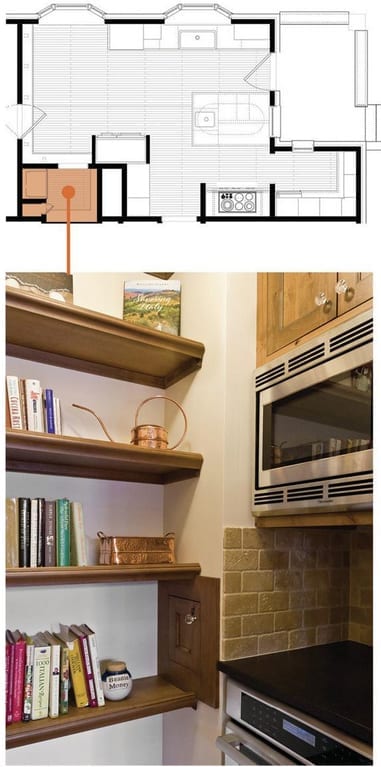
Into the fold: Removing the door and adding upper and lower cabinets makes this former pantry feel like part of the main kitchen.

Photo Credit: Dennis Jourdan (photo) | Nicole Babcock (floorpan) via Remodeling Magazine

Cook Nook: The second pantry has a microwave and an oven. The existing laundry chute remains – but it has been reframed to match the cabinetry.

Separate Yet Cohesive

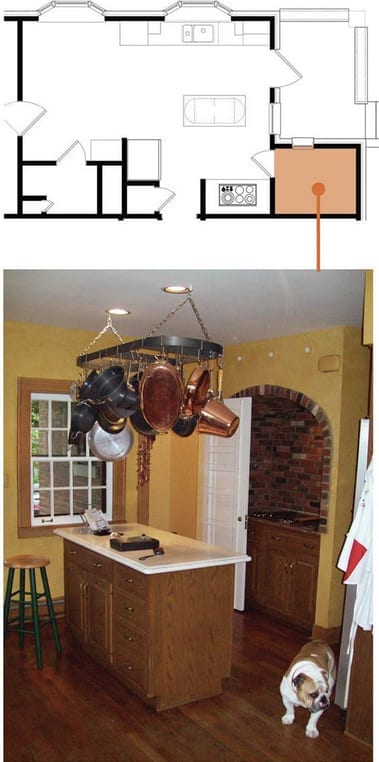
The existing 360-square-foot kitchen included two under-utilized pantries. Lawson thought the 18-square-foot closet next to the stove alcove would work better as a butler’s pantry, so Menn removed the door to make it part of the kitchen and replaced the wire-rack shelves with cabinets that match those in the main kitchen. The L-shaped run of cabinets has upper and lower cabinets and a countertop. An undercounter wine refrigerator is the only appliance. 

The other 24-square-foot closet is closer to the dining room. Lawson considered removing the walls to incorporate it into the dining space, but there were two obstacles to doing that: a laundry chute in the closet and a two-story chimney that runs adjacent to that pantry. “We were bound,” Menn says, but the team also thought that retaining the quaint “little pockets” of space matched the style of the 90-year-old home. As they had done with the other closet, the crew removed the door. The existing closet had some shelves, an outlet, and a hanging bulb. The new space contains an oven, counter space, and upper shelves with a microwave. The wife likes to bake, and this area gives her a space to work in while her husband prepares food in the main kitchen area.

Photo Credit: Dennis Jourdan Photography via Remodeling Magazine

Brick or Treat

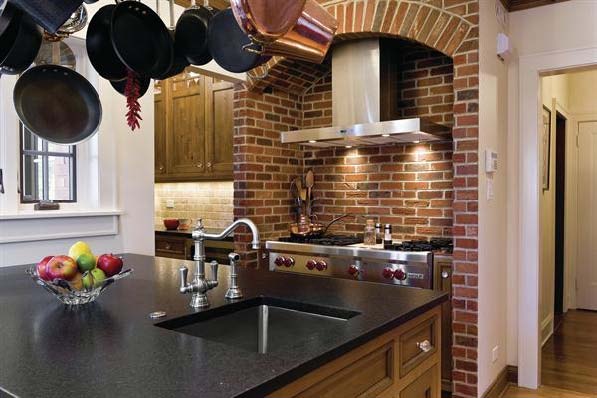
The original cooking alcove was outlined with faux brick. The clients liked the idea of a brick alcove and felt that it fit well with the new design’s rustic feel. And, Lawson says, the material ties in with the brick porch outside the kitchen.

Menn and Lawson thought the alcove could be enhanced to make more of a statement, so Menn’s team created a taller, softer arch at the top of the opening and installed real brick – cut ¾-inch thick – on the entire wall, as well as on the wall adjacent to the butler’s pantry.

The alcove also has contemporary features, including a sleek stainless steel hood, a Wolf cooktop, and a stainless steel storage drawer custom-made by the cabinet shop. The hood is actually made for an above-island installation that the clients had considered for the addition version of the project. They liked the shape, so Menn installed it here. He made custom ductwork to meet local code and vented the hood through an exterior wall. Narrow base pull-out cabinets flank the stove and hold spices. 

(You’re reading ‘Standing Room Only’ originally posted on Remodeling)

Sensational Space-Saving Kitchens


Galley Kitchens - Bruce Buck.jpg

Photo Credit: Bruce Buck via This Old House

Galley Kitchens

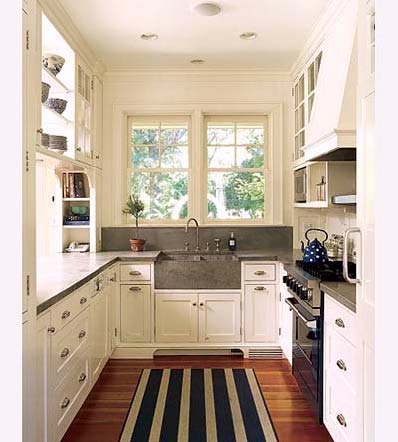
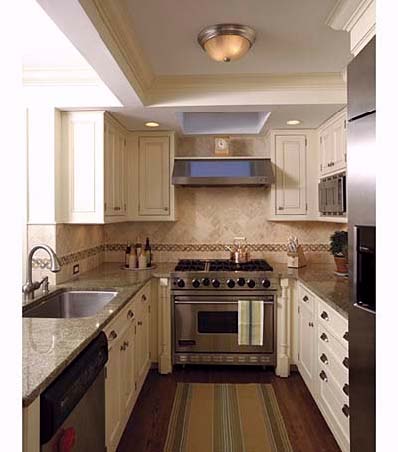
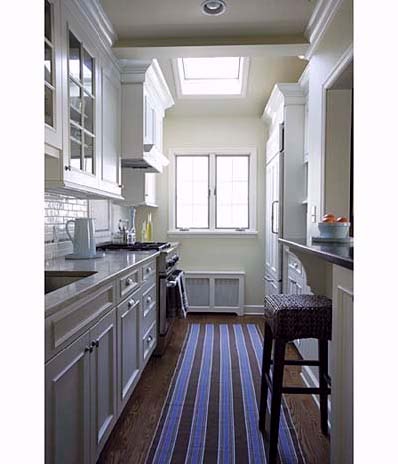
For maximum efficiency when short on space, this layout excels. Its two parallel counters make all points of the work triangle equally accessible. Important things to keep in mind during your design are; aisle space, light and storage.

In this kitchen (pictured), concealing the fridge and dishwasher behind cabinetry panels gives the small space a tidy look. Light-colored cabinets, open shelving, and a large pass-through window make the galley open and airy.


Shake it Up - Joshua McHugh.jpg

Photo Credit: Joshua McHugh via This Old House

Shake It Up

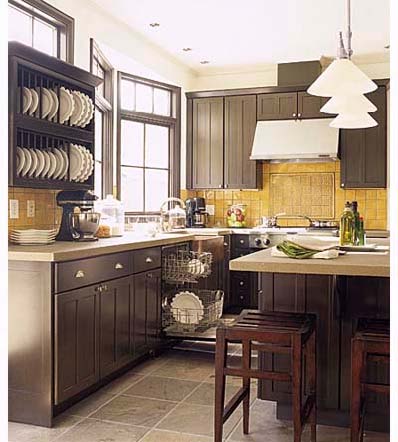
Defined by simple lines, natural and handcrafted materials, and a muted palette, this Shaker-style kitchen (pictured) is smart and functional. The large wall-hung plate rack makes attractive dishware a visual focus, and offers quick access when setting the table. Small apothecary drawers alongside the range make use of often wasted space, while base cabinets are fitted with pull-out shelves and full-extension drawers to maximize storage. The island is perfect for meals, with a cast-concrete counter and a triple-pendant lamp overhead.


Universal Appeal - Joshua McHugh.jpg

Photo Credit: Joshua McHugh via This Old House

Universal Appeal

Designed for a older couple, this kitchen (pictured) tucks away great tricks for a comfortable lifestyle. The lighting scheme removes the risk of over lighting or glare by using undercabinet fluorescent strips and large milk-glass pendant globes. Easy-to-pull handles are used on the refrigerator and dishwasher, the latter of which is a drawer, eliminating the need to bend down to load and unload. The kitchen sink is equipped with a single lever and integrated sprayer hose, and the rangetop’s continuous grill allows for easy movement of pots and pans without any lifting.


Form Meets Function - Deborah Whitlaw Llewellyn.jpg

Photo Credit: Deborah Whitlaw Llewellyn via This Old House

Form Meets Function

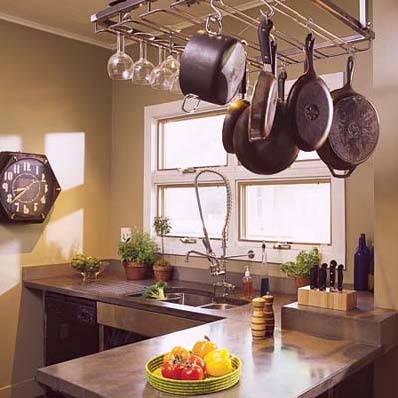
Beauty and function live simultaneously in this small kitchen (pictured). The stylish concrete countertops are complete with a knife block and a built-in drain board. Adding bigger windows and getting rid of the surrounding upper cabinets opened up the space. Cabinets line the adjacent wall.


Family Affair - Michael Luppino.jpg

Photo Credit: Michael Luppino via This Old House

Family Affair

The professional range in this galley kitchen (pictured) serves as the focal point of the design. The configuration offers plenty of counter space, as well as lots of room for cabinets. A pass-through serves as a breakfast bar and looks out onto an intimate corner banquette for family dinners.


Fine Dining - Ann Spurling.jpg

Photo Credit: Ann Spurling via This Old House

Fine Dining

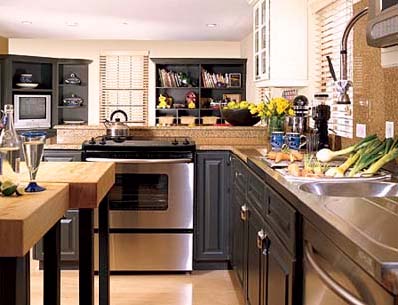
A cozy gathering spot, this kitchen (pictured) is equipped with all the necessities of a professional chef’s workspace. Two ranges, a large utility sink with an industrial-size pot washer, a pair of butcher-block islands on wheels, and wall-to-wall cabinets make prepping, cooking, and serving food easy as pie.


Old Fashioned Feel - Pascal Blancon.jpg

Photo Credit: Pascal Blancon via This Old House

Old-Fashioned Feel

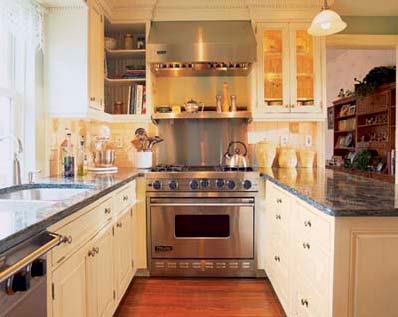
The U-shaped layout of this kitchen (pictured) offers an efficient work triangle for its owners, a couple with a penchant for cooking. Wine cubbies above the window make use of often-overlooked space. Antique-white painted cabinets, dark green granite countertops, and original oak floors help stainless steel appliances blend into the 1874 farmhouse.


Small Wonder - Eric Plasecki.jpg

Photo Credit: Eric Plasecki via This Old House

Small Wonder

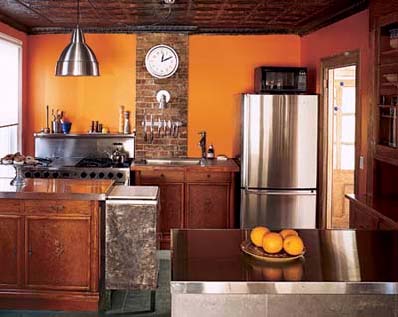
Taking down a wall and replacing it with a breakfast bar opened up this 11-by-12-foot space (pictured). Additional counter space for prep was added with a second peninsula, which also anchors the work triangle. An existing tin ceiling and a brick chimney were uncovered, coordinating well with the antique pine base cabinets that were salvaged from the owner’s grandmother’s house. 


Gorgeour Galley - Michael Luppino.jpg

Photo Credit: Michael Luppino via This Old House

Gorgeous Galley

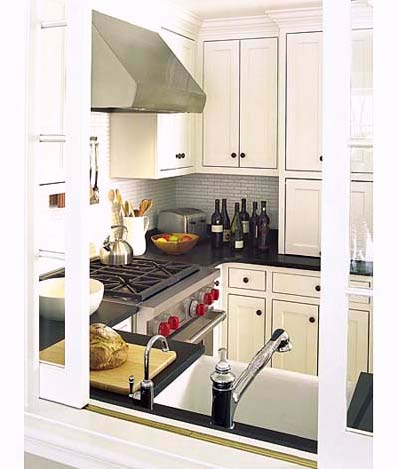
This galley kitchen (pictured) is efficient in its narrow footprint, with ample built-in storage and counter space. A pass-through window opens the room up to an adjacent dining area, while providing a two-seater breakfast bar. Glass-front cabinets with lighted interiors offer a visual focal point.


Santa Fe Style - Peter Vitale.jpg

Photo Credit: Peter Vitale via This Old House

Santa Fe Style

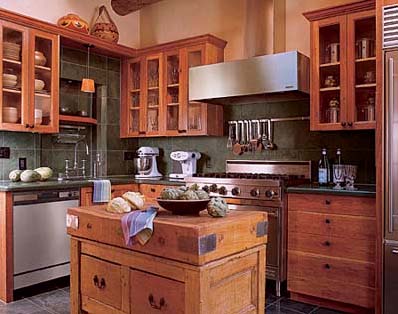
This modest kitchen (pictured) is ideal for its setting in the historic district of Santa Fe, New Mexico. Black slate covers the countertops, backsplash, and floor. While custom cherry cabinets flank a s stainless steel range. The custom-made island serves as a centerpiece to the design.


Rearranging Things - Alexandria Rowley.jpg

Photo Credit: Alexandra Rowley

Rearranging Things

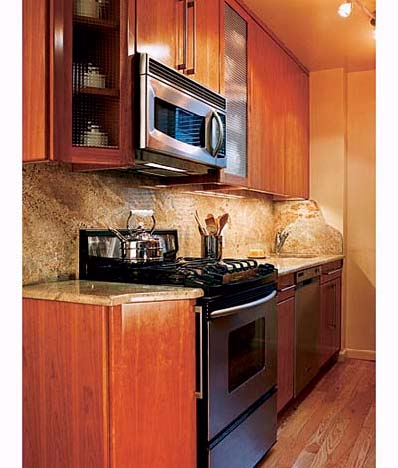
Chef Michael Lomonaco’s plan for his 7-by-10 foot Manhattan galley kitchen (pictured) was simple: use every available space efficiently, without changing the basic layout. So he moved the sink faucet into the corner and the microwave to over the range – the only configuration changes he made – freeing up counter space for food prep. 


Packing it In - Pascal Blancon.jpg

Photo Credit: Pascal Blancon via This Old House

Packing it In

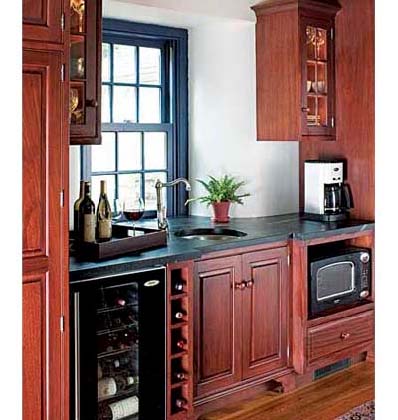
With five kids and a passion for cooking, this homeowner was determined to transform her pea-sized kitchen (pictured) into a comfortable working space. The solution? Packing every corner with smart storage solutions. This particular nook houses lots of cabinet space, a coffee maker, wine cooler, wine rack, bar sink, child-height microwave, and a kids’ snack corner. 

Holiday Home Improvement Projects


Happy Holidays.jpg

The run-up to the holiday season is a good time to be taking care of home improvement projects. Friends and family will be dropping by a bit more frequently, so they’ll be able to see the fruit of your labors.

Even if your home isn’t a major social setting, if you’re like most of us, you tend to spend a bit more time indoors in the winter, so you might as well be making the most of your home for the people living in it: you.

Seal the driveway and fix those cracks in the sidewalk

Salt on the roads and frequent temperature changes can break down your entrance ways. Make a good impression on the outside of your home and avoid curious looks from guests thinking “was that crack always there?”

Home theatre area

You’ve got a big screen television and a great sound system. But what about the stand the TV rests on? How about the decor? You may want to look at custom cabinets or storage for your DVDs and related items. Is the couch your guests will be sitting on looking a bit worn? Upgrade and replace as needed. You may also want to consider mounting your flat screen television on a wall for more effective use of space and a sophisticated look. 

The kitchen: the most used room in the house

When you’ve got company over for the holidays, even if the main event may be in the living room, people naturally gravitate towards the kitchen for an extra cup of cocoa or a gingerbread cookie from the pantry. Think about new cabinets, solid slab countertops or a coat of paint that brightens up the room can create a welcoming feel. And if you’ve upgraded your kitchen utilities like your dishwasher, you’ll have an easier time after the party is done.

Bathroom fix-ups

New tiles and re-grouting can add a fresh look to your bathroom. Maybe it’s also time to add touches like a new mirror, shower curtain or bathroom mat.

Designer fireplace and maintenance

A lot of holiday parties tend to center around the fireplace. Custom fireplaces that double as art installations are becoming more popular. More homes are also including them in other parts of the house besides the living room, such as in the kitchen or master bedroom.

If installation is a bigger job than you were thinking and you’ve already got a working fireplace, at least get your maintenance done, cleaning it up, checking connections and ventilation and ensuring cracks in the mantle or other areas get sealed properly.

Give yourself a home improvement schedule

You’re not going to want to deal with dust and packaging from home improvement projects while your guests are arriving. Give yourself plenty of time to work through your improvements, and don’t bit off more than you can chew. Give yourself a realistic list to accomplish and if you can’t get it done before New Year’s Eve, well, there’s always next year.

CONSUMERS PLAY IT SAFE AND PRACTICAL WHEN CHOOSING KITCHEN COUNTERTOPS

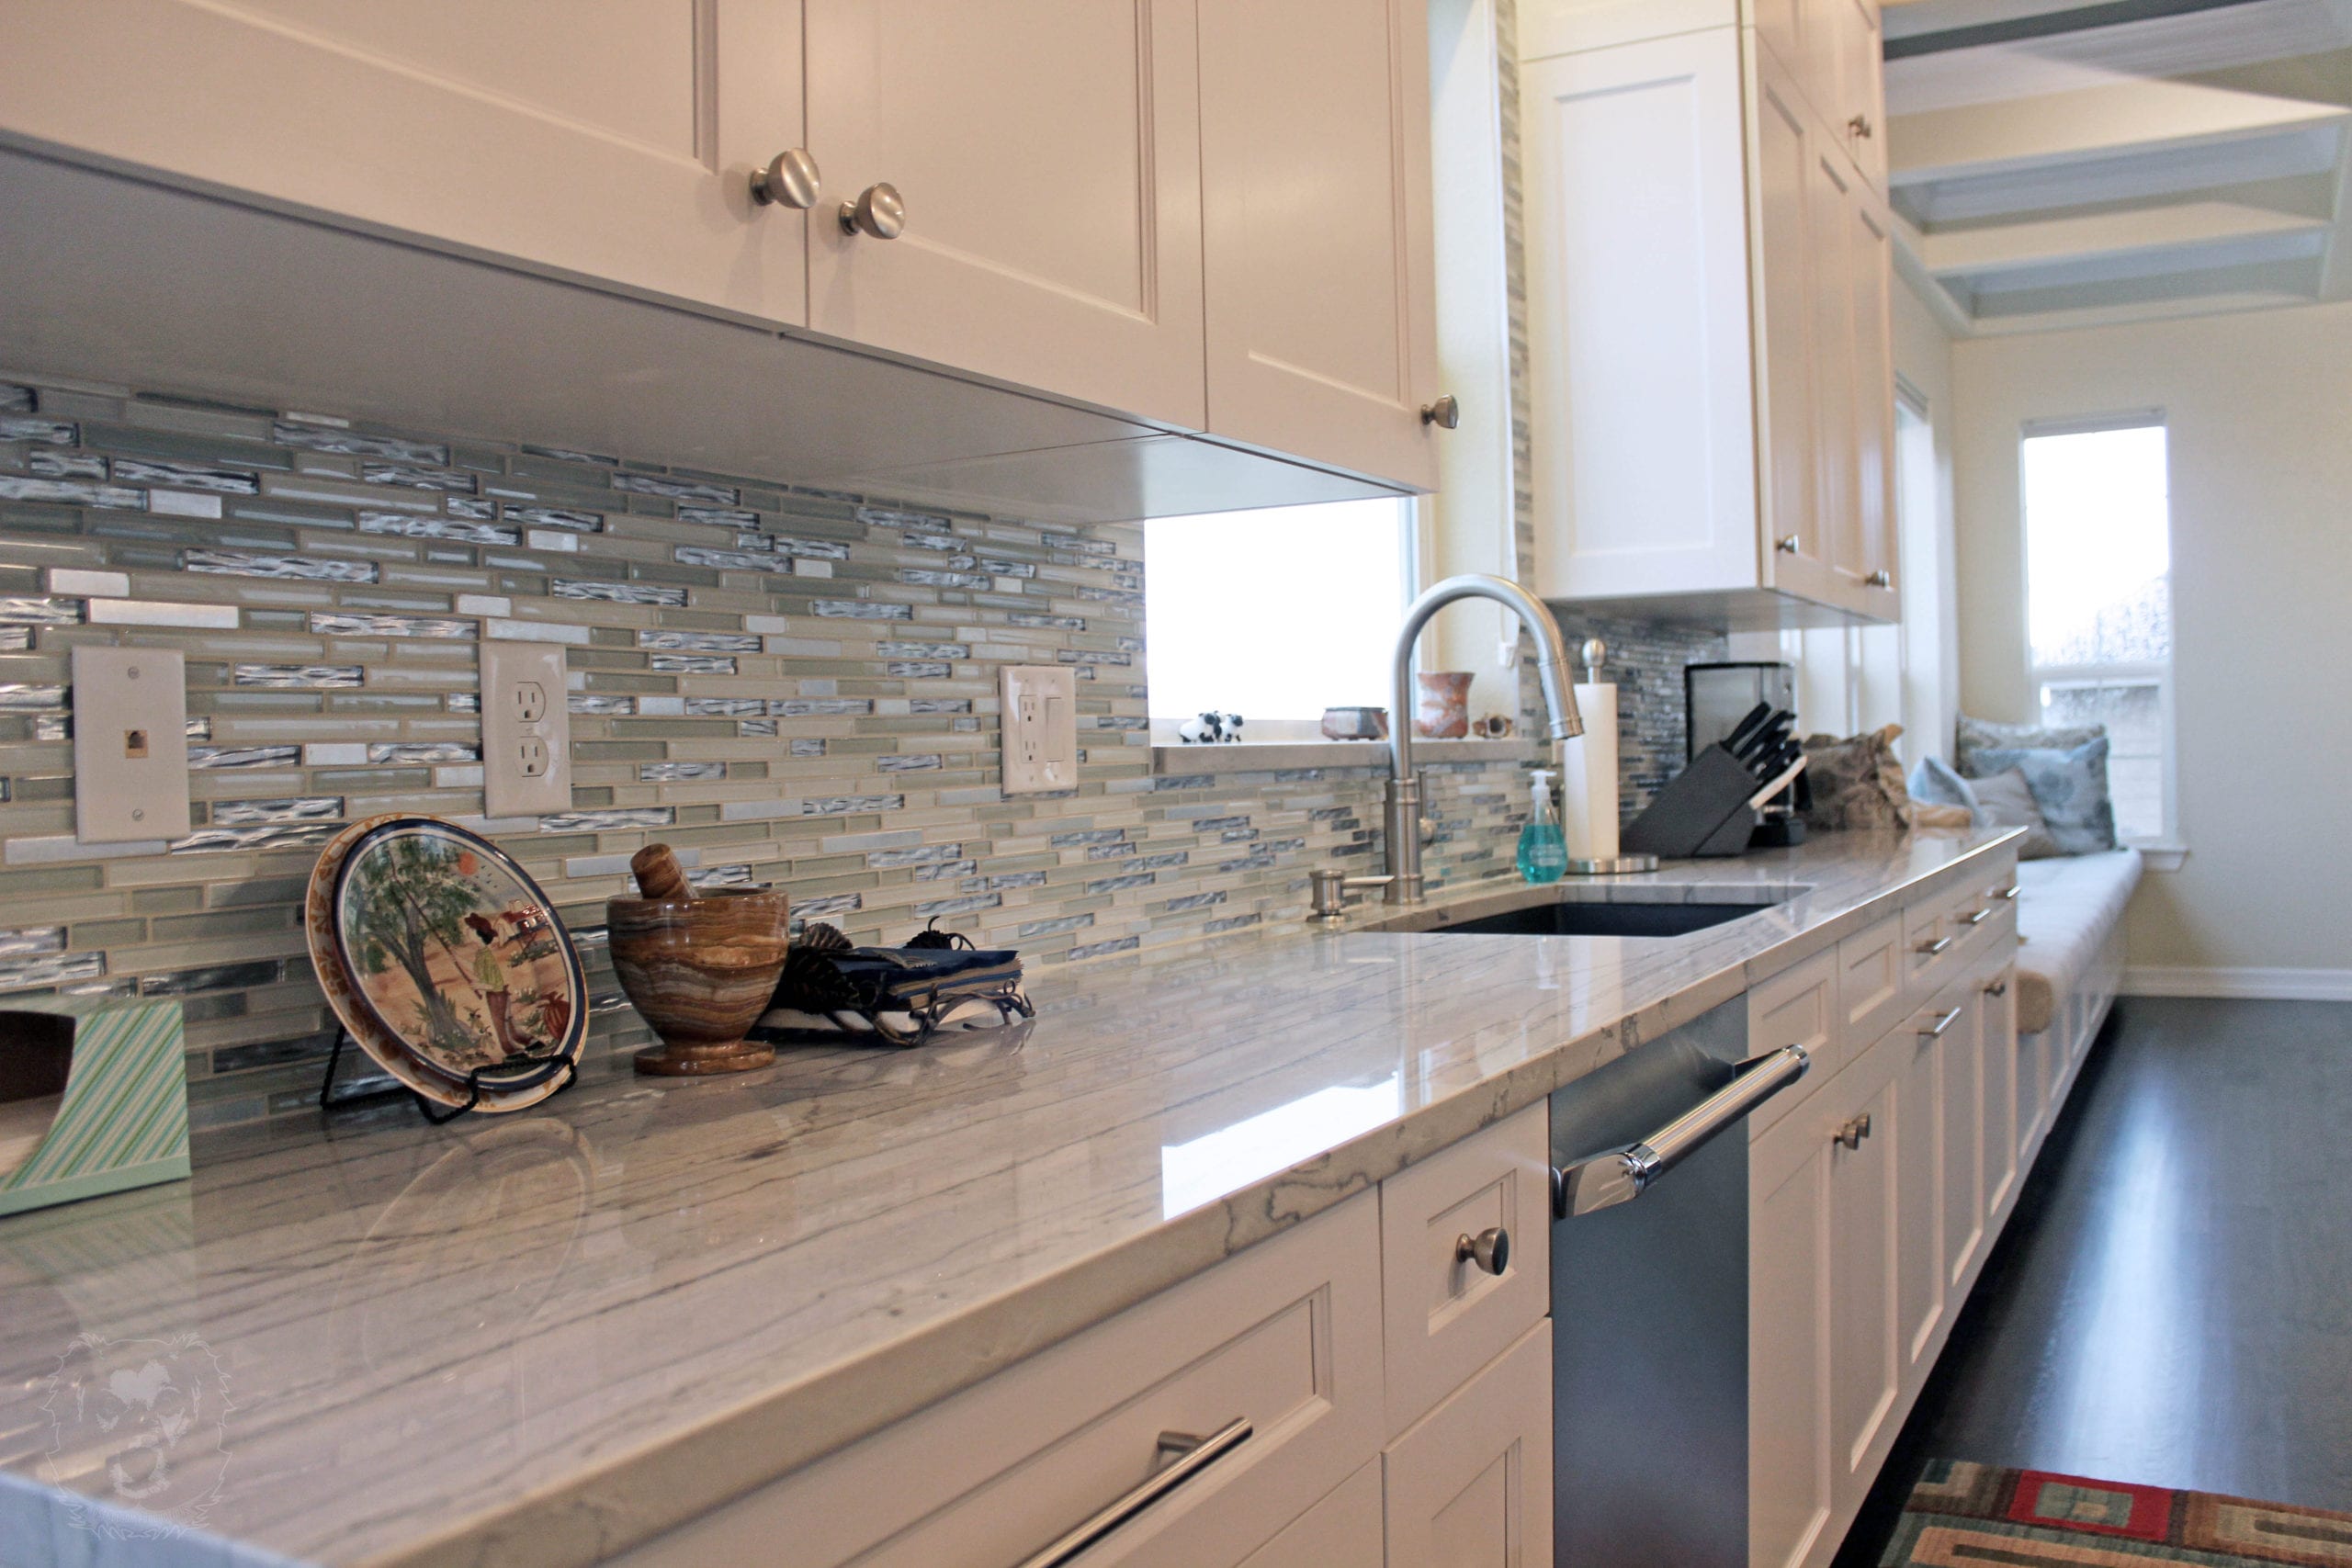
Granite kitchen countertop

If you had to sum up current trends in kitchen countertops in a few phrases, you might use the following: durability, generational preferences, clean and simple and ice cream sundaes. When taken together, they reflect prevailing consumer attitudes about kitchen remodels (and perhaps home improvement projects in general). Sure, they’re renovating for themselves but hey, let’s not get too crazy.

Read more

Kitchen Counters | High-Tech Solid Surfaces Make Maintenance Easy

Solid-surface countertops are the stuff of George Jetson, in which high-tech plastics can be heat sculpted into any imagined shape. These modern surfaces take on many appearances, including stone, yet shed the shortcomings of their counterparts with a nonporous surface that doesn’t age or develop a patina. In this cutting-edge countertop right for your kitchen? Read on to learn more.

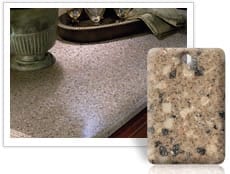
Photo: Wilsonart Solid Surface in Bedrock

The basics: solid-surface counters are a blend of acrylic or polyester resins, powdered fillers and pigments, cast into slab. There are many manufacturers of these synthetic counters, including Corian, HIMACS, Wilsonart, Formica, LivingStone, and more.

Cost: $50 to $100 per square foot installed.

Advantages: solid surface is durable nonporous, making it resistant to stains, mildew and bacteria. Its unique composition makes buffing out scratches a breeze and provides that appearance of a seamless installation, including for integral backsplashes. This product outshines its competitors with an ability to be thermoformed into unusual shapes and configurations.

Disadvantages: its resin-based composition makes this counter material sensitive to heat and vulnerable to scratches. As with many countertops, keep your trivets and cutting boards handy.

Sustainability: many solid-surface manufacturers tout GreenGuard‘s approval, which certifies that due to the nonporous surface and low chemical emissions, the countertop contributes to healthy indoor air quality.

The ecological shortcoming of these products is their composition, which comes from finite, nonrenewable resources, including petroleum and aluminum trihydrate (ATH), which is strip mined. Choosing a solid-surface product with recycled content, can reduce the negative environmental impact.

Maintenance: soapy water will suffice for everyday spiffing up of this easy-to-clean surface. However, it’s essential to dry the surface completely after cleaning or spills, as wet counters can lead to a dull or uneven, blotchy finish.

Special considerations: acrylic solid surface is more pliable, whereas its polyester-based counterparts claim a deeper coloration. Dark colors will show more fingerprints.

Bathroom Remodeling Guide: Dos and Don’ts

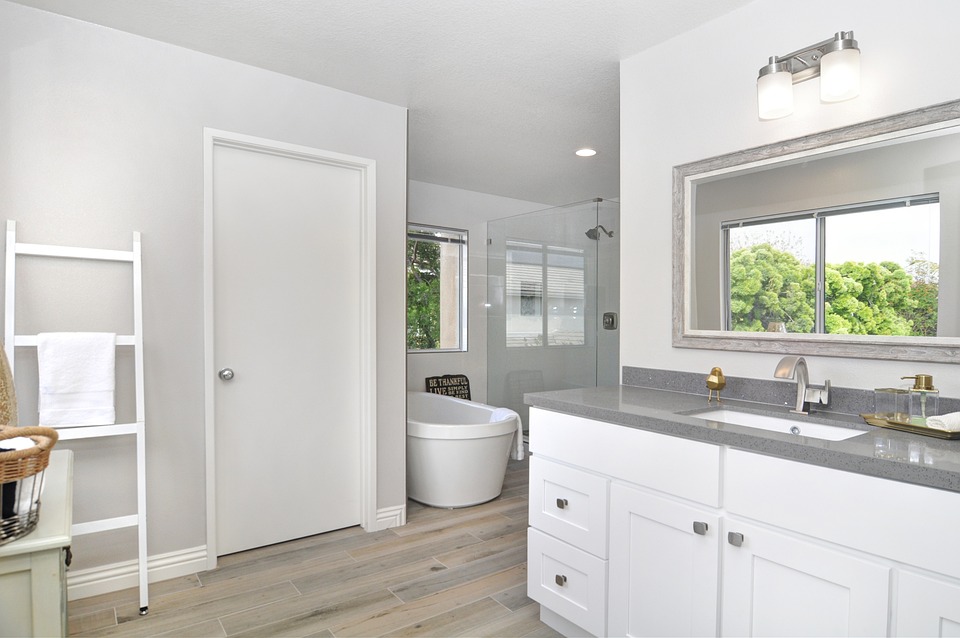
Bathroom counter and cabinets

Seven Upgrades That’ll Make You Happy & Seven You May Regret

An expertly remodeled master bathroom will provide years of pleasure and comfort. But do an amateur job and you’ll be reminded of that fact every day. It’s a tricky space, unfortunately, with lots of moving parts crammed into a tight footprint, not to mention the volumes of water ready to exploit any and all leaks. Setting a budget and planning ahead are two ways to keep your project on track and also take care to choose the best sink, countertop, and toilet for your space. The following list of dos and don’ts will help you master the remodel, whether you do the work yourself or hire it out.

Seven Good Ideas

When you’re investing in a home remodeling project, you want to make sure that the results not only please you but add value to your home and save you money on energy and water as well. These seven steps will help you take advantage of the latest design trends, technologies and products.

#1). Budget for the Unexpected

Hidden water damage is a common problem in bathrooms, whether from a leaky shower pan or running toilet. “If the floor feels spongy, that’s a sign of serious water damage,” says John Petrie, owner of Mother Hubbards Custom Cabinetry in Mechanicsburgh, PA. Other issues are truly hidden, for example a vent stack inside a wall that you thought you were going to knock down. 

An experienced contractor will do exploratory work early in the project to sniff out as many issues as possible. “In the case of the vent stack, we’ll investigate above the bathroom to see the pipe coming up through the house,” says Petrie. But contractors can’t see through walls, so don’t expect them to catch every possible pitfall. That’s why it’s important to build a 10 to 15 percent cushion into your budget. If nothing goes wrong, you’ll have a nice little windfall. 

#2). Hide the Toilet

A master bath that’s stylish and functional can also be discreet. That’s why it’s nice to hide this fixture away, either in its own “room-within-the-room” or behind a half wall. A piece of furniture – an armoire or dresser, say – can create the necessary barrier without the expense of a framed wall.

#3). Do Choose Appropriate Surfaces

Your master bathroom’s surfaces do more than just contribute to the overall aesthetic. They also take lots of abuse. Porcelain tile is a favorite among designers, for use on the floors and walls alike. “You can find some versions in the $5 per square foot range that look like natural stone,” says Petrie. He recommends larger tile sizes to minimize grout lines, easing the upkeep. That might mean 18-by-18-inch tile on the floors and 12-by-12-inch on some or all of the walls, perhaps transitioning to 6-by-6 tiles on the diagonal with a glass mosaic transition strip.

Porcelain is also a popular option for bathroom sinks, though it proved prone to chipping in our tests. Enamel-on steel sinks were especially durable and stain-resistant, as were stainless steel sinks, which are becoming more popular for use in bathrooms. Solid-surface sinks are another durable option that allows the sink to be integrated with the vanity countertop and, if you like, the adjoining cove or backsplash.

When it comes to the countertop, granite and quartz have migrated from the kitchen into the bathroom, where they deliver the same durability and visual interest. Laminate and solid surface are still popular as well, and can be cost-effective options, though both scratch easily.

#4). Splurge on the Shower Photo: American Cabinet & Flooring Designer Clay Bernard

The empire of the Roman tub is officially over. “People started to realize that they could count on one hand how many times they actually used the tub,” says Petrie. “We’re now using that space to create larger showers, often with his and her showerheads, body sprays, and even steam generators.”

To create this sensual experience, you’ll need a shower stall that measures at least 4-by-6-feet, larger than the 3-by-3-feet box that used to be standard. If you can take the stall up to 5-by-7-feet, you may also be able to do away with the door, since the showerhead(s) can be direct in a way that the spray doesn’t reach beyond the shower area (an L-shaped design is helpful). This will eliminate a sizable expense, especially if you were planning on a frameless door, which can be pricey. One caveat: Don’t eliminate the bathtub if there aren’t any other bathrooms in the house with a tub. 

#5). Consider Water Efficiency

Showerheads, toilets, and faucets have all become more water-efficient in recent years, thanks to the Environmental Protection Agency’s voluntary WaterSense program, which labels products that are 20 precent more efficient than federal standards. Our tests have found many WaterSense winners, including low-flow showerheads that deliver a satisfying pulse while meeting the flow rate of 2.5 gallons per minute. “You can even have a rain showerhead these days that’s low-flow,” says Petrie.

As for toilets, several WaterSense-qualified models that use just 1.28 gallons per flush make the recommended list of our latest toilet ratings. That could save you at least 4,000 gallons and some $90 per year in water bills if you’re replacing a toilet that dates from 1995 or earlier. Choosing a faucet with an aerator can reduce the water flow in your bathroom sink by 30 percent or more.

#6). Make Room on the Vanity

Since grooming is the main task at the vanity, it’s important to have plenty of surface area to put things down. While the his-and-her double sink configuration has been popular in the past, it often makes sense to have a single sink and more counter space. “Couples I work with usually realize that the second source of water is less important than the additional countertop,”says Carolyn Cheetham, president of Design Works by Cheetham in Alberta, Canada. Besides maximizing the counter space, opting for a single sink vanity saves you the expense of the second sink and faucet. And eliminating a set of plumbing expands the available space inside the vanity. 

#7). Provide Adequate Ventilation and Light

Moisture not only breeds mold and mildew, it can take a toll on finishes and painted surfaces. A bathroom fan is the best defense. Guidelines from the National Kitchen and Bath Association call for a ducted system that’s at least 50 cubic feet per minute, though you may need twice as much ventilation if the space is larger than 100 square feet or if you plan to install a steam shower. Consider a humidity-sensing unit that will automatically turn on and off depending on the amount of moisture in the air.

As for lighting, the goal is to bring different layers of illumination into the room. A ceiling fixture is suitable for general lighting, but it will cast shadows on your face when you’re seated at the vanity. That’s why you’ll also want sconces or other vertical fixtures mounted on either side of the vanity. Some medicine cabinets are available with vertical lighting strips.

The shower and toilet should also have a dedicated task light, such as a recessed canister light. Consider fixtures that use LED bulbs. Many provided bright, even illumination in our lightbulb tests with the promise of 50,000 hours, though they do cost more. Remember to put the fixtures on dimmer switches so that light levels can be adjusted depending on the mood and task at hand. 

Seven Costly Mistakes

Avoiding these seven common goofs could save you thousands of dollars on the project, especially if you’re planning an upscale remodel. You’re also likely to enhance the comfort, style, and efficiency of the finished project.

#1). Don’t Rush the Process

Now that you’re committed to the idea of a new bathroom, you probably want it done tomorrow. But poor planning is the leading cause of cost overruns on these projects. “Nothing is more expensive than doing things twice,” says Elizabeth Goltz, owner of Design by Orion in Kansas City. Depending on the size and scope of your bath project, you should spend several weeks to a few months on the planning process. If you don’t have a Pinterest account yet, consider one. This website lets you keep a digital ideas file of inspiring images you find on the Internet, say for tile styles, favorite fixtures, and clever designs. 

As you plan the space, try to come up with a design that keeps the major plumbing lines in place. Moving the toilet from one wall to another will mean relocating a 3-inch drain line in a home, which can cost thousands. “If you can keep the toilet, shower, and sink where they are, you’ll save significantly on the project,” says Petrie. 

#2). Don’t Skimp on Skilled Labor

The do-it-yourself approach can be an effective way to trim costs, but it’s best to focus on the front and back ends of the project, say, ripping out the old tub during demolition and handling the finish painting. Leave the more complicated installations to professionals, ensuring they’re highly skilled. “A good tile setter can make a low-cost tile look expensive,” says Goltz. “On the flipside, you could spend a fortune on tile, and a bad tile layer will make it look cheap.”

Given how many trades are required for a typical bathroom remodel – plumbers, electricians, tile setters, cabinet installers, and more – it pays to find a top-notch general contractor to manage operations. Meet with at least three contractors, preferably those you find through word of mouth. Make sure the person you settle on has an up-to-date license and insurance, including workers’ compensation. And scrutinize the contract; it should list every product down to the model number and finish. And don’t automatically go with the lowest bid.

#3). Don’t Cut Corners on Key Materials

Another common mistake is cheaping out on those items that get the most use. Lifetime warranties that cover leaks and stains have become more common on all but the cheapest faucets. PVD (physical vapor deposition) finishes resisted our best attempts at scratching them, but drain cleaners can stain them slightly. Chrome was also pretty durable in our tests, but can be scratched if you rub it with a heavy duty scouring pad.

Tile is another material that you can touch and feel each day. While you can find quality options for $5 per square foot, super cut-rate tiles may have slight size inconsistencies. The results will be crooked lines that make a bathroom look shoddy.

So where can you save? Light fixtures tend to perform the same across most price points – it’s the high design that costs more. You might also find that opting for a basic finish on faucets and fixtures saves you hundreds of dollars without compromising quality. And you definitely don’t need to blow your budget on a luxury toilet, like Kohler’s $6,390 Numi, with its motion-activated lid and built-in bidet. Those are cool features, but toilets costing as little as $300 delivered the best flush in our tests. 

#4). Don’t Stop Thinking About Tomorrow

You may be the picture of good health today, but you can’t predict the future. What you can do, however, is ensure that your bathroom will serve you and your loved ones regardless of your abilities by following the basics of Universal Design (i.e. aging in place). “It is absolutely coming onto people’s radar, even younger clients,” says Alan Zielinkski, president of NKBA.

And you don’t have to worry about ending up with an institutional look. Many universal design features are now part of mainstream bathroom design. For example, the larger shower stall that’s in favor today offers easy access and universal use, provided it has a zero-threshold and a built-in seating platform. “The bench is also a nice place for an able-bodied women to sit and shave her legs,” says Cheetham. Regarding toilets, so-called comfort-height models that are easier to get on and off of are now just as common as standard-height models. Even grab bars have enjoyed a design upgrade; many now match towel bars and other accessories. And they’re not just for the elderly. Grab bars make it easier for pregnant women or young children to get in and out of the bathtub.

Even if you don’t incorporate every element of universal design into the bathroom now, it’s worth putting in the structural framework, such as blocking in the walls for future support bars. Make sure your contractor makes a drawing of the wall so that you can find the blocking if, and when, the time comes.

#5). Don’t Forget to Factor in Water Use

Bathroom fixtures have become more water-efficient, especially if you choose WaterSense-qualified models. But the trend toward tricked-out showers, often with his-and-her “shower towers” that might include multiple showerheads and body sprays, will likely result in your water and energy use going up. It also means your bathroom’s existing drain and plumbing lines might require an upgrade. “You may need to resize your water lines from half-inch to three-quarters,” says Petrie, an upgrade that can add hundreds, if not thousands, to your project.

Thirsty fixtures may require you to upgrade your water heater as well, say, from a unit that holds 50 gallons a day to one that holds 80 gallons. That could cost you another $1000 or so – figure on roughly $2000 if you choose one of the energy-efficient hybrid water heaters that Consumer Reports’ test have found to be good long-term investments.

#6). Don’t Buy Products Online Without Seeing Them in Person Photo: American Cabinet & Flooring

Going online is great for researching products and design ideas. But materials and finishes aren’t always as they appear on your computer screen. That blue-gray quartz vanity top might be more blue than gray in real life, or the light fixtures that look understated online could overwhelm your actual space. That’s why we always recommend visiting a showroom or design center before you buy. While you’re there you may even get the showroom to meet or even beat the online price. 

#7). Don’t Forget About Storage

Running from the shower to grab a towel from the hallway linen closet gets old – and cold – fast. A closet inside the bathroom is ideal, though an armoire or even just a simple chest can hangle the essentials. And a medicine cabinet is still the best place for you various health-care and first-aid essentials. 

Photo: American Cabinet & Flooring’s Showroom Bathroom Display

Copyright © 2006-2012 Consumers Union of U.S., Inc.

ConsumerReports.org Buying Guide: Countertops

Granite Countertop in Denver Kitchen

Getting Started

Replacing a kitchen or bathroom countertop can be a relatively inexpensive part of a total remodeling job, costing as little as $550 for 55 square feet (about 18 linear feet) of laminate counter. Then again, you can spend 10 times that on costlier materials. Whichever once you choose, buy enough the first time out. Delivery is expensive, color and veining vary from sample to sample, and materials bought separately may not match.

Traditionally, the more exotic countertop materials have been used in the kitchen. But more and more materials such as concrete, granite, limestone, marble – and yes, even stainless steel – are migrating to the bathroom. Though bathroom counters typically see less wear and tear than kitchen counters, you might want to limit materials that need TLC to powder rooms or lightly used guest bathrooms. 

Read more

Bathroom Remodeling Tips

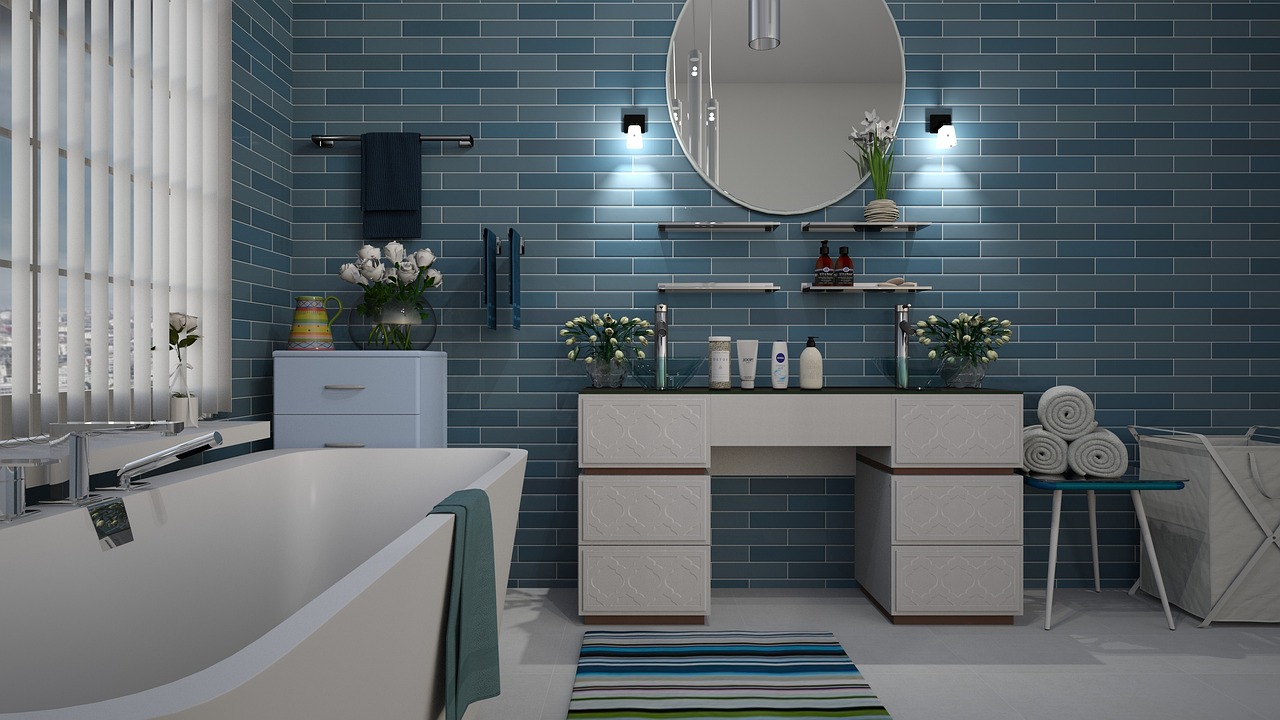
blue and white tile bathroom

A single bathroom remodeling tip could inspire fresh thinking for your entire remodeling project. Trends area always being updated, so it’s useful to know what’s new in home bathroom design. You’ll find bathroom remodeling advise and inspiration here.

Express Yourself

Choosing Colors: A fresh coat of paint is an easy way to give your room an instant face-lift. Single color schemes make small rooms larger and a neutral palette can expand your space more. Or, add drama with colors like deep reds, eggplant, ochre, and dark blues or greens. 

The Personal Touch: Collections and objects that express your personality or your family history will make your home interesting to your guests and more enjoyable for you. 

Imported Ideas: Consider letting a favorite hotel or restaurant, or an outdoor spot that you enjoy, provide the inspiration for your bedroom, dining room or bath. 

Planting Style: One beautiful plant can be a strong design statement. Your style sense will determine whether a dramatic green plant or a bright floral bouquet is best for you.

Dynamic Design

The Right Finish: Now more than ever, you have choices for kitchen and bath fixtures. While matte or polished chrome are always popular, homeowners are choosing darker finishes such as oil-rubbed bronze and wrought iron. Consider the look and feel you wish to create when deciding. 

Bright Ideas: Halogen downlights and scones provide whiter light and fresh designs. Visit the lighting section of your home improvement center to get a better idea of these styles.

Quick ‘n Easy: Multi-purpose rooms need to switch moods easily. Today’s high-tech dimmers let you fine-tune your lights – even dim or raise them with a remote. 

Mix It Up: Today’s larger kitchen has room for variety. Mix-and-match styles and wood types for an eclectic feel that adds a unique look, from baseboard to hanging cabinets.

Packs a Punch

High-Performance Shower: Today’s shower design offers unprecedented opportunities for adding deluxe features – massaging vertical spas, rain shower showerheads and luxurious materials such as glass, tile and stone. 

Organized Kitchen: Specialized storage systems, appliances and fixtures speed meal preparation and keep entertaining organized. Choose open shelving for quick access. Locate a faucet next to the range to fill big pots quickly and conveniently.

Design Focus: A single, dramatic focal point for a room you’re remodeling makes the improvements more obvious. Try a special piece of furniture, an interesting piece of art or one wall that’s boldly colored.

Double Duty: Lighting is a sculpture as well as illumination. Choose light fixtures in shapes that are pleasing to look at – whether they’re switched on or off.

Works for Me

Getaway Baths: The bath can be a relaxing, serene environment. Add massaging or rain showerheads, a deep Zen soaking tub and even music and candles to enhance the revitalizing experience. 

Counter Space: If your bathroom is being shared by the family, counter space is critical. Consider a vanity with cabinets for extra storage and organization.

Ageless Amenities: Features usually associated with older homeowners – easier access, brighter lighting and convenient handholds – are helpful at any age. Adding them with your remodel could improve your home’s resale value.

Bed and Breakfast: Adding a morning bar to a master bedroom with an elaborate, built-in countertop and sink is a great way to add luxury and functionality.

Practical Approach

Finding Your Design: Start a scrapbook of design ideas you find in magazines and online. This will help you establish a foundation for your remodeling project. 

Sketch Your Layout: This will help you understand how you would like your new room to look and help you change the little things that you don’t care for in your current design.

Set a Budget: By outlining how much you can spend on each phase of the project you will be able to see if you can splurge on the extras; like a contractor or if you need to cut and do it yourself.

Set a Timeline: This will help you keep on track and allow you to achieve your remodeling goals.