FREE DESIGNS AND ESTIMATES

Kitchen Ideas: How to Choose the Perfect Backsplash

Article by: Sophie Baylis

The humble backsplash has come a long way. Once upon a time, its purpose was purely functional: a tiled area behind the stove and sink to protect kitchen walls from stains and splashes. Today the availability of all manner of materials in a wide array of finishes means your backsplash can make more of a statement. To help you decide which material would work best for you, we offer expert advice on the 10 most popular backsplash materials.

Read more

10 Pair-Ups for Black in the Kitchen

Article by: Laura Gaskill

It can be cool and modern, elegant and traditional, or something in between — black in the kitchen may be having a moment, but this classic color isn’t going anywhere. As in other rooms, remember that a little bit of black can go a long way, so consider the size of your room and the amount of natural light before committing. From cabinetry and tilework to floors, here are 10 ideas for incorporating the deepest, darkest hue into your kitchen design.

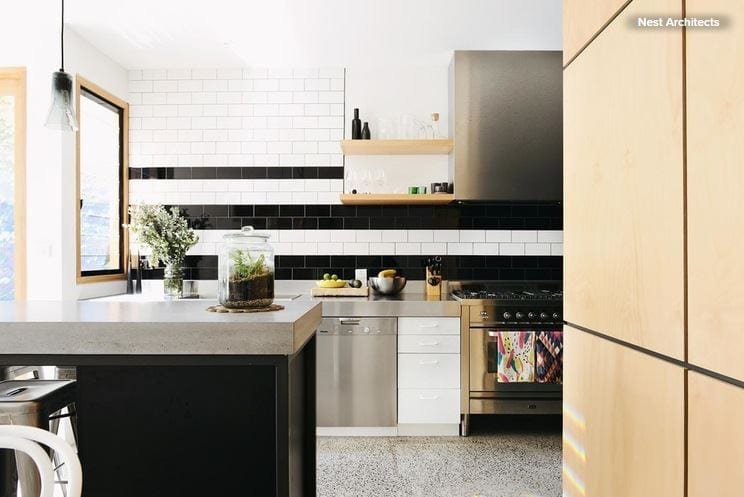
1. Black and white striped tile + polished concrete. Give simple subway tiles a fresh treatment by alternating horizontal rows of black and white tile. Varying the width of the stripes makes the look more dynamic; stainless steel appliances and polished concrete counters add a sleek, modern note.

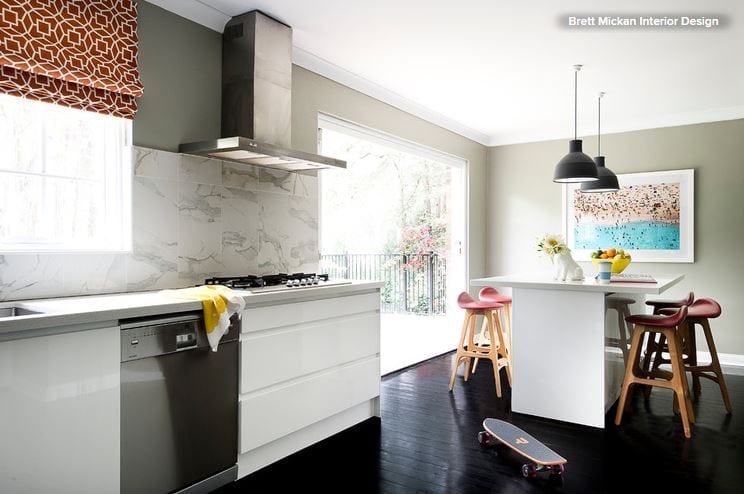
2. Black floors + warm gray walls. Black stained wood floors and white cabinetry are warmed up by “greige” walls, a cozier alternative to stark white. Dark floors paired with a lighter hues on the walls and ceiling can make a room feel taller. Bright window shades and stools, plus a large framed beach photograph, give this space a playful feel.

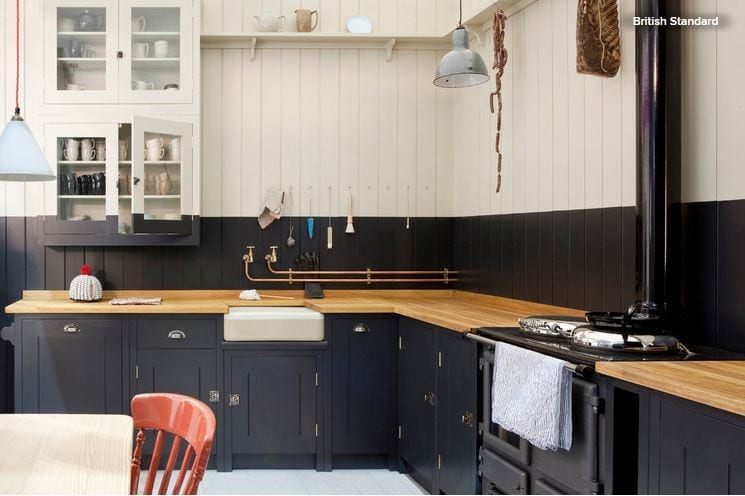
3. Bicolor black and white walls + oak counters. Can’t decide between black and white? Split the difference: Paint the lower half of the kitchen black and the upper half white for a creative look. In this kitchen a line was drawn around the room and everything below it — including the bottom portion of the upper cabinets — was painted black, and everything above it white.

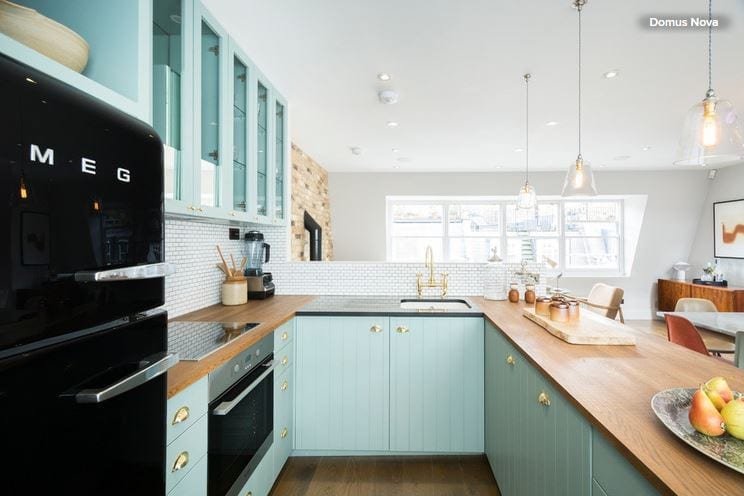
4. Shiny black appliances + aqua cabinets + brass hardware. Black appliances and a black sink surround add a polished note to this pale aqua kitchen. The bright brass gooseneck faucet and hardware stand out like jewelry against the watery-hued cabinetry.

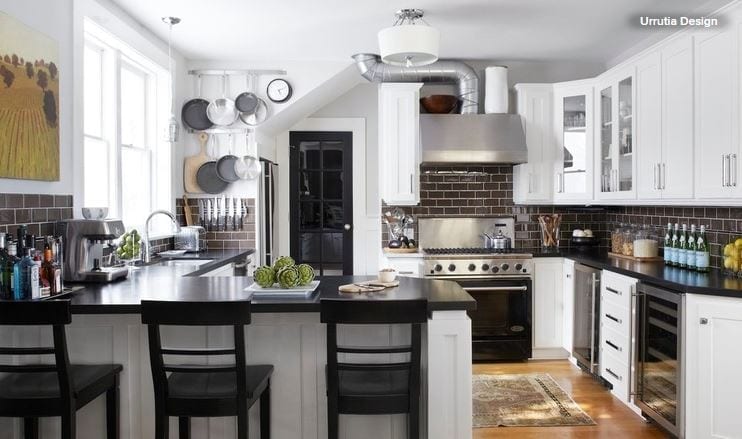
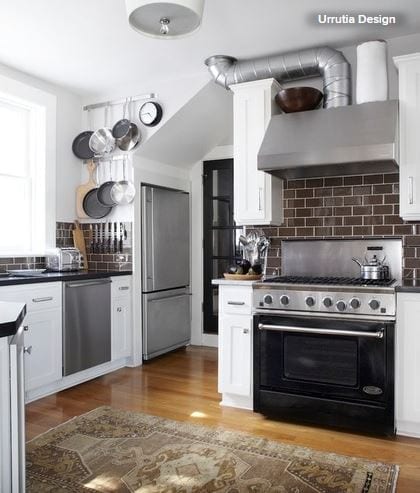
5. Black counters + chocolate backsplash.Who says black and brown don’t go together? On the contrary, sleek black counters paired with glossy chocolate brown subway tiles make for a rich combination. The rest of this kitchen was done in crisp white, which keeps the space feeling light and spacious.

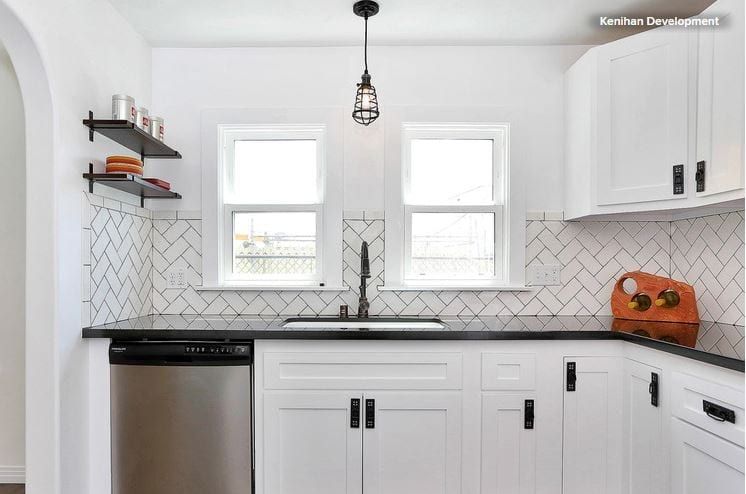
6. Black counters + black grout + white tile. For such a simple, easy change, swapping out light grout in favor of dark makes a big impact — not to mention it’s easier to keep looking clean! Classic white subway tile installed in a herringbone pattern calls attention to the spaces between more than if it were laid in straight rows.

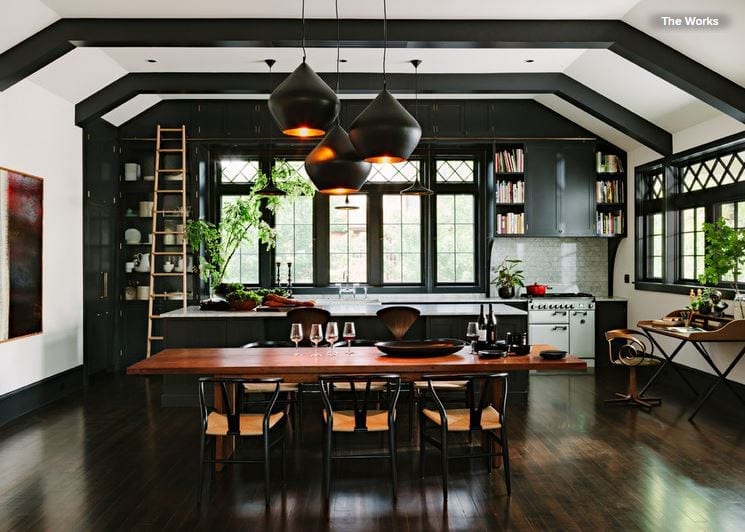
7. Black cabinets + black trim + dark stained wood floors. If your kitchen is part of a larger, open-plan space, deep, saturated color can make the space feel kitchen-like. In this room, dark stained floors, black cabinets and black trim are enhanced by sculptural Tom Dixon pendant lights and a Carrara-marble-topped island.

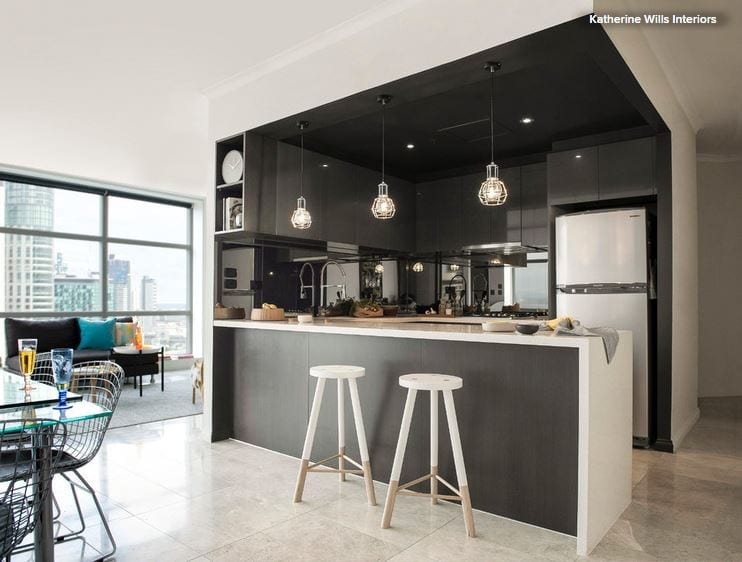
8. Black cabinets + white and wood. Black cabinetry paired with white counters is a clean, simple and modern look. Stylish pendant lights, plus a few details in white and wood — like the paint-dipped stools shown here — keep this combination from feeling too simple. 

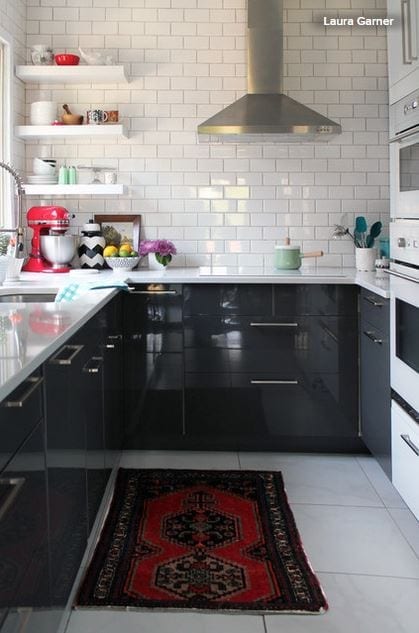
9. Black lower cabinets + white subway tile + white floors. Increase the sense of space in a small kitchen by using black on lower cabinets, and forgo uppers in favor of open shelves installed on a glossy white subway tile wall. High-gloss finishes on cabinet fronts and tilework help maximize light.

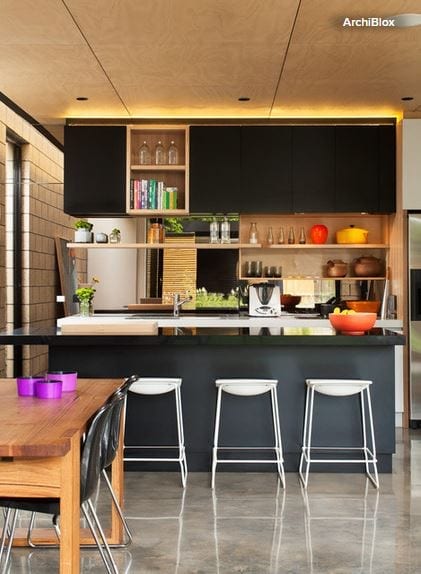
10. Black cabinets + pops of color.Sometimes what you put on your counters and shelves is just as important as the material they are made of. Here, a handful of brightly hued accessories pops against jet-black counters and cabinets.

Big Ideas for Compact Kitchens

Article by: Sara Emslie

Even the smallest of kitchen spaces needs to deliver big when it comes to form and function. No matter how awkwardly shaped or compact your cooking space, design tricks can help make even tiny corners work hard and look good too. These kitchens offer ideas for getting more from less and giving a high-function space a clean, uncluttered appearance.

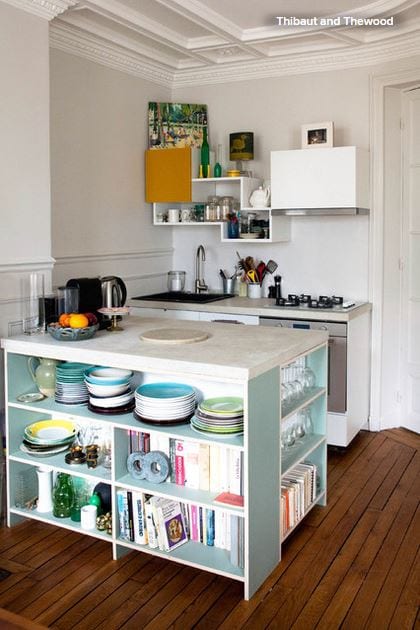
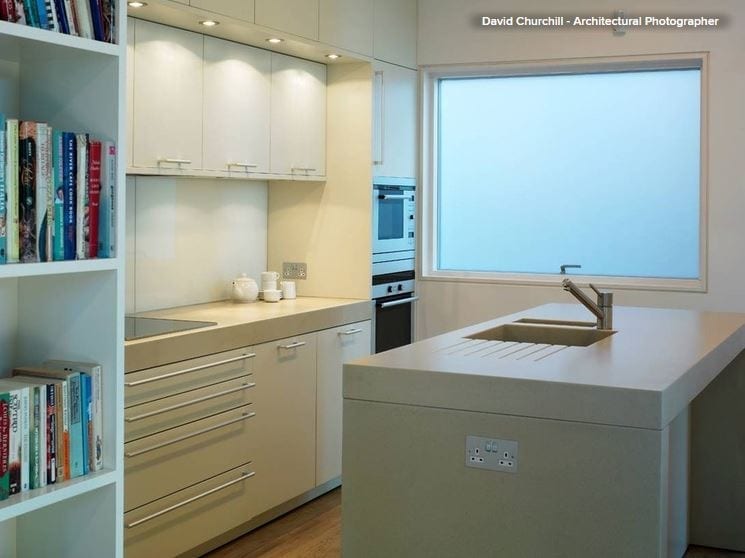
Use open storage as display. If your tiny kitchen is part of a larger open-plan space, consider an island with built-in open shelves. This will add storage and display space and help separate food prep, cooking and clean-up areas from those for other living functions. 

Use attractive tableware, accessories and cookbooks to create a pleasing display.

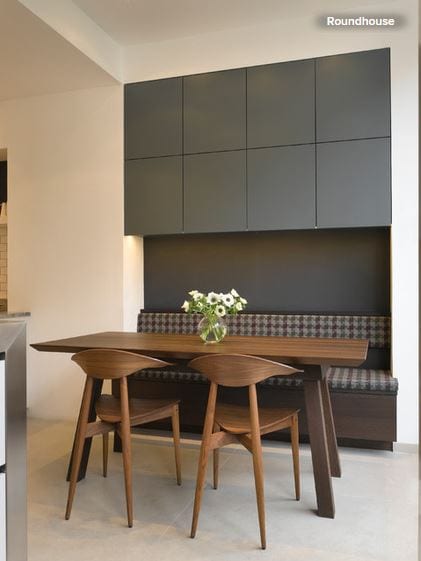
Store high (and seamlessly). A clever way to add storage in a tiny kitchen is to position it high up the wall. Installing storage above seating, such as a built-in bench, can be a particularly smart use of space. 

For a clean, contemporary feel, fit the cupboards with push latches, removing the need for a door handle and creating a seamless finish that gives the impression of more space. A ladder stored away — perhaps inside a bench seat — can be used to access high cupboards.

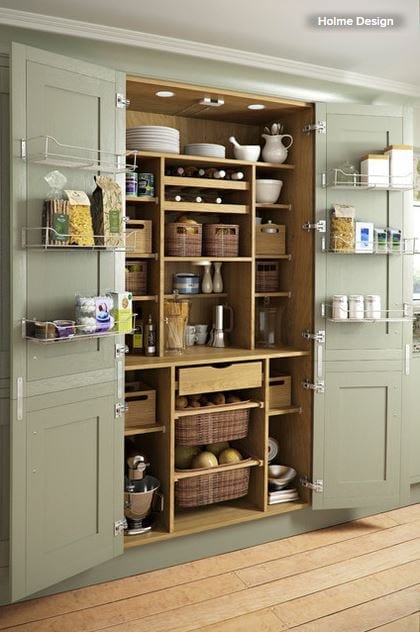
Custom build a pantry cupboard. Well-planned storage makes efficient use of space and can help keep your kitchen organized. Consider a custom all-in-one pantry cupboard if you’re designing a kitchen from scratch. Install custom storage baskets for shelves and rail bars and baskets for cupboard doors to make the most of the space inside. 

A cupboard pantry can be used to store everything from food to china and kitchen equipment. And when the doors are closed, it’s all neatly out of sight.

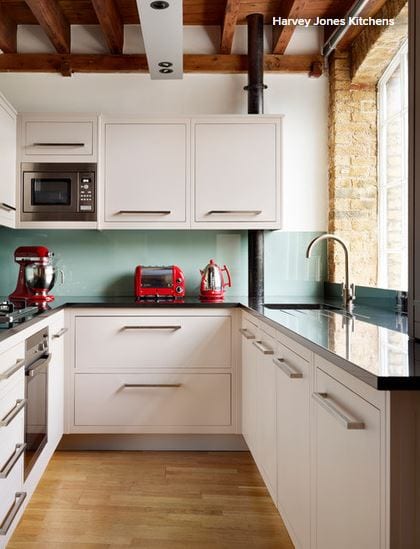
Integrate built-in appliances. Shop around for appliances that will work in compact spaces and consider integrating them into your kitchen design. The framework needed for integrated designs eats up a little more lateral space, but the result will be a neater look. 

Think laterally, too — dishwashers are available as pullout drawers and can be paired with a storage drawer with the same front for a fuss-free finish. Microwaves and ovens can be fitted into a bank of wall cupboards, freeing up counter space for other kitchen essentials.

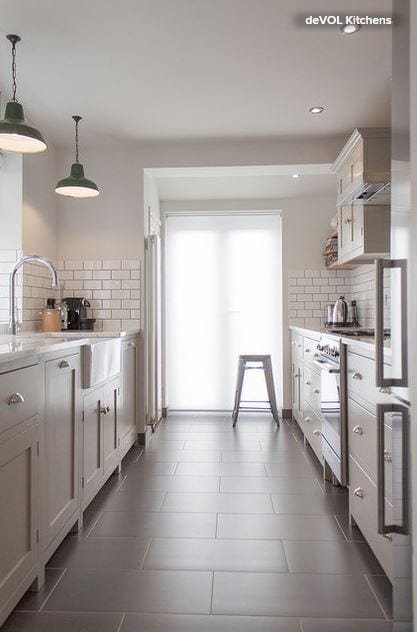
Think industrial. Utilitarian styling is ideal for making the most of a compact kitchen. It echoes the kitchens of days gone by, and its robust aesthetic says it means business, despite being a tiny space. Look for subway tiles, industrial factory lighting and Shaker-style units that combine beauty with utility.

Squeeze in an eating space. Having a space for sitting and eating in a kitchen, no matter how small, doubles the room’s functionality, making it feel more substantial. 

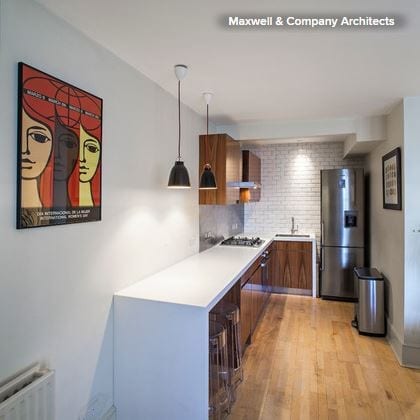
A compact breakfast bar, for example, can be both a dining area and an additional work surface for food preparation. To save space, choose bar stools that can be tucked under the counter when not in use. Try giving this tiny tabletop a separate visual identity with bold accessories, such as bright artwork and standout lighting. 

A fold-out, wall-mounted table is another option for a small kitchen.

Highlight character with color. Flashes of vivid color are ideal for adding a wow factor to a tiny space. It might be small, but it can still have presence. 

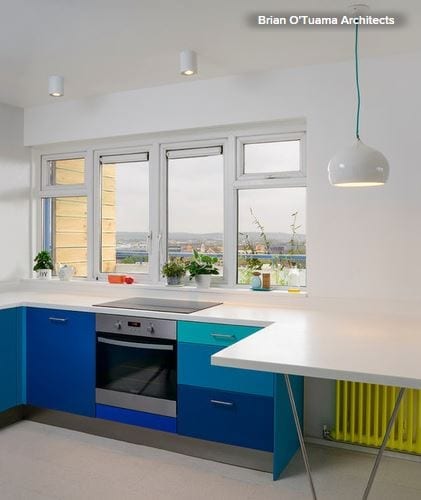
Against a pure white background, neon shades really stand out, so use these to emphasize any design features that have character and style. Maximize the different sizes and configurations of drawer and cupboard fronts to create eye-catching color combinations and design appeal.

Stick to a restricted palette, though, and keep clutter stored so as not to overcrowd your little kitchen.

Go for top of the line. Being small on space doesn’t mean a kitchen can’t be big on style. Adopt a high-end approach for fixtures and hardware in an otherwise minimal space to give a compact kitchen a designer look. 

Smart handles, inset lighting, state-of-the-art integrated appliances, contemporary faucets and molded draining boards are all design features often found in larger, more expensive kitchen designs, but they can add a big style hit to a tiny kitchen too.

10 Countertop Mashups for the Kitchen

Article by: Katie Pegler

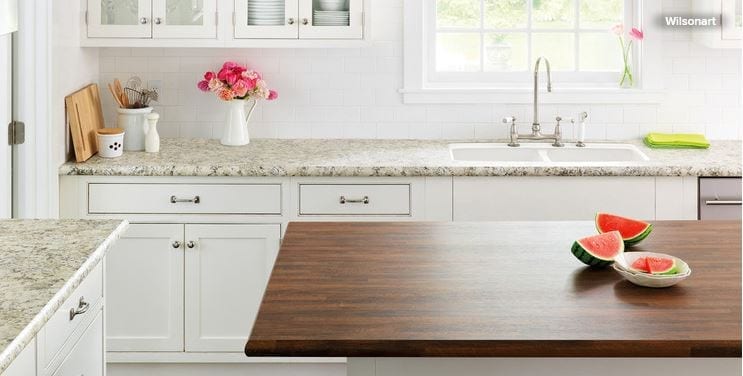
Mixing materials for kitchen countertops has many benefits. For one, you can save money by using a less expensive material for your perimeter countertops while splurging on something more luxurious for an island top. Plus, mixing materials is a great way to add visual interest to your kitchen and avoid the overabundance of one color or material. With that in mind, designers are pairing marble with walnut, granite with reclaimed wood, engineered quartz with maple butcher block and more to create diverse surfaces for working, eating and gathering.

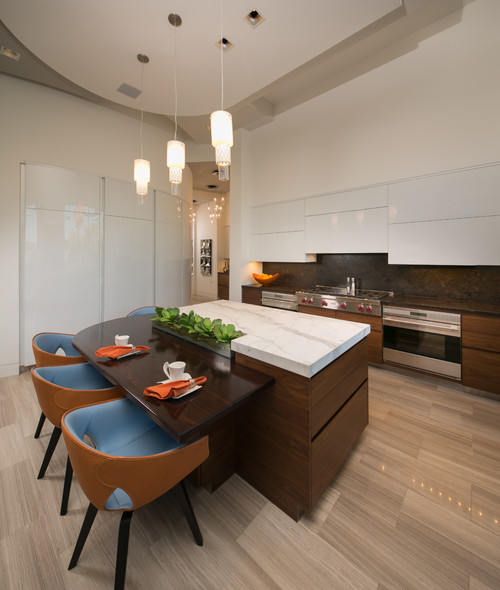
Marble Island With Wenge Bar

“Our overall design was form meets function throughout this kitchen design,” says Ashley Luberger, design associate at Osborne Cabinets and Millwork. “The island is the key focal point of this space, so we wanted to add interest combining heights and different materials to create a cohesive space.” 

Osborne designed and fabricated the island cabinets and wood top, made out of African wenge wood. “The wood has a really dark natural color along with a really tight grain pattern, creating a contemporary feel,” Luberger says. Collaborative Design Group chose the marble top.

The wood top was selected for the lower eating area because it is more durable than marble, which was used only on the island to avoid stain concerns. 

Marble Perimeter With Walnut Island

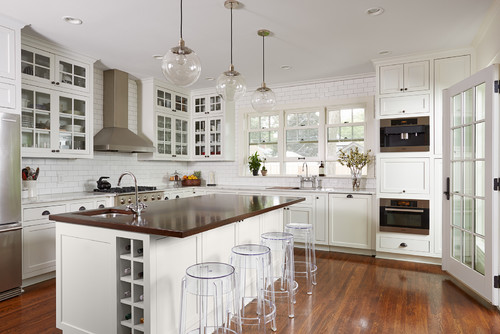
A white kitchen was a must for the owners of this Minneapolis home. However, both the husband and wife grew up in houses with wood countertops and were keen to incorporate wood. Nicole Bostman, owner and lead designer at Dezaar Interiors, found a happy medium by pairing a white marble countertop and oversize walnut island. “We wanted to introduce the warmth of wood to balance all the white, which can sometimes look a little cold and clinical,” Bostman says.

Walnut Countertops With Marble Island Top

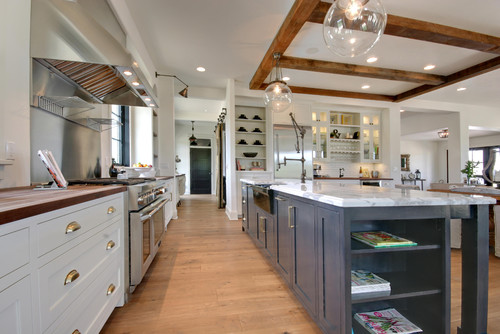
In this Nunica, Michigan, kitchen by Meiste Homes, the perimeter countertops are oiled walnut, while the custom island is topped with a 10-foot slab of Arabescato marble with a built-up ogee edge. 

Be sure to follow proper maintenance routines for each material. Wood can chip and warp, especially in wet areas, such as near the sink. And marble can stain and chip. 

Quartz Perimeter With Maple Butcher Block Island

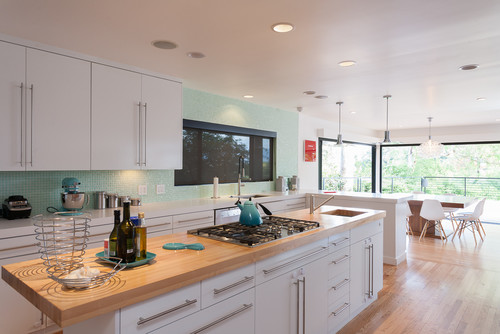
Before the remodel of this Los Angeles contemporary home, the owners had white marble countertops. Gabriel Abikasis, president of Kasis Construction, recommended engineered quartz as a durable alternative.

To add depth, texture and contrast to the white cabinets, Abikasis used 2-inch-thick maple butcher block in a clear satin finish for the island. 

Granite Perimeter With Reclaimed-Wood Island

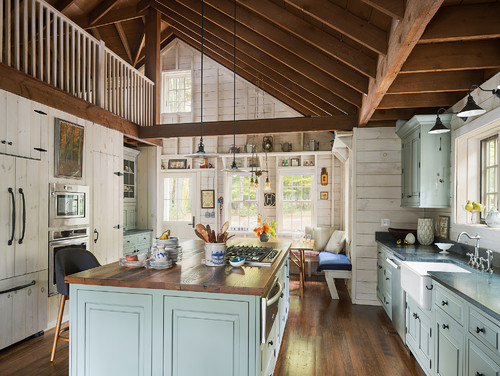
This design of this kitchen reflects the homeowners’ desire to retain the old elements of the 1930s cabin.The main countertop is Jet Mist honed granite, while the island has a reclaimed-wood top fabricated by Grothouse Lumber. The wood island is sealed and cannot be used for cutting directly on. “The contrasting wood counter warms up the kitchen and makes it feel more cabin-like than if everything was dark granite,” says Kelly Ennis, principal at Ennis Nehez

Photo by Colin Cadle Photography – Discover kitchen design ideas

Granite Island With Walnut Chopping Block Extension

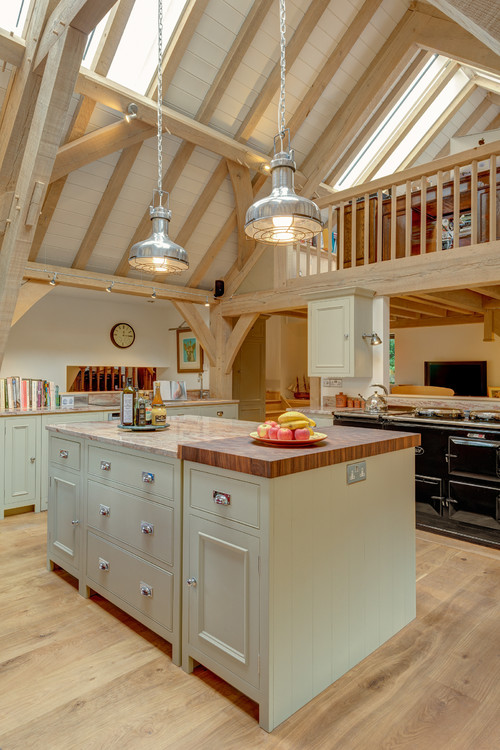
Much thought was put into this kitchen, because it’s in the “forever home” of its owners, in Dartmouth, England. They wanted to make the most of the new space and were meticulous in defining their kitchen right down to listing what items each cabinet would need to store, so that Distinctive Living Kitchens could plan for the correct cabinet sizes and functionality.

The inspiration for the granite came from an existing granite countertop in the laundry room, which Distinctive Living Kitchens matched to the Shivakashi granite counters that are paired with the end-grain walnut chopping block island extension. 

Granite Island With Walnut Butcher Block Extension 

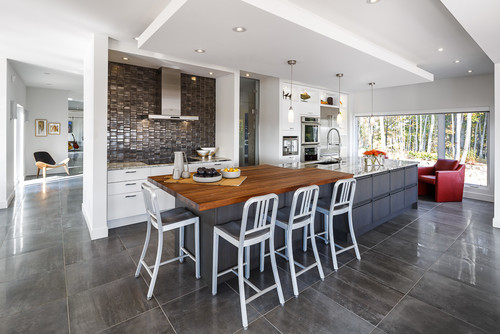
This Ottawa, Canada, home was built for a couple who wanted an environment conducive to entertaining large groups of family and friends, so a large, functional kitchen with good flow was key. “In addressing the functionality, I wanted to create a space that looked aesthetically balanced with functional and decorative elements,” says Nathan Kyle, senior interior designer at Astro Design Centre.

The island counters have silver wave granite surrounding the prep area mixed with walnut butcher block for the eating area. The inclusion of two materials was necessary to create the length that was required without having a seam in the countertop, and created a length that was ideal for entertaining. The butcher block also allows for a warmer touch on the area where people can rest elbows, versus a cold surface. 

“Using a two-toned kitchen allows for the back wall, which is utilitarian in nature, to stand on its own and juxtapose itself with a more detailed decorative island,” Kyle says. 

Concrete Island With Wood Inlay

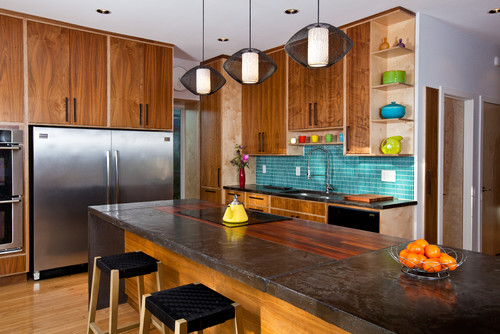
For this contemporary Kansas City, Missouri, kitchen, Studiobuild blended poured concrete for the majority of the island and juxtaposed it with a wood inlay surrounding the cooktop on the same plane. Not only does this look have more visual interest, but a large island for eating and working eliminated the need for an eating nook.

Pietra Cardosa Stone Perimeter With Maple Island

For this center kitchen island, Brooks Custom used a 2-inch-thick premium wide-plank maple top. The light-colored wood contrasts with the dark Pietra Cardosa stone countertop along the perimeter of the kitchen. The seemingly simple finish on the island ties the modern farmhouse look together. 

Basaltina Perimeter With Walnut Island

Here a walnut island surface warms the basaltina perimeter and helps add contrast to the white kitchen. It offers the perfect fusion of natural materials and lower maintenance. “There is always a balance to strike between durability offered by manufactured options and the beauty and soul of living materials,” says interior designer Joelle Nesen of Maison.

9 Ways to Save on Your Kitchen Remodel

Article by: Kelli Kaufer

When you’re investing in a home remodeling project, you want to make sure that the results not only please you but add value to your home and save you money. Never is that more true than in a kitchen remodel, where costs can added up so quickly that your budget can all of a sudden seem like pennies in a jar. To avoid that and keep costs in line, and yet still get the kitchen of your dreams, here are a few of my favorite ways of getting the most out of a tight budget.

1. Go with ready-to-assemble cabinets. The biggest cost in a kitchen remodel is new cabinets. The most expensive option is going custom, for which the cabinetry is designed, built and installed to specifically fit your space. Exotic woods, ornate details and period styles will add to the cost and delivery time but result in a one-of-a-kind kitchen. Custom cabinets can cost $10,000 to $60,000, as cabinets can range from $250 to $1,500 per linear foot.

If your budget doesn’t allow for custom, but you need new cabinets, ready-to-assemble (RTA) is a good option. Ready-to-assemble or semicustom cabinets can sometimes be half the cost, from around $125 to $900 per linear foot depending on the material, style and cost of installation. If you are a do-it-yourselfer, you can assemble these yourself; if not you will need to hire a contractor. Semicustom cabinets are selected from existing designs and are prefabricated offsite in standard sizes, with limited options in terms of sizing, styles, materials and finishes.

In-stock cabinets are for customers who want to grab their cabinets right off the shelf and get going. These stock cabinets come in standard sizes, shapes and colors. Since the cabinet dimensions are not based on your kitchen, space-wasting fillers may be required to make the cabinets fit. These cabinets are very affordable for remodelers on a budget. Cabinets can range from $75 to $400 per linear foot.

Keep in mind, though, that costs will vary by location.

2. Keep existing cabinets if possible. If your cabinets are good quality and you like the style, resurfacing is a great option. It’s amazing how color can transform a kitchen and a few coats of paint can give life to a once-drab space. Resurfacing and painting make for the most cost-effective option, but ensure that you take the steps needed to get a beautiful finish. 

A simple paint job might cost a few hundred dollars. But for a more extensive refacing job, $5,000 to $15,000 is likely if new veneer is added to the face of the cabinets.

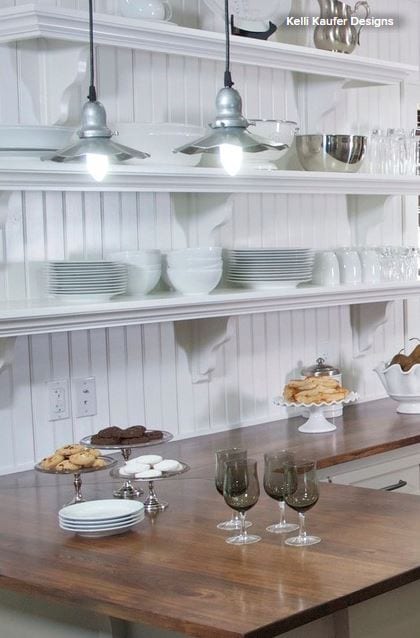
3. Choose open shelving where possible.Open shelving creates interest in the space as well as saves money. Using salvaged wood or painted planks from your local hardware store for shelving is a cost-effective and functional option to display everyday dishes (items that don’t spend enough time on the shelf to accumulate dust).

Open shelving can save a few thousand dollars, but while it may be tempting to do away with fitted cabinets altogether, they’re still valuable and efficient for storage, particularly if you have a small kitchen and a lot to pack into it.

4. Consider alternative countertop materials. There is a wide range of countertops to choose from — solid surfaces, recyclable products, concrete, tile, stone and more. Granite is still a popular choice for countertops, but at $50 to $100 or more per square foot installed, it can push any budget over the top. Consider using two different surfaces instead, such as making the outside perimeter butcher block and the island granite. This can cut the cost in half.

If granite is not in the budget but you like the look of stone, consider laminate, an inexpensive alternative. The costs ranges from $8 to $20 per square foot, including installation. Laminate has come a long way with its high-definition selections and new cut-edge profiles. The new laminates look so much like stone, you could be easily fooled. 

5. Keep appliances where they are. If your plan is to get new cabinets, think about keeping your appliances where they are. Moving the mechanics and electrical for appliances can be costly, not to mention the ceiling on the floor below and the walls may need to be cut into to expose the mechanicals. These are costs that many homeowners don’t think about when planning a kitchen remodel.

Keeping the appliances where they are will save you thousands of dollars. More often than not, moving an appliance 1 foot costs as much as moving it 6 feet, depending on where the mechanicals are located.

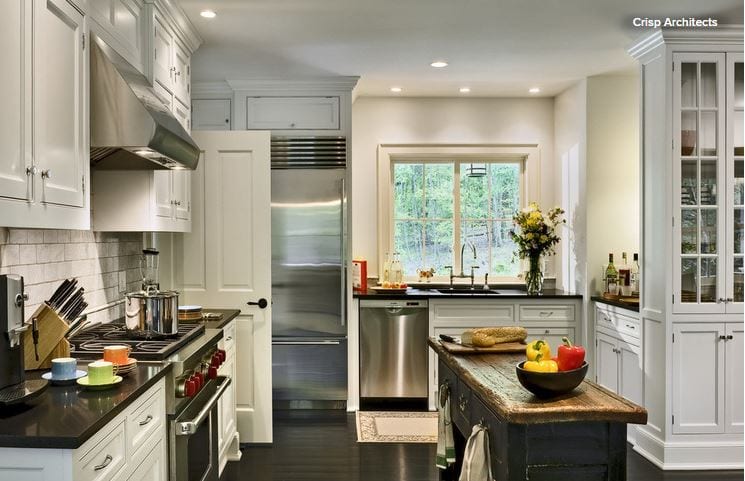
6. Look at different options for islands. A 6-foot island with new cabinets can run $800 and up. Instead of using cabinets for your kitchen island, think of repurposing a piece of furniture. An old table or a dresser is a great alternative to bring unique character into the space. Keep an eye on Craigslist, the Houzz Shop, salvage stores, estate sales and garage sales. Depending on how resourceful you are, you can save yourself hundreds of dollars.

Tip: When looking for a piece, make sure it is countertop height (36 inches).

7. Opt for a cutout rather than removing a wall. Many homeowners want to open the space between the kitchen and their family room to create an open floor plan. When removing a wall there are many things to consider. Is it load bearing? Does it have venting, water pipes or electrical running through it, which will need to be rerouted? After removing a wall, the ceiling, other walls and floor may need to be cut into and repaired.

A less expensive option to consider is a cutout. Not only does it open a room, but it can provide extra countertop space and an area for additional seating. You will still need to check for mechanics and plumbing, but the floor and ceiling will not need to be repaired, which will save you money.

8. Try track lighting instead of recessed lighting. Adding recessed lighting can become a bigger project than planned. Holes need to be cut into the ceiling, electrical wiring needs to be added, and there may be hidden costs in repairing the ceiling. The overall cost for a single recessed light is $100 to $150, including the costs for materials and an electrician. This can add up quickly.

To keep costs down, think about track lighting. There are many styles, shapes and finishes. They give off plenty of light for tasks in the kitchen and, when placed on a dimmer, give off a nice ambient light.

10 Design Moves From Tricked-Out Bathrooms

Article by: Natasha Saroca

Seemingly standard cupboards with smart, unique or high-tech elements and accessories behind their doors can make a world of difference when it comes to making a bath zone more organized and user friendly.Cases in point: The 10 bathroom cabinet ideas you’ll find here. While they may look fairly basic upon first glance, take a closer look and you’ll find that the beauty (and benefits) of these bathroom storage units go well beyond the surface.

Read more

Bathroom Countertops 101: The Top Surface Materials

Article by: Lisa Kahn

Choosing the perfect material for one’s bathroom countertops can be a bit of a brain teaser, thanks to the abundant — and quite attractive — options available at nearly every price level. But because bathroom surfaces typically don’t face the same abuse as those in the kitchen (think hot frying pans, sharp carving knives and spilled Bordeaux), the decisions most buyers wrestle with are usually more about style and cost than Herculean strength. Fortunately, the top bathroom countertop materials on the market combine beauty and brawn in equal measure. Here’s a closer look at some of the most sought-after bathroom surfaces among today’s buyers.

Read more

Bathroom Workbook: 7 Natural Stones With Enduring Beauty

There’s no other material quite like natural stone. No two pieces are exactly alike, and nothing else adds the same organic warmth and texture to a bathroom. Not to mention the longevity. If they’re well maintained, your stone surfaces can last a lifetime. 

Marble, of course, has been a popular stone choice for luxurious interiors for centuries based on its inherent beauty. But while Carrara and Calacatta remain classics, they have their downsides, and they aren’t your only options. Here are seven other natural stone varieties, each with its own unique characteristics and strengths, worth considering for your bathroom floors, countertops and walls.

Read more

12 Stylish Kitchen Counters That Seem to Float in Space

Want your kitchen countertop to be the hero of your new cooking zone rather than relegated to the background? One way to do that is to look beyond the basic block-like counter and incorporate a cantilevered, or floating, countertop into your kitchen design instead. Here are 12 cantilevered counters that not only offer showstopping style but also enhance functionality and create the illusion of more space.
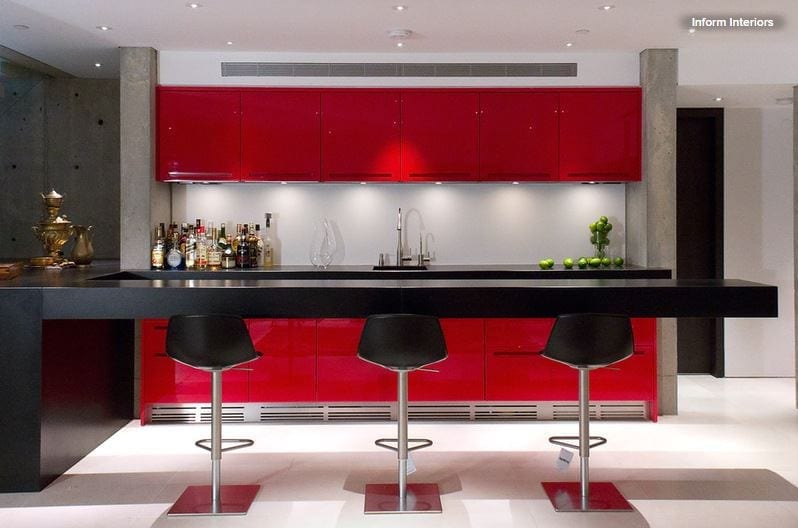
1. Suspended reality. This may look like an optical illusion, but there was no hocus-pocus involved when this striking, impressively long floating counter was built — that we know of, anyway. Its gravity-defying design is just one reason this cantilevered countertop commands attention. Its luxe, chunky look and sleek black color (which boldly contrasts the vibrant red cabinetry opposite) also ensure that the suspended structure exudes jaw-dropping appeal.

The expansive bar provides plenty of room for several people to sit and enjoy a drink or meal, while the open area beneath ensures that spills and crumbs can be cleaned up with ease, making this an ideal setup indoors or outdoors.

Tip: If your countertop is thick, opt for minimalist stools with a slim profile so the design doesn’t appear too heavy.
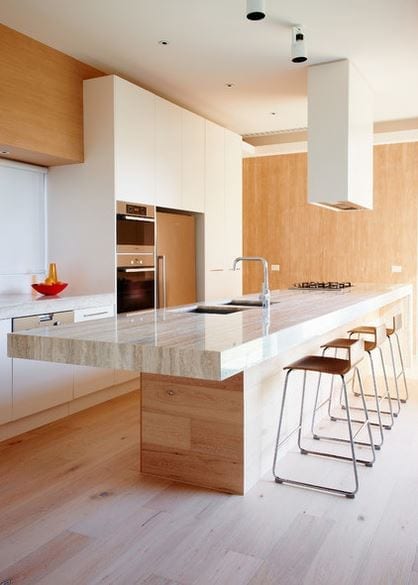
2. Natural wonder. If you want to infuse your kitchen with warmth, subtle sophistication and an air of luxury, consider a cantilevered-counter combo of natural stone and timber. Here the suspended style showcases the quiet beauty of the travertine top, while the wood cabinetry below softens the look and complements the stone’s neutral tones.

But style isn’t all this counter has to offer. The cantilevered top also provides additional workspace (which helps offset the area taken up by the double sink and stovetop farther down the island) and room for extra chairs, which comes in handy when entertaining.

Tip: When choosing wood to pair with your stone countertop, look for one that’s free of prominent knots or patterns that could clash with the veining of the natural stone.
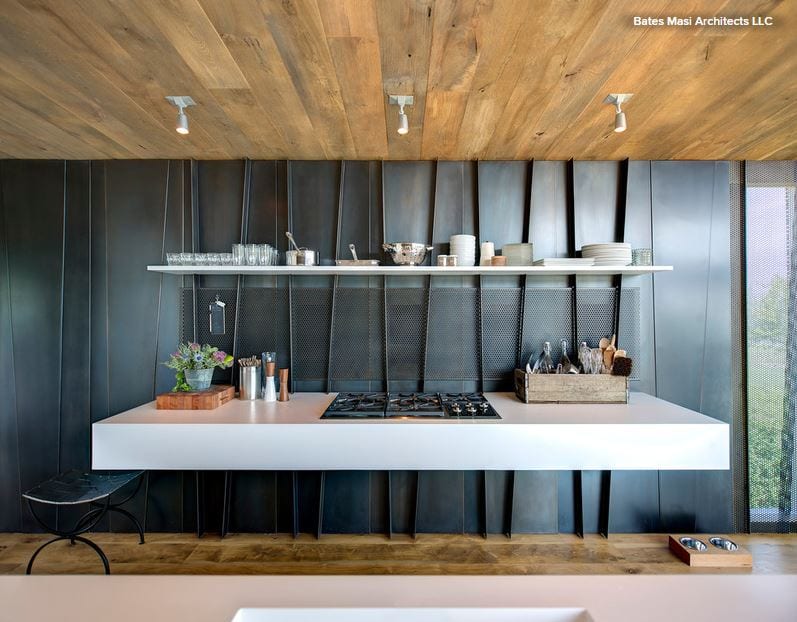
3. Minimalist chic. Although this cantilevered surface is a dedicated work zone, it also succeeds in injecting this modern rustic kitchen with a hearty dash of visual interest. The clever floating contraption is anchored to the wall by way of steel tabs that protrude from the metal surface and double as decorative elements that transform the vertical surface into an accent wall. Crisp white was a smart color choice for the surface, as it cuts through the room’s moody palette, while the thickness gives the space a clean, contemporary feel.
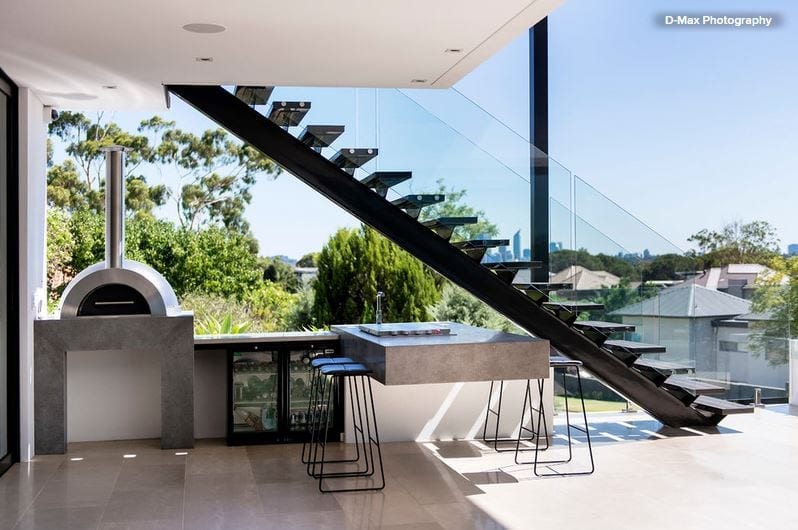
4. Cool and clean. If you hate being on cleanup duty after a family barbecue, a floating concrete counter like this one will make the chore a little easier to bear. Thanks to its suspended design, crumbs and spills can be swept or hosed away quickly. Polished cement also is durable, stain resistant and easy to clean, so it doesn’t require much effort to make the surface look as good as new after entertaining.

Also, note how the cool gray surface adds an industrial edge to the contemporary outdoor kitchen and entertaining area, while the countertop’s bold lines and streamlined look complement the sleek style of the space.
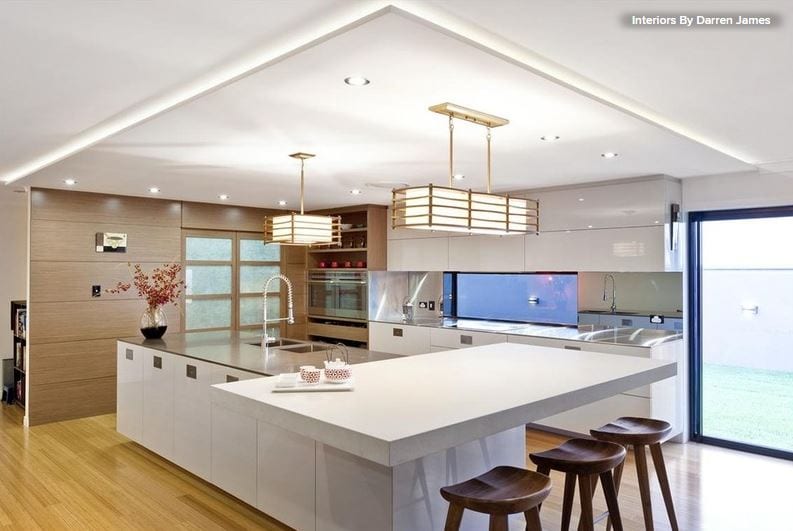
5. On the side. Now here’s a chic cantilevered counter with a twist. Rather than extending a section of the thin, neutral-toned countertop past the end of the island, designer Darren James placed a separate slab of stone (in a contrasting tone and thickness) on top and rotated it to sit across the width of the workspace. This not only helps define the cooking zone and visually separate it from the surrounding open-plan area, but also makes the space feel more communal, as the seating faces inward, fostering a sense of togetherness.

As you can see, the contrasting look and unique configuration of both counters also succeed in transforming a basic island top into a statement-making design feature.
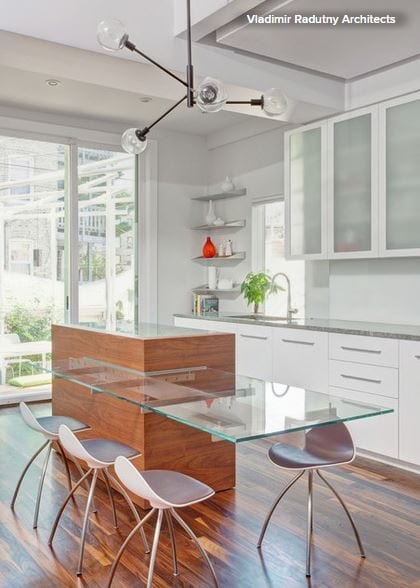
6. See-through style. Don’t be too hasty to say, “Nuh-uh; no way” to a floating glass countertop. Sure, they’re not for everyone (like those with young kids), but they can work for some in the right space.

Here an eye-catching glass countertop appears to jut out from the corner of a taller wood prep zone. It’s stabilized by a metal bracket that supports the see-through surface. The material was selected to enhance the airy, spacious feel of the kitchen, and coupled with the suspended design, it successfully does just that. Although it’s an unconventional choice for a kitchen countertop, the structure here was designed to be a eating area, rather than a food-prep space, so the material should hold up fine.
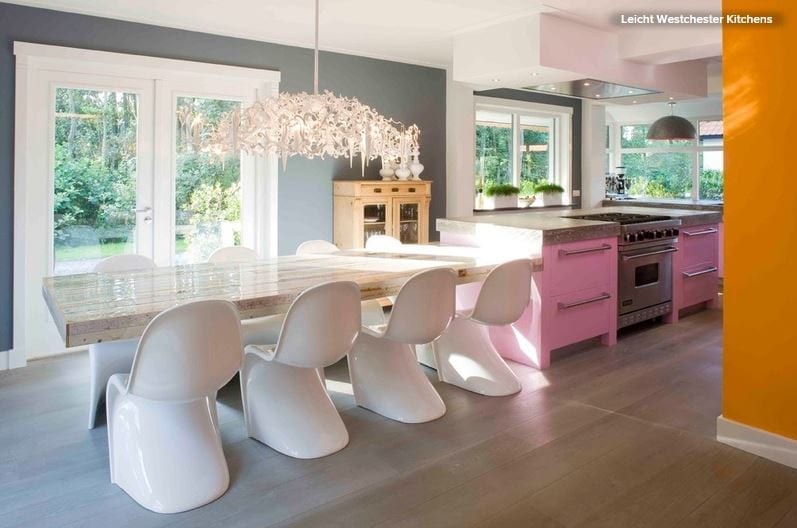
7. Family friendly. One design trend we’ve seen in the kitchen project section of Houzz is the integrated kitchen counter–dining table. This elegant transitional-style cooking and eating area shows how this concept takes shape with the help of a cantilevered countertop.

Here the floating counter has been lowered so that it stands at table height, rather than matching the height of the adjacent concrete counter. This allows for more comfortable and ergonomic seating (unlike bar stools, which can sometimes cause aches and pains in your back and legs after you’ve been perched on one for a while —or does that just happen to short people like me?). This means your family and friends won’t mind sitting around the table for long meals and lengthy catch-up sessions.

The long, cantilevered counter provides loads of visual appeal too. The rustic, reclaimed wood table contrasts beautifully with the contemporary pastel pink cabinetry and industrial-looking cement counter, creating a space that oozes subtle sophistication but still makes a strong style statement. White retro-style dining chairs complete the look and add another layer of interest to the eclectic scheme.
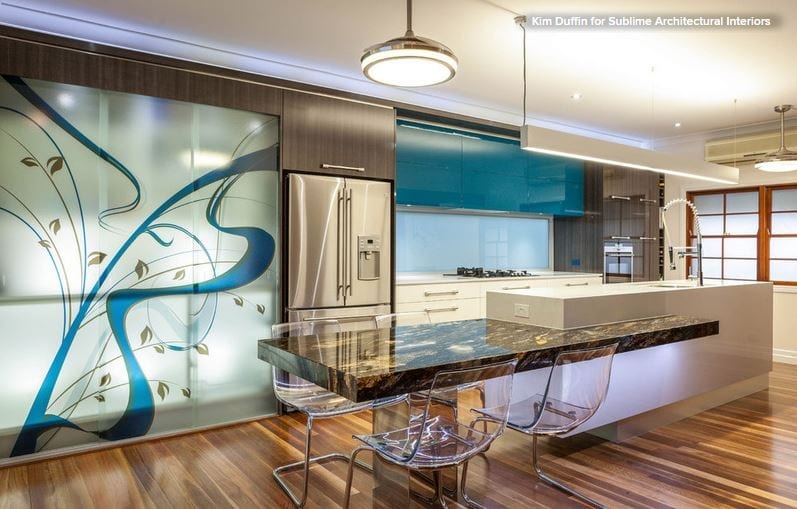
8. Optical illusion. This stunning counter may appear as if it’s floating, but if you look closely, you’ll see that there’s actually a mirror-finish post that supports the stunning granite countertop from below — how sneaky! Even so, this showstopping cantilevered-look counter still deserves a mention, since it achieves the same airy, space-enhancing look as a suspended countertop, albeit with some help from a supportive friend.

Here it’s not just the striking countertop material that makes a dramatic statement. The undercounter lighting and the way the granite appears to be embedded in the white Caesarstone island also take the stylish kitchen counter to new heights. The lowered height of the bench makes this casual dining area more practical and comfortable, too.

Tip: If you’re worried that a natural stone countertop may be too high maintenance for you, choose an engineered stone or a high-quality laminate instead.
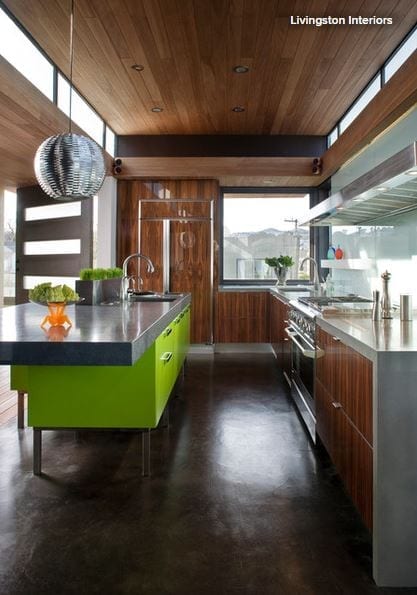
9. Green with envy. What was the first thing that caught our eye when we spied this cool cooking space? The striking island, of course — though the shimmering disco ball–like pendant light probably came in a close second. While the island’s eye-popping lime-green base immediately attracts the eye, the dramatic lines of the thick floating concrete top also command attention.

Polished concrete is a stylish and practical kitchen surface choice, as it not only injects any space with a cool, contemporary edge, but is also extremely low maintenance and environmentally friendly, making it ideal for those who desire an ecochic cooking zone that’s a breeze to clean. Did we mention the material is very affordable, too?
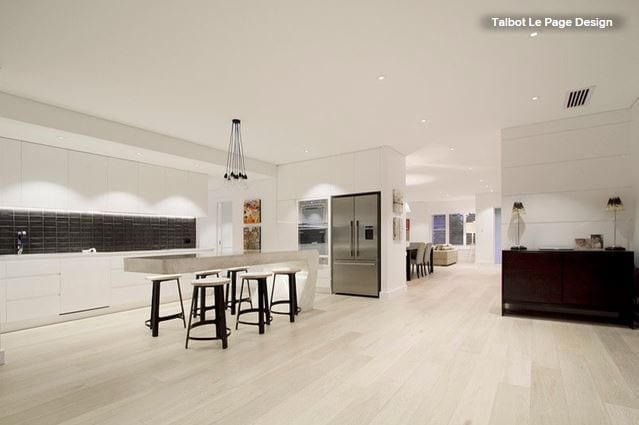
10. Space age. If you want to make a bold statement in your kitchen, opt for a cantilevered counter that’s fashioned from an interesting material in an unexpected shape, such as the cutting-edge, contoured design shown here. LED lights fitted underneath add to the freestanding form’s space-age vibe and help highlight the showstopping centerpiece.

Thanks to its tall height, there’s plenty of room to tuck several bar stools below the counter, which helps keep the pathways free of obstacles and ensures that the room maintains its clean, uncluttered look.

Tip: Install tinted LED strip lights below the floating countertop for a more dynamic and colorful look.
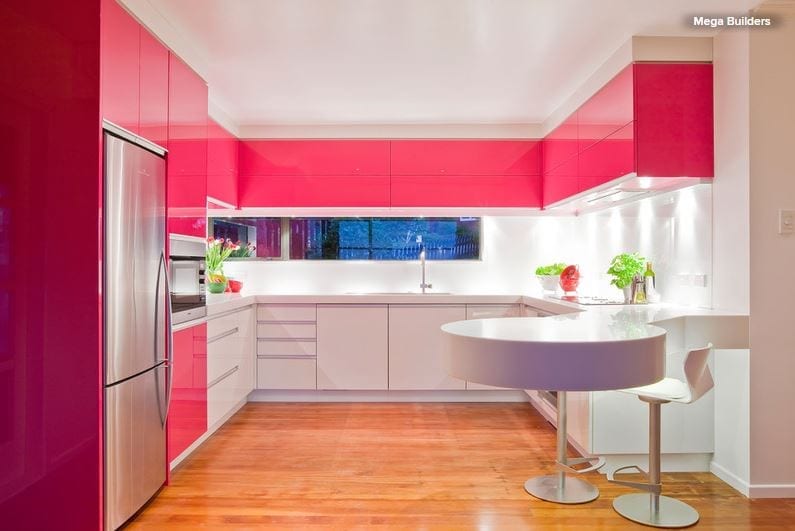
11. Going round. Worried that a suspended countertop won’t work in your spatially challenged cooking zone? This chic U-shaped kitchen shows how it’s done. Here a round floating bar is cantilevered out from the wall and floor cabinets, providing a spot for casual eats, an additional workspace and a social hub where family and friends can mingle when you’re entertaining. It also adds another layer of visual interest. Notice how the counter’s smooth, curved shape contrasts with the sharp lines and boxy forms that are used throughout the area.
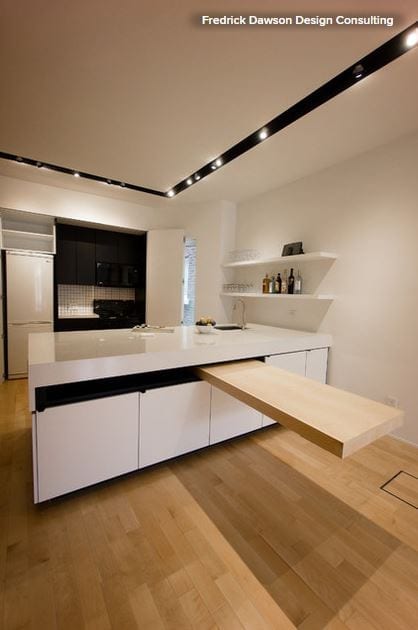
12. Hidden treasure. Now you see it; now you don’t! A space-savvy cantilevered pivot table like this one is a clever, creative addition that will boost the functionality of any compact cooking zone. When extended, the table enhances the visual appeal of the space, thanks to its sharp lines and striking silhouette, transforming the otherwise basic kitchen counter into an interesting design feature. Note how the blonde timber and subtle wood grain echo the timber used underfoot and add warmth to the cool white palette, too.