FREE DESIGNS AND ESTIMATES

Bathroom Remodel Insight: A Houzz Survey Reveals Homeowners’ Plans

Article by:

Older and younger generations often have widely differing viewpoints. But who knew bathrooms could be so divisive? In a recent Houzz survey, we asked homeowners planning a bathroom remodel or already in the process of one about their needs and desires. Of the 7,645 people who responded, young and old homeowners tended to fall into two clear groups. 

Homeowners 65 and older are more likely to skip adding a bathtub than those under 35. This could be for any number of reasons, but it’s likely that younger homeowners may have or expect to have children, who would be more likely to use a tub. Plus, those 65 and older likely choose showers because they’re more accessible for aging in place.

Bathtubs have traditionally boosted resale value (which 31 percent of the respondents said was the driving factor for their bathroom remodel), but older people may be planning to hang on to their homes longer, so resale isn’t as much of an issue.


For those adding tubs, freestanding models top the list, with 33 percent of respondents preferring them over drop-ins, undermounts and other styles. 


Young and old are also split on how they like their showers. If you’re under 45, you’re more likely to choose a rain shower and multiple showerheads. If you’re over 55, you likely prefer hand showers and sliding bars.


Meanwhile, there are two camps when it comes to, er, No. 2. The survey found an even split when it comes to toilet exposure: 52 percent of people want an open toilet versus one behind a closed door. Younger homeowners (25 to 34 years old) prefer tankless or wall-mounted models over the traditional two-piece ones. 

Upgrading features and fixtures was the main reason cited for remodeling a bathroom (49 percent). Frameless glass is one of the more popular choices. About 79 percent of people will choose all-glass enclosures for their main shower, and 54 percent will chose frameless glass.


Lighting is important too, whether it’s bringing in the natural sunshine with skylights or adding more LED lights. New windows top the list too, with 48 percent of respondents saying they plan to add a window and 41 percent a lighted vanity mirror. And if that’s not enough, 7 percent say they’ll add a showerhead with LED lights.


Also, 42 percent of all respondents are planning to add a shower seat. I think it was Winston Churchill who said, “Why stand when you can sit?”


White cabinets are the preferred color choice, with 32 percent of homeowners saying they’ll choose this ultimate neutral hue.


Contemporary Bathroom by Portland Kitchen & Bath Designers Kirstin Havnaer, Hearthstone Interior Design, LLC 

Brushed nickel (26 percent) and polished chrome (24 percent) are the front-runners for faucet finishes.

8 Ideas for High-Functioning Mudrooms

Mudrooms help us transition from our adventures in the great outdoors to the comforts inside our homes. But when packed with clever built-ins, space-maximizing storage and nifty organizers, a mudroom can also become a high-functioning, double-duty space that can accommodate anything from folding laundry to making crafts. 

Don’t believe me? Check out these fantastic mudrooms and my space-saving mudroom organization tips to see how you can make the entry to your home attractive, functional and clutter free.

Office space. Transform your mudroom into a double-function space with a built-in desk and file storage. One wall is all you need if you plan it right. The cubbies and hooks help keep outdoor gear and clutter separated from the desk area. 

Mediterranean Entry by Portland Interior Designers & Decorators Jessica Helgerson Interior Design 

Helpful hooks. Turn an awkward or a dead space into something you’ll actually use. A row of simple hooks around the perimeter and a few well-placed wire baskets have turned this once-empty nook into a valuable drop zone near the home’s entry. 


Neat and clean. Not all of us like to have our jackets and coats on display. These floor-to-ceiling cabinet doors keep clutter out of sight and add an architectural statement.


Laundry time. If you have a spacious mudroom at the back of your house, take advantage of all that room. Consider including a laundry section to make life a little easier. A washer, dryer and small sink mean you can throw dirty clothes right into the wash as soon as you get home. 

Pet station. If you share your home with furry friends, your mudroom is the perfect place for a doggie stop. This pet-friendly mudroom’s special space for cleaning pets means the owners will never see a muddy paw print in their house again. A sophisticated palette of durable materials makes it feel sleek, despite its practical purpose.


Seasonal storage. Mudrooms can be the perfect place in which to store outdoor sports gear for all four seasons, with the right organizational techniques. This ski-loving family came up with a great solution to keep their winter gear under control: Cubbies for gloves and hats up top, spots for boots below the bench and custom ski racks keep everything neat and tidy.

Personalized. Clever and colorful solutions help bring this mudroom to life. Let your little ones choose a favorite color to make their special space in your mudroom more fun. Color-coordinated baskets add a little personality to an all-white space with minimal cost and effort.


Get crafty. If you have the room, incorporate a workstation into your mudroom. Wrap a gift, help your child with a school project or prepare a package for the mail on your way out the door. Having everything in one spot will make multitasking much easier. 

Woodipedia: Is It Cherry or Is It Alder?

Article By:

Stains have made it very easy to color one type of wood to make it look like another kind. But there are two species of wood that really do look alike in their raw state: cherry and alder. Here’s how to tell the difference. 

When you think of a cozy country kitchen, most likely you are envisioning warm-colored cherry cabinets. “Cherry was one of the most popular cabinet woods in rural areas throughout the country, because it was so widely distributed across the United States,” notes Andy Richmond, vice president and certified appraiser at Garth’s Antiques in Delaware, Ohio.

Yet there is another wood species that features a milder version of cherry’s reddish tones and grain patterns. Alder is affectionately referred to by woodworkers as “poor man’s cherry.” With a coat of finish, it can easily pass for cherry to less-discerning eyes. 

Cherry basics. When we speak of cherry, we are really referring to black cherry — Prunus serotina. A distinctive element of most cherry wood is gum spots, or pitch pockets. They’re short, black streaks that look like hardened resin deposits.

Sometimes cherry has pin knots — tiny brown circles that again add visual interest. High-end cherry is figured, meaning undulating rays of light seem to shoot across the grain, lending the board a shimmering depth. This radiant effect is called chatoyance.


Alder basics. Commonly known as red alder, Alnus rubra grows principally in the Pacific Northwest, where it is the most commercially abundant hardwood. The consistent grain pattern and quiet coloration of alder is polarizing. Some people like it for exactly that reason, while other people find it boring. Alder can have pin knots, but it doesn’t have gum spots.

You’ll sometimes hear references to clear or knotty alder, but those are just general descriptions. “That’s not a grade,” says Walt Maas, manager of Bohnhoff Lumber in Vernon, California. “There are industry standards for grading lumber — like there are for grading meat. Each type of wood has its own specifications that professional hardwood lumber graders follow.” 

This makes it easier to compare prices when shopping. However, Maas notes that some companies put their own proprietary grades on lumber, which makes comparison shopping more difficult. 

Other by Vernon Furniture & Accessories VERMONT WOODS STUDIOS 

Differences between cherry and alder. There are three main differences. First, alder is significantly softer, so it weighs less. Second, alder is cheaper. And finally, alder has no sapwood, which is the creamy colored wood on the edge of a board. Like walnut, cherry is known for having a lot of sapwood. 

Cost. Cherry’s price is somewhat dependent upon the amount of sapwood. Most boards have more heartwood (the pinkish-red color) on one side and noticeably more sapwood on the opposite side. The percentage of each on a single board influences pricing. Another factor is board width. Wider boards of all species are more expensive.

Maas reports that the current wholesale price of cherry at his yard is $3.20 per board foot. Alder is priced substantially lower, at $2.70 per board foot. 

Color. While alder is fairly even in color, cherry’s basic red cast can have a whole spectrum of variations. This makes it difficult for woodworkers to color match the boards on large projects. Gene Leslie of Rancho Cucamonga, California (who made the cherry cabinets shown here) evened out the disparate tones by treating all the wood with lye to artificially age it while maintaining the clarity of the grain. Amateurs need to be thoroughly educated on this process before attempting it, however, since lye is highly caustic. 

When making tabletops and cabinet door panels, woodworkers frequently cut off the sapwood to feature the prized heartwood. The sapwood is then used for the interior structures, especially in drawer construction. 

Durability. Black cherry rates 950 on the Janka scale for hardness, which puts it on equal footing with soft maple but far below tougher hard maple (1,450) and black walnut (1,010). 

Alder is rated 590, ranking it as a very soft hardwood, slightly above poplar (540).


Not cherry. While there are no wood types erroneously identified as alder, there are several misnamed cherries. Chief among them is Brazilian cherry, also known as Jatoba. It’s an extremely popular flooring choice these days, not only because of its cherry-like color, but also because of its durability. Brazilian cherry rates 2,350 on the Janka scale. (Remember, hard maple is 1,450.)


Other woods masquerading as cherry are Patagonian cherry, Bolivian cherry and African cherry, which is also known as Makore.
 

Finishing. Cherry and alder are both prone to blotching when finishing coats are applied. Again, some people accept this as a beautiful trait of real wood, while other woodworkers try every finishing trick in the business to minimize it. It’s a good idea to ask for a finished sample. 

UV stability. Cherry naturally patinates to a darker, richer color over time. American antiques specialist Andy Richmond notes that antique cherry furniture can resemble mahogany.

It’s also a notoriously UV-unstable wood, which some woodworkers use to their advantage. To quickly and painlessly deepen the color of some cherry boards, woodworker Gene Leslie intentionally leaves them out in the sun after milling them. 

Sustainability. Domestic hardwoods have been endorsed by the U.S. Deptartment of Agriculture as a preferred green building material — in large part due to the responsible harvesting methods practiced by the American hardwood industry. The other important factor in the sustainability of American hardwoods is the minimal transportation requirements, compared to those of imported exotics.


Smart Investments in Kitchen Cabinetry — a Realtor’s Advice

Article By: Tiffany Carboni

The kitchen is the most expensive room in the house to build. The national average cost of a kitchen remodel is $50,000, though the real cost can vary widely, depending on where you live, the scope of the project and the materials you choose. New cabinetry can take up much of that expense. Make the most of this big purchase by treating your new cabinets as an investment. 

Realtor Victoria Gangi offers insider tips on how to get the best return on your cabinet investment, even if you’re not moving in the foreseeable future. 

Create an optimal layout. Long before a kitchen starts to take actual shape, there needs to be a well-crafted plan for how the kitchen will be laid out to offer maximum benefits to the homeowners and their guests. 

“Layout is the number-one feature home buyers are looking at in a kitchen,” says Gangi. “You will lose your audience if cabinets aren’t designed in a functional way with good flow.” 

A kitchen or cabinet designer can help you get started. Don’t make any rushed decisions in the planning process. 

One way to help visualize a designer’s plan is to tape out the dimensions of the new cabinet configurations on the floor and walls. Granted, you’re going to need a really good imagination for this to work, but it will give you an opportunity to literally walk through the measurements to see if things feel well spaced. 

Invest in quality cabinetry. Once you’ve got a plan for where everything’s going to go, decide on a style and quality that will age well and withstand trends and changing tastes.

Quality cabinets are one of the smartest investments in a kitchen remodel, saysKarl Keul, owner of Cameo Kitchens. “The lesser grades of cabinets tend not to age gracefully and often need more upkeep,” he notes.


The quality to choose will depend on your long-term plans. “Midrange cabinets are generally a good bet,” Gangi says. “If you intend to sell your home, these cabinets will look attractive to buyers, and you’ll likely see a return on your investment.”

She adds, “Even if you plan on staying in your home for the foreseeable future, this is still a safe option, because they’ll last. Choose top-of-the-line cabinets only if you have the money to create the kitchen of your dreams without any worries of recouping the money.” 

Integrate the door style. Choose a door style and color that integrate well with the rest of your home, especially rooms that look directly into the kitchen. If the rest of your house is traditional, you’d be better off steering toward a more traditional or transitional door style than going completely modern, and vice versa.  

“Don’t choose a style that’s too ornate or too modern,” Gangi advises. “Modern is good; people like clean lines and clean finishes. But ultramodern or any style that’s too out of the norm isn’t what buyers tend to want.” 

In general the best kitchen designs are those that work in harmony with the rest of the home’s architecture rather than try to fight it. A harmonious house is easier for potential buyers to understand and, in turn, to want to outbid each other for. 

A savvy designer can help navigate you toward the best cabinet options that will work for your home and budget.


Choose light colors. Lighter-colored cabinetry will appeal to more buyers. “Dark kitchens are out,” notes Gangi. “People prefer light and bright.” 

To integrate the appliances or not? Integrated appliances significantly increase the cost of a kitchen, not only because of the added cabinetry door fronts, but also because the appliances needed to facilitate this option are more expensive.

While this feature may look attractive to some home buyers, especially in a price range where integrated appliances are an expectation rather than an exception, your may not see the return on this high-priced detail in a midrange-price house. 

According to Gangi, your cabinet investment can be safe even if you don’t integrate the appliances. “Stainless steel appliances are still very popular and well accepted by buyers,” she says. 

Choose cabinet details that matter. What’s inside the cabinet is just as important as what’s on its outside. “Buyers are on the lookout for rollout and quiet-close drawers,” notes Gangi. “This is where that choice of midrange versus low-range cabinet quality becomes important. Spending the extra money it takes to get good-quality slide rails and quiet-close features will come back to you.”


Opt for clean-lined hardware. “Buyers prefer drawer pulls and handles to be just as clean lined as the cabinetry,” says Gangi. 

If you like ornate hardware, go for it. However, should you sell your home, expect to replace those fancy pulls with a more streamlined set that will appeal to a broad range of buyers. The good news is that your fancy hardware can move with you.

9 Ways to Configure Your Cabinets for Comfort

Article By: Jennifer Ott

Those of you building or renovating a kitchen face countless decisions. Just for the cabinetry you have to select the materialframe typedoor stylehardware and more. 

I hate to add to your list of selections to make, but there are a few details to think about when it comes to ergonomics, too; how you configure your cabinetry can make your kitchen a comfortable and efficient workspace for you and your family.

1. Minimize uppers. Wall cabinets can be a stretch for many to access — or altogether out of reach for some — so consider removing wall cabinets and putting in a bank of windows instead. This is an especially smart move if doing this will give you a nice view. 

2. Be shallow. Instead of wall cabinets, I like to install shallow floor-to-ceiling pantries. They’re an efficient use of an interior wall, where you can’t have a window anyway. By limiting the depth to just 6 to 9 inches, you are forced to line up your dry goods in a single row, making everything easier to find.


3. Go for open shelves. If you really need wall-mounted storage, try installing a few open shelves. They’re a more efficient way to store items, because you (and your guests) can see where everything is, and you don’t have to open and close cabinet doors to access things. Limit the stored items to those you use often so they are less likely to collect dust. 

4. Lift up, not out. For those who want closed wall cabinet storage, take a look at horizontal cabinets. There’s only one door you need to open to see everything in the cabinet, and you don’t have to step out of the way as you open and close it. 

5. Install drawers. When it comes to base cabinets, I can’t recommend drawers over doors strongly enough. Deep drawers can hold almost anything you need to store in a base cabinet. Plus, it’s much more efficient to just pull the drawer out and have all the contents on view right in front of you than having to open two doors and root around for what you need.


6. Avoid corners. If you can design your kitchen to not have corner cabinets, do so. Corners tend to cause traffic jams in kitchens, and corner cabinets can be awkward to use. 

7. Or make the best of your corners. If you can’t avoid corner cabinets, then at least make them as functional and easy to use as possible with fully rotating lazy Susans or clever corner drawers.


8. Upgrade cabinetry.Soft-close door hinges and drawer glides are more must-haves. It is totally worth the small extra charge for these features, which allow you to shut doors and drawers with one efficient push and no slamming.


9. Vary countertop heights. While the standard kitchen countertop height is 36 inches, there are many tasks that are more comfortably performed on a lower or higher surface. This is especially true for those who are taller or shorter than average. 

Typically you want your forearms to be at or near level when you’re working at the countertop. But for us tall folks, that’d require a surface height of 42 inches or more — a difficult height for kids or shorter members of the household to use. 

The solution is to set up areas with differing countertop heights to accommodate the various statures of the users and their tasks. Extra storage room in the cabinet underneath is an additional upside to taller work surfaces.

Your Guide to Choosing Kitchen Cabinets

Article by: Vanessa Brunner

The right kitchen cabinetry can make or break your kitchen’s functionality and style — not to mention your budget. No pressure, right? Don’t stress yet — Houzz’s kitchen cabinet guides can walk you through the process, from start to finish. Resource guides covering everything from Shaker to flat panel, from corbels to aprons, from glass knobs to recessed pulls, are all listed here in easy-to-access fashion.


Door Styles

Shaker, flat or inset? Your cabinet door style is important — it may be your biggest kitchen expense, after all — but choosing it doesn’t have to be stressful. See which of these popular cabinet doors fit with your home’s style. 

Get the guide: Popular Cabinet Door Styles for Kitchens of All Kinds


Who says cabinets have to be wood? Put your best dishes on display and open up your kitchen to light and space with glass cabinets. 

Get the guide: 8 Beautiful Ways to Work Glass Into Your Kitchen Cabinets

Go beyond the standard swinging door in your new kitchen. Flip-up doors, pocket doors and corner drawers can make your cabinets more functional and your life easier. 

Get the guide: 8 Cabinet Door and Drawer Types for an Exceptional Kitchen


If you’d rather stick with something more traditional for your cabinets, then the timeless Shaker style is a sure bet. Learn how to make this look work with different counter, hardware and backsplash materials. 


Add a more traditional furniture style to your kitchen storage with a countertop hutch. Glass fronts make these the perfect place to put pretty dishes on display. 


Open shelving feels as much at home in modern kitchens as it does in traditional ones. See how to make this simple, clean storage style work in your home. 

Using ecofriendly materials isn’t rare anymore — it’s easy to choose kitchen cabinetry that contributes to a healthy home and family, as long as you know what to look for. 


Can’t decide between two different styles? Mix and match — two different cabinet styles can make an even bigger impact. 

Hardware Styles

Of course, once you have your cabinets chosen, you have a whole other task ahead of you: choosing hardware. Even if you’ve got simple Shaker cabinets like these, your choice of drawer pulls and knobs makes a big difference in your finished look. 


Flat-panel cabinets tend to work best in modern kitchens; make sure you choose hardware to match. Clean, simple and contemporary pulls work well with this cabinetry style. 

Raised-panel cabinetry tends to suit traditional kitchens. Look for classic, old-world fixtures to fit this beautiful style. 

Colors and Finishes

Colorful kitchen cabinetry has made a big comeback. Try pretty palettes to give your kitchen flair.


Try playing with two different colors on your kitchen cabinetry. Scared to go too bold? Contrast a single bright color with neutral finishes. 

If you want to get color the DIY way, read our related ideabook first. Painting your kitchen cabinets can be difficult, but these pro tips will help. 

Get the guide: From the Pros: How to Paint Kitchen Cabinets


Stains are a great way to get color on your kitchen cabinetry without covering up the wood’s beauty. From greens to blues to browns, stain colors can really enhance your new kitchen. 


Curious about color but worried about the maintenance? A distressed finish can cover all the bases, offering a warm, bright look that can actually embrace wear and tear. 

Sometimes a kitchen remodel doesn’t require a new fridge or oven — but how do you pick a cabinet color to go with your existing appliances? Check out our cabinet color guide for cabinets with dark appliances. 

Get the guide: Cabinet Colors for Dark Appliances


Molding and Details

Adding molding is an easy way to make any type of cabinetry look custom. Whether you want to add crown molding to your existing kitchen or edge molding to new cabinets, this guide can help you envision the final result. 

Decorative supports, aprons, corbels and toe kicks — these features might not come standard on most cabinetry, but they can make a huge visual impact. 

Learn how frosted, textured and seeded glass is made, and whether or not it can work with your kitchen cabinets. 

Get the guide: Choose Your Kitchen Cabinet Glass


Whether you’re building a new kitchen or retrofitting an existing one, it’s important to keep universal design in mind. Clever accessories will make your kitchen comfortable and accessible for everyone who uses it. 


Kitchen ideas, bathroom ideas, and more ∨

Browse living room ideas, from a sectional sofa couch to chandelier lights and floorlamps, for your next interior design project.
Find a wall shelf, customizable closet organization and stylish furnishings to whip your closet into shape.


Cleaning Up in the Laundry Room

ARTICLE BY ANITA SHAW

Downstairs, lurking somewhere in a dark corner of an unfinished basement, is a cramped area housing the washer and dryer. It’s an image most people can relate to as, at one time or another, we have stood in a “laundry room” like this.

Well, that image can be banished from memory, as today’s laundry rooms are not only bright and airy, they are places where people actually enjoy spending time. They are incorporating many amenities from other areas of the home and acting as gathering spaces for a variety of activities. And, the desire for these spaces to incorporate high-end design and functionality is definitely on the rise.

“I consider laundry spaces to be almost on the level with kitchens and baths,” states Tina Kuhlmann, principal designer, Primrose Design Interiors in San Diego, CA. “People are in and out of there all of the time. It’s a really integral part of the kitchen and the family.”

While storage is a necessity in the laundry room, Lee Taylor, showroom manager for Taralla Kitchen and Bath in the Bronx, NY, notes, “the look of the cabinets and countertops are sometimes more important. These rooms have become an extension of the kitchens and living spaces.”

laundry room

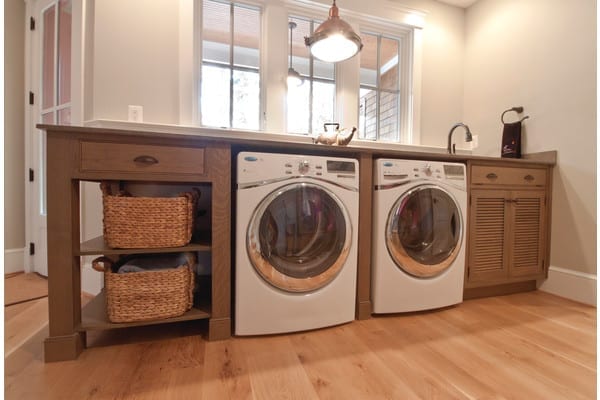
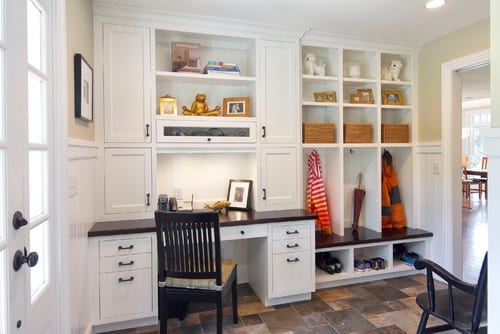
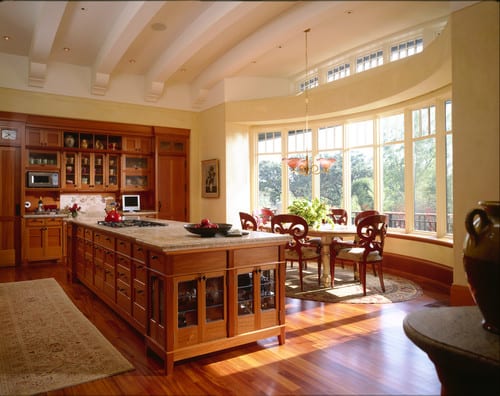
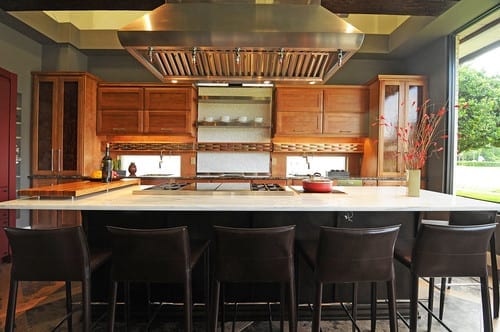
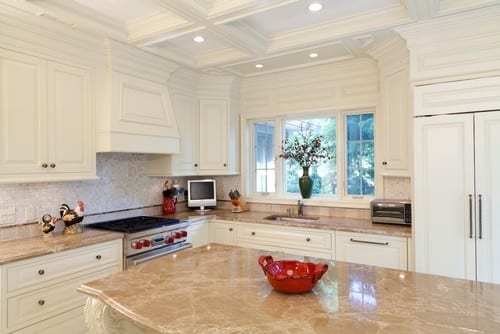
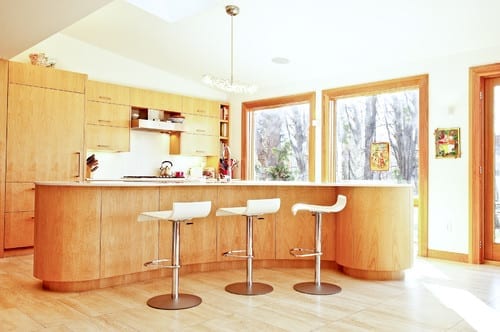
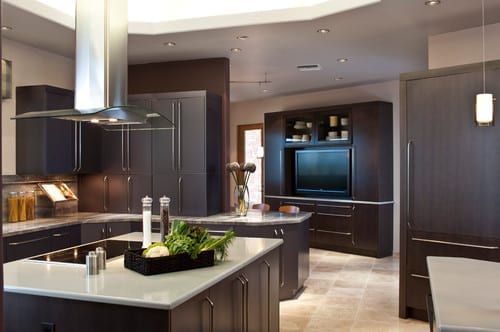
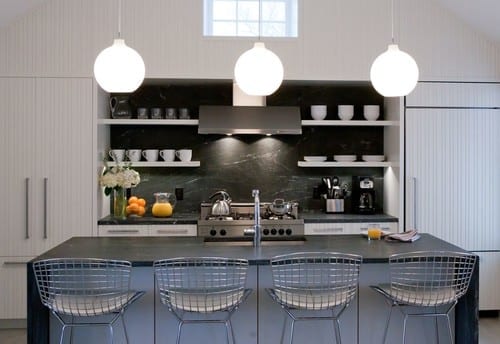
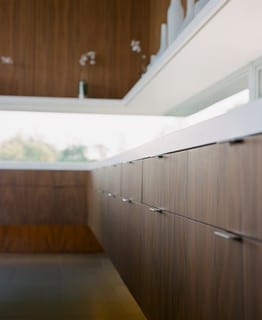
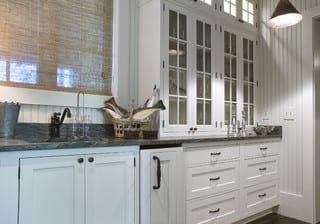
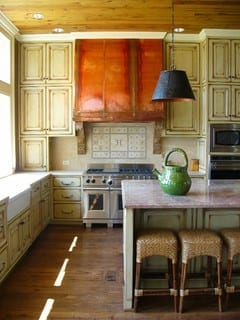
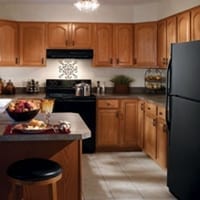
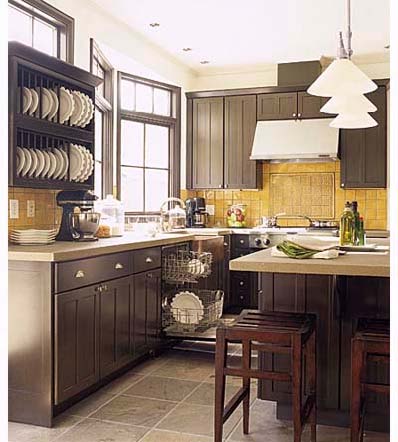
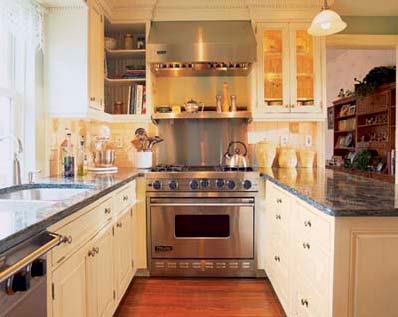
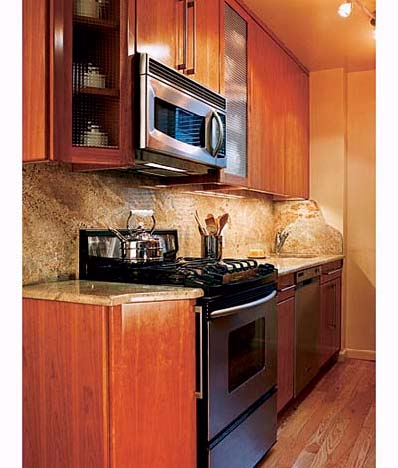
Photo: Kelly Keul Duer and Virginia Vipperman | Designer: Cameo Kitchens

Laundry necessities

The approach to designing today’s laundry rooms is much the same as with other rooms, according to designers. It’s critical to understand how clients not only wash and dry their clothes, but also use the surrounding space.

Families tend to do laundry in different ways, so it is important to know their habits, stresses Mike Macklin, designer, Cameo Kitchens in Falls Church, VA. “If the family brings their laundry down in baskets and promptly takes the basket back to their rooms, open shelving is a practical way to go. But, if the laundry tends to pile up, storage behind doors may be a better idea.”

“I put a lot of things behind doors because I know people are messy,” stresses Kuhlmann. “Very few of us live like the catalogs look.”

Of course, a surface to act as a folding area is critical, and one size does not fit all. “When I’m dealing with empty nesters, they often ask for a place to fold that is nice and at back level, so there isn’t a lot of bending over,” comments Kuhlmann.

“Many of our customers opt to use washers and dryers that fit under the counter,” notes Macklin. “This provides a counter space more than long enough to fold and organize clean laundry.”

An oversized sink is an important element, according to several designers. “I always include a laundry sink with a pull-down faucet,” states Kuhlmann. “The pull-down faucet is really nice because you can get in there and spray those stains out or pretreat.”

It can also be used to wash delicates and, once those delicates are washed, areas for hanging become very important.

“Sometimes I’ll do a tall hanging cabinet for delicates because people don’t always want to dry them in a dryer, and they don’t really want to look at them, either,” reports Kuhlmann. She has created cabinets to hang delicates that function like a closet. She includes open-weave bronze or copper on the door, sometimes backed by fabric, to allow for air circulation for drying.

“Drying racks and drip areas are a big deal,” adds Lynley Serratt, CKD, CBD, Allied ASID, director of sales and marketing, Palmer Todd in San Antonio, TX. She reports that her firm has done pull-out drying racks in the space between the top of the front-load washer and dryer and the cabinet above.

laundry room cabinets

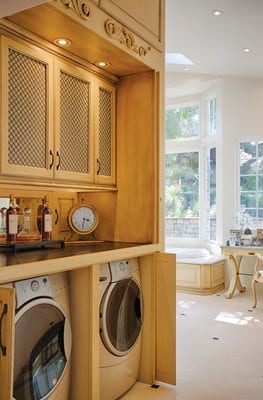
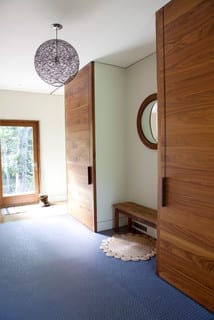
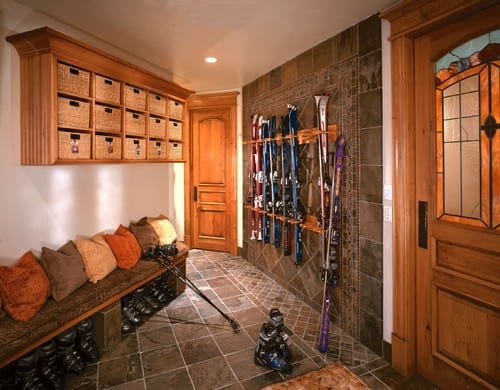
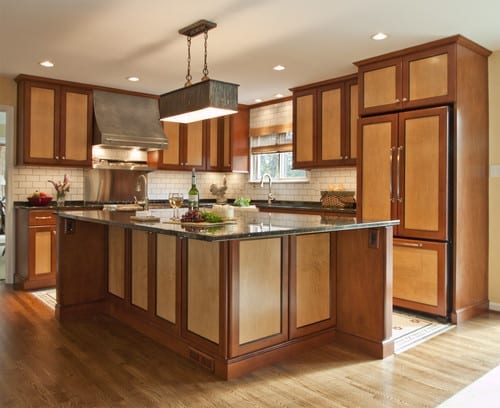
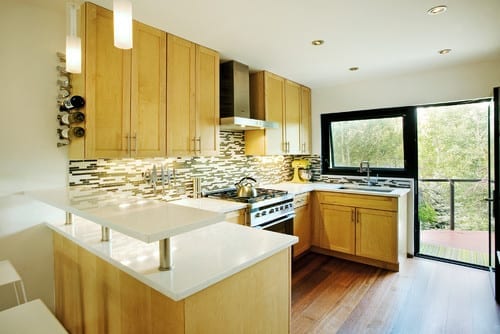
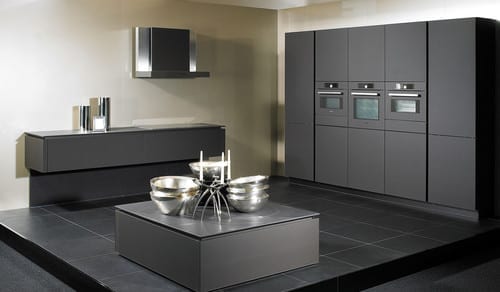
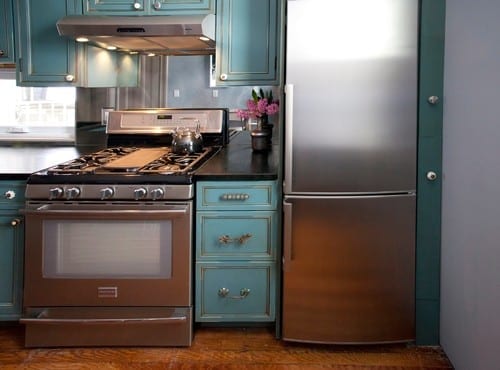
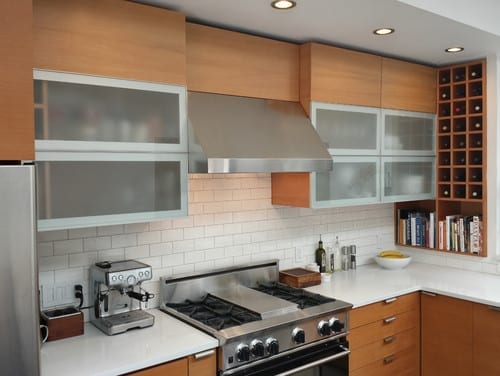
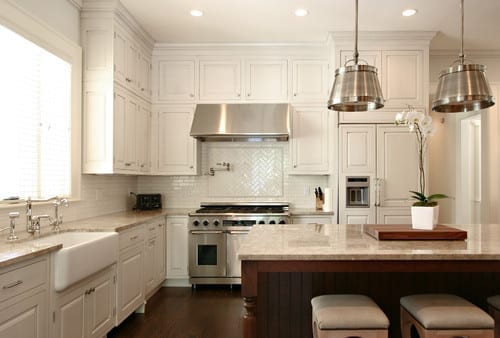
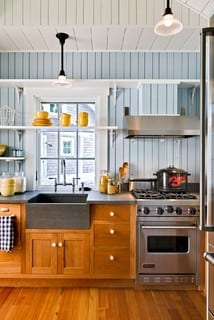
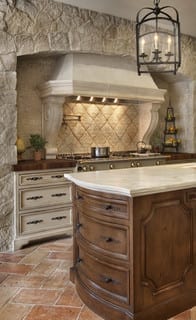
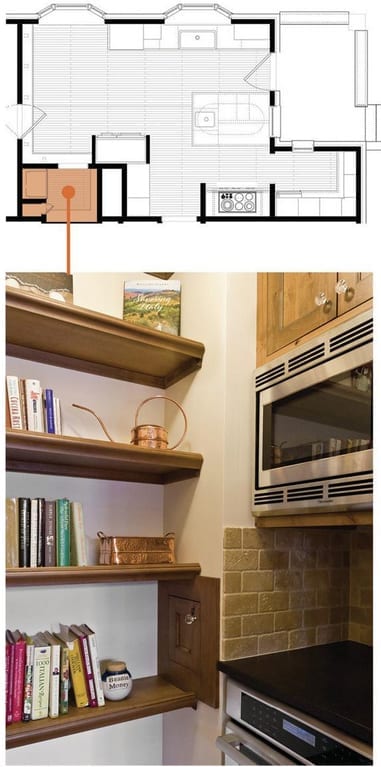
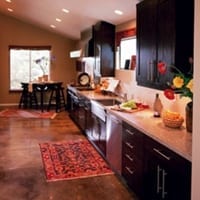
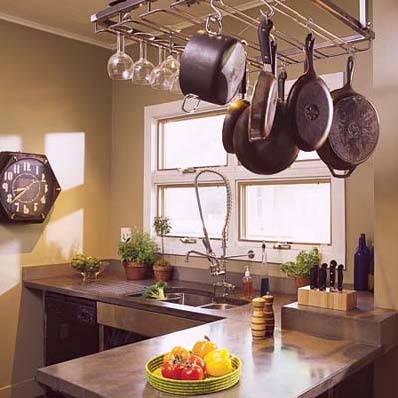
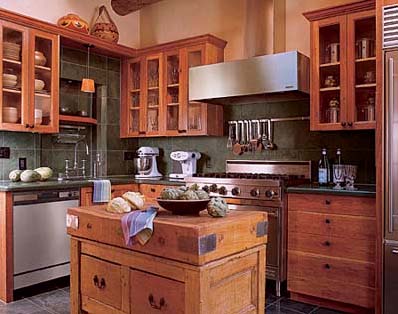
Photo: John Lennon Photography | Designer: Tina KuhlmanAnd, while ironing may be akin to drudgery, ironing boards are important to the room’s design. However, tucked away and out of sight is the preference for this household item. Kuhlmann likes to put the ironing board behind a finished door panel so that it looks like it’s part of the cabinetry.

Laundry plus

In addition to the items people expect to find in the laundry room, there are several surprise amenities that are finding their way into the design. Charging stations for the family’s multitude of electronic devices have found a home here, as have beverage refrigerators and flat-screen televisions.

Of course, innovative storage is a must, especially in rooms that serve multiple purposes.

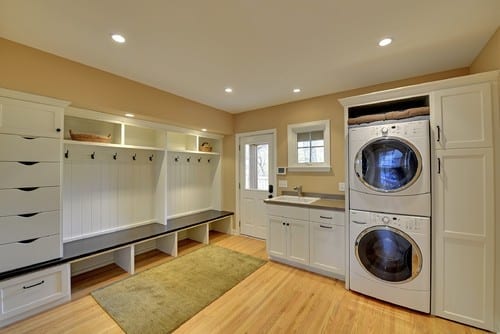
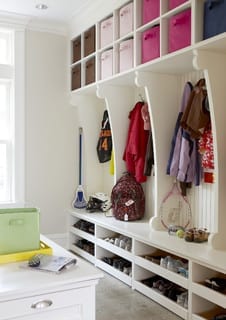
“Organized space for coats, hats, backpacks and sports equipment is essential [when this area is combined with a mud room], and bench seating can be an effective means of hiding these necessities,” reports Macklin.

“These rooms are used by all members of the house on a daily basis for staying organized, and for keeping the clutter out of the rest of the house,” she reports.

“I tend to like drawers in the laundry room that aren’t as deep – maybe three or four of them. That way, you don’t lose things in the bottom,” remarks Kuhlmann. If a larger drawer works better for the space aesthetically, she will often add a hidden drawer within the larger one that can roll fully to the back of the drawer.

Lighting – both natural and installed – is key to the space for both function and spirit. Since time will be spent in a laundry room that serves multiple purposes, windows that bring in daylight are essential to the overall design. And, according to Kuhlmann, good undercabinet lighting is important, especially for matching dark socks!

People also like to personalize the space with add-on features. “You can explore your personality a bit more in this room because, typically, it’s just one family member running the show, unlike a kitchen or bath where you have to compromise,” explains Jenny Rausch, CKD, president, Karr Bick Kitchen and Bath in Brentwood, MO.

laundry room cabinets

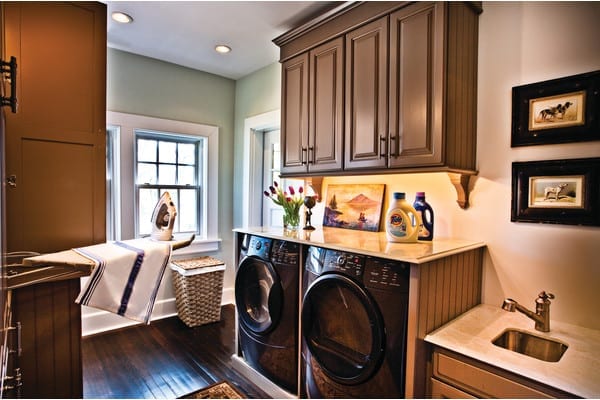
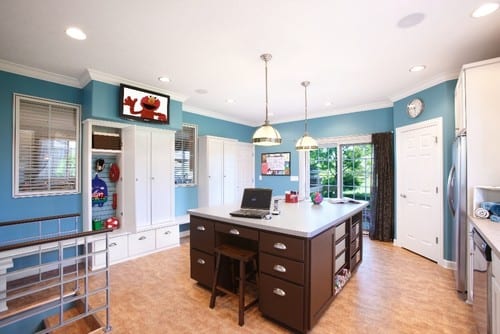
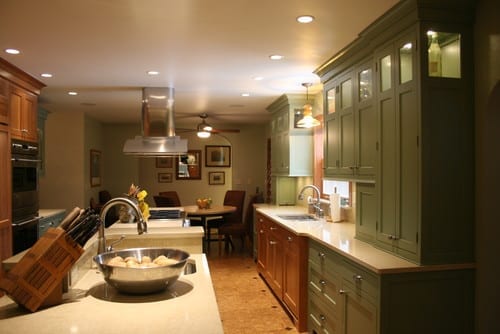
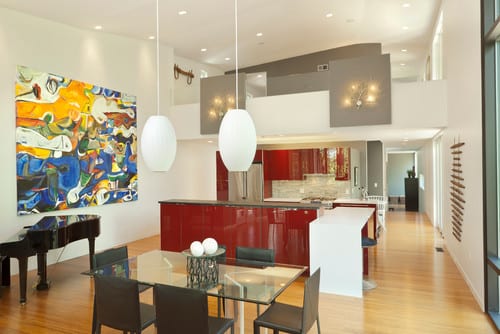
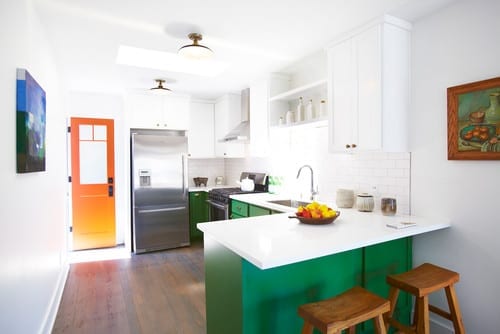
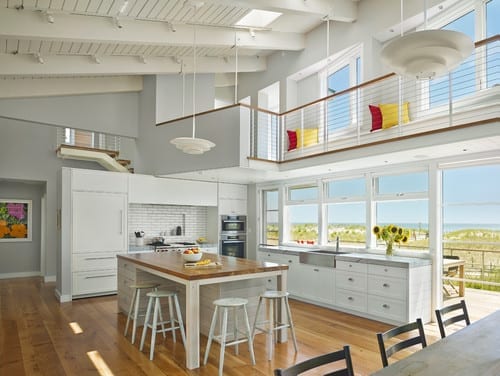
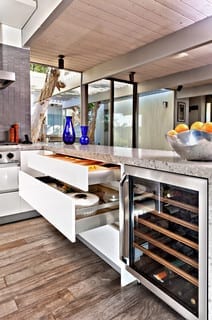
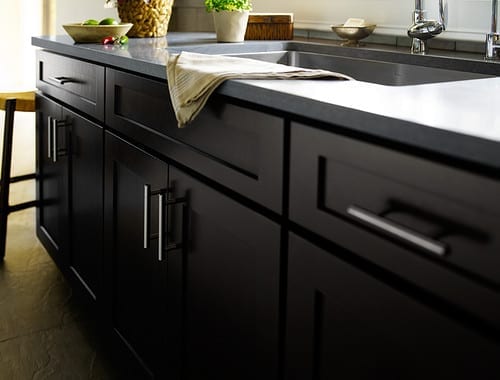
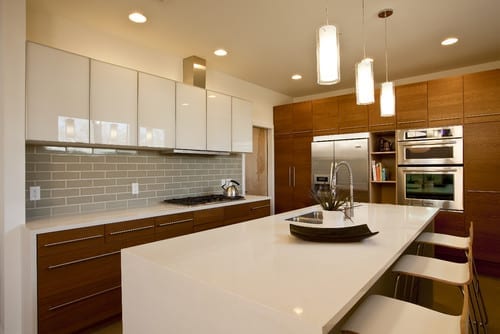
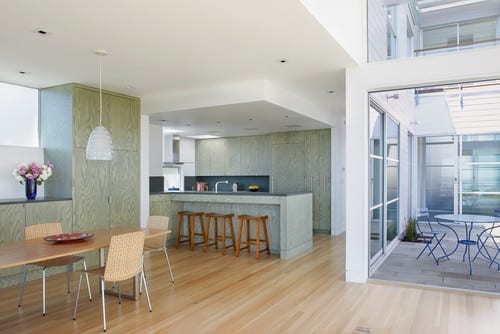
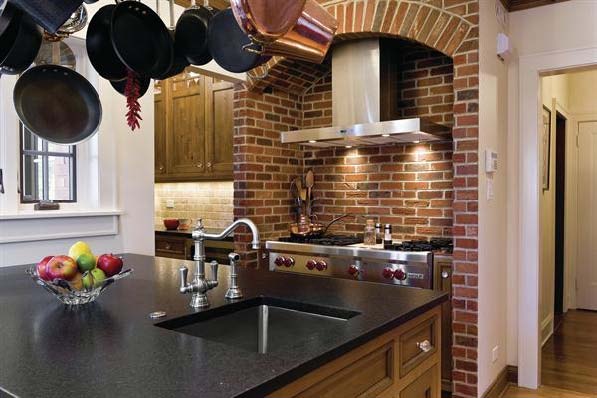
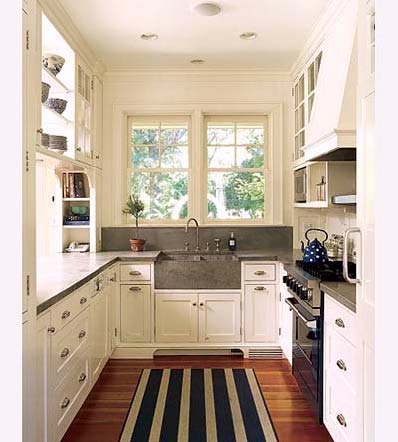
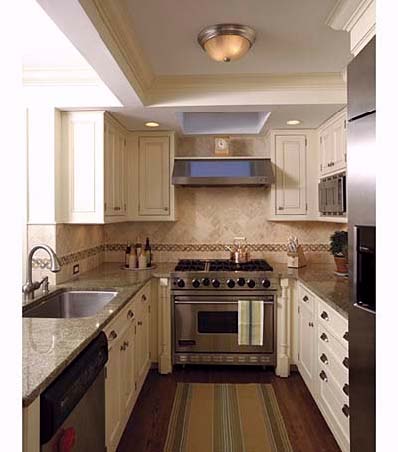
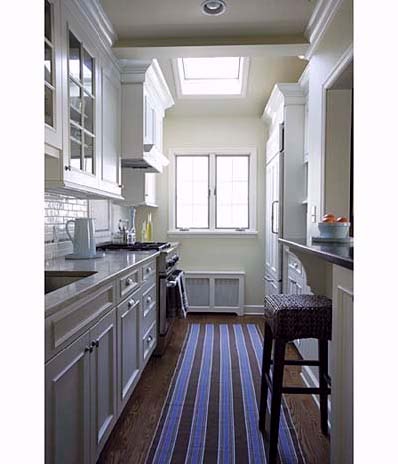
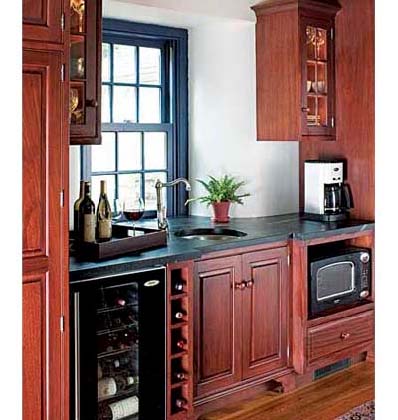
Photo: Denash Photography | Designer: Jenny Rausch

She has created laundry rooms with glass tile, marble tops and crystal chandeliers. “If you love an expensive backsplash tile, the good news is that, in a laundry room, you probably won’t need that much of it,” she stresses.

Kuhlmann agrees. “A tile backsplash is a significant amount more money, but you can have a lot of fun with it. It gives the difference between looking at a dry wall surface and that punch of design.”

Kuhlmann also likes putting solid surface countertops in the laundry room when she can. “Nobody wants to be scrubbing tile grout,” she comments.

Rausch stresses that the laundry room can be just as profitable as a kitchen because the same materials are used in both spaces. “Lighting, cabinets and tile carry high margins, and all can be done to the max in these dream laundries,” she comments.

“It’s important to pay attention to all of the details,” continues Rausch. “It’s not just a laundry room – it can be a sanctuary.”

While the idea of laundry room as sanctuary may not have caught on as of yet, the laundry room as mud room, gift wrapping center or craft space certainly has.

Wrapping areas are very popular in the laundry room, according to Kuhlmann, and she will incorporate storage for rolls of ribbon and wrap, scissors, tape and the like.

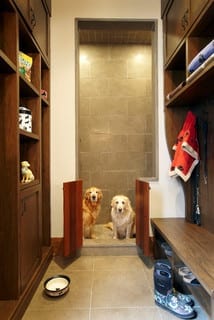
Kuhlmann has done laundry room dog washes, too. “I’ll install a shower pan and a handshower low on the wall for when your pet comes into the mud room and has muddy feet,” she explains.

“We expect more requests for laundry room renovation in the future, as customers seek to maximize every inch of their home,” concurs Macklin. “The laundry room will be more of a home center and an important component of the home’s design.”

“Call it what you will, the laundry room has become this wonderful multi-use space that’s not just about laundry anymore. It’s almost like a secondary multi-purpose room adjacent to the kitchen, and if we educate our clients in that general direction, they’re going to want it that much more,” states Kuhlmann.

(You are reading an article originally posted on ForResidentialPros.com)

Kitchen Design: How to Avoid Standing Room Only

Photo Credit: Dennis Jourdan Photography via Remodeling Magazine

Room for Two: Alder cabinets, honed granite countertops and a tumbled marble backsplash give this kitchen a rustic feel.

The homeowners of this 1920s house (pictured above) had been planning a kitchen remodel for a long time. They went so far as to work on a design that would enclose the porch to expand the space, then got cold feet during the market downturn, and, worrying about the return on investment for an addition, put the project on hold.

By the time designer Diane Lawson, of Diane Lawson Designs in Nashville, TN; met the couple, they had revisited the project but had opted to stay within the existing footprint. However, they presented her with a long list of desires that included: good traffic flow for two cooks, separate cooking areas, an island, increased storage, and a rustic Italian design and details that would blend with the home’s Italianate style. 

Though most homeowners today want to open up the kitchen to the rest of the house, Lawson says this couple bucked the trend, choosing to maintain the separation from the living and dining rooms.

Fitting in the long list of the client’s wants required some compromise, including a peninsula rather than an island, but Lawson viewed the project as putting a puzzle together to set all the pieces neatly in to the outline. 

Photo Credit: Dennis Jourdan Photography via Remodeling Magazine

Window & Wall Upgrade: When the original windows were replaced with low-E units, insulation was also added to the exterior wall.

Puzzle Pieces

To help create a rustic Italian feel, the clients chose knotty alder cabinets. Lawson says that this species has increased in popularity during the last 10 years and that the wood – sometimes referred to as “poor man’s cherry” because of it’s similar grain and reddish tones – can cost 10% to 15% less than cherry.

Since not all manufacturers carry alder, Lawson opted for custom cabinetry. Going with a custom shop also had the advantage of enabling her to maximize storage and create a furniture look with cabinets that fit the age and style of the house. “[The choice] boils down to [the client’s] wish list and what they are looking to achieve,” Lawson explains. “And, of course, budget.”

The clients wanted to use the same finish throughout the kitchen – a rare choice these days, Lawson says. Currently, most of her clients are opting for a contrasting finish for the island. 

Lawson had known remodeler Michael Menn, of Michale Menn Ltd., in Chicago, for almost 20 years and brought him on to help her with the extensive remodel.  The ceiling above the sink had a soffit. Menn removed it to accommodate Lawson’s design, which took the cabinets to the ceiling to provide extra storage. 

One of Lawson’s biggest design challenges was the traffic pattern for the family’s two “heavy-duty chefs” and keeping them out of each other’s way. The original freestanding island really affected the pattern, so Lawson moved the island to abut a wall. “While you don’t have access on all four sides [of the island],” Lawson says, “it gave us more room in the busy aisle-way, which is the main entry into the kitchen and is where we needed as much space as possible” – especially when one of the cooks is standing at the island prep sink. 

The island has a small trash cabinet and a shelf for the client’s heavy stand-mixer.

Photo Credit: Dennis Jourdan (photo) | Nicole Babcock (floorplan) via Remodeling Magazine

Into the fold: Removing the door and adding upper and lower cabinets makes this former pantry feel like part of the main kitchen.

Photo Credit: Dennis Jourdan (photo) | Nicole Babcock (floorpan) via Remodeling Magazine

Cook Nook: The second pantry has a microwave and an oven. The existing laundry chute remains – but it has been reframed to match the cabinetry.

Separate Yet Cohesive

The existing 360-square-foot kitchen included two under-utilized pantries. Lawson thought the 18-square-foot closet next to the stove alcove would work better as a butler’s pantry, so Menn removed the door to make it part of the kitchen and replaced the wire-rack shelves with cabinets that match those in the main kitchen. The L-shaped run of cabinets has upper and lower cabinets and a countertop. An undercounter wine refrigerator is the only appliance. 

The other 24-square-foot closet is closer to the dining room. Lawson considered removing the walls to incorporate it into the dining space, but there were two obstacles to doing that: a laundry chute in the closet and a two-story chimney that runs adjacent to that pantry. “We were bound,” Menn says, but the team also thought that retaining the quaint “little pockets” of space matched the style of the 90-year-old home. As they had done with the other closet, the crew removed the door. The existing closet had some shelves, an outlet, and a hanging bulb. The new space contains an oven, counter space, and upper shelves with a microwave. The wife likes to bake, and this area gives her a space to work in while her husband prepares food in the main kitchen area.

Photo Credit: Dennis Jourdan Photography via Remodeling Magazine

Brick or Treat

The original cooking alcove was outlined with faux brick. The clients liked the idea of a brick alcove and felt that it fit well with the new design’s rustic feel. And, Lawson says, the material ties in with the brick porch outside the kitchen.

Menn and Lawson thought the alcove could be enhanced to make more of a statement, so Menn’s team created a taller, softer arch at the top of the opening and installed real brick – cut ¾-inch thick – on the entire wall, as well as on the wall adjacent to the butler’s pantry.

The alcove also has contemporary features, including a sleek stainless steel hood, a Wolf cooktop, and a stainless steel storage drawer custom-made by the cabinet shop. The hood is actually made for an above-island installation that the clients had considered for the addition version of the project. They liked the shape, so Menn installed it here. He made custom ductwork to meet local code and vented the hood through an exterior wall. Narrow base pull-out cabinets flank the stove and hold spices. 

(You’re reading ‘Standing Room Only’ originally posted on Remodeling)

Design 101: Common Kitchen Shapes That Blend Beauty and Function

We all want our kitchens to be both beautiful and functional. And while you may have an idea of how you want your new kitchen to look, balancing proportion and scale to achieve a harmonious whole is critical. However you’ll also want to understand the factors that impact how it feels to be in the space. Here, we’ve gathered some information on kitchen shapes, optimizing functionality and how to ensure a layout works for you and your family.

Your Lifestyle and Your Home Will Influence Your Kitchen’s Shape

Are you an aspiring cook? Do you like to entertain? Is counter space a premium? These are just some of the considerations that will determine which kitchen shape is right for you.

Photo Credit: Omega | MasterBrand Cabinets, Inc.

U-SHAPED

Popular with many cooks because of its efficiency, the U-shaped kitchen offers generous counter space and provides an efficient workflow by creating a compact work triangle. It can however make the cook feel apart from a group when entertaining, as most movement will be facing one of the three walls.

Photo Credit: Omega | MasterBrand Cabinets, Inc.

L-SHAPED

The L-shaped kitchen offers flexibility for both large and small homes. This shape utilizes only two kitchen walls, providing an open sensibility. The L-shape minimizes traffic through the kitchen and, typically, features larger expanses of countertops, allowing ease of preparation at mealtime.

L-SHAPED WITH AN ISLAND

An L-shaped kitchen with an island is ideal for entertaining. The ample counter space along the “L”of the kitchen becomes the primary work area, while the island allows guests or other family members to gather, to help prepare or just visit… AND to stay out of the way of the cook!

Photo Credit: Omega | MasterBrand Cabinets, Inc.

G-SHAPED

A modified “U” shape, the G shaped kitchen is very efficient. However, unless one or more of the walls are designed as half or “pony” walls, this kitchen shape can feel confining for today’s cook.

SINGLE WALL

This layout positions all of the appliances on a single wall, and would typically be found in a studio apartment or other very small space.

Photo Credit: Omega | MasterBrand Cabinets, Inc.

GALLEY

Open on both ends, the Galley requires a minimum corridor width of 48″ so that the cook can easily maneuver during meal preparation. Typically, appliances are near one another which is convenient, but due to the corridor shape of the kitchen, all of the household traffic will pass through the space.

Efficiency Has a Shape: The Triangle

The basic work triangle is comprised of an imaginary line drawn between the kitchen’s primary work areas:

  1. food storage (refrigerator)
  2. food preparation (stove)
  3. clean up (sink)

For maximum efficiency, the sum total of the triangle should be 26 linear feet, with the sink being the center point.

What You Can Expect From Your Designer

In addition to offering guidance on door style, wood type and color selections; a professional kitchen designer will typically prepare three types of documents for your review:

  1. floor plan
  2. elevations of all the wall that receive cabinetry
  3. perspective view from one of more vantage points within the room

Availability of these documents to the consumer is usually contingent on a contractual agreement and/or down payment.

FLOOR PLAN

A floor plan shows the wall layout from above, and an outline of all the components that will fill the space, such as base, wall and tall cabinetry. Sometimes lighting and electrical detailing are also shown on this plan.

Photo Credit: Omega | MasterBrand Cabinets, Inc.

ELEVATION

A “flat” drawing that shows each wall of cabinetry as if you were standing and facing it head on. The elevation view is good for seeing the detail of the cabinetry components that aren’t visible in the floor plan view. It is also good for establishing heights of components within the room.

Perspective

A perspective drawing is one that is “3D” or dimensional. It shows the room as it would be actually seen from the viewpoint of a person 5′-6″ in height. Perspective drawings provide details such as areas that are increased or reduced in depth, a dimensional quality that elevation drawings don’t offer.

Testing the Fit

It is a good idea to layout the proposed kitchen in the actual space. If the space is empty, this is easily accomplished a couple of different ways. Refer to the completed floor plan utilizing a tape measure and masking tape to indicate where cabinets and appliances will be located. Newspaper can be folded to adjust its size and then moved around within the space – perfect for determining just how big that island should be! If there is an existing kitchen in place, you’ll have to improvise a bit. Both tape and newspaper can be used to outline new cabinets or appliances, helping you visualize your new space.

Sensational Space-Saving Kitchens


Galley Kitchens - Bruce Buck.jpg

Photo Credit: Bruce Buck via This Old House

Galley Kitchens

For maximum efficiency when short on space, this layout excels. Its two parallel counters make all points of the work triangle equally accessible. Important things to keep in mind during your design are; aisle space, light and storage.

In this kitchen (pictured), concealing the fridge and dishwasher behind cabinetry panels gives the small space a tidy look. Light-colored cabinets, open shelving, and a large pass-through window make the galley open and airy.


Shake it Up - Joshua McHugh.jpg

Photo Credit: Joshua McHugh via This Old House

Shake It Up

Defined by simple lines, natural and handcrafted materials, and a muted palette, this Shaker-style kitchen (pictured) is smart and functional. The large wall-hung plate rack makes attractive dishware a visual focus, and offers quick access when setting the table. Small apothecary drawers alongside the range make use of often wasted space, while base cabinets are fitted with pull-out shelves and full-extension drawers to maximize storage. The island is perfect for meals, with a cast-concrete counter and a triple-pendant lamp overhead.


Universal Appeal - Joshua McHugh.jpg

Photo Credit: Joshua McHugh via This Old House

Universal Appeal

Designed for a older couple, this kitchen (pictured) tucks away great tricks for a comfortable lifestyle. The lighting scheme removes the risk of over lighting or glare by using undercabinet fluorescent strips and large milk-glass pendant globes. Easy-to-pull handles are used on the refrigerator and dishwasher, the latter of which is a drawer, eliminating the need to bend down to load and unload. The kitchen sink is equipped with a single lever and integrated sprayer hose, and the rangetop’s continuous grill allows for easy movement of pots and pans without any lifting.


Form Meets Function - Deborah Whitlaw Llewellyn.jpg

Photo Credit: Deborah Whitlaw Llewellyn via This Old House

Form Meets Function

Beauty and function live simultaneously in this small kitchen (pictured). The stylish concrete countertops are complete with a knife block and a built-in drain board. Adding bigger windows and getting rid of the surrounding upper cabinets opened up the space. Cabinets line the adjacent wall.


Family Affair - Michael Luppino.jpg

Photo Credit: Michael Luppino via This Old House

Family Affair

The professional range in this galley kitchen (pictured) serves as the focal point of the design. The configuration offers plenty of counter space, as well as lots of room for cabinets. A pass-through serves as a breakfast bar and looks out onto an intimate corner banquette for family dinners.


Fine Dining - Ann Spurling.jpg

Photo Credit: Ann Spurling via This Old House

Fine Dining

A cozy gathering spot, this kitchen (pictured) is equipped with all the necessities of a professional chef’s workspace. Two ranges, a large utility sink with an industrial-size pot washer, a pair of butcher-block islands on wheels, and wall-to-wall cabinets make prepping, cooking, and serving food easy as pie.


Old Fashioned Feel - Pascal Blancon.jpg

Photo Credit: Pascal Blancon via This Old House

Old-Fashioned Feel

The U-shaped layout of this kitchen (pictured) offers an efficient work triangle for its owners, a couple with a penchant for cooking. Wine cubbies above the window make use of often-overlooked space. Antique-white painted cabinets, dark green granite countertops, and original oak floors help stainless steel appliances blend into the 1874 farmhouse.


Small Wonder - Eric Plasecki.jpg

Photo Credit: Eric Plasecki via This Old House

Small Wonder

Taking down a wall and replacing it with a breakfast bar opened up this 11-by-12-foot space (pictured). Additional counter space for prep was added with a second peninsula, which also anchors the work triangle. An existing tin ceiling and a brick chimney were uncovered, coordinating well with the antique pine base cabinets that were salvaged from the owner’s grandmother’s house. 


Gorgeour Galley - Michael Luppino.jpg

Photo Credit: Michael Luppino via This Old House

Gorgeous Galley

This galley kitchen (pictured) is efficient in its narrow footprint, with ample built-in storage and counter space. A pass-through window opens the room up to an adjacent dining area, while providing a two-seater breakfast bar. Glass-front cabinets with lighted interiors offer a visual focal point.


Santa Fe Style - Peter Vitale.jpg

Photo Credit: Peter Vitale via This Old House

Santa Fe Style

This modest kitchen (pictured) is ideal for its setting in the historic district of Santa Fe, New Mexico. Black slate covers the countertops, backsplash, and floor. While custom cherry cabinets flank a s stainless steel range. The custom-made island serves as a centerpiece to the design.


Rearranging Things - Alexandria Rowley.jpg

Photo Credit: Alexandra Rowley

Rearranging Things

Chef Michael Lomonaco’s plan for his 7-by-10 foot Manhattan galley kitchen (pictured) was simple: use every available space efficiently, without changing the basic layout. So he moved the sink faucet into the corner and the microwave to over the range – the only configuration changes he made – freeing up counter space for food prep. 


Packing it In - Pascal Blancon.jpg

Photo Credit: Pascal Blancon via This Old House

Packing it In

With five kids and a passion for cooking, this homeowner was determined to transform her pea-sized kitchen (pictured) into a comfortable working space. The solution? Packing every corner with smart storage solutions. This particular nook houses lots of cabinet space, a coffee maker, wine cooler, wine rack, bar sink, child-height microwave, and a kids’ snack corner.