FREE DESIGNS AND ESTIMATES

How to Keep Your Stainless Steel Clean

Article by: Bonnie McCarthy

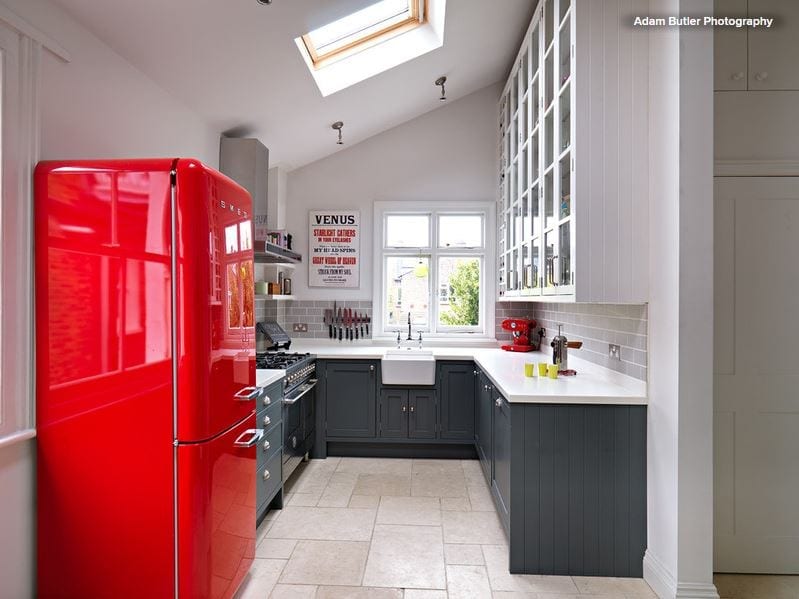
For the past few years, designers have debated whether or not stainless steel will continue to reign supreme in kitchens across America or lose its popularity to glossy black or white appliances boasting sleek, smooth finishes.

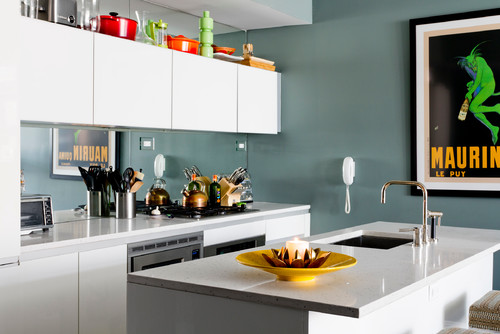
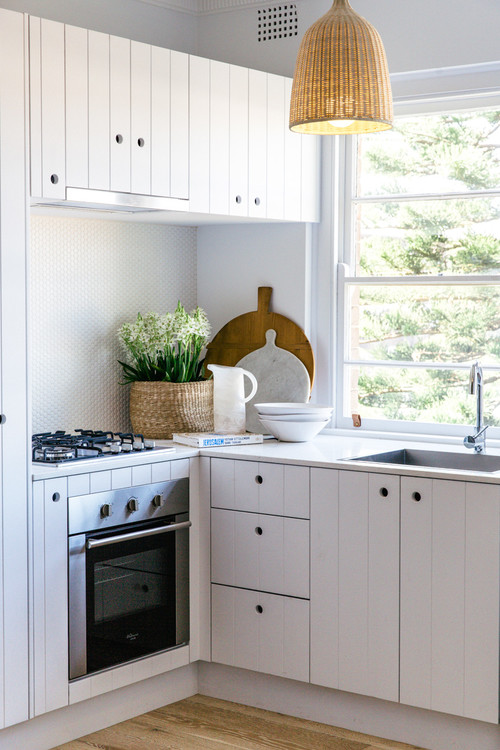
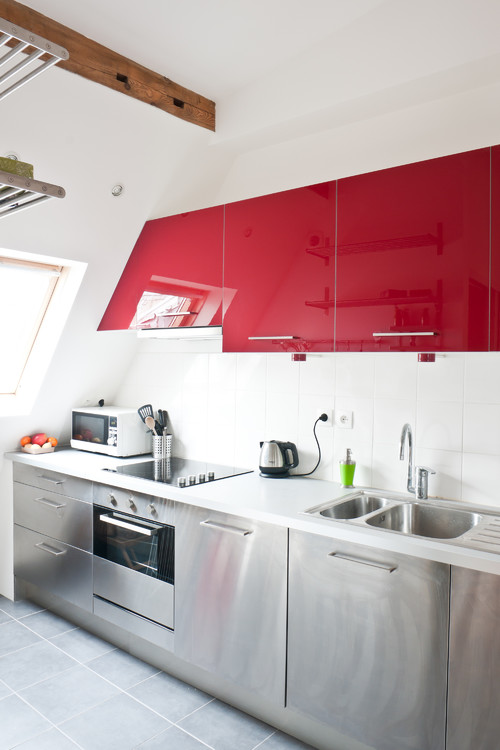
While the trendsetters debate, however, millions of us continue to choose to live with the commercially cool look and functionality of stainless steel. Whether you have a little or a lot of the shiny stuff, here’s what experts suggest we do about those fingerprints, and how to care for and clean one of the hardest-working surfaces in the house.

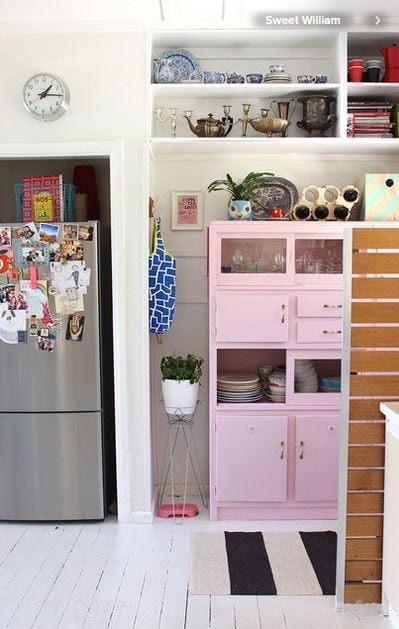
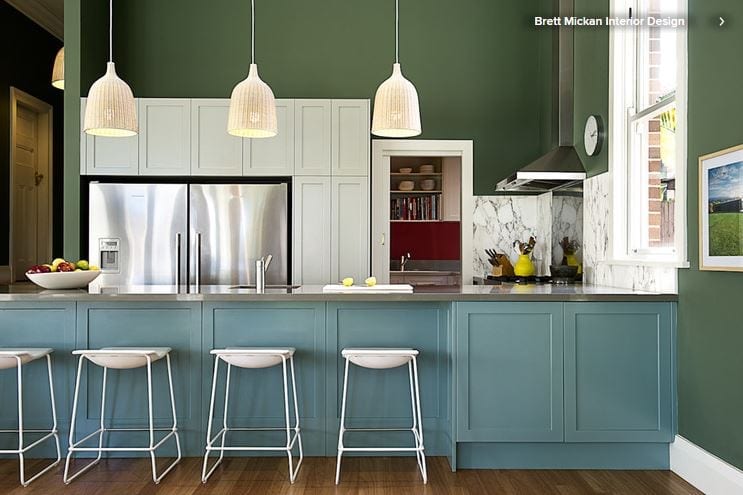
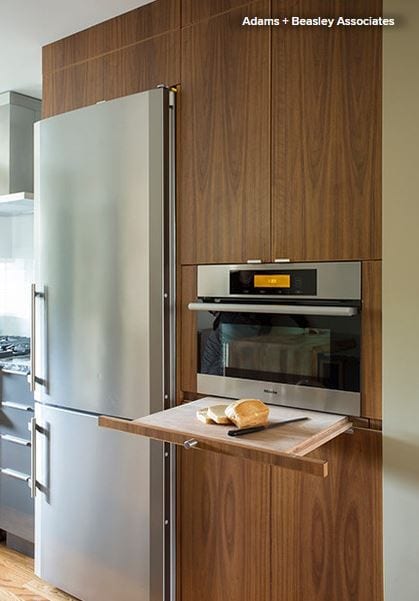
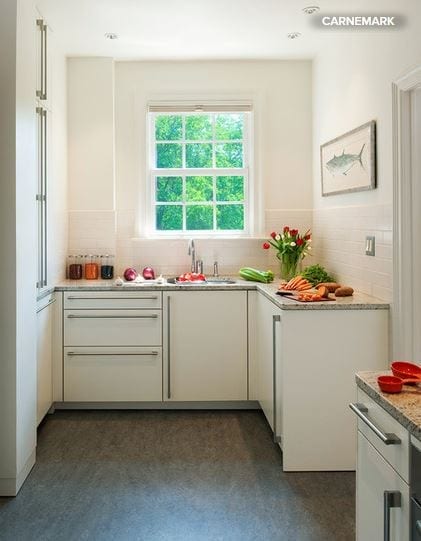
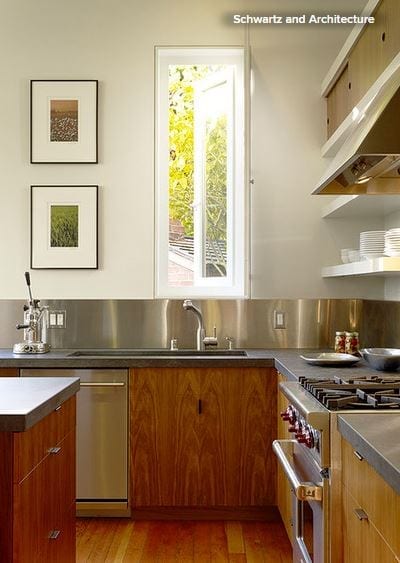
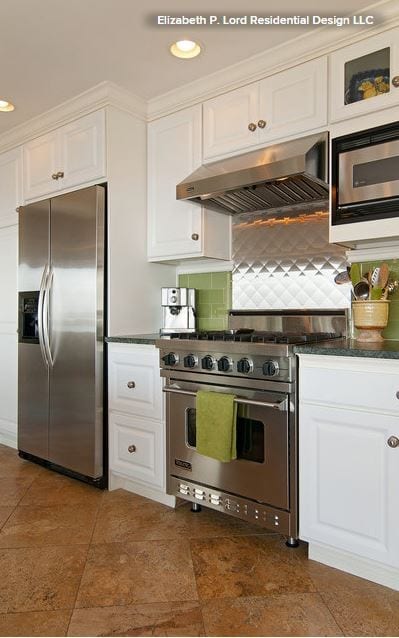
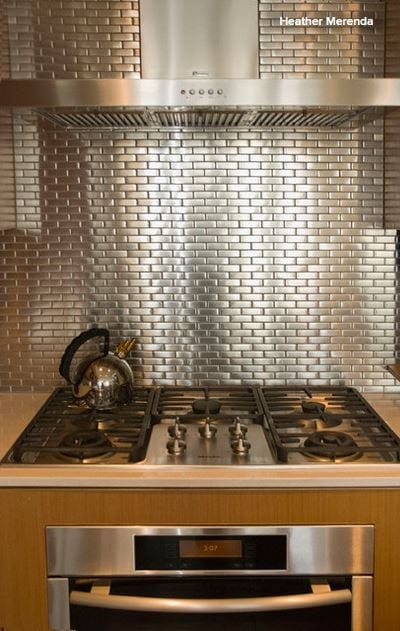
Keeping Stains off the Stainless. Aside from looking great and having a smooth, nonporous surface that hinders the growth of bacteria and other microorganisms, one of the reasons stainless steel is so widely used in professional kitchens is that it won’t rust easily in spite of daily wear and tear. 

Unfortunately, that doesn’t mean rust and stains can’t happen.The experts at the North American Association of Food Equipment Manufacturers say that if the protective film on stainless surfaces is scratched with a steel pad or wire brush, comes into contact with hard water that is allowed to puddle or sit, or is exposed to chlorides from household cleansers, it becomes vulnerable to damage.

Safety first. For safe care and cleaning, start with the right tools. The European Stainless Steel Development Association, or ESDA, suggests using soft sponges and microfiber cloths as the first line of defense.

Don’t clean with steel scouring pads, which can scratch. Instead choose plastic scrubbing pads for tough jobs.

Go with the grain. On stainless steel surfaces with brushed or polished finishes, always wipe and scrub in the same direction as the “grain” lines in the metal.

Better with age. The ESDA says in addition to the availability of an increasing number of fingerprint-proof finishes, regular stainless steel shows fewer fingerprints over time. Patience is a virtue.

Stainless solutions. When it comes to choosing cleaning products, Mindi DiNunno, owner of Polished 2 Perfection, says whatever you decide, the key to cleaning is sticking to it. “Stay consistent,” she says. “Most cleansers don’t blend together well, and it makes it much harder to keep perfect. For appliances, we use CLR [Stainless Steel Cleaner]. It will clean off any hard-water stains from the water and ice dispenser and any drips or food.” 

Like the other experts, she says to make sure to go with the grain.

Since products containing chloride can be harmful to the protective finish on stainless steel, the ESDA advises using the following:

  • Diluted vinegar (for cleaning limescale)
  • Baking soda (to remove coffee deposits)
  • Alcoholic solvents, such as acetone (for removing adhesives)
  • Chloride-free glass sprays (especially efficient for polished, mirror-like surfaces)
  • Commercially manufactured pastes and sprays that specify use on stainless steel

Naturally clean. For a DIY approach to cleaning using pantry items, the sustainable-living team at Eartheasy advises dampening a cloth with undiluted white vinegar or olive oil and wiping in the direction of the grain.

To clean a stainless sink, it suggests pouring club soda on an absorbent cloth to scrub, then wiping dry.

Shine on. Spray cleansers made specifically for cleaning decorative stainless steel surfaces usually contain silicone oil, and although they will remove fingerprints and smudges, they will not prevent them. The ESDA says the silicone oil can be completely removed by washing with mild soap and water. 

Using a polishing paste is another way to keep stainless sparkling. Commercially sold pastes, such as 3M Marine Metal Restorer and Polish, will create a microscopic wax layer on the surface that will make it easy to clean. Since the pastes are resistant to detergents, treatment with a polishing paste may last several months. It can be removed using alcohol on a soft cloth.

It’s important to note that pastes and sprays meant for cleaning decorative stainless steel elements — refrigerator doors, kitchen backsplashes — should not be used on pots, pans or surfaces where food is prepared.

Do not use silver dip polishes, like the ones used for cleaning jewelry, because they are corrosive to stainless steel.

12 Genius Design Moves for Small Kitchens

Article by: Natasha Saroca

Is your kitchen lovely and large, or is it on the smaller side? If it falls into the latter group, I can sympathize. I spent the better part of last year living in a studio apartment with a single-wall kitchen that was a measly 32 square feet (3 square meters). However, it wasn’t the shortage of square footage that was the problem, but rather that the cooking zone wasn’t the smartest, most efficient or space-savviest of kitchen designs. (For instance, it had no usable work area, as the sink and cooktop took up pretty much all of the countertop space.)

Since I was only renting the apartment, I couldn’t renovate the area, but that didn’t stop me from mentally writing a list of improvements I’d make if given the chance. Here are some of the design tricks I would have used to transform the spatially challenged kitchen into a cooking zone that was big on functionality, space-maximizing solutions and visual appeal, and that offered the illusion of spaciousness, too. Borrow these ideas when tackling your own cramped-kitchen makeover or, if you’ve successfully revamped a compact cooking zone for the better, share your must-try design moves in the Comments section.

1. Add a mirrored backsplash. A strategically placed mirror works wonders when it comes to creating the illusion of spaciousness in a cramped room, as it will bounce light around and help visually elongate the walls. An easy way to introduce this reflective surface into a small kitchen is by way of a mirrored backsplash — a sneaky and extremely effective design trick used in this compact cooking zone.

2. Be open to open shelving. While not everyone is a fan of open shelving, there’s no denying it’s a smart storage solution for rooms with a modest footprint. Not only do open shelves deliver an airy, open and bulk-free look — unlike cabinets with solid doors, which can look visually heavy in a small space — but they also ensure that kitchen essentials are easily accessible, too. Hanging storage, another functional and space-maximizing solution spotted in this cooking zone, achieves a similar effect.

If you’re eager to incorporate open shelving, just be mindful that the shelves will require a little extra upkeep to ensure that they and their contents remain dust free.

3. Opt for an all-white palette. Choosing an all-white color scheme will make your compact kitchen look light, airy and more spacious than it is in reality. If an all-white palette isn’t up your decorating alley, or you desire a scheme that offers more visual drama, opt for white walls or overhead cabinets, and try base cupboards made from wood or dressed in a dark, dramatic tone. Using white up top will enlarge the space visually, while the darker tone down below will anchor the room without making it feel closed in.

Alternatively, you might like to consider a soft neutral or pastel palette. Barely-there hues such as powder blue, mint, cream or dove gray are ideal for use in small spaces, as they add a hint of color and interest without being too overwhelming or heavy like bolder, more saturated tones, which can weigh down a compact room.

4. Fill your space with light. Flooding your room with natural light will go a long way toward making a small area look more spacious. However, if you’re restricted when it comes to window placement and size, the next best thing is to come up with a lighting plan that will brighten up and help visually enlarge your space, while transforming it into a more functional work zone, too.

This airy, cheerful kitchen is lucky enough to boast four different light sources: a generously sized window, which allows an abundance of natural light to filter into the room; a ceiling light that provides ambient lighting; a long wall-mounted fixture that illuminates the area from above and draws attention to the sunny feature wall that it’s affixed to; and undercabinet lights that ensure the countertop is well lit and showcase the suspended style of the overhead cabinets, which adds to the room’s sense of spaciousness.

5. Create the illusion of space with horizontal and vertical lines. This striking kitchen is a study in how to enlarge a space visually by introducing vertical and horizontal lines. As you can see looking at the striped cupboard doors and panels in this compact cooking zone, vertical lines draw the eye upward and add height to a small room, while horizontal lines add depth and make narrow spaces appear wider and roomier.

6. Incorporate space-savvy storage. A shortage in storage is a problem usually associated with small kitchens. However, this obstacle can be overcome by incorporating clever, space-maximizing storage solutions in your cooking zone — think corner drawers, appliance garages, pullout vertical pantries, drawer organizers and corner systems. Doing so will ensure that everything has a place to call home in your kitchen, cutting unnecessary clutter and visual bulk and making the area more effective to work in.

7. Go with glossy finishes. High-shine surfaces, such as stainless steel, two-pack polyurethane and ceramic tiles, will not only inject your kitchen with interest and sleek sophistication, but will amplify the natural and artificial light in the room, making the area appear more spacious.

8. Choose a countertop that works double time. Since space is at a premium in small cooking areas, it’s important that every surface, material and design element earns its keep, even your kitchen countertop. While countertops have a practical purpose — as food prep surfaces and general workspace — they can also double as a space to stash kitchenware (such as the crafty pullout chopping board pictured here), which will help keep your counter and cupboards free of physical and visual clutter. Other space-saving, cleverly concealed countertop accessories you might like to consider include a built-in utensil holder, condiments organizer, knife block or bread box, each of which sits flush with the top of the counter.

9. Choose glass-front doors. Like open shelving, glass-front cupboards trick the eye into thinking a compact kitchen is more generous in size, but with the benefit of keeping the contents of your cupboards free from dust and cooking splatter. Just remember to keep things nice and orderly inside for a clean, clutter-free look.

Another perk of decking out your cooking zone with glass cabinet doors is that you can easily see what items are stashed inside your cabinets and when you’re running low on pantry items, resulting in a more efficient space to work in.

10. Fit in a cleverly concealed table for casual eats. Don’t have room for a breakfast bar or dining table in your kitchen? Take design cues from this crafty space and incorporate a foldable table that can be tucked out of sight when not in use. The geometric chairs slide into the nook below, so as to not take up precious floor space and to enhance the room’s clean, seamless look.

Another space-savvy solution is to equip your countertop with a pullout table, like the one shown above.

11. Stick with clean, slender lines. Resist the urge to decorate your compact kitchen with fussy design elements and decor that will crowd it and add unnecessary visual bulk. Instead, stick with features with clean, simple lines that are visually lightweight and don’t consume too much floor space. 

This design trick takes shape in several ways in this small yet stylish kitchen. Note the slim breakfast bar, floating shelves and leggy bar stools; the use of finger pulls instead of bulky handles; and the simple industrial-style exposed bulbs, which draw the eye up to the ceiling, adding to the illusion of space.

12. Master the art of distraction. A high-impact feature wall not only will inject visual drama into a compact kitchen, but will also add depth and draw the eye down the length of the room, making it appear longer and more open. This contemporary kitchen proves just how successful this design trick can be when done right.

Likewise, a statement ceiling will also amplify the height of a kitchen that has diminutive dimensions, while doubling as a showstopping focal point. Take design cues from this compact cooking zone and paint your ceiling a bright hue (steer clear of moody colors, like black and dark gray, which will visually lower the roof and make the room appear more intimate). Alternatively, you might like to lift the look of your ceiling with wallpaper or a mirrored surface, or try a recessed ceiling with LED lighting.

[See more from Natasha Saroca on Houzz.]

Colorful Ways to Make Over Your Kitchen Cabinetry

Article by: Nelly Reffet

As much as we love white kitchens for their timeless versatility, bringing in color with the cabinetry can add a wow factor or brighten up a tired scheme. If you are a renter or want to introduce just a touch of color, you can add it subtly with hardware or occasional furniture. And if you’re ready to go bravely into a more permanent change or a bold new look, you can splash color in or on cabinets. See what a difference color can make in the kitchens below.

Bravery Level 1: Change Your Hardware

For a change that’s not too dramatic but still effective, replace your knobs and handles. Ceramic knobs and handles come in many colors, shapes and designs, and replacing them can bring a subtle but welcome change to your kitchen. It’s quick, cost effective and totally doable in a rental. Just make sure you keep the landlord’s old handles to screw back on again. Never underestimate the smaller changes. The details and finishing touches are often what make a room sing.

Bravery Level 2: Paint Occasional Furniture

What if you are renting or you don’t feel like painting permanent fixtures, such as cabinets? You can paint occasional kitchen furniture, such as a butcher block, stand-alone pantry or kitchen island. 

The best result is when the chosen color contrasts with the rest of your kitchen. In this kitchen, see how the red stands out, strong and vibrant, against the blue floors and the white everything else? To make sure your painted piece doesn’t become the elephant in the room, try using the same color again for accent items and decorative accessories, such as the door handles.

Painting furniture can be a little bit tricky and messy, and the result can look far from spotless if you rush it. First, take your piece of furniture to a well-ventilated, well-lit space, and make sure there is plenty of space to walk around it while it’s drying. Remove any knobs, handles, drawers and even doors if you can. Use painter’s tape to mask areas you do not wish to paint, such as glass on doors.

Next, prepare the furniture. No matter how much the paint packaging claims sanding is optional, be sure to sand your piece of furniture thoroughly. Even if you can apply paint without sanding, doing so will improve the longevity of your work. After sanding, clean your piece to remove any wood dust particles. 

Depending on the paint you choose, and what the furniture surface is like, choose whether to use a primer before applying two coats of your finishing paint. Start by painting the frame. Then proceed with painting doors and drawers. Always make sure the paint is fully dry — not just touch dry — before you put the piece back in place.

Bravery Level 3: Dress Up the Backs of Your Cabinets

For cabinets with glass doors (or no doors), applying wallpaper or painting the backs of them is a fantastic way to add color and create a strong background to display your glassware against. For cabinets with only solid doors, adding color to the backs can be fun update that adds a little quirkiness and makes you smile every time you open the doors.

You can also paint the backs of your cabinets. For a nice professional finish, remove the shelves if possible, and apply painter’s tape to the frames and other surfaces you do not wish to paint. As I have an unsteady hand, I tend to opt for a wide tape — that way even if my brush slips a bit, my cabinets are still protected.

This kitchen scheme goes the extra mile, with a painted panel of sunny yellow above a white-tiled backsplash. This simple DIY trick really adds dimension to the kitchen.

Bravery Level 4: Paint the Shelves

Open shelving has made a strong comeback in kitchen design during the past couple of years. But more often than not, finishes are limited to white or wood. If you feel like adding an accent color, why not step gently out of the norm and paint your shelves a different shade of awesome? Don’t hesitate to go for a strong color — a shelf is reasonably small and is not going to overwhelm your space. It can easily be repainted if you grow tired of the color, so be brave and embrace that strong hue you have been dreaming of.

Bravery Level 5: Paint the Cabinets 

Perhaps the boldest change you can make to your kitchen cabinets is to paint them. While the process can be time consuming, the results can be striking and take your kitchen to a new level. Whether your cabinets are wood or laminate, you can find the right type of paint in a wide range of colors. My biggest tip is that no matter how impatient you are and how promising the paint is supposed to be, don’t skip on the preparation phase, which is even more important for frequently used cabinets than for occasional pieces. Thorough sanding and priming are essential for a smooth and long-lasting finish.

If you have a compact kitchen that doesn’t get much natural light, a bright color might be just what your space needs. These colorful cabinets have been paired with a graphic black and white tile floor. You could accessorize yours with superfunky pendant lights or gutsy artwork. Adding more boldness to the room will complement the cabinets while preventing them from overpowering the room, especially if it’s small.

If you have always had a neutral kitchen and are not quite ready for a dramatic change, opt for cool, timeless or light shades such as navy blue, sage green, duck-egg blue and mint green. The color will add dimension and interest without being overstimulating.

You don’t have to paint all of the cabinets, either — you can leave some white and paint others. For a partial color makeover, I often recommend that my clients paint cabinets that are already visually different from the rest — for example, a tall pantry versus standard cabinets or glass-door cabinets versus solid doors, and even upper cabinets (usually shallower and higher) versus base cabinets. The paint will enhance their differences, and since they are already different to start with, they might as well be really different and stand out.

10 Ideas to Make Your Outdoor Kitchen Sizzle

Article by: Laura Gaskill

Looking to spice up your grilling area this summer? Try adding one (or more) of these fun features, from grill-side seating to a vintage fridge. As long as the weather is fine, you may find yourself cooking outside more than in!

Pull up to the kitchen bar. Keep guests entertained with bar seats pulled up to the grill, where they can taste hot-off-the-fire nibbles. On its own, this is a great small-space solution; in a more expansive yard, supplement the grill-side seats with a larger dining table.

Get the cooking area under cover. A roof over the outdoor cooking area makes it easier for the grill master to keep grilling even when an unexpected rainstorm pops up. The L-shaped counter space with seating and adjacent dining area and fire pit make this a backyard guests will never want to leave.

Add a full-size fridge. If you cook outdoors a lot, a fridge and freezer can be a big help. Keep them stocked with ice, chilled drinks and the food you plan to grill, and that will free up space in your regular fridge. Of course, not just any fridge will do — a retro style in a cheerful color, like the Smeg shown here, will add to the style of your outdoor space.

Coordinate with color. Grills, decks and outdoor seating tend to be neutral and no-frills, so use a few pops of bold color to wake up your outdoor kitchen. Bright poppy red was used here in artwork, dishes, a chair and a sleek trash can.

Pack in useful details. It’s the little things that can make all the difference in your outdoor kitchen experience, so consider what would benefit you the most — better lighting, prep space, music? This Toronto rooftop kitchen includes a mini fridge, dish storage, speakers for an electronic device and night lighting.

Get cooking in the garden. Highlight your love of ultra-local ingredients with an outdoor kitchen located near your veggie garden. A brick surround that matches the low garden wall helps integrate the kitchen into the larger outdoor space.

Go modern. Concrete and rich wood are a modern minimalist pairing perfect for an urban environment. This outdoor kitchen is outfitted with a pizza oven — a worthy splurge if you love doing a weekly pizza night at home!

Double up on grills and storage. If you’re serious about barbecue, it could be worth your while to invest in two grills: one gas (for quick cooking) and one charcoal (for traditional smoky barbecue). A stainless steel gas grill and a “big green egg” perfect for slow cooking are connected by cabinetry in this Red Hook, Brooklyn, backyard. A sink and plenty of counter space make prepping food easy, and hidden storage below means you can keep outdoor cookware and tools close at hand.

Put a pergola over the grill. A garden structure like a pergola adds architectural interest to the outdoor kitchen and provides a place to attach sconce lighting. And while you wouldn’t want climbing plants dangling directly over the grill (hello fire hazard!), if your pergola is a safe distance from the heat, you could grow plants over it, giving the area a lush green touch.

Bring your indoor style out. The small-scale but well-crafted cabinetry in this outdoor kitchen echoes the interior style. Locating the grill within steps of the kitchen door makes it easy to carry ingredients outside and hot plates of food in, and a built-in bench seat provides a spot for guests to sit and chat while the food is being prepared.

12 Breakfast Nooks Cool Enough for a Dinner Party

Article by: Susan Redman

Nothing brings a family or group of friends closer together than sharing a meal. It’s even better when they are comfortably rubbing shoulders as well. Kitchen nooks and dining alcoves are ideal for such intimacy, making the dining experience especially enjoyable. Here are 12 inspiring kitchen nook designs to install in your dream home.

1. First-class compartment. In keeping with the warm, minimalist elements featured elsewhere in this California ranch house, this nook has cedar ceilings, Sheetrock walls,exposed timber framing and structural steelwindows. The site for the house is edged with mature evergreen trees and opens to a field with views out to the Pacific Ocean. With its panoramic-size window and glorious outlook to a countryside vista, this sleek dine-in nook is a stylish way to eat at home. 

2. Norwegian wood. In this country kitchen, designed by architect Christine Fikseaunet, a simple window seat with an upholstered banquette cushion is paired with a wood table to create a casual dining setting. With the addition of a small screen in the corner of the nook, it also allows for communal television viewing among family members or friends.

3. Covered dining. This dining space has a wood alcove built up and over a table, creating an elegant dining space that looks like a private dining booth in an upscale bistro. The mix of materials, from the timber paneling to the channeled upholstery and stone table, adds sophistication to the alcove’s slick urban look.

4. Rough hewn. This industrial-style dining arrangement is easy to copy. Find a wood trestle table and some midcentury modern chairs, and fit them into a small area of your home, preferably with a window view. The tight space and brick and plaster walls give the dining area a congenial air.

5. Bright and breezy. This built-in banquette needs little more than a small table and a couple of light-colored chairs to complete a fine-looking and functional kitchen nook. The window bench extends from the end of the kitchen cabinets to create an ideal space between two big windows. The banquette can also double as storage with a hinged lid seat covered by cushions.

6. Budget box. Make the most of a breakfast nook by installing a complete compartment that keeps diners out of the way of the cooking action in the kitchen. Additionally, those on a budget will benefit from copying the style of the boxed-in nook pictured here. Inexpensive wood can be painted white to make the area bright. To add value, choose a more expensive tabletop and treat it with a good sealant oil to keep it looking good with use.

7. Geometric play. This small dining nook was designed by Kimball Starr Interior Design in San Francisco. Starr says her clients wanted the area off the kitchen to be used as an activity nook for playing board games with friends; she added a touch of grown-up glamour with impressive geometric pendants and a custom banquette upholstered in a playful fabric.

8. Cool and clean. This spectacular dining banquette is sited in the middle of a living space in a renovated 1960s apartment in Melbourne. It was decorated by interior design company Mr. Mitchell within a stand-alone, all-white cube. This “allowed us to introduce the macramé screen, which is a fun reference to the retro era of the apartment,” says Mr. Mitchell director Andrew Mitchell. 

The banquette is a focal point of the home, providing an intimate place for family gatherings or a quiet place for reading or working.

9. Retro kitchen and dining nook. This small eating nook would work well in a house with midcentury aspirations. It’s plain and simple but has been well decorated with a set of shelves that also acts as a divider. 

The wall map is a retro classroom touch that can encourage guests to share after-dinner stories of their world travels. Decorating the area with fun travel posters from faraway places can also encourage the exchange of personal travel stories and tips for future adventures.

10. Garden fresh. Children’s colorful artwork has been framed and hung to personalize this charming nook. This is a great idea for families, especially when a kitchen nook is also used as a homework and craft center. 

Installing a small U-shaped nook is a clever way to divide a kitchen with a generous expanse of floor. Take advantage of the extra room and install a nook big enough to accommodate plenty of dinner party guests.

11. Corner nook. Custom woodwork and banquette seating can create a sophisticated corner nook in the kitchen. In this L-shaped arrangement, the wood grain of the built-in banquette is matched to the kitchen countertops and complemented by a white table and cabinets. To add color and interest, it has been decorated with a variety of flea market finds.

12. Dramatic flair. In an all-white kitchen, introduce color and texture with bold and cheerfully patterned upholstery. Brighten up the nook with glass pendants, a colorful table setting and freshly picked flowers. Note how the pullout drawers under the benches provide storage — a perfect place in which to keep all your board, card and trivia games for after-dinner fun. 

How to Plan a Kitchen That Extends Outside

Article by: Sarah Nolen

My clients are always asking me how to create that mysterious seamless connection between an indoor and outdoor kitchen, and vice versa. You may be thinking, “What on earth does that even mean? Does it mean I always leave my doors open? Or fill my kitchen with potted plants?” 

Creating a true connection between indoor and outdoor areas goes a step further than those two ideas and enters the realm of clever design, especially when it comes to the kitchen. If planned correctly, a kitchen can be opened to untapped entertaining (and cooking) space. What is created is a larger kitchen area — and if planned carefully, an all-weather entertaining space.

When deciding to connect your indoor space with your outdoor space, especially in terms of kitchen design, it is a good idea to make a list of what you want to achieve aesthetically and how you want the space to function. Do you want to have a space you can use all year round? How will you integrate the two spaces into one? What are the key aspects of the spaces you want to change, and what do you want to remain the same?

Here are a few points to consider when connecting your indoor and outdoor space with a kitchen.

Let your kitchen counter cross boundaries. A kitchen counter is a place where we prepare, cook and serve food and mingle. So let’s consider continuing it into both spaces, blurring the line between indoors and outdoors, which creates an immediate connection to both spaces. There are a number of ways to ensure that your kitchen counter in your outdoor area will also be functional.

You have the option to use your bench as a bar space when you are entertaining.

Or how about incorporating a fully decked-out kitchen with built-in barbecue, sink and wine fridge? Your countertop could continue out from an indoor island or along a shared wall.

Create invisible glass connections. Installing bifold, sliding or stacking doors and windows in your indoor kitchen will open up the spaces to each other whether they are closed or open. Even when the openings are closed, the clear glazing will create a visual connection between both areas. And when the weather is warm, the glass can be completely pushed back, allowing for the kitchen counter to be used outside.

Slim frames for windows and doors will help them visually disappear. You want the main focus to be the flow between the areas, not the framework. In return, be prepared for bountiful amounts of natural light and airflow that will take over the interior of your home. Summer, here we come!

Blend materials to create flow. It’s preferable from a visual perspective to have the kitchen counter constructed from one material, which means if it continues outside, you’ll need to think about weather-appropriate surfaces. Engineered materials like Caesarstone and Quantum Quartz are suitable choices, as are concrete and stainless steel.

The connection between materials doesn’t have to be only via the countertop. Think about your floor finish, which is the largest finish in both areas. Using the same tile but in different finishes is a perfect example of continuous material selection throughout. The indoor tile will need to be indoor-rated, whereas the outdoor one will need to be suitable for external application — though the color and pattern can still look the same.

Make it a comfort zone. When it’s cold outside, you’ll need some form of heating. This can be portable gas heaters, which are perfect for entertaining outdoors; when not in use, they can be stored in the garden shed or garage. Or perhaps you could try a more permanent feature, like ceiling radiator panels, which are turned on and off with a switch and can stay in place all year round.

For the summer consider ceiling fans for a cooling breeze. Set these over the areas where you’ll spend the most time, such as the dining table.

See a Complete Kitchen Remodel for $11,000

Article by: Mitchell Parker

Norma Rushton and her partner, Randy Dyke, really wanted a waterfront property in the Vancouver area but were quickly priced out of most places. When they lucked into a mobile home on the Stave River about an hour east of downtown Vancouver, they were thrilled at the great location right on the water at a good price. But that’s where their excitement ended. The home was in bad shape and needed major repairs.

BEFORE: Recently they started adding more storage and function to the original kitchen (shown here), which had been picked apart since it was built in 1970. For example, the backless cabinets had been cut up by previous owners to make room for a larger refrigerator and stove, leaving little storage. “The cabinets were starting to get useless,” Rushton says.

AFTER: Determined, Rushton, a high school theater teacher, spearheaded a complete gut and remodel, choosing all the materials, fixtures and appliances, while Dyke, a retired water taxi driver, did a lot of the work, including installing the drywall, molding, trim, backsplash (twice) and new window and patching the floor. The couple painted everything together. Professionals installed the cabinets and countertops. 

But best of all, the couple got discounted help from their contractor neighbor, Milan Vaclavik of Milan’s Home Renos, who took care of the plumbing, framing and electrical work at a friendly rate. 

Though the homeowners considered getting granite countertops, they ended up going with Formica instead. “Granite is too hard of a surface,” Rushton says. “I wanted something a little more forgiving.”

BEFORE: A bank of upper cabinets and a floor-to-ceiling cabinet made things a bit claustrophobic and blocked views between the kitchen and living room. “I wanted to be able to sit in the living room and see out the windows of the kitchen to the water,” Rushton says.

AFTER: They reduced the size of the upper cabinets and did away with the tall cabinet altogether, opening up the sightline between the two spaces. “Now you can actually chat with whoever’s in the kitchen,” Rushton says. 

The couple had a couple of remodeling disasters along the way. Rushton had found solid oak cabinets at a discounted price that she really liked, but when they arrived, they were the wrong model. With the renovation already under way, she had to make a tough decision and went with the different cabinets, which ended up throwing off all their measurements. 

The backsplash was another compromise. The first one that Rushton put up was “a horrible mistake,” she says. She had found peachy-taupey-colored porcelain tiles that looked great lying on the counter. But as soon as she installed them vertically on the wall, the angle of the light turned them green. A local tile guy informed her that artificial colors tend to do that and suggested a natural stone product instead. “It was either I live with it or let the money go,” she says. “I let it go and went and got marble tile instead.”

BEFORE: The washer and dryer were shoved into a storage closet in the kitchen, while an old cabinet did the work of storing bowls, platters and mail. 

AFTER: The homeowners replaced them with a stacking washer and dryer unit, an Ikea unit of sliding drawers for a pantry and a place for the vacuum cleaner. “It was all about getting what I need for putting things away,” Rushton says.

Sliding doors nicely seal off the laundry and pantry area, freeing up clutter near the pristine river view. 

Rushton says they budgeted about U.S.$8,000 but the actual cost came in at just over $11,000. 

Here’s some of the breakdown: 

Cabinets: $2,300
Cabinet handles: $170
Countertops: $675
Closet doors: $250
Washer, dryer, microwave: $2,000

Lighting: $335
New flooring (closet): $85
Wood: $85
Paint: $170
Backsplash: $335 
Sink: $250
Window: $60
Labor: $1,000

Ikea shelving: $300
Drywall, insulation, plumbing fixtures, electrical wiring, switches, plugs, power tools, screws and brackets, taxes and other miscellaneous expenses: around $3,200

Smart Ways to Make the Most of a Compact Kitchen

Article by: Joanna Simmons

We might all dream of a huge family kitchen, but most of us have to make do with something smaller. That said, whatever the size of our kitchen, the demands we place on it tend to be the same. We want it to function well for preparing and cooking meals. We might also like to be able to sit and eat in there, even if just perched at a breakfast bar. And we need space for a lot of different objects, from chunky appliances to silverware, dishes and food. The good news is, with some clever planning and great design, it is possible to have all these functions in one tiny space, as these inspiring spaces demonstrate.

Use every nook and cranny. It sounds obvious, but where space is tight, it’s essential to make use of all of it. This might mean commissioning custom units. Shelves or cupboards designed for your space, rather than bought off the shelf, can exploit even the most awkward corners or weirdly angled rooflines. Luckily, since the number of units you will be able to fit is limited by the small size of the room, a custom design often will be reasonably economical, too.

Enjoy a little rack n’ rail. Wall cupboards can eat into the space in a very small kitchen, but you can still make any wall work for you by adding racks, rails and slim shelves. These can hold things like saucepans, strung up on S hooks, mugs and pots holding cutlery, and even utensils. Covering the wall in blackboard paint helps it to multitask even more, as a place where you could write shopping lists and messages.

Make it streamlined. Chunky and mismatched pieces would eat into the space and make a tiny kitchen feel cluttered. Instead, opt for units with a minimalist look and, as here, a countertop that flows over all the base units and even extends to become a breakfast bar. The minimalist metal legs seen here keep sight lines open. This kitchen is flooded with natural light, so the color on the unit doors invigorates the space without encroaching on it.

Find another home for laundry appliances. It’s not uncommon to find washing machines and dryers installed in the kitchen, but, when space is limited, it’s a good idea to find an alternative home for them. A nook under some stairs can be a good place. Or consider putting a dryer — and perhaps a freezer — in the garage, if you have one.

Choose clever details. There are heaps of clever space-saving elements that can be built into a new kitchen, so if you’re starting from scratch, look for things like slim spice jar storage, knife drawers,toe-kick drawers and integrated chopping boards that can be slid over a sink or pulled out from the wall.

Try freestanding pieces. Freestanding furniture has its benefits in a small kitchen too. If you take the view that where room is tight, it’s important to make every item you place in it shine, then suddenly there is a logic to not building everything in. A freestanding piece containing an oven, sink and cupboards, like this one, looks like a beautiful piece of furniture that fits elegantly into the space.

Raise the ceiling. Rethinking the dimensions of the room and having some architectural work done can make a huge difference to a small kitchen. If yours is in a single-story space, raising the ceiling to expose a sloping roofline would add a huge sense of light and airiness. It also would offer the opportunity to install skylights, which pull in more light than vertical windows. Plus it would create a tall wall against which you can fit cupboards or shelves for maximum storage.

Build up to the ceiling. Floor space may be limited, but vertical space is often the same in a tiny kitchen as in a huge one. So make the most of it by building units that stretch right up to the ceiling — or just nearly. A small gap above tall cabinets can offer just enough breathing room to help keep the room from feeling cramped. Keep infrequently used items on the upper shelves and try using sleek handle-less doors, so the units look streamlined and seamless and don’t dominate the room.

Integrate appliances. You may yearn for a huge, freestanding range complete with five burners, but a small-scale kitchen is not the place to install one. Instead, integrate your appliances for a more streamlined look and a space-savvy solution. Building the microwave into a cupboard will free up countertop space, and why not go for a boiling-water tap to dispense with the need for a kettle?

Work in a portable mini island. In addition to built-in units, a small, movable butcher’s block with shelves, like this one, can prove incredibly useful. It would take up very little room while supplying additional storage and prep space. It would also create the relaxed, freestanding look you may have been craving but thought you couldn’t pull off in a small kitchen.

Open vs. Closed Kitchens — Which Style Works Best for You?

Article by: Vanessa Brunner

For centuries the kitchen was strictly a workspace. Often tucked in the back of the house, it had room for just the bare essentials. But a peek at many new kitchens today reveals a very different approach: the open-concept kitchen at the heart of the home. 

“The kitchen was really a closed-off spot for a long time,” says John Petrie, president-elect of the National Kitchen & Bath Association. “Now people want the kitchen to be an active part of the family home.” Although open-concept kitchens are by far the more popular choice today, some homeowners are embracing elements of the past — namely a separate, more closed-off layout. Could we be shifting back to the kitchens of yesteryear? 

We asked three kitchen experts for their thoughts on the two kitchen styles, and how you can decide which one is right for you.

How the Walls Came Down

Twenty years ago the term “cocooning” arose in the home design world. Home life shifted as people spent more time at home. “Home was a safe place, a refuge and where you wanted to be,” says Petrie.

The desire for a cocoon fueled the open-concept kitchen, allowing homeowners to spend more time with family and friends while cooking and cleaning. “It also showcased a shift to a more casual lifestyle,” says Andrea Dixon of Fiddlehead Design Group. “People weren’t afraid to expose reality — i.e., a messy kitchen.” 

“When the walls came down, the kitchen became an integral part of the home,” says Petrie. Kitchens soon became the center of the house — the room that everything else revolved around. 

Today this layout has become the go-to kitchen style, particularly for families. The combined layout allows for optimum multitasking — parents can prepare dinner, watch the news and help with homework at the same time. “I’m a huge open-concept-kitchen fan,” says Anthony Carrino of Brunelleschi Construction. “I find that the benefits far outweigh those of throwing the kitchen into another room. Ninety-nine percent of our clients ask for an open-concept kitchen.”

The Case for a Closed Kitchen

The kitchen is already the most expensive room in the house to remodel, and turning a closed kitchen into an open plan can add to the cost. Tearing down walls means dealing with plumbing, electrical and structural work on a huge scale. Sometimes the added expense means compromising in other areas. 

For homeowners who’d rather invest in other parts of their kitchen — appliances, materials or cabinetry — reworking the layout may not be worth it. “You have to think about what’s best for you,” says Petrie. When it comes to allocating your kitchen budget, which is more important, he asks, “an efficient, functional kitchen with better appliances? Or an open layout that connects to the rest of your home?”

While most of Dixon’s clients ask for open-concept kitchens, some prefer a closed-off space. “There will always be some people who are uncomfortable with letting guests see their ‘unmentionables,'” she says. “It’s definitely a more formal layout, but it ultimately comes down to personal preference.” 

If you want to leave your smells and mess behind when serving meals, a closed layout could be for you.


“You can get creative with a closed kitchen, too,” says Carrino. If space allows, a small booth, fold-down table or rolling bar can make a closed kitchen more of a social space.

Cons of a Closed Layout

Of course, a closed-off kitchen’s isolation also can be its main downfall. This layout doesn’t allow for direct access from the kitchen to the dining table, or vice versa. And it’s difficult to interact with friends and family while whipping up meals, since most of the room is reserved for the work triangle.

Choosing What’s Right for You

There’s no set formula that can tell you which kitchen layout will work better in your home. Part of having a conversation with a designer is trying to figure out what’s best for you. Start with a list of needs and wants, and go from there. “You’ve got to consider the way you live in your home and the way you use your home,” says Carrino. “How do you use your kitchen? How do you foresee using your new kitchen?” 

Everyone’s needs are different, so don’t let yourself sway with trends. “A family with kids that need supervision might decide to do an open-concept plan with a large multifunctional island,” says Dixon. “But a couple who loves to entertain might opt for a closed-concept space so they can prep courses ahead of time and not spoil the surprise. It totally depends on your lifestyle.” 

Kitchen Evolution: Work Zones Replace the Triangle

Article by:

When I began studying kitchen design many (many!) years ago, I learned all about the much-venerated kitchen work triangle — in which the refrigerator, range and sink are placed 4 to 9 feet apart, forming a roughly equilateral triangle. This design principle was developed back when most people had smaller, closed-off kitchens, where only one person prepared and cleaned up meals. It’s an efficient way to lay out appliances and the sink in a small closed or semiclosed kitchen. 

The work triangle is still useful today, but with kitchens that now run the gamut from tiny single-wall galleys up to large open-plan kitchens, it’s more useful to think in terms of work zones instead.

Work zones are really just the natural evolution of the kitchen work triangle. As kitchens grew in size and opened up to other rooms in the house, it became more of a challenge to place appliances in a neat triangular layout. We also have more appliances than ever before — dishwashers, extra sinks, microwaves, separate cooktops and wall ovens — not to mention more people working and socializing in the space. By sectioning off your kitchen into work zones, you’ll maximize efficiency in a larger space; more cooks, as well as their guests, will be better accommodated.

Group appliances and fixtures according to use.To set up work zones in your kitchen, think of the tasks you perform regularly: storing food, prep, cooking, baking, serving, eating, cleaning, making coffee, chilling wine etc. A work zone contains everything you use to perform each task. 

For instance, you should place your dishwasher next to your sink, with a compost bin and a garbage bin nearby to streamline kitchen cleanup.


Store what you need where you need it most. In addition to grouping appliances and fixtures according to use, give yourself enough storage in each zone for what you need to perform the task. 

This wood-topped baking zone is perfect for kneading bread or rolling out pizza dough. All the bread-making and baking tools can be stored in the cabinets below. Someone can easily work at this station while another person prepares food in another part of the kitchen.

Provide landing areas next to major appliances.For safety and efficiency, consider placing a countertop landing area next to your major kitchen appliances, especially the range, cooktop, microwave and wall ovens. 

You want to be able to quickly set down something hot without having to trek halfway across your kitchen. This will also give you a cooking work zone; you can store items like knives, cutting boards and pots and pans in the cabinets and use the countertops for chopping and cooking prep.


Create a kids’ zone. If you have children and a good-size space, set up an area in the kitchen where the kids can hang out, do homework and eat snacks. This will allow you to all be in the kitchen together without the little ones getting underfoot.


Consider a zone for guests. If you have an open kitchen and like to entertain often, you know how important it is to have an area where guests can hang out and chat while you prepare food and drinks. A large island or peninsula works well for this, since it can act as a barrier that keeps visitors from getting in your way while also giving them a place to perch while you work. Again, think about the items you use for serving and entertaining, and store them in the cabinets below so you can easily access them.

Widen the aisles. Whether you opt for the traditional work triangle or to break up your kitchen into work zones, pay attention to your kitchen’s aisle widths. The recommended minimum aisle width is 42 inches, but I prefer 48 inches, especially in kitchens with multiple cooks. If you cook and entertain often and have the space, you could go as wide as 54 inches. Wider than that, though, and your space will likely become inefficient, as you’ll spend more time walking than cooking.