FREE DESIGNS AND ESTIMATES

9 Ways to Spice Up Your Kitchen Cabinetry

Article by: Jo Leevers

Freestanding cupboards, mix-and-match colors, contrasting textures, individual drawer pulls — kitchens can be as creative as their owners. If sleek, clean-cut units don’t get you excited, take inspiration from these nine ways to get a more varied look in the kitchen.


SpiceUpCabinetry1.JPG

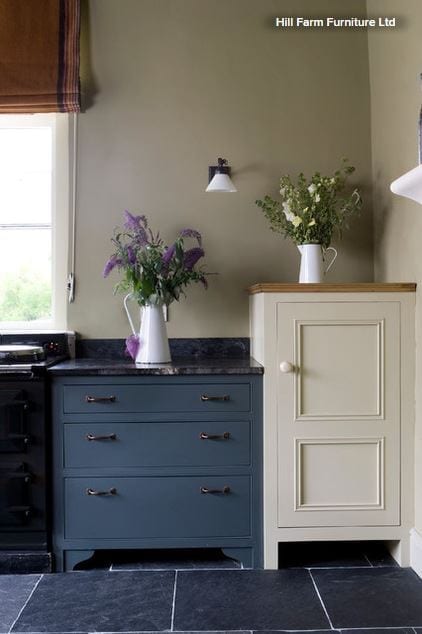
1. Mix cabinet styles. This kitchen’s cabinets are all the same trendy gray, but they sidestep predictable symmetry because two pieces are different styles. They work together, but their drawers have different depths and storage options. A rail for pots and pans creates more variety.


SpiceUpCabinetry2.JPG

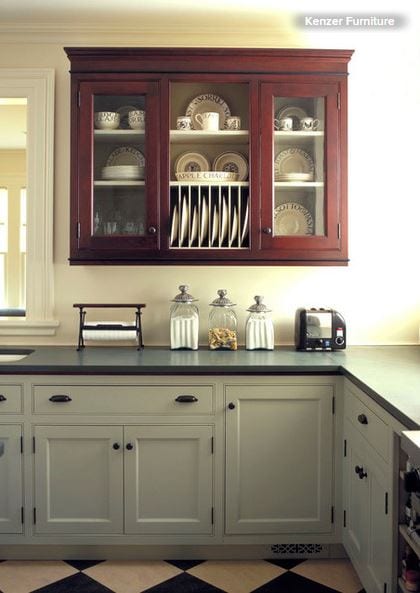
2. Feature a key piece. To keep things interesting in a kitchen with matching cabinets, add a standout storage unit. It could be a plate rack or a bright or weathered dresser. It will break up the rigidity of a single-finish kitchen and let your personality shine through.


SpiceUpCabinetry3.JPG

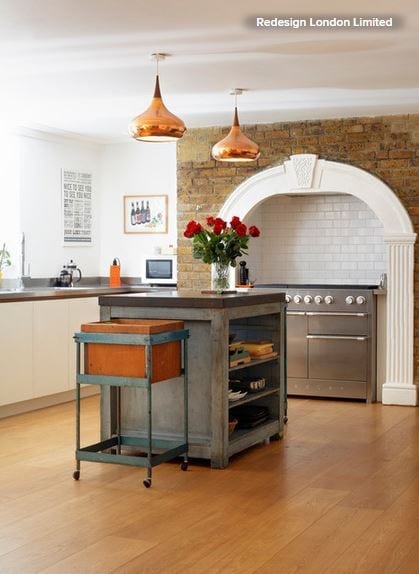
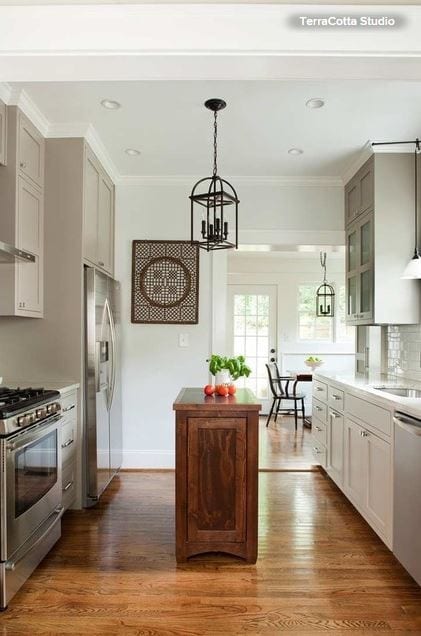
3. Work in an island. For impact in a large kitchen, an island needs to be a “hero” piece that can carry the space. This weathered central island doesn’t conform to any norms. Along with the industrial storage on wheels, it adds just the right amount of character.


SpiceUpCabinetry4.JPG

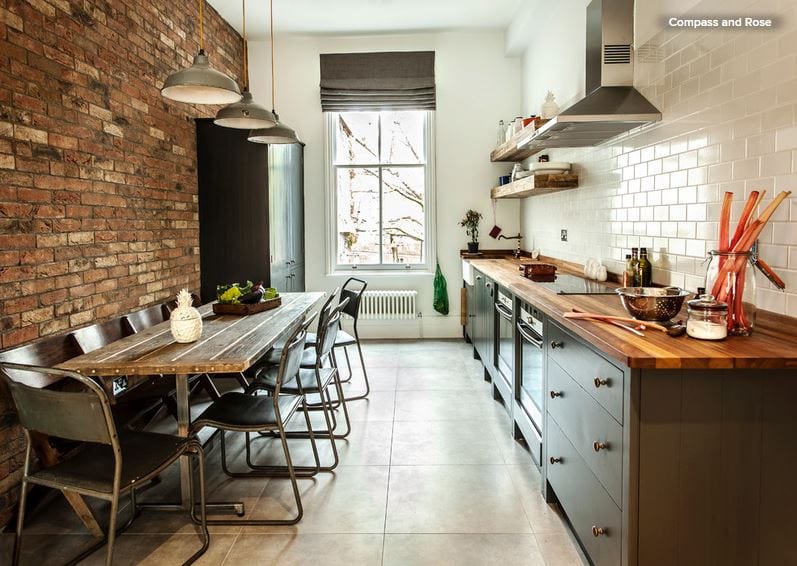
4. Try an urban loft style. A strong dose of industrial style livens up this slim kitchen. Wood, metal, gray paint and ceramic surfaces mix easily, thanks to similar tones. Then there are the contrasts: Bare bricks are mirrored by glossy metro tiles, waist-level units by a taller cabinet. Matching kitchen pieces in this space could have looked too uniform; these look freed up and innovative.


SpiceUpCabinetry5.JPG

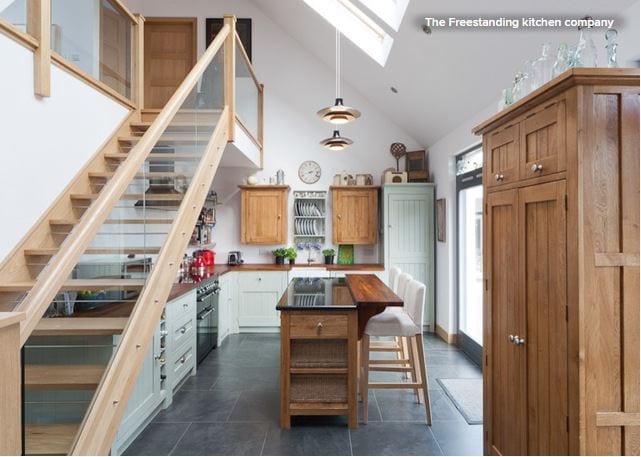
5. Go two-tone. A blend of two shades — palest green and natural bare timber — brings a breath of fresh air to this kitchen. Tongue and groove cabinets and two types of handles are extra custom twists.


SpiceUpCabinetry6.JPG

6. Compare and contrast. A creative kitchen doesn’t have to be off-the-charts unusual. Simply combining two tones, two surfaces and two heights does the job. Carefully crafted finishes give the space a quality feel.


SpiceUpCabinetry7.JPG

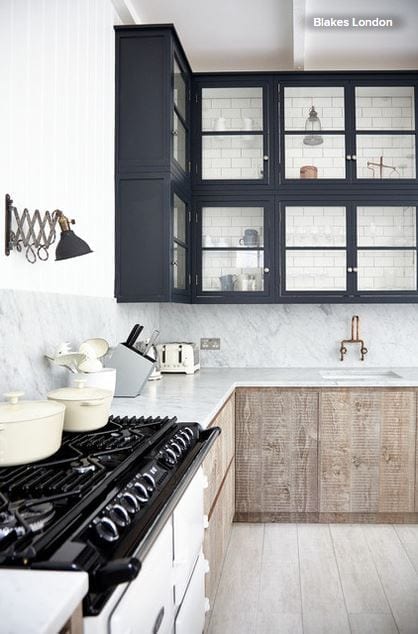
7. Cast it in monochromes. The dark-on-light color scheme here adds visual interest, and the contrast of raw, waxy timber and smooth marble creates a look that’s unique.


SpiceUpCabinetry8.JPG

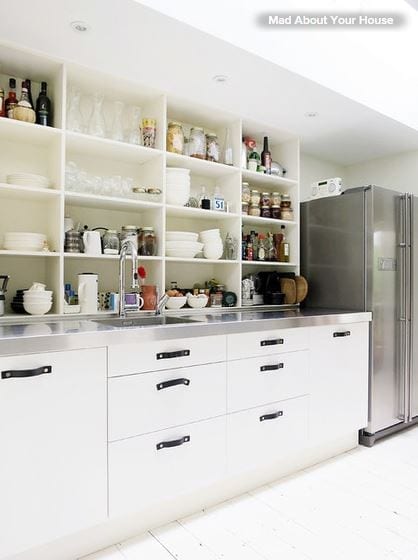
8. Add your own handles. This kitchen works its magic with off-the-shelf Ikea units with tactile leather handles. They handles are eye catching and pleasant to hold — significant, when you consider how often they’ll be used. Open shelving on top combines with a stainless steel countertop that wouldn’t be out of place in a chef’s kitchen.


SpiceUpCabinetry9.JPG

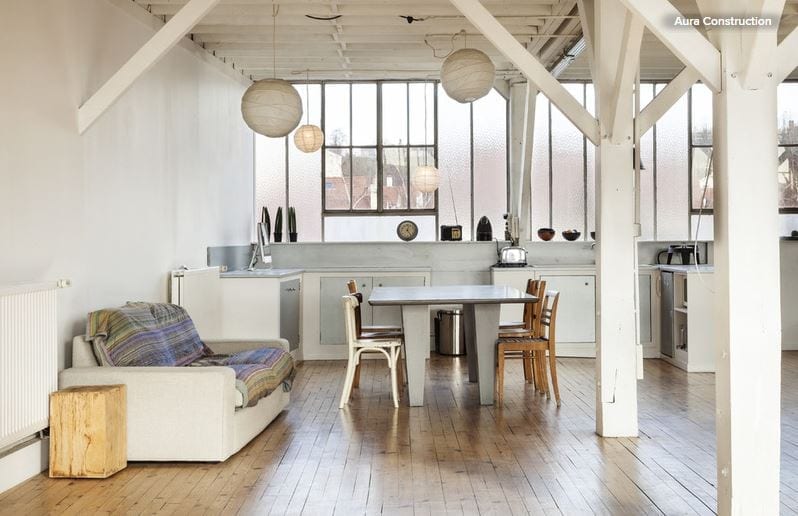
9. Pare it back. This converted industrial warehouse is a dramatic space, so the designer wisely didn’t try to make the kitchen steal the show. Zinc-colored doors inside pale frames, metallic tones and a pared-back 1960s vibe for the furnishings help this kitchen work in its setting — proof that statements don’t always have to be shouts.

Pet-Friendly Design: Making Room for the Dog Dish

Article by:

When I say there is nothing quite so unpleasant as stepping in a dog’s water dish, I speak from experience (no thanks, Augie). Like a good pet owner, I keep my pup’s water bowl filled with fresh water. It’s located in the kitchen, where I inevitably get busy and distracted and step in the drink. It has happened a lot, which goes to show you really can’t teach an old dog new tricks.

When I next remodel, I’m going to plan for this condition, using the clever ideas from these fellow pet owners as inspiration.

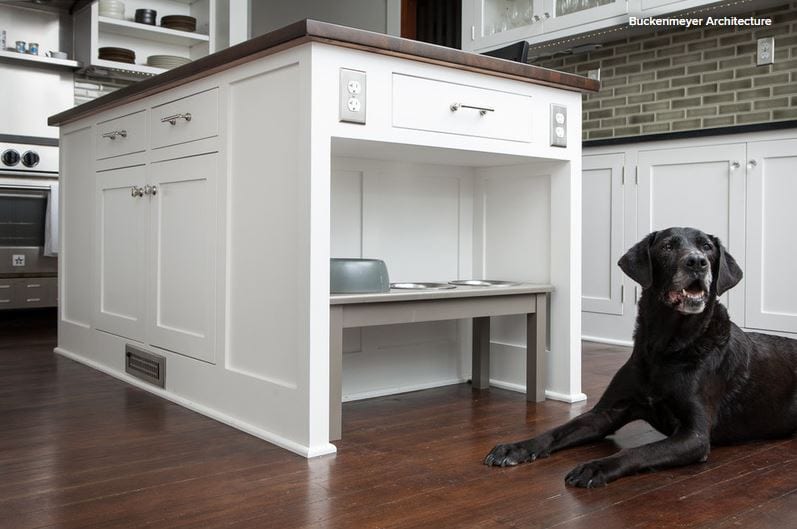
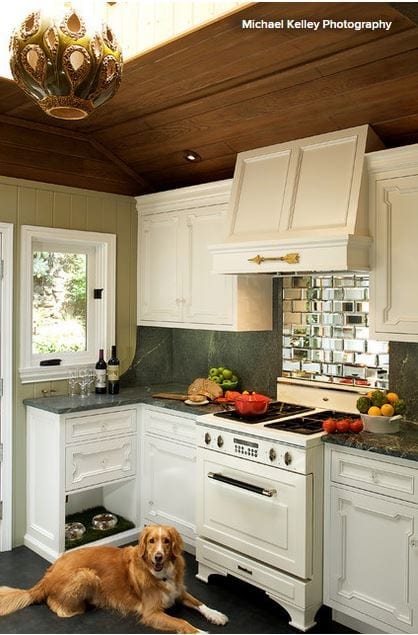
In this project, by Buckenmeyer Architecture, finding a space for the dog dishes was a key design consideration. “A recess at one end of the island keeps the bowls out of the way,” says Marty Buckenmeyer.

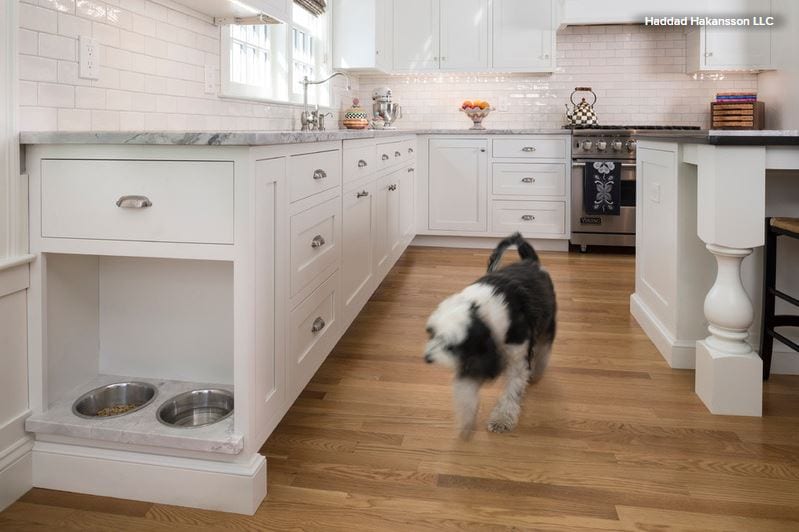
Judging from the gray around his or her muzzle, I’m guessing this sweet dog is a little long in the tooth. I’m sure the elevated bowls are appreciated.

The designers at Haddad Hakansson employed a similar strategy in this kitchen, but they placed the bowls at the end of a cabinet run as opposed to an island. It’s a smart move in a kitchen that has the room. “One of the highlights of this space is the custom dog dishes,” the designers write. They are “inset into a small slab of white quartzite. The cabinet above has a tilt-out tray for dog treats.”

Perhaps the feature helped the space win first place in the 2014 NKBA northern New England kitchen design competition. And, as you can tell by the blur running toward the eating area, it clearly has won the popular canine vote too.

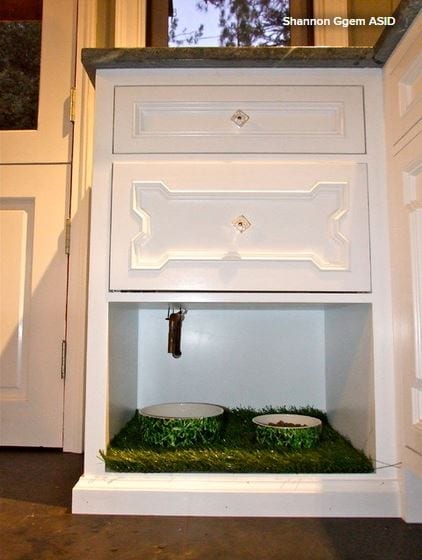
In this kitchen, by Shannon Ggem, the lucky dog can pretend he or she is eating in the wild, thanks to a dining niche lined with artificial turf.


A closer look reveals the other features. Not only does the space have bowls printed with a grass image, but it has a faucet with an above-counter control. As the designer says: “No bending!”


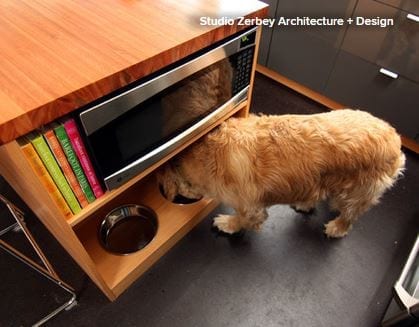
With built-in bowls and the same material treatment as the kitchen island, this dog eating area, by Studio Zerbey Architecture + Design, is almost undercover.


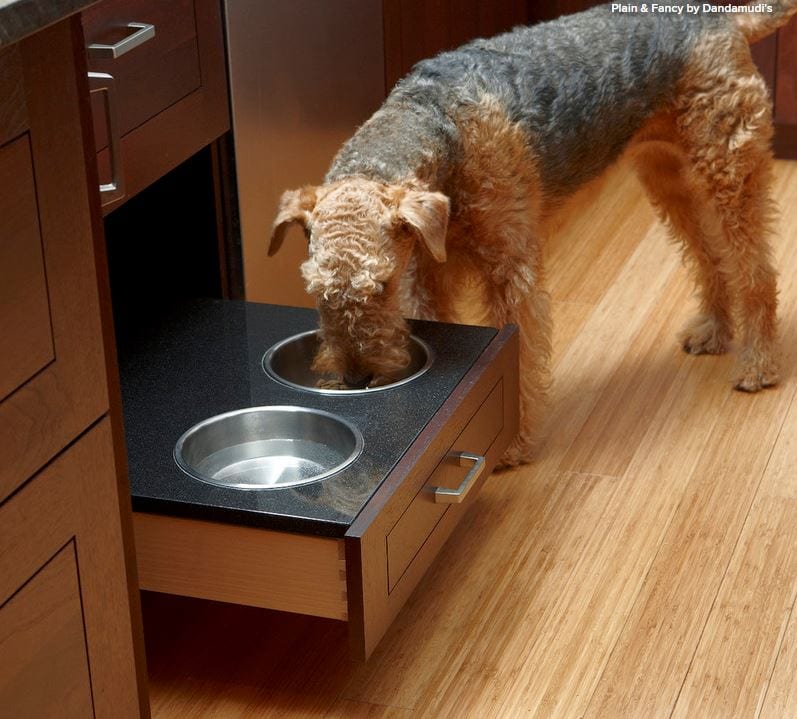
This niche, by Plain & Fancy by Dandamudi’s, is outfitted with a pullout drawer and an easy-to-clean stone surface.

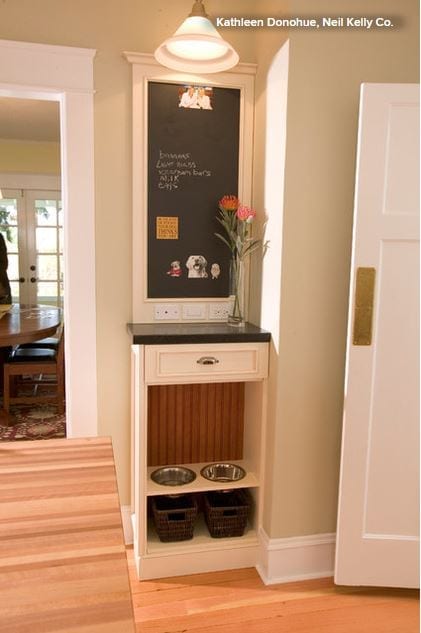
Some smart and space-endowed homeowners take the dog dishes farther from the kitchen triangle. In this project, by Kathleen Donohue, Neil Kelly, the eating area is under the command center.


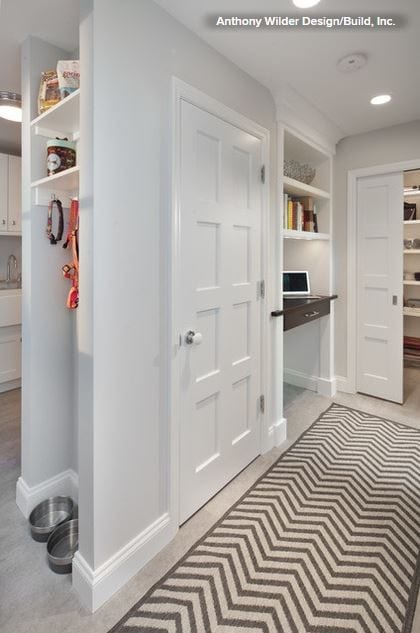
In this project, by Anthony Wilder Design/Build, an eating and storage area for the dog is tucked into the end of a wall. Below are the bowls; above are dog accessories and treats.


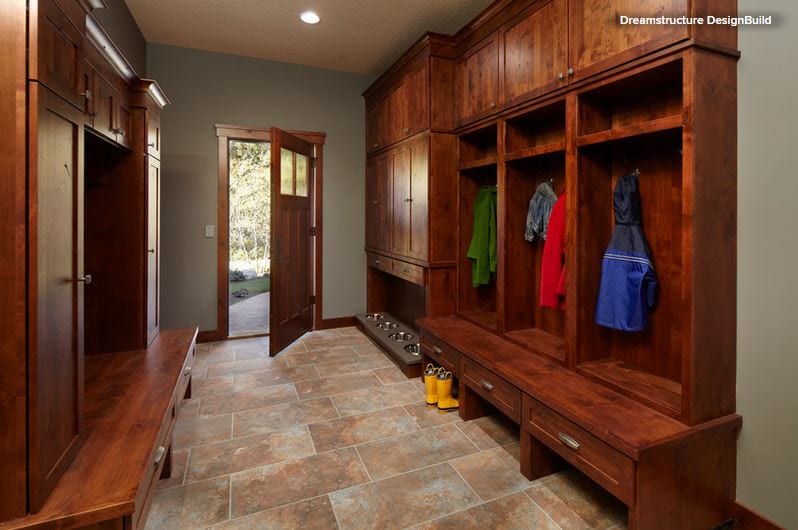
This mudroom, by Dreamstructure DesignBuild, is outfitted for everyone — four-legged and two. Due to the recessed and elevated nature of the bowls, you’d be unlikely to step in them — but if you did, you might be wearing your boots.

10 Upgrades for a Touch of Kitchen Elegance

Article by:

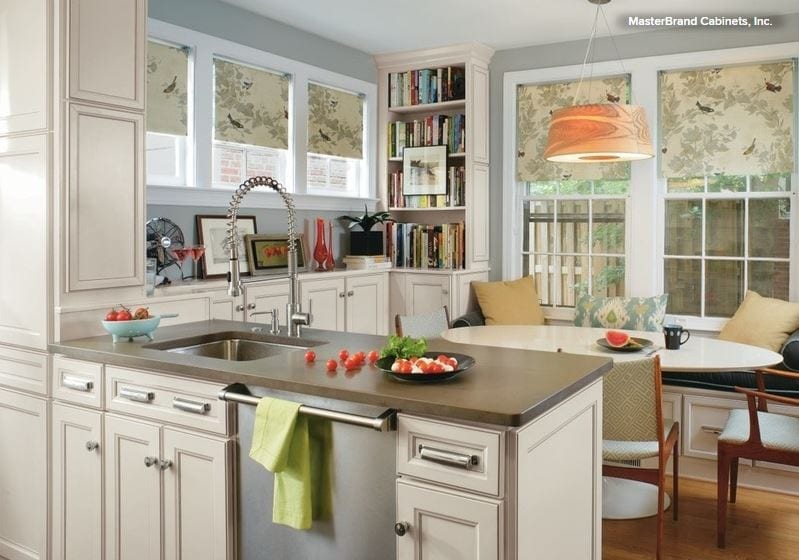
“Elegant” “sophisticated,” “simply beautiful” — are these words you would use to describe your dream kitchen? Even just adding a coat of paint, new lighting and carefully chosen decorative details can bring your current kitchen a bit closer to that dream. Here are 10 upgrades to consider.

1. Roman shades. Covering the window with a classic Roman shade gives the kitchen a finished look. Go with a color and a pattern that coordinate with your cabinet and wall color, or stick with natural linen, which goes with everything.

2. Topiary. A pair of topiaries flanking the sink is an elegant finishing touch. Use a vintage champagne bucket as a cachepot, or wrap a simple pot in burlap and tie on a velvet bow. If your kitchen gets a good amount of natural light, by all means get real plants — but if not, there’s no shame in picking up a couple of high-quality fakes.


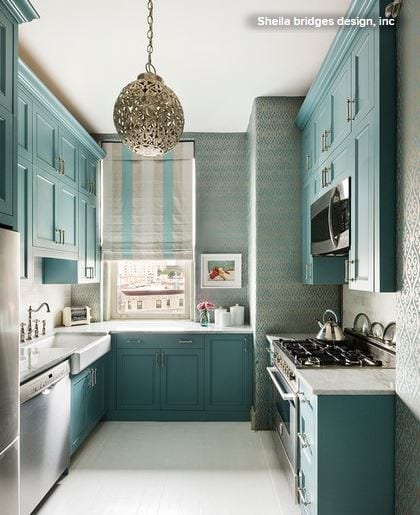
3. Pendant lighting. Swapping out a plain ceiling light fixture for something with more style can be done quickly — and your new pendant light can become the focal point of the room. Don’t be afraid to go big; even in a small kitchen like the one shown here, a sizable pendant looks striking, not overpowering.

4. A rich cabinet color. Whether you paint your cabinets or stain them a natural wood tone, a rich color is a high-impact, low cost way to change the look of your kitchen. Try a saturated hue like the blue-green shown here, or a chic gray or slate on just the lower cabinets.


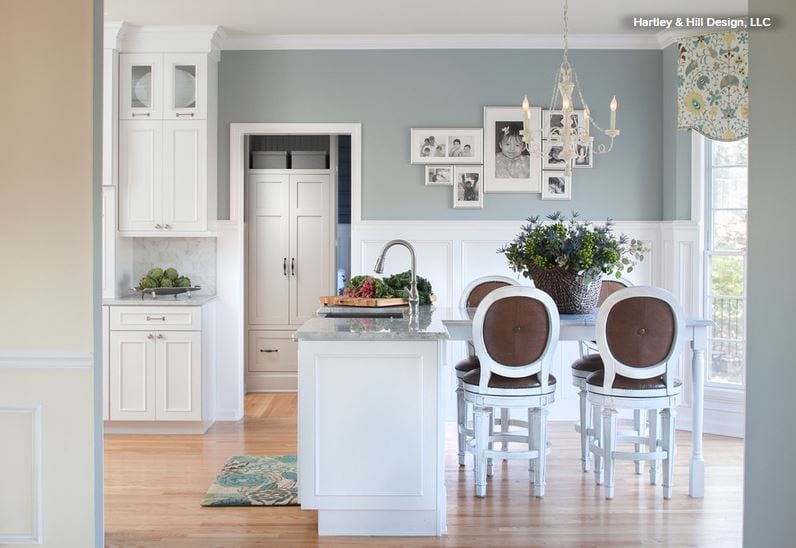
5. Wall paint. If you don’t want to repaint or restain your cabinets, another way to bring in color is by painting the walls. With all of the appliances and cabinetry, kitchen wall space is often fairly limited — which means not only is it quicker to paint, but the color is less likely to overwhelm than in, say, the living room. Try a smoky blue, rich “greige” or warm mocha.

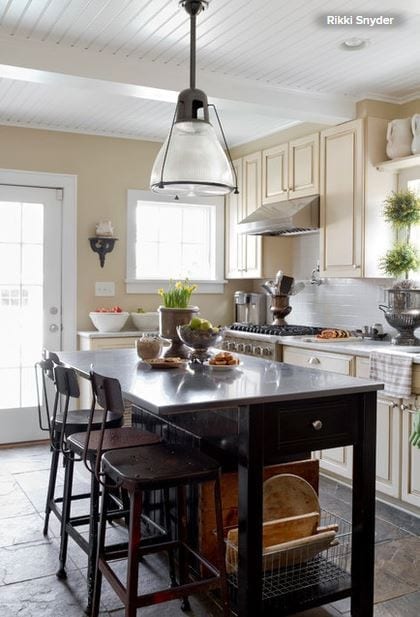
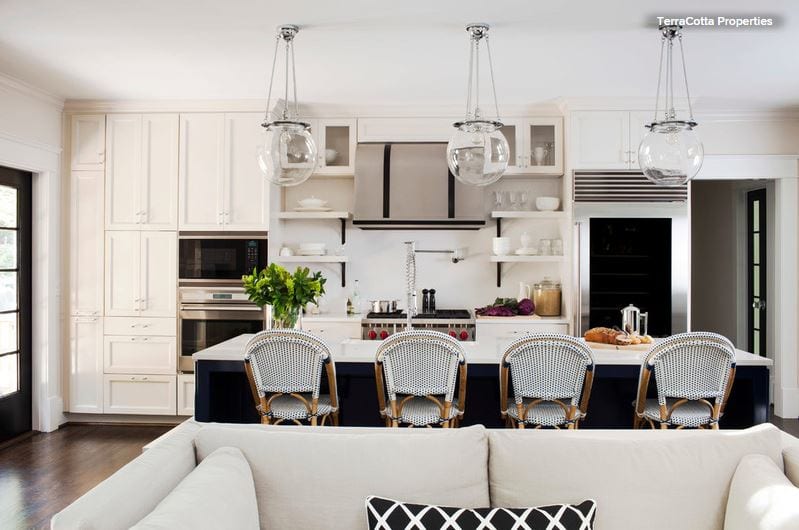
6. Upscale counter stools. There are so many options when it comes to kitchen counter seating that there’s no reason to stick with plain bar stools, unless you want to. Try classic bistro stools (like the ones shown here), sculptural wooden stools or sleek Lucite ones.

Also notice the pendant lights in this kitchen — if you have a long counter, placing a row of three large-scale pendant lights above is a great way to bring focus to the space. Glass pendants like the ones shown here are elegant and maximize light.

7. Glass cabinet fronts. Update old cabinets by having several of the doors replaced with glass fronts. This costs far less than replacing full cabinets and can completely change the look and feel of your kitchen. Remember, whatever is in the new glass-front cabinets will be visible at all times, so choose just a few cabinet fronts to replace and commit to keeping the interiors orderly.


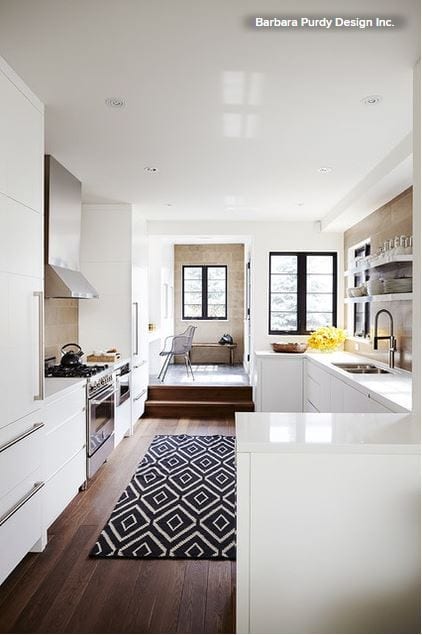
8. A chic rug. If you’ve shied away from using a rug in the kitchen for fear of spills and stains, try a chic indoor-outdoor version. These rugs come in beautiful colors and patterns now, and no one has to know about the stain-fighting powers.


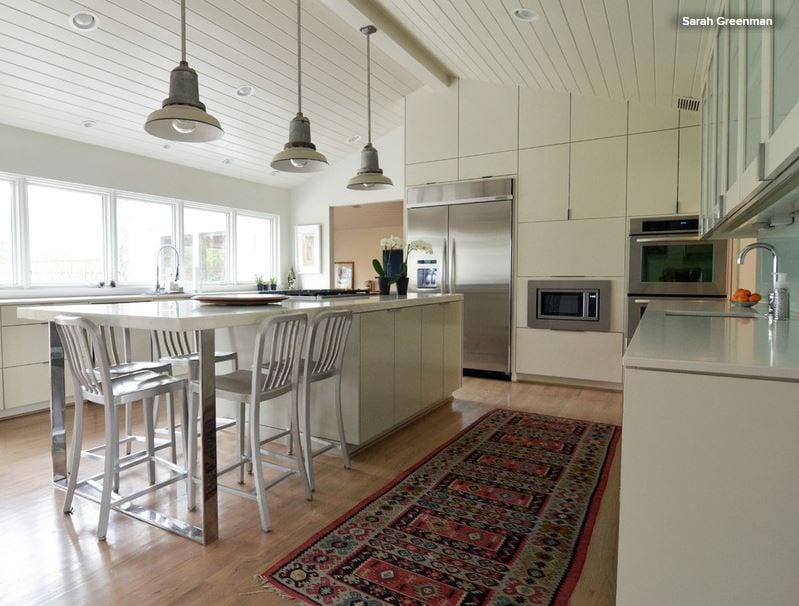
If you’re not frightened of spills, lay down a beautiful (but not priceless) Oriental carpet. Rugs made from wool and other natural materials are quite forgiving when it comes to stain removal, as long as you act promptly.

9. Branches in a tall vase. Branches last far longer than cut flowers — but more than that, they exude elegance. An armful of seasonal branches plunked in a tall vessel is an easy way to instantly boost the ambience in your kitchen.

10. Decorative details. Framed artwork on the wall — and not just “kitchen” art but art you could just as easily hang in another room — can add polish to any kitchen.

Mirrors are unexpected in the kitchen, and just like in other spaces, they can be a wonderful way to boost light. A small table lamp tucked onto the counter brings a warm glow that makes a kitchen feel more welcoming.

Not a Big Cook? These Fun Kitchen Ideas Are for You

Kitchen design tends to be centered around the presumption that you will be spending loads of time in your kitchen cooking. Not so earth shattering, right? But the fact is, not everyone loves to cook. Not everyonecould really use a supersize fridge, dual ovens and an enormous island. So what do you do when it’s time to think about a kitchen design, when all you’ve used your oven for is storage? While it makes sense for certain basics to be in place (sink, stove, dishwasher) even if you rarely cook, there is plenty of room for creativity. From wine storage to a library wall, here are a few ideas to consider.


BigCook1.JPG

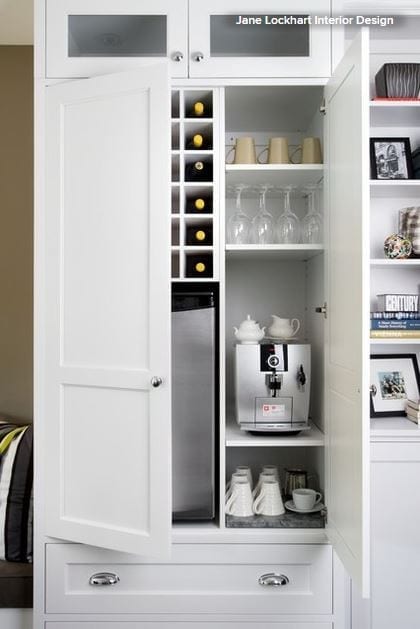
Wine storage. If you don’t have a large collection of cookware to house, it makes sense to shift some of that storage space to something you do use. 

Oenophiles may want to add a temperature-controlled wine cellar cabinet for bottles that need to be aged, in addition to open shelving for ready-to-drink bottles.


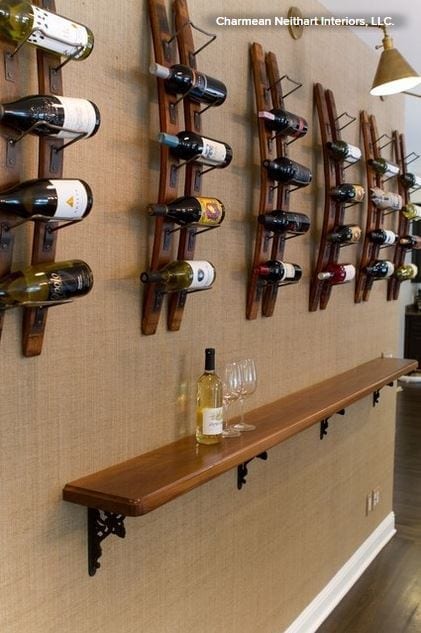
BigCook2.JPG

You could even create your own home wine bar experience with wall-mounted bottle storage, paired with a “tasting bar” attached to the wall.


BigCook3.JPG

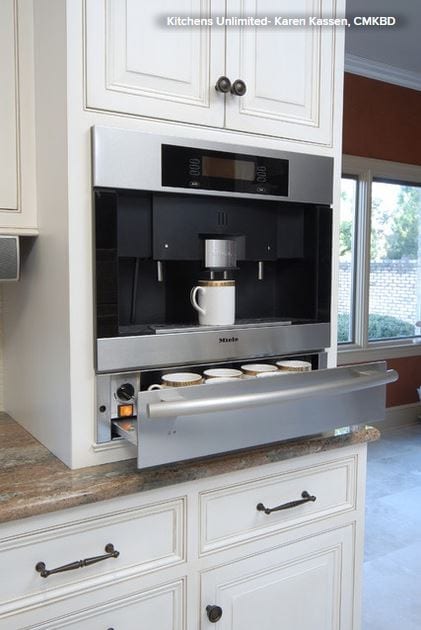
Fancy coffee station. Love your morning latte or cappuccino? Splurge on a top-notch espresso maker so you can whip up your morning beverage of choice at home. Since you’re not spending as much on fancy knives and cookware, why not?


BigCook4.JPG

When less work is what you want, look into a fully automatic coffeemaker. With the push of a button, you can have a cup of delicious coffee or even an espresso drink, depending on the model you choose.


BigCook5.JPG

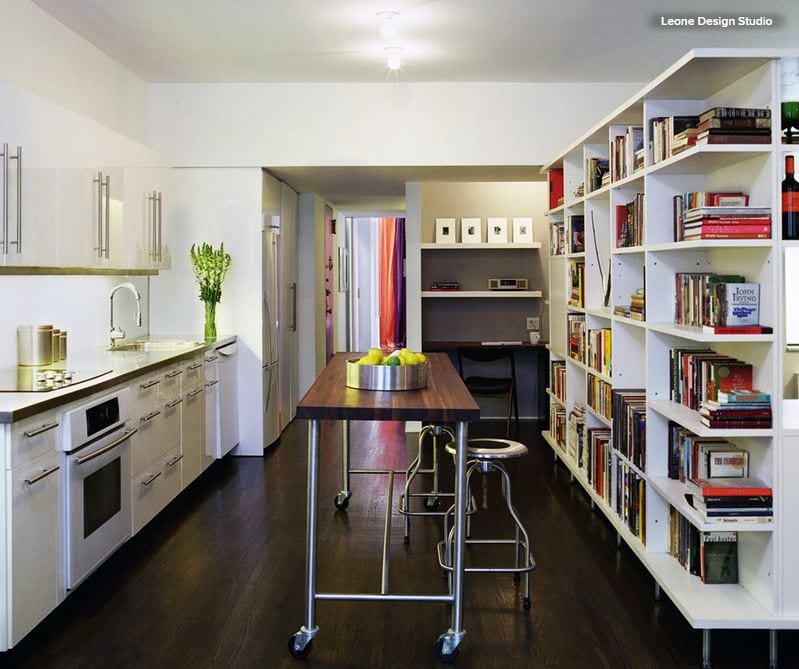
Library wall. If books are one of your great loves, consider dedicating a kitchen wall to bookshelves. You can house a good portion of those books that seem to multiply when you’re not looking, while keeping kitchen storage options flexible. As long as the shelves are large enough, a future owner could just as easily use them to store dishes, cookware or cookbooks.


BigCook6.JPG

Cover (but rethink) the basics. Even those who rarely cook should include a few basic appliances in the kitchen. You never know if you may one day decide to cook at home more often, and even if you don’t enjoy cooking frequently, most people occasionally need a kitchen stocked with the basics. 

A fridge and freezer, a stovetop, an oven, a sink, a dishwasher, a toaster and a microwave are the bare bones for most kitchens. That said, these pieces do not need to be massive to get the job done. In fact, going overboard on appliances may just make cooking in your kitchen seem more intimidating.


BigCook7.JPG

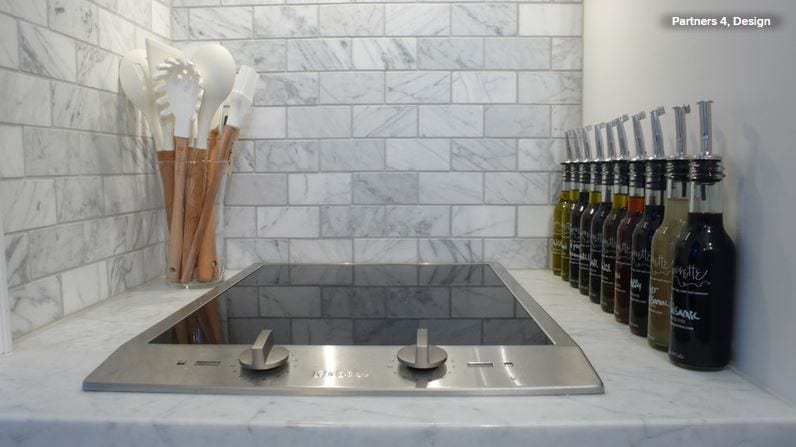
If your kitchen is small and you rarely cook, one alternative to the classic big oven is a separate cooktop paired with a compact oven, or even a convection toaster oven, for cooking (or warming) food.


BigCook8.JPG

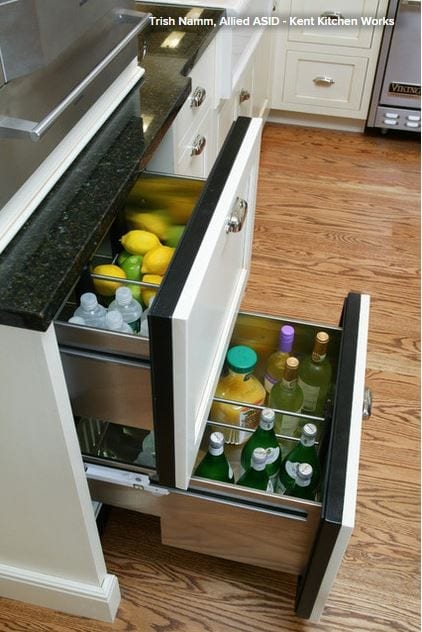
And if you really have no use for a giant fridge and freezer, consider instead a few handy fridge and freezer drawers. They can be tucked into small nooks and don’t overwhelm a space like a full-size fridge can.


BigCook9.JPG

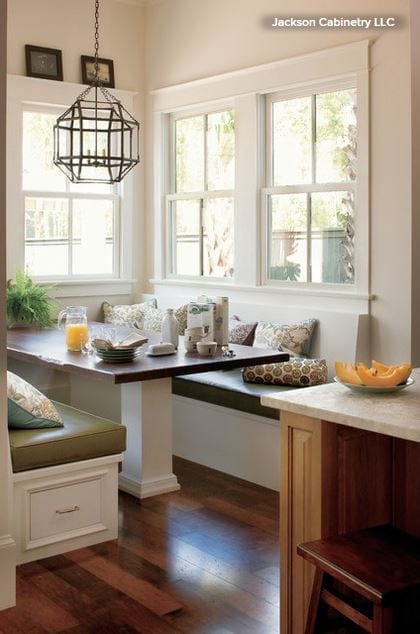
Delightful seating area. When you don’t need to worry about maximizing cabinet space, some fun possibilities open up; a lovely little seating area in the kitchen is one great option. After all, even if you don’t spend hours cooking, you likely do want to be able to sit down in a comfortable space and enjoy a cup of coffee in the morning, or a simple supper (even if it’s takeout) after a long day.

12 Stylish Kitchen Counters That Seem to Float in Space

Want your kitchen countertop to be the hero of your new cooking zone rather than relegated to the background? One way to do that is to look beyond the basic block-like counter and incorporate a cantilevered, or floating, countertop into your kitchen design instead. Here are 12 cantilevered counters that not only offer showstopping style but also enhance functionality and create the illusion of more space.
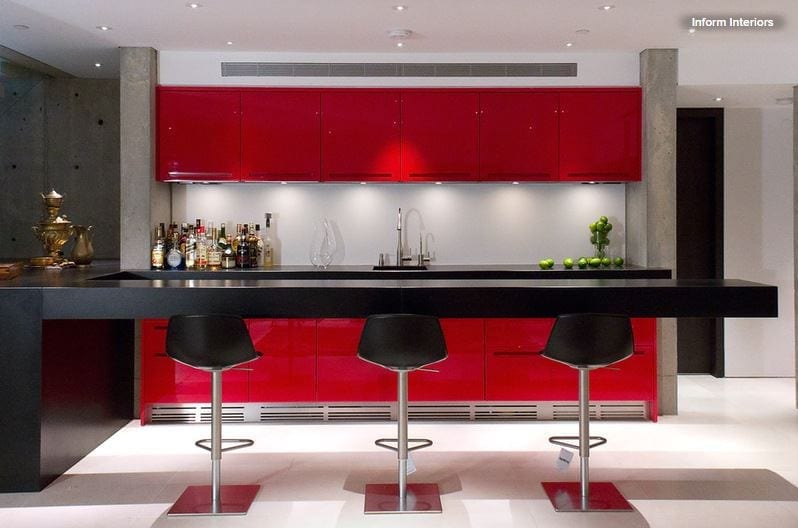
1. Suspended reality. This may look like an optical illusion, but there was no hocus-pocus involved when this striking, impressively long floating counter was built — that we know of, anyway. Its gravity-defying design is just one reason this cantilevered countertop commands attention. Its luxe, chunky look and sleek black color (which boldly contrasts the vibrant red cabinetry opposite) also ensure that the suspended structure exudes jaw-dropping appeal.

The expansive bar provides plenty of room for several people to sit and enjoy a drink or meal, while the open area beneath ensures that spills and crumbs can be cleaned up with ease, making this an ideal setup indoors or outdoors.

Tip: If your countertop is thick, opt for minimalist stools with a slim profile so the design doesn’t appear too heavy.
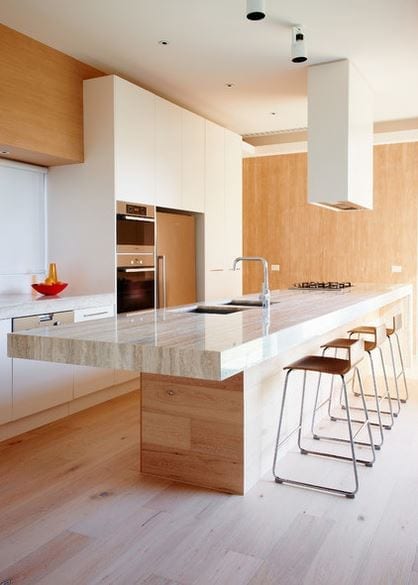
2. Natural wonder. If you want to infuse your kitchen with warmth, subtle sophistication and an air of luxury, consider a cantilevered-counter combo of natural stone and timber. Here the suspended style showcases the quiet beauty of the travertine top, while the wood cabinetry below softens the look and complements the stone’s neutral tones.

But style isn’t all this counter has to offer. The cantilevered top also provides additional workspace (which helps offset the area taken up by the double sink and stovetop farther down the island) and room for extra chairs, which comes in handy when entertaining.

Tip: When choosing wood to pair with your stone countertop, look for one that’s free of prominent knots or patterns that could clash with the veining of the natural stone.
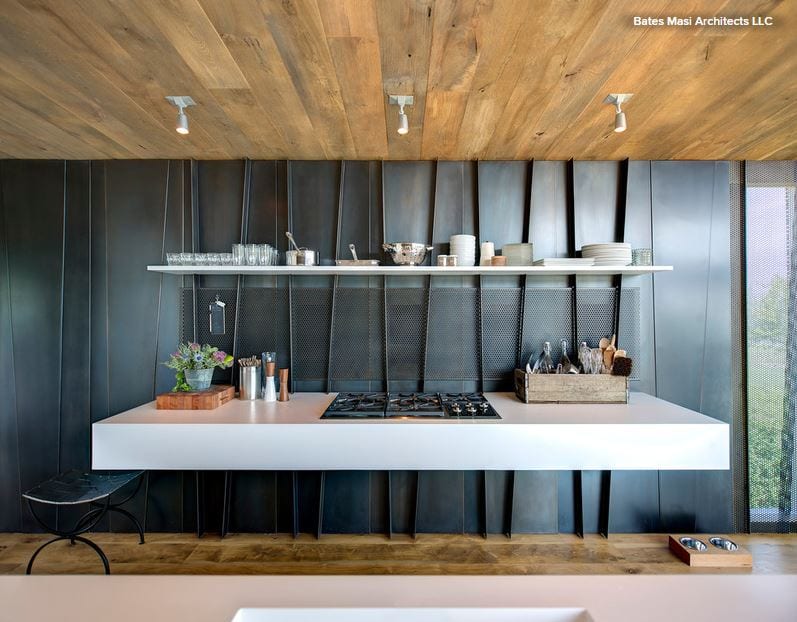
3. Minimalist chic. Although this cantilevered surface is a dedicated work zone, it also succeeds in injecting this modern rustic kitchen with a hearty dash of visual interest. The clever floating contraption is anchored to the wall by way of steel tabs that protrude from the metal surface and double as decorative elements that transform the vertical surface into an accent wall. Crisp white was a smart color choice for the surface, as it cuts through the room’s moody palette, while the thickness gives the space a clean, contemporary feel.
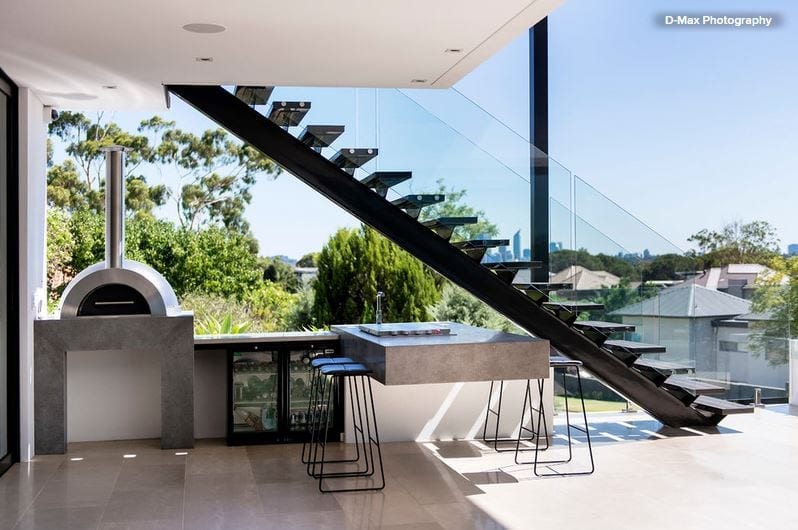
4. Cool and clean. If you hate being on cleanup duty after a family barbecue, a floating concrete counter like this one will make the chore a little easier to bear. Thanks to its suspended design, crumbs and spills can be swept or hosed away quickly. Polished cement also is durable, stain resistant and easy to clean, so it doesn’t require much effort to make the surface look as good as new after entertaining.

Also, note how the cool gray surface adds an industrial edge to the contemporary outdoor kitchen and entertaining area, while the countertop’s bold lines and streamlined look complement the sleek style of the space.
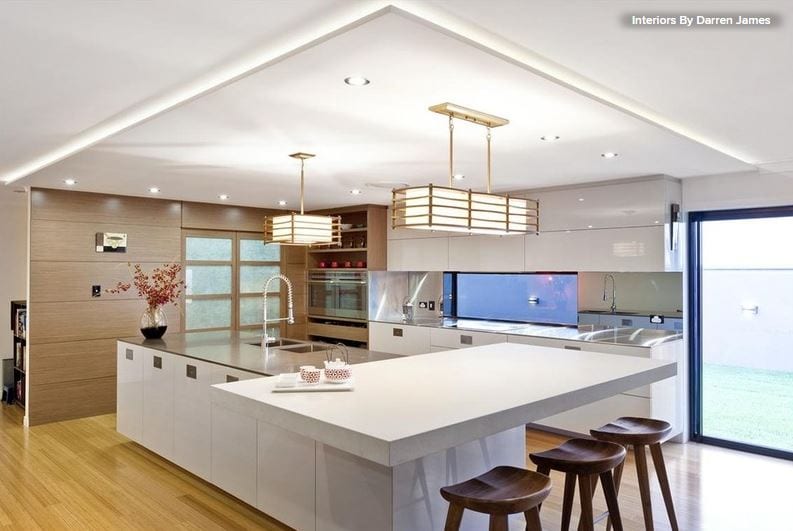
5. On the side. Now here’s a chic cantilevered counter with a twist. Rather than extending a section of the thin, neutral-toned countertop past the end of the island, designer Darren James placed a separate slab of stone (in a contrasting tone and thickness) on top and rotated it to sit across the width of the workspace. This not only helps define the cooking zone and visually separate it from the surrounding open-plan area, but also makes the space feel more communal, as the seating faces inward, fostering a sense of togetherness.

As you can see, the contrasting look and unique configuration of both counters also succeed in transforming a basic island top into a statement-making design feature.
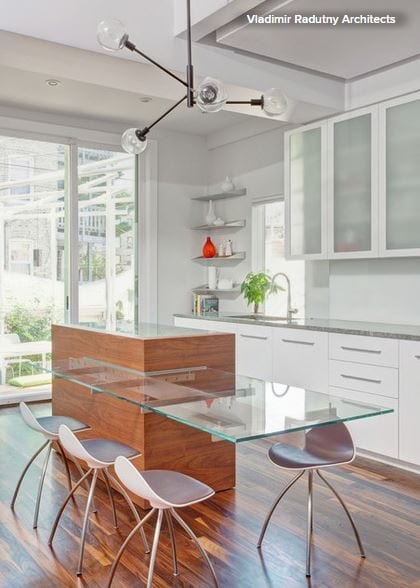
6. See-through style. Don’t be too hasty to say, “Nuh-uh; no way” to a floating glass countertop. Sure, they’re not for everyone (like those with young kids), but they can work for some in the right space.

Here an eye-catching glass countertop appears to jut out from the corner of a taller wood prep zone. It’s stabilized by a metal bracket that supports the see-through surface. The material was selected to enhance the airy, spacious feel of the kitchen, and coupled with the suspended design, it successfully does just that. Although it’s an unconventional choice for a kitchen countertop, the structure here was designed to be a eating area, rather than a food-prep space, so the material should hold up fine.
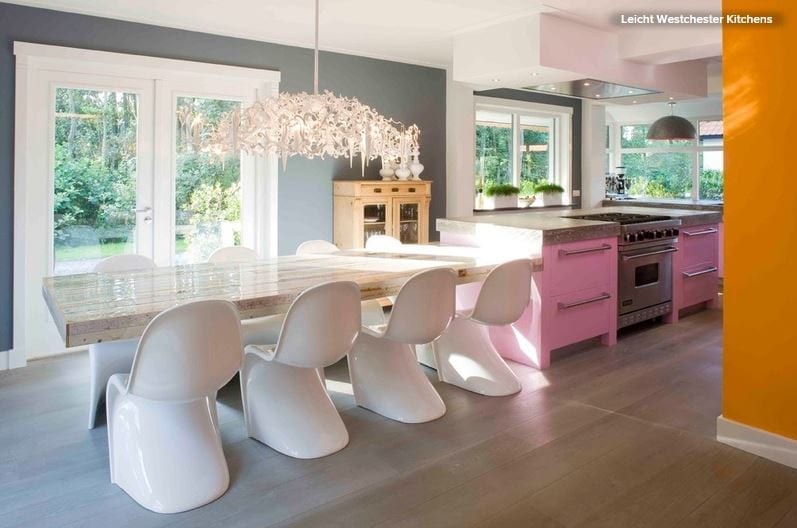
7. Family friendly. One design trend we’ve seen in the kitchen project section of Houzz is the integrated kitchen counter–dining table. This elegant transitional-style cooking and eating area shows how this concept takes shape with the help of a cantilevered countertop.

Here the floating counter has been lowered so that it stands at table height, rather than matching the height of the adjacent concrete counter. This allows for more comfortable and ergonomic seating (unlike bar stools, which can sometimes cause aches and pains in your back and legs after you’ve been perched on one for a while —or does that just happen to short people like me?). This means your family and friends won’t mind sitting around the table for long meals and lengthy catch-up sessions.

The long, cantilevered counter provides loads of visual appeal too. The rustic, reclaimed wood table contrasts beautifully with the contemporary pastel pink cabinetry and industrial-looking cement counter, creating a space that oozes subtle sophistication but still makes a strong style statement. White retro-style dining chairs complete the look and add another layer of interest to the eclectic scheme.
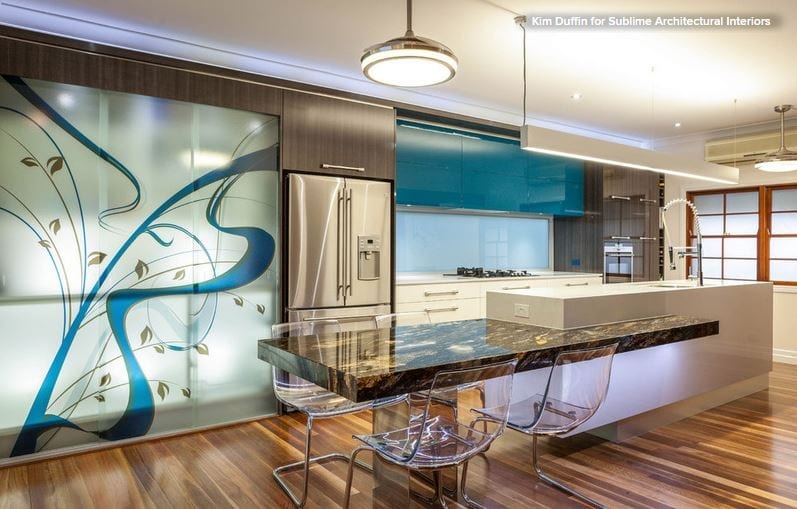
8. Optical illusion. This stunning counter may appear as if it’s floating, but if you look closely, you’ll see that there’s actually a mirror-finish post that supports the stunning granite countertop from below — how sneaky! Even so, this showstopping cantilevered-look counter still deserves a mention, since it achieves the same airy, space-enhancing look as a suspended countertop, albeit with some help from a supportive friend.

Here it’s not just the striking countertop material that makes a dramatic statement. The undercounter lighting and the way the granite appears to be embedded in the white Caesarstone island also take the stylish kitchen counter to new heights. The lowered height of the bench makes this casual dining area more practical and comfortable, too.

Tip: If you’re worried that a natural stone countertop may be too high maintenance for you, choose an engineered stone or a high-quality laminate instead.
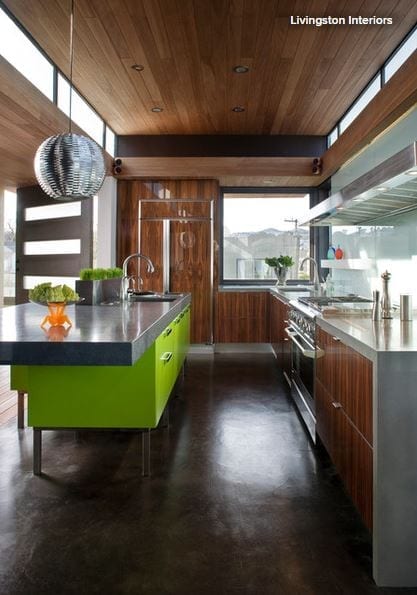
9. Green with envy. What was the first thing that caught our eye when we spied this cool cooking space? The striking island, of course — though the shimmering disco ball–like pendant light probably came in a close second. While the island’s eye-popping lime-green base immediately attracts the eye, the dramatic lines of the thick floating concrete top also command attention.

Polished concrete is a stylish and practical kitchen surface choice, as it not only injects any space with a cool, contemporary edge, but is also extremely low maintenance and environmentally friendly, making it ideal for those who desire an ecochic cooking zone that’s a breeze to clean. Did we mention the material is very affordable, too?
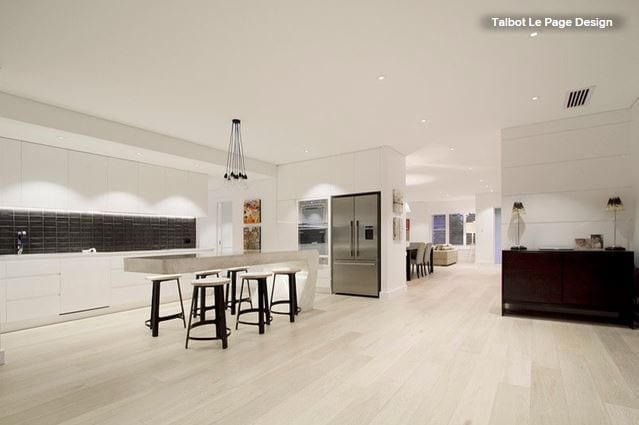
10. Space age. If you want to make a bold statement in your kitchen, opt for a cantilevered counter that’s fashioned from an interesting material in an unexpected shape, such as the cutting-edge, contoured design shown here. LED lights fitted underneath add to the freestanding form’s space-age vibe and help highlight the showstopping centerpiece.

Thanks to its tall height, there’s plenty of room to tuck several bar stools below the counter, which helps keep the pathways free of obstacles and ensures that the room maintains its clean, uncluttered look.

Tip: Install tinted LED strip lights below the floating countertop for a more dynamic and colorful look.
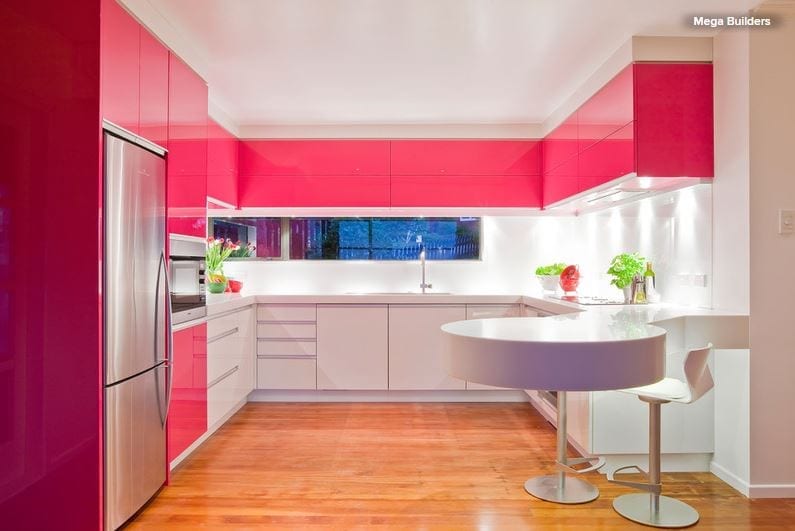
11. Going round. Worried that a suspended countertop won’t work in your spatially challenged cooking zone? This chic U-shaped kitchen shows how it’s done. Here a round floating bar is cantilevered out from the wall and floor cabinets, providing a spot for casual eats, an additional workspace and a social hub where family and friends can mingle when you’re entertaining. It also adds another layer of visual interest. Notice how the counter’s smooth, curved shape contrasts with the sharp lines and boxy forms that are used throughout the area.
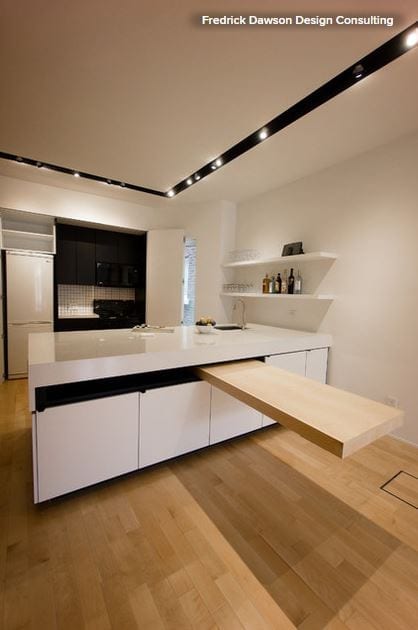
12. Hidden treasure. Now you see it; now you don’t! A space-savvy cantilevered pivot table like this one is a clever, creative addition that will boost the functionality of any compact cooking zone. When extended, the table enhances the visual appeal of the space, thanks to its sharp lines and striking silhouette, transforming the otherwise basic kitchen counter into an interesting design feature. Note how the blonde timber and subtle wood grain echo the timber used underfoot and add warmth to the cool white palette, too.
8 Ways to Get a Handle on the Junk Drawer

Junk drawers get a bad rap, and while it is (mostly) well deserved, there is a way to get that beast sorted and organized once and for all. From creating categories to making smart choices about what goes in and what stays out, these eight tips can help transform junk drawers into “really useful stuff” drawers, ones that keep small items right where you need them.

1. Have more than one small-stuff drawer. A single drawer for small items is simply not enough for most households — and overstuffing is what turns a “really useful stuff” drawer into a junk drawer. It starts innocently enough — you want to quickly clear off a counter because guests are coming, so you slide a few random screws, a rubber band and some pocket change into the drawer. The thing is, it’s a slippery slope. Once that drawer starts to look disorganized, it’s easy to just forget the whole thing and start shoving in every loose item that crosses your path.

2. Come up with categories.
 To stop that from happening, begin by choosing a few categories of small-stuff drawers. Then you can stop thinking of them as junk drawers entirely, and start thinking of them based on the theme of their contents. For instance:

  • Household tools drawer
  • Office supplies drawer
  • Electronics drawer
  • Crafts or gift-wrapping drawer
  • Drawer for personal items you need to get out the door

3. Know the two ways to sort. There are certainly other ways to sort your belongings, but these two ways are simple and effective.

  • Like with like. A family member of mine sorts her kitchen tools into two drawers: “scoopy-stirry” (spoons, ladles etc.) and “cutty-pokey” (knives, vegetable peelers etc.). Sounds a little silly, but it works, and once you know where these drawers are, you can quite easily find what you need, even if you are not familiar with her kitchen. Other like-with-like categories might include tools, paper goods, and electronics and power cords.
  • Complete a task. The second way of sorting is to corral everything you need to complete a task from start to finish. In one drawer in my home, for instance, I have envelopes, stamps, pens, checks and an address book. You might want a drawer near the front door to keep your keys, wallet, cell phone, sunglasses and other personal items.

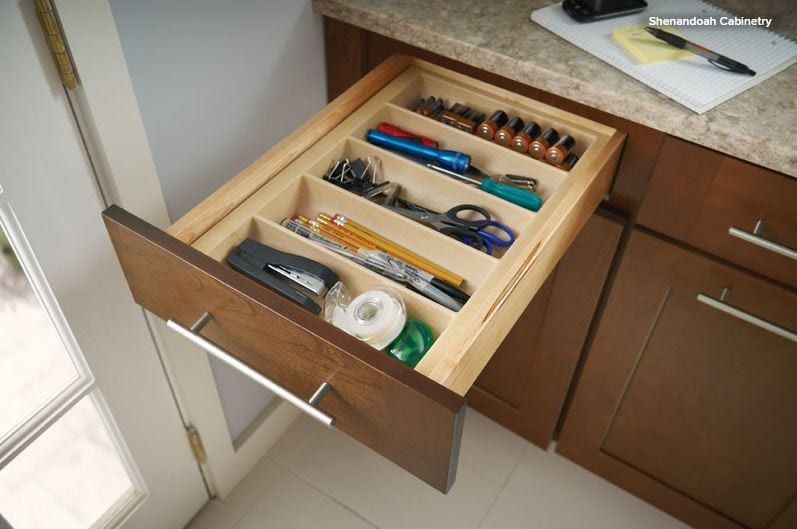
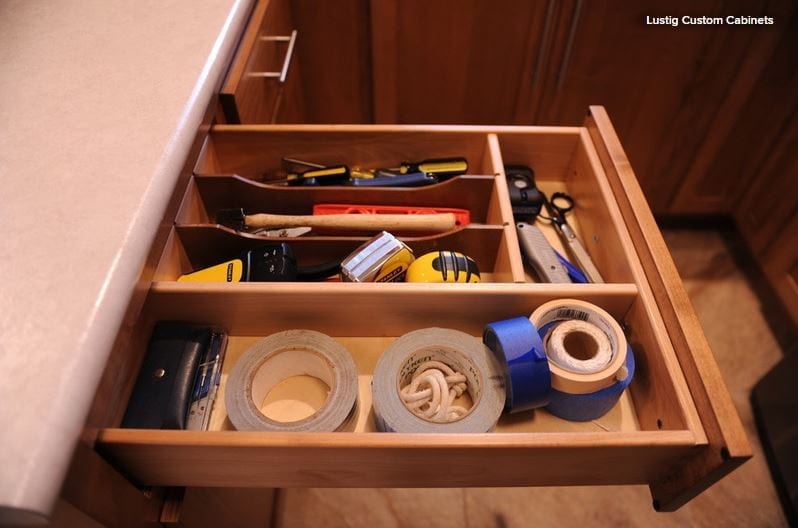
Here is a good example of a well-tended tool drawer. It contains useful, everyday tools — tape, twine, scissors and screwdrivers. This is not the place for arcane tools and specialized equipment used only once or twice each year. Which brings us to the next point.

4. Know what doesn’t belong. In addition to your small-stuff drawers, it’s helpful to have another location for small items that you rarely use. While your measuring tape and box cutters may deserve a spot in a small-stuff drawer, those random screws do not. 

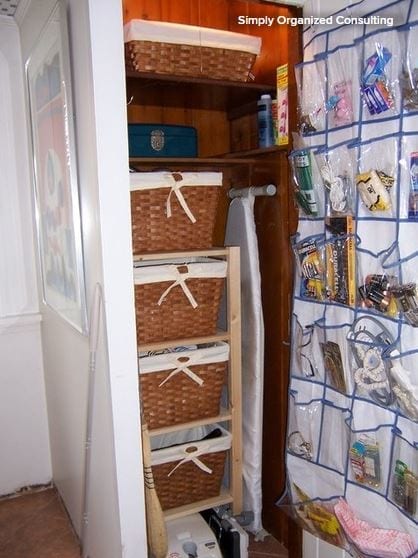
An over-the-door shoe organizer hung inside a utility closet makes an ideal spot for stowing random items that do not belong in a small-stuff drawer.


5. Always label loose parts. If there were only one tip I could ensure that you take away from this, it would be this: Never put a loose part away without labeling it. An easy way to do this is to pop the item in a zip-top bag, place a piece of masking tape on it and write what it is on the tape using a Sharpie. This way when you go to get rid of your old speakers, you can quickly find all of the cords that go with them and get rid of those, too. I started doing this recently, and it has changed my (organizing) life.
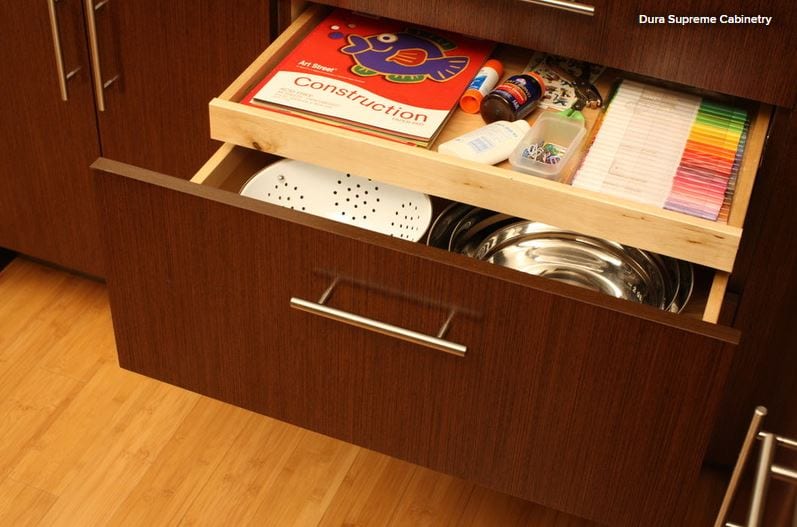
6. Keep it where you use it. Are your kids always doing art projects in the kitchen? Keep a drawer for arts and crafts supplies there, instead of down the hall. When items are stored in the room where they are used, they are far more likely to be returned to the right place.

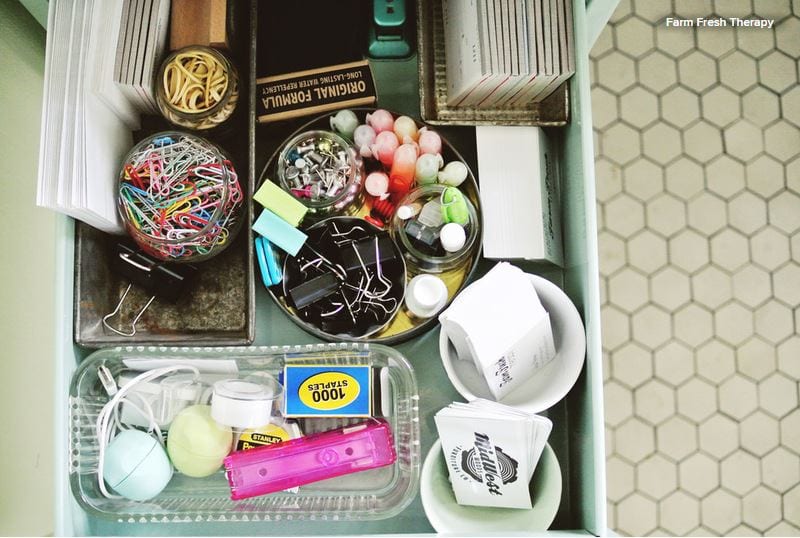
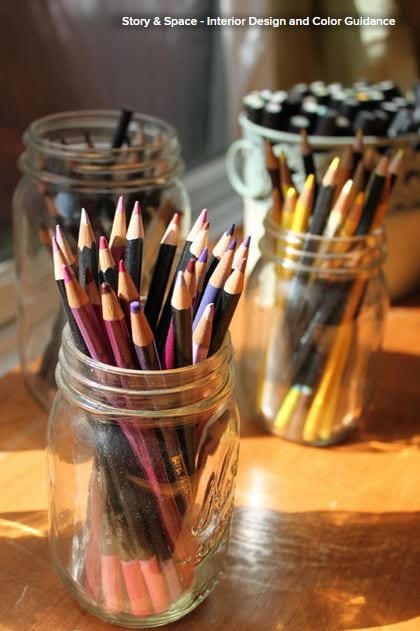
7. Find the right container for the job. Not everything needs to lie flat in a drawer. If your drawers are deep enough, consider standing some items upright in simple glass jars. 

Experiment with upcycled containers — egg cartons are good for sorting tiny items, and jam jars work wonderfully for paper clips.


8. Think outside the drawer. Not everything needs to be in a drawer. Papers are better off in flat boxes (labeled, of course) or files. Baskets with drawer inserts placed inside have the advantage of being portable, so you can bring them right where you need them.

The Kitchen Storage Space That Hides at Floor Level

The humble toe kick is an often-overlooked design detail, and maybe for good reason: It stands practically underfoot, serving in fact only to give our feet a place to rest while we’re working at the counters and cupboards above. However, whether in the kitchen, bathroom or elsewhere, there is much you can do with a toe kick, so it’s worth taking a moment to think about this small design detail. Here are a few helpful design tips for the last place you’d ever think about looking.

Toe kicks are, as a rule, typically 3 to 4 inches high, and recessed 3 inches underneath a cabinet. This gives you room for your feet — or your toes, anyway — while you’re standing at the counter without wasting cabinet space or creating a pocket that’s too deep to clean.


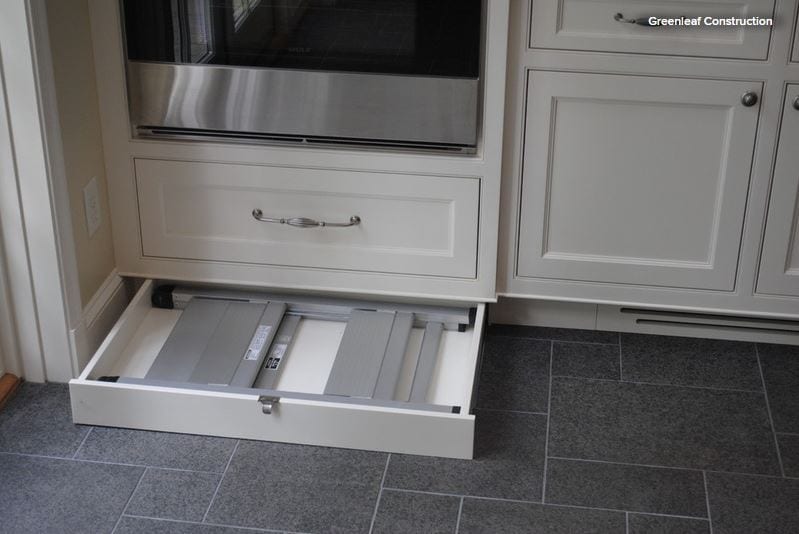
However, a toe kick doesn’t have to be wasted space. Drawers for extra storage are the perfect use for this overlooked space.


They work great for wide, flat items, like specialty pans you don’t use every day …

… or a stepladder for when you need to reach those tall upper cabinets.

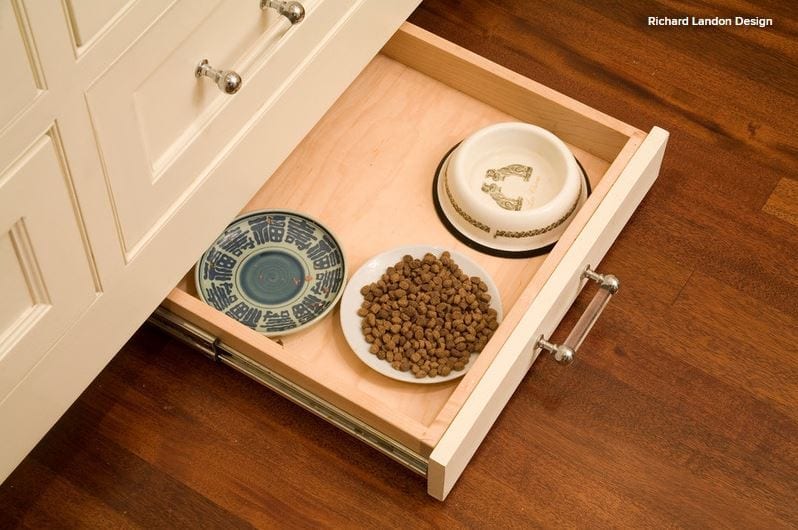
A toe-kick drawer can also house your pet food if you prefer to keep it out of the way between meals — or if your pet is a bit of an overeater!

Get a clean, classic look by matching the cabinets to avoid a visual break (especially perfect with statement wood floors).


For a richer, traditional look, add faux feet to the cabinet fronts to give built-ins a furniture-inspired feel.


Stainless steel (especially with stainless steel appliances) will let your toe kicks make a subtly modern statement.

Or you can use a hint of color or repeat a beautiful tile — both work great in darker spaces to add some life.

Underlighting isn’t just for cabinets. Glowing toe kicks look great in a space with other modern LED light sources (like in a ceiling alcove).


To make toe kicks disappear, try painting them black or using a dark material …

… or give them a mirrored finish, and your cabinets will appear to float.

Want other uses for your toe kick? Try a modern central vacuum system. You can incorporate a hidden suction port in the toe kick so crumbs and dust can be swept away without your even bending over.


And a toe-kick heat vent will keep you toasty during a meal in your breakfast nook or banquette.

Your guests (and you) will appreciate the extra effort, even if they have no idea that your toe kick packs such a design punch!

Kitchen Counters: Quartzite Offers Strength and Beauty

Natural Quartzite Countertop

When choosing a kitchen countertop material, many homeowners who might have gone with granite or marble are giving quartzite a second look. Before you bring this material into your kitchen, take the time to learn the pros, cons and special considerations to see if it’s right for you. 

The basics: Quartzite is a metamorphic rock formed from sandstone. The transformation happens when sandstone is heated within the earth’s crust and shifting tectonic plates supply pressure. The resulting stone has pleasing streaks, rich colors and eye-catching patterns. Colors range from white to black, with shades of blue, green, yellow and brown. 

Popular quartzite varieties include:

  • White Macaubas (has an elegant translucent gray or white background with darker gray or blue veining)
  • Mother of Pearl (has a similar look to marble, with gold, green and gray veining)
  • Taj Mahal (a natural-toned stone often described as having a translucent quality)
  • La Dolce Vita (a popular beige stone with moderate movement)

But be aware that the industry is loose about names and what is categorized as quartzite. “There are many varieties,” says stone fabricator Alex DiPietro. “You want to distinguish between the soft and hard quartzites. Ask your fabricator if they have worked with the specific stone before, and they will tell you their experience.”
And don’t confuse quartzite with quartz (also known as quartz composite), a manufactured product crafted from resin and quartz chips tinted with various colors.

Cost: Around $80 to $200 per square foot installed.

Advantages: “To me the greatest advantage is that it’s a beautiful stone with wonderful tone and variety,” says designer Sarah Robertson. “A vein-cut quartzite will have streaks that are very linear and have a contemporary vibe, while a cross-cut quartzite has diagonal lines with a more organic look to it.”

Quartzite stands up to heat, but prolonged heat exposure can cause problems. Using trivets for hot pots and pans is a smart way to protect your quartzite counters.

Disadvantages: While very strong, quartzite counters are costly and not indestructible. The quality of quartzite varies, and heavy use can cause etching, staining or scratching.

Maintenance: This varies depending on the type of quartzite you choose. There are varieties of quartzite that don’t have to be sealed every year, some that don’t have to be sealed at all and others that require regular sealing. Check with your stone fabricator for information on the quartzite of your choice. 

To keep your quartzite counters in top shape, clean up spills quickly and be careful with grease and acidic foods. You can use a damp, soft cloth to regularly clean the surface and use a mild spray disinfectant when needed. When in doubt, check with your stone fabricator for the best cleanser for your particular quartzite.  

Special considerations: Quartzite is a very heavy stone that requires professional installation by a licensed contractor. Looks vary from stone to stone, and since varieties often go by more than one name, make sure to examine and view each stone slab carefully. 

And consider asking for samples, says Robertson. “You can get a chunk of the stone from a fabricator and do the stain testing yourself at home. If you’re really concerned about what vinegar or lemon juice will do to the counter, try it out yourself.”

How to Recycle Your Kitchen

Article by:

If you like getting your hands dirty, demolition can be one of the most fun and satisfying parts of a kitchen remodel. But whether you’re going the DIY route or hiring a pro, you’re likely to end up with at least one Dumpster full of trash. The Environmental Protection Agency estimates that about 170 million tons of construction and demolition waste were generated in 2003 (the last year for which figures are available), with most of it ending up in landfills.

The sad part is that much of what ends up as waste could have been reused or recycled. While recycling building materials can take longer than simply whacking them with a sledgehammer, construction company SOD Builderssays some things — such as large appliances and granite countertops — can be easily recycled with the right charity or facility.

Here you’ll learn more about what you can recycle and who might want it.

Who to hire: Green demolition is mandatory in some cities, and contractors may not get their permit deposit back if they don’t recycle a certain percentage of their construction and demolition waste.

Your general contractor (GC) may already be skilled in green demolition, or may hire a green demolition company that already has ties to local charities and can remove building materials and finishes according to their specifications. If your remodel is a DIY project, check with your municipality to find out whether any local recycling regulations apply.

Whether it’s your city or your conscience that motivates you to recycle, you may decide to hire a green demolition company yourself to keep things easy and ensure that all recyclable materials are removed properly. If you do decide to go this route, choose a reputable firm for which no complaints have been registered with the Better Business Bureau, and get references.

If you’re looking to recycle a handful of items — your appliances, countertops and cabinets, for example — you can likely handle the process yourself.

Cost range: Because it takes more time to carefully remove building materials than to smash them with a sledgehammer, hiring a green demolition company can be more costly — up to $10,000 more per job than a regular demolition company, depending on scale and size. Fortunately, some of the extra cost can be offset by avoiding landfill charges and with tax credits earned by donating materials.

Many GCs, however, now recycle materials automatically. Oren Dagan of SOD Builders recycles many materials during a typical project. For an average kitchen, he says he usually incurs a cost of only $150 at the county recycling plant; he donates many materials for a tax write-off or reuses them in the same home.

Typical project length: About a week.

Project considerations: If you’re working with professionals, they’re already equipped to deal with the proper removal of building materials, but if you’re doing it yourself, it’s smart to take an inventory of what you’d like to recycle and talk to local charities to determine what condition they need items to be in.

Some groups will accept only still-assembled cabinetry and countertops, while recycling plants will take scraps, remnants and small pieces. You might also consider doing a second sweep after you’re finished the remodel to donate any large remnants or unused materials instead of throwing them away.

Here’s are some materials you can likely recycle or donate:

  • Kitchen appliances of all sizes
  • Cabinetry
  • Granite countertops
  • Steel, copper and brass elements — and don’t forget about plumbing
  • Lumber and plywood
  • Hardware
  • Fixtures (Including lighting, electrical and the sink)
  • Unused ceramic or vinyl tile
  • Drywall
  • New carpet and linoleum
  • Doors
  • Furnishings

Getting started: Reach out to local charities about two weeks before you start the actual demo to find out which items they’ll accept and in what condition.

Dagan donates almost all large appliances to The Salvation Army, as it accepts nonworking appliances as long as they are fixable. “I’ve never had an appliance they couldn’t fix,” says Dagan. He offers smaller appliances to Goodwill, although he doesn’t have any specific reason for splitting things up that way other than a wish to share the wealth among multiple charities.

Habitat for Humanity also accepts a wide variety of kitchen items, from fixtures to appliances to cabinetry, although it relies on specific donation guidelines to ensure that the families who move into the homes it builds won’t get stuck with substandard materials. You can review the guidelines here.

Dagan also likes to recycle kitchen cabinets within the same home, and points out that old cabinetry can create great, practical storage space for a garage or workshop. If you’re getting rid of an old or damaged granite countertop, or end up with leftover pieces, Dagan says fabricators are often happy to take them off your hands.

As for the rest, call your municipal recycling plant to find out what it accepts, whether there are fees and how those charges are calculated.

Your Guide to a Smooth-Running Construction Project

Construction and craft tools

Imagine walking into your newly built or remodeled home and seeing it exactly as you had imagined it at the start of construction: the windows are all in the right places, the flooring is the right color, and the kitchen cabinets are a perfect fit.

Now allow me to pinch you on the arm, because for most people, reality is often different from that idyllic scenario. You might see missing trim around the bedroom doors or wonder why that small change in the kitchen cost so much. Looking back, you might ask, “And why did we have to hire another subcontractor to finish the bathroom?” 

Of course, there are things you just can’t plan for, but there’s plenty that you can. Costly changes and additional time-consuming work can be kept to a minimum if you fully understand what you are building before you start. By understanding the construction process, being part of the team and keeping a firm grip on the budget, your construction project can result in the home of your dreams. 

Read more