FREE DESIGNS AND ESTIMATES

Foolproof Ways to Declutter Your Kitchen

Article by: Kat Bern

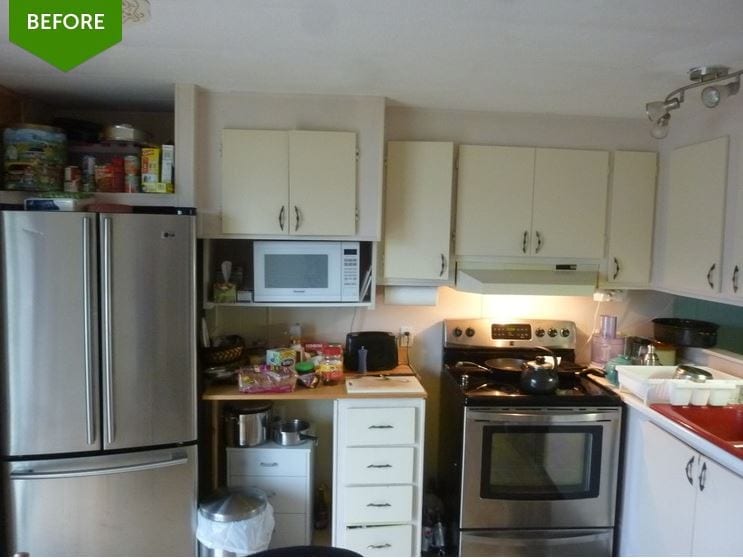
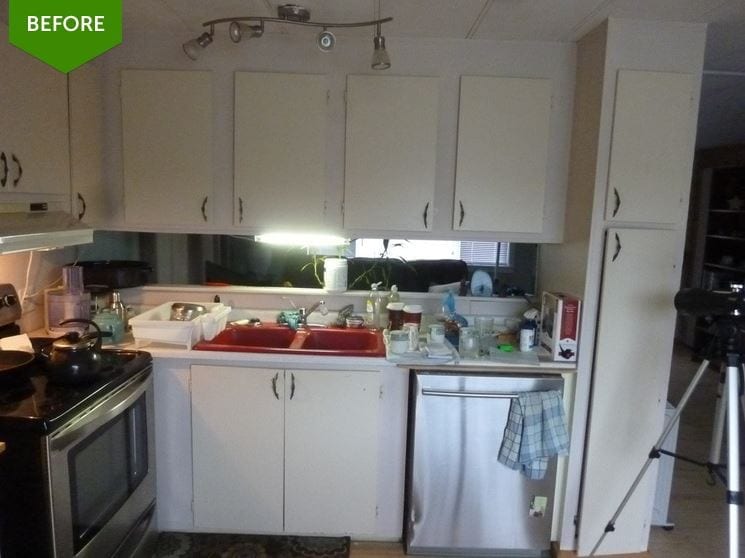
You know that feeling when you’re trying to whip up a quick dinner after work and everything in your kitchen seems to be conspiring against you? You can’t find the ingredients you could have sworn you had, things are tumbling off the shelves, and nothing is where it should be. If you know what I’m talking about, then it’s time to declutter your kitchen.

A good way of figuring out what constitutes clutter is to ask yourself two questions: Does it serve you anymore? Does it bring you joy? If the answer to both of these questions is no, chances are you won’t even notice when the item is gone. So let’s have a look at common space wasters and how to get rid of them.

Save the tidying for later. Don’t make extra work for yourself. If you want to make your kitchen more functional, declutter it before you do any tidying. Otherwise you’ll mess everything up in the process of decluttering. And there’s no point tidying up things you’ll eventually throw out, donate or sell.

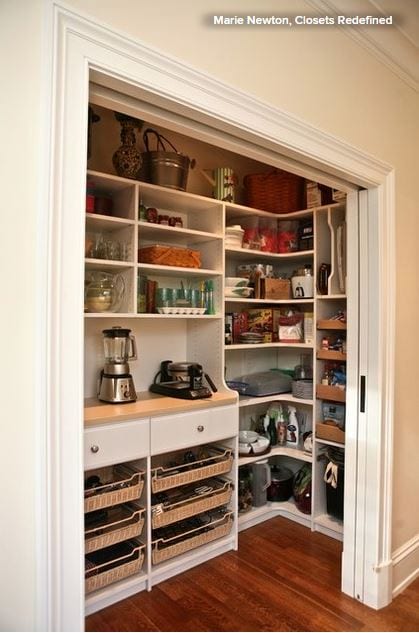
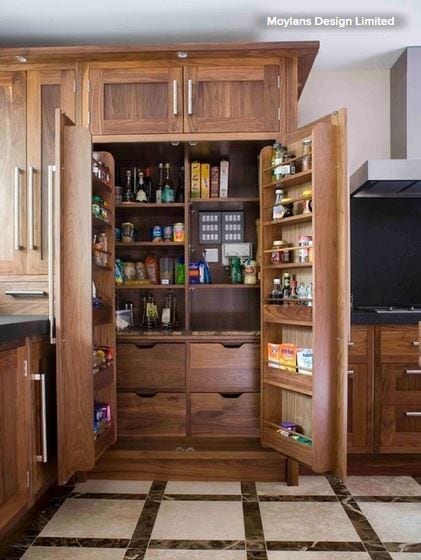
Purge your pantry. Go through your pantry or the cupboards that hold your cans and jars and remove any out-of-date products. When I recently challenged some of my clients to do this, they couldn’t believe their eyes, finding cans dating back to 2007. 

If you think an item is something you might realistically use, pull it out, put it on the side and give yourself a deadline by which to use it (assuming it’s still safe to eat). If you haven’t used it by then, get rid of it.

Minimize the plastic. Next, it’s time to tackle the plastic bags and plastic bottles. Many of us have a tendency to keep things “just in case.” But then instead of keeping one just-in-case plastic bottle, or the few plastic bags we might realistically reuse, we keep 10. 

Select a couple of really durable bags and perhaps a bottle or two if you think they might be useful, and create a place to store them neatly in your kitchen. Recycle the rest — you’ll never be able to use them all.

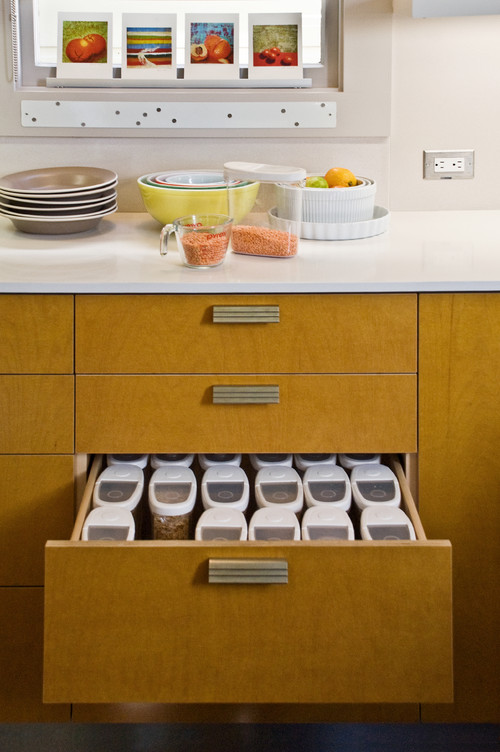
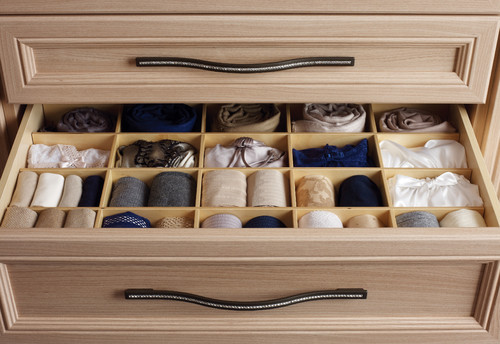
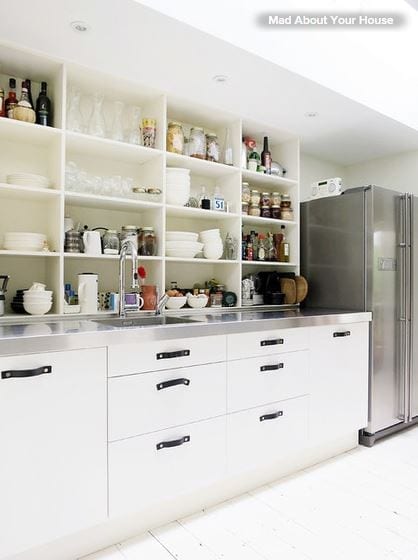
Sort your food containers. Do you find yourself overwhelmed every time you open the dreaded drawer or cupboard with plastic containers? It’s time to take them all out, give the space a good cleaning and match up all of your boxes with their lids. Throw out any that don’t have a match and, if your collection isn’t a neat set like this one, consider storing them with their lids on. It’ll keep them clean while in storage and, although they’ll take up more space, it will make them easier to use.

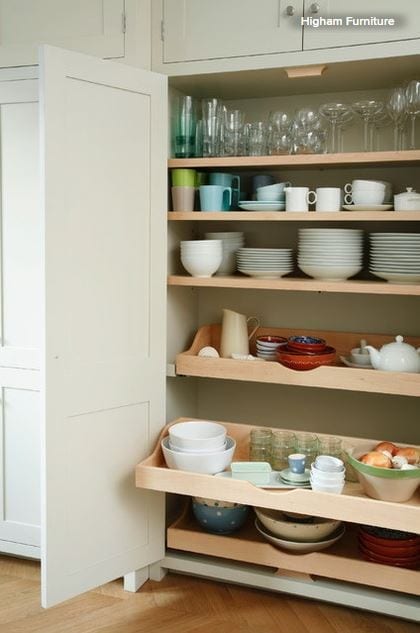
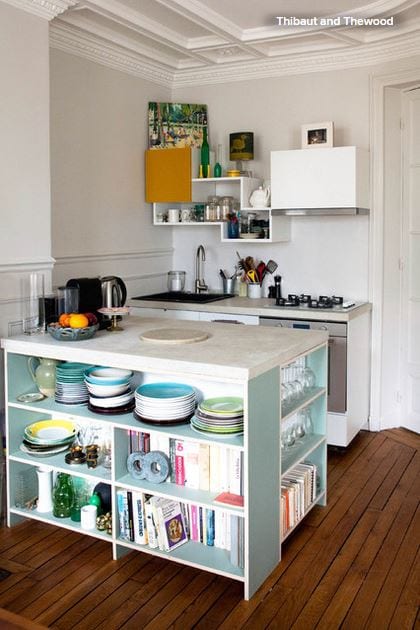
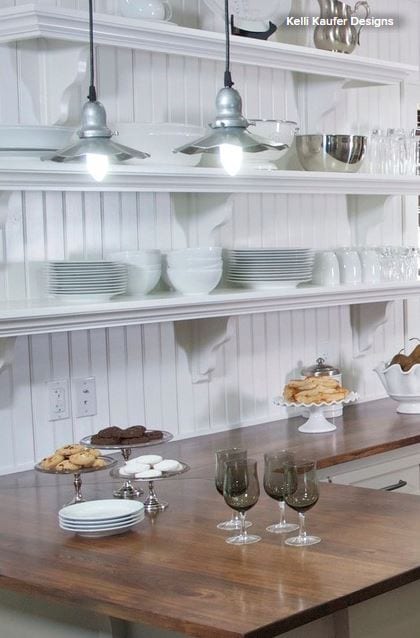
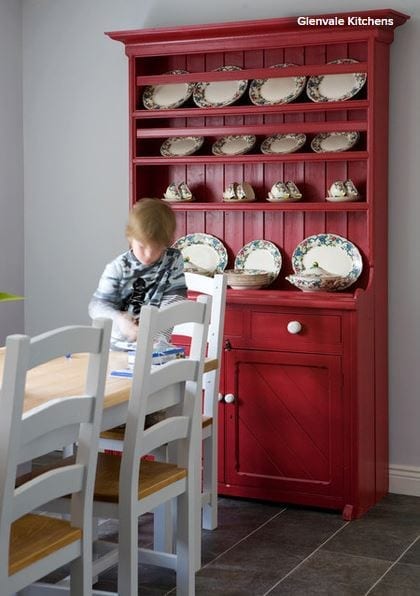
Cull your dishware. Do you have lots of dishes, including old and new sets mixed together? Figure out exactly how many dishes you need by putting away the older set away for a week and seeing how you get on. If you do just fine without it and you’re not attached, it might be time to donate it to charity.

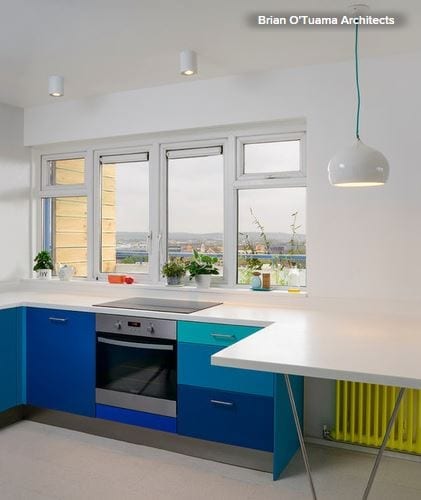
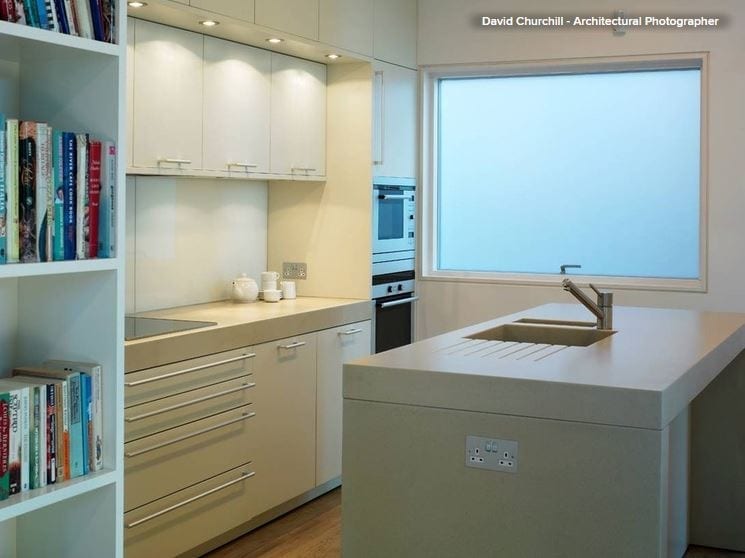
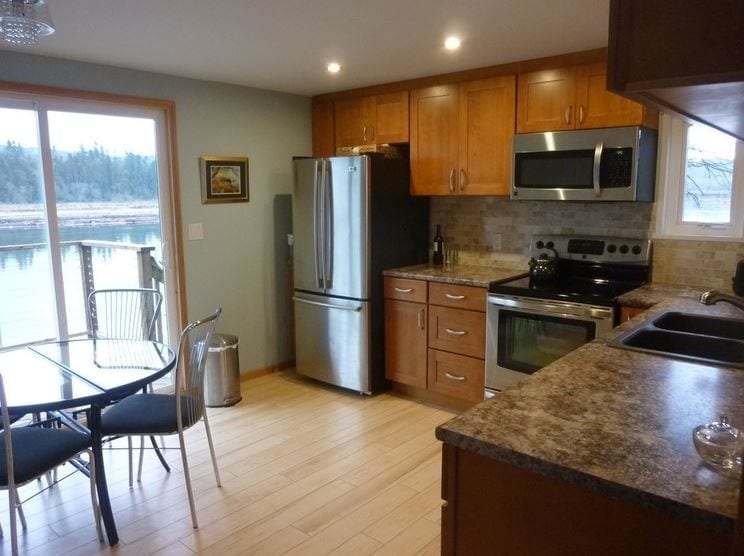
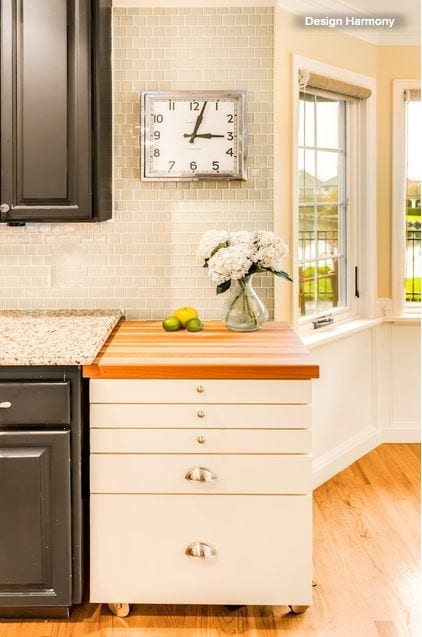
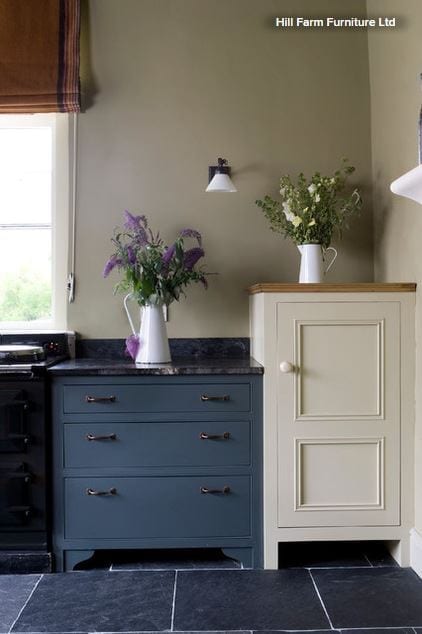
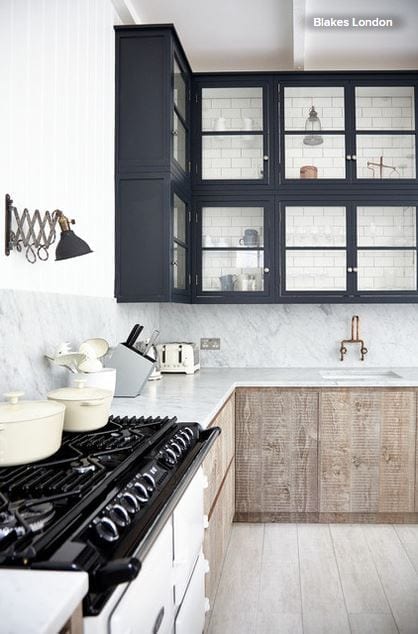
Prioritize your appliances. Kitchen appliances can be real space wasters. They’re bulky, and a lot of them get only occasional use. That’s why you want to make sure you keep only the ones you use daily, or a minimum of a few times a week, out on the countertop. If you make waffles only as a treat, pack the waffle maker away on a high shelf and take it down only on those occasions. Keeping the countertops clear is a great way to make a kitchen feel larger and less chaotic.

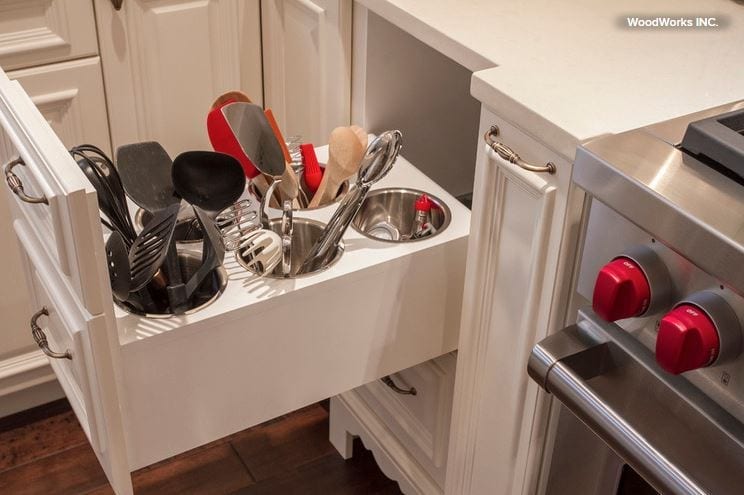
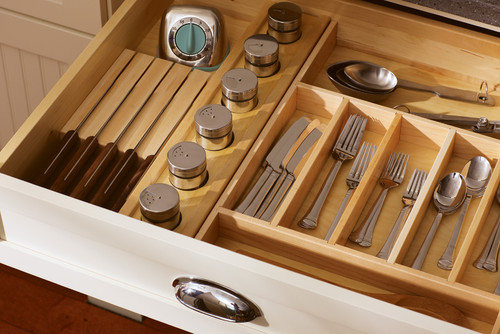
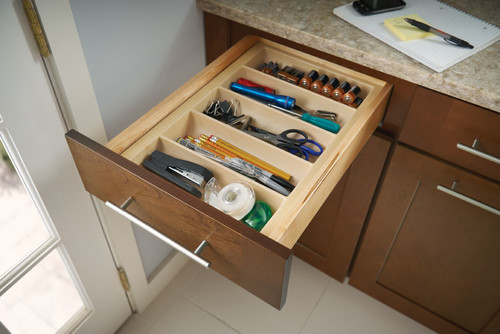
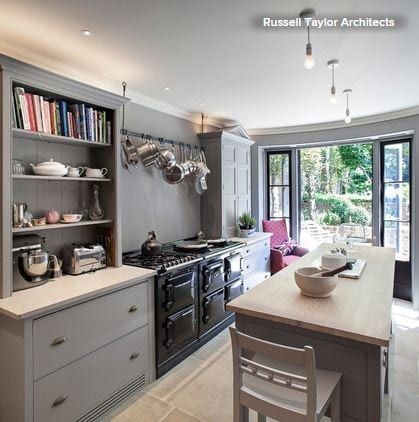
Streamline your utensils. Go through your cooking utensils and donate any you haven’t used in more than a year. Then sort them, putting like with like, and keep them easily accessible near the range. Try to find a dedicated spot for them, whether it’s a spare drawer you can neatly organize or a bit of extra countertop space for some containers.

Get your foils and wraps in order. A great idea for organizing wraps is putting them all into one drawer. But be careful — you don’t want it to become a designated drawer for “a bit of everything.” Make sure you keep the rolls tidily next to one other and, if you wish to add anything else, organize everything with a tray or container. You don’t want random objects lying around — they definitely won’t help when you’re trying to pack a sandwich in a rush.

Sort recipe books and takeout menus.Have a look through all your cookbooks and takeout menus and keep only the ones you actually use. If you haven’t cooked from a book in the past year, gift it to someone who’s looking for new inspiration. You’ll free up some space on your shelf, and the book will make someone else happy. 

If you haven’t ordered food from a certain place for a while, the same rule applies — and with so many menus available online, there’s less and less reason to clog up a shelf or drawer with paper copies.

Create a box of items you’re not sure about. If you’re not sure whether you’re ready to say goodbye to some items, put them all in a box, write the date on that box and move it to a garage or loft. If you come across the box in, say, six months, and realize you haven’t been looking for those items, it might be easier for you to let them go. And remember, by getting rid of the old, you’re actually making space for the exciting and new.

Big Ideas for Compact Kitchens

Article by: Sara Emslie

Even the smallest of kitchen spaces needs to deliver big when it comes to form and function. No matter how awkwardly shaped or compact your cooking space, design tricks can help make even tiny corners work hard and look good too. These kitchens offer ideas for getting more from less and giving a high-function space a clean, uncluttered appearance.

Use open storage as display. If your tiny kitchen is part of a larger open-plan space, consider an island with built-in open shelves. This will add storage and display space and help separate food prep, cooking and clean-up areas from those for other living functions. 

Use attractive tableware, accessories and cookbooks to create a pleasing display.

Store high (and seamlessly). A clever way to add storage in a tiny kitchen is to position it high up the wall. Installing storage above seating, such as a built-in bench, can be a particularly smart use of space. 

For a clean, contemporary feel, fit the cupboards with push latches, removing the need for a door handle and creating a seamless finish that gives the impression of more space. A ladder stored away — perhaps inside a bench seat — can be used to access high cupboards.

Custom build a pantry cupboard. Well-planned storage makes efficient use of space and can help keep your kitchen organized. Consider a custom all-in-one pantry cupboard if you’re designing a kitchen from scratch. Install custom storage baskets for shelves and rail bars and baskets for cupboard doors to make the most of the space inside. 

A cupboard pantry can be used to store everything from food to china and kitchen equipment. And when the doors are closed, it’s all neatly out of sight.

Integrate built-in appliances. Shop around for appliances that will work in compact spaces and consider integrating them into your kitchen design. The framework needed for integrated designs eats up a little more lateral space, but the result will be a neater look. 

Think laterally, too — dishwashers are available as pullout drawers and can be paired with a storage drawer with the same front for a fuss-free finish. Microwaves and ovens can be fitted into a bank of wall cupboards, freeing up counter space for other kitchen essentials.

Think industrial. Utilitarian styling is ideal for making the most of a compact kitchen. It echoes the kitchens of days gone by, and its robust aesthetic says it means business, despite being a tiny space. Look for subway tiles, industrial factory lighting and Shaker-style units that combine beauty with utility.

Squeeze in an eating space. Having a space for sitting and eating in a kitchen, no matter how small, doubles the room’s functionality, making it feel more substantial. 

A compact breakfast bar, for example, can be both a dining area and an additional work surface for food preparation. To save space, choose bar stools that can be tucked under the counter when not in use. Try giving this tiny tabletop a separate visual identity with bold accessories, such as bright artwork and standout lighting. 

A fold-out, wall-mounted table is another option for a small kitchen.

Highlight character with color. Flashes of vivid color are ideal for adding a wow factor to a tiny space. It might be small, but it can still have presence. 

Against a pure white background, neon shades really stand out, so use these to emphasize any design features that have character and style. Maximize the different sizes and configurations of drawer and cupboard fronts to create eye-catching color combinations and design appeal.

Stick to a restricted palette, though, and keep clutter stored so as not to overcrowd your little kitchen.

Go for top of the line. Being small on space doesn’t mean a kitchen can’t be big on style. Adopt a high-end approach for fixtures and hardware in an otherwise minimal space to give a compact kitchen a designer look. 

Smart handles, inset lighting, state-of-the-art integrated appliances, contemporary faucets and molded draining boards are all design features often found in larger, more expensive kitchen designs, but they can add a big style hit to a tiny kitchen too.

9 Ways to Save on Your Kitchen Remodel

Article by: Kelli Kaufer

When you’re investing in a home remodeling project, you want to make sure that the results not only please you but add value to your home and save you money. Never is that more true than in a kitchen remodel, where costs can added up so quickly that your budget can all of a sudden seem like pennies in a jar. To avoid that and keep costs in line, and yet still get the kitchen of your dreams, here are a few of my favorite ways of getting the most out of a tight budget.

1. Go with ready-to-assemble cabinets. The biggest cost in a kitchen remodel is new cabinets. The most expensive option is going custom, for which the cabinetry is designed, built and installed to specifically fit your space. Exotic woods, ornate details and period styles will add to the cost and delivery time but result in a one-of-a-kind kitchen. Custom cabinets can cost $10,000 to $60,000, as cabinets can range from $250 to $1,500 per linear foot.

If your budget doesn’t allow for custom, but you need new cabinets, ready-to-assemble (RTA) is a good option. Ready-to-assemble or semicustom cabinets can sometimes be half the cost, from around $125 to $900 per linear foot depending on the material, style and cost of installation. If you are a do-it-yourselfer, you can assemble these yourself; if not you will need to hire a contractor. Semicustom cabinets are selected from existing designs and are prefabricated offsite in standard sizes, with limited options in terms of sizing, styles, materials and finishes.

In-stock cabinets are for customers who want to grab their cabinets right off the shelf and get going. These stock cabinets come in standard sizes, shapes and colors. Since the cabinet dimensions are not based on your kitchen, space-wasting fillers may be required to make the cabinets fit. These cabinets are very affordable for remodelers on a budget. Cabinets can range from $75 to $400 per linear foot.

Keep in mind, though, that costs will vary by location.

2. Keep existing cabinets if possible. If your cabinets are good quality and you like the style, resurfacing is a great option. It’s amazing how color can transform a kitchen and a few coats of paint can give life to a once-drab space. Resurfacing and painting make for the most cost-effective option, but ensure that you take the steps needed to get a beautiful finish. 

A simple paint job might cost a few hundred dollars. But for a more extensive refacing job, $5,000 to $15,000 is likely if new veneer is added to the face of the cabinets.

3. Choose open shelving where possible.Open shelving creates interest in the space as well as saves money. Using salvaged wood or painted planks from your local hardware store for shelving is a cost-effective and functional option to display everyday dishes (items that don’t spend enough time on the shelf to accumulate dust).

Open shelving can save a few thousand dollars, but while it may be tempting to do away with fitted cabinets altogether, they’re still valuable and efficient for storage, particularly if you have a small kitchen and a lot to pack into it.

4. Consider alternative countertop materials. There is a wide range of countertops to choose from — solid surfaces, recyclable products, concrete, tile, stone and more. Granite is still a popular choice for countertops, but at $50 to $100 or more per square foot installed, it can push any budget over the top. Consider using two different surfaces instead, such as making the outside perimeter butcher block and the island granite. This can cut the cost in half.

If granite is not in the budget but you like the look of stone, consider laminate, an inexpensive alternative. The costs ranges from $8 to $20 per square foot, including installation. Laminate has come a long way with its high-definition selections and new cut-edge profiles. The new laminates look so much like stone, you could be easily fooled. 

5. Keep appliances where they are. If your plan is to get new cabinets, think about keeping your appliances where they are. Moving the mechanics and electrical for appliances can be costly, not to mention the ceiling on the floor below and the walls may need to be cut into to expose the mechanicals. These are costs that many homeowners don’t think about when planning a kitchen remodel.

Keeping the appliances where they are will save you thousands of dollars. More often than not, moving an appliance 1 foot costs as much as moving it 6 feet, depending on where the mechanicals are located.

6. Look at different options for islands. A 6-foot island with new cabinets can run $800 and up. Instead of using cabinets for your kitchen island, think of repurposing a piece of furniture. An old table or a dresser is a great alternative to bring unique character into the space. Keep an eye on Craigslist, the Houzz Shop, salvage stores, estate sales and garage sales. Depending on how resourceful you are, you can save yourself hundreds of dollars.

Tip: When looking for a piece, make sure it is countertop height (36 inches).

7. Opt for a cutout rather than removing a wall. Many homeowners want to open the space between the kitchen and their family room to create an open floor plan. When removing a wall there are many things to consider. Is it load bearing? Does it have venting, water pipes or electrical running through it, which will need to be rerouted? After removing a wall, the ceiling, other walls and floor may need to be cut into and repaired.

A less expensive option to consider is a cutout. Not only does it open a room, but it can provide extra countertop space and an area for additional seating. You will still need to check for mechanics and plumbing, but the floor and ceiling will not need to be repaired, which will save you money.

8. Try track lighting instead of recessed lighting. Adding recessed lighting can become a bigger project than planned. Holes need to be cut into the ceiling, electrical wiring needs to be added, and there may be hidden costs in repairing the ceiling. The overall cost for a single recessed light is $100 to $150, including the costs for materials and an electrician. This can add up quickly.

To keep costs down, think about track lighting. There are many styles, shapes and finishes. They give off plenty of light for tasks in the kitchen and, when placed on a dimmer, give off a nice ambient light.

Got a Disastrously Messy Area? Try Triage

Article by: Alison Hodgson

For those of us who are Not Naturally Organized, running a household can be overwhelming. “I don’t even know where to begin” is a common lament. We look at our Naturally Organized family members and friends and wonder how they do it. How do they stay on top of everything? 

The short (and terrible) answer is, they never allow things to get out of hand. 

“Well, that’s not helpful,” you may be thinking. What if — asking for a friend — your house is completely out of hand and has been for some time? Where do you even start?

You start with a system designed especially for disasters: triage.

In medical terms, triage is the process of sorting victims of a battle or disaster into three categories:

  • Those who will probably live whether or not they receive care
  • Those who will probably die whether or not they receive care
  • Those whose lives may be saved by immediate care

But we were talking about houses! What does triage have to do with cleaning?

Consider a personal example. My home (which is not the one pictured here) has an open-concept plan. The front door opens into a small entry, and from there you can see it all: kitchen to the left, living room to the right and a long harvest table straight ahead. 

I told you before how I ignored one end of our dining room table while I focused on keeping our kitchen island clear. The north end of our table was dead to me while I worked to save our island and, really, our entire kitchen. The living room was never in any danger; I had that well in hand from the very beginning. 

Triage worked. I focused my energy on keeping the kitchen counters clean and cleared and allowed my family’s mess to accumulate on the table. Once maintaining the kitchen became habitual, I turned my attention to the table. We’re still building our housekeeping muscle there, but more often than not it’s clear.

In my kitchen I prioritized using the triage system: Everything on the outside (counters, sink, cabinets, appliances) is kept neat and clean, but a few of my cabinets aren’t well organized. My baking cupboard is a jumble, and so is one of the cabinets where I store food storage containers. For the first I need to buy containers to decant my dried goods, and for the other, adding another shelf would probably solve the problem. For now these cabinets are in the first category of triage: They’ll live. I’ll get to them later. 

If my desk met this desk at a party and tried to strike up a conversation based on commonalities, “I too am a wooden and horizontal surface” is pretty much all it would have to say.

On the other end of the spectrum is my desk. I have a small study just off the living room, accessible by French doors. There’s just enough room for a daybed, bookshelves and my desk. I keep the daybed neatly made, and it’s a favorite spot where my kids read. The desk is a hellhole, pure and simple, and forever it’s been in the most dire category of triage: as good as dead. I have been willing to shove piles of paper around until I noticed that my Naturally Organized husband (who often brings work home on the weekends) always sets up at our dining room table. I asked him if he would like to work on the desk in the study if I cleared it up, and he said yes, so the desk is getting moved up to the life-saving category.

If you would like to try triage for your own disaster relief, here are a few things to consider: 

Start with what’s visible. This is obvious, but it can go against the instincts of those of us who are Not Naturally Organized. How many times have you said, “We’re getting this place all cleaned up!” and then dumped out drawers, taken everything out of cupboards scrubbed them and then collapsed half-way through sorting everything and ended up with an even bigger mess? Yeah, me too. We tend to swing between perfection and squalor. 

If you’re cleaning the bathroom, just clean it. Scrub the sinks, tub and toilet; sweep the floor; wash the mirror; but do not clean out the cabinet under the sink. When cleaning has become habitual, then you can go for it.

Lower your standards. We love our pretty pictures, and there is a tender ache reserved for beautifully organized spaces. Show me a pantry with containers neatly labeled, and you have my heart. 

The day my house burned down, seemingly out of nowhere my arm shot in the air, and I shouted, “We’re getting a walk-in pantry!” Everyone attributed that to shock, but I was absolutely clear, and today I do have a walk-in pantry with shelves floor to ceiling. I love it. Is it swoonworthy? No. Does it store a ton of food, extra serving pieces, cleaning supplies and small appliances? Definitely, and it’s organized enough.

Don’t trust your instincts. Those of us who are Not Naturally Organized need to check our impulses when we decide to clean and organize. What we’re itching to do is rarely what we ought to do. For example, we have built-in bookcases flanking our fireplace. When we moved a year after the fire, the books I replaced numbered in the hundreds and not the thousands I once owned. As I continued to buy books, I simply set them on the shelves without a lot of organization, and that’s been fine. They’re routinely dusted and pulled forward so they’re always neat, and yet I have been longing to empty all the shelves and reorganize everything. 

This is a little tricky because this needs to be done, but not today. Before I tear into that project, I need to install some shelves in the study and really, of all the things I have going on, it’s a lower priority. My books are totally in category one. They’ll live without rearranging.

See a Complete Kitchen Remodel for $11,000

Article by: Mitchell Parker

Norma Rushton and her partner, Randy Dyke, really wanted a waterfront property in the Vancouver area but were quickly priced out of most places. When they lucked into a mobile home on the Stave River about an hour east of downtown Vancouver, they were thrilled at the great location right on the water at a good price. But that’s where their excitement ended. The home was in bad shape and needed major repairs.

BEFORE: Recently they started adding more storage and function to the original kitchen (shown here), which had been picked apart since it was built in 1970. For example, the backless cabinets had been cut up by previous owners to make room for a larger refrigerator and stove, leaving little storage. “The cabinets were starting to get useless,” Rushton says.

AFTER: Determined, Rushton, a high school theater teacher, spearheaded a complete gut and remodel, choosing all the materials, fixtures and appliances, while Dyke, a retired water taxi driver, did a lot of the work, including installing the drywall, molding, trim, backsplash (twice) and new window and patching the floor. The couple painted everything together. Professionals installed the cabinets and countertops. 

But best of all, the couple got discounted help from their contractor neighbor, Milan Vaclavik of Milan’s Home Renos, who took care of the plumbing, framing and electrical work at a friendly rate. 

Though the homeowners considered getting granite countertops, they ended up going with Formica instead. “Granite is too hard of a surface,” Rushton says. “I wanted something a little more forgiving.”

BEFORE: A bank of upper cabinets and a floor-to-ceiling cabinet made things a bit claustrophobic and blocked views between the kitchen and living room. “I wanted to be able to sit in the living room and see out the windows of the kitchen to the water,” Rushton says.

AFTER: They reduced the size of the upper cabinets and did away with the tall cabinet altogether, opening up the sightline between the two spaces. “Now you can actually chat with whoever’s in the kitchen,” Rushton says. 

The couple had a couple of remodeling disasters along the way. Rushton had found solid oak cabinets at a discounted price that she really liked, but when they arrived, they were the wrong model. With the renovation already under way, she had to make a tough decision and went with the different cabinets, which ended up throwing off all their measurements. 

The backsplash was another compromise. The first one that Rushton put up was “a horrible mistake,” she says. She had found peachy-taupey-colored porcelain tiles that looked great lying on the counter. But as soon as she installed them vertically on the wall, the angle of the light turned them green. A local tile guy informed her that artificial colors tend to do that and suggested a natural stone product instead. “It was either I live with it or let the money go,” she says. “I let it go and went and got marble tile instead.”

BEFORE: The washer and dryer were shoved into a storage closet in the kitchen, while an old cabinet did the work of storing bowls, platters and mail. 

AFTER: The homeowners replaced them with a stacking washer and dryer unit, an Ikea unit of sliding drawers for a pantry and a place for the vacuum cleaner. “It was all about getting what I need for putting things away,” Rushton says.

Sliding doors nicely seal off the laundry and pantry area, freeing up clutter near the pristine river view. 

Rushton says they budgeted about U.S.$8,000 but the actual cost came in at just over $11,000. 

Here’s some of the breakdown: 

Cabinets: $2,300
Cabinet handles: $170
Countertops: $675
Closet doors: $250
Washer, dryer, microwave: $2,000

Lighting: $335
New flooring (closet): $85
Wood: $85
Paint: $170
Backsplash: $335 
Sink: $250
Window: $60
Labor: $1,000

Ikea shelving: $300
Drywall, insulation, plumbing fixtures, electrical wiring, switches, plugs, power tools, screws and brackets, taxes and other miscellaneous expenses: around $3,200

10 Design Moves From Tricked-Out Bathrooms

Article by: Natasha Saroca

Seemingly standard cupboards with smart, unique or high-tech elements and accessories behind their doors can make a world of difference when it comes to making a bath zone more organized and user friendly.Cases in point: The 10 bathroom cabinet ideas you’ll find here. While they may look fairly basic upon first glance, take a closer look and you’ll find that the beauty (and benefits) of these bathroom storage units go well beyond the surface.

Read more

Organizing Secrets: It’s the Little Things

Article by: Laura Gaskill [Houzz]

Imagine walking into someone’s home, opening the junk drawer and seeing not a pile of junk, but neat little compartments holding necessary items. A pantry where the jars and cans are lined up like soldiers, shelves labeled and not even close to overflowing; a sock drawer where every sock has a mate. 

For a home to be kept thoroughly organized, you have to be mindful of the smallest habits, the tiniest motions and details — otherwise things rapidly descend into chaos. But is all that mindfulness possible for a mere mortal? I am beginning to think that what separates the truly organized from the rest of us is how the little things are handled. What if, by starting with a commitment to keep one small area of your house ultra tidy, you were able to create a domino effect that eventually affects every room? 

Here we’ll take a look at eight small areas that can be problems and ways to transform them into beacons of an organized life. 

The bedside table. 

I admit it; I have been known to carry huge stacks of books, magazines and notebooks — more than any human could possibly read in a week, let alone in one sitting — to bed with me. 

The teetering mass flows over the bedside table onto the floor, tumbles under the bed and inevitably spreads onto the adjacent radiator cover. And really, that’s fine … for a short time. But if you have a similar problem, and the mess stays (or grows) all week long, it may be time for an intervention. 

I plan to start by adding a small vase of fresh flowers, a candle and a small piece of art beside the bed. Having something lovely to wake up to seems like a positive motivation to take that extra minute in the evening, before shutting off the light, to put the books, tablet or magazines away. This seems like such an easy fix, I may start with this as my first new habit.

The entry. 

The main problem here tends to be the habit of leaving lots of things out because you may want them at some point during the week. 

To transform this area, start thinking about only the next day. Will you wear those boots again tomorrow? What about the jacket, scarf and bag? If not, put them away in a main closet instead of letting them pile up by the front door. 

Set out just what you need, and not only will your entry look neater, but you’ll get out the door more quickly and easily in the morning.

The utensil drawer. 

We all have that one main kitchen drawer that houses utensils — no problem there. But it isn’t just utensils, it it? It also likely holds a random assortment of cooking tools, cookie cutters, various thermometers, broken chopsticks and a few stray rubber bands … at least mine does. 

The problem here, I think, is that the utensils don’t quite fill the drawer completely, which leaves ample room for marauders like leftover skewers from the barbecue last July. I suggest we start thinking of this drawer as the kitchen workhorse drawer: Let it contain your everyday flatware, plus any other small tools you reach for constantly (measuring cups and spoons, an extra timer), and that’s it.

The pantry. 

Containers are a problem in the pantry— they look messy, and the jumble of sizes and shapes makes it hard to find things. 

Decanting the things you buy constantly into airtight containers is definitely something a highly organized person would do. Don’t, however, fall into the slightly less organized person’s trap of buying all of those special containers, decanting everything into them one time and then continuing to buy regular packages and shoving them in on top of the pretty ones, which then tumble over, completely ignored and neglected.

I suggest starting instead by making it a routine to go through the pantry every time you go to the market. Consolidate containers, clear out old stuff and wipe down the shelves. Add a few nice wire baskets if you want to corral wayward boxed goods. 

And if you do want to upgrade to pretty matching containers, remember to label their contents.

The junk drawer. Let’s begin by not calling this the junk drawer  call it the “really useful stuff” drawer instead. Batteries, scissors, stamps … this is stuff you need! No actual junk belongs in there. If there is any junk, get it out. If it’s still crammed too full, you probably have some not-so-useful stuff in there, like old birthday cards and that dead cell phone you’ve been meaning to take to the e-waste center. Get that out, too. Now add neat little dividers and give yourself a great big pat on the back.

The bathroom sink. Clutter problems in this area tend to come from a combination of a) being short on time in the mornings, and b) having too many products. Also, it may be necessary to face the fact that you just do not like getting things in and out of a medicine cabinet. 

Try keeping your daily essential toiletries in one or two nice-looking baskets, lidded or not, set atop the sink or toilet. Should you buy another toiletry product that doesn’t fit in your allotted bins, get rid of something else. 

As for time in the mornings, if you make it a habit to put everything back in its place when you are done using it, your getting-ready area will be neat as a pin the next morning, actually making it quicker to get out the door.

The sock drawer. What is it about socks, for heaven’s sake? I’ve given up on always finding every sock’s mate, but I have committed to giving each lone sock an ultimatum: lone socks no longer live in my drawer. They are immediately booted back to the laundry room, where they will remain until another cycle of wash has gone through. If no mate has been found by that time, it goes in the trash. 

This works amazingly well, and I’ve found that my family has lost very few socks since putting this system in place. To take it to the next level, you will need some sort of drawer dividers to give each pair of socks and tights their own cozy little home. I think just peeking into a drawer this organized would make me feel more positive about life in general.

The coffee table. The coffee table was never much of a problem in my house until we had a child. Now we rarely see the top of it. It does seem unnecessary to get too regimented about keeping surfaces perfectly cleared throughout the day, but a once- or twice-daily clearing of the decks can help keep this area neat. Having a nice tray to place on top can help give you something to aspire to — knowing your coffee table has the potential to look cute may be enough motivation to get you to keep it that way.

Read more from Houzz: The 5 Decisions That Can Lead to Clutter

Hidden Charging Cabinet Juices Family’s Electronics

Article by: Becky Harris

“Everything tends to wind up on the kitchen counters,” says interior designer Harmony Weihs. While working on a breakfast nook in Jeff and Amy Miller’s Mercer Island, Washington, kitchen, she couldn’t help but notice all of the phones, tablets and laptops that had overtaken this couple’s kitchen counters. “They had wires everywhere, even dragged across a gas range,” Weihs says. “I said, ‘Yeah … so … this is a safety hazard!’” In addition to safety concerns and keeping the electronics sheltered from spills and grease, the designer wanted to help the couple free up their cooking and prep space. She designed a freestanding cabinet with built-in power strips that not only cleared up their countertop space but also added to it.

Photos by Holland Photography

“This is a very simple piece. It’s so function based,” says Weihs, of Design Harmony. The freestanding cabinet sits atop 3-inch stainless steel casters so it can be moved anywhere. If the couple’s needs should change or they ever move, it can roll right into a home office, a bedroom or even a closet. 

However, knowing the exact place where it would fit, Weihs designated a 35-inch height, so that the top is tucked beneath the granite kitchen countertop rather than butting up against it. The cabinet has a 1¾-inch functional beech butcher block top, so it doubles as extra prep and chopping space. Matt Larson of Cabinet Connection crafted the cabinet.

The cabinet also is tucked between the kitchen and the breakfast nook. It is crafted of a paint-grade maple and was lacquered to match the millwork in this area. 

Dedicated tablet and laptop drawers make the most of the space. The top three drawers are 1½ inches deep to accommodate laptops and their plugs. This dictated 3-inch-high drawer faces. Each of the top three drawers has a built-in power strip in the back. Only one cord comes out of the back of the cabinet to plug into an outlet.

“Technology and the sizes of these items are always changing, so I wanted to keep the drawers simple and versatile,” the designer says. The drawers do not have any special compartments inside. There’s room to stack two tablets. 

The bottom two drawers tend to corral children’s paperwork, homework, mail — the other things that would otherwise wind up cluttering up the countertops. “Anytime you have a place to house something, you will eventually wind up putting it there,” Weihs says. Even when the electronics are not charging, the family stashes them out of the way in the cabinet.

Bathroom Workbook: Layer on the Texture for High Bath Style

Bathroom Design Photo

Article by: Shana Ecker

I once read that the average American spends almost three full years of his or her life in the bathroom. If that’s true, perhaps we should consider making this space a little more worthy of our time. Bathrooms can often be sterile and cold, with slick and shiny surfaces. But just as with any other room in your home, adding texture to your bathroom can make it vibrant and welcoming. With gorgeous natural stones, plumbing fittings with intricate details and textural linens, wall treatments and more, there are endless ways to give your bathroom depth and personality. But beware: If you get inspired by the stylish little spaces below, you may find yourself spending a few more years in the bathroom.

Read more

9 Ways to Spice Up Your Kitchen Cabinetry

Article by: Jo Leevers

Freestanding cupboards, mix-and-match colors, contrasting textures, individual drawer pulls — kitchens can be as creative as their owners. If sleek, clean-cut units don’t get you excited, take inspiration from these nine ways to get a more varied look in the kitchen.


SpiceUpCabinetry1.JPG

1. Mix cabinet styles. This kitchen’s cabinets are all the same trendy gray, but they sidestep predictable symmetry because two pieces are different styles. They work together, but their drawers have different depths and storage options. A rail for pots and pans creates more variety.


SpiceUpCabinetry2.JPG

2. Feature a key piece. To keep things interesting in a kitchen with matching cabinets, add a standout storage unit. It could be a plate rack or a bright or weathered dresser. It will break up the rigidity of a single-finish kitchen and let your personality shine through.


SpiceUpCabinetry3.JPG

3. Work in an island. For impact in a large kitchen, an island needs to be a “hero” piece that can carry the space. This weathered central island doesn’t conform to any norms. Along with the industrial storage on wheels, it adds just the right amount of character.


SpiceUpCabinetry4.JPG

4. Try an urban loft style. A strong dose of industrial style livens up this slim kitchen. Wood, metal, gray paint and ceramic surfaces mix easily, thanks to similar tones. Then there are the contrasts: Bare bricks are mirrored by glossy metro tiles, waist-level units by a taller cabinet. Matching kitchen pieces in this space could have looked too uniform; these look freed up and innovative.


SpiceUpCabinetry5.JPG

5. Go two-tone. A blend of two shades — palest green and natural bare timber — brings a breath of fresh air to this kitchen. Tongue and groove cabinets and two types of handles are extra custom twists.


SpiceUpCabinetry6.JPG

6. Compare and contrast. A creative kitchen doesn’t have to be off-the-charts unusual. Simply combining two tones, two surfaces and two heights does the job. Carefully crafted finishes give the space a quality feel.


SpiceUpCabinetry7.JPG

7. Cast it in monochromes. The dark-on-light color scheme here adds visual interest, and the contrast of raw, waxy timber and smooth marble creates a look that’s unique.


SpiceUpCabinetry8.JPG

8. Add your own handles. This kitchen works its magic with off-the-shelf Ikea units with tactile leather handles. They handles are eye catching and pleasant to hold — significant, when you consider how often they’ll be used. Open shelving on top combines with a stainless steel countertop that wouldn’t be out of place in a chef’s kitchen.


SpiceUpCabinetry9.JPG

9. Pare it back. This converted industrial warehouse is a dramatic space, so the designer wisely didn’t try to make the kitchen steal the show. Zinc-colored doors inside pale frames, metallic tones and a pared-back 1960s vibe for the furnishings help this kitchen work in its setting — proof that statements don’t always have to be shouts.