FREE DESIGNS AND ESTIMATES

How to Pick the Right Floor for Your Garden Room

Article By: Billy Goodnick

Every room needs a floor, and outdoor garden rooms are no exception. Paths, decks, patios, overlooks, trash can storage pads, lawns, ground cover plantings … they’re all floors. If you can walk on it, store something on it or roll around on it, I call it a floor. 

The simplest, least expensive floor material is the dirt that comes with a property. Unfortunately, the problem with an all-dirt garden floor is, well, it’s dirty, even downright muddy when wet. It does have one redeeming trait: It’s dirt cheap. But it’s highly likely that you’ll have to choose something other than dirt for most of your garden. How to decide, given all the options? As with any design decision I make, I look for practicality, beauty and sustainability. 

As the saying goes, form follows function. So first consider how the surface will be used and what’s the most appropriate material to support that use. 


Loose materials for more casual spaces. I consider loose materials like crushed rock, graveland shale (also bark mulch) when I want an informal garden pathway or lounging area. They usually cost less and require less labor than other materials, and you don’t have to be a master builder to make them look good. But because these materials can be movable after placement, you’ll need to do some maintenance to keep them from wandering off.

Hard materials for more formal areas. On the other hand, hard materials such asflagstone, brick, tile, concrete and lumber lend themselves to more “civilized” applications like patios, decks and entryways. These generally withstand a lot of traffic and can easily be cleaned with a broom, a washing down (preferably not in water-scarce climates) or an electric blower, if that’s your tool of choice.

Visual appeal. But we seek more than just utility. The first thing we notice in a garden is its visual appeal and sense of style — not how easily ketchup stains can be vanquished. Take cues from the materials and finishes of your house as well as influences from the natural environment.

Environmental impact. Think about where the materials originated, whether they come from recycled sources and whether they are permeable. If you don’t know, ask.

Cost. For most of us, cost is the elephant in the room. The best advice I can offer here is to notbe penny wise and pound foolish. I’ve found time and again that a bit more expense (sometimes a lot) on the front end assures that you’ve selected the best floor for the job, the one least likely to come back and bite you later. 

7 Materials for Outdoor Floors — and How to Use Them


Stone. Stone is enduring and elemental, taking many forms. Where a naturalistic style is most appropriate, irregular slabs of flagstone edged with dainty ground covers look right at home. In formal dining terraces, geometric shapes solidly mortared to a slab are a practical solution, assuring that the stones stay in place and provide a level surface. 

When it comes to selecting the right stone for your project, consider not only the color, but also its surface texture. Too smooth and it might present a slip hazard; too irregular and you’ll have a hard time leveling a table (or walking in 6-inch stiletto heels — not a problem for me).

Stability and safety are paramount concerns, so be sure to set the stepping stones on a well-compacted base with some of their mass underground to keep them from tilting and moving around. Check that pathway stones are large enough and ergonomically spaced so you can land on them without having to delicately dance from one to the next.

The color of the stone should harmonize with the exterior of your home, other garden hardscaping and natural elements. You’ll find a wide range, from nearly black to gray to white, and browns including rusty oxide-infused shades.

Brick. Brick is another durable flooring material that can express the aura of a classic garden. If the visible foundation of your house is brick, use the same brick as a walkway border to bind the house and the garden into a coherent composition. Or you can unleash your artsy, bohemian style by creating random patterns and infusing the design with random sprinklings of other materials, like stone or decorative tiles.

If you’re the one responsible for rolling the trash cans from the side yard to the curb every Thursday evening, you’ll be happy you passed on a pea gravel path and went with a continuous ribbon of mortared brick.

The color palette for brick requires additional design decisions; colors include a range of nearly black through gray, brown, red and some yellowish tints. Although individual bricks are rectangular, there are endless patterns to experiment with, including traditional running bond, herringbone, basket weave, radial spokes, gentle curves and whimsical layouts that look like someone pounded down one too many beers at lunch.


In formal situations brick is laid on a compacted bed of masonry sand or mortared onto a solid slab of concrete. This approach ensures that the brick will not subside or shift, a critical detail under tables and chairs. For paths the standard approach is to set the outer edges of brick in a solid concrete base, pave the inner surface with brick set on well-compacted mason’s sand and then brush more sand into the joints to lock them into place.

For shady, moist areas where moss can cause slip-and-fall accidents, be vigilant about choosing materials, like brick, that can withstand a strong blast from a hose or deep scrubbing with a coarse broom.

Caution: Where the ground freezes, loosely set brick can heave, making the path uneven and possibly dangerous. And steer clear of mature trees with surface roots.


Tile. Tile, like brick, offers a broad palette of styles, ranging from crisp, contemporary forms to old-world Mediterranean. Because tile is thin and unable to bear much weight on its own, it is always mortared to a solid foundation. Be careful to avoid slick surfaces, since they can become dangerously slippery when wet.


Concrete. Square foot for square foot, concrete is a smart long-term investment. It starts off in a semiliquid state, meaning it can assume any shape. If plain old sidewalk gray isn’t your style, concrete can be textured and colored to look like stone, seeded with pebbles, pocked with rock salt or stained with intense pigments to create bold designs. One problem with traditional concrete, though, is it’s impermeable; it sheds water rather than allowing it to percolate into the soil where it can do some good.

Modern Landscape by Other Metro Landscape Architects & Designers Evergreen Consulting / 4EGC 

Decking. A contractor friend of mine calls wood decks “dry rot in slow motion.” He’s pretty spot-on. Traditional wood decks, regardless of how much waterproofing sealant you apply each year, will eventually succumb to nature’s forces (or termites). 

But if you’ve got a sloping property, need a level surface for outdoor entertaining and want to avoid the expense and disruption of building retaining walls, decking is the way to go. Since you’re not likely to add on to the deck once it’s built, now is the time to decide how it will be used and make space for all the furnishings you want. 

To avoid the effects of weathering and decay, consider building with manufactured plastic lumber made from recycled bottles, plastic bags and wood scraps. It comes in standard lumber sizes, connects with screws and doesn’t rot, making it ideal for rooftop getaways. 

Traditional Landscape by San Francisco Landscape Contractors Frank & Grossman Landscape Contractors, Inc.


Loose materials.Although they might seem like a low-budget cop-out,loose materials like gravel, crushed rock, compacted shale and decomposed granite can be an inexpensive yet elegant choice, especially whenedged by a richer material, like stone or brick. Advantages include permeability, low cost and ease of installation.

However, these materials are more likely to be displaced, especially if water passes over them. And gritty, sandy materials are the last things you want to track onto your hardwood entryway. One of my favorite design treatments for upgrading crushed rock paths uses enriched thresholds and intersections of stone.


Plants. In addition to inert materials, there’s all the living stuff. Once again, your choice should be guided by the intended use: Active recreation, for example, calls for the evenly mowed surface of a tended lawn.

Another consideration is how “at home” a lawn is in your climate. Where rainfall is dependable and plentiful, you needn’t be too concerned about using potable water for irrigation. And there are lots of organic approaches to lawn care, so you can avoid the old-school arsenal of chemical sprays and treatments that can be detrimental to beneficial insects, wildlife and groundwater. But in arid climates, more and more people are going lawnless to help conserve water as well as lower their dependence on fossil fuels for mowing and edging.


Meadows, with their tussled, just-got-out-of-bed appearance, are ideal for creating a rustic feeling — and can attract a diversity of beneficial insects and other cool things for kids to discover. You can walk through them or mow romantic, sinuous paths to explore. If you don’t need to wander through the space, any combination of ankle-high perennials and ground covers can provide color and an open expanse that will carry the eye across the garden.

Greenhouses | A History

Outdoor living spaces are the top of mind as Spring continues to be sprung. The same goes for gardens, whether you’re starting one, or continuing to care for one. An element that takes in all of these is the greenhouse. So, in celebration of the greenhouse, here’s guest writer (for Build Direct Blog) Amy Moczynski to outline the history and function of greenhouse. 

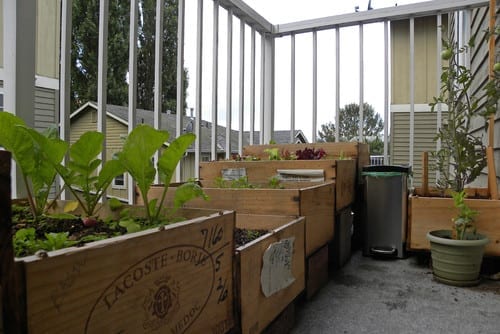
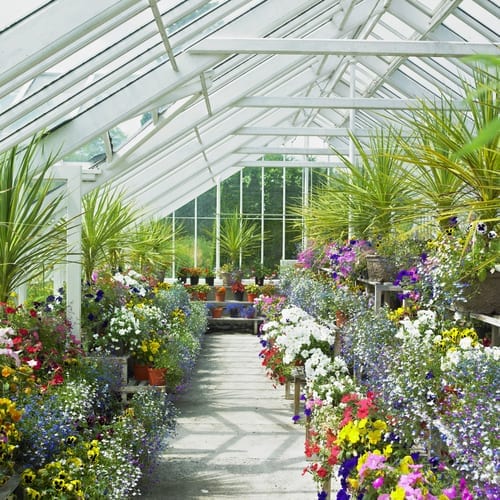
Photo: Greenhouse via Build Direct Blog

Now that you’ve filed your taxes and the warmer weather is creeping its way into your neighborhood, you might be thinking of home improvements that will make your yard a top-notch outdoor destination. If you spend a lot of time out in your flowerbeds, or are looking to grow more exotic and warm climate plants for the first time, that tax refund might be better spent on a greenhouse. 

Early History of the Greenhouse

Greenhouses date back to about 30 A.D. when Roman emperor Tiberius built one of the earliest known greenhouses out of tiny translucent sheets of mica (glass had not yet been invented). The first practical greenhouse was designed by French botanist Jules Charles in 1599 and they gained popularity in the 17th century England. During this time period, greenhouses were seen more as a status symbol than something to use for practical growing purposes. Elite “orangeries” as they were called were constructed as an expansion of the home with a solid roof, glass walls and even a stove for heating. These buildings were status symbols and often used for entertaining.

America’s first recorded greenhouse was built by Andrew Faneuil in 1737. Faneuiil was a wealthy Bostonian merchant who used his greenhouse primarily to grow fruit. The greenhouse gained popularity slowly, and greenhouses were built primarily for the wealthy. George Washington even had a greenhouse at Mt. Vernon so he could grow and serve pineapples to his house guests.

Greenhouses and the Industrial Revolution

By 1825, greenhouses became wildly popular and their style began evolving. Many used furnaces to heat the air and some were built primarily for the wealthy by south-facing windows, a design concept that is still used today. In the 20th and 21st centuries, aluminum, fiberglass, polyethylene and PCP building materials have made greenhouses more cost effective and practical than greenhouses of the past, making them available to more than just elite homeowners.

In addition to the different types of materials used to construct greenhouses, they come in several styles. While most greenhouses are freestanding, there are attached greenhouses that provide gardeners with easy access to water and electricity. The A-frame greenhouse is great for regions that get a lot of snow, but depending on the size of the greenhouse, there can be limited head room and ventilation.

Styles of Greenhouses

While more decorative than an A-frame greenhouse, the gothic arch greenhouse is more challenging to construct. However, this style of greenhouse is good for regions that receive a lot of precipitation throughout the year as the sloped roof prevents rain or snow from accumulating on the roof. The span roof greenhouse is probably the most widely used greenhouse style and can be considered the most practical. The layout offers room for the gardener, and most varieties are large enough to fit a wheelbarrow, making transporting supplies easier.

A difference in styles isn’t the only thing that can make one greenhouse stand out from the others. Greenhouses can be made from a variety of different materials, including glass and plastics. The frame of the greenhouse can also be constructed from wood, plastic, aluminum or steel, letting homeowners mix and match the materials used to construct their greenhouse. More important than the material used to construct the frame is what a homeowner uses to cover their greenhouse.

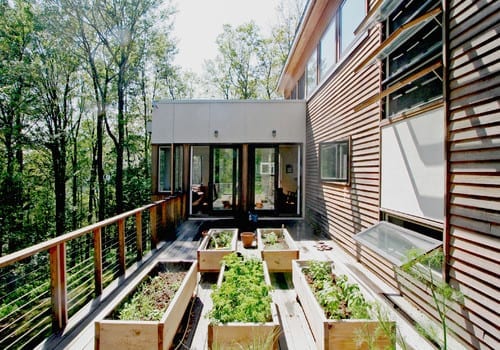
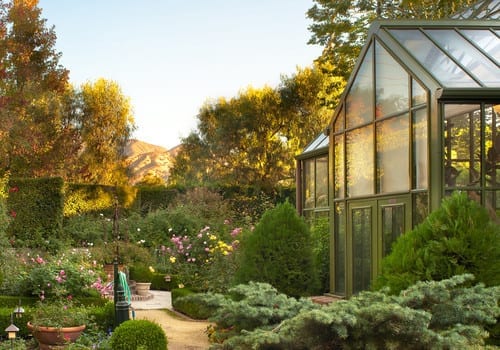
Photo: Traditional Landscape by Pasadena Design-build HartmanBaldwin via Build Direct Blog 

Materials Used to Build Greenhouses

The material used to cover a greenhouse will dictate how much light is allowed in, as well as how much heat can escape. Glass is the traditional covering for a greenhouse, mostly due to its strength and ability to retain heat better than plastic. Clear glass allows plenty of light to enter into the greenhouse, but frosted panels can help break up the light rays to allow the light to more evenly distribute among the plants. 

An alternative to glass as a greenhouse covering is plastic, usually either film plastic or rigid plastic. Rigid plastic coverings, which can be fiberglass, acrylic, or polycarbonate, are shatterproof or shatter resistant depending on the type of material chosen. They also retain heat well and allow light to pass through the materials. One advantage over glass is during the warmer months, a rigid plastic greenhouse requires less cooling than a glass greenhouse of the same size. 

Film glass coverings offer a tremendous advantage over glass coverings because they are only a fraction of the cost. While they only last typically three to five years, film glass coverings can heat as effectively as glass. Film plastics also offer an additive that lets condensation run down the covering material as opposed to dripping on the plants in the greenhouse, which can help prevent plants from being exposed to contaminated water.

Connected to a Proud Tradition

So when considering new additions for your backyard, think about investing in a greenhouse to connect your home to a long line of luxury and opulence. In addition to creating a shared connection with wealthy and noble figures in history, greenhouses also provide the opportunity to create a great exotic growing environment. They can allow you to grow varieties of plants that aren’t native to your hometown and provide a year-round growing environment. Plus, they can add a look of opulence to your traditional backyard. 


(You are reading an article originally posted on Build Direct Blog)

Garden Design for Small Spaces

By now, most people in the northern hemisphere are digging in their yards to make their environments beautiful for summer. Garden design is challenging whether you have an acre or a few hundred square feet, but smaller spaces seem to be especially so. It’s easy to get intimidated and overwhelmed with choices when you’re a new gardener.

The very first thing to think about is what you want your garden to do. Is it an outdoor living area for entertaining or relaxing? Do you want an outdoor kitchen? Will the yard produce food or do you just want ornamentals? How much maintenance can you put in each week? Do you need privacy? Once you have a purpose, you can begin to fill in the blanks with details.

Photo: via Build Direct Blog

Tailor Your Garden to Your Outdoor Living Space

Here in New Mexico, walled courtyards are popular, leading right out from the home’s living area. Roomy ones hold full kitchens, fireplaces, built-in seating, fountains and hot tubs, while less spacious areas have a small table with café chairs. I have seen everything in between, too!

Frequently, the perimeter of a larger courtyard is planted with native and drought tolerant species. Low plantings keep the space open to reflect the expansiveness of the high desert and to keep our 13,000 foot mountains in view. Container plantings of ornamentals are used as accents and focal points, and there may be a small tree on each end as a frame. Flooring is flagstone, or sometimes a small grassy area has been planted. A dining table with chairs or a full set of patio furniture allows for various entertaining scenarios. That’s very basic in an area where everyone has an acre of land. The courtyard might be 600 square feet, and it becomes an extra room in three seasons. 

Photo: via Build Direct Blog

In town, the courtyards are very small and need privacy fencing. An entry gate is installed in a traditional eight-foot high latilla fence. Lush vines are grown over it to extend its height, create a garden and offer more privacy. Flooring is concrete, flagstone or small pavers, and gardening is done in containers if there is no more space to dig into the ground. Maybe there is a bench or a small chair and side table. The courtyard becomes more of an entryway than a main living space, but everyone here tries to take advantage of our wonderful climate in even the smallest way!

Vegetable Gardens and Flower Gardens – The Perfect Borders 

If you want to grow food, you don’t need much space. Vegetables and herbs can be mixed in with a flower border – lettuces and greens in front, and climbers going up a trellis in the back. Or remove the flower border completely, and just plant vegetables, herbs and fruit!

Many varieties have now been cultivated to grow in pots, since the food growing movement has spread to the cities. Don’t be afraid to try your hand at growing food, no matter how small your space. Everyone can have a container with food in it, even if it’s a recycled 5-gallon bucket. A few large pots won’t take up much of a footprint, and with upright supports they will hold tomatoes, beans, cucumbers and squash. Smaller containers are good for shallow rooted plants like lettuce, kale, chard, spinach and herbs.

Native Plants Means Low-Maintenance

If you need a low maintenance garden, native plants are the best choice. They only need the watering that nature provides, and they are already use to the soil in your yard. They need no soil amendments, and they are acclimated to the local climate, so they don’t need to be fussed over.

Also consider slow-growing plants, and install a drip irrigation system with a timer for automatic watering. Several inches of decorative mulch will keep down weeds and keep in moisture to further reduce your workload. Even a few well-placed flowering trees and shrubs can add enough greenery without a lot of work.

Piece by Piece

Envision your garden and yard space after considering your personal needs. Put it together piece by piece, or if it’s small enough, spend a weekend digging and planting. Any small space can be beautified with a little planning and a few good plants.


(You are reading an article originally posted on Build Direct Blog)

Benefits of Container Gardening

There are personal and environmental benefits to gardening in containers. First, it’s a good way for beginners to start small. A pot with a few plants in it is less intimidating than designing and executing a garden of any size. Instead of figuring the best place for a garden, digging up the lawn and planning heights, food production and bloom time of flowers, you can fill a pot with soil, plant some ornamentals and food, water it in and be done!


Eclectic Patio.jpg

Photo Credit: Eclectic Patio by Dallas Media and Blogs Sarah Greenman

You have control over the size of your garden, and there are fewer decisions to make. There is less maintenance for a container garden, too. I spend hours weeding, dead-heading flowers, checking for bugs, harvesting and dragging hoses from here to there (I know – the garden writer without an irrigation system! Blasphemy!). When containers are clustered in one spot, all your supplies and chores are also in one spot. 

Container Gardening | Take Notes

Growing only a few plants also lets you study them. If you make notes about their performances, you can expand your gardening knowledge each year, and you may eventually be inclined to dig up some lawn for a bigger garden with more varieties. On the other hand, you may never get the gardening bug, and containers may suit your needs to garden minimally!

If you only have a small outdoor living area, containers are perfect for having a bit of greenery in your life. It’s a bonus to get food, herbs and cut flowers from your deck or balcony. Containers can even be part of the design, so a small collection can be a tastefully designed art project. 


Modern Patio.jpg

Photo Credit: Modern Patio by New York Architect Resolution: 4 Architecture

Portability of Container Gardens

Being portable, containers can also be moved around. They can be brought in for the winter or placed for a special event. 

As for the environment, it’s important we grow our own food, especially in urban areas. As Monsanto creeps into our gardens more and more each day, we need to retain our independence by growing our own food, saving seed and sharing with out community. Even one pot with one tomato plant in it is a way to fight back. Anyone with a smidgeon of space can grow a little bit of food. If you’ve never grown your own food before, you’ll be hooked on the freshness and flavor!

Saving Water

Containers also save water. Instead of a sprinkler showering a garden and its surrounds, you can put the right amount exactly where it needs to go. The same stands for fertilizers (organic, of course). Instead of broadcasting them over spaces where there are no plants, you can give a container planting exactly what it needs. 

Self watering containers gauge when plants need water then delivers it to them. Alternatively, you can set up a drip system to cover a series of pots that are close together. That is the most resource efficient way to water. And you don’t have to think about it. Put your system on a timer, and you won’t have to think about it. That’s great for the gardener without a lot of time to spend fussing over a garden. 

The best containers are recycled or upcycled. See the author’s ‘container garden’ Pinterest board for recycling and irrigation ideads!


Traditional Outdoor Planters.jpg

Photo Credit: Traditional Outdoor Planters by Other Metro Wayfair

One for Every Porch or Balcony

Container gardens makes a lot of sense, from the need or desire to grow food in a small area to accommodating disabled and elderly people to saving resources with efficient water systems. Soon we will see a small garden on every porch or balcony!

(*You are reading an article originally posted to Build Direct Blog)

Spring Gardens Are Blooming! Here’s What to Do in April

Colder climates may still be shrugging off winter, but most gardeners are excited to be back to work by April. Dry summers in California and the American Southwest call for drought-tolerant plantings and water-wise practices. Butterflies signal spring’s return in the Great Lakes region and elsewhere,while flowering native trees make their presence known in the Northeast. In Texas and the Southeast, warming temperatures mean everything from herbs to vegetables to annuals can be sown from seed. Here’s what to do in your garden, by U.S. region, this April.


Rocky Mountain Gardener’s April Checklist

Photo: Lake Irene Trail in Rocky Mountain National Park via Flickr user KrossbowPlanting is the name of the game in the April garden. Plants in all forms can be installed as soon as the soil is warm and workable. In the meantime attend to the last of the spring cleanup chores and get your lawn in shape for the coming season. Enjoy the symphony of greens that’s being played right now by all of the emerging new foliage.

Plant bare root plants. Roses, clematis and young fruit trees are commonly available for sale in our region this month, as well as asparagus, rhubarb, strawberries and grapes.

Bare-root planting is an economical option that comes with a small window of time to implement, so take advantage of the opportunity. Select plants that have not leafed out yet with a well-developed, healthy root system (not dried out or rotted). Plant them as soon as possible – if not immediately – after purchasing and keep them moist until the root system is established. 

Transplant or divide crowded perennials when new growth emerges. Summer and fall bloomers like asters, hummingbird flower (Zauschneria spp), Maximillian sunflower (Helianthus maximiliana), gayfeather (Liatris spp), tall garden phlox (Phlox paniculata), coneflower (Echinacea spp) and ornamental grasses may need attention.

A plant with a dead center or a lack of blooms last year may indicate that it needs to be divided. Here’s how:

  • Use a sharp spade to dig out the plant with as much of its root system as possible (6 to 12 inches beyond the drip line).
  • Remove some of the soil from the root ball and pull or chop it into large sections that include both stems and roots.
  • Replant the divisions – or share them with a friend – and water thoroughly.

Plant cold-tolerant annuals in containers as a colorful welcome to spring. Good flower choices include pansies, violas, English daisies, snapdragons and sweet alyssum. Prep any previously used containers by cleaning them thoroughly with a solution of one part bleach to nine parts hot water. Fill your pots with a growing medium made specifically for container gardens, one that’s lightweight and well draining yet moisture retentive.

Cut back woody perennials and subshrubs to within a few inches of the ground. These include Russian sage (Perovskia atriplicifolia), Powis Castle Sage (Artemesia), bluemist spirea (Caryopteris spp), butterfly bush (Buddleia davidii), leadplant (Amorpha canescens), rabbitbrush (Chrysothamnus nauseosus) and St. John’s wort (Hypericum spp). 

Sow cool-season vegetable crops directly into the ground once the soil temperature is at least 40 degrees Fahrenheit. Plant potatoes, peas, Swiss chard, kale, turnips, carrots, spinach, radishes, onions and lettuces. Keep frost blankets and cloches handy to protect seedlings from the inevitable April snowstorms.

Get your lawn off to a good start.

  • Core aerate your lawn before fertilizing it mid month. Leave the plugs on the lawn to decompose and add nutrients to the soil.
  • Overseed thin lawn areas with high-quality grass seed when the soil temperature reaches 40 degrees Fahrenheit. Rake the area to be seeded to expose the soil, then scatter the seeds in a dense, single layer. Cover the seeded areas with a scant ¼ inch of compost and water thoroughly. Keep the area evenly moist until the seeds germinate. 
    • Note: do not use preemergent weed controls, such as corn gluten, in areas that have been newly seeded.
  • Tune up your lawn mower and sharpen the blades. Sharp blades not only make your job easier (especially if you’re using a push or reel mower), but a crisply cut blade of grass is less susceptible to disease infestations than one that is torn and ragged from a blunt mower blade.

Install plant supports – such as circular cages, loop stakes and grow-through grids – to support tall, floriferous perennials once they come into bloom. Placing supports now will allow the plant to grow into and through the structure with a more natural appearance. Peonies, catmint (Nepeta spp), baby’s breath, delphiniums and tall varieties of yarrow (Achillea spp) are all good candidates for support.

Green Remodeling Ideas That Will Save You Money

“Going green” is more than just a passing phase – being environmentally thoughtful has become a way of life for many Americans, not to mention businesses that serve their needs. From recycling bottles and cans to investing in a do-it-yourself composter, homeowners all over the country are doing their part to help reduce emissions and protect the planet for future generations. 

There are plenty of small things you can do to make your home more energy efficient, but what if you want to go a step further? Whether you’re building a new home or renovating your current place, these green remodeling ideas will save you money over that long haul and make your home more appealing to buyers when you’re ready to sell – while saving the earth in the process. 


Solar-Panels-on-Houses.jpg

Solar Panels

They’re expensive to install, but solar panels are worth the investment. Last April, the Lawrence Berkley National Laboratory released its findings of an eight-and-half-year study of the California real estate market. According to the report, existing homes that were retrofitted with solar panels sold for an average of $17,000 more than comparable homes without them.

They’ll also save you a lot of money over time. For example, a homeowner in Chicago who pays an average of $200 per month on electricity would spend more than $43,000 to have solar panels installed. After tax credits and rebates, the total cost would be just over $30,000. However, after just one year, that homeowner would save anywhere between $1,200 to $2,778 on electric bills. After 25 years, that savings could be as high as $116,560.

To find out how much solar panels could save you, visit: Solar-Estimate.org


CompositeDecking.jpg

Composite Decking

In addition to saving trees by using composite decking instead of wood, you’ll save yourself a big hassle. Wooden decks need to be sealed every couple years to keep water out, and eventually the elements will cause at least a few boards to rot and splinter. 

Composite decking, made from a blend of wood waste and plastic, doesn’t require the same upkeep as traditional wood deck boards. You won’t need to seal it, which eliminates the time and money you’d spend resealing plus fewer chemicals will be released into the air. And since the deck won’t rot, no trees will be cut down and used to replace it after a few years. 

The average cost of a composite deck addition is $15,579, according to Remodeling Magazine, but you can expect to recoup more than 60% of your cost when you sell your home – more than if you replaced your roof or added a master suite. 


synthetic grass.jpg

Synthetic Grass

It sounds crazy, but using fake grass in your yard is a real thing. It looks surprisingly real, and is great for homes in dry climates where it requires a lot of extra effort – and water – to grow the real thing. According to online retailer Artificial Turf Supply, the synthetic stuff costs about twice as much to install as sod. In a 1,500 square-foot yard, ground prep, sod and a sprinkler system would cost $4,750 a year while artificial grass would run just over $10,000. 

But over an eight-year period (the warranty period of the synthetic grass listed on the site), the cost of maintaining a sod lawn would cost more than $14,500. During that same period, there would be no additional costs to maintain the fake stuff, which means a savings of more than $4,000. After 15 years, the savings skyrockets to $13,000. Basically, artifical turf pays for itself completely.

And you’re doing more than putting money in your pocket. You may still “rinse” the lawn from time to time, but you won’t waste gallons of water saturating the ground to keep the grass alive. It doesn’t need mowing, either, which means lower gasoline emissions polluting the air. 

No matter what green home remodeling project you want to pursue, make sure you find yourself a like-minded contractor. Look for a pro who has some experience in green building, or is at least open-minded and eager to get an eco-friendly project under his or her belt. 

Copyright © 2012 Yahoo! Inc.