FREE DESIGNS AND ESTIMATES

What You Can Do to Save Big on Home Energy Bills


housemoneyenergy_300.jpg

Photo: Greener Choices. If you’re like the typical American, you know a thing or two about energy efficiency, but you’re also leaving serious savings on the table. Take a look at the seven energy questions listed below to test your own Energy IQ. Then read through the answers to learn the latest efficiency news and advice, which could lower your utility bills by hundreds of dollars. 

1). What has happened to energy consumption by all households in the U.S. since the late 1970s?

  • Increased by about 50%

  • Increased by about 25%

  • Stayed about the same

  • Decreased by about 25%

  • Decreased by about 50%

Today’s homes are about 30% bigger than those built in the late 1970s, they’re buzzing with electronics, and nine out of ten have air conditioning. And yet, total energy consumption has been basically flat. “But the bar was unbelievably low to begin with,” says Arthur Rosenfeld, Distinguished Scientist Emertius at Lawrence Berkeley National Laboratory and a two-term commissioner with the California Energy Commission. “Energy was dirt cheap back then, and if you were in the market for a new car or refrigerator, you had no way of measuring efficiency.”

Appliance standards have done the most to counteract other increases in home energy use. Take refrigerators: A typical 1975 model consumed about 1,750 kilowatt-hours (kWh) per year. Efficiency standards helped bring that figure down to around 500 kWh in 2011, and a target of about 400 kWH is set for 2015. Clothes washers and dishwashers have also been impressive efficiency gains. The new lighting-related energy use in half by 2035. And standards set for 2015 and beyond will improve the efficiency of air conditioners and water heaters, which together account for almost one-third of the average home’s energy use.

2). Which home improvement will usually lower a household’s annual energy costs the most?

  • Upgrading windows

  • Adding insulation to an attic

  • Installing light-colored roof shingles

  • Sealing all air leaks, including leaky ducts


homepower_240.jpg

Photo: Greener ChoicesSlick advertising by manufacturers may be the reason that many people incorrectly choose windows in this question. Though new windows can save energy, especially double-glazed units with low-E coatings, Consumer Reports’ tests have found that it could take 20 years to recoup the investment.

The swiftest savings come from sealing air leaks in your home’s walls, windows, and especially its ductwork, which 33% of respondents answered correctly. “Leaky return ducts can also introduce unwanted air pollutants into the home,” adds Kathleen Hogan, Deputy Assistant Secretary for Energy Efficiency at the Department of Energy.

Duct insulating and sealing are best left to a professional and could lower your annual heating and cooling bills by $400. You can then use  a combination of caulk, foam board, expandable sealant, and weather stripping to plug leaks around windows, doors, electrical outlets, and other openings in your home.

Adding attic insulation is often the next best way to save energy. In a typical residence, laying 11 inches of fiberglass or rock wool or 8 inches of cellulose insulation could save up to $200. Cool roofs are designed to reflect more sunlight and absorb less heat. They can trim cooling costs in warm regions, especially if there’s conditioned living space directly beneath the roof.

3). Which configuration typically uses more energy?

  • A standard high-definition DVR set-top box and 55-inch LCD TV

  • A standard sized side-by-side refrigerator


samsungfridge_240.jpg

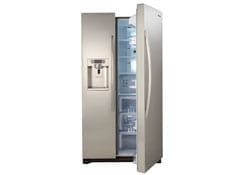
Photo: Greener ChoicesThe correct answer is the refrigerator – it’s the more energy-intensive configuration, with an approximate annual consumption of 500 kWh, compared with around 300 kWh for the TV and set-top box. But most homes have just one fridge, and multiple TVs and cable boxes are the norm. What’s more, the calculations assumed a set-top box that meets the latest Energy Star 3.0 specification, which could be at least 40% more efficient than what you may have at home. That’s why the total energy that many households consume watching TV is greater than what they use to keep their food and drinks cold.

If you have an old set-top box, ask your cable provider to replace it with one that meets Energy Star’s 3.0 specification. The country’s six largest cable companies, serving approximately 85% of cable households, promised that at least 90% of new set-top boxes deployed to customers by the end of 2013 will be Energy Star 3.0 qualified. And if you keep a TV in a guest room or other seldom-used part of the house – unplug it! and any ancillary equipment.

4). Which renewable energy device doesn’t qualify for a federal tax credit?

  • Solar water heater

  • Pellet stove

  • Geothermal heat pump

  • Residential wind turbine


pellet stove.jpg

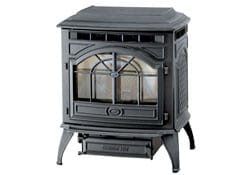
Photo: Consumer ReportsThe correct answer is pellet stoves. They are the one form of renewable energy not eligible for a federal tax credit, which expired in 2011. The pellet stove industry is lobbying hard for its reinstatement, saying the U.S. is the potential world leader in the production of the appliances and their clean-burning fuel.

For now, geothermal heat pumps, residential wind turbines, and solar energy systems qualify for a credit, covering 30% of the cost with no cap. The tax credit is good through 2016 and can be applied to existing homes and new construction using IRS form 5695. Check www.dsireusa.org for state and local incentives.

5). Adjusting a thermostat 5° to 10° F at night and when you’re not at home can cut a household’s annual energy costs by how much on average?

  • Under 10%

  • 10% to 20%

  • 21% to 30%

  • Over 30%


newthermostat_240.jpg

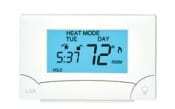
Photo: Greener ChoicesEach degree you adjust the thermostat could translate into 2% savings if the setback period covers the sleeping and working hours. So in this scenario, the correct answer is 10% to 20%. Given that the average American household spends about $1,000 on heating and cooling, that amounts to potential savings of $200 – enough to cover the cost of several programmable thermostats.

6). On average, which appliance uses more energy per load? 

  • A washing machine

  • A clothes dryer


consumerlaundry_240.jpg

Photo: Greener ChoicesThe correct answer is the dryer as the more energy-intensive laundry appliance. Dryers generate heat, which most people know requires a lot of energy – upward of 900 kWh per year to be exact. But increased focus on dryer efficiency could make this question less of a no-brainer.

The Energy Star program named Advanced Clothes Dryers the winner of its 2012 Emerging Technology Award. Heat pump clothes dryers, which already command significant market shares throughout parts of Europe, have the most promise. Those dryers extract heat from a home’s ambient air and release it at a higher temperature inside the drum. Compared with conventional electric dryers, they could save $30 to $40 per year and as much as $700 over the life of the unit, though consumers will need to get used to longer drying times and steeper up-front costs.

The first advanced clothes dryers are expected to be out in 2013. Energy Star is also developing a specification for conventional dryers that could improve their efficiency by 5% to 10%. In the meantime, your best bet for saving energy on laundry is to buy a high efficiency washer that will spin the most water from a load before it goes in the dryer.

7). Can you guess how much ‘standby power’ costs?

Many devices in the home consume electricity even when you’re not actively using them. All that vampire power can add up to 10% of your electricity bill. Unplugging or powering down the following gadgets could save you approximately $120 dollars a year, especially if they’re older models without auto-shutdown modes. (Sources for figures below: Lawrence Berkeley National Laboratory, Carnegie Mellon University)

Digital set-top box (with TV off): $25

Video game console (idle mode): $75

Combo DVD/VCR player (on): $13

Cordless power tool and charger (fully charged): $8 

Bathroom Remodeling Guide: Dos and Don’ts

Bathroom counter and cabinets

Seven Upgrades That’ll Make You Happy & Seven You May Regret

An expertly remodeled master bathroom will provide years of pleasure and comfort. But do an amateur job and you’ll be reminded of that fact every day. It’s a tricky space, unfortunately, with lots of moving parts crammed into a tight footprint, not to mention the volumes of water ready to exploit any and all leaks. Setting a budget and planning ahead are two ways to keep your project on track and also take care to choose the best sink, countertop, and toilet for your space. The following list of dos and don’ts will help you master the remodel, whether you do the work yourself or hire it out.

Seven Good Ideas

When you’re investing in a home remodeling project, you want to make sure that the results not only please you but add value to your home and save you money on energy and water as well. These seven steps will help you take advantage of the latest design trends, technologies and products.

#1). Budget for the Unexpected

Hidden water damage is a common problem in bathrooms, whether from a leaky shower pan or running toilet. “If the floor feels spongy, that’s a sign of serious water damage,” says John Petrie, owner of Mother Hubbards Custom Cabinetry in Mechanicsburgh, PA. Other issues are truly hidden, for example a vent stack inside a wall that you thought you were going to knock down. 

An experienced contractor will do exploratory work early in the project to sniff out as many issues as possible. “In the case of the vent stack, we’ll investigate above the bathroom to see the pipe coming up through the house,” says Petrie. But contractors can’t see through walls, so don’t expect them to catch every possible pitfall. That’s why it’s important to build a 10 to 15 percent cushion into your budget. If nothing goes wrong, you’ll have a nice little windfall. 

#2). Hide the Toilet

A master bath that’s stylish and functional can also be discreet. That’s why it’s nice to hide this fixture away, either in its own “room-within-the-room” or behind a half wall. A piece of furniture – an armoire or dresser, say – can create the necessary barrier without the expense of a framed wall.

#3). Do Choose Appropriate Surfaces

Your master bathroom’s surfaces do more than just contribute to the overall aesthetic. They also take lots of abuse. Porcelain tile is a favorite among designers, for use on the floors and walls alike. “You can find some versions in the $5 per square foot range that look like natural stone,” says Petrie. He recommends larger tile sizes to minimize grout lines, easing the upkeep. That might mean 18-by-18-inch tile on the floors and 12-by-12-inch on some or all of the walls, perhaps transitioning to 6-by-6 tiles on the diagonal with a glass mosaic transition strip.

Porcelain is also a popular option for bathroom sinks, though it proved prone to chipping in our tests. Enamel-on steel sinks were especially durable and stain-resistant, as were stainless steel sinks, which are becoming more popular for use in bathrooms. Solid-surface sinks are another durable option that allows the sink to be integrated with the vanity countertop and, if you like, the adjoining cove or backsplash.

When it comes to the countertop, granite and quartz have migrated from the kitchen into the bathroom, where they deliver the same durability and visual interest. Laminate and solid surface are still popular as well, and can be cost-effective options, though both scratch easily.

#4). Splurge on the Shower Photo: American Cabinet & Flooring Designer Clay Bernard

The empire of the Roman tub is officially over. “People started to realize that they could count on one hand how many times they actually used the tub,” says Petrie. “We’re now using that space to create larger showers, often with his and her showerheads, body sprays, and even steam generators.”

To create this sensual experience, you’ll need a shower stall that measures at least 4-by-6-feet, larger than the 3-by-3-feet box that used to be standard. If you can take the stall up to 5-by-7-feet, you may also be able to do away with the door, since the showerhead(s) can be direct in a way that the spray doesn’t reach beyond the shower area (an L-shaped design is helpful). This will eliminate a sizable expense, especially if you were planning on a frameless door, which can be pricey. One caveat: Don’t eliminate the bathtub if there aren’t any other bathrooms in the house with a tub. 

#5). Consider Water Efficiency

Showerheads, toilets, and faucets have all become more water-efficient in recent years, thanks to the Environmental Protection Agency’s voluntary WaterSense program, which labels products that are 20 precent more efficient than federal standards. Our tests have found many WaterSense winners, including low-flow showerheads that deliver a satisfying pulse while meeting the flow rate of 2.5 gallons per minute. “You can even have a rain showerhead these days that’s low-flow,” says Petrie.

As for toilets, several WaterSense-qualified models that use just 1.28 gallons per flush make the recommended list of our latest toilet ratings. That could save you at least 4,000 gallons and some $90 per year in water bills if you’re replacing a toilet that dates from 1995 or earlier. Choosing a faucet with an aerator can reduce the water flow in your bathroom sink by 30 percent or more.

#6). Make Room on the Vanity

Since grooming is the main task at the vanity, it’s important to have plenty of surface area to put things down. While the his-and-her double sink configuration has been popular in the past, it often makes sense to have a single sink and more counter space. “Couples I work with usually realize that the second source of water is less important than the additional countertop,”says Carolyn Cheetham, president of Design Works by Cheetham in Alberta, Canada. Besides maximizing the counter space, opting for a single sink vanity saves you the expense of the second sink and faucet. And eliminating a set of plumbing expands the available space inside the vanity. 

#7). Provide Adequate Ventilation and Light

Moisture not only breeds mold and mildew, it can take a toll on finishes and painted surfaces. A bathroom fan is the best defense. Guidelines from the National Kitchen and Bath Association call for a ducted system that’s at least 50 cubic feet per minute, though you may need twice as much ventilation if the space is larger than 100 square feet or if you plan to install a steam shower. Consider a humidity-sensing unit that will automatically turn on and off depending on the amount of moisture in the air.

As for lighting, the goal is to bring different layers of illumination into the room. A ceiling fixture is suitable for general lighting, but it will cast shadows on your face when you’re seated at the vanity. That’s why you’ll also want sconces or other vertical fixtures mounted on either side of the vanity. Some medicine cabinets are available with vertical lighting strips.

The shower and toilet should also have a dedicated task light, such as a recessed canister light. Consider fixtures that use LED bulbs. Many provided bright, even illumination in our lightbulb tests with the promise of 50,000 hours, though they do cost more. Remember to put the fixtures on dimmer switches so that light levels can be adjusted depending on the mood and task at hand. 

Seven Costly Mistakes

Avoiding these seven common goofs could save you thousands of dollars on the project, especially if you’re planning an upscale remodel. You’re also likely to enhance the comfort, style, and efficiency of the finished project.

#1). Don’t Rush the Process

Now that you’re committed to the idea of a new bathroom, you probably want it done tomorrow. But poor planning is the leading cause of cost overruns on these projects. “Nothing is more expensive than doing things twice,” says Elizabeth Goltz, owner of Design by Orion in Kansas City. Depending on the size and scope of your bath project, you should spend several weeks to a few months on the planning process. If you don’t have a Pinterest account yet, consider one. This website lets you keep a digital ideas file of inspiring images you find on the Internet, say for tile styles, favorite fixtures, and clever designs. 

As you plan the space, try to come up with a design that keeps the major plumbing lines in place. Moving the toilet from one wall to another will mean relocating a 3-inch drain line in a home, which can cost thousands. “If you can keep the toilet, shower, and sink where they are, you’ll save significantly on the project,” says Petrie. 

#2). Don’t Skimp on Skilled Labor

The do-it-yourself approach can be an effective way to trim costs, but it’s best to focus on the front and back ends of the project, say, ripping out the old tub during demolition and handling the finish painting. Leave the more complicated installations to professionals, ensuring they’re highly skilled. “A good tile setter can make a low-cost tile look expensive,” says Goltz. “On the flipside, you could spend a fortune on tile, and a bad tile layer will make it look cheap.”

Given how many trades are required for a typical bathroom remodel – plumbers, electricians, tile setters, cabinet installers, and more – it pays to find a top-notch general contractor to manage operations. Meet with at least three contractors, preferably those you find through word of mouth. Make sure the person you settle on has an up-to-date license and insurance, including workers’ compensation. And scrutinize the contract; it should list every product down to the model number and finish. And don’t automatically go with the lowest bid.

#3). Don’t Cut Corners on Key Materials

Another common mistake is cheaping out on those items that get the most use. Lifetime warranties that cover leaks and stains have become more common on all but the cheapest faucets. PVD (physical vapor deposition) finishes resisted our best attempts at scratching them, but drain cleaners can stain them slightly. Chrome was also pretty durable in our tests, but can be scratched if you rub it with a heavy duty scouring pad.

Tile is another material that you can touch and feel each day. While you can find quality options for $5 per square foot, super cut-rate tiles may have slight size inconsistencies. The results will be crooked lines that make a bathroom look shoddy.

So where can you save? Light fixtures tend to perform the same across most price points – it’s the high design that costs more. You might also find that opting for a basic finish on faucets and fixtures saves you hundreds of dollars without compromising quality. And you definitely don’t need to blow your budget on a luxury toilet, like Kohler’s $6,390 Numi, with its motion-activated lid and built-in bidet. Those are cool features, but toilets costing as little as $300 delivered the best flush in our tests. 

#4). Don’t Stop Thinking About Tomorrow

You may be the picture of good health today, but you can’t predict the future. What you can do, however, is ensure that your bathroom will serve you and your loved ones regardless of your abilities by following the basics of Universal Design (i.e. aging in place). “It is absolutely coming onto people’s radar, even younger clients,” says Alan Zielinkski, president of NKBA.

And you don’t have to worry about ending up with an institutional look. Many universal design features are now part of mainstream bathroom design. For example, the larger shower stall that’s in favor today offers easy access and universal use, provided it has a zero-threshold and a built-in seating platform. “The bench is also a nice place for an able-bodied women to sit and shave her legs,” says Cheetham. Regarding toilets, so-called comfort-height models that are easier to get on and off of are now just as common as standard-height models. Even grab bars have enjoyed a design upgrade; many now match towel bars and other accessories. And they’re not just for the elderly. Grab bars make it easier for pregnant women or young children to get in and out of the bathtub.

Even if you don’t incorporate every element of universal design into the bathroom now, it’s worth putting in the structural framework, such as blocking in the walls for future support bars. Make sure your contractor makes a drawing of the wall so that you can find the blocking if, and when, the time comes.

#5). Don’t Forget to Factor in Water Use

Bathroom fixtures have become more water-efficient, especially if you choose WaterSense-qualified models. But the trend toward tricked-out showers, often with his-and-her “shower towers” that might include multiple showerheads and body sprays, will likely result in your water and energy use going up. It also means your bathroom’s existing drain and plumbing lines might require an upgrade. “You may need to resize your water lines from half-inch to three-quarters,” says Petrie, an upgrade that can add hundreds, if not thousands, to your project.

Thirsty fixtures may require you to upgrade your water heater as well, say, from a unit that holds 50 gallons a day to one that holds 80 gallons. That could cost you another $1000 or so – figure on roughly $2000 if you choose one of the energy-efficient hybrid water heaters that Consumer Reports’ test have found to be good long-term investments.

#6). Don’t Buy Products Online Without Seeing Them in Person Photo: American Cabinet & Flooring

Going online is great for researching products and design ideas. But materials and finishes aren’t always as they appear on your computer screen. That blue-gray quartz vanity top might be more blue than gray in real life, or the light fixtures that look understated online could overwhelm your actual space. That’s why we always recommend visiting a showroom or design center before you buy. While you’re there you may even get the showroom to meet or even beat the online price. 

#7). Don’t Forget About Storage

Running from the shower to grab a towel from the hallway linen closet gets old – and cold – fast. A closet inside the bathroom is ideal, though an armoire or even just a simple chest can hangle the essentials. And a medicine cabinet is still the best place for you various health-care and first-aid essentials. 

Photo: American Cabinet & Flooring’s Showroom Bathroom Display

Copyright © 2006-2012 Consumers Union of U.S., Inc.

ConsumerReports.org Buying Guide: Flooring

vinyl wood flooring

Getting Started

Begin by considering where the flooring will go and how much traffic, sunlight, and other wear and tear it will get. Vinyl proved tops in our moisture tests and most linoleum. Plastic laminates, and solid wood fared nearly as well. But many engineered woods, as well as some solid woods, and a linoleum product we tested flubbed that test – a serious drawback in a busy kitchen. And while the best vinyls and plastic-laminates fended off wear better than solid wood, they can’t be refinished when worn. 

How to Shop

Before settling on a product, spend a few dollars on two or three samples. That can be a lot less expensive than winding up with flooring that looks great in a catalog or on a website and then awful in your home. Manufacturers generally match most wood or engineered-wood flooring for color or grain. But variations can occur from one batch to the next, so buy the flooring you’ll need all at once. All the plastic-laminate floorboards in a package often have a similar pattern, so you may want to pull from multiple packages to avoid repetition.

To determine how much flooring you’ll need, measure the room’s square footage by multiplying its length times its width. (Divide an irregularly shaped room into smaller rectangles, calculate the square footage of each rectangle, and then add them together.) Then buy 7 to 10 percent extra to allow for mistakes, bad samples, and waste. You might also want to invest in an extra box of flooring for future repairs or additions. 

Where to Save

One way to save is on overstocks. Also, take advantage of mistakes. You can often save on opened or damaged boxes or on flooring with minor flaws that no one will notice.

Hiring a pro to do the installation? You can trim hundreds of dollars off the job by doing the time-consuming prep work like prying up the old flooring, leveling or filling the subfloor, and removing any baseboard that’s in the way. 

Green Floors That Didn’t Cut It

Bamboo is considered renewable because it’s a fast-growing grass. The best bamboo floorings we tested area stranded products such as the EcoTimber solid and Teragren engineered flooring, which are made of fibers that are shredded and compressed for strength. Cork floors are made of tree bark in a process that doesn’t kill trees.

Know How Rough You’ll Be

The best products in every category were also the best overall in our simulated foot-traffic tests. For less busy kitchens, you may want to consider the top engineered wood or bamboo, with its blend of natural veneer and easy installation.

Pick a Factory Finish

Prefinished wood and bamboo floors cost about 40 percent more than unfinished products. But you’re likely to save overall because a factory finish tends to last longer-and paying a pro to apply the finish adds costs, mess, and hassle. Factory finishes are also warranted by the manufacturer. 

Check for Certification

Vinyl floors with the industry’s FloorScore certification emit relatively low levels of volatile organic compounds, substances linked to health problems and pollution. All vinyl we recommend has that certification. For wood flooring, certification by the Forest Stewardship Council and the Sustainable Forestry Initiative offers some assurance that it comes from responsibly managed forests, a plus for the planet. The product and manufacturer must be certified; check the packaging. 

When You Get it Home

Before installing wood or laminate flooring, unpack it and let it sit for one to three days in the space where it will be installed so that its temperature and moisture match the levels in the room.

Keeping New Floors Looking Good

If you need to heat the room soon after installation, raise the temperature gradually over the course of a week – especially if you have radiant heat – to allow the flooring to adjust. Sweep or vacuum floors with a soft broom or brush, and clean with a damp but not overly wet mop. Check the manufacturer’s guidelines for recommended cleaning products. And put felt pads under furniture to prevent scratching. 

Types of Flooring

Though you’ll find a growing array of styles, most flooring falls into one of these six types. The type of flooring you choose will depend on your taste, needs, and budget.

  • Solid Wood
  • Engineered Wood
  • Plastic Laminate
  • Vinyl
  • Linoleum
  • Ceramic Tile

Flooring Features

Different flooring materials require different installation techniques. Homeowners install about half of all flooring. Floated floors that go down without glue or fasteners are easiest. In the case of vinyl, planks or tiles; they are easier to install than sheets. 

  • Nail- or Staple-Down Installation: These are the methods of choice with solid wood and engineered wood over a wood subfloor. Standard, ¾-inch-thick solid-wood strip and plank flooring is traditionally nailed to the subfloor; thinner solid or engineered material is almost always stapled. The fasteners are usually driven diagonally through the tongue side of the material and into the subfloor (blind-nailed) so they are invisible once the floor is finished. Solid flooring can also be nailed straight through the surface (face-nailed) with decorative cut nails or fastened with screws, which are typically countersunk and concealed with wood plugs. Installers often sandwich a layer of 15-pound felt or rosin paper between the subfloor and floor to prevent moisture between the two and to deaden sound.
  • Floating Installation: This works with engineered wood, plastic laminate, linoleum and some ceramic tile over a wood or concrete subfloor or existing flooring. Tongue-and-groove planks or tiles lock together mechanically. Some products must also be glued together at the joints. The material generally goes over a thin foam or cork pad, which fills minor flaws in the subfloor and absorbs sound. Installations over concrete require a thin plastic vapor barrier.
  • Glue-Down Installation: Engineered wood, vinyl, linoleum, and tiles are typically glued. You trowel adhesive onto a clean, flat, wood or concrete subfloor or existing flooring and lay down the sheets, planks, or tiles. No vapor barrier is required. Some glue-down flooring is simply peel-and-stick, the easiest to install. You’ll also find vinyl flooring in sheets and easier-to-install tiles.

Copyright © 2006-2012 Consumers Union of U.S., Inc.

ConsumerReports.org Buying Guide: Kitchen Cabinets

kitchen cabinets

Getting Started

Once upon a time, dovetail joints inside the drawers were practically all you needed to distinguish high-end cabinets. The distinction has blurred as more manufacturers offer premium features even on low-end lines. Indeed, we found you can have these and other once-exclusive features and still wind up with shoddy construction.

A little research beforehand can save you time at the store and the thousands you can lose on less-than-stellar cabinets. Start by checking online manufacturer and retail sites and catalogs and taking a good look at store displays; you’ll be able to tell the quality cabinets from the polished pretenders once you know where to look. And trust your taste; readers who chose cabinets solely on the basis of advice from contractors, designers, or architects were twice as likely to report a problem as those more involved in the selection, according to a survey by the Consumer Reports National Research Center. 

Put Your Money Where it Counts

If you’re on a tight budget, skip the non essentials and focus on convenience. Work-savers include a lazy Susan, a pull-down soap and sponge holder, and deep drawers for pots. Glazing, while nice, typically adds 10 to 20 percent to the cost. Remember to factor labor into your budget, since installation can easily account for more than half of the cabinet’s cost. 

Consider Renewing Your Old Cabinets

Replacing cabinets is typically the priciest part of a kitchen remodel. Readers who hired contractors paid on average more than $9,000 for new cabinets, and about a quarter of the readers paid more than $15,000, according to our survey. A couple of long weekends’ work can change your kitchen’s look for a tenth that cost. If your old cabinets are plumb, square, and sturdy, consider refinishing them with some simple sanding, painting or staining, and drilling. You can even dress them up with custom-built doors, possibly with glass panes, and still save a bundle over all-new cabinets. Even having a cabinetmaker reface old cabinets with veneer costs less than replacing them. 

You can also make old cabinets work better than new by adding pull-out shelves, lazy Susans, and other inexpensive upgrades. The final touch: install several under-cabinet halogen, xenon, or fluorescent task lights wherever you or a family member will be dicing, doing homework, or reading a recipe. 

Types of Cabinets

Cabinets can vary greatly in price. Here’s an overview of the three types of cabinets in broad price segments that you’ll find at stores. 

Basic

Often called stock, these are inexpensive, off-the-shelf cabinets, ready to assemble and install. Many use frameless construction where the door has no lip or “reveal” around it.

Photo: Consumer Reports

PROS: These are a money-saving choice if you aren’t too picky about the style options or don’t demand a perfect fit. More have better drawers, sold-wood doors, and other once-pricey features. And we’ve found basic models that perform better in our wear tests than some more-expensive models. 

CONS: Many basic boxes are thinly veneered particle board, rather than higher-quality plywood. Style and trim options, sizes, and accessories, are still limited. And figure on an hour or more of assembly time for each set of base and wall cabinets. 

Midlevel

These semi-custom models are a sound choice for most kitchens. Many use face-framePhoto: Consumer Reports construction, where the solid-wood frame shows around the door and drawers.

PROS: Midlevel models offer many made-to-order custom options, including size, materials, finish, elaborate crown moldings and other trim, and accessories such as range-hood covers. That can make them the best-value option overall.

CONS: As with basic cabinets, features and quality can vary considerably. Boxes may be veneered particleboard rather than high-quality plywood. 

Premium

Short of custom made-to-order cabinets, these semi-custom models offer the most style and storage options.

Photo: Consumer Reports

PROS: They generally come with plywood boxes and other premium materials and hardware. Widths may come in ¼-inch increments, rather than the typical 3-inches.

CONS: While generally less expensive than fully made-to-order custom units, models with the most features and highest quality can cost as much as some full-custom units. 

Features

What separates a well-made cabinet from a cheap imitation? Here are the cabinet features to look for-and what to avoid. 

Cabinet Box: Best is ½-to ¾-inch furniture-grade plywood. Medium-density fiberboard (MDF) is OK, but avoid ⅜-inch coated particleboard.

Doors: Most manufacturers offer a similar range of door-style options for all their price levels. Look for a solid-wood frame surrounding solid-wood or plywood panels. Veneered particleboard or an MDF panel is OK, but avoid laminate or thermofoil over particleboard.

Drawers: Well-built drawers are critical, because they get the most use. The best ones have solid-wood sides, dovetail joinery, and a plywood bottom that fits grooves on four sides. Avoid stapled particleboard.

Hardware: Full-extension drawer guides are better than integrated side rails or under mounted double-roller designs. Some premium models have a “soft close” feature that stops drawers from slamming shut. Many cabinet models allow you to upgrade the drawer guides. As for door hinges, we didn’t find any significant differences among the different types. 

Shelves: Look for ¾-inch plywood of MDF. Lesser quality ⅝- or ½-inch particleboard shelves may sag.

Mounting Strips: Ask the contractor to use ¾-inch hardwood strips or metal strips with bolt holes. Thinner wood, MDF, or particlebard can be a concern with heavily loaded wall cabinets. 

Copyright © 2006-2012 Consumers Union of U.S., Inc.