FREE DESIGNS AND ESTIMATES

Bathroom Workbook: Layer on the Texture for High Bath Style

Bathroom Design Photo

Article by: Shana Ecker

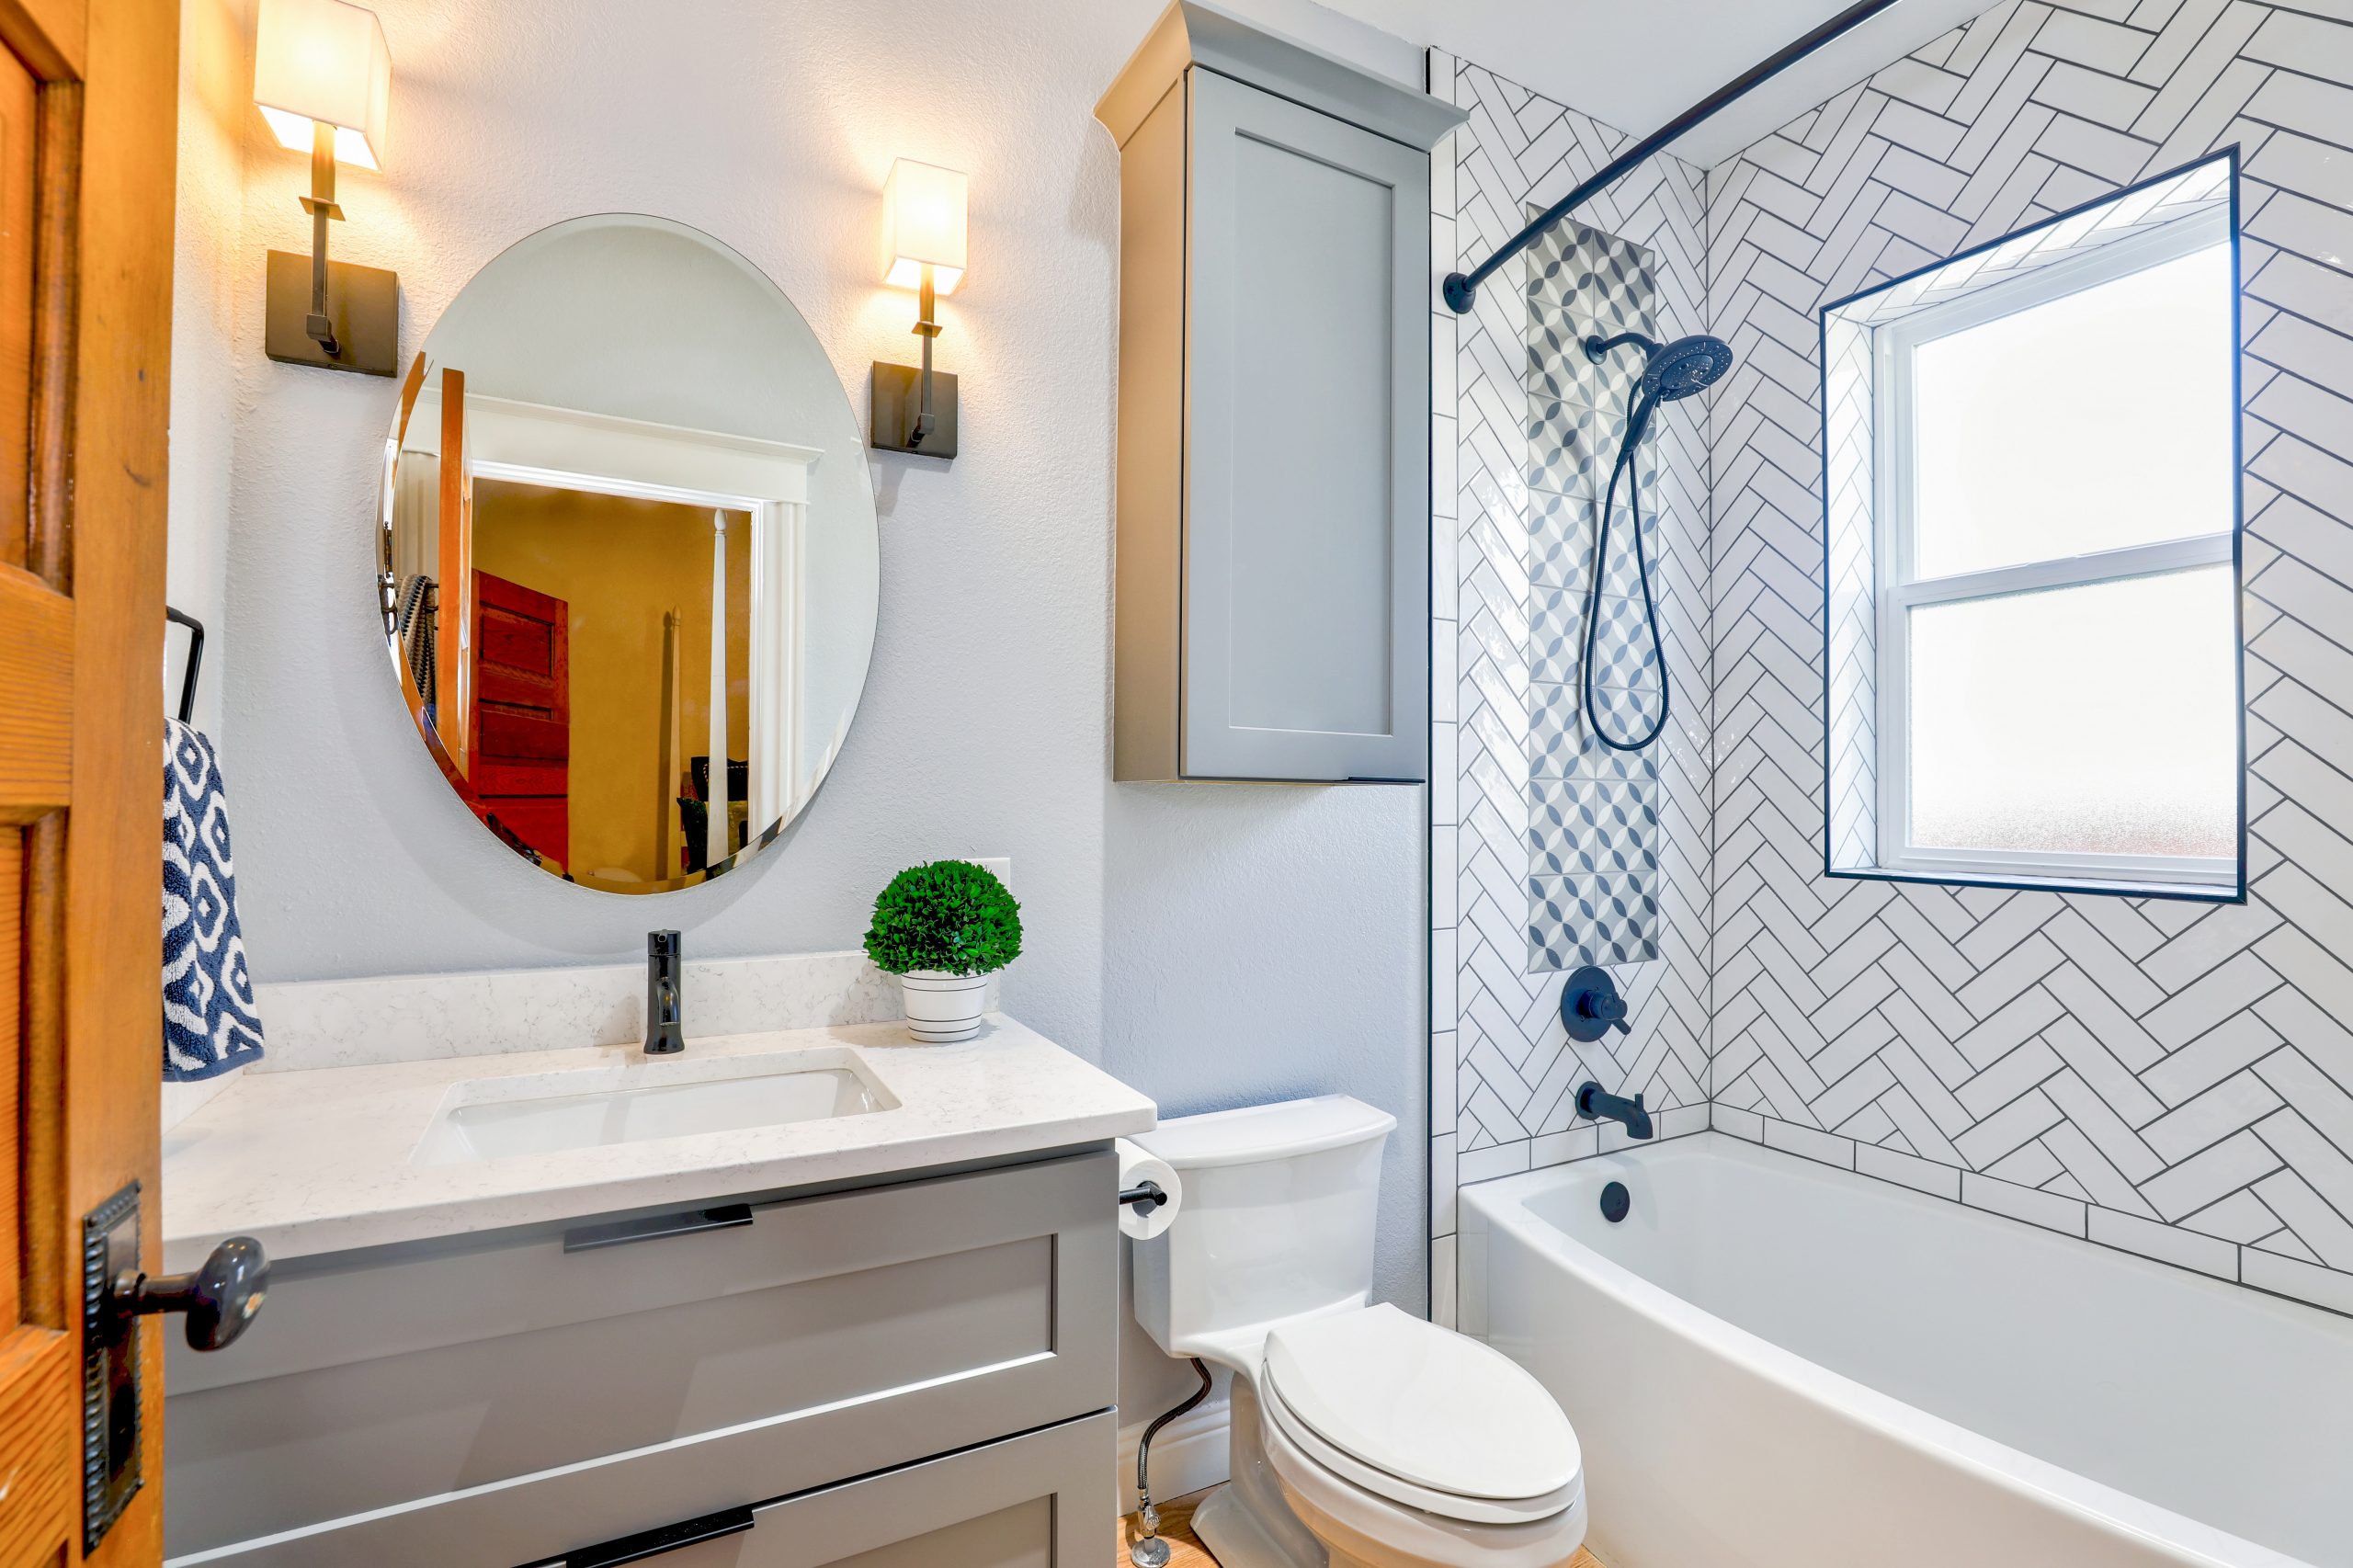
I once read that the average American spends almost three full years of his or her life in the bathroom. If that’s true, perhaps we should consider making this space a little more worthy of our time. Bathrooms can often be sterile and cold, with slick and shiny surfaces. But just as with any other room in your home, adding texture to your bathroom can make it vibrant and welcoming. With gorgeous natural stones, plumbing fittings with intricate details and textural linens, wall treatments and more, there are endless ways to give your bathroom depth and personality. But beware: If you get inspired by the stylish little spaces below, you may find yourself spending a few more years in the bathroom.

Read more

Kitchen Evolution: Work Zones Replace the Triangle

Article by:

When I began studying kitchen design many (many!) years ago, I learned all about the much-venerated kitchen work triangle — in which the refrigerator, range and sink are placed 4 to 9 feet apart, forming a roughly equilateral triangle. This design principle was developed back when most people had smaller, closed-off kitchens, where only one person prepared and cleaned up meals. It’s an efficient way to lay out appliances and the sink in a small closed or semiclosed kitchen. 

The work triangle is still useful today, but with kitchens that now run the gamut from tiny single-wall galleys up to large open-plan kitchens, it’s more useful to think in terms of work zones instead.

Work zones are really just the natural evolution of the kitchen work triangle. As kitchens grew in size and opened up to other rooms in the house, it became more of a challenge to place appliances in a neat triangular layout. We also have more appliances than ever before — dishwashers, extra sinks, microwaves, separate cooktops and wall ovens — not to mention more people working and socializing in the space. By sectioning off your kitchen into work zones, you’ll maximize efficiency in a larger space; more cooks, as well as their guests, will be better accommodated.
Group appliances and fixtures according to use.To set up work zones in your kitchen, think of the tasks you perform regularly: storing food, prep, cooking, baking, serving, eating, cleaning, making coffee, chilling wine etc. A work zone contains everything you use to perform each task. 

For instance, you should place your dishwasher next to your sink, with a compost bin and a garbage bin nearby to streamline kitchen cleanup.


Store what you need where you need it most. In addition to grouping appliances and fixtures according to use, give yourself enough storage in each zone for what you need to perform the task. 

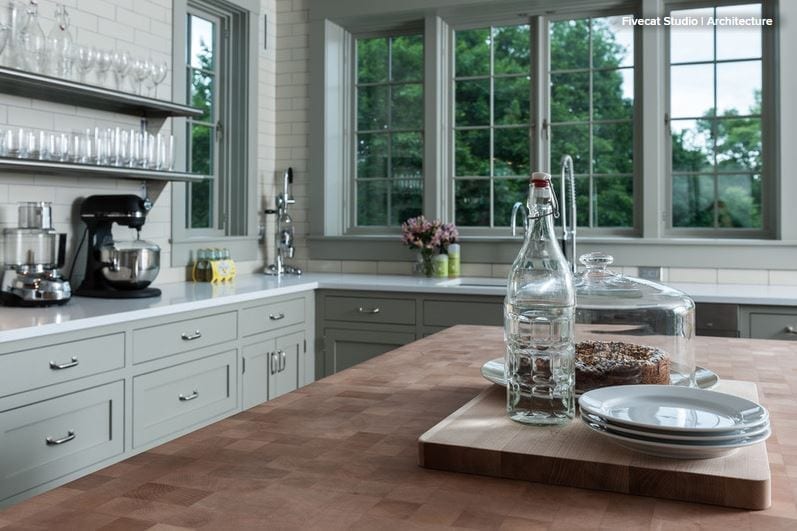
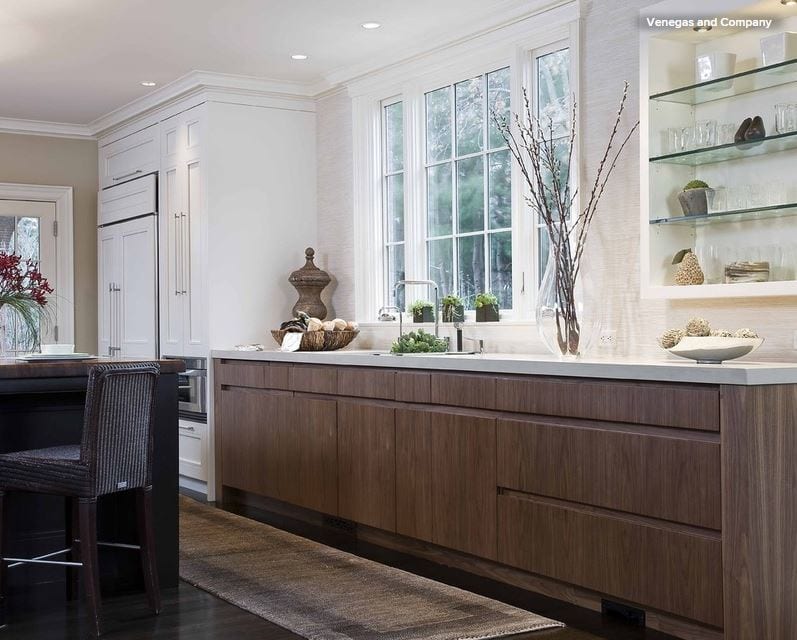
This wood-topped baking zone is perfect for kneading bread or rolling out pizza dough. All the bread-making and baking tools can be stored in the cabinets below. Someone can easily work at this station while another person prepares food in another part of the kitchen.

Provide landing areas next to major appliances.For safety and efficiency, consider placing a countertop landing area next to your major kitchen appliances, especially the range, cooktop, microwave and wall ovens. 

You want to be able to quickly set down something hot without having to trek halfway across your kitchen. This will also give you a cooking work zone; you can store items like knives, cutting boards and pots and pans in the cabinets and use the countertops for chopping and cooking prep.


Create a kids’ zone. If you have children and a good-size space, set up an area in the kitchen where the kids can hang out, do homework and eat snacks. This will allow you to all be in the kitchen together without the little ones getting underfoot.


Consider a zone for guests. If you have an open kitchen and like to entertain often, you know how important it is to have an area where guests can hang out and chat while you prepare food and drinks. A large island or peninsula works well for this, since it can act as a barrier that keeps visitors from getting in your way while also giving them a place to perch while you work. Again, think about the items you use for serving and entertaining, and store them in the cabinets below so you can easily access them.

Widen the aisles. Whether you opt for the traditional work triangle or to break up your kitchen into work zones, pay attention to your kitchen’s aisle widths. The recommended minimum aisle width is 42 inches, but I prefer 48 inches, especially in kitchens with multiple cooks. If you cook and entertain often and have the space, you could go as wide as 54 inches. Wider than that, though, and your space will likely become inefficient, as you’ll spend more time walking than cooking. 

9 Ways to Spice Up Your Kitchen Cabinetry

Article by: Jo Leevers

Freestanding cupboards, mix-and-match colors, contrasting textures, individual drawer pulls — kitchens can be as creative as their owners. If sleek, clean-cut units don’t get you excited, take inspiration from these nine ways to get a more varied look in the kitchen.


SpiceUpCabinetry1.JPG

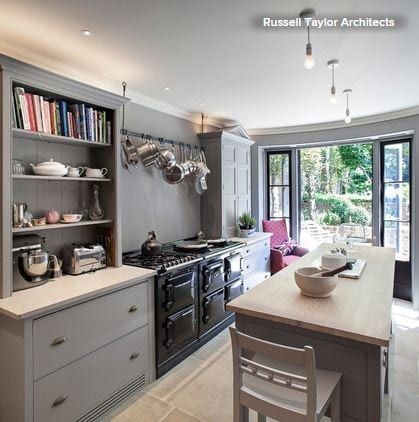
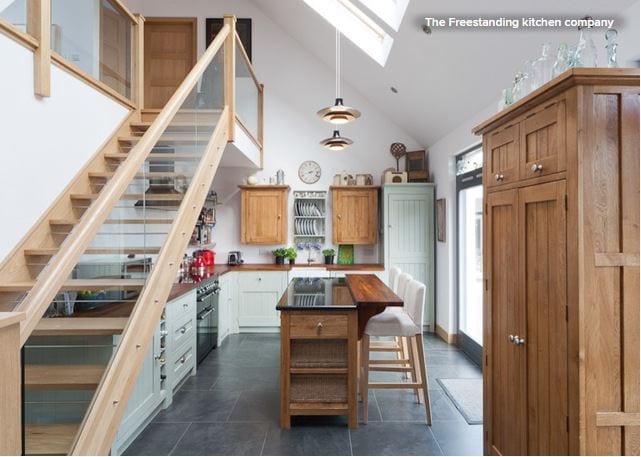
1. Mix cabinet styles. This kitchen’s cabinets are all the same trendy gray, but they sidestep predictable symmetry because two pieces are different styles. They work together, but their drawers have different depths and storage options. A rail for pots and pans creates more variety.


SpiceUpCabinetry2.JPG

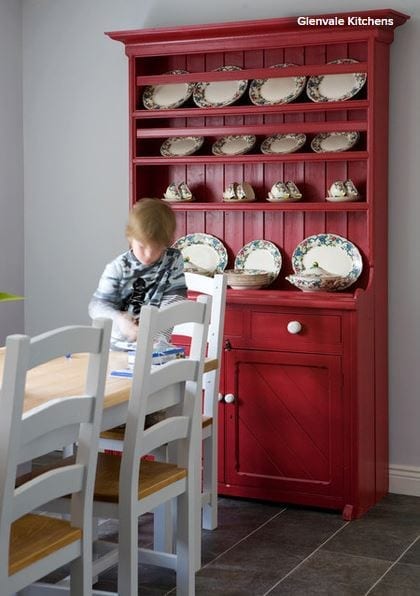
2. Feature a key piece. To keep things interesting in a kitchen with matching cabinets, add a standout storage unit. It could be a plate rack or a bright or weathered dresser. It will break up the rigidity of a single-finish kitchen and let your personality shine through.


SpiceUpCabinetry3.JPG

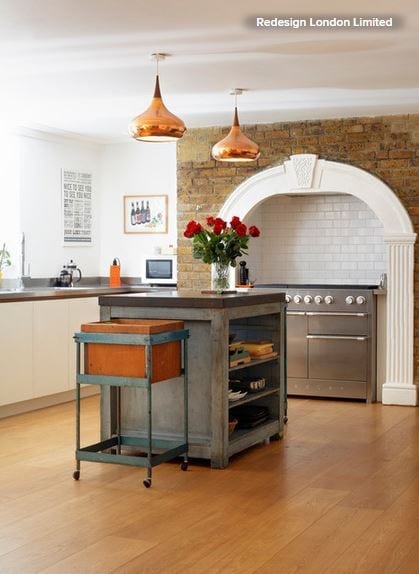
3. Work in an island. For impact in a large kitchen, an island needs to be a “hero” piece that can carry the space. This weathered central island doesn’t conform to any norms. Along with the industrial storage on wheels, it adds just the right amount of character.


SpiceUpCabinetry4.JPG

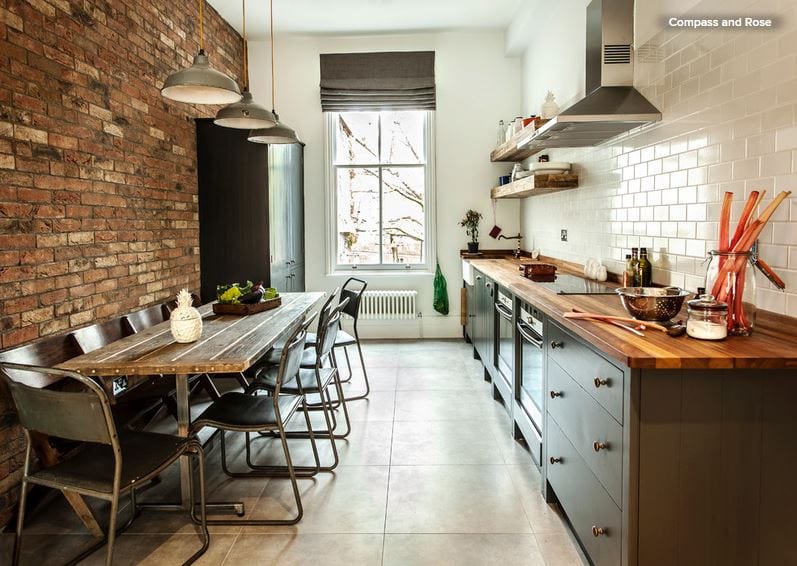
4. Try an urban loft style. A strong dose of industrial style livens up this slim kitchen. Wood, metal, gray paint and ceramic surfaces mix easily, thanks to similar tones. Then there are the contrasts: Bare bricks are mirrored by glossy metro tiles, waist-level units by a taller cabinet. Matching kitchen pieces in this space could have looked too uniform; these look freed up and innovative.


SpiceUpCabinetry5.JPG

5. Go two-tone. A blend of two shades — palest green and natural bare timber — brings a breath of fresh air to this kitchen. Tongue and groove cabinets and two types of handles are extra custom twists.


SpiceUpCabinetry6.JPG

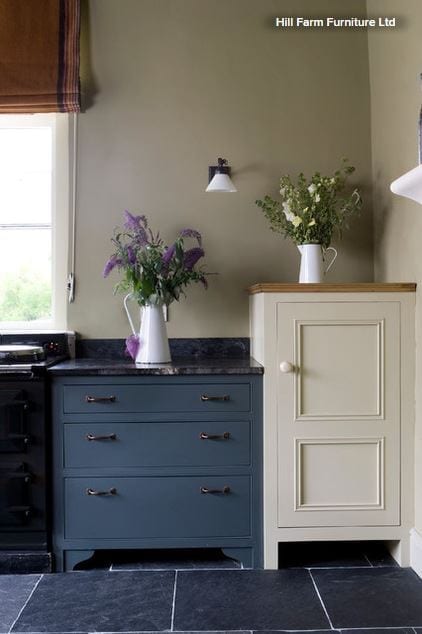
6. Compare and contrast. A creative kitchen doesn’t have to be off-the-charts unusual. Simply combining two tones, two surfaces and two heights does the job. Carefully crafted finishes give the space a quality feel.


SpiceUpCabinetry7.JPG

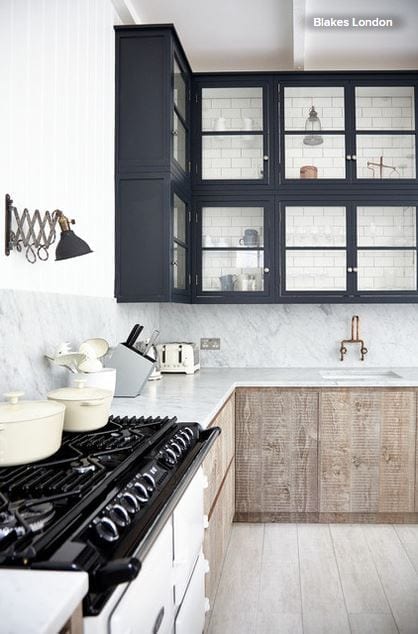
7. Cast it in monochromes. The dark-on-light color scheme here adds visual interest, and the contrast of raw, waxy timber and smooth marble creates a look that’s unique.


SpiceUpCabinetry8.JPG

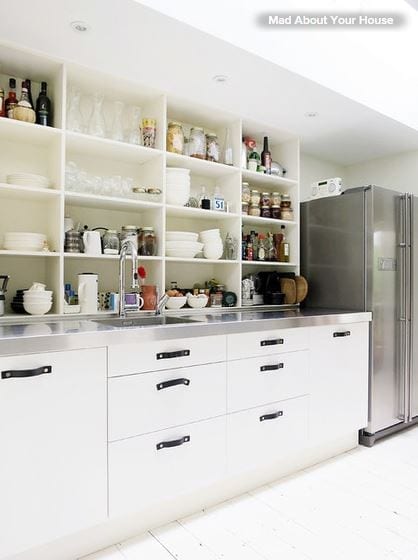
8. Add your own handles. This kitchen works its magic with off-the-shelf Ikea units with tactile leather handles. They handles are eye catching and pleasant to hold — significant, when you consider how often they’ll be used. Open shelving on top combines with a stainless steel countertop that wouldn’t be out of place in a chef’s kitchen.


SpiceUpCabinetry9.JPG

9. Pare it back. This converted industrial warehouse is a dramatic space, so the designer wisely didn’t try to make the kitchen steal the show. Zinc-colored doors inside pale frames, metallic tones and a pared-back 1960s vibe for the furnishings help this kitchen work in its setting — proof that statements don’t always have to be shouts.

Pet-Friendly Design: Making Room for the Dog Dish

Article by:

When I say there is nothing quite so unpleasant as stepping in a dog’s water dish, I speak from experience (no thanks, Augie). Like a good pet owner, I keep my pup’s water bowl filled with fresh water. It’s located in the kitchen, where I inevitably get busy and distracted and step in the drink. It has happened a lot, which goes to show you really can’t teach an old dog new tricks.

When I next remodel, I’m going to plan for this condition, using the clever ideas from these fellow pet owners as inspiration.

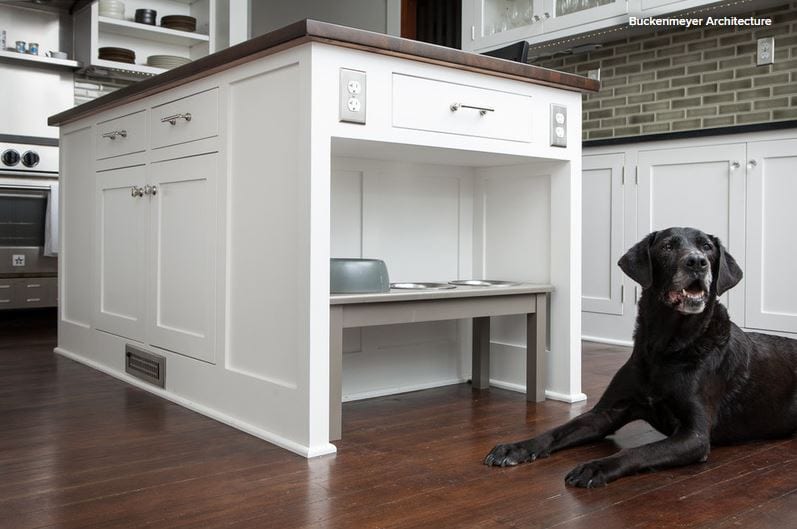
In this project, by Buckenmeyer Architecture, finding a space for the dog dishes was a key design consideration. “A recess at one end of the island keeps the bowls out of the way,” says Marty Buckenmeyer.

Judging from the gray around his or her muzzle, I’m guessing this sweet dog is a little long in the tooth. I’m sure the elevated bowls are appreciated.
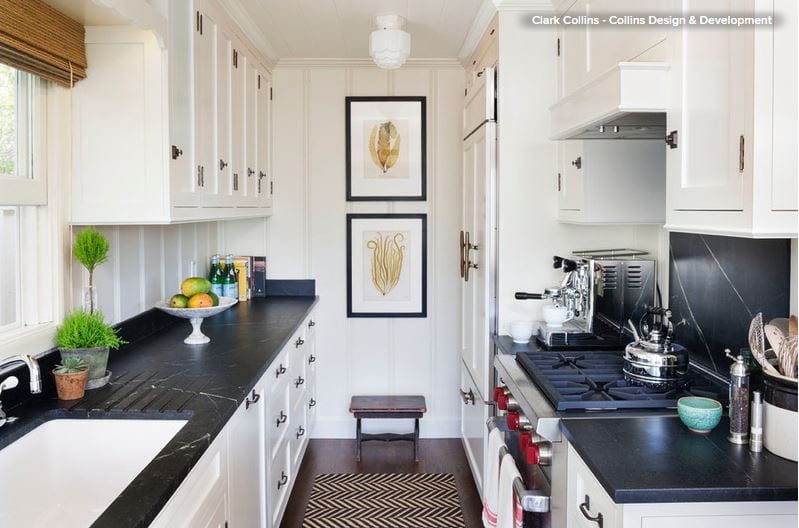
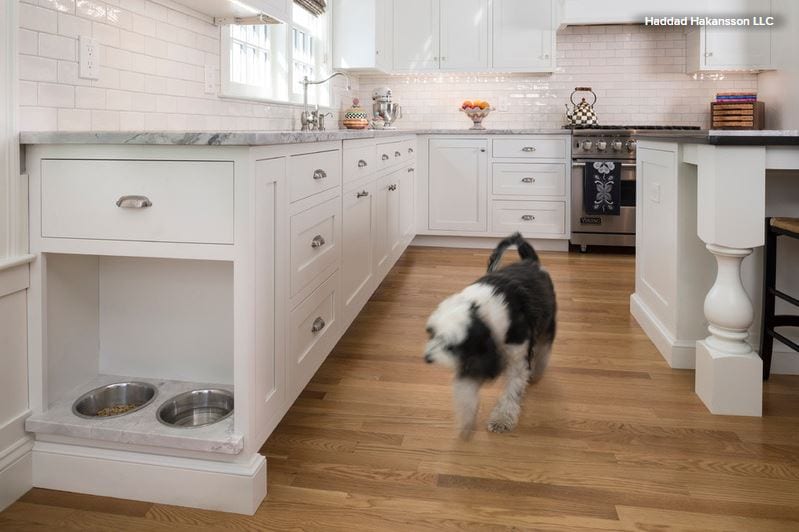
The designers at Haddad Hakansson employed a similar strategy in this kitchen, but they placed the bowls at the end of a cabinet run as opposed to an island. It’s a smart move in a kitchen that has the room. “One of the highlights of this space is the custom dog dishes,” the designers write. They are “inset into a small slab of white quartzite. The cabinet above has a tilt-out tray for dog treats.”

Perhaps the feature helped the space win first place in the 2014 NKBA northern New England kitchen design competition. And, as you can tell by the blur running toward the eating area, it clearly has won the popular canine vote too.

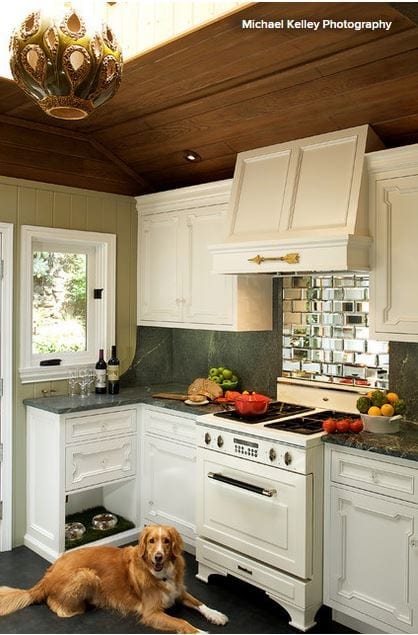
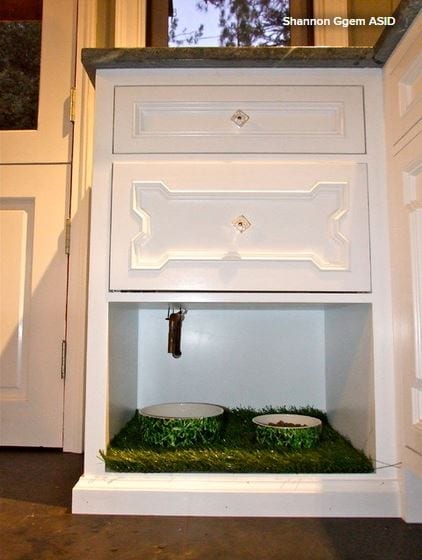
In this kitchen, by Shannon Ggem, the lucky dog can pretend he or she is eating in the wild, thanks to a dining niche lined with artificial turf.


A closer look reveals the other features. Not only does the space have bowls printed with a grass image, but it has a faucet with an above-counter control. As the designer says: “No bending!”


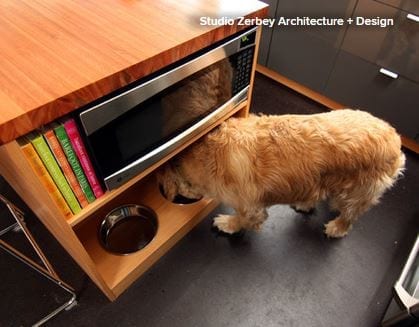
With built-in bowls and the same material treatment as the kitchen island, this dog eating area, by Studio Zerbey Architecture + Design, is almost undercover.


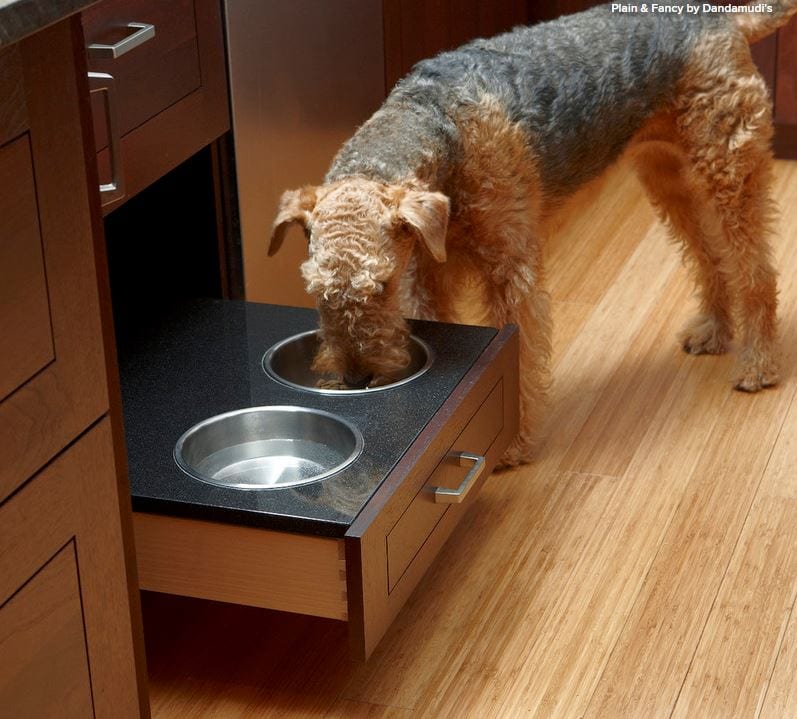
This niche, by Plain & Fancy by Dandamudi’s, is outfitted with a pullout drawer and an easy-to-clean stone surface.

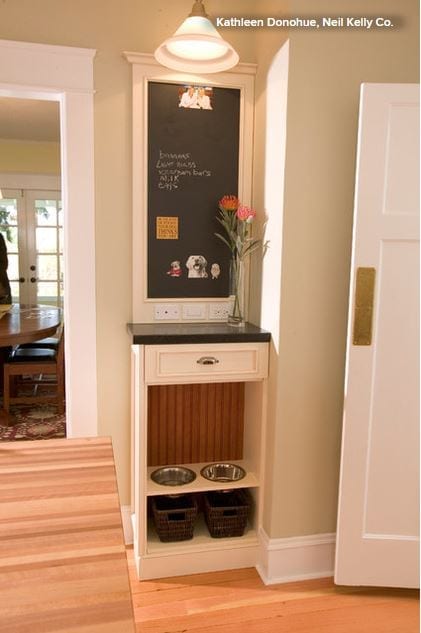
Some smart and space-endowed homeowners take the dog dishes farther from the kitchen triangle. In this project, by Kathleen Donohue, Neil Kelly, the eating area is under the command center.


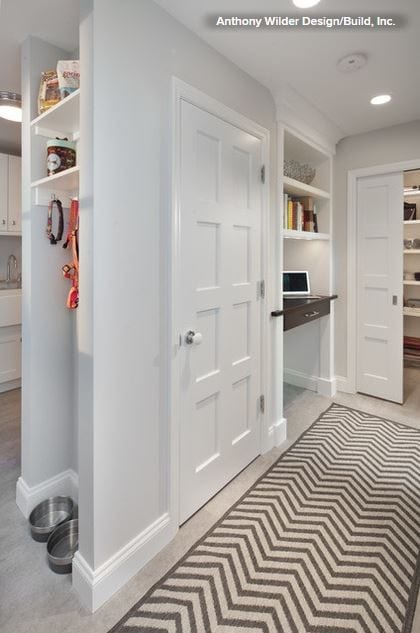
In this project, by Anthony Wilder Design/Build, an eating and storage area for the dog is tucked into the end of a wall. Below are the bowls; above are dog accessories and treats.


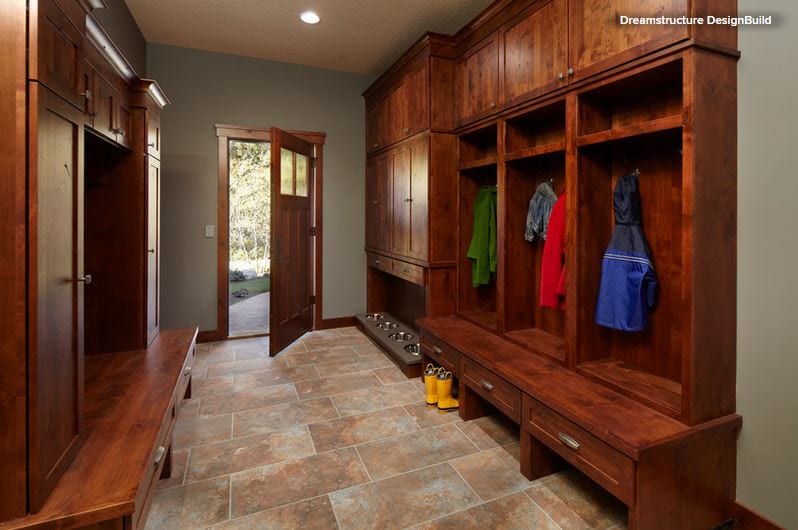
This mudroom, by Dreamstructure DesignBuild, is outfitted for everyone — four-legged and two. Due to the recessed and elevated nature of the bowls, you’d be unlikely to step in them — but if you did, you might be wearing your boots.

10 Upgrades for a Touch of Kitchen Elegance

Article by:

“Elegant” “sophisticated,” “simply beautiful” — are these words you would use to describe your dream kitchen? Even just adding a coat of paint, new lighting and carefully chosen decorative details can bring your current kitchen a bit closer to that dream. Here are 10 upgrades to consider.

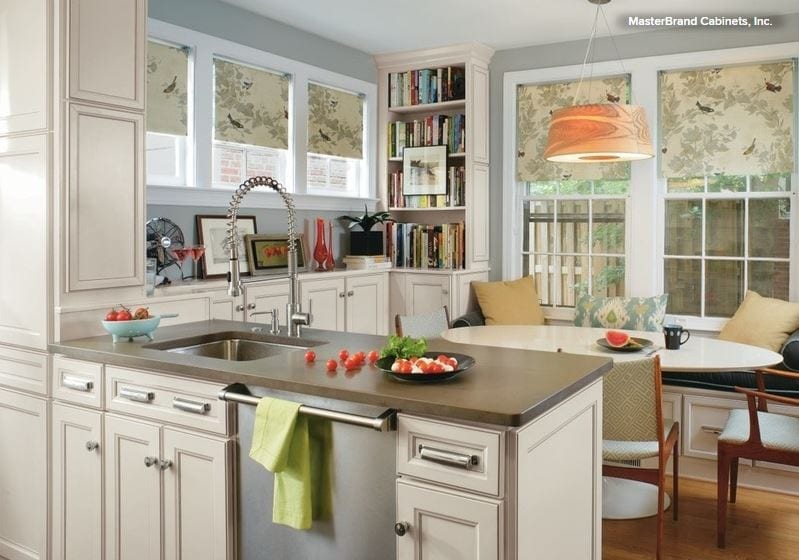
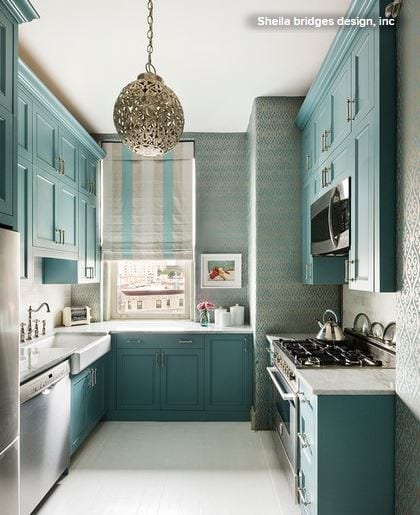
1. Roman shades. Covering the window with a classic Roman shade gives the kitchen a finished look. Go with a color and a pattern that coordinate with your cabinet and wall color, or stick with natural linen, which goes with everything.

2. Topiary. A pair of topiaries flanking the sink is an elegant finishing touch. Use a vintage champagne bucket as a cachepot, or wrap a simple pot in burlap and tie on a velvet bow. If your kitchen gets a good amount of natural light, by all means get real plants — but if not, there’s no shame in picking up a couple of high-quality fakes.


3. Pendant lighting. Swapping out a plain ceiling light fixture for something with more style can be done quickly — and your new pendant light can become the focal point of the room. Don’t be afraid to go big; even in a small kitchen like the one shown here, a sizable pendant looks striking, not overpowering.

4. A rich cabinet color. Whether you paint your cabinets or stain them a natural wood tone, a rich color is a high-impact, low cost way to change the look of your kitchen. Try a saturated hue like the blue-green shown here, or a chic gray or slate on just the lower cabinets.


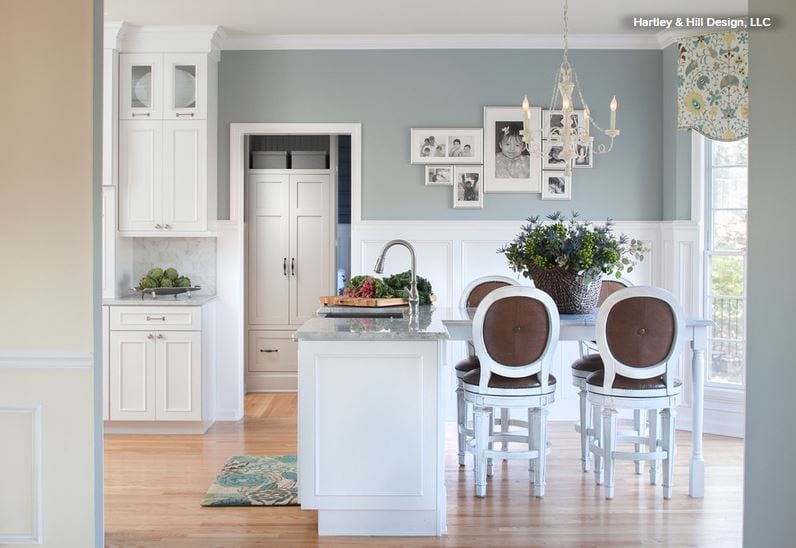
5. Wall paint. If you don’t want to repaint or restain your cabinets, another way to bring in color is by painting the walls. With all of the appliances and cabinetry, kitchen wall space is often fairly limited — which means not only is it quicker to paint, but the color is less likely to overwhelm than in, say, the living room. Try a smoky blue, rich “greige” or warm mocha.

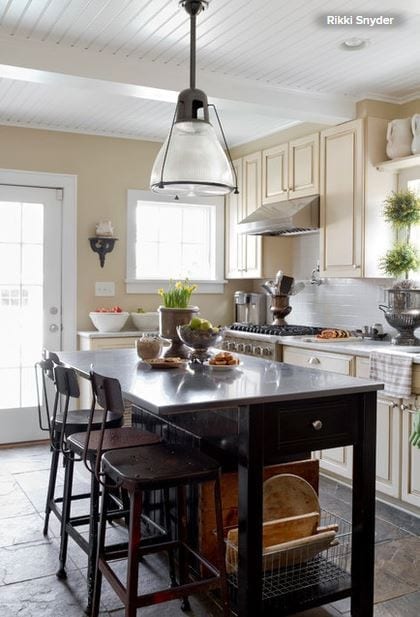
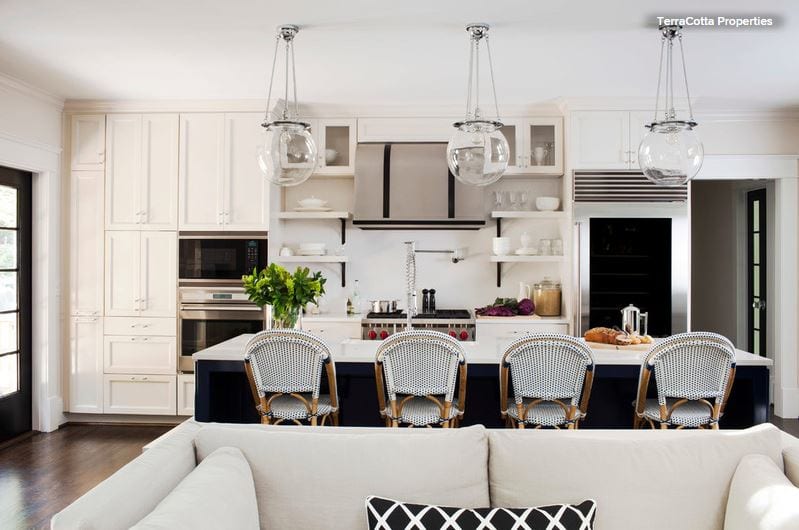
6. Upscale counter stools. There are so many options when it comes to kitchen counter seating that there’s no reason to stick with plain bar stools, unless you want to. Try classic bistro stools (like the ones shown here), sculptural wooden stools or sleek Lucite ones.

Also notice the pendant lights in this kitchen — if you have a long counter, placing a row of three large-scale pendant lights above is a great way to bring focus to the space. Glass pendants like the ones shown here are elegant and maximize light.

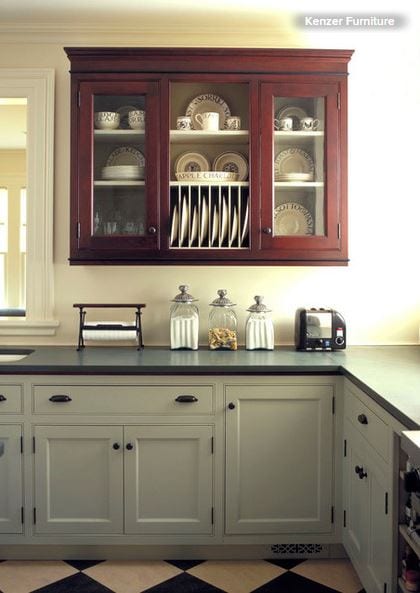
7. Glass cabinet fronts. Update old cabinets by having several of the doors replaced with glass fronts. This costs far less than replacing full cabinets and can completely change the look and feel of your kitchen. Remember, whatever is in the new glass-front cabinets will be visible at all times, so choose just a few cabinet fronts to replace and commit to keeping the interiors orderly.


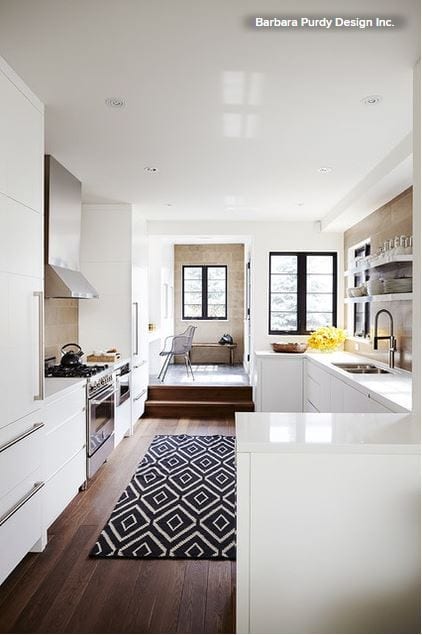
8. A chic rug. If you’ve shied away from using a rug in the kitchen for fear of spills and stains, try a chic indoor-outdoor version. These rugs come in beautiful colors and patterns now, and no one has to know about the stain-fighting powers.


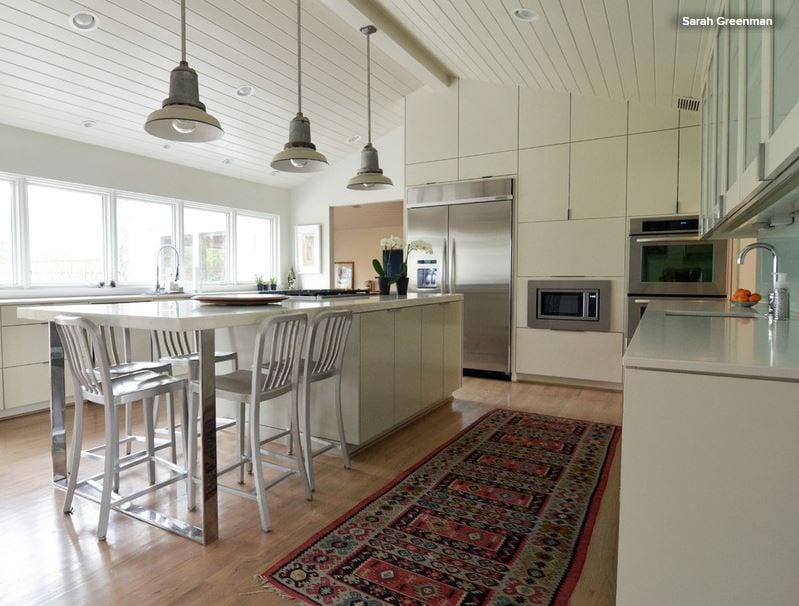
If you’re not frightened of spills, lay down a beautiful (but not priceless) Oriental carpet. Rugs made from wool and other natural materials are quite forgiving when it comes to stain removal, as long as you act promptly.

9. Branches in a tall vase. Branches last far longer than cut flowers — but more than that, they exude elegance. An armful of seasonal branches plunked in a tall vessel is an easy way to instantly boost the ambience in your kitchen.

10. Decorative details. Framed artwork on the wall — and not just “kitchen” art but art you could just as easily hang in another room — can add polish to any kitchen.

Mirrors are unexpected in the kitchen, and just like in other spaces, they can be a wonderful way to boost light. A small table lamp tucked onto the counter brings a warm glow that makes a kitchen feel more welcoming.

Bathroom Workbook: 7 Natural Stones With Enduring Beauty

There’s no other material quite like natural stone. No two pieces are exactly alike, and nothing else adds the same organic warmth and texture to a bathroom. Not to mention the longevity. If they’re well maintained, your stone surfaces can last a lifetime. 

Marble, of course, has been a popular stone choice for luxurious interiors for centuries based on its inherent beauty. But while Carrara and Calacatta remain classics, they have their downsides, and they aren’t your only options. Here are seven other natural stone varieties, each with its own unique characteristics and strengths, worth considering for your bathroom floors, countertops and walls.

Read more

Not a Big Cook? These Fun Kitchen Ideas Are for You

Kitchen design tends to be centered around the presumption that you will be spending loads of time in your kitchen cooking. Not so earth shattering, right? But the fact is, not everyone loves to cook. Not everyonecould really use a supersize fridge, dual ovens and an enormous island. So what do you do when it’s time to think about a kitchen design, when all you’ve used your oven for is storage? While it makes sense for certain basics to be in place (sink, stove, dishwasher) even if you rarely cook, there is plenty of room for creativity. From wine storage to a library wall, here are a few ideas to consider.


BigCook1.JPG

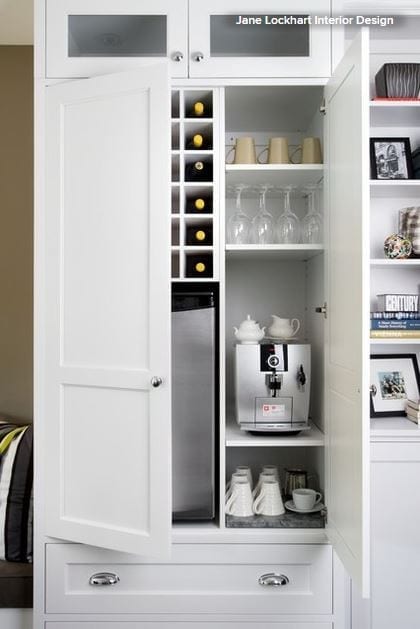
Wine storage. If you don’t have a large collection of cookware to house, it makes sense to shift some of that storage space to something you do use. 

Oenophiles may want to add a temperature-controlled wine cellar cabinet for bottles that need to be aged, in addition to open shelving for ready-to-drink bottles.


BigCook2.JPG

You could even create your own home wine bar experience with wall-mounted bottle storage, paired with a “tasting bar” attached to the wall.


BigCook3.JPG

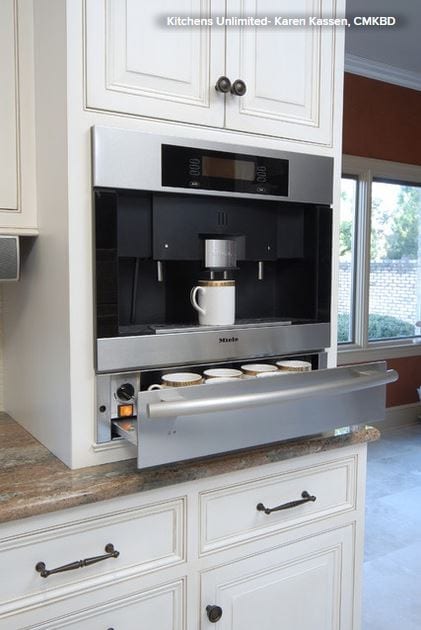
Fancy coffee station. Love your morning latte or cappuccino? Splurge on a top-notch espresso maker so you can whip up your morning beverage of choice at home. Since you’re not spending as much on fancy knives and cookware, why not?


BigCook4.JPG

When less work is what you want, look into a fully automatic coffeemaker. With the push of a button, you can have a cup of delicious coffee or even an espresso drink, depending on the model you choose.


BigCook5.JPG

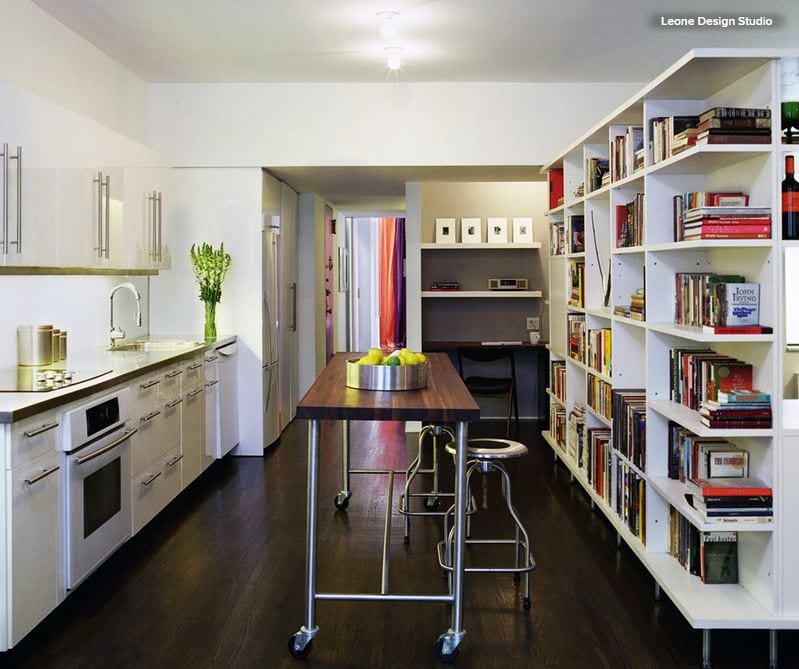
Library wall. If books are one of your great loves, consider dedicating a kitchen wall to bookshelves. You can house a good portion of those books that seem to multiply when you’re not looking, while keeping kitchen storage options flexible. As long as the shelves are large enough, a future owner could just as easily use them to store dishes, cookware or cookbooks.


BigCook6.JPG

Cover (but rethink) the basics. Even those who rarely cook should include a few basic appliances in the kitchen. You never know if you may one day decide to cook at home more often, and even if you don’t enjoy cooking frequently, most people occasionally need a kitchen stocked with the basics. 

A fridge and freezer, a stovetop, an oven, a sink, a dishwasher, a toaster and a microwave are the bare bones for most kitchens. That said, these pieces do not need to be massive to get the job done. In fact, going overboard on appliances may just make cooking in your kitchen seem more intimidating.


BigCook7.JPG

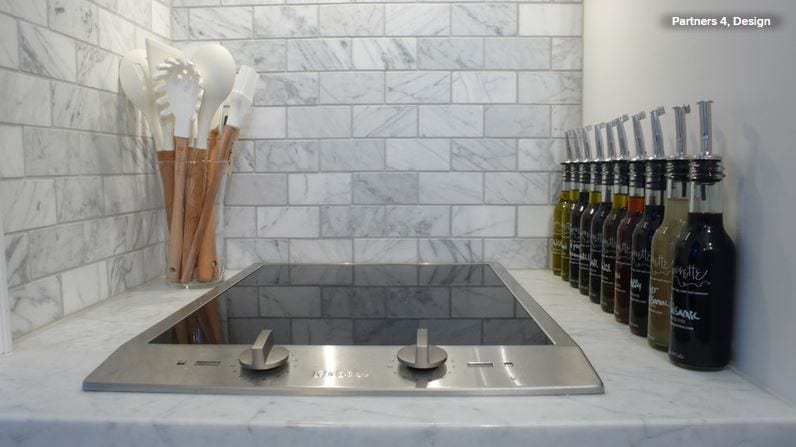
If your kitchen is small and you rarely cook, one alternative to the classic big oven is a separate cooktop paired with a compact oven, or even a convection toaster oven, for cooking (or warming) food.


BigCook8.JPG

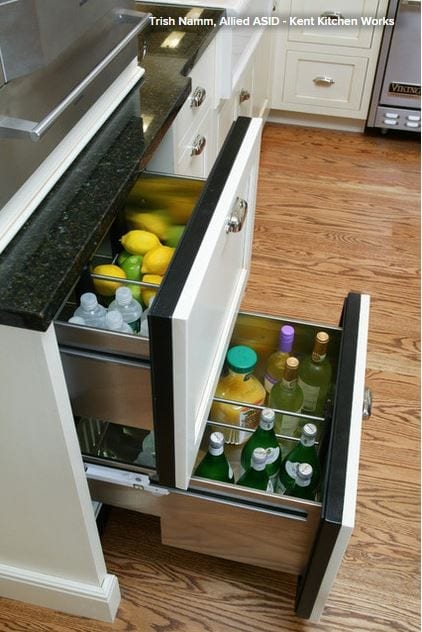
And if you really have no use for a giant fridge and freezer, consider instead a few handy fridge and freezer drawers. They can be tucked into small nooks and don’t overwhelm a space like a full-size fridge can.


BigCook9.JPG

Delightful seating area. When you don’t need to worry about maximizing cabinet space, some fun possibilities open up; a lovely little seating area in the kitchen is one great option. After all, even if you don’t spend hours cooking, you likely do want to be able to sit down in a comfortable space and enjoy a cup of coffee in the morning, or a simple supper (even if it’s takeout) after a long day.

To-Dos: Your October Home Checklist

Article by:

With the air turning crisp, leaves falling and farmer’s markets overflowing with squash, gourds, apples and potatoes, October is a time to celebrate the harvest — and button up the home and garden for the winter ahead. From raking leaves to sharpening knives, see which of these 13 to-dos make your list this month.

1. Rake leaves. Clearing away leaves from lawns is hard work, so be sure to choose a rake that feels good to you. Plastic rakes don’t last as long, but they are lightweight — which helps if you get fatigued easily (or have a lot of leaves to contend with). Instead of bagging all of the leaves you collect, try chopping some with your mower and using them as mulch in flower beds, or add them to a compost pile.

2. Clean gutters and downspouts. Schedule rain-gutter cleaning for after most of the leaves have fallen. Inspect gutters and downspouts for cracks and loose parts, and make repairs as needed.
3. Put up storm windows and doors. If you use storm windows or doors and haven’t put them up yet, now is the time.

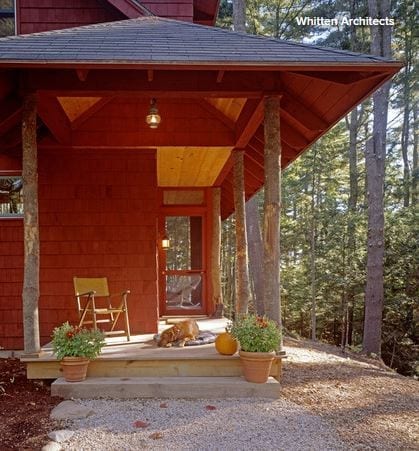
4. Decorate outdoor spaces. Fall flowers, pumpkins and gourds are versatile enough to work throughout the season. If you enjoy decorating for Halloween, get out that frightful decor.

5. Shut off exterior faucets and store hoses for winter. Disconnect, drain and roll hoses before storing them indoors for the winter. Shut off the water supply to exterior faucets to prevent frozen pipes.


6. Sharpen knives. The holidays are around the corner — be sure your knives are ready to take on all of that cooking by having them professionally sharpened now.

7. Launder and iron holiday linens. Get ahead of the holiday crunch and prep your linens — roll up the freshly laundered and ironed linens on old wrapping paper tubes to prevent wrinkles.

8. Decorate with layers of warmth. Get toasty indoors with cozy throws, thicker curtains and soft rugs. If you haven’t done so yet, swap out your bedding for thicker blankets and fluffy duvets.


9. Check safety devices. Test all smoke and carbon monoxide detectors in the house, and replace batteries as needed. Check the expiration date on the kitchen fire extinguisher and replace it if needed.
10. Swap seasonal clothes.
 Depending on where you live, September can be a fickle month — but now that October has arrived, it’s time to settle into more predictable fall weather. Gather up stray sandals and lightweight clothing that you don’t plan to wear again until spring, and pack it away. Also look over your fall and winter clothes, and note anything you will need to replace this year.


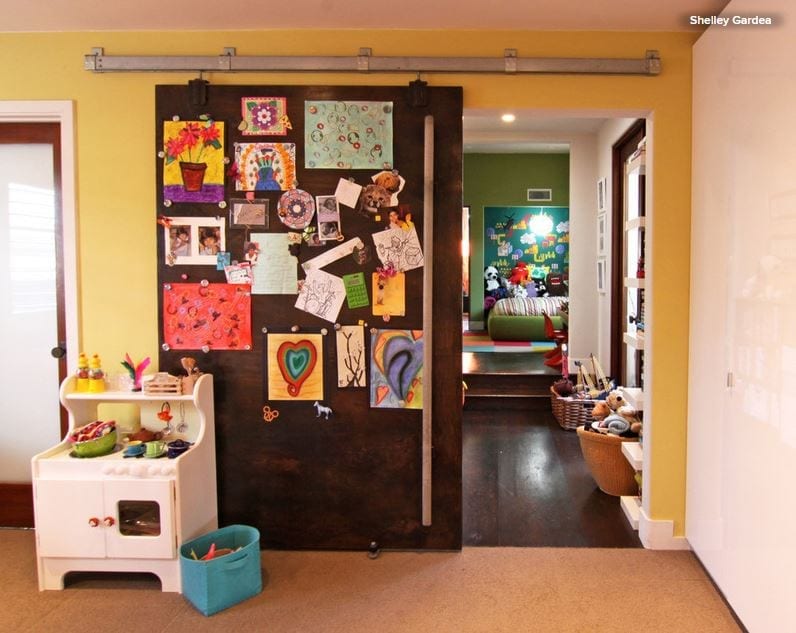
11. Start an art wall for all of those school projects. Corral those stacks of paper coming home from school with a dedicated space for display. A large bulletin board or magnet board makes hanging art and papers easy. Or you could try art wire with bulldog clips, or simply tape art to the wall with colorful masking tape.

12. Start planning or making holiday gifts. I know it seems like the holidays are still a long way off, but that’s exactly why it’s smart to start thinking about gifts now. Especially if you have hopes of making anything by hand! At the very least, start a gift list that you can add to as you think up ideas.

13. Savor your favorite fall traditions. Is there a local harvest festival you’d love to attend, a favorite pumpkin patch or apple orchard to visit? Mark some dates on your calendar so you don’t miss out.

4 Secrets to a Luxurious Bathroom Look

Ever looked at a beautiful bathroom and wondered what takes its design to the next level? You’re not alone. Many homeowners want to know how some bathrooms get that mysterious designer je ne sais quoi. I’ll let you in on a few secrets. Because the overall material costs are low in a small space like a bathroom, it’s a great place to spurge a little on a few features. But it also helps to know where to spend and where to save. Here are a few of my favorite tricks for getting a nicely finished look for a lower cost.

Read more

How to Recycle Your Kitchen

Article by:

If you like getting your hands dirty, demolition can be one of the most fun and satisfying parts of a kitchen remodel. But whether you’re going the DIY route or hiring a pro, you’re likely to end up with at least one Dumpster full of trash. The Environmental Protection Agency estimates that about 170 million tons of construction and demolition waste were generated in 2003 (the last year for which figures are available), with most of it ending up in landfills.

The sad part is that much of what ends up as waste could have been reused or recycled. While recycling building materials can take longer than simply whacking them with a sledgehammer, construction company SOD Builderssays some things — such as large appliances and granite countertops — can be easily recycled with the right charity or facility.

Here you’ll learn more about what you can recycle and who might want it.

Who to hire: Green demolition is mandatory in some cities, and contractors may not get their permit deposit back if they don’t recycle a certain percentage of their construction and demolition waste.

Your general contractor (GC) may already be skilled in green demolition, or may hire a green demolition company that already has ties to local charities and can remove building materials and finishes according to their specifications. If your remodel is a DIY project, check with your municipality to find out whether any local recycling regulations apply.

Whether it’s your city or your conscience that motivates you to recycle, you may decide to hire a green demolition company yourself to keep things easy and ensure that all recyclable materials are removed properly. If you do decide to go this route, choose a reputable firm for which no complaints have been registered with the Better Business Bureau, and get references.

If you’re looking to recycle a handful of items — your appliances, countertops and cabinets, for example — you can likely handle the process yourself.

Cost range: Because it takes more time to carefully remove building materials than to smash them with a sledgehammer, hiring a green demolition company can be more costly — up to $10,000 more per job than a regular demolition company, depending on scale and size. Fortunately, some of the extra cost can be offset by avoiding landfill charges and with tax credits earned by donating materials.

Many GCs, however, now recycle materials automatically. Oren Dagan of SOD Builders recycles many materials during a typical project. For an average kitchen, he says he usually incurs a cost of only $150 at the county recycling plant; he donates many materials for a tax write-off or reuses them in the same home.

Typical project length: About a week.

Project considerations: If you’re working with professionals, they’re already equipped to deal with the proper removal of building materials, but if you’re doing it yourself, it’s smart to take an inventory of what you’d like to recycle and talk to local charities to determine what condition they need items to be in.

Some groups will accept only still-assembled cabinetry and countertops, while recycling plants will take scraps, remnants and small pieces. You might also consider doing a second sweep after you’re finished the remodel to donate any large remnants or unused materials instead of throwing them away.

Here’s are some materials you can likely recycle or donate:

  • Kitchen appliances of all sizes
  • Cabinetry
  • Granite countertops
  • Steel, copper and brass elements — and don’t forget about plumbing
  • Lumber and plywood
  • Hardware
  • Fixtures (Including lighting, electrical and the sink)
  • Unused ceramic or vinyl tile
  • Drywall
  • New carpet and linoleum
  • Doors
  • Furnishings

Getting started: Reach out to local charities about two weeks before you start the actual demo to find out which items they’ll accept and in what condition.

Dagan donates almost all large appliances to The Salvation Army, as it accepts nonworking appliances as long as they are fixable. “I’ve never had an appliance they couldn’t fix,” says Dagan. He offers smaller appliances to Goodwill, although he doesn’t have any specific reason for splitting things up that way other than a wish to share the wealth among multiple charities.

Habitat for Humanity also accepts a wide variety of kitchen items, from fixtures to appliances to cabinetry, although it relies on specific donation guidelines to ensure that the families who move into the homes it builds won’t get stuck with substandard materials. You can review the guidelines here.

Dagan also likes to recycle kitchen cabinets within the same home, and points out that old cabinetry can create great, practical storage space for a garage or workshop. If you’re getting rid of an old or damaged granite countertop, or end up with leftover pieces, Dagan says fabricators are often happy to take them off your hands.

As for the rest, call your municipal recycling plant to find out what it accepts, whether there are fees and how those charges are calculated.