FREE DESIGNS AND ESTIMATES

Construction Timelines: What to Know Before You Build

Article by:

One of the first questions we get when talking to clients about a new custom home or remodel is, “How much will it cost?” This is usually quickly followed by the second question, “How long will it take?” The answer to both is, “It depends.” 

While we don’t want to be evasive, there are many variables that have to be factored in before we can adequately assess the time and cost of a project. One thing that most homeowners don’t see initially is that for a properly planned and designed project, the design and construction phases can last roughly the same amount of time.

As I’ve written about previously, the design process can take up to six to eight months for a new custom build (including determining the client’s needs, designing to those needs and deciding how to best to build the project). And it could take longer if there are complications such as other approvals or if someone objects to your project. This time is not spent just daydreaming and staring out the window — your team is working to understand the design and construction to smooth out potential issues in your timeline. 

Be realistic. It’s often difficult for homeowners to know what’s realistic for each phase of the construction process. For instance, one week to construct a kitchen is not realistic due to the number of services and trades involved — installers, plumbers, tile contractors. It would be foolhardy to think that everything could be done to satisfaction in such a short time. 

What’s also confusing is that timelines for suburban developments can be wildly different from a single luxury custom home. We have had clients ask us why a custom home costs more per square foot and takes longer that a tract home. The reason is that developers have crews that move from house to house and are dedicated to that development. This means that for all intents and purposes, they finish their work on one house and move on to the next. 

On a custom house, your framers might be a week late showing up (because their last job ran late), and then the next trade in line is thrown off as well. You can see how this can cause a domino effect on your project. Most contractors can’t wait around until the exact time they are needed on a site — they have to keep their crews busy, or they don’t get paid. So they tend to overbook rather than underbook to make sure they have enough work to keep them busy. 

Often one trade cannot begin work until another is finished. There is time associated with mobilization and demobilization of each trade, and often one of the trades cannot be onsite the exact day or even within a week of when you need it. So often there is downtime that needs to be accounted for. When planning, it is important not to try to plan schedules too tightly, as they rarely work out that way.

Understand the timeline and the implications of what is written. Do you know what demolition entails? The mess? The noise? Words on a spreadsheet can seem awfully abstract when you are looking at them in your living room, but they can mean a whole different thing when one wall of your kitchen is blown out in the middle of a March storm. It might mean that you want to consider moving out while some of the more disruptive work is completed. Your design team should be helping determine this as part of their work. If you don’t understand what specific items mean, clarify them with your team. 

Also, plan for construction to take place when it will best for the project and affect your family the least. One of our clients learned the hard way after he insisted on starting a project just as winter set in. The contractors were only able to pour the footings, and then a cold snap set in, which held up the project for six weeks. The lesson here is to understand what potential delays could crop up that could derail your project timeline. 

What is in the timeline? Your timeline should be specific enough to include a level of detail that helps you and your team understand the logical flow of activities, so you can follow the logical steps that should happen in sequence. It is typical to require the contractor, as part of the contract, to prepare a comprehensive schedule for all work and phases from start to finish and present it at the beginning of the project. This schedule is then reviewed at a start-up meeting, at which the client, architect, contractor and major consultants who might have a stake are present. 

Get a sense of what could affect the timeline. There’s a rule of thumb for construction used by contractors and designers: “It will always take longer than you think.” There are a number of factors that conspire against the pristine order of a freshly minted timeline document: complexity, weather, number of construction workers, permits and inspections, back orders and delays for materials, equipment or fixtures. Make sure you or your team members are aware of products that have a long lead time. These could include materials, equipment or products that are not warehoused locally, such as custom-fabricated furniture, light fixtures or imported tile. 

There are also municipal approvals to consider. A municipal building inspector has to come to the site during construction to check that what is being built corresponds with the drawings. It is the contractor who coordinates these inspections, and who needs to plan for them so work doesn’t stop while everyone waits for an inspection to happen. 

If the inspector feels there is a gap between what has been documented in the drawings and what is being built, he or she can request more information from the team. This is to understand that the changes from what is documented in the drawings will still satisfy the building code. Or worse, the inspector can place a stop-work order, which effectively shuts down the project. And that can put your timeline on life support. But with proper project oversight from your design team, your project should be able to move along smoothly. 

Final details. For some reason the final details on a project often take a lot longer that you might think. The reasons are that they often require very precise work that takes time to get right. Things like installing trim or custom millwork can wreak havoc on a schedule. 

On a recent project, we specified a custom millwork piece for all the bathrooms. The challenge was that it required coordinating three separate trades: the millworker who built the cabinets, the countertop contractor who fabricated the quartz and the stainless steel fabricator who made the custom sink. While the owner is thrilled with how it looks, it did take some time to get everyone involved on the same page. 

One thing to keep in mind is that at the end of the project, most of the budget has been spent and many of the tradespeople have made the majority of their money. This is where holdbacks come in. A holdback keeps a certain percentage of the contract amount set aside until a set number of days after completion. Tradespeople want to see their work completed and will finish up what needs to be done. But in some cases, it is important to not only judge the amount of work done when a contractor applies to be paid but also how much work is left, and can the remaining funds motivate them to finish. It is not unheard of for a designer to return a contractor’s application for payment and insist that certain details are done first before the requested amount is paid out. 

Just as there is not one piece of art that everyone agrees is perfect, there is no construction timeline that fits all projects. But by working with your team, you can understand the components that go into your timeline. And that can help avoid timeline trauma during construction.
February Checklist for a Smooth-Running Home

Article by:

February means the thick of snow and cold across most of the country — but that doesn’t mean we can’t dream of spring. Spruce up your home this month by giving your bedroom a feng shui makeover in honor of Valentine’s Day, plus take stock of cleaning supplies, keep road salt out of the house and refresh walls with paint (and maybe some new art, too). These 10 to-dos can help you keep your home in top shape, even if the weather outside is still frightful. 

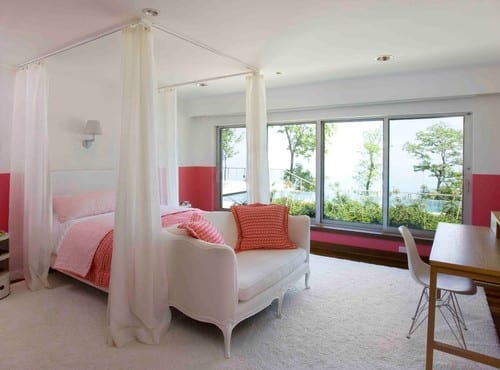
1. Tune up the bedroom with feng shui. With Valentine’s Day this month, it seems like a good time to spruce up the bedroom. If you are in the market for new bedding, consider shades of pink and red to encourage romance. Rotating your mattress regularly will help prevent it from developing hills and valleys, which in feng shui can be seen as separating partners in the bed. While you’re moving mattresses around, have a peek underneath the bed — what’s hiding down there? In feng shui a clean area beneath the bed is best for relationships, so be sure to vacuum up dust bunnies and deal with hidden clutter. 

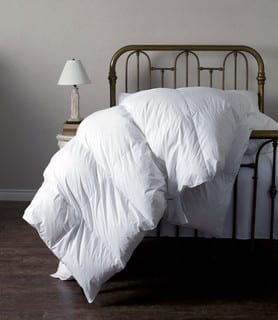
2. Fluff pillows and duvets. Duvets and pillows looking flat? That’s because over time, air is pressed out of them, and the filling (whether down or synthetic) can shift and clump.

Some synthetic-filled pillows and duvets can be machine washed (check the labels for instructions), and even down-filled items can be fluffed up in a dryer on a no-heat setting. Toss a few tennis balls into the dryer with your duvet to help it regain maximum fluffiness.


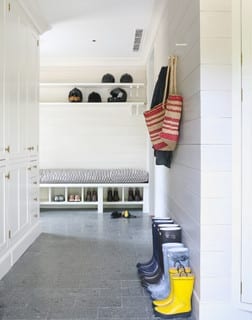
3. Clean up road salt from entrances. If the winters are chilly where you live, you know how grimy road salt and melted snow can leave your floors, especially in high-traffic areas. After giving these areas a thorough cleaning, stow your supplies nearby so it’s easy to sweep floors regularly.

4. Clean seat cushion covers. Like floors, entryway seat cushions can take a beating at this time of year. Take off removable covers and launder them; spot clean upholstery. 

5. Tidy and restock cleaning supplies. Get prepped for spring cleaning by sorting out your cleaning supplies. Toss products you tried that didn’t work and fill in gaps with fresh cleaning supplies and tools. Look over your dish towels, mop heads and microfiber cleaning rags, and replace them as needed. 

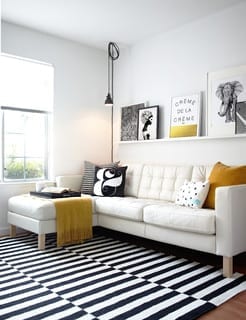
6. Rotate art and touch up walls. Give your home a winter wake-up call by swapping out a few pieces of artwork, patching dings in the walls and touching up paint. 

Make rearranging your collection easier in the future by installing a few narrow shelves around the house, like the one shown here.


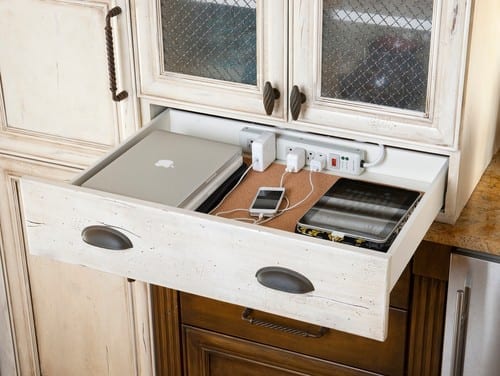
7. Recycle e-waste. Old tech devices, CFL bulbs, ink and toner cartridges, and batteries contain dangerous toxins and cannot be tossed in with your other garbage or recycling. Store up your e-waste in one place and take it to a recycling center that accepts these items. Some office supply stores, like Staples, have free e-waste recycling programs — just drop everything off at your local store, and you’re done. 

8. Change furnace filters. A clean furnace filter will help your heating system work more efficiently and trap more dust and allergens. Most high-efficiency filters should be changed every three months — but it helps to inspect them every month, just to be sure.

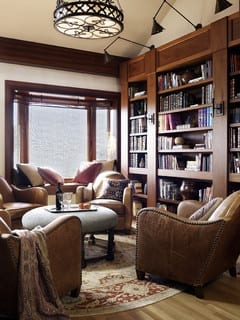
9. Spruce up your favorite reading nook. This is a good time to get cozy with a book. Spruce up your reading corner with a warm throw, a soft rug and a comfy ottoman to put your feet on. And if you find yourself stuck in the house on a snowy afternoon, why not spend it organizing your books?


10. Book a summer rental … and consider renting your home out, too. Seem a little early to be thinking about summer vacations? Not if you want to book a cottage — highly coveted locations arebooked months in advance. 

And if you want to offset the costs of your trip this year, consider listing your home as a rental or look into doing a house swap to stay somewhere for free.

Get the Look of a Built-in Fridge for Less

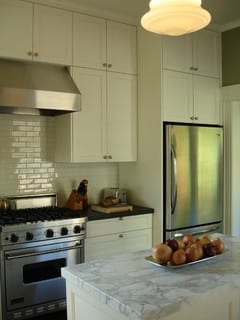
Counter-depth refrigerators are popular appliances for new kitchens. Their appeal is that they save precious aisle space by sitting flush with the cabinets rather than sticking out. This makes the kitchen look smooth, custom and visually organized. These models can also be finished with matching cabinet doors for an even more cohesive look. 

The downside is that they are very expensive. They can cost two to three times more than a regular freestanding refrigerator, and must be wider to incorporate the same cubic-foot storage. If you want this look without the extra expense, design your kitchen and cabinets so that your regular-size refrigerator sits flush with your cabinets. 


Freestanding refrigerators come in many sizes and configurations. While typical base and tall cabinets are 24 inches deep, freestanding refrigerators can be 30 inches deep or deeper, with varying widths too. Therefore, you should select your refrigerator early in the planning process. 

To get that flush look, you can either recess a freestanding unit several inches into a wall or have your cabinets furred out several inches to meet the refrigerator.

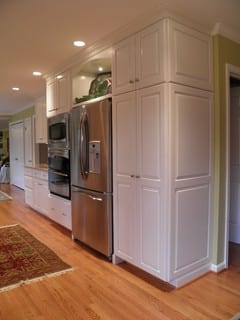
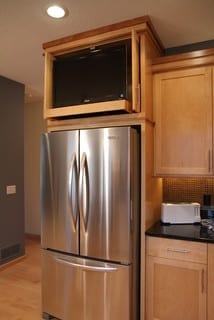
In this kitchen, if you look carefully, you’ll see that the 24-inch-deep base cabinets that extend to the left are recessed behind the oven cabinets. The appliance portion of this wall, therefore, has been furred out. Note that the side cabinet panel on the right has been ordered in a larger size to accommodate the depth of the refrigerator, which is greater than 24 inches.

In this case the refrigerator door sticks out beyond the base cabinets. But because there are deep side panels and a deep cabinet overhead, the refrigerator looks incorporated into the cabinetry and built in. A deep cabinet above the refrigerator is a good place for tray storage or even a TV, as shown here.


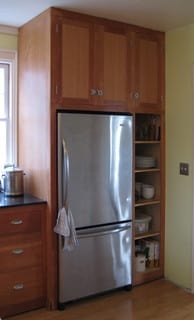
Here is another kitchen where deeper cabinets accommodate the greater depth of a freestanding unit. This refrigerator is a bottom-freezer model.


Here the homeowners built a wider set of deep cabinets, which include some open shelves for display.


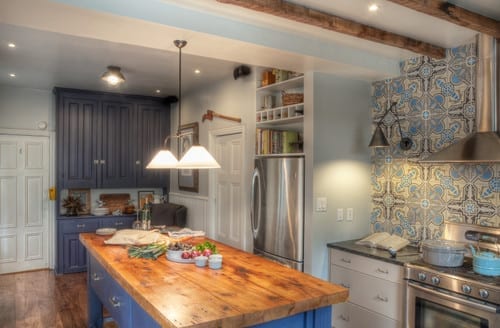
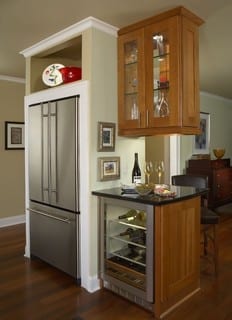
Another way to “build in” your freestanding refrigerator is to actually build it into the wall, rather than cabinets. If your kitchen plan will allow it, this is probably the easiest and most cost-effective way to get the look, because you can make the opening the exact width and depth you require. You also won’t have any cabinet modification costs. 


This is particularly nicely done. The very linear refrigerator fits neatly into the opening and is trimmed out with house molding. The display shelf above draws the eye up. With a wine refrigerator next to the main refrigerator in a small peninsula cabinet, this is a good area for dispensing drinks.


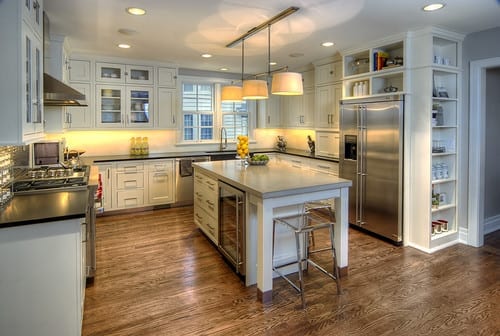
This kitchen utilizes a very effective way to incorporate a deep refrigerator: The cabinets are stepped, for a very custom look. From the corner to the left of the refrigerator, the cabinets are typical sizes: 12 inches deep on top; 24 inches deep on the bottom. Next comes the upper cabinets and the appliance garage unit, probably 15 to 18 inches deep. The deepest cabinet is around the refrigerator, with display cabinets above. 

On the end is a tall open cabinet that creates an interesting visual display as one enters the kitchen. Note that this cabinet is actually pulled back a few inches from the refrigerator depth, so it continues the stepped look and also makes that corner a little less intrusive. 


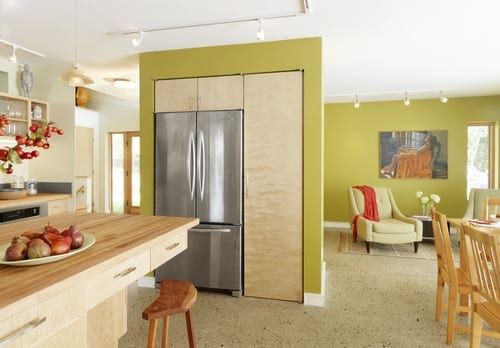
Cabinets and a refrigerator sandwiched within stud walls create a clean and contemporary look here. The cabinets were probably furred out within the walls. 


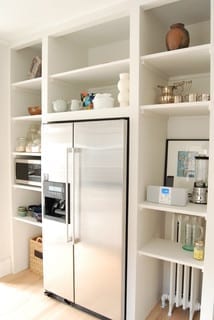
This refrigerator is the centerpiece of an open display area. This would be a very cost-effective way to house a refrigerator and small appliances while using a short wall. (This treatment even accommodates a radiator.)

9 Big Space-Saving Ideas for Tiny Bathrooms

Really small bathrooms can be incredibly challenging to design. When there is hardly room for a toilet and sink, let alone a shower (a tub being totally out of the question), the usual fixtures and room layout simply will not do. These nine ideas go beyond simply making your bathroom look bigger and actually free up more space.

Read more

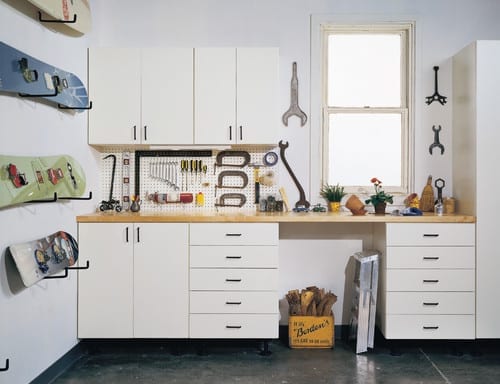
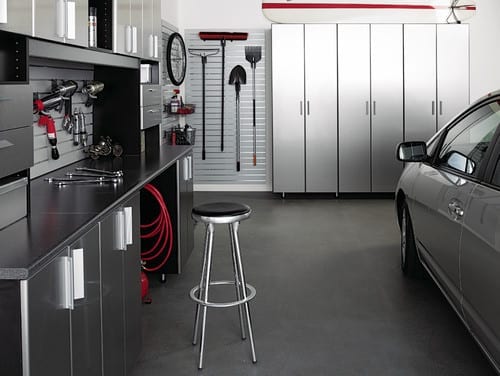
How to Make Your Garage a Storage Powerhouse

Article by:

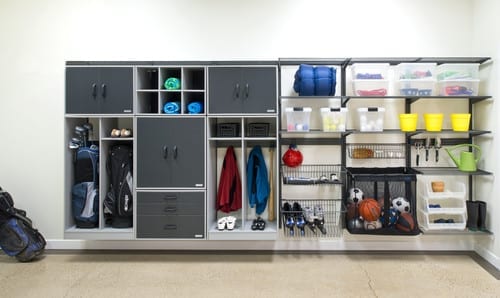
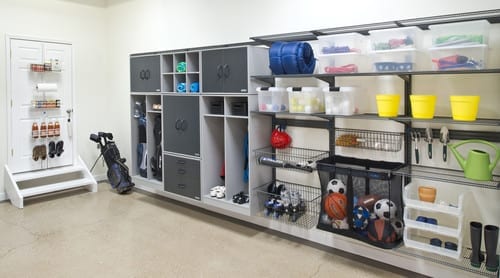
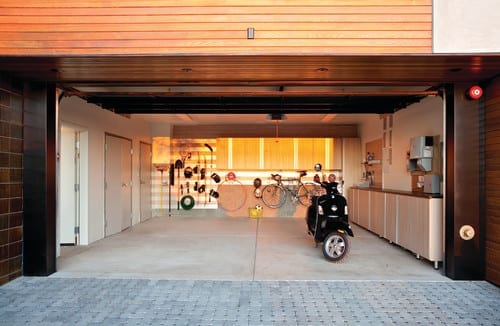
Garages often turn into repositories for everything from sports equipment to holiday decorations. But with planning you can turn your garage into a harmonious space with room to actually — wait for it — park the car. 

Why: “The garage is definitely the most underutilized space in the house,” says Amanda Le Blanc, a professional organizer (she owns The Amandas in Birmingham, Alabama) and spokesperson for Organized Living. “I prefer the garage to the attic for storage, because a garage actually has less temperature fluctuation.” 

How: Ginny Scott, chief design officer at California Closets, says to start by determining what you need to store. “You need to think of your goal first. Do you want to store overflow from the pantry? Do you want to make a Costco closet? Do you need a workspace like a potting or tool bench? Maybe you need a place to stash sports equipment. Once you have determined what you want to do, that will inform the kinds of shelving, cabinets or lockers you need,” she says. 

Le Blanc says knowing yourself will help you figure out what kind of storage you need. “It’s all about how you function in a space,” she says. “An organization system won’t change the type of person you are.” 

She says that although a garage lined with storage lockers and cabinets has a clean look — an important factor for garages that open at the front of the house and are visible to the neighbors — if you are of the “out of sight, out of mind” school, closed storage is not for you. “If you are that type of person, then go for open shelves and labeled bins,” she says. 

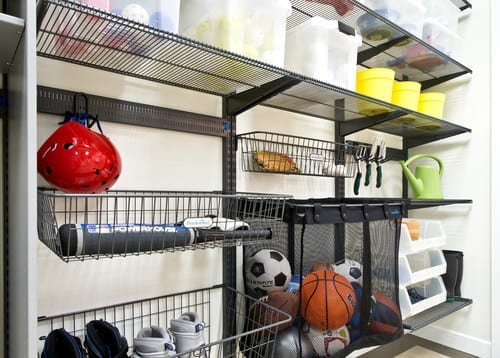
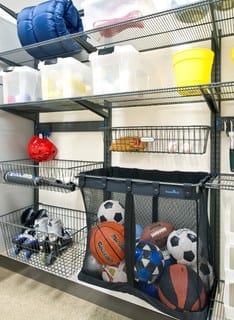
Le Blanc says for kids’ items and sports equipment, open shelving is almost always the answer. “I tell parents to forget about lids with kids,” she says. “If there’s a barrier, it seems to keep them from putting things away.”

Whether you are installing shelves that are open or in cabinets, Scott suggests choosing adjustable units for the garage. “It’s more important here than elsewhere,” she says. “We may not change the way we use our pantry much, but what we use in the garage varies from year to year and season to season.”


Scott adds that it’s also important to choose storage units that are made from durable materials; items stored in the garage are often heavy, so you want shelves that won’t buckle or bend. She also says in the tighter confines of the garage, you are more likely to bump, brush or spill things on your storage system, so an easy-clean material such as a high-grade laminate is often best. 

Cost: It depends on material selection. “The good news is that garage storage is often less expensive than regular closets, because we usually use simple materials and hardware, and we usually don’t use glass inserts,” says Scott.
She says an 8-foot run of open shelving in a garage could cost $1,000 to $2,000 (rough estimate). A row of storage lockers of the same length might cost $2,000 to $3,000. 

Project length: From consultation to installation, this kind of project could take three to five weeks, Scott says.

Permit: “Unless we are doing something structural or adding electricity, no permit is generally needed,” says Scott.

10 Creative Ways to Give Your Kitchen a Boost

Article by:

After the flurry of holiday decorating and baking is over, the kitchen can seem a bit forlorn — but if one of your New Year’s resolutions was to eat healthier or cook more meals from scratch, it’s important that your kitchen supports and inspires you. These 10 doable project ideas are meant to revive your kitchen and make it an inspiring space that you can’t wait to spend time in. 

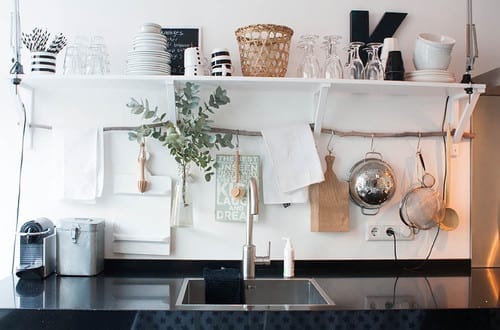
1. Use a found branch for hanging storage. If you have open shelving in your kitchen that rests on brackets, as shown here, extend their usefulness by sliding a thoroughly cleaned branch through the base of the brackets. Use simple S-hooks to hang small pots, spoons and other implements from the branch. You can even hang a small vase or a mason jar filled with flowers — just wrap the mouth with twine or wire to form a loop, and hang it from an S-hook. 

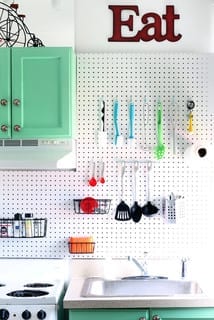
2. Try a pegboard in the kitchen, à la Julia Child.Julia was onto something when she designed the now-famous pegboard pot rack on the wall of her Cambridge, Massachusetts, kitchen. You can do the same by hanging basic pegboard on your kitchen wall and using S-hooks to hang cooking tools. Paint the pegboard to match your walls for a seamless look.


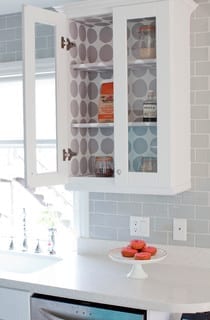
3. Paper the interior of a glass cupboard. This is the perfect place to use up any wallpaper scraps you may have lying around. If you don’t have wallpaper, pretty shelf paper or even quality gift wrap can be used instead.


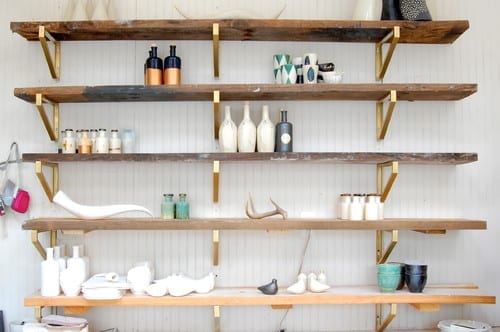
4. Glam up your shelving. Another easy way to spice up basic wall shelves is by coating the brackets with gold paint. Or, for a similar effect with less fuss, pick up a roll of copper tape at the hardware store and carefully apply it just to the edge of your shelves — this works best if your shelves are the same thickness as the tape, so measure first. 

5. Bring in fresh blooms. You probably buy fresh flowers for other rooms in your home from time to time; why not snip a few for the kitchen? A vase with slots for individual blooms, like the one shown here, is ideal because it is so easy to fill.


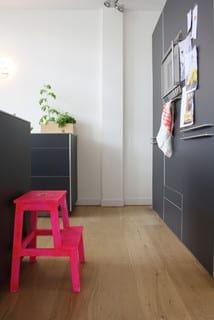
6. Add a splash of unexpected color. Transform a plain step stool with a lick of vibrant color, paint the interior of your pantry, or line your drawers with polka dot paper. A bit of color or pattern where it’s least expected is especially welcome when it’s gray outdoors.


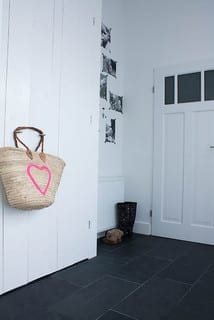
7. Give a plain basket a neon makeover. French market baskets are some of the most useful little accessories to keep around the house. Spruce one up with a simple painted-on star or heart in a neon hue and use it as a mini hamper for dirty dish towels and cloth napkins. For an even easier (and temporary) take, simply cut and stick on neon-colored tape.


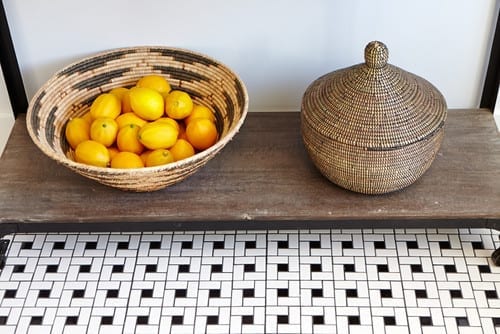
8. Borrow baskets from the living room for produce storage and display. Have some lovely woven baskets just hanging around with nothing in them? Put them to work storing long-lasting produce like potatoes and onions, or colorful piles of lemons and limes.

9. Hang food magazines on a painted ladder. If you refer to your favorite food mags for recipes and menu ideas, keep them handy. A short ladder leaning against the wall is a perfect spot for stashing a rotating selection of your favorite foodie magazines — and in a pinch, even smaller cookbooks could get slung here, too.


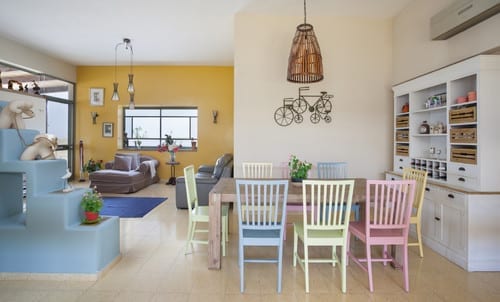
Mediterranean Dining Room by Other Metro Architects & Designers Echo Design 

10. Paint your breakfast-table chairs in a rainbow of pastels. Love pastels? I say, go for it. After all, why shouldn’t your breakfast nook be the cheeriest spot in the house? And if you don’t feel up to painting the entire chairs, even giving just the legs or seats a dip in pastel hues would make a big impact.


Bathroom Remodel Insight: A Houzz Survey Reveals Homeowners’ Plans

Article by:

Older and younger generations often have widely differing viewpoints. But who knew bathrooms could be so divisive? In a recent Houzz survey, we asked homeowners planning a bathroom remodel or already in the process of one about their needs and desires. Of the 7,645 people who responded, young and old homeowners tended to fall into two clear groups. 

Homeowners 65 and older are more likely to skip adding a bathtub than those under 35. This could be for any number of reasons, but it’s likely that younger homeowners may have or expect to have children, who would be more likely to use a tub. Plus, those 65 and older likely choose showers because they’re more accessible for aging in place.

Bathtubs have traditionally boosted resale value (which 31 percent of the respondents said was the driving factor for their bathroom remodel), but older people may be planning to hang on to their homes longer, so resale isn’t as much of an issue.


For those adding tubs, freestanding models top the list, with 33 percent of respondents preferring them over drop-ins, undermounts and other styles. 


Young and old are also split on how they like their showers. If you’re under 45, you’re more likely to choose a rain shower and multiple showerheads. If you’re over 55, you likely prefer hand showers and sliding bars.


Meanwhile, there are two camps when it comes to, er, No. 2. The survey found an even split when it comes to toilet exposure: 52 percent of people want an open toilet versus one behind a closed door. Younger homeowners (25 to 34 years old) prefer tankless or wall-mounted models over the traditional two-piece ones. 

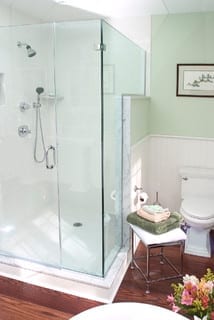
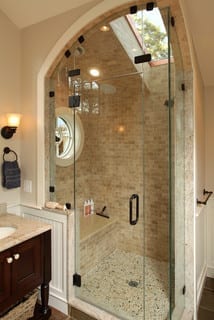
Upgrading features and fixtures was the main reason cited for remodeling a bathroom (49 percent). Frameless glass is one of the more popular choices. About 79 percent of people will choose all-glass enclosures for their main shower, and 54 percent will chose frameless glass.


Lighting is important too, whether it’s bringing in the natural sunshine with skylights or adding more LED lights. New windows top the list too, with 48 percent of respondents saying they plan to add a window and 41 percent a lighted vanity mirror. And if that’s not enough, 7 percent say they’ll add a showerhead with LED lights.


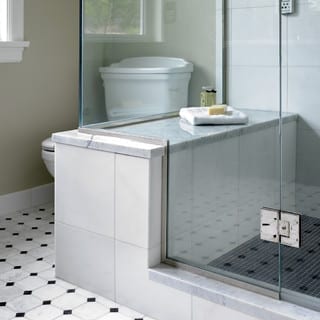
Also, 42 percent of all respondents are planning to add a shower seat. I think it was Winston Churchill who said, “Why stand when you can sit?”


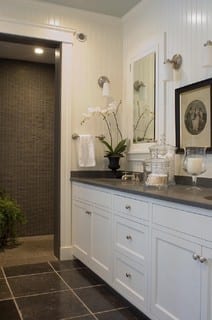
White cabinets are the preferred color choice, with 32 percent of homeowners saying they’ll choose this ultimate neutral hue.


Contemporary Bathroom by Portland Kitchen & Bath Designers Kirstin Havnaer, Hearthstone Interior Design, LLC 

Brushed nickel (26 percent) and polished chrome (24 percent) are the front-runners for faucet finishes.

Bathroom Remodel: A Survey Reveals Homeowners’ Plans

Article by: Mitchell Parker

Older and younger generations often have widely differing viewpoints. But who knew bathrooms could be so divisive? In a recent Houzz survey, we asked homeowners planning a bathroom remodel or already in the process of one about their needs and desires. Of the 7,645 people who responded, young and old homeowners tended to fall into two clear groups.

Contemporary Bathroom

by

Glen Ellyn Kitchen & Bath Remodelers

Drury Design

Homeowners 65 and older are more likely to skip adding a bathtub than those under 35. This could be for any number of reasons, but it’s likely that younger homeowners may have or expect to have children, who would be more likely to use a tub. Plus, those 65 and older likely choose showers because they’re more accessible for aging in place.

Bathtubs have traditionally boosted resale value (which 31 percent of the respondents said was the driving factor for their bathroom remodel), but older people may be planning to hang on to their homes longer, so resale isn’t as much of an issue.

Traditional Bathroom

by

Atlanta General Contractors

Cablik Enterprises

For those adding tubs, freestanding models top the list, with 33 percent of respondents preferring them over drop-ins, undermounts and other styles. 

Contemporary Bathroom

by

Bethesda Design-Build Firms

ART Design Build

Young and old are also split on how they like their showers. If you’re under 45, you’re more likely to choose a rain shower and multiple showerheads. If you’re over 55, you likely prefer hand showers and sliding bars.

Rustic Bathroom

by

Toronto Photographers

Peter A. Sellar – Architectural Photographer

Meanwhile, there are two camps when it comes to, er, No. 2. The survey found an even split when it comes to toilet exposure: 52 percent of people want an open toilet versus one behind a closed door. Younger homeowners (25 to 34 years old) prefer tankless or wall-mounted models over the traditional two-piece ones.

Traditional Bathroom

by

Fort Washington General Contractors

HomeTech Renovations, Inc.

Upgrading features and fixtures was the main reason cited for remodeling a bathroom (49 percent). Frameless glass is one of the more popular choices. About 79 percent of people will choose all-glass enclosures for their main shower, and 54 percent will chose frameless glass.

Traditional Bathroom

by

Duxbury Design-Build Firms

ARCHIA HOMES

Lighting is important too, whether it’s bringing in the natural sunshine with skylights or adding more LED lights. New windows top the list too, with 48 percent of respondents saying they plan to add a window and 41 percent a lighted vanity mirror. And if that’s not enough, 7 percent say they’ll add a showerhead with LED lights.

Transitional Bathroom

by

Victoria Architects & Designers

The Sky is the Limit Design

Also, 42 percent of all respondents are planning to add a shower seat. I think it was Winston Churchill who said, “Why stand when you can sit?”

Traditional Bathroom

by

Larkspur Architects & Designers

McCoppin Studios

White cabinets are the preferred color choice, with 32 percent of homeowners saying they’ll choose this ultimate neutral hue.

Contemporary Bathroom

by

Portland Kitchen & Bath Designers

Kirstin Havnaer, Hearthstone Interior Design, LLC

Brushed nickel (26 percent) and polished chrome (24 percent) are the front-runners for faucet finishes.

How to Remodel Your Fireplace

Article by:

The fireplace is often the most commanding element in any room it’s in. Size and abundance of material are often factors, but as renovation specialist Ron Parko points out, our eyes are naturally drawn to the darkest object in a room anyway. Oftentimes, that’s the firebox when it’s unlit. 

Naturally you want this element, and everything that surrounds it, to complement the rest of your home. In many older homes where large brick fireplaces prevail, this can pose a challenge. What do you do? Cover it, paint it, rip it out? Here’s what to consider. 

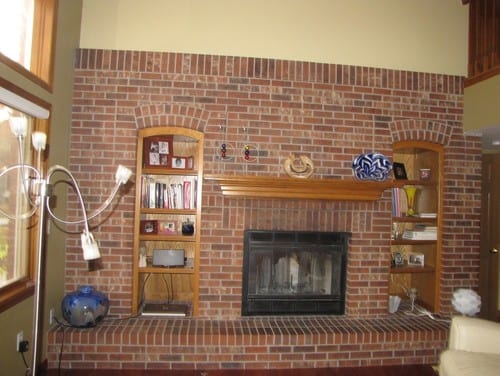
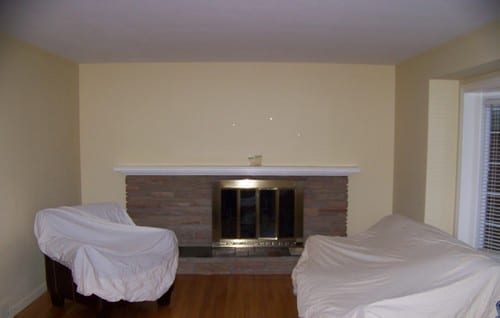
Before Photos by Denver Fireplaces Distinctive Mantel Designs, Inc 

Project: Remodeling a fireplace wall.

Why: Replacing a fireplace wall is mostly an aesthetic choice, but besides pleasing you now, an updated fireplace can also can add resale value. 

Who to hire: Someone with plenty of experience remodeling fireplaces is recommended if the job is more than just drywalling or plastering. Someone like Rita Henry, will consult with clients through email and provide renderings and design plans so they can hire a local general contractor to do the actual work. 

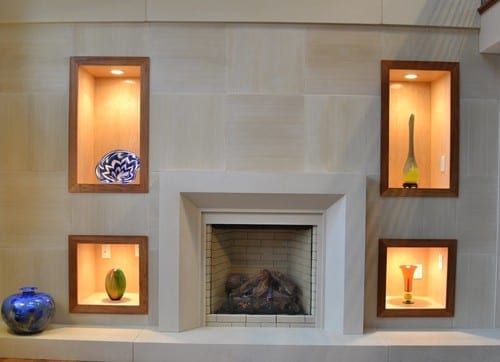
Brick fireplaces are the most popular to replace. Henry says a quick and easy solution is to simply wrap the brick in either tile or wood, leaving the exposed brick for the firebox. “It’s a more updated look that’s one of the least expensive,” she says. And that way the brick will remain beneath the new material in case a future home buyer prefers brick. 

For the brick fireplace shown here, she wrapped the whole thing in tile. 

Traditional Living Room by Denver Fireplaces Distinctive Mantel Designs, Inc 

AFTER: The stone tile runs wall to wall, creating a dramatic look. It completely changed the tone of the living room in this Denver home

You could also choose to drywall or plaster over the brick, creating a blank canvas that you can then do pretty much anything you want with.
 

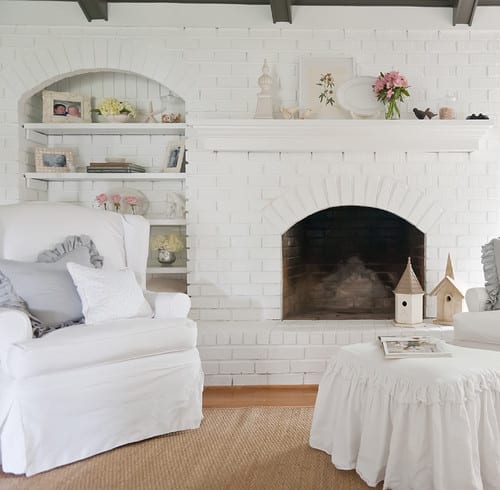
Painting is also an option. While Henry doesn’t prefer the look of painted brick, it’s a relatively inexpensive update that can easily be changed. 

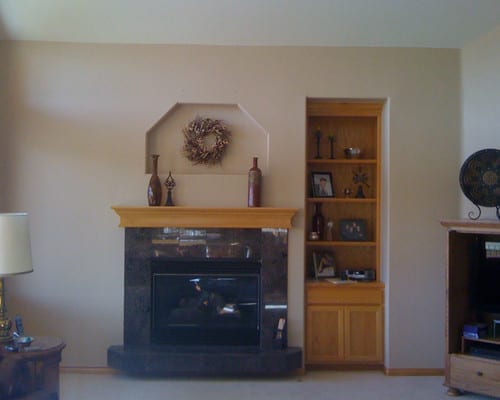
Before Photos by Denver Fireplaces Distinctive Mantel Designs, Inc 

For this project Henry ripped out all the existing elements, flattened the niche and cleaned up the wall. 

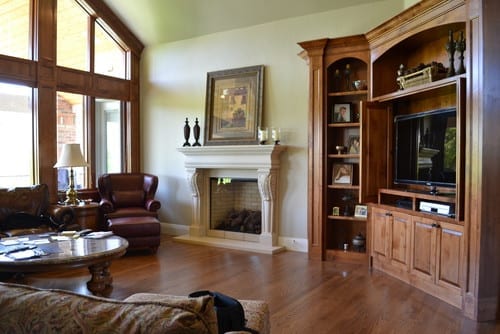
Traditional Family Room by Denver Fireplaces Distinctive Mantel Designs, Inc 

AFTER: A new mantel and built-ins transformed the space. Henry says an upgrade on this scale could be done for around $3,000.

Length of project: A standard drywall installation with mantel and surround can be completed in two days. A custom mantel or more extensive ductwork or electrical installation can take five or six weeks. 

For this 1950s fireplace, renovation specialist Ron Parko’s client wanted to add bookcases and extend the hearth to each wall.  

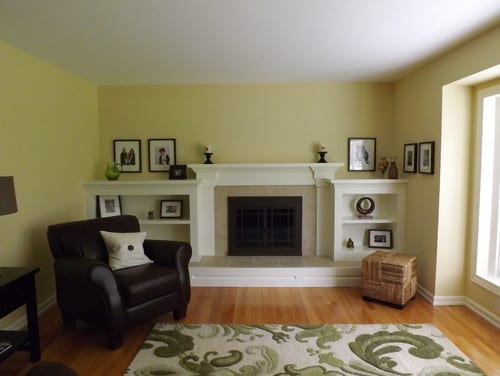
AFTER: Because the fireplace is off center, Parko tried to mask it while also extending it out. Raising the elevation made it dominant, while photos and accessories help distract the eye from the imbalance. 

Cost: Drywalling over a brick fireplace could run about $1,500. Parko says a 6-foot-wide floor-to-ceiling paint-grade oak or poplar fireplace with a tiled hearth could run around $2,000. Wrapping an entire fireplace wall in stone and adding a custom mantel could run around $9,000. The most expensive remodel Parko did was for $12,000, which included bookcases, hidden drawers and a mantel leg that concealed a shotgun. 

Permit needed: Only if you’re altering the firebox, adding a wood burner or converting to gas.

Best time of year to do this project: This is a year-round project, but if you’re considering adding hardwood to a room or doing anything to the walls, including painting, it’s best to do the fireplace first. 

7 Tips for Designing Your Bedroom

Article by:

Have you ever been in a room that just feels right? Nine times out of 10, it’s because it has a simple design that functions well. But creating a simple design is harder than it looks — particularly in bedrooms. 

Why? Because every bedroom absolutely has to have a bed in it. And beds are big and ungainly, and dictate the placement of every other object in the room. But if you’re lucky enough to be planning a bedroom from scratch or remodeling an existing bedroom, you can control the other elements and create a space that’s both practical andpretty. 

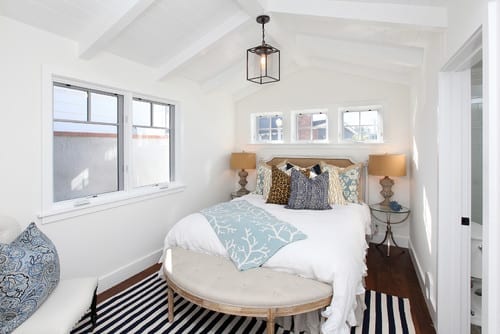
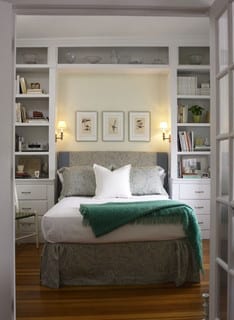
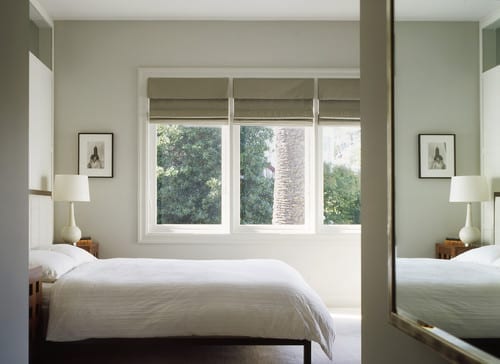
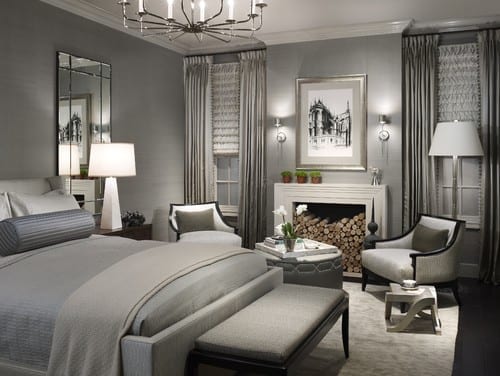
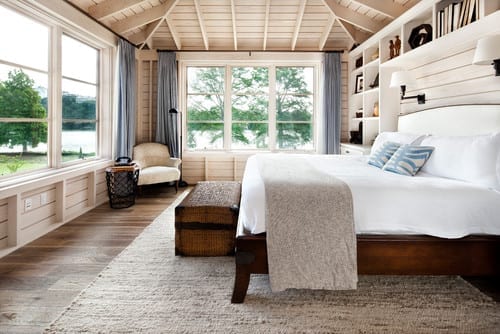
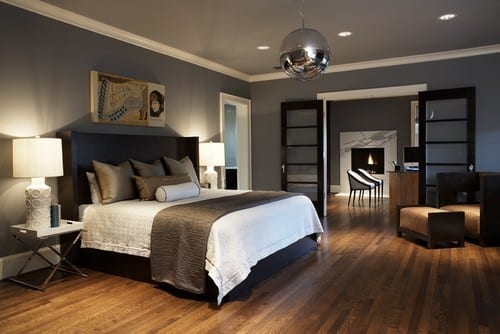
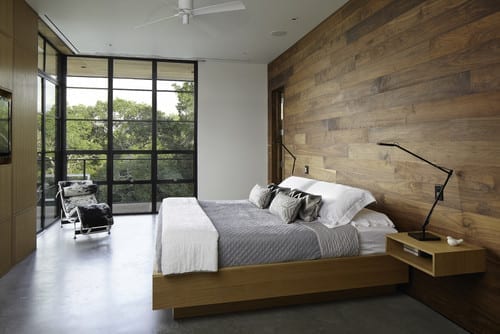
The bedrooms shown here manage that feat with panache. Even if you don’t have a great view, access to the outdoors or plenty of space to work with, the principles they embody and the simplicity they show can inspire your own bedroom design project. 

Because the bedroom is one of the simplest rooms in the house, it’s often overlooked. One of the first steps to a great bedroom design is having an efficient and well-designed floor plan that gives you everything you want — no matter how much space you start with. 

Here are seven tips to help you get the most out of your bedroom. 

1. Simple circulation. Try to keep your circulation on one side of the room. Hotels do a great job of this. There’s a reason 90 percent of hotels have the same floor plan: because it’s simple and it works. 
Circulation plans become a little more challenging with en suite rooms (bedrooms with bathrooms attached) or bedrooms that have doors to the outside.


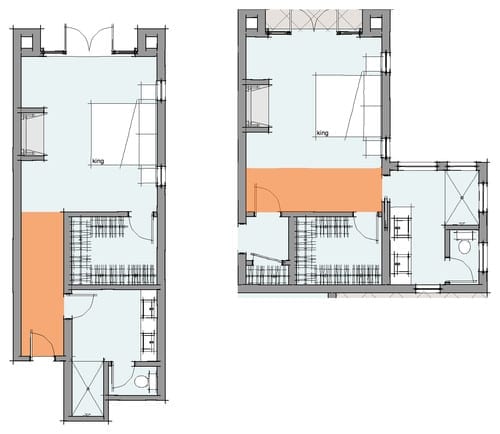
To save on space, pay attention to where you locate the bathroom and closet in your bedroom. Rooms that have bathroom or closet access before the sleeping area require a longer hall (see the left-hand plan). If you organize the circulation so the bathroom and closet are accessed through the sleeping area (right-hand plan), you don’t need a separate hall, and you can add the circulation space into the room to make it feel larger, too. 

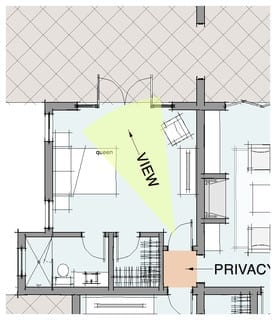
2. Focus on the view. A bedroom always feels nicer when the first thing you experience is a pleasant view out the window — as opposed to a view looking straight at the bed. If you’re designing a new bedroom or reworking an old one, try to come up with a layout that focuses on the vista — whether it’s something as stunning as a lake or as simple as your backyard. 

3. Keep privacy in mind. It’s always nice when you can leave the bedroom door open without forsaking all of your privacy. The small foyer in this example provides separation from the family room. I always try to avoid designing a layout in which you look directly into the bedroom from a more public space, like a great room, kitchen or family room.


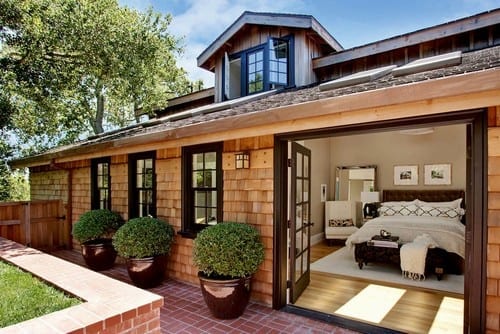
4. Connect with the outdoors. While this might not be feasible in all climates, connecting a room with the outdoors is a great way to make the space feel larger and admit more natural light. If your bedroom is on the ground floor (or is on the second story and has an adjacent terrace), adding a set of French doors can instantly increase visual space.  

5. Consider the furniture layout. Your bedroom’s architecture should take your furniture into account. Bedroom floor plans usually have a bed wall — but what about dressers, nightstands, TVs, chairs and a desk? Work with your architect or designer to make sure there is enough space beside the bed for nightstands and ample circulation so you can access three sides of the mattress. 

6. Increase light and ventilation. Locating your bedroom at the corner of your home can give you windows on two or more adjacent walls. This gives you the added benefit of cross ventilation and a softer natural light. 
7. Take your time. Great design takes a while and usually requires refining before you come up with the perfect plan for your lifestyle. Don’t rush through the design — it’s worth taking a little extra time up front to make sure you have a more efficient and functional plan in the end. 

The truth is, great design doesn’t necessarily mean a space that’s overly complex and expensive to build. A space that functions better, costs less to build, is more efficient to run and is easier to maintain can be an outstanding example of great design.