FREE DESIGNS AND ESTIMATES

10 Ecofriendly Tips and Tricks for Cleaning Your Home

Article by: Luisa Rollenhagen

Chemical based cleaning products have drawbacks: They’re pricey, they may trigger health issues and their manufacture, use and disposal can harm the environment. So if you’re approaching a spring cleaning of your home this year, why not consider these effective all-natural cleaning alternatives?

Lemon

Lemons are nature’s cleaning wunderkind. They have powerful antiseptic and antibacterial properties and are a natural deodorizer due to their high acidic content. Here are some suggestions for how to use lemons in your home: 
Have your copper pans lost their shine? Dip half a lemon in salt or baking powder to scour your pans to their former glory.Mix a bit of lemon juice with baking soda to remove stains from plastic containers. Combine lemon peel and white vinegar in a jar, allow to marinate for a few days, then strain out the peel to use the vinegar as a cleaner. A small dish containing vinegar and lemon juice will absorb odors.Rub a slice of lemon across your chopping board to disinfect the surface.
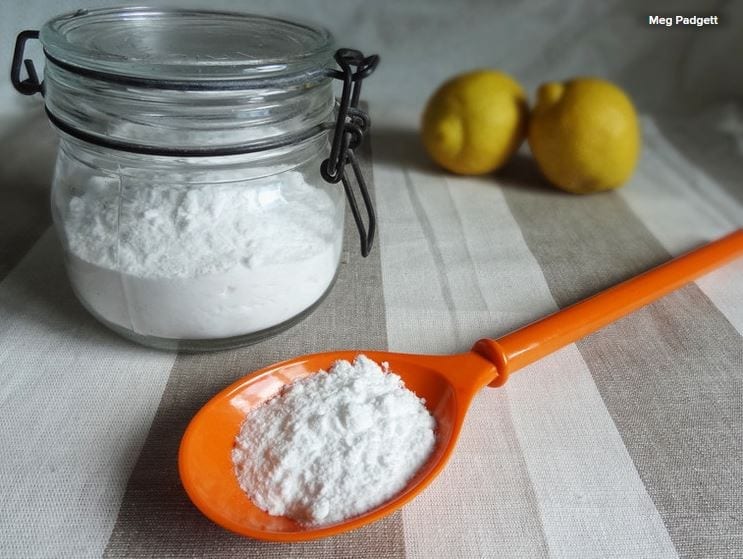
Baking Soda

Baking soda, like lemon, is another one of nature’s cleaners. Also known as sodium bicarbonate, this mildly alkaline substance functions as a gentle abrasive, deodorant and more. 

A thick paste of baking soda and water can be useful in removing surface rust. A more liquid mixture of baking soda and water can function as an all-purpose light cleaner that’s particularly effective on grease. 

Clean your oven. A thick paste of baking soda and water can be applied to the bottom of the oven to clean it. Let it sit for a couple of hours or overnight before scraping it off and wiping the surface.

Brighten the bowl. Baking soda also is a winner in the bathroom. Throw a cup of baking soda into the toilet bowl and let it sit for more than an hour. Then add a cup of white vinegar, let the mixture sit for a while longer, and flush.


Safely clean your clothes. Baking soda also is a great addition to your laundry room. When added to your washing machine, it can soften your clothes and remove any unpleasant odors.

Fun fact: If your clothes happen to be contaminated with uranium, add a cup of baking soda to the wash to get rid of that pesky nuclear radiation. This sounds like a joke, but it’s not. Apparently scientists have discovered that sodium bicarbonate will bind with depleted uranium dust and remove it from clothes, which chemical detergents can’t manage. Talk about an all-purpose cleaner. Nonetheless, don’t go playing in uranium dust anytime soon, kids.

White Vinegar

Mentioned a couple of times already, white vinegar is a weak acetic acid that can be used in almost all aspects of home cleaning, as it has strong antibacterial properties. 

Vinegar diluted in water is an effective stain remover for various textiles. It’s also a great natural deodorizer, and can be combined with various other natural products, such as lemon juice, to absorb odors. Simmer vinegar with water on the stove while cooking to prevent cooking odors. Vinegar can help remove strong scents left over from fish, onion and garlic too.

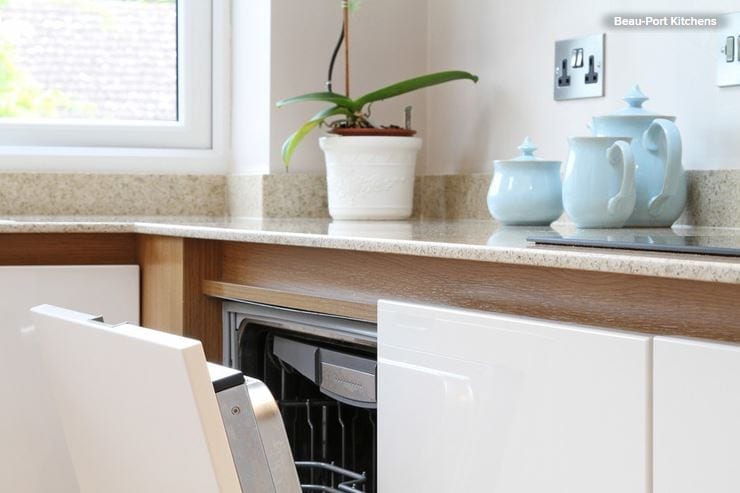
Refresh your dishwasher. If your dishwasher could use a thorough cleaning, ditch the expensive chemical tabs and instead fill a dishwasher-safe bowl with two cups of white vinegar and set it on the top rack. Let the otherwise empty dishwasher run one cycle to get rid of any odors and bacteria.

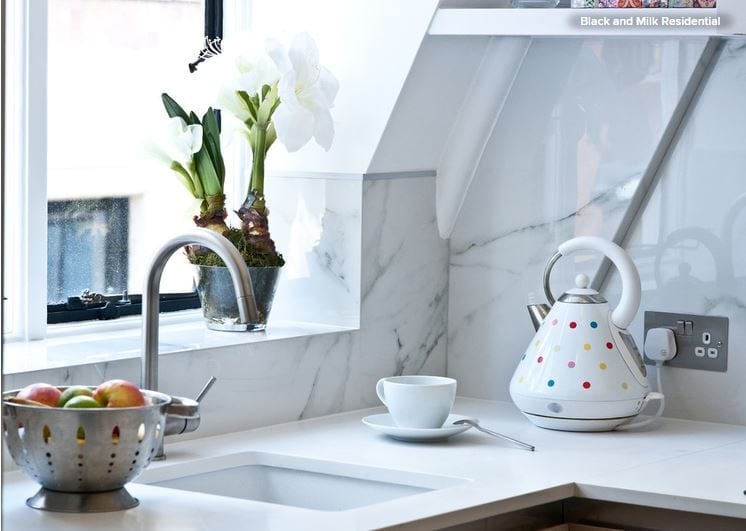
Descale your kettle. Vinegar is your friend again here, although you can use lemon juice, too. Pour a 50/50 mixture of white vinegar and water into your kettle, allow it to boil, then rinse the kettle out once it cools down a little but is still warm.

Make your windows shine. Vinegar to the rescue again. Fill an empty spray bottle with a 50/50 mixture of white vinegar and water and use a microfiber cloth to wipe down your windows and avoid any streaking. This also works wonders for mirrors.

Keep those tiles sparkly. The grout between tiles in the bathroom can quickly accumulate mold, which is both unsightly and unhealthy. Remove it by mixing one part carbonated water with one part white vinegar and spray it on the moldy areas. 

If the grime still doesn’t scrub off, add two parts baking soda to the vinegar-water mix to make a thick paste. Let the mixture sit on the grout for at least 15 minutes before scrubbing it off. 

February Checklist for a Smooth-Running Home

Article by:

February means the thick of snow and cold across most of the country — but that doesn’t mean we can’t dream of spring. Spruce up your home this month by giving your bedroom a feng shui makeover in honor of Valentine’s Day, plus take stock of cleaning supplies, keep road salt out of the house and refresh walls with paint (and maybe some new art, too). These 10 to-dos can help you keep your home in top shape, even if the weather outside is still frightful. 

1. Tune up the bedroom with feng shui. With Valentine’s Day this month, it seems like a good time to spruce up the bedroom. If you are in the market for new bedding, consider shades of pink and red to encourage romance. Rotating your mattress regularly will help prevent it from developing hills and valleys, which in feng shui can be seen as separating partners in the bed. While you’re moving mattresses around, have a peek underneath the bed — what’s hiding down there? In feng shui a clean area beneath the bed is best for relationships, so be sure to vacuum up dust bunnies and deal with hidden clutter. 

2. Fluff pillows and duvets. Duvets and pillows looking flat? That’s because over time, air is pressed out of them, and the filling (whether down or synthetic) can shift and clump.

Some synthetic-filled pillows and duvets can be machine washed (check the labels for instructions), and even down-filled items can be fluffed up in a dryer on a no-heat setting. Toss a few tennis balls into the dryer with your duvet to help it regain maximum fluffiness.


3. Clean up road salt from entrances. If the winters are chilly where you live, you know how grimy road salt and melted snow can leave your floors, especially in high-traffic areas. After giving these areas a thorough cleaning, stow your supplies nearby so it’s easy to sweep floors regularly.

4. Clean seat cushion covers. Like floors, entryway seat cushions can take a beating at this time of year. Take off removable covers and launder them; spot clean upholstery. 

5. Tidy and restock cleaning supplies. Get prepped for spring cleaning by sorting out your cleaning supplies. Toss products you tried that didn’t work and fill in gaps with fresh cleaning supplies and tools. Look over your dish towels, mop heads and microfiber cleaning rags, and replace them as needed. 

6. Rotate art and touch up walls. Give your home a winter wake-up call by swapping out a few pieces of artwork, patching dings in the walls and touching up paint. 

Make rearranging your collection easier in the future by installing a few narrow shelves around the house, like the one shown here.


7. Recycle e-waste. Old tech devices, CFL bulbs, ink and toner cartridges, and batteries contain dangerous toxins and cannot be tossed in with your other garbage or recycling. Store up your e-waste in one place and take it to a recycling center that accepts these items. Some office supply stores, like Staples, have free e-waste recycling programs — just drop everything off at your local store, and you’re done. 

8. Change furnace filters. A clean furnace filter will help your heating system work more efficiently and trap more dust and allergens. Most high-efficiency filters should be changed every three months — but it helps to inspect them every month, just to be sure.

9. Spruce up your favorite reading nook. This is a good time to get cozy with a book. Spruce up your reading corner with a warm throw, a soft rug and a comfy ottoman to put your feet on. And if you find yourself stuck in the house on a snowy afternoon, why not spend it organizing your books?


10. Book a summer rental … and consider renting your home out, too. Seem a little early to be thinking about summer vacations? Not if you want to book a cottage — highly coveted locations arebooked months in advance. 

And if you want to offset the costs of your trip this year, consider listing your home as a rental or look into doing a house swap to stay somewhere for free.

How to Remodel Your Fireplace

Article by:

The fireplace is often the most commanding element in any room it’s in. Size and abundance of material are often factors, but as renovation specialist Ron Parko points out, our eyes are naturally drawn to the darkest object in a room anyway. Oftentimes, that’s the firebox when it’s unlit. 

Naturally you want this element, and everything that surrounds it, to complement the rest of your home. In many older homes where large brick fireplaces prevail, this can pose a challenge. What do you do? Cover it, paint it, rip it out? Here’s what to consider. 

Before Photos by Denver Fireplaces Distinctive Mantel Designs, Inc 

Project: Remodeling a fireplace wall.

Why: Replacing a fireplace wall is mostly an aesthetic choice, but besides pleasing you now, an updated fireplace can also can add resale value. 

Who to hire: Someone with plenty of experience remodeling fireplaces is recommended if the job is more than just drywalling or plastering. Someone like Rita Henry, will consult with clients through email and provide renderings and design plans so they can hire a local general contractor to do the actual work. 

Brick fireplaces are the most popular to replace. Henry says a quick and easy solution is to simply wrap the brick in either tile or wood, leaving the exposed brick for the firebox. “It’s a more updated look that’s one of the least expensive,” she says. And that way the brick will remain beneath the new material in case a future home buyer prefers brick. 

For the brick fireplace shown here, she wrapped the whole thing in tile. 

Traditional Living Room by Denver Fireplaces Distinctive Mantel Designs, Inc 

AFTER: The stone tile runs wall to wall, creating a dramatic look. It completely changed the tone of the living room in this Denver home

You could also choose to drywall or plaster over the brick, creating a blank canvas that you can then do pretty much anything you want with.
 

Painting is also an option. While Henry doesn’t prefer the look of painted brick, it’s a relatively inexpensive update that can easily be changed. 

Before Photos by Denver Fireplaces Distinctive Mantel Designs, Inc 

For this project Henry ripped out all the existing elements, flattened the niche and cleaned up the wall. 

Traditional Family Room by Denver Fireplaces Distinctive Mantel Designs, Inc 

AFTER: A new mantel and built-ins transformed the space. Henry says an upgrade on this scale could be done for around $3,000.

Length of project: A standard drywall installation with mantel and surround can be completed in two days. A custom mantel or more extensive ductwork or electrical installation can take five or six weeks. 

For this 1950s fireplace, renovation specialist Ron Parko’s client wanted to add bookcases and extend the hearth to each wall.  

AFTER: Because the fireplace is off center, Parko tried to mask it while also extending it out. Raising the elevation made it dominant, while photos and accessories help distract the eye from the imbalance. 

Cost: Drywalling over a brick fireplace could run about $1,500. Parko says a 6-foot-wide floor-to-ceiling paint-grade oak or poplar fireplace with a tiled hearth could run around $2,000. Wrapping an entire fireplace wall in stone and adding a custom mantel could run around $9,000. The most expensive remodel Parko did was for $12,000, which included bookcases, hidden drawers and a mantel leg that concealed a shotgun. 

Permit needed: Only if you’re altering the firebox, adding a wood burner or converting to gas.

Best time of year to do this project: This is a year-round project, but if you’re considering adding hardwood to a room or doing anything to the walls, including painting, it’s best to do the fireplace first. 

7 Tips for Designing Your Bedroom

Article by:

Have you ever been in a room that just feels right? Nine times out of 10, it’s because it has a simple design that functions well. But creating a simple design is harder than it looks — particularly in bedrooms. 

Why? Because every bedroom absolutely has to have a bed in it. And beds are big and ungainly, and dictate the placement of every other object in the room. But if you’re lucky enough to be planning a bedroom from scratch or remodeling an existing bedroom, you can control the other elements and create a space that’s both practical andpretty. 

The bedrooms shown here manage that feat with panache. Even if you don’t have a great view, access to the outdoors or plenty of space to work with, the principles they embody and the simplicity they show can inspire your own bedroom design project. 

Because the bedroom is one of the simplest rooms in the house, it’s often overlooked. One of the first steps to a great bedroom design is having an efficient and well-designed floor plan that gives you everything you want — no matter how much space you start with. 

Here are seven tips to help you get the most out of your bedroom. 

1. Simple circulation. Try to keep your circulation on one side of the room. Hotels do a great job of this. There’s a reason 90 percent of hotels have the same floor plan: because it’s simple and it works. 

Circulation plans become a little more challenging with en suite rooms (bedrooms with bathrooms attached) or bedrooms that have doors to the outside.


To save on space, pay attention to where you locate the bathroom and closet in your bedroom. Rooms that have bathroom or closet access before the sleeping area require a longer hall (see the left-hand plan). If you organize the circulation so the bathroom and closet are accessed through the sleeping area (right-hand plan), you don’t need a separate hall, and you can add the circulation space into the room to make it feel larger, too. 

2. Focus on the view. A bedroom always feels nicer when the first thing you experience is a pleasant view out the window — as opposed to a view looking straight at the bed. If you’re designing a new bedroom or reworking an old one, try to come up with a layout that focuses on the vista — whether it’s something as stunning as a lake or as simple as your backyard. 

3. Keep privacy in mind. It’s always nice when you can leave the bedroom door open without forsaking all of your privacy. The small foyer in this example provides separation from the family room. I always try to avoid designing a layout in which you look directly into the bedroom from a more public space, like a great room, kitchen or family room.


4. Connect with the outdoors. While this might not be feasible in all climates, connecting a room with the outdoors is a great way to make the space feel larger and admit more natural light. If your bedroom is on the ground floor (or is on the second story and has an adjacent terrace), adding a set of French doors can instantly increase visual space.  

5. Consider the furniture layout. Your bedroom’s architecture should take your furniture into account. Bedroom floor plans usually have a bed wall — but what about dressers, nightstands, TVs, chairs and a desk? Work with your architect or designer to make sure there is enough space beside the bed for nightstands and ample circulation so you can access three sides of the mattress. 

6. Increase light and ventilation. Locating your bedroom at the corner of your home can give you windows on two or more adjacent walls. This gives you the added benefit of cross ventilation and a softer natural light. 

7. Take your time. Great design takes a while and usually requires refining before you come up with the perfect plan for your lifestyle. Don’t rush through the design — it’s worth taking a little extra time up front to make sure you have a more efficient and functional plan in the end. 

The truth is, great design doesn’t necessarily mean a space that’s overly complex and expensive to build. A space that functions better, costs less to build, is more efficient to run and is easier to maintain can be an outstanding example of great design. 

December Checklist for a Smooth-Running Home

Article by:

With winter officially beginning on December 21 and holiday festivities around the corner, there is a lot to prepare this month! For those in cold climates, it’s time to begin thinking about snow and ice removal, blocking drafts and getting cozy indoors … and we can all use a good dose of Zen as the busy holiday season gets rolling. Here are 13 home tasks to consider adding to your list this month. 

1. Put up holiday decorations. If you like to decorate for the holidays, now is the time! Dig out the Christmas lights and test them early in the month, so you have ample time to replace nonworking strands. Hang exterior lights, wreaths and swags, being sure to use only exterior-rated lights, and plug them in safely to an outside outlet if possible.

2. Plan for holiday home safety. With night falling earlier this month, and many people headed out of town, it pays to be extra safety-conscious — whether or not you are going anywhere. Always lock doors and windows, set your alarm system if you use one and keep the area around your house well-lit and your bushes trimmed back. 

3. Simplify your holiday. Take a moment to sit down and really consider what you love — and don’t care for — about the holiday season. No one can do it all, and trying to accomplish too much only creates stress and disappointment. Pick your top three favorite holiday activities or traditions, and commit to doing them this month. Then list your threeleast favorite holiday activities and vow to skip them this year. 

If you are feeling pressure from friends or relatives to keep doing certain things (i.e., baking a dozen different kinds of cookies), tell them that you are simplifying your holiday this year, and are focusing on the things you love most. Then invite them to share in something youdo want to do, like going ice skating or drinking hot cocoa. 

4. Add layers of warmth. Drape soft throws or thick sheepskins over chairs and sofas, and roll out plush rugs on your floors. Aside from being decorative, extra layers of textiles provide a wonderful boost of warmth in winter.

5. Add weather stripping and door sweeps as needed. Feel a draft? Don’t ignore it. Apply weatherstripping to the drafty area and your house will feel warmer right away. If the problem is cold air flowing in from under a door, what you need is a door sweep. Usually made from hard plastic, a door sweep attaches to the bottom of your door, closing the gap that lets cold air in. 

6. Carve out your own space to get Zen. Boost energy and relieve stress during the holiday season by creating your own private space to meditate, do yoga or simply relax. Ideally, choose a sunny corner of your home where you can get a bit of morning sun. 

7. Consider a backup heat source. If you live in a cold climate with regular winter storms that sometimes knock out power, it may be beneficial to invest in a woodstove or generator— something to provide backup heat if your regular heat source is unavailable. If a woodstove is your backup, be sure to stock up on plenty of firewood. If you decide to go with a generator, enlist a pro to teach you how to set it up and use it safely — when used improperly, a generator can start a fire.

8. Update your emergency kit and store it with your camping supplies. If you already havea household emergency kit, check the expiration dates on food and medications in it, and replace as needed. If you do not yet have one, get one! You may find many of your camping supplies helpful in an emergency, so consider storing your emergency kit and camping gear in the same (easily accessible) place. 

9. Beware of sneaky mice and rats (ugh!). Not so nice to think about, but if you see signs (i.e., droppings) that little critters have invaded your home, it’s best to take care of the problem as soon as possible. To prevent future problems, store all food in airtight containers, clean your pantry regularly and seal up any holes or cracks in your home that may lead outside.


10. Keep walkways clear of snow and ice. As we get further along in December, many folks living in cold climates will get their first snow. Be prepared by stocking up on snow shovels and ice melt, and store your tools where you can easily get to them during a storm. Just be aware that certain ice melting products can be harmful to pets and plants — read the labels carefully before buying, and try to keep products off of your lawn and garden beds.

11. Check your roof for ice dams. Ice dams are areas of built-up ice that can accumulate on your roof, potentially causing leaks when they melt. If you can safely reach them, break them up now to prevent future damage.

12. Knock snow from tree branches. Large amounts of snow can cause trees to lose branches, which can be especially dangerous if a large limb is positioned near your home. Use a long-handled broom or other tool to gently knock snow from branches. 

13. Thinking about remodeling next year? Use downtime this month to begin creating ideabooksand scouting for pros, and have an initial discussion about the job.