FREE DESIGNS AND ESTIMATES

Win The 2022 Colorado St. Jude Dream Home Giveaway

St. Jude Dream Home Giveaway Banner

You could win a brand new home in Colorado Springs and support St. Jude Children’s Research Hospital with the 2022 St. Jude Dream Home Giveaway. We are proud to once again be a trade partner working with Covington Homes, who is building another Dream Home to benefit St. Jude Children’s Research Hospital. We’ll be installing some gorgeous countertops for the home and we’re happy to do it for such a wonderful cause.

St. Jude’s mission is to advance cures, and means of prevention, for pediatric catastrophic diseases through research and treatment where no child is denied treatment based on race, religion or a family’s ability to pay.

Here’s how the giveaway works, they have a limited number of tickets that are sold for $100 each. They draw a winner from all the tickets sold who receives the Colorado Springs home valued at almost $600,000. Every $100 ticket helps ensure families never receive a bill from St. Jude for treatment, travel, housing or food.

Covington Homes and all of its trade partners have been working tirelessly building the 2022 St. Jude Dream Home. The home will be completed and given away this summer. Covington Homes’ goal is always to build the Dream Homes at zero cost, meaning that all of the proceeds from the ticket sales of the Dream Home Giveaway go directly to benefit St. Jude Children’s Research Hospital.

St Jude Dream Home Rendering
Artist’s rendering of the 2022 Colorado Springs St. Jude Dream Home.

The 2022 Dream Home is located in beautiful Banning Lewis Ranch, at 9798 Lone Oak Ln. Colorado Springs, CO 80927. They will have an open house in June, so you can see just how nice those countertops look, along with the rest of the house.

Giveaway Date: June 29

The giveaway is scheduled to take place on June 29, 2022, from 4 p.m. to 6 p.m. and you’ll be able to watch the drawing on KKTV 11.

Take a look at the gorgeous Silestone ethereal haze quartz countertops by Cosentino that we put in as one of the trade partners for the 2022 the Colorado Springs St. Jude Dream Home.

2022 St. Jude Dream Home Giveaway Tickets

Win a house. Help save kid’s lives. Want to get your ticket for the 2022 Dream Home giveaway? Follow think link to buy your ticket(s) before they sell out and learn more about all the other prizes up for grabs, including:

  • The 4-bedroom, 4-bath house in Colorado Springs
  • A $10,000 shopping spree at Furniture Row
  • A $10,000 Visa gift card
  • A luxury ski getaway to Aspen Snowmass
  • A five-person spa

Tickets can also be purchased by phone at (800) 379-5217, or you can download a printable mail-in form here.

When you reserve a ticket, you’re helping St. Jude understand, treat and defeat childhood cancer and other life-threatening diseases.

Your Guide to 6 Kitchen Island Styles

By Sam Ferris

There are plenty of reasons to include an island in your kitchen — extra storage, seating and workspace, for example. But there are also several reasons why you might want to choose one island shape and style over another. This guide to six popular kitchen island styles will help you determine which one is right for you.

1. L-Shaped

This type of island can ebb and flow with the shape of your kitchen or fill in the blank space with more storage and prep space.

Pros. L-shaped islands tend to be large with correspondingly generous storage. Their sprawling design ensures that workspace isn’t crowded, a huge perk for households with avid chefs or more than one cook. You won’t have an issue finding room for bar-style seating. If you aren’t a fan of clean lines, L-shaped islands bring some intrigue to the table.

Cons. While L-shaped islands may be larger and provide more prep space, they aren’t exactly open-concept. They can chop up your kitchen design, which can hamper efficiency during meal prep. The shape may be too spread out for some homeowners, and it doesn’t always maximize storage space since corners tend to decrease accessibility.

2. Galley

With fewer frills and a straightforward design, galley islands are built to be workhorses. They can be a good fit for any type of kitchen layout, assuming that there’s enough space for one.

Pros. Often considered the quintessential island design for open-concept kitchens, galley islands ensure that your space has flow and remains efficient with their streamlined design. They usually maximize storage space because there aren’t any corners or curves. Appliances and stored items are always accessible. The design also favors bar-style seating.

Cons. Yes, galley islands are simple and efficient, but some homeowners may think they’re boring. They certainly won’t wow the eye unless they’re larger than life or have an intricate exterior. Sometimes they’re too small to comfortably fit an appliance, which can create problems with your layout.

3. Circular or Curved

If you’re looking to add personality to your kitchen layout, a circular island may be for you. The design can go full circle or feature a half-moon.

Pros. Circular and curved islands add an interesting visual dynamic to kitchens. They’re a go-to option if you don’t want a run-of-the-mill island design. Like L-shaped islands, they’re packed with prep space. There’s more than enough room to operate during meal prep. Circular designs can incorporate expansive seating areas that leave enough room for four-plus guests to comfortably eat and socialize.

Cons. Prep and storage space aren’t always efficient with circular islands. Your counter is spread out and curved, which can limit the way you cook. Storage units can be harder to access in some designs (they may be underneath a countertop overhang, for instance). Plan on wasted storage space unless your cabinets are customized to include creative options.

4. Furniture-Style

An unconventional choice, furniture islands can make your kitchen feel like your home’s premier hangout spot. Wide-ranging options can include a custom piece designed by a local carpenter and an antique table or chest of drawers.

Pros. It doesn’t matter if it’s custom-built, an age-old heirloom or store-bought — a furniture piece adds character to your kitchen. It’s one way to put your personal touch on your space and make it your own. The detail and decorative nature of the furniture will catch the eye of guests. These pieces usually aren’t bulky and fit seamlessly within your kitchen. Open-style designs can create fine displays for your decor.

Cons. Furniture pieces weren’t always built for storage, so that antique you had to have may not hold much of your cookware. There’s also the issue of durability. Older pieces may not last in the hustle and bustle of a modern kitchen. Wear and tear can take their toll. Furniture tops can’t take a beating the way granite or quartz can.

5. U-Shaped

U-shaped islands may be a chef’s dream. Three walls of cabinetry and appliances are enough to increase the efficiency of any kitchen.

Pros. Both highly functional and spacious, U-shaped islands are perhaps the largest and most accommodating. Extra storage space? Check. More workspace? You got it. Room for seating? There’s even that too. They can house more than one appliance if they’re big enough. You may not have to leave your island when you’re prepping food.

Cons. Their sheer size can also be the U-shaped islands’ biggest downfall. Some homeowners may find cooking and cleaning less efficient and may hate going the distance from one side to the other. These islands are bulky and can close off your kitchen from the rest of your home. The double corners will sacrifice accessible storage space unless they feature a Lazy Susan or swing-out device.

6. Rolling

No room for a built-in island? No problem. Rolling islands are a convenient alternative. You can whisk them around as you roam your kitchen and then tuck them neatly aside when you’re finished cooking.

Pros. Rolling islands are the crème de la crème in versatility. A godsend for smaller kitchens that lack adequate prep space, they can function as a worktop, food tray or a spare surface to place your ingredients. Depending on their size, they’re easy to stow and move. Best of all, they’re extremely affordable compared with cabinetry

Cons. Whipping up meals on wheels isn’t for everyone. Rolling islands are compact, which simply won’t work for some homeowners, even ones who are short on space. They can be a hassle to roll out during meals or to store. Bigger designs may be hard to move for some homeowners. They offer little to no storage.

The 5 Layers of a Well-Lit Kitchen

Develop a layered lighting plan to create a functional, adaptable and illuminated kitchen

By: David Warfel

When planning a lighting scheme for a client’s kitchen, I like to think about cake. Let me explain. On my birthday, a red velvet cake always comes my way, and it includes four layers with a cherry and icing on top. Just like that cake, a well-lit kitchen should also have four layers for different lighting needs. I call these light layers: “doing,” “knowing,” “feeling” and “changing.”

“Doing” lights help you perform manual tasks like prepping and cooking in the kitchen. “Knowing” lights help you navigate your way around a kitchen. “Feeling” lights make a kitchen feel inviting and comfortable. “Changing” lights help you adjust to the time of day and set a desired mood. And finally, the cherry and icing on top are all about adding decorative fixtures that let your personal style shine.

Layer 1: Lights for Doing

Your kitchen lighting scheme should start with creating a functional workspace. Adding lights where you need them the most, such as above countertops, sinks and cooktops, will let you perform manual tasks in a bright and safe atmosphere. We need light to see what we’re doing, especially when using sharp knives and high-temperature burners. You want to protect your fingers, so getting this layer right is important. In the kitchen above, note the strong lighting over the cooktop and the pendant lighting above the countertop. LED lights mounted underneath cabinets are also a great way to add functional lighting to your kitchen.

Layer 2: Lights for Knowing

Designers call it “ambient light,” but it is really just a layer of light to help us know where we are and where we are going. Recessed “can” down lights are a great option here because they light up the floor and bounce light off cabinet fronts to create a bright, well-lit space. Adding toe-kick lighting underneath cabinets and islands is also a great way to help prevent stubbing toes at night. Wall sconces are another way to provide the ambient lighting that can help you better navigate your kitchen.

Layer 3: Lights for Feeling

Showcase lights, also known as accent lights, all have one thing in common: They help a space feel more inviting and comfortable. Whether you use illuminated cabinets, chandeliers, sconces or pendants, showcase lights should be visible from wherever you stand or sit in the kitchen. That way you’ll get the benefit of this feel-good lighting at all times. Showcase lights might also help you perform functional tasks in the kitchen, but their main purpose is to draw attention and make a room feel complete.

Layer 4: Lights for Changing

As the sun changes location in the sky, lighting needs inside the kitchen change as well. During the day, natural light from windows might be all the lighting your kitchen requires. But at night, you’ll want your kitchen brighter for cooking meals and more dramatic for entertaining guests. Adding dimmers to your kitchen lighting is key for setting the mood.

Keep in mind that our eyes require more light as we age. So if you expect to stay in your home for awhile, you might want to add more lights than necessary now so you’ll have them later.

Cherry on Top: Decorative Light Fixtures

The fun part is choosing decorative fixtures that look at home in your kitchen, like this barn-style sconce in a country cottage. Think carefully about your personal style and kitchen design and then determine whether the light fixtures you choose can add any of the other layers of light needed.

Not keen on decorative fixtures? Choosing to minimize visible fixtures is also a valid style choice ideal for streamlined modern designs. You may want to highlight something else, like the backsplash in this kitchen lit by concealed LED strips.

How to Find Your Kitchen Style

If you’re planning to remodel your kitchen, here’s how to find inspiration and start narrowing down your choices.

By Rebekah Zaveloff

When most homeowners embark on a kitchen remodel, they spend endless hours collecting inspiring kitchen photos. But this doesn’t necessarily help people figure out what they want, and it can even cause confusion. The tough part of the process is learning to narrow down the options and home in on what you want your dream kitchen to look like.

Gather Inspiration

Collect images. You may not be able to see it at first, but a pattern will show itself. You may find that a whole bunch of your kitchen inspiration images may need to be added to an ideabook for a future farmhouse or weekend getaway, but don’t skip over them just because they don’t relate to this project, save them for later.

Don’t edit yourself (yet). Don’t make yourself nuts from the get-go by trying to edit as you collect. I really believe in collecting with reckless abandon first and editing later. Editing yourself while you gather inspiration can be challenging and stifling for creativity.

Organize (but only if you want to). It’s OK to be unorganized and even a little messy with your photo categorization. If you’d like to organize your photos in your ideabook, then you’re a step ahead of us, but for those who don’t, don’t sweat it. There’s time to go back to your photos and label them later.

Start looking for a pro. This can be a great time to start noting the professionals who are responsible for the designs you like and looking for a design professional you might like to interview. For some homeowners, the right thing to do is hire a professional out of the gate and have him or her help you through this inspiration-gathering phase. Some homeowners even hand this off completely to a designer, and it’s the designer’s job to listen, interpret, and collect inspiration for the client and bring it back for approval.

Categorize Photos

Once you have a fair number of inspiration images to work with, go back through them and put them into loose categories.

You can categorize by style: Maybe you seem to fall on the fence between vintage and modern. Or maybe you find that you have a bunch of images of kitchens with dark wood floors. You can create a collection dedicated completely to islands or kitchen banquette seating. Consider creating an idea book for lighting, one for wallpaper, and any other details you’d like to single out. For now don’t think about why you like things, just that you do or don’t.

Edit Your Selections

Go back through your ideabooks and see if you still respond emotionally to the images within. If it’s been a while since you started gathering inspiration and you’ve looks at hundreds of spaces, your taste might have changed without you even realizing it. Ruthless editing can help clarify things. You’ll look at a room and say “Why on earth did I save that photo?” If you can’t remember and it doesn’t speak to you any longer, ditch it. See how easy that was?

Collect Images With Intention

Now that you’ve collected at random, categorized and edited, go back through all your saved photos and review images for specific items. Look only for glass-front cabinets, industrial hoods or island lighting, for example, not at the image as a whole. You might not like all features of a room, but one element could be exactly what you want.

When working with a client — often more than once during a project — I pull inspiration images and say, “Don’t look at the wall color or the cabinet style. Just look at the hood.” Or “look at the way the crown molding transitions around the beam and hood” or something very specific like that. Make a note beneath a photo with an element you like and edit your photos again.

How to Choose a Kitchen Sink Size

By Jennifer Ott

In addition to choosing the best materialmounting typenumber of bowls, and bowl depth for your kitchen sink, you also have a range of sink size options. An extra-wide kitchen sink will obviously give you more space for food prep and cleanup, and you might prefer it over the confines of a smaller sink, but bigger sinks typically cost more and can take up valuable real estate in a small kitchen.

Feeling overwhelmed? Don’t worry. We’ve pulled together kitchens that feature various sink sizes, along with tips to help you figure out the perfect sink size for your cooking and cleaning needs.

Read more

Smooth Solutions to Kitchen Counter Corners

The designers of these kitchens found creative ways to ease the transition from counter to walking zone.

Erin Carlyle April 26, 2020. Writing about the cost of renovation and what it takes to remodel. Former Forbes real estate reporter. Fascinated by cool homes, watching the bottom line.

It’s pretty standard for kitchen cabinets to run in a straight line until they meet the end of a wall or the start of a doorway. But sometimes, that isn’t the smoothest route. These six kitchens employ clever alternatives for ending a run of cabinets. Though the solutions vary, each makes the nearby passageway feel a little more smooth. Could this be a solution for your kitchen?

1. Curved Toward Walkway

For this Northwest Washington, D.C., kitchen by Case Architects & Remodelers, the designer gave the countertop a curve to soften the lines and give the space a transitional feel. The curve is also a practical choice because the counter abuts a walkway that heads toward a door. A curve in the pebbled quartz countertop means there’s no sharp corner to hit should you make a misstep.

2. Recessed by Door

Another way to pull the counter back from the walkway is to recess it, as Shannon Eckel-Braun of Design Factory Interiors did for this Waterloo, Ontario, kitchen. Instead of a full-depth cabinet abutting the door that leads outside, a 12-inch-deep cabinet creates some breathing room. “I wanted it to be recessed back so you feel like you can smoothly walk around it,” Eckel-Braun says. “I didn’t want the countertops to just end.”

3. Angled by Door

This kitchen in Stockholm, Sweden, by Stylingbolaget has a range that sticks out farther than the doorway wall. One option would have been to stop the run of counter where the range ends.

But the designer found a solution that also adds storage: angling the countertop to the left of the range so it forms a wedge that looks interesting but not awkward. More important, it creates a smooth route in and out of the kitchen. And with the space used for open shelving rather than a traditional closed cabinet, all that space is easily accessed.

Here’s a more traditional way to angle a counter near a doorway: with a corner cabinet. The shape of this end run of cabinets in Oakland, California, by Kitchens by Francis invites you into the room. It also smooths the way out — you can glide right by via an efficient diagonal route.

4. Rounded on End of Run

The designer of this kitchen in Hampshire, England, used curves to soften the lines of this long, narrow kitchen. The curve of the tall breakfast table echoes the curve of the cabinet by Lewis Alderson & Co. Both curves distract the eye from the otherwise long, straight shape of the space. The cabinet’s curve also allows space for a walkway around the table.

5. Rounded on Island

In this Minneapolis kitchen by Crystal Kitchen + Bath, squared-off cabinets at the perimeter maximize storage, but the curved shape of this island’s end zone offers a practical way to avoid uncomfortable bumps where people tend to hang out. As with the first example in this story, rounding the island adds to the room’s transitional feel, as do the speckled countertops and horizontal bar pulls on the cabinets.

8 Tips for Harmony in the Kitchen

Article by: Laura Gaskill

There are probably as many ways to handle cooking and kitchen chores as there are people — is it any wonder the kitchen tends to be a hub for minor (but irritating) household disagreements? Whether you and your partner or housemate have been bickering over dishwashing or garbage duty, here are eight strategies for maintaining peace and harmony in the kitchen.

1. Don’t micromanage. Unless it’s a major health issue (like cross-contamination), if your partner/housemate/kid likes to do things differently than you do, let them. Even if it bugs you, know that it’s far from the end of the world if the dishwasher is loaded “the wrong way” or the cheese ends up in the produce drawer. Choose your battles carefully, because picking too many fights in the kitchen is sure to end in disgruntlement on both sides.


Harmony Kitchen 2

2. Take care of the other person’s most disliked chore —and ask them to do the same for you. It’s incredible how personal the issue of chores can be! Do you despise garbage duty? Can’t stand chopping veggies? Whatever it is, let it be known and try to arrange a fair swap of duties of personal worst for worst. This relieves a lot of chore pressure, since what each of you strongly dislikes is taken out of the equation.

3. Try the Golden Rule of dish washing. The Golden Rule of dish washing states that if you cook, you are officially off the hook for dish washing and cleanup duty. This method makes a lot of sense and keeps things pretty simple and conflict-free. Of course, it won’t work for everyone — perhaps you enjoy cooking and don’t mind doing the dishes (or you’re worried your precious pans won’t be cared for properly), in which case it’s best to find an alternative chore for the non-cook to take on.

4. Be willing to break the Golden Rule of ddish washing If you cooked — and dirtied every single pan and dish in the house in the process — be considerate and pitch in during cleanup, even if you usually follow the Golden Rule. This is especially important if your partner or housemate usually makes simple, one-pot dinners when it’s their turn to cook. And it follows that it’s reasonable to ask for a little cleanup help when they’re the one to whip up an elaborate feast. A bit of flexibility makes for a more positive experience for everyone. (Just don’t forget to ask nicely if you’re the one who made the mess.)

5. Avoid the too-many-cooks situation. If you both like to cook, trying to collaborate on a meal isn’t always the most positive (or peaceful) experience. And if your kitchen is small, it can be hard for more than one person to be cooking at a time. If either of these scenarios sounds familiar, consider having one person do some early prep work (like chopping veggies or starting a marinade) and let the other person take over when it comes time to put the dish together. And it’s probably a good rule that whoever is doing the actual cooking gets to decide how it’s done.

6. Keep a master shopping list.There’s nothing more frustrating than starting in on a recipe only to discover you’re out of a key ingredient. Designate a single spot in the kitchen, such as a centrally located chalkboard or notepad, as the place to jot down ingredients and supplies as they run out, and encourage everyone in the house to use it.

7. Make decisions during peace time. If an issue comes up that you feel you need to hash out, wait until you’ve moved on to a non-kitchen activity before bringing it up with your partner or housemate. 

In other words, don’t try to settle anything during the dinner rush — tensions may already be running high if you’re trying to get dinner on the table, and any argument isn’t likely to end well.

8. Get some outside help. If everyone in your household (including you) is very busy, getting a bit of extra help to get kitchen tasks done can make all the difference. Perhaps you could hire a cleaning service to take care of the most onerous chores, or try signing up for one of the new delivery services that provide fresh ingredients and recipes. Even something as simple as grabbing some meal plans and shopping lists online can ease the day-to-day burden of keeping the household nourished and running smoothly.

Kitchen Color: 7 Sensational Yellow Backsplashes

Article by: Jennifer Ott

While shopping recently I was struck by the prevalence of yellow hues, particularly for the latest spring fashions, in each and every store I passed. And it’s no big surprise that I’m now also seeing an uptick in requests for yellow backsplashes and wall colors for kitchens. 

If you’ve shied away from yellow in the past, it’s time to revisit this hot hue. Whether you prefer a pale lemon, a warm glowing gold or an eye-popping primary, there are increasingly more options out there for yellow backsplashes. Here are 7 stunning kitchens with yellow backsplashes, as well as a few of my top picks for yellow tiles.

I would never recommend picking a backsplash color solely because it’s trendy, but if you love yellow, I think it’s a fantastic choice for a kitchen. We associate yellow with sunshine and firelight, with zesty citrus and spring’s first flowers. It’s tough to feel blue in a sunny yellow space. 

The tiles used here are just the ticket in this charming, rustic kitchen. I like how the designer went for a single open shelf instead of wall cabinets, and that the tile runs straight up to the ceiling. 

Backsplash: Handmade 2-inch by 2-inch ceramic tiles. For a similar look, try the bright yellow Mexican Talavera tiles from Tierra y Fuego.

Don’t want to deal with grout maintenance? Try this cool and contemporary alternative to backsplash tile: back-painted glass. This is a terrific option for those who have a specific color in mind for their backsplash and are having trouble finding it in tile form, as you can paint the glass in any color you can dream up. The bold goldenrod backsplash here adds such liveliness to this kitchen, and it plays really well with the white wall cabinets and the greenish-gray base cabinets — what an excellent combination of materials and colors.

Backsplash: Glass back-painted in Golden Sand from Dulux. For a similar paint color available in the United States, check out Yellow Coneflower from PPG Pittsburgh Paints.

Of course, paint isn’t the only thing you can put behind glass; here’s a backsplash made with fabric-backed glass. What a brilliant idea! I love the yellow and gray patterned fabric that was used; it’s busy but works, because it picks up other colors used in the kitchen. The best part about this backsplash is that it was designed so that the entire thing can be taken down and the fabric changed out as desired.

Backsplash: Custom backsplash made with ⅔-inch tempered glass, affixed with metal standoffs, over fabric attached to plywood.

These bold lemon-yellow glass mosaic tiles simply sparkle in this modern kitchen, making the backsplash the star. Which brings up an important point I like to make to clients who are on tight budgets: If your backsplash area is relatively small, such as this kitchen’s, you might be surprised how affordable even the more expensive backsplash materials can be. If you are using only a few square feet of material, it doesn’t have to be a budget buster. And if you make it the focal point of the kitchen, I say it’s money very well spent.

Backsplash: 2-inch by 2-inch Glacier Glass mosaic tile in Citrine Satin from Stone Source.

If bold yellow backsplashes just aren’t your thing, check out this beautiful glass tile in a soft sand color. I am digging this as an alternative to white subway tile. It adds the perfect wisp of color in an otherwise very neutral space. The sheen from the glass also adds a nice textural element, particularly in contrast to the more matte-finished cabinets.

Backsplash: Lucian glass tiles in Sand from Ann Sacks.

Here’s another fetching mellow yellow backsplash tile. In general I advise homeowners to pick either a bold hue or an unusual shape when selecting backsplash tile. It can help keep the tile from feeling dated too quickly. This soft yellow diamond-shaped tile has such great dimensionality as well as a glamorous, mod vibe. It’s perfect in this cool kitchen.

Backsplash: 3-inch by 9-inch diamond-shaped tiles from Heath Ceramics.

I’ve had two different clients tell me that this is their favorite kitchen on Houzz. I can see why. It’s a beautiful light-filled space with clean lines and expansive white walls that gets a warm boost from the wood floors and that fantastic yellow glass mosaic backsplash. 

Backsplash: 1-inch by 2-inch glass tile in Corn, running bond pattern, from Global Tile Design.

Should You Save or Splurge When Selecting Products?

Article by Lauren Hunter

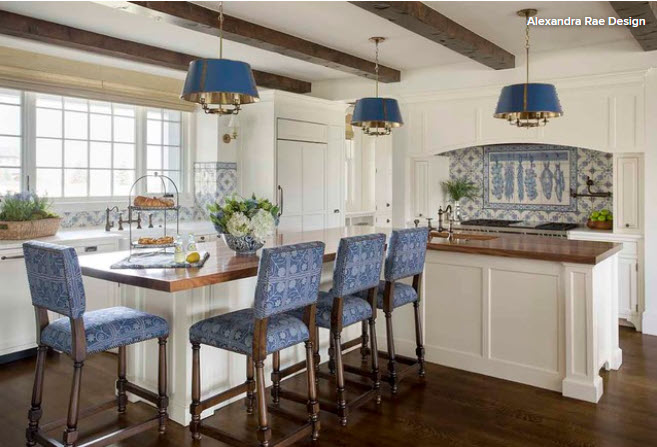
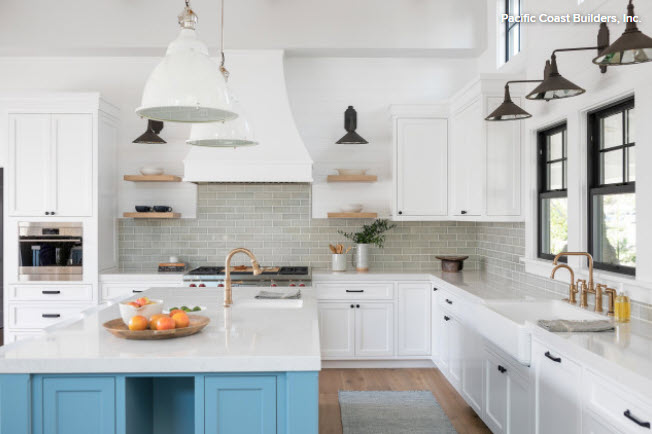
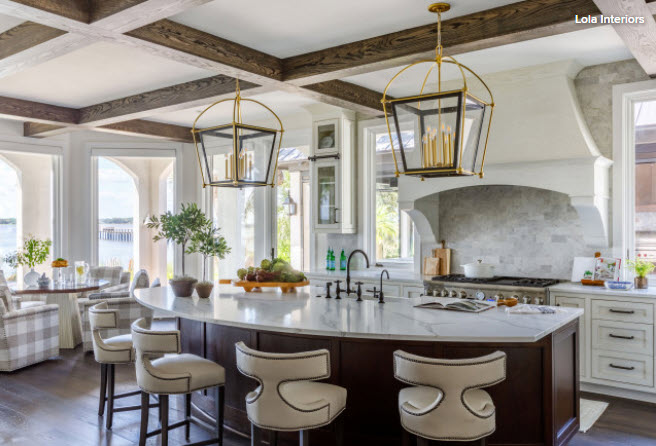
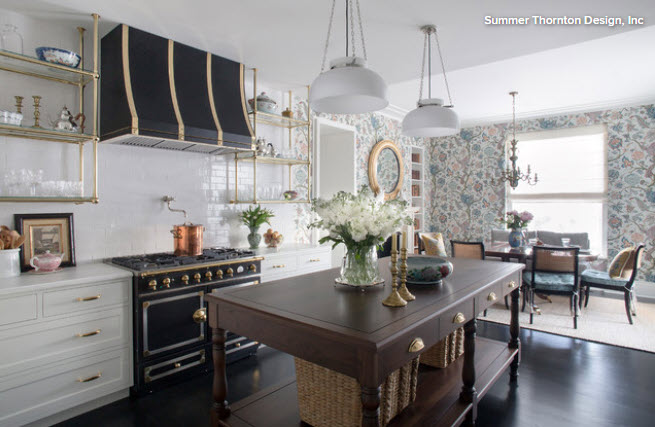
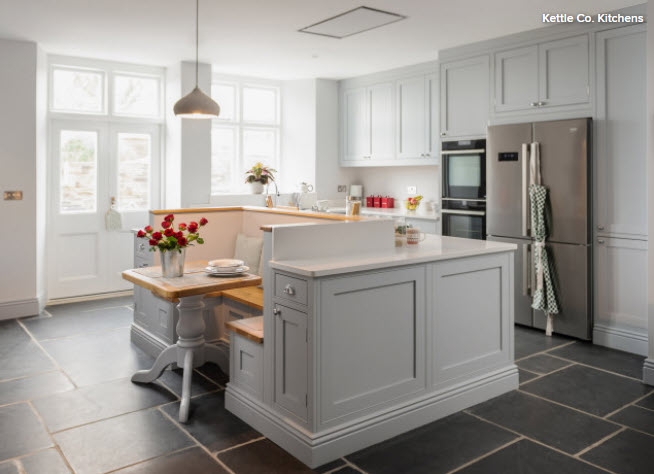
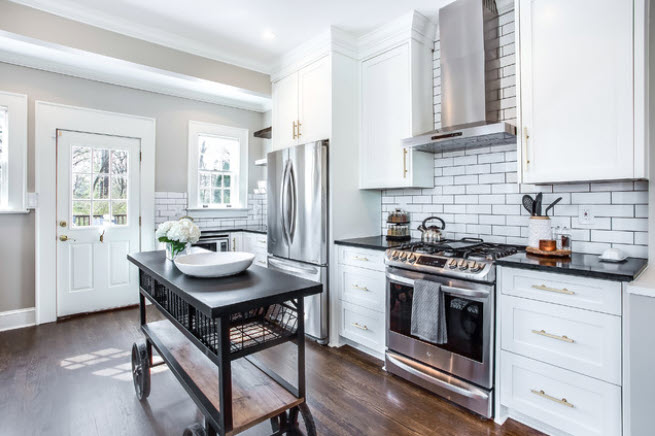
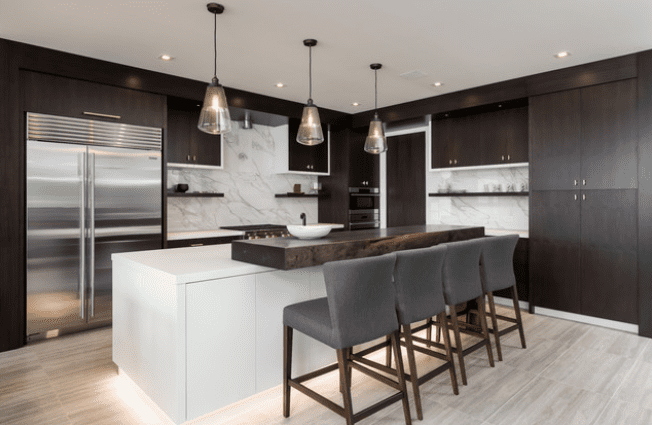
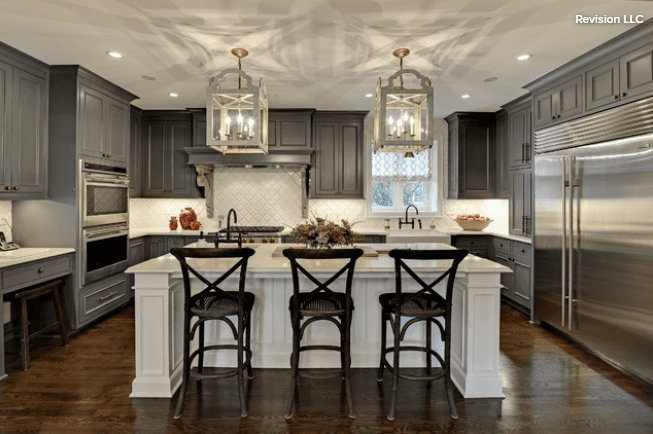
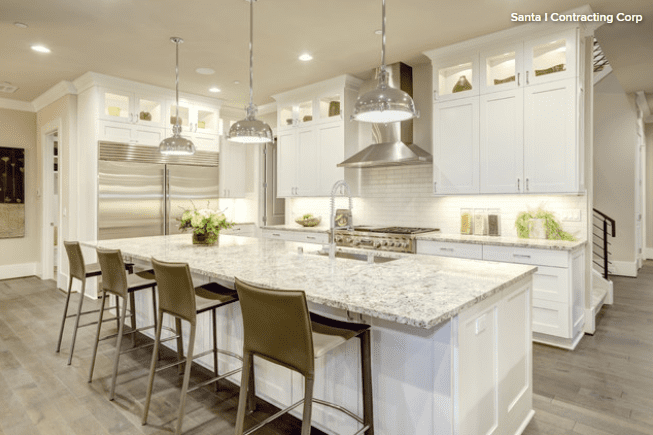
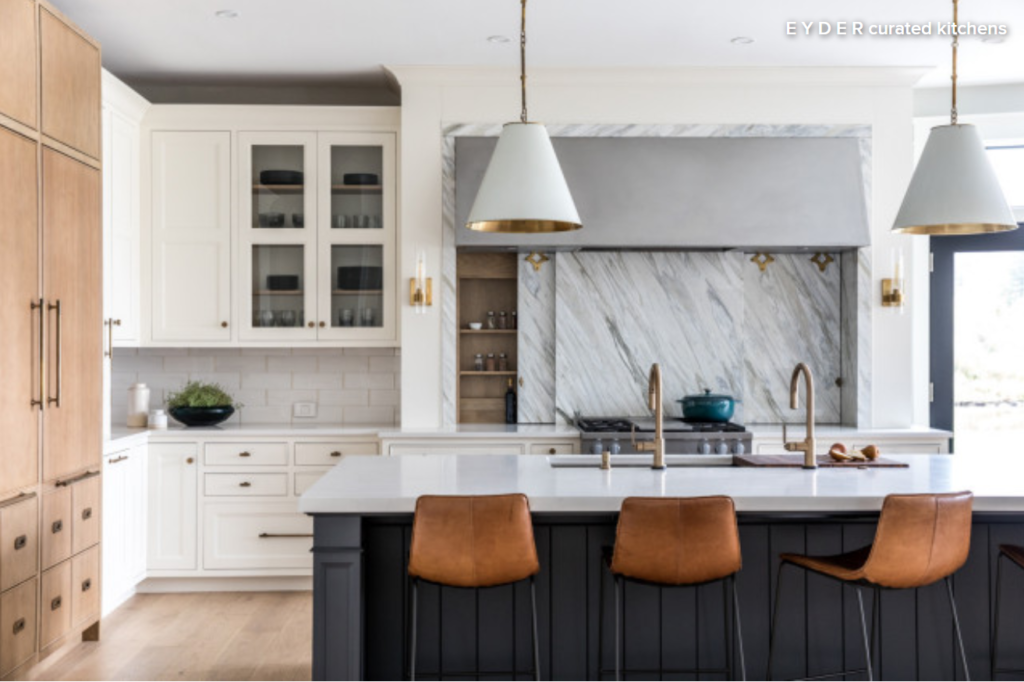
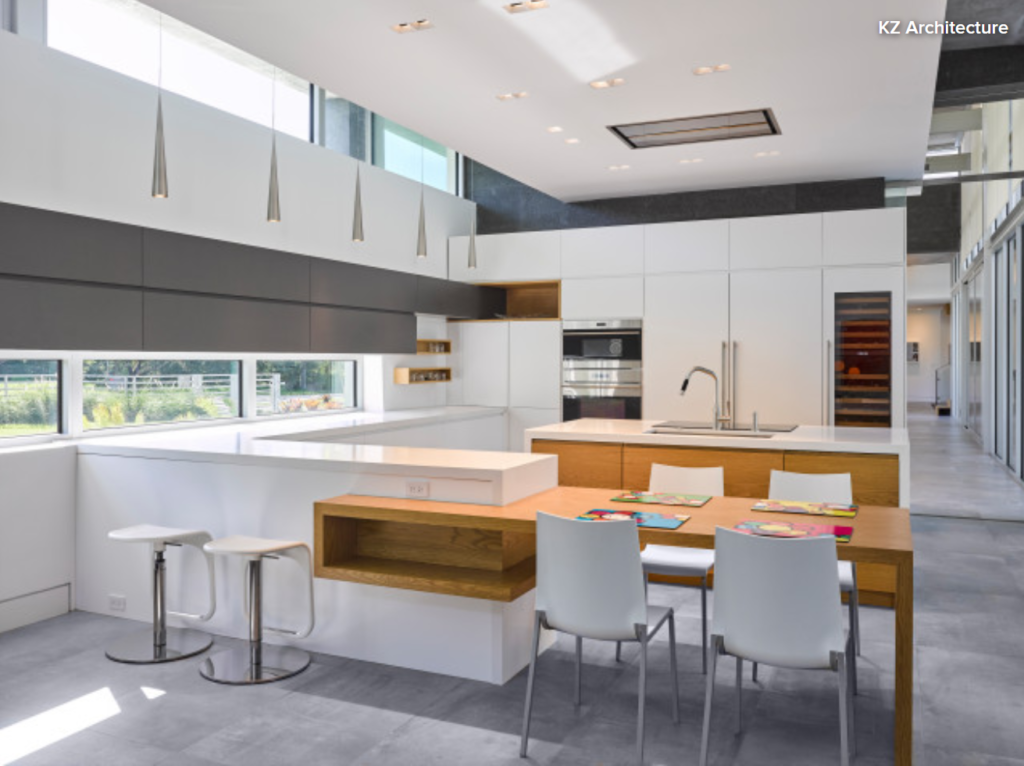
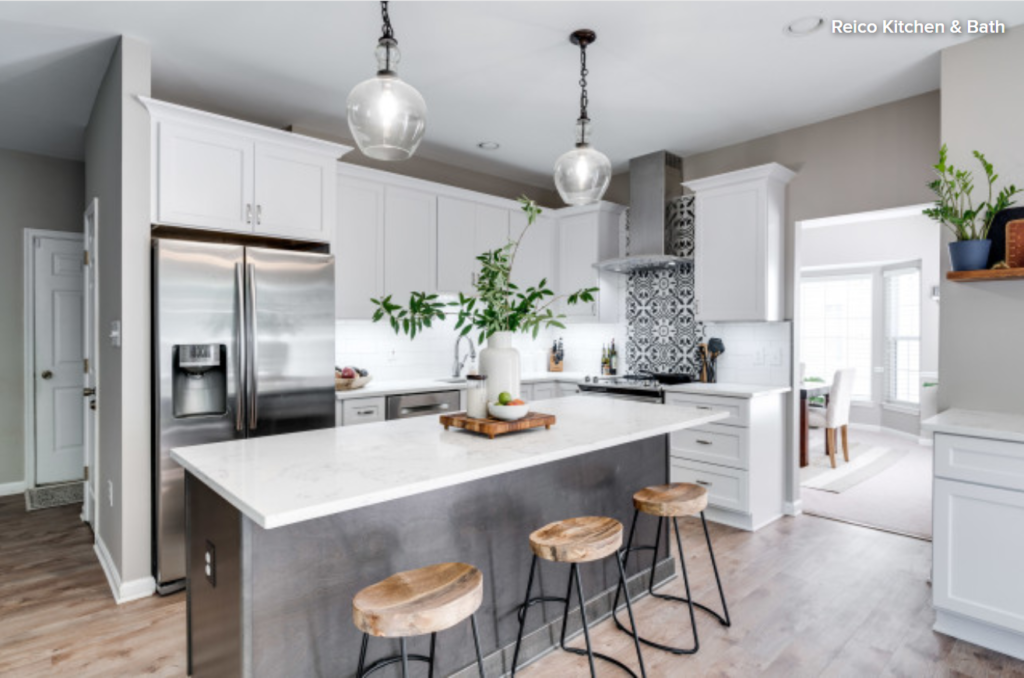
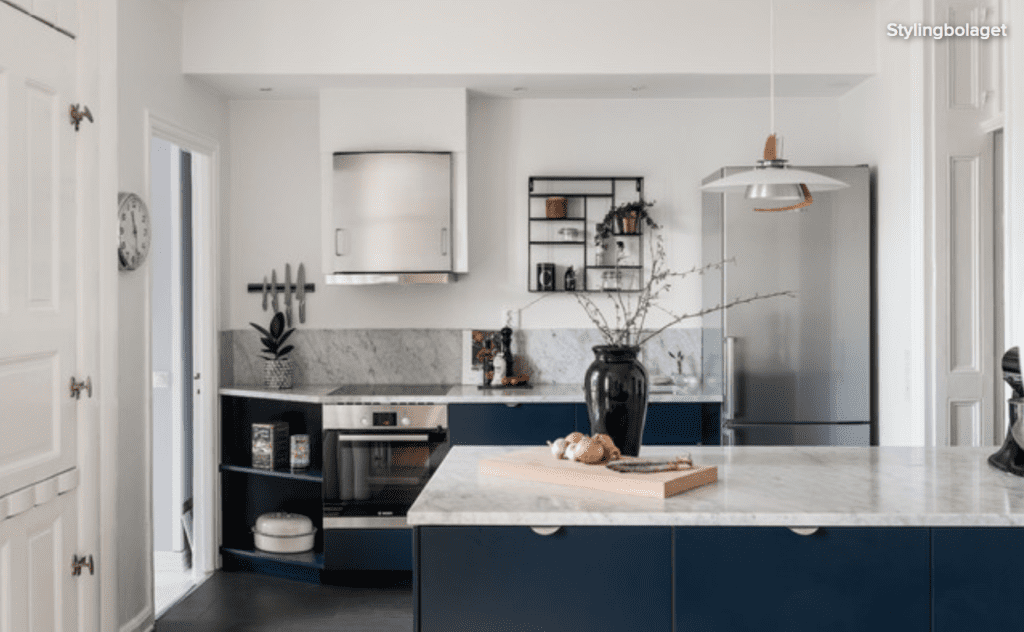
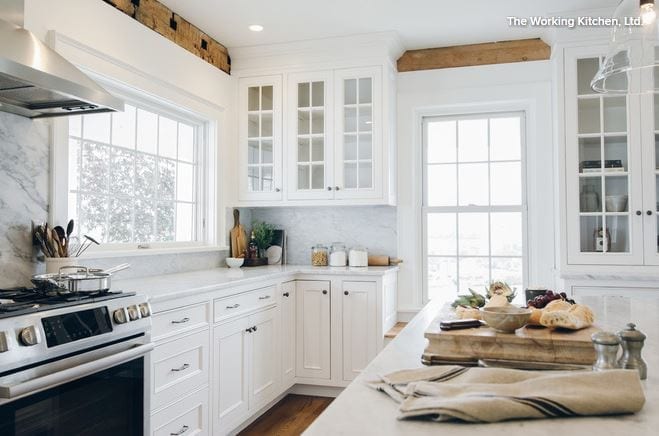
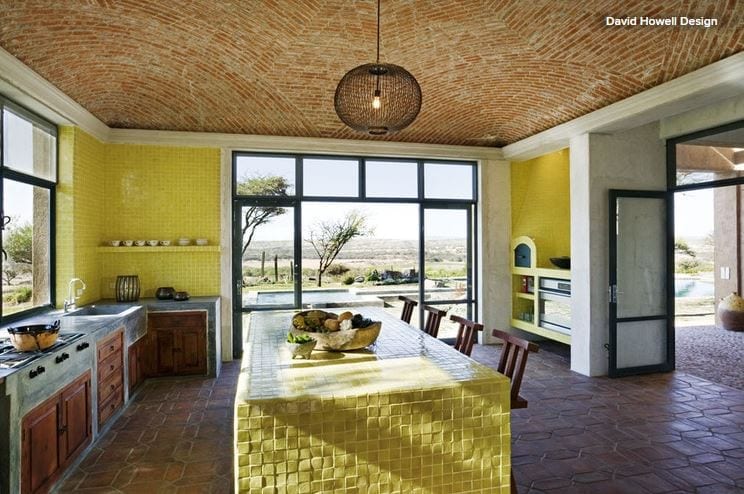
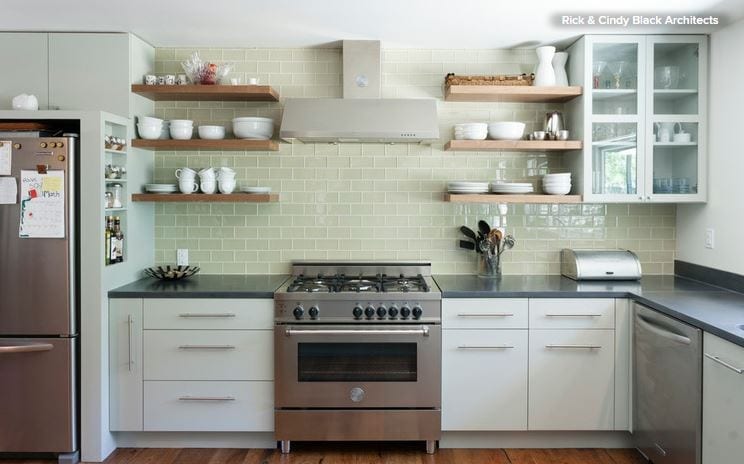
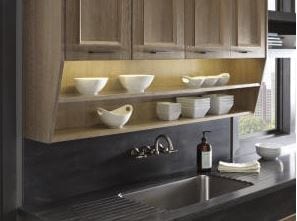
Major Kitchen Remodel, Midrange

Average cost: $56,768

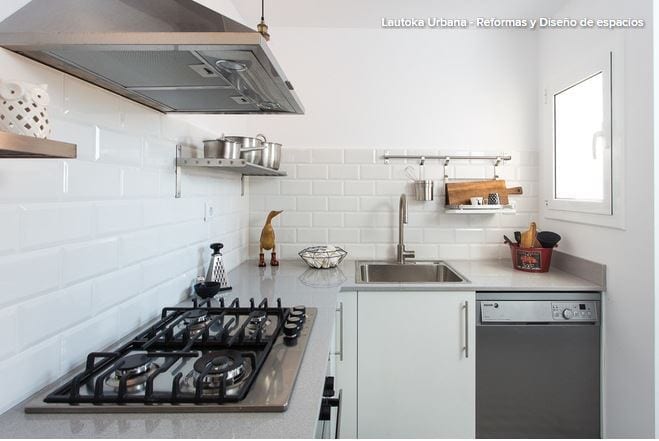
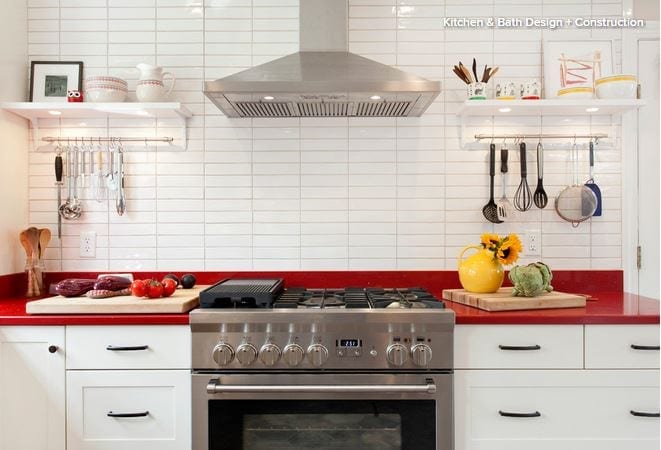
The heart of the home is no place to skimp, but a major kitchen remodel doesn’t have to break the bank. High-ticket items, such as cabinetry and appliances, make up the largest chunk of the project cost but also allow for the most savings. Meanwhile, fixtures like sinks and faucets have smaller price tags but can quickly add up in cost. Here are some price ranges we found for the kitchen. Remember, lower-cost solutions, such as cabinet refacing and countertop resurfacing, broaden the price ranges even more.

Semi-custom cabinetry: $15,000 to $50,000 for 30 linear feet of cabinetry and a 3-by-5-foot island. Based on these numbers, outfitting the kitchen with top-of-the-line semi-custom cabinets costs almost as much as the entire national average project cost.

Appliances: Like cabinetry, this category can vary widely. Homeowners who want the basics can spend as little as $2,500, while high-end customers can spend six times that on the refigerator alone.

Laminate countertops: Look for $20 per square foot for standard styles, to $40 per square foot for materials using the latest imaging technologies. Are your clients dead-set on granite? Have them double that price range.

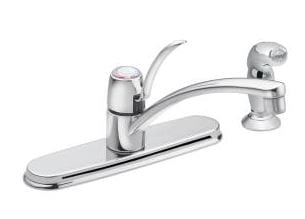
Standard faucet: Pick up a no-frills chrome-finish faucet for as little as $50. But if your client’s definition of “standard” includes a pull-out, pull-down, or side spray, prices quickly rise. Count on $150 to $550 for models with those features.


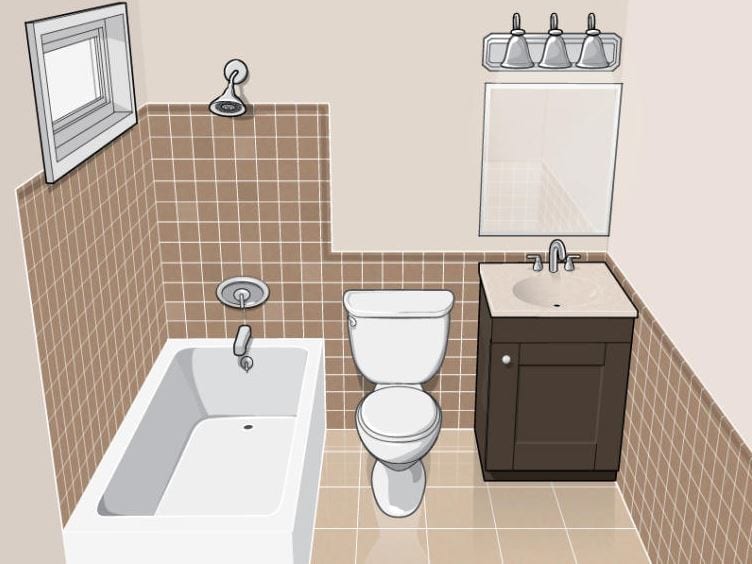
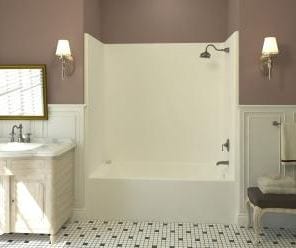
Bathroom Remodel, Midrange

Average Cost: $16,724

Bathrooms are four of the five most expensive Cost vs. Value projects ranked by cost per square foot. That said, fixture prices are reasonably consistent across manufacturers. Remind clients that while high-end fixtures and fancy tile can bust the budget, it’s labor they’ll pay the most for in these small spaces.

Ceramic tile: For the shower surround, we found 4-inch square ceramic tile for as little as 8 cents each, but double that if you want something other than plain white, and continue up to $13 per square foot, including accent tile for $1 or more each. On the floor, 12-inch square ceramic tile ranges from less than $1 per square foot to more than $5 per square foot for slate-look or patterned tile. Clients who want glass, natural stone, metal, or specially formatted designs can easily top their tile allowances.

Bathtubs: This project calls for a 60-by-30-inch alcove tub, which we found for as little as $220 for acrylic or $550 for porcelain-on-steel. Both materials topped out at around $1,500, with no bells or whistles. Add jets or other therapies and $1,500 can become the starting price.

Toilets: A quick $100 will buy the specified “standard white toilet,” but what does “standard” mean? One piece or two? Gallons per flush? Some design flair? Generally, two-piece toilets cost less than one-piece units, though either can be had for less than $250. Higher-price units can run $650, though we found some ornate designs priced as high as $1,400.

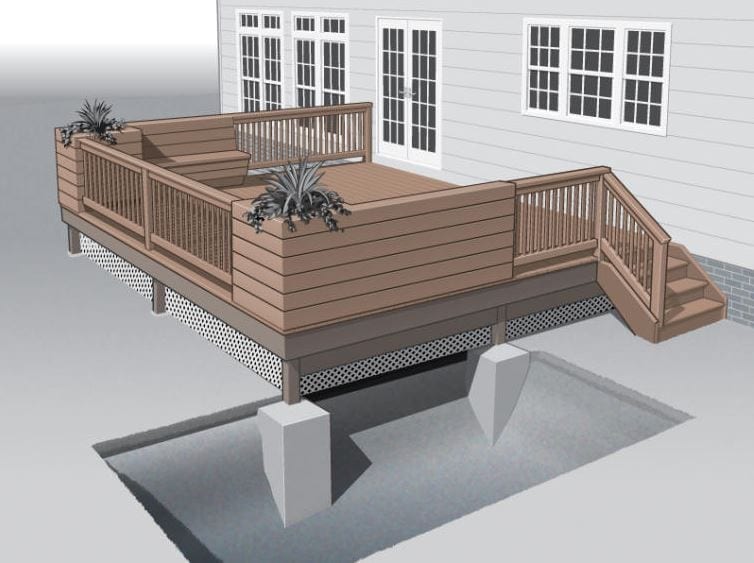
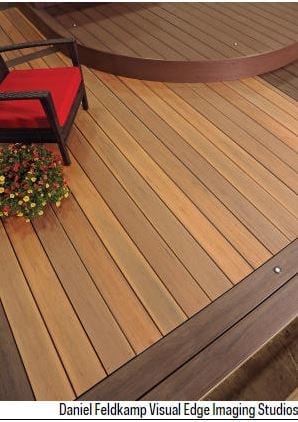
Deck Addition – Composite, Upscale

Average Cost: $36,385

With so many options on the market, composite decking may be among the more challenging product selections for homeowners to nail down, so to speak. Considered by some deck builders to be a step up from pressure-treated lumber for its durability and longevity, composite decking has been joined in recent years by all-plastic PVC decking and other selections that incorporate varying amounts of wood, plastic, and recycled content. Product composition plays into pricing, along with board dimensions, solid vs. hollow construction, capped vs. uncapped material, and capacity for hidden fasteners.

For this category, manufacturers asked us to remind users that pricing will vary by region and that labor will play heavily into the price of a decking project. Several companies also advised considering product life cycle and life span when choosing composite decking.

Composite decking:Keeping labor, regionality, and life span in mind, we found composite decking prices ranging from $1.63 to about $4 per linear foot. PVC products cost slightly more at upward of $5 per linear foot for some brands.

Railing: To complement the composite deck, this project calls for composite railing, which we found for $10 to $70 per linear foot. Vinyl options cost from $8 to $25, and aluminum from $5 to $35. Stair sections may be priced differently, and premium balusters and glass panels can run up to $150 per linear foot.

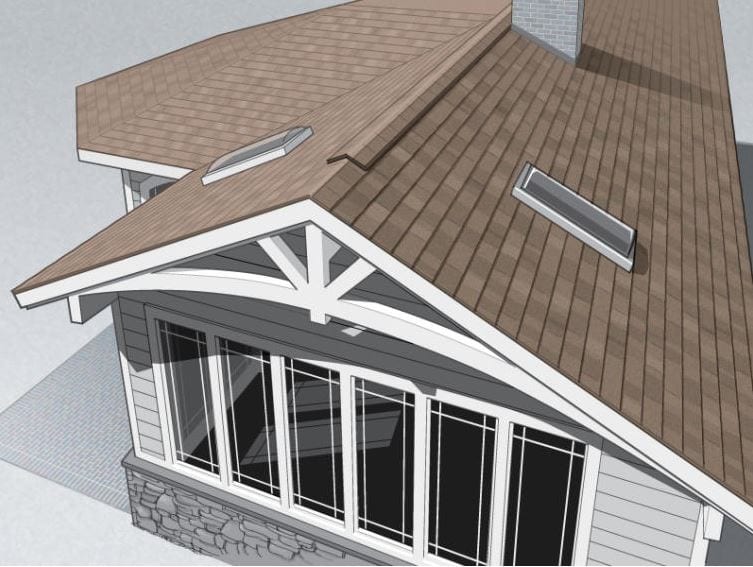
Roofing Replacement, Midrange

Average cost: $19,528

Asking for the price of asphalt shingles is like asking how much an airline ticket will cost. Pricing for commodity building materials such as shingles is heavily dependent on the cost of raw materials, and manufacturers regularly send “price increase alerts” to their distributors. In 2014, those price increases were around 5% to 9% for roofing materials.

That said, industry professionals note that downward price corrections do happen as the market demands. Additionally, contractors can often take advantage of bulk or package pricing options that reflect discounts off list prices, but may include labor costs—which can be hard to call out from the total. Take all those intricacies into account when considering the price for a 30-square roof. Pricing cited here reflects retail figures, which can vary significantly from distributor pricing.

Asphalt shingles: Three-tab shingles will be the most economical option at as low as $23 per bundle, but architectural shingles are a more popular choice and can run from $30 to $60 per bundle. With three to five bundles per square, the materials cost works out to $70 to $280 per square. Expect premiums on cool-roof products.

Felt underlayment: For $15 to $20 per roll retail, a roll of 15-pound felt covers about 4 squares, or half that with 30-pound felt. (Expect to spend $8 to $10 per square.) Synthetic underlayments cost about $14 to $25 per square, but their peel-and-stick properties may help reduce labor costs.