FREE DESIGNS AND ESTIMATES

Wood and White Brighten This Kitchen

Article by: Monica Banks

Kitchen at a Glance
Who lives here: A couple with two children
Location: Rosemont neighborhood of Montreal
Size: 210 square feet (19.5 square meters)

After living in their 1945 home for a few years, the owners decided it was time to expand their 155-square-foot kitchen, which lacked sufficient storage and felt cluttered. Originally, the home was designed in the typical Montreal fashion, with one corridor that has separate rooms branching off from the axis. The homeowners wanted not only to have more space, but also to give that space an open-concept feel.


White_Wood_Kitchen_2.JPG

Before. In this snapshot taken before the remodel, the existing kitchen had an eclectic look; the homeowners wanted to give it a cleaner, more minimalist design style.


White_Wood_Kitchen_3.JPG

Before. The kitchen also felt a bit closed in, thanks to the side walls surrounding the entry opening into the space.


White_Wood_Kitchen_4.JPG

Kitchen (After)

Layout. Removing those side walls and opening up the kitchen to the adjacent dining area created more breathing room and brought in more light. The right side of the room is composed of wall cabinetry that gives the family plenty of storage space. The kitchen is now 210 square feet. 

Style. Though the kitchen has a simple palette of primarily wood and white, the space feels dynamic thanks to variation in the textures and shapes — from the subway backsplash and the hexagon floor tiles to the beadwork on the upper cabinets and even the horizontal lines marked by the open shelving.

Floor. The homeowners kept the existing cherry floor but had it sanded and refinished.


White_Wood_Kitchen_5.JPG

This photo shows the left side of the kitchen (when viewed from the dining room). On the floor in front of the sink, the homeowners added a strip of hexagon tile for visual interest. 


White_Wood_Kitchen_6.JPG

Backsplash. Simple white ceramic subway tile gives the room subtle detailing that supports the kitchen’s clean, modern look. 


Island. The island countertop is covered with multiple tile pieces (see first photo in this story) that echo the subway tile pattern. 

Cabinets. A two-tone cabinet scheme contributes to the kitchen’s contemporary feel. The majority of the cabinetry and hardware is from Ikea, but the wood doors were handmade by a local artisan. 


White_Wood_Kitchen_8.JPG

Niche. The cabinetry wall on the right side of the kitchen is broken up by a central nook that the designers finished in herringbone tile. 

How to Bring the Beauty of Reclaimed Wood to the Bath

Article by: Becky Harris

Reclaimed wood has never been more popular, making its way from basement bars all the way up to elegant master bathrooms. Used on flooring, vanities, accent walls, mirror frames and even tub surrounds, this material adds warmth and rich texture. It’s also a wonderful contrast to the usual bathroom materials, such as glass, granite, marble and tile, which can leave a space feeling cold. “Reclaimed wood can be a once-in-a-lifetime gift,” says Nathan Daves, of Restoring TexasBut using it in a room full of potential splashes and steam takes some extra consideration. “At the end of the day, water is the evil kryptonite for wood,” Daves says. 

Daves also warns that not all reclaimed wood is created equal. A broken-up pallet will not withstand moisture at all like old-growth pine lumber harvested from a pre-1940s barn, for example. Other good choices for moisture resistance are reclaimed teak and old-growth cypress. Whichever wood you use and wherever you decide to use it, check out this list of ideas and advice to see if reclaimed wood will suit your bathroom.
1. Talk to your contractor about the realities of protecting the wood. No matter whether you treat the wood or not, protecting it from direct contact with water is a good idea. “If water is allowed to sit on the wood, it will eventually find its way in,” says Daves, who recommends sealing reclaimed wood used in a bathroom with an oil-based polyurethane. “Anything that coats the wood will eventually be infiltrated and begin breaking down, but woods with high rot resistance will last longer,” he says.

Using wood as an accent wall where it won’t be splashed by water is smart. Here, a high backsplash protects it from direct contact with water.
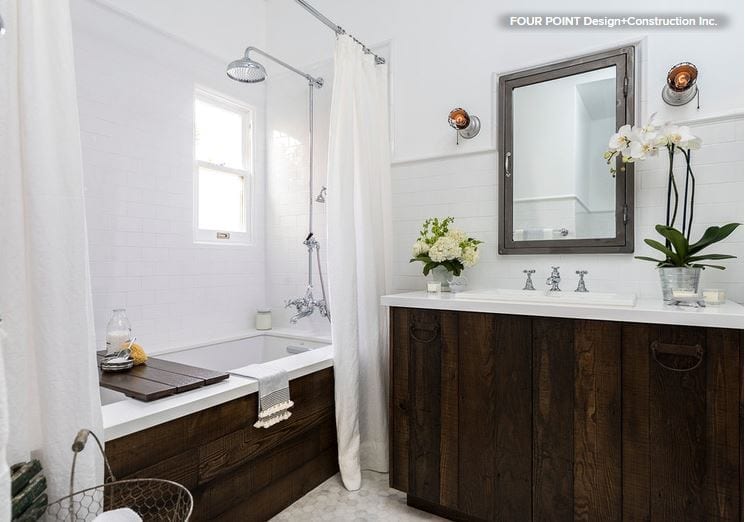
2. Realize that the material will swell and contract. In this Hollywood actor’s bungalow, salvaged wood mixed with crisp white and vintage accents give the room a modern eclectic look. The designer, Laura Schwartz-Muller, even had a simple matching tub shelf crafted to match. 

Schwartz-Muller understood the importance of treating the reclaimed wood as “a living, breathing thing,” as she describes it, one that will grow and contract. Thus, she used flexible silicone caulking and left a ⅛-inch gap between the sides of the tub and the walls, and beneath the tub top. She sealed the wood with three coats of fully cured polyurethane to protect it from moisture. 
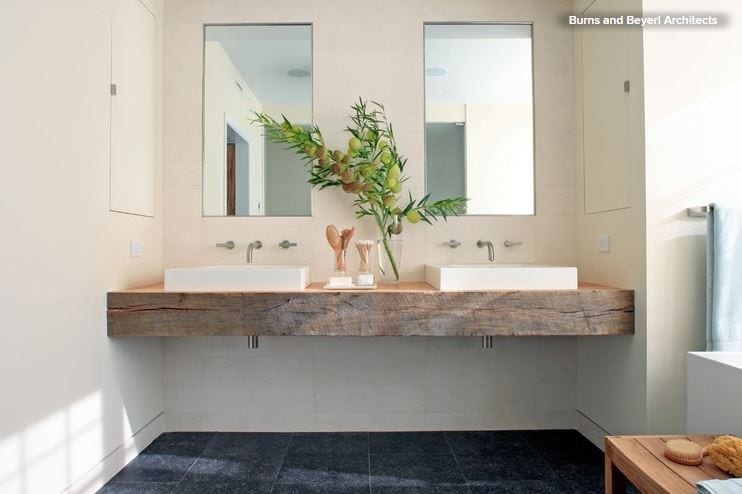

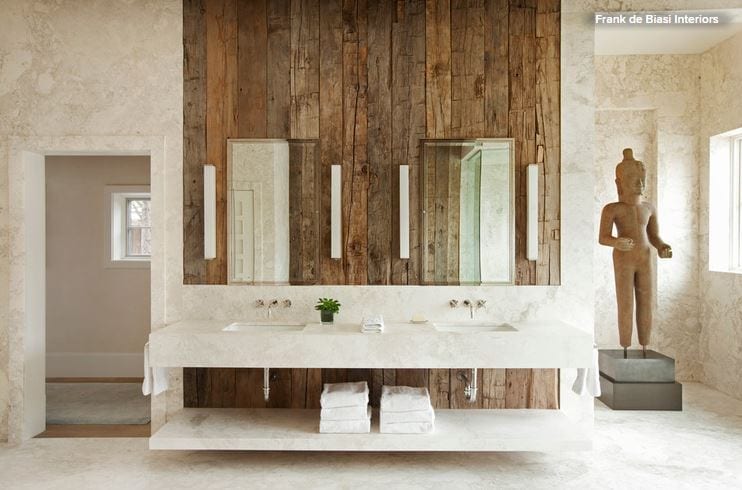
3. Use reclaimed wood for contrast. It’s a wonderful way to add warmth to a modern bathroom. The rough-hewn quality of these reclaimed white oak timbers makes them standouts in this otherwise clean-lined space. 

There is extra maintenance involved, so you have to decide if the look is worth it to you. When these owners opted not to add a glass top to the counter, they were aware that they would need to do a little light sanding and add a new satin-finish polyurethane coat on their countertop every few years. 

Tip: The designers at Burns and Beyerl Architects recommend using reclaimed wood as a countertop in adult bathrooms as opposed to those for kids, as kids are less likely to mop up any splashes and little puddles they might make when using the sink. 
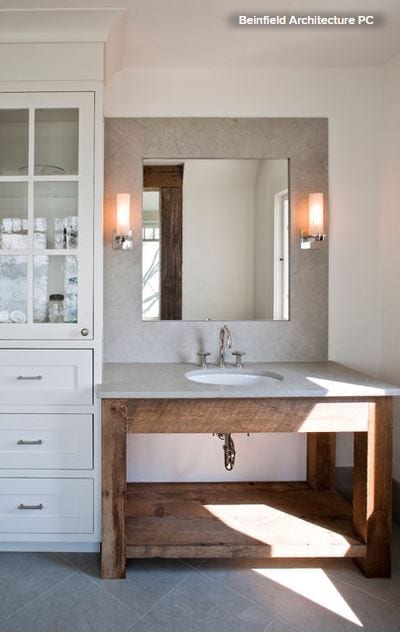
4. Add a different countertop atop a reclaimed wood base. If you’re turned off by the extra maintenance required by a wood counter, this is a good alternative. In this elegant bath, an open vanity base constructed from old barn wood adds a striking material to the textural palette. The designers at Beinfield Architecture treated it with a clear wood sealer. 

Using a fan when you’re steaming up the bathroom is another way to help keep moisture away from your reclaimed wood.
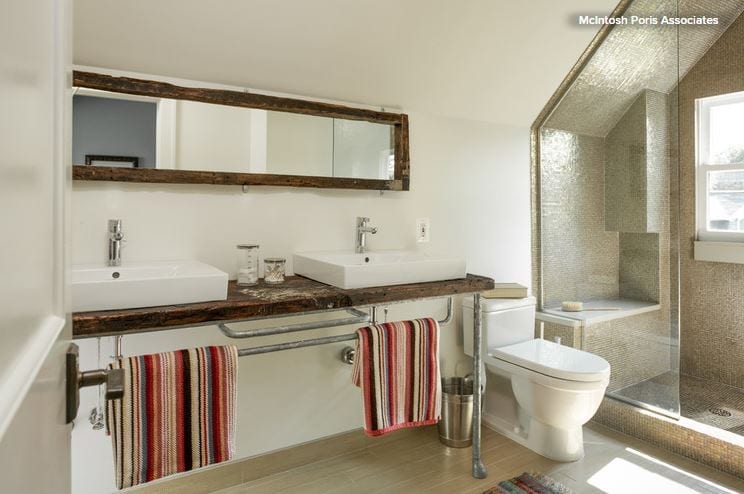
5. Add more than one reclaimed wood accent. Here the vanity counter and mirror create three long horizontal lines of dark rustic reclaimed wood. 

In fact, reclaimed wood is an element these homeowners used throughout their farmhouse, and it ties the rooms to one another. 
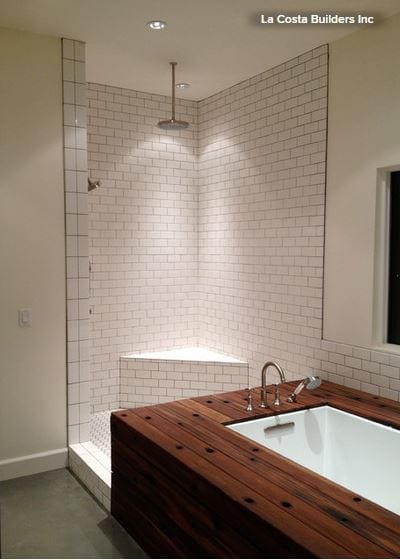
6. Consider teak. Teak is one of the most rot-resistant wood species out there, which is why these teak boards surrounding the tub originally were used on the deck of the USS North Carolina battleship. The coloring and knots make the bathtub a focal point in the room.
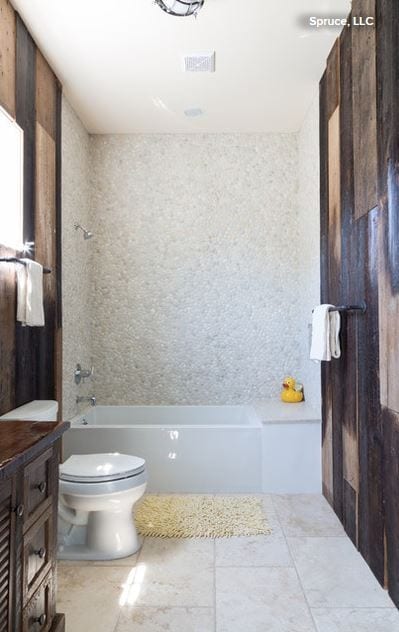
7. Highlight your home’s history by harvesting wood during the demolition phase and upcycling it in the renovations. In this New Orleans bathroom, interior designer Nomita Joshi-Gupta of Spruce used bargeboards that were original to the house. These bargeboards are at home with water; they are lumber recycled from cargo barges that floated goods down the Mississippi River and were then broken up upon arrival. It was a common construction material in Creole architecture historically. “When we gutted the house, we found bargeboard, and we decided to reuse it in many portions of the house,” she says.

The design team took the best pieces and installed them like paneling, then sealed it with polyurethane. “It is a beautiful texture, and it was nice to reuse and reclaim the home’s own history,” Joshi-Gupta says.
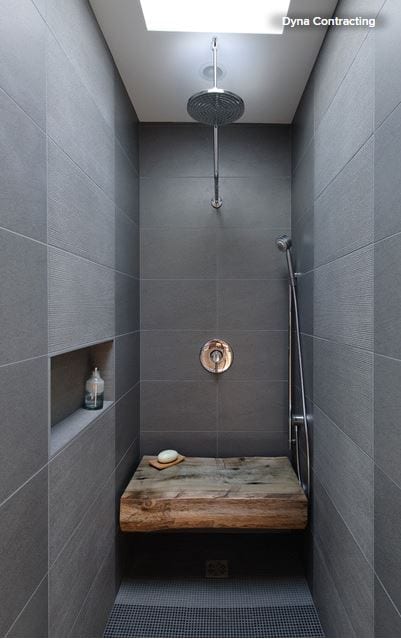
It’s only fitting that this piece of cedar in this floating house in Seattle serves as a unique shower bench, because it was part of an old log float. As it had floated on the water for many years before, the client decided sealing it wasn’t necessary. 
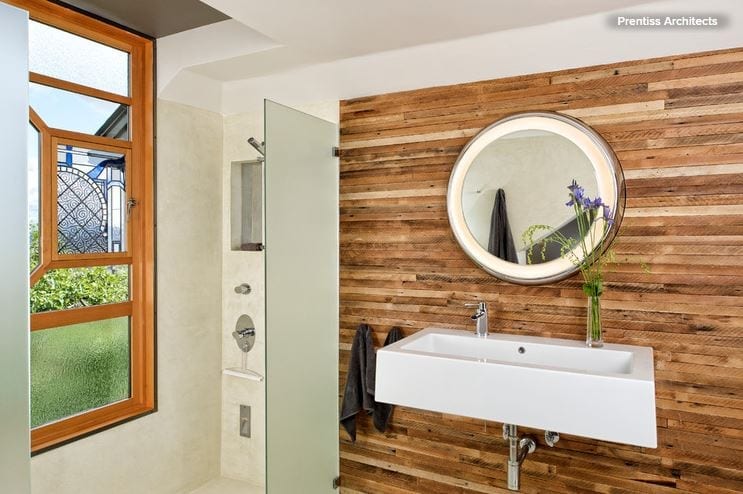
When remodeling his 1902 foursquare home, architect Geoff Prentiss ripped out plaster and preserved the 113-year-old fir lath beneath it. “The lath, usually between 24 and 48 inches in length, was stained in part, which I liked, but also had lots of tiny nails and bunches of sand in it, which was not so good,” Prentiss says. He pulled out the nails, shook the pieces and then very lightly sanded the rough-sawn surface. After installing it on the walls, he used a clear sealer. “There has been no issue in the wood absorbing water, even as the backsplash of the sink,” he says.
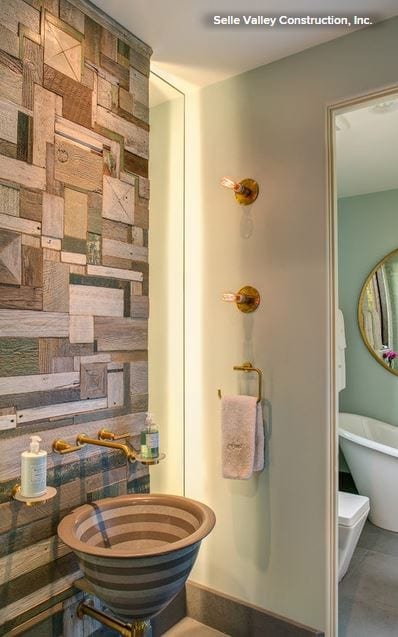
8. Create something artful. This beautiful wall is a patchwork of reclaimed wood pieces made by local Sandpoint, Idaho, artist Rob Payne.
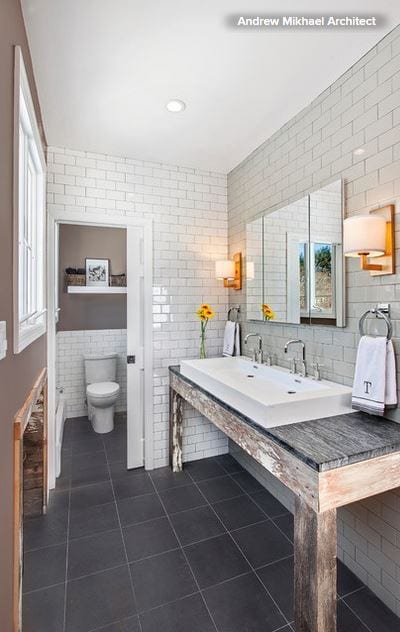
9. Combine reclaimed wood with soapstone countertops. The combination of the sanded-down white paint on the reclaimed-wood base and the veins in the countertop tie the two pieces of this vanity together in a unique way. A long trough sink and a frameless mirror create a clean look.
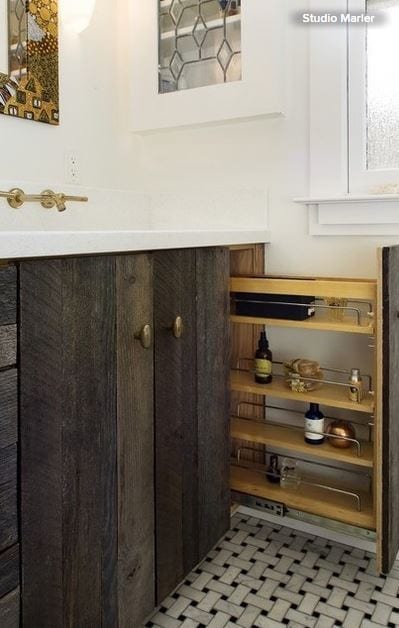
10. Pair reclaimed wood with unlacquered brass fixtures and hardware. The way the material patinates works well with the rustic look of reclaimed wood. 

On this vanity, Studio Marler used recycled wood for the doors and drawer fronts. Surprisingly modern storage solutions hide behind the vintage-looking facade.
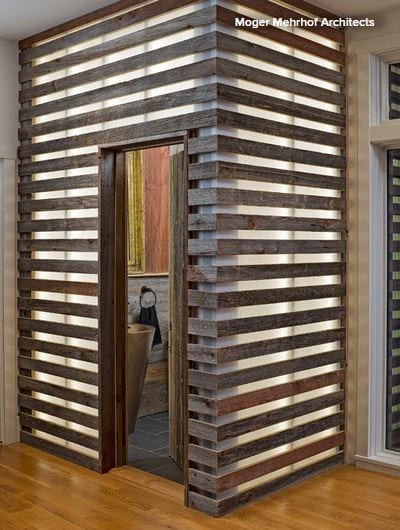
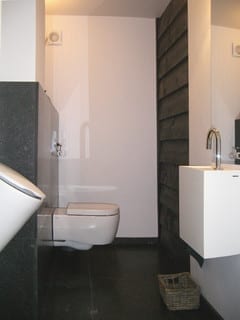
11. Use reclaimed wood in a powder room. If the thought of steam from the shower, splashes from daily face washing and toothbrushing, or keeping up a wood countertop has put you off, consider using it in the powder room. 

In this contemporary barn-like home, the main floor’s powder room has a unique reclaimed-wood and Plexiglas surround that glows like a lantern. The architects specified that the Plexiglas be sanded to give it a frosted look. 
Wood in the Bathroom? Absolutely!

Article By: Mark Clement

The conventional wisdom is that tile is the go-to for bathroom surfaces. We see tile everywhere, from the bathroom at work to the subway, to everybody’s house.

I love tile, but just because it’s so popular doesn’t mean we have to design with it. And tile and grout aren’t as impervious as you might think and are not required for looks, durability or cleanliness in wet areas like kitchens and baths. 

In fact, you can do amazing things with wood, even in the bathroom. The way it feels, sounds and even reflects light is wonderful. It also offers color and depth, and can soften the look of hard ceramic finishes. 

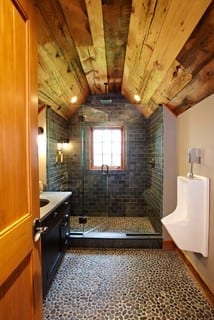
While wood is a durable choice for bathroom floors, it’s also fantastic on the ceiling. It adds a sense of natural warmth in a space where, well, most of us are au naturel. 

Yes, this ceiling is above a shower. You can imagine the potential moisture problems. I always recommend using a fan in the bathroom, but adding a second barrier between the steam rising from the shower and what’s behind the ceiling might be smart here. I recommend sealing the wood surface with boiled linseed oil and/or urethane. I also recommend sheeting the ceiling joists with 15-pound tar paper (the black paper you see under roof shingles) before installing the wood. 

Tar paper is water resistant and will keep moisture that does make it through the ceiling (not much, if any) inside the room. The moisture will evaporate back into the room and dry with the rest of the air, especially if you’re using planks instead of a tongue and groove material.


Wood on an accent wall — in this case, beveled siding — softens and adds texture. Moisture is always a concern in a wet area, and the usual go-to bathroom coating is semigloss paint. 

When it comes to wood, I like the texture to be the star, so I prime the base coat with oil (it’s smelly, so do it outside) and make sure the end grains and backs get coated to thoroughly seal the wood. 

Installing wood is often easy, fast and cleaner than sanding drywall.


When you’re remodeling a bathroom, there are many materials you can use for the walls that’ll help battle ever-present moisture. Water-resistant drywall (often called green board) and cement board are popular, but they’re not necessary or any more durable than natural softwood planks like eastern white pine. 

Bare wood will stain, but coating it with a water-based urethane will help keep all that natural wood grain vibrant. And having different-colored wood cabinets and storage is a nice touch, with clean, horizontal lines drywall can’t touch. 

I recommend tongue and groove stock, as opposed to planks, to create a continuous barrier to minimize moisture migration into the walls. 

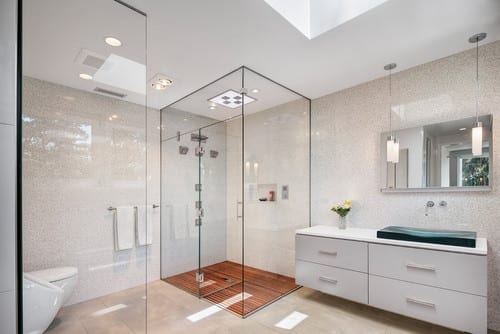
Think creatively. Wood is used on decks and docks, where it is constantly shifting between wet and dry (and getting snowed on). So why not use it the shower floor or another bathroom area?

This pallet floor is custom detailed for this shower assembly. An easily customizable pallet built from any number of widely available lumber species — pine, cedar, Douglas fir — could be designed for a standard shower with a poured and sealed shower pan in place of tile. Or it could cover tile, which is my preference, because I find it easier to clean. 

I also like the idea of creating a simpler element inspired by this design: a wooden bath mat. Wood is easy to seal and clean with basic household detergents, and it’s much less slippery than glazed tile.  

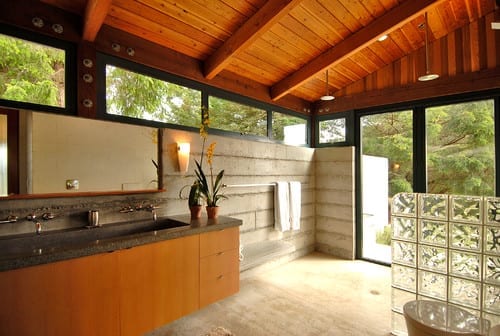
Using wood in the bathroom enables a mix of materials to create depth and warmth across different materials and styles. This concrete wall might have appeared cold and heartless were it not for the soaring rafters and V-joint roof decking above. Scale this feature down to convey the same effect in a smaller space. 

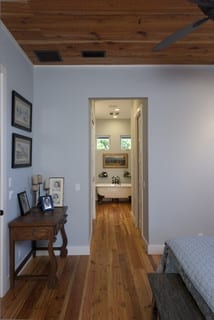
I’ve installed wood flooring in bathrooms. Not only does it deliver a sweet style, but it’s durable, in large part because urethane finishes are fantastic. I always put 15-pound tar paper down to protect the floor from any water that does get through.


Other reasons to use wood floors in the bathroom, besides looks, are ease and continuity. It’s easier to run flooring that exists in the other rooms of the house through to the bathroom. And it creates a flow, a feeling of continuity, that I find calming.