FREE DESIGNS AND ESTIMATES

10 Storage Solutions for Kitchens With Character

Article by: Joanna Simmons

Kitchens are all about storage, but it can become rather predictable: Think rows of built-in cupboards and wall cabinets, with an emphasis on practicality over personality. So how can your cooking space ingeniously accommodate everything you need while also looking original and exciting? These 10 great solutions offer some fresh ideas — not to mention storage eye-candy!


Cabinet Storage Solutions 1

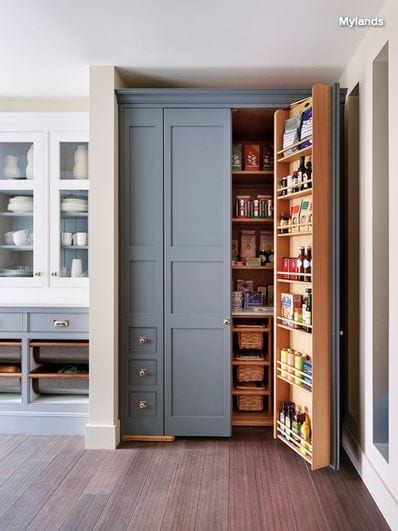
Go full-size. Pantries are huge news in kitchen storage and for good reason. While a conventional base unit requires you to get down on your knees with a flashlight to find that last can of beans, anything stored in a tall pantry like this one is easily visible and accessible. 

Typically fitted with drawers, racks, baskets and even lighting — and performing valiantly even when ultra-slender — these modern beauties offer plenty to love.


Cabinet Storage Solutions 2

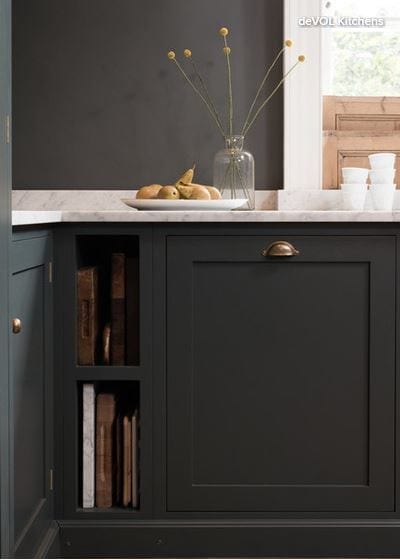
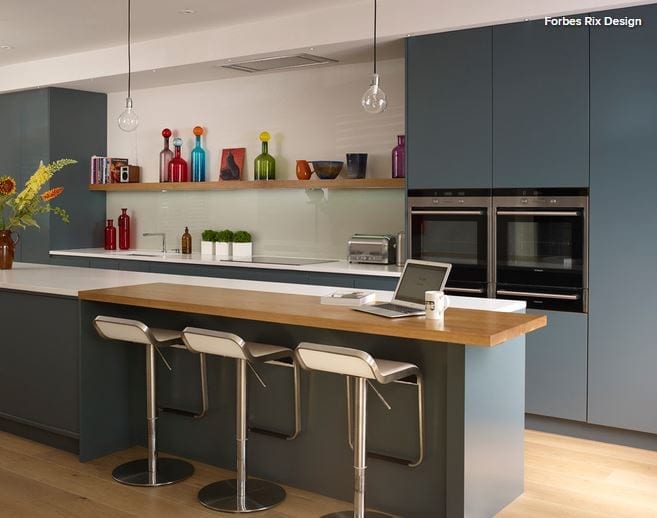
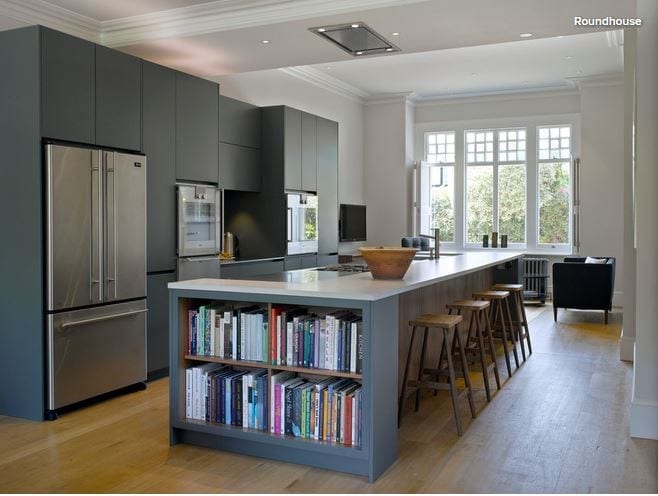
Create an island library. Passionate home chefs accumulate lots of cookbooks over the years, but not always the space to store them. Volumes kept near the stove can become scruffy and grease-spattered and perhaps don’t merit being displayed prominently. 

How about this, though: neat shelves on the end of an island? The books are visible — and add color — without being central to the design of the kitchen, and they’re easy to grab when you’re searching for a recipe.


Cabinet Storage Solutions 3

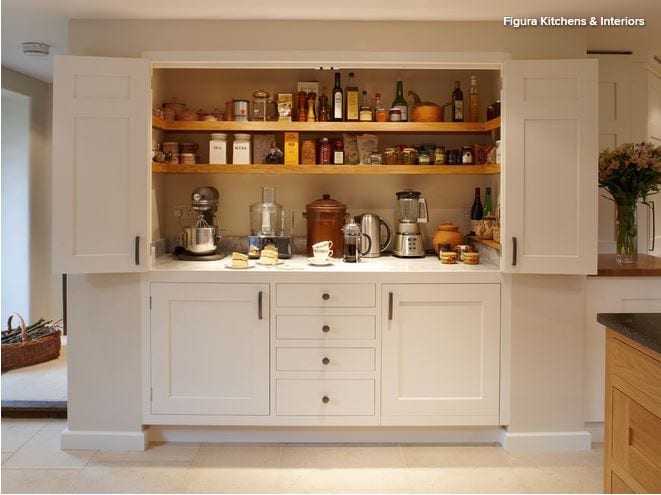
Scale up. A pantry that’s also a breakfast station is sure to set any storage fanatic’s pulse racing. This is perhaps the ultimate piece of kitchen furniture, one most of us can only dream about. 

It combines oodles of storage with a dedicated space where you can prepare your coffee and toast. You can then stand and gaze at your neatly arranged shelves while you eat. Life doesn’t get much better than that, does it?

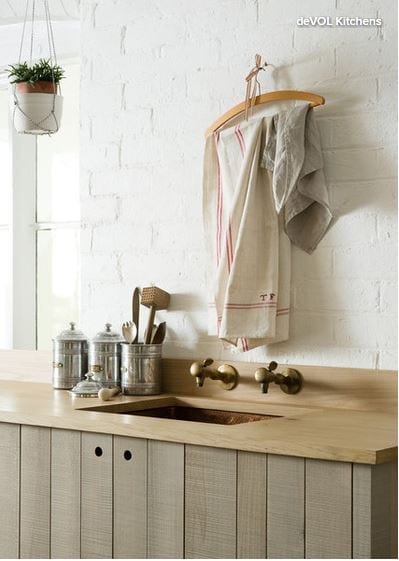
Repurpose a hanger. Dish towels go on a cupboard or oven door handle, right? Wrong. You can hang them on a hanger that is hanging on the wall! Original, quirky, inexpensive storage.


Cabinet Storage Solutions 5

Carve out space for the unwieldy. Chopping boards and trays are sizable, often heavy pieces that benefit from a dedicated home like this compartment incorporated into a run of cabinets. It’s such a simple little storage detail, but so invaluable.


Cabinet Storage Solutions 6

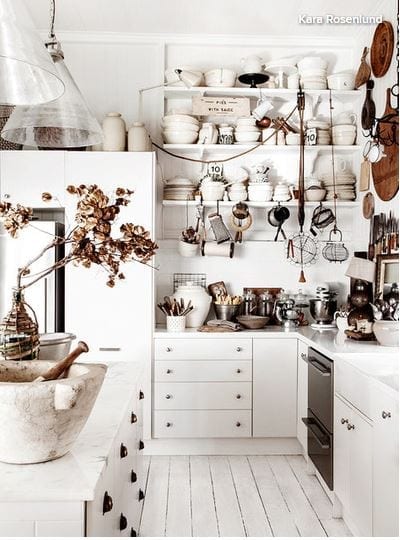
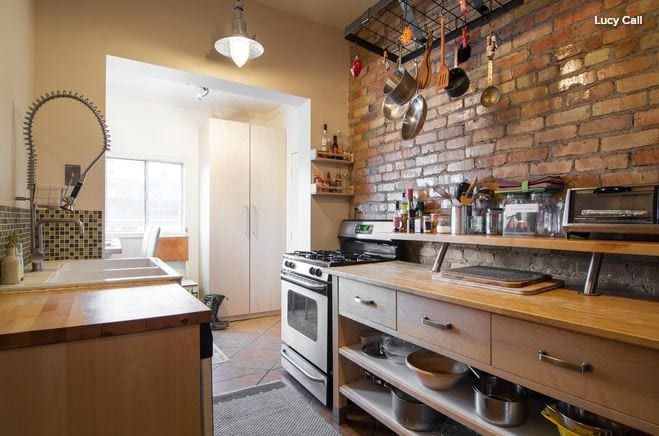
Ditch convention. This pale and unpretentious kitchen may not be to a neat freak’s taste, but there’s something to be admired in its anything-goes approach to storage. 

Superficially cluttered though it may appear, I suspect its owner knows exactly where everything is and that all the essentials are within a quick grab from the stove.

Opt for a lovely long shelf. There’s a growing trend for long shelves that simply break up a run of units rather than provide workaday storage. They can become home to beautiful objects or the odd cookbook or plant, helping to personalize a built-in design and lighten its look.


StorageSolution8.JPG

Hang it high. Making use of vertical space is a smart move in a kitchen, where storage often has to be worked into a small footprint. This space features a metal rack that was probably never intended for a kitchen but works beautifully holding pans and utensils. 

It’s attached high on the wall to reduce the risk of banging a head against a frying pan!

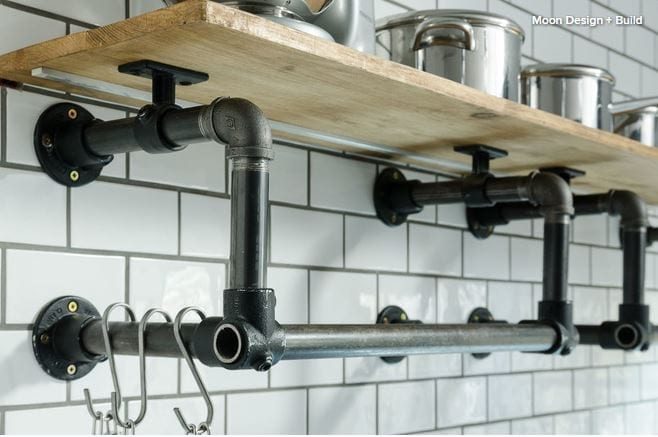
Resist the sleek. Kitchen design often tends toward the sleek and efficient, but it can also rock a more edgy, homemade look while still packing in tons of practical storage. So think laterally and use old piping and boards to make some shelving — you’ll get storage and original style at the same time.

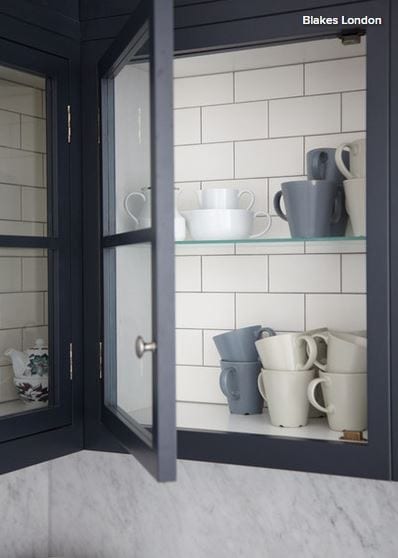
Add a twist to the typical.Kitchen storage needs to be well-designed and abundant enough to hold everything from mugs to marmalade. But really great kitchen storage does it while adding a twist of unique style. 

These glass-fronted cupboards are fairly basic, but the tiling on the interior adds detail and interest and contributes to the kitchen’s industrial feel.

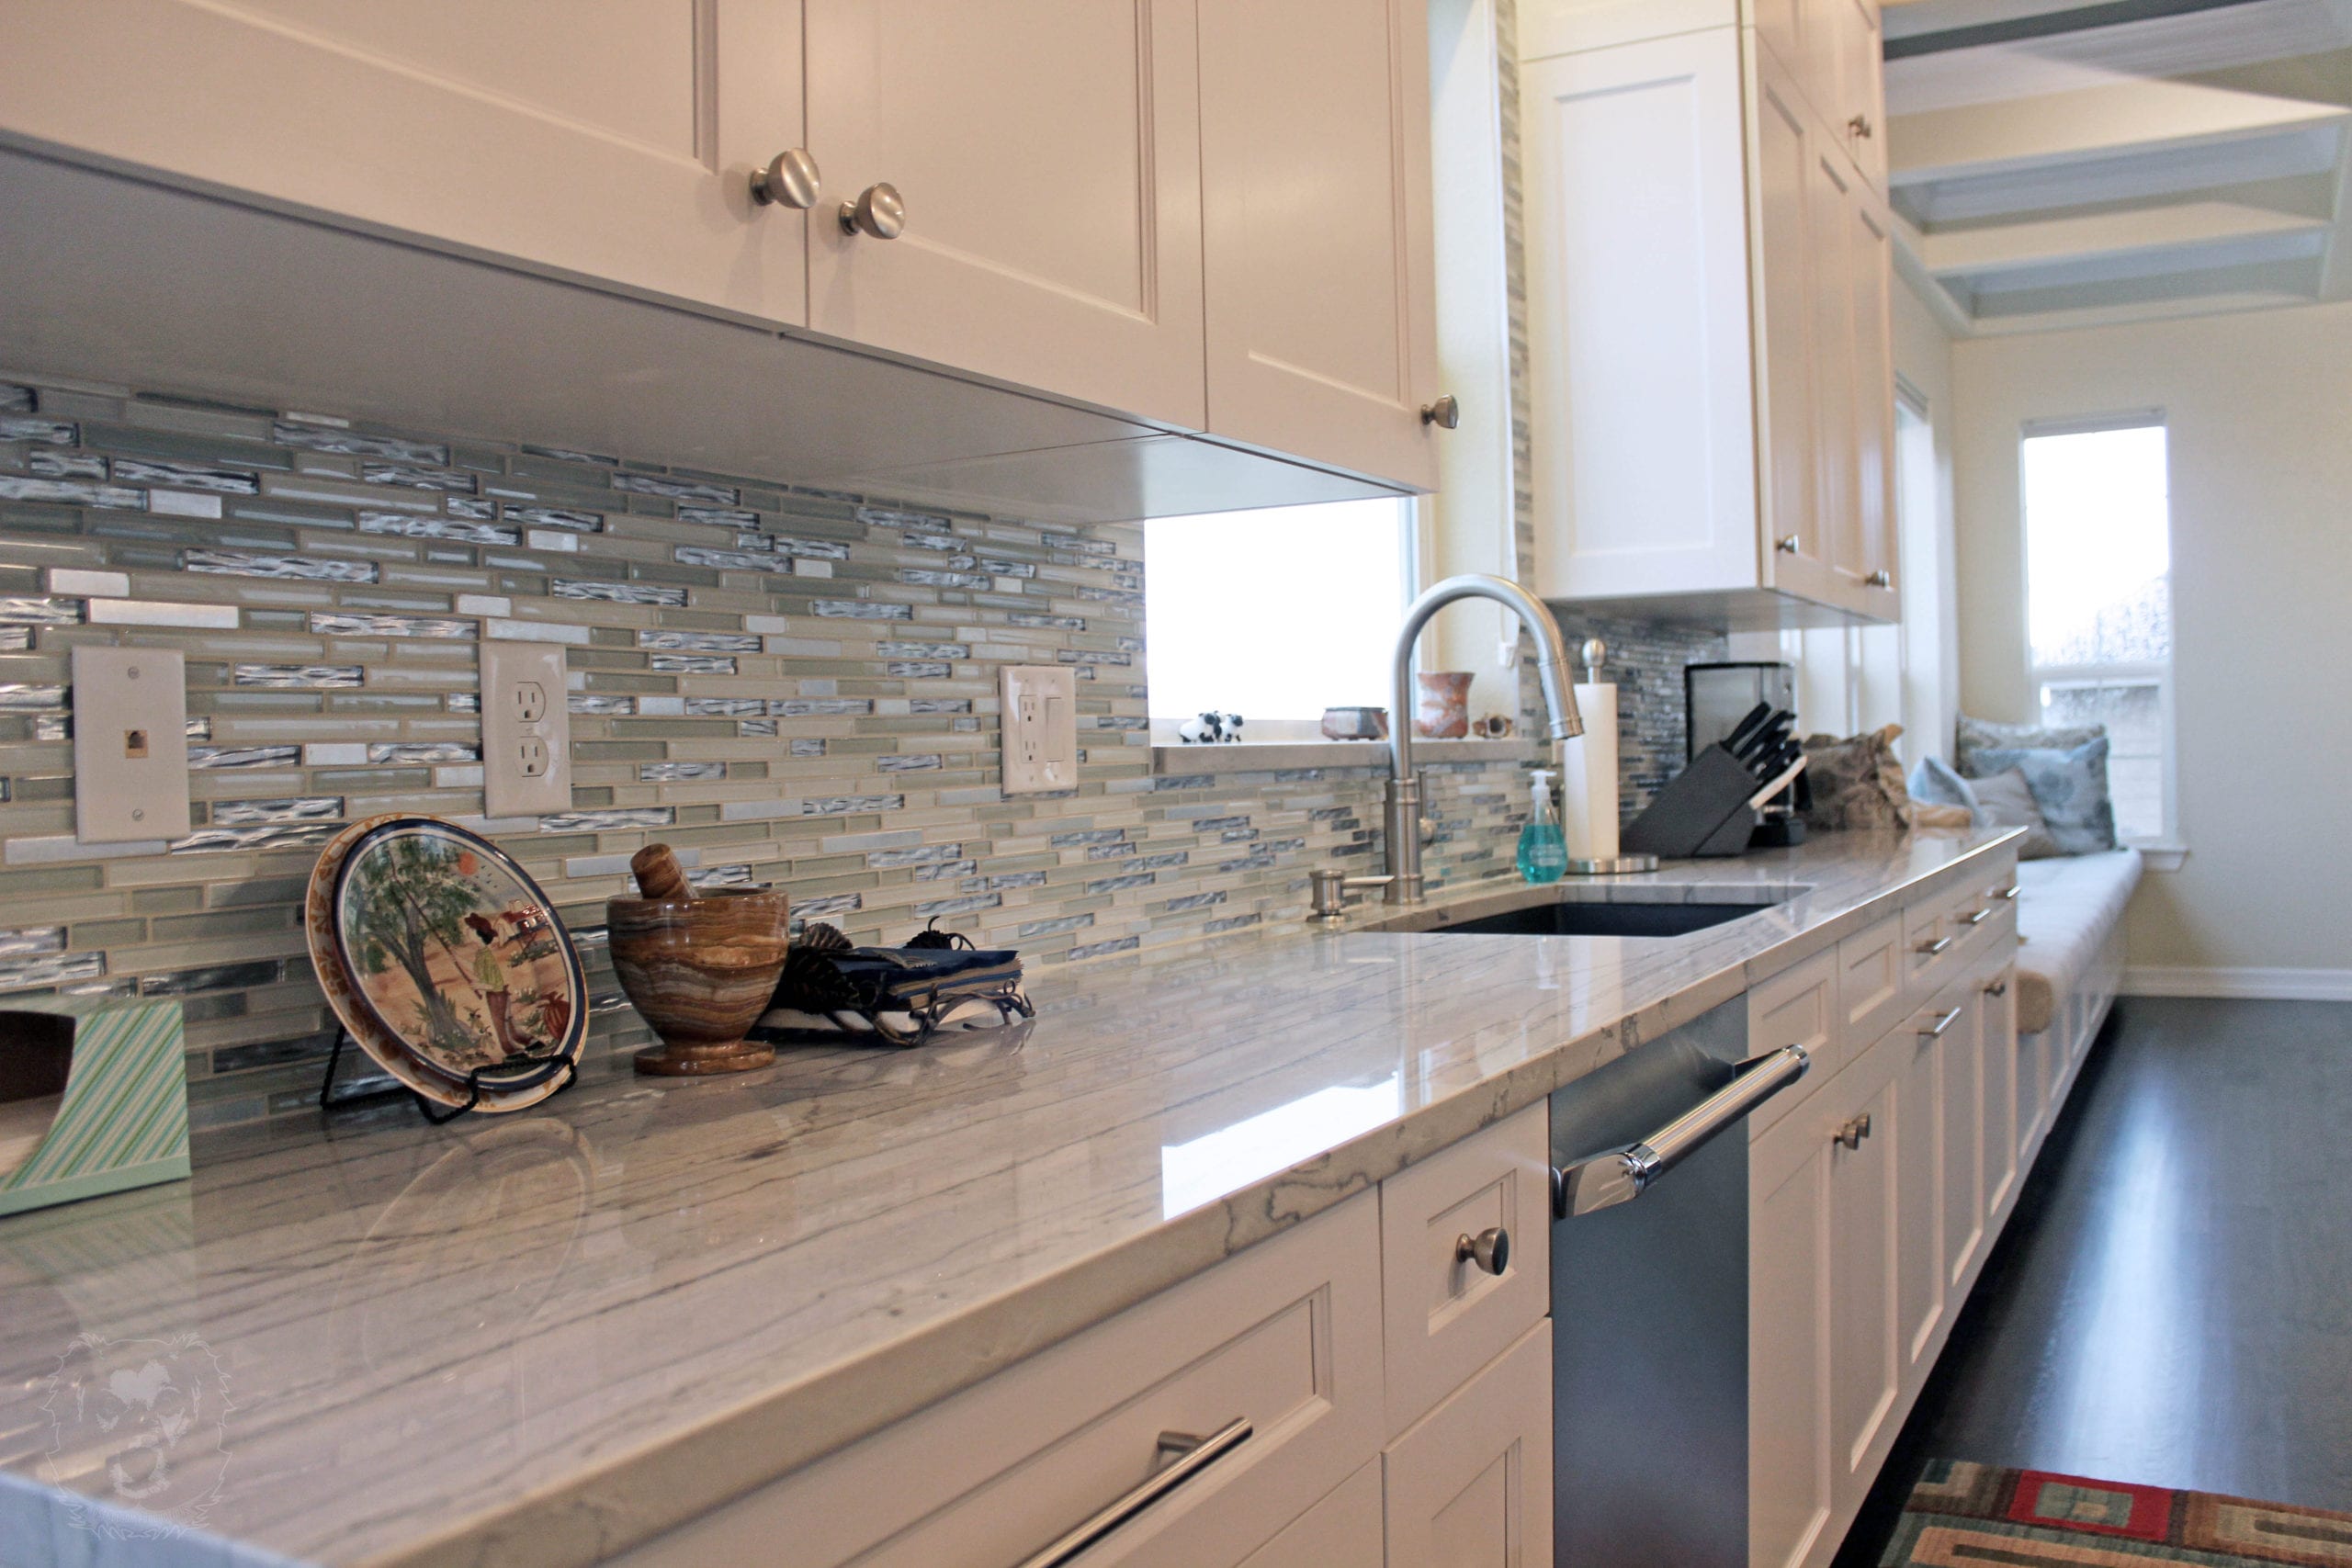
CREATING ECO SUSTAINABILITY IN COUNTERTOP FABRICATION

Granite Countertop in Denver Kitchen

When it comes to construction of any kind, environmental concerns are more important than ever. This is why The Top Shop Inc (AC&F) partnering with VT Industries, is committed to providing sustainable products and using environmentally friendly manufacturing methods.

Our production facility located in Denver, Colorado works hard to keep emissions and waste to a minimum, conserve natural resources, and protect local ecosystems. This strategically located facility, allows The Top Shop Inc. (AC&F) to provide the shortest lead times available but more importantly, reduce harmful vehicle emissions that contribute to air pollution and ozone depletion.

Every post form countertop we offer is GREENGUARD Indoor Air Quality Certified®. The Top Shop Inc. (AC&F) partnering with VT Industries, is the first and only laminate countertop product to receive this low-emitting certification, ensuring our product will contribute to healthy indoor air and building occupant wellness.

With EQcountertops, The Top Shop Inc. (AC&F) takes the sustainability of our countertops to the next level. Manufactured using 100% pre-consumer recycled particleboard, water-based adhesives and GREENGUARD Certified laminate, EQcountertops meet multiple green building standards, including Leadership in Energy and Environmental Design (LEED®) and NAHB’s green building guidelines.

Best of all at The Top Shop Inc. (AC&F), we’re continually adapting our manufacturing techniques and providing innovative products to ensure environmental responsibility. All employees—from production to accounting—are involved and encouraged to find innovative ways to make our business efficient and effective.

12 Genius Design Moves for Small Kitchens

Article by: Natasha Saroca

Is your kitchen lovely and large, or is it on the smaller side? If it falls into the latter group, I can sympathize. I spent the better part of last year living in a studio apartment with a single-wall kitchen that was a measly 32 square feet (3 square meters). However, it wasn’t the shortage of square footage that was the problem, but rather that the cooking zone wasn’t the smartest, most efficient or space-savviest of kitchen designs. (For instance, it had no usable work area, as the sink and cooktop took up pretty much all of the countertop space.)

Since I was only renting the apartment, I couldn’t renovate the area, but that didn’t stop me from mentally writing a list of improvements I’d make if given the chance. Here are some of the design tricks I would have used to transform the spatially challenged kitchen into a cooking zone that was big on functionality, space-maximizing solutions and visual appeal, and that offered the illusion of spaciousness, too. Borrow these ideas when tackling your own cramped-kitchen makeover or, if you’ve successfully revamped a compact cooking zone for the better, share your must-try design moves in the Comments section.

1. Add a mirrored backsplash. A strategically placed mirror works wonders when it comes to creating the illusion of spaciousness in a cramped room, as it will bounce light around and help visually elongate the walls. An easy way to introduce this reflective surface into a small kitchen is by way of a mirrored backsplash — a sneaky and extremely effective design trick used in this compact cooking zone.

2. Be open to open shelving. While not everyone is a fan of open shelving, there’s no denying it’s a smart storage solution for rooms with a modest footprint. Not only do open shelves deliver an airy, open and bulk-free look — unlike cabinets with solid doors, which can look visually heavy in a small space — but they also ensure that kitchen essentials are easily accessible, too. Hanging storage, another functional and space-maximizing solution spotted in this cooking zone, achieves a similar effect.

If you’re eager to incorporate open shelving, just be mindful that the shelves will require a little extra upkeep to ensure that they and their contents remain dust free.

3. Opt for an all-white palette. Choosing an all-white color scheme will make your compact kitchen look light, airy and more spacious than it is in reality. If an all-white palette isn’t up your decorating alley, or you desire a scheme that offers more visual drama, opt for white walls or overhead cabinets, and try base cupboards made from wood or dressed in a dark, dramatic tone. Using white up top will enlarge the space visually, while the darker tone down below will anchor the room without making it feel closed in.

Alternatively, you might like to consider a soft neutral or pastel palette. Barely-there hues such as powder blue, mint, cream or dove gray are ideal for use in small spaces, as they add a hint of color and interest without being too overwhelming or heavy like bolder, more saturated tones, which can weigh down a compact room.

4. Fill your space with light. Flooding your room with natural light will go a long way toward making a small area look more spacious. However, if you’re restricted when it comes to window placement and size, the next best thing is to come up with a lighting plan that will brighten up and help visually enlarge your space, while transforming it into a more functional work zone, too.

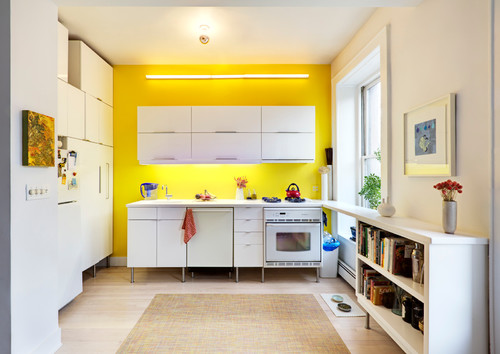
This airy, cheerful kitchen is lucky enough to boast four different light sources: a generously sized window, which allows an abundance of natural light to filter into the room; a ceiling light that provides ambient lighting; a long wall-mounted fixture that illuminates the area from above and draws attention to the sunny feature wall that it’s affixed to; and undercabinet lights that ensure the countertop is well lit and showcase the suspended style of the overhead cabinets, which adds to the room’s sense of spaciousness.

5. Create the illusion of space with horizontal and vertical lines. This striking kitchen is a study in how to enlarge a space visually by introducing vertical and horizontal lines. As you can see looking at the striped cupboard doors and panels in this compact cooking zone, vertical lines draw the eye upward and add height to a small room, while horizontal lines add depth and make narrow spaces appear wider and roomier.

6. Incorporate space-savvy storage. A shortage in storage is a problem usually associated with small kitchens. However, this obstacle can be overcome by incorporating clever, space-maximizing storage solutions in your cooking zone — think corner drawers, appliance garages, pullout vertical pantries, drawer organizers and corner systems. Doing so will ensure that everything has a place to call home in your kitchen, cutting unnecessary clutter and visual bulk and making the area more effective to work in.

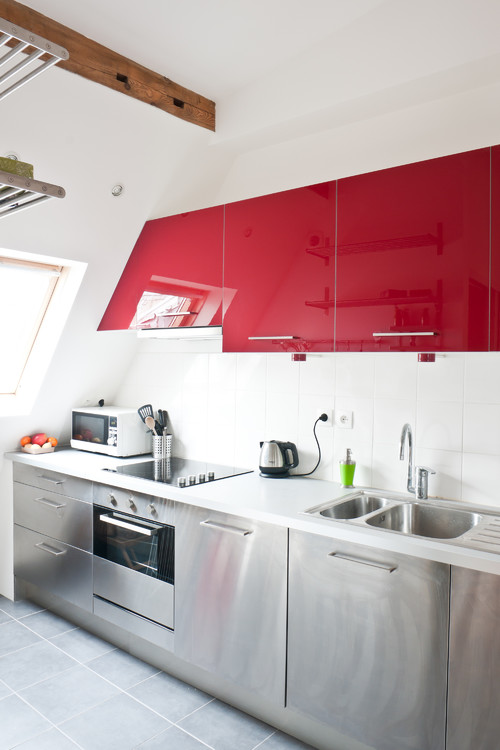
7. Go with glossy finishes. High-shine surfaces, such as stainless steel, two-pack polyurethane and ceramic tiles, will not only inject your kitchen with interest and sleek sophistication, but will amplify the natural and artificial light in the room, making the area appear more spacious.

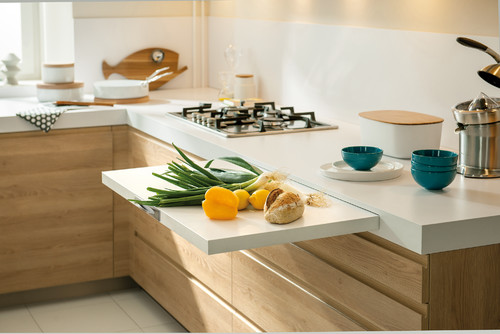
8. Choose a countertop that works double time. Since space is at a premium in small cooking areas, it’s important that every surface, material and design element earns its keep, even your kitchen countertop. While countertops have a practical purpose — as food prep surfaces and general workspace — they can also double as a space to stash kitchenware (such as the crafty pullout chopping board pictured here), which will help keep your counter and cupboards free of physical and visual clutter. Other space-saving, cleverly concealed countertop accessories you might like to consider include a built-in utensil holder, condiments organizer, knife block or bread box, each of which sits flush with the top of the counter.

9. Choose glass-front doors. Like open shelving, glass-front cupboards trick the eye into thinking a compact kitchen is more generous in size, but with the benefit of keeping the contents of your cupboards free from dust and cooking splatter. Just remember to keep things nice and orderly inside for a clean, clutter-free look.

Another perk of decking out your cooking zone with glass cabinet doors is that you can easily see what items are stashed inside your cabinets and when you’re running low on pantry items, resulting in a more efficient space to work in.

10. Fit in a cleverly concealed table for casual eats. Don’t have room for a breakfast bar or dining table in your kitchen? Take design cues from this crafty space and incorporate a foldable table that can be tucked out of sight when not in use. The geometric chairs slide into the nook below, so as to not take up precious floor space and to enhance the room’s clean, seamless look.

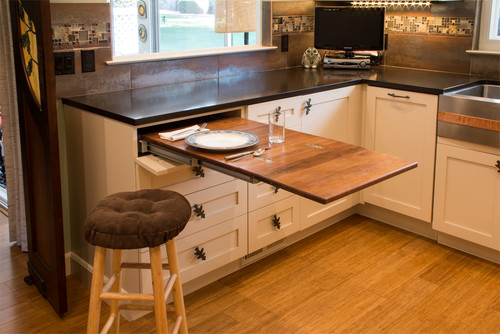
Another space-savvy solution is to equip your countertop with a pullout table, like the one shown above.

11. Stick with clean, slender lines. Resist the urge to decorate your compact kitchen with fussy design elements and decor that will crowd it and add unnecessary visual bulk. Instead, stick with features with clean, simple lines that are visually lightweight and don’t consume too much floor space. 

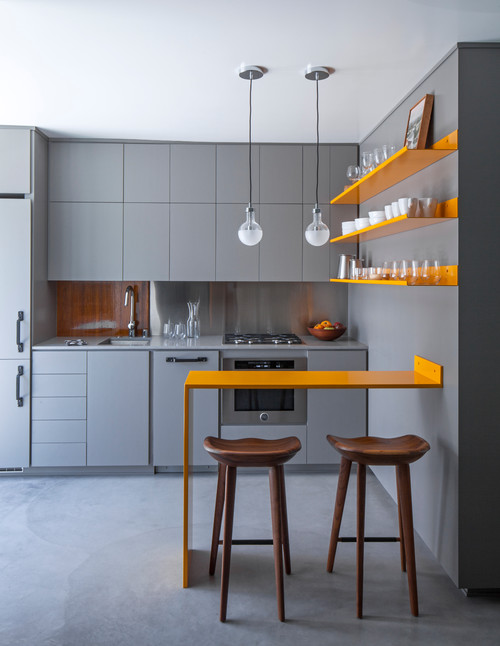
This design trick takes shape in several ways in this small yet stylish kitchen. Note the slim breakfast bar, floating shelves and leggy bar stools; the use of finger pulls instead of bulky handles; and the simple industrial-style exposed bulbs, which draw the eye up to the ceiling, adding to the illusion of space.

12. Master the art of distraction. A high-impact feature wall not only will inject visual drama into a compact kitchen, but will also add depth and draw the eye down the length of the room, making it appear longer and more open. This contemporary kitchen proves just how successful this design trick can be when done right.

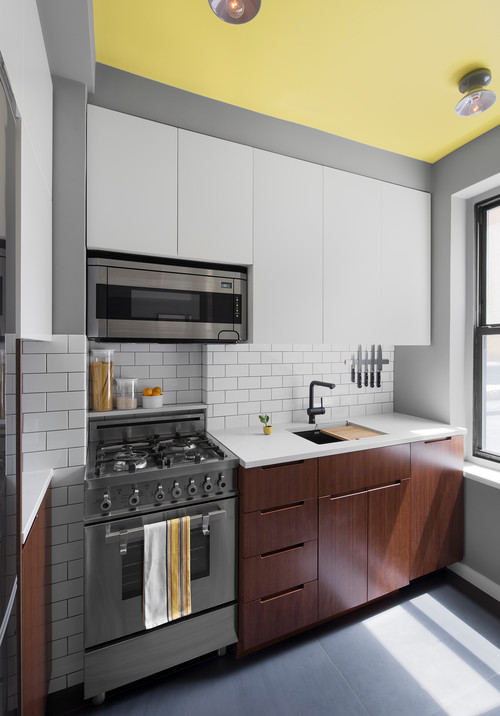
Likewise, a statement ceiling will also amplify the height of a kitchen that has diminutive dimensions, while doubling as a showstopping focal point. Take design cues from this compact cooking zone and paint your ceiling a bright hue (steer clear of moody colors, like black and dark gray, which will visually lower the roof and make the room appear more intimate). Alternatively, you might like to lift the look of your ceiling with wallpaper or a mirrored surface, or try a recessed ceiling with LED lighting.

[See more from Natasha Saroca on Houzz.]

10 Countertop Mashups for the Kitchen

Article by: Katie Pegler

Mixing materials for kitchen countertops has many benefits. For one, you can save money by using a less expensive material for your perimeter countertops while splurging on something more luxurious for an island top. Plus, mixing materials is a great way to add visual interest to your kitchen and avoid the overabundance of one color or material. With that in mind, designers are pairing marble with walnut, granite with reclaimed wood, engineered quartz with maple butcher block and more to create diverse surfaces for working, eating and gathering.

Marble Island With Wenge Bar

“Our overall design was form meets function throughout this kitchen design,” says Ashley Luberger, design associate at Osborne Cabinets and Millwork. “The island is the key focal point of this space, so we wanted to add interest combining heights and different materials to create a cohesive space.” 

Osborne designed and fabricated the island cabinets and wood top, made out of African wenge wood. “The wood has a really dark natural color along with a really tight grain pattern, creating a contemporary feel,” Luberger says. Collaborative Design Group chose the marble top.

The wood top was selected for the lower eating area because it is more durable than marble, which was used only on the island to avoid stain concerns. 

Marble Perimeter With Walnut Island

A white kitchen was a must for the owners of this Minneapolis home. However, both the husband and wife grew up in houses with wood countertops and were keen to incorporate wood. Nicole Bostman, owner and lead designer at Dezaar Interiors, found a happy medium by pairing a white marble countertop and oversize walnut island. “We wanted to introduce the warmth of wood to balance all the white, which can sometimes look a little cold and clinical,” Bostman says.

Walnut Countertops With Marble Island Top

In this Nunica, Michigan, kitchen by Meiste Homes, the perimeter countertops are oiled walnut, while the custom island is topped with a 10-foot slab of Arabescato marble with a built-up ogee edge. 

Be sure to follow proper maintenance routines for each material. Wood can chip and warp, especially in wet areas, such as near the sink. And marble can stain and chip. 

Quartz Perimeter With Maple Butcher Block Island

Before the remodel of this Los Angeles contemporary home, the owners had white marble countertops. Gabriel Abikasis, president of Kasis Construction, recommended engineered quartz as a durable alternative.

To add depth, texture and contrast to the white cabinets, Abikasis used 2-inch-thick maple butcher block in a clear satin finish for the island. 

Granite Perimeter With Reclaimed-Wood Island

This design of this kitchen reflects the homeowners’ desire to retain the old elements of the 1930s cabin.The main countertop is Jet Mist honed granite, while the island has a reclaimed-wood top fabricated by Grothouse Lumber. The wood island is sealed and cannot be used for cutting directly on. “The contrasting wood counter warms up the kitchen and makes it feel more cabin-like than if everything was dark granite,” says Kelly Ennis, principal at Ennis Nehez

Photo by Colin Cadle Photography – Discover kitchen design ideas

Granite Island With Walnut Chopping Block Extension

Much thought was put into this kitchen, because it’s in the “forever home” of its owners, in Dartmouth, England. They wanted to make the most of the new space and were meticulous in defining their kitchen right down to listing what items each cabinet would need to store, so that Distinctive Living Kitchens could plan for the correct cabinet sizes and functionality.

The inspiration for the granite came from an existing granite countertop in the laundry room, which Distinctive Living Kitchens matched to the Shivakashi granite counters that are paired with the end-grain walnut chopping block island extension. 

Granite Island With Walnut Butcher Block Extension 

This Ottawa, Canada, home was built for a couple who wanted an environment conducive to entertaining large groups of family and friends, so a large, functional kitchen with good flow was key. “In addressing the functionality, I wanted to create a space that looked aesthetically balanced with functional and decorative elements,” says Nathan Kyle, senior interior designer at Astro Design Centre.

The island counters have silver wave granite surrounding the prep area mixed with walnut butcher block for the eating area. The inclusion of two materials was necessary to create the length that was required without having a seam in the countertop, and created a length that was ideal for entertaining. The butcher block also allows for a warmer touch on the area where people can rest elbows, versus a cold surface. 

“Using a two-toned kitchen allows for the back wall, which is utilitarian in nature, to stand on its own and juxtapose itself with a more detailed decorative island,” Kyle says. 

Concrete Island With Wood Inlay

For this contemporary Kansas City, Missouri, kitchen, Studiobuild blended poured concrete for the majority of the island and juxtaposed it with a wood inlay surrounding the cooktop on the same plane. Not only does this look have more visual interest, but a large island for eating and working eliminated the need for an eating nook.

Pietra Cardosa Stone Perimeter With Maple Island

For this center kitchen island, Brooks Custom used a 2-inch-thick premium wide-plank maple top. The light-colored wood contrasts with the dark Pietra Cardosa stone countertop along the perimeter of the kitchen. The seemingly simple finish on the island ties the modern farmhouse look together. 

Basaltina Perimeter With Walnut Island

Here a walnut island surface warms the basaltina perimeter and helps add contrast to the white kitchen. It offers the perfect fusion of natural materials and lower maintenance. “There is always a balance to strike between durability offered by manufactured options and the beauty and soul of living materials,” says interior designer Joelle Nesen of Maison.

See a Complete Kitchen Remodel for $11,000

Article by: Mitchell Parker

Norma Rushton and her partner, Randy Dyke, really wanted a waterfront property in the Vancouver area but were quickly priced out of most places. When they lucked into a mobile home on the Stave River about an hour east of downtown Vancouver, they were thrilled at the great location right on the water at a good price. But that’s where their excitement ended. The home was in bad shape and needed major repairs.

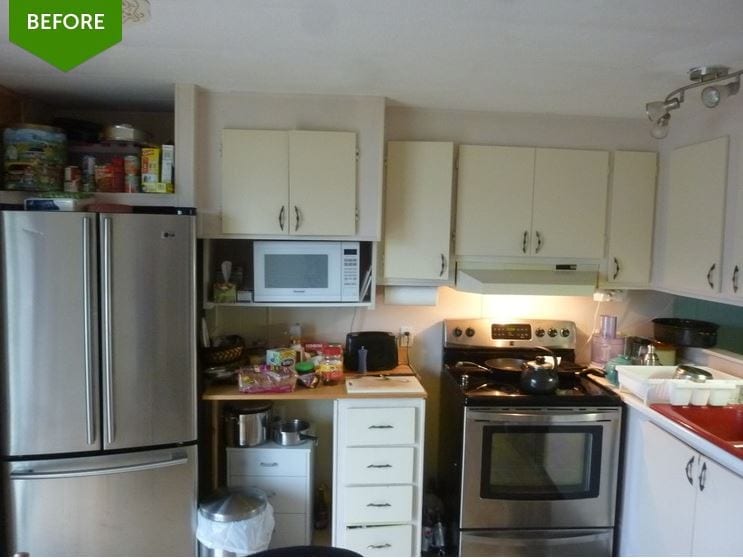
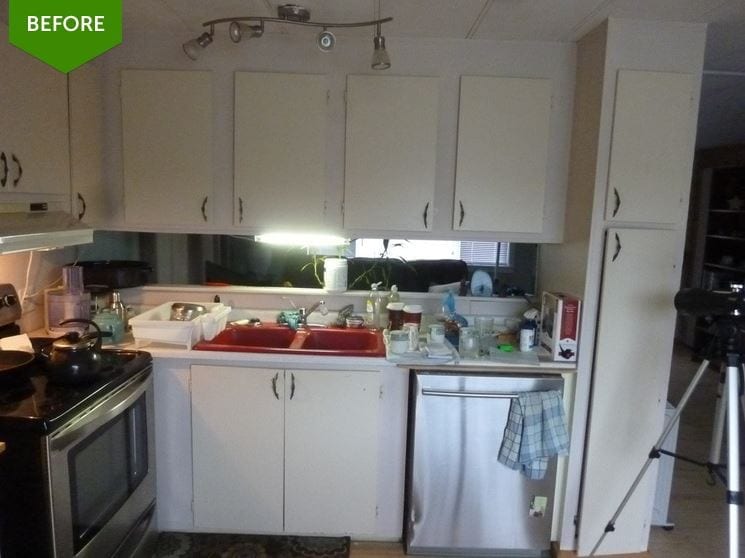
BEFORE: Recently they started adding more storage and function to the original kitchen (shown here), which had been picked apart since it was built in 1970. For example, the backless cabinets had been cut up by previous owners to make room for a larger refrigerator and stove, leaving little storage. “The cabinets were starting to get useless,” Rushton says.

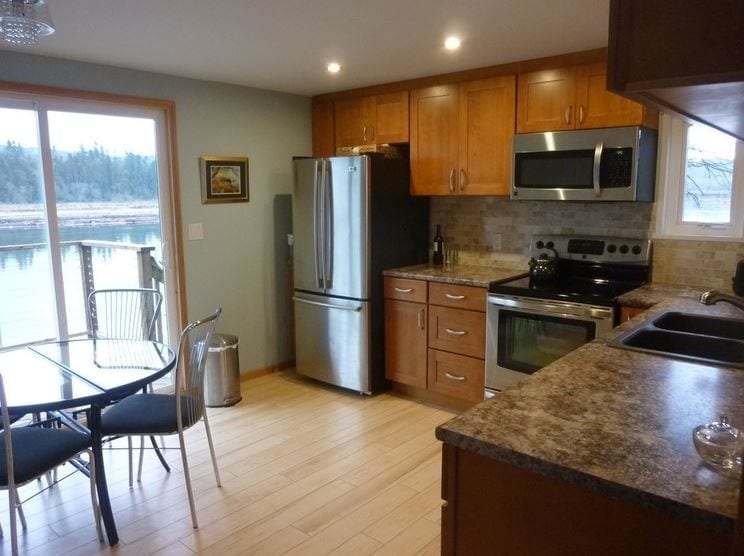
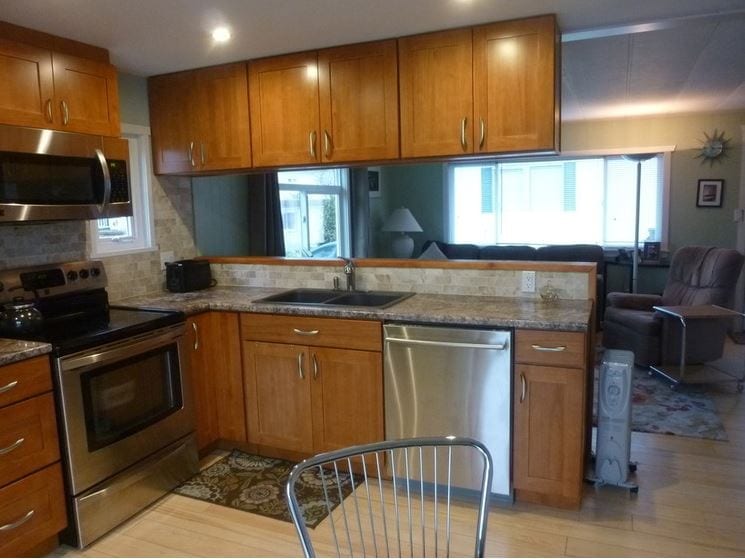
AFTER: Determined, Rushton, a high school theater teacher, spearheaded a complete gut and remodel, choosing all the materials, fixtures and appliances, while Dyke, a retired water taxi driver, did a lot of the work, including installing the drywall, molding, trim, backsplash (twice) and new window and patching the floor. The couple painted everything together. Professionals installed the cabinets and countertops. 

But best of all, the couple got discounted help from their contractor neighbor, Milan Vaclavik of Milan’s Home Renos, who took care of the plumbing, framing and electrical work at a friendly rate. 

Though the homeowners considered getting granite countertops, they ended up going with Formica instead. “Granite is too hard of a surface,” Rushton says. “I wanted something a little more forgiving.”

BEFORE: A bank of upper cabinets and a floor-to-ceiling cabinet made things a bit claustrophobic and blocked views between the kitchen and living room. “I wanted to be able to sit in the living room and see out the windows of the kitchen to the water,” Rushton says.

AFTER: They reduced the size of the upper cabinets and did away with the tall cabinet altogether, opening up the sightline between the two spaces. “Now you can actually chat with whoever’s in the kitchen,” Rushton says. 

The couple had a couple of remodeling disasters along the way. Rushton had found solid oak cabinets at a discounted price that she really liked, but when they arrived, they were the wrong model. With the renovation already under way, she had to make a tough decision and went with the different cabinets, which ended up throwing off all their measurements. 

The backsplash was another compromise. The first one that Rushton put up was “a horrible mistake,” she says. She had found peachy-taupey-colored porcelain tiles that looked great lying on the counter. But as soon as she installed them vertically on the wall, the angle of the light turned them green. A local tile guy informed her that artificial colors tend to do that and suggested a natural stone product instead. “It was either I live with it or let the money go,” she says. “I let it go and went and got marble tile instead.”

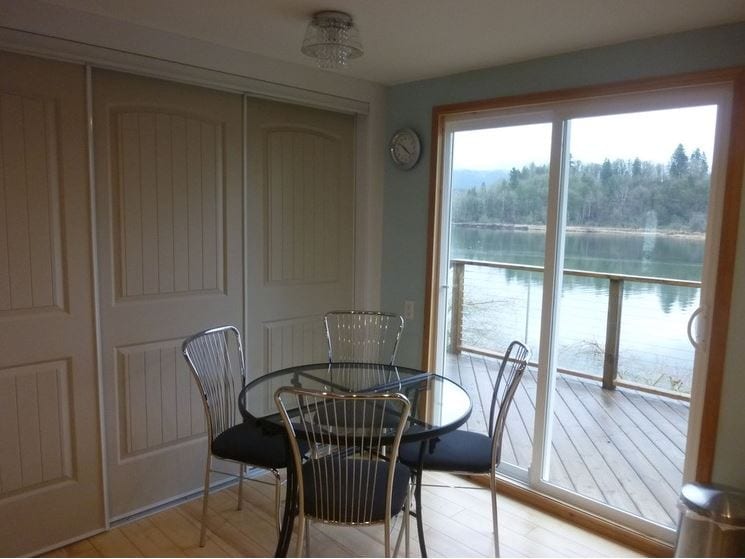
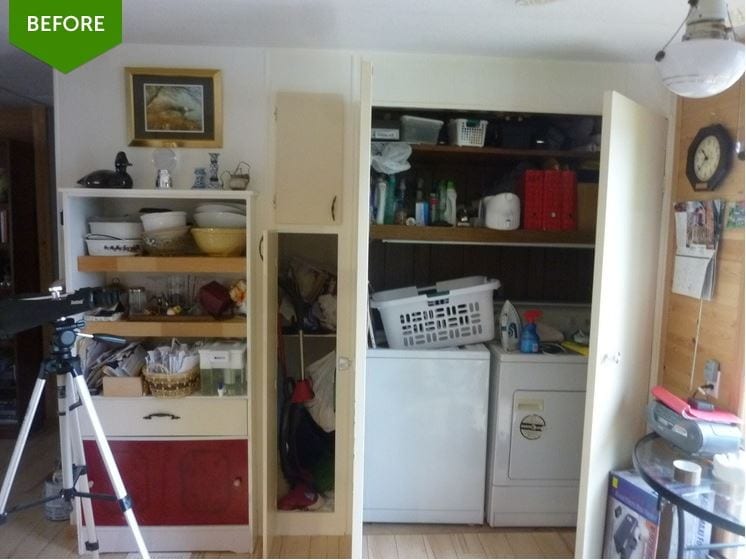
BEFORE: The washer and dryer were shoved into a storage closet in the kitchen, while an old cabinet did the work of storing bowls, platters and mail. 

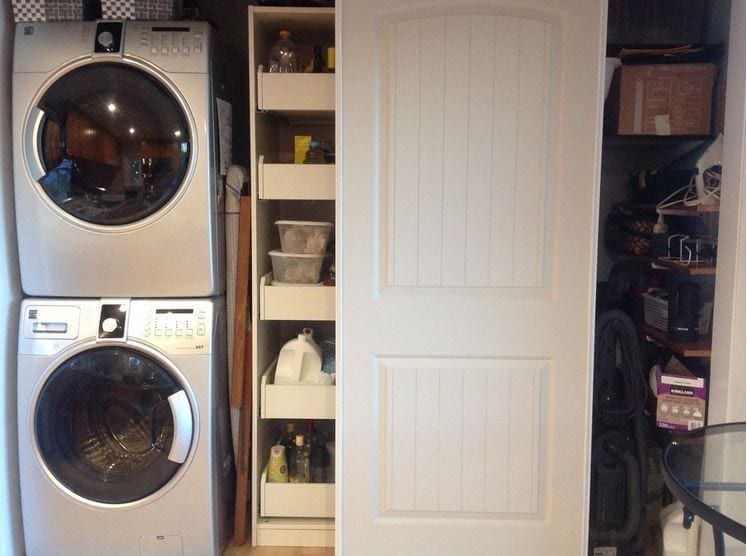
AFTER: The homeowners replaced them with a stacking washer and dryer unit, an Ikea unit of sliding drawers for a pantry and a place for the vacuum cleaner. “It was all about getting what I need for putting things away,” Rushton says.

Sliding doors nicely seal off the laundry and pantry area, freeing up clutter near the pristine river view. 

Rushton says they budgeted about U.S.$8,000 but the actual cost came in at just over $11,000. 

Here’s some of the breakdown: 

Cabinets: $2,300
Cabinet handles: $170
Countertops: $675
Closet doors: $250
Washer, dryer, microwave: $2,000

Lighting: $335
New flooring (closet): $85
Wood: $85
Paint: $170
Backsplash: $335 
Sink: $250
Window: $60
Labor: $1,000

Ikea shelving: $300
Drywall, insulation, plumbing fixtures, electrical wiring, switches, plugs, power tools, screws and brackets, taxes and other miscellaneous expenses: around $3,200

Smart Ways to Make the Most of a Compact Kitchen

Article by: Joanna Simmons

We might all dream of a huge family kitchen, but most of us have to make do with something smaller. That said, whatever the size of our kitchen, the demands we place on it tend to be the same. We want it to function well for preparing and cooking meals. We might also like to be able to sit and eat in there, even if just perched at a breakfast bar. And we need space for a lot of different objects, from chunky appliances to silverware, dishes and food. The good news is, with some clever planning and great design, it is possible to have all these functions in one tiny space, as these inspiring spaces demonstrate.

Use every nook and cranny. It sounds obvious, but where space is tight, it’s essential to make use of all of it. This might mean commissioning custom units. Shelves or cupboards designed for your space, rather than bought off the shelf, can exploit even the most awkward corners or weirdly angled rooflines. Luckily, since the number of units you will be able to fit is limited by the small size of the room, a custom design often will be reasonably economical, too.

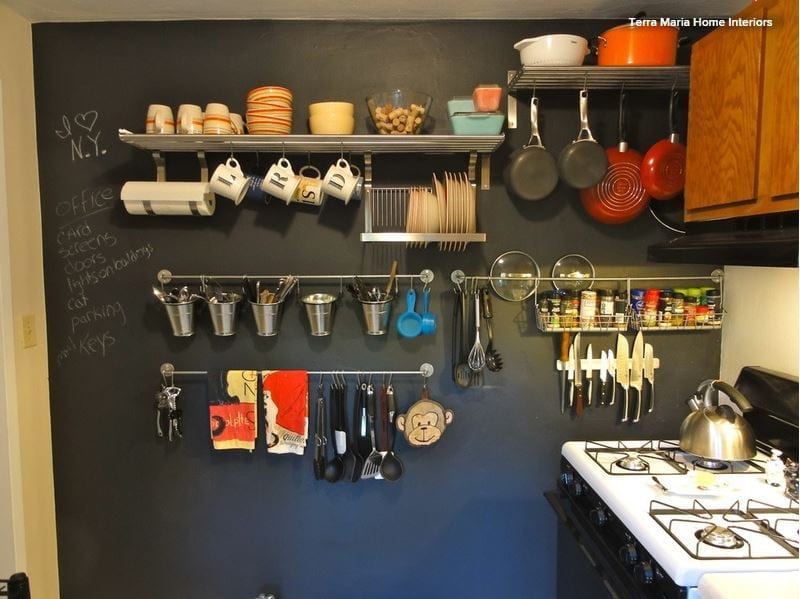
Enjoy a little rack n’ rail. Wall cupboards can eat into the space in a very small kitchen, but you can still make any wall work for you by adding racks, rails and slim shelves. These can hold things like saucepans, strung up on S hooks, mugs and pots holding cutlery, and even utensils. Covering the wall in blackboard paint helps it to multitask even more, as a place where you could write shopping lists and messages.

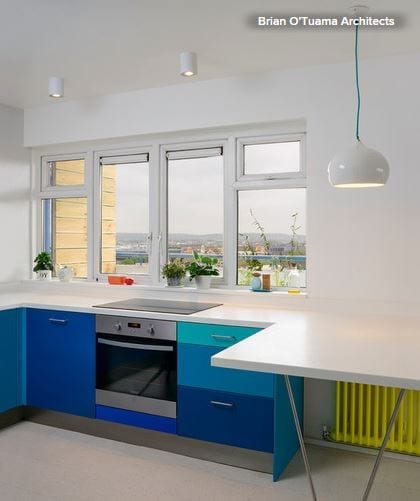
Make it streamlined. Chunky and mismatched pieces would eat into the space and make a tiny kitchen feel cluttered. Instead, opt for units with a minimalist look and, as here, a countertop that flows over all the base units and even extends to become a breakfast bar. The minimalist metal legs seen here keep sight lines open. This kitchen is flooded with natural light, so the color on the unit doors invigorates the space without encroaching on it.

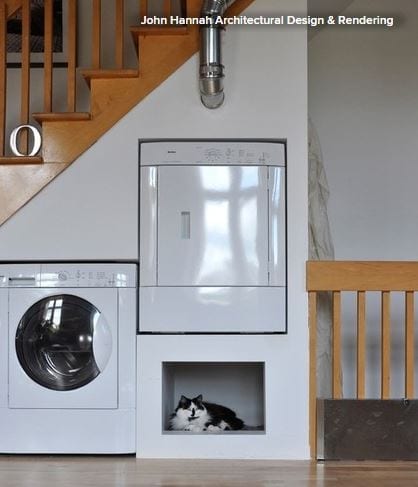
Find another home for laundry appliances. It’s not uncommon to find washing machines and dryers installed in the kitchen, but, when space is limited, it’s a good idea to find an alternative home for them. A nook under some stairs can be a good place. Or consider putting a dryer — and perhaps a freezer — in the garage, if you have one.

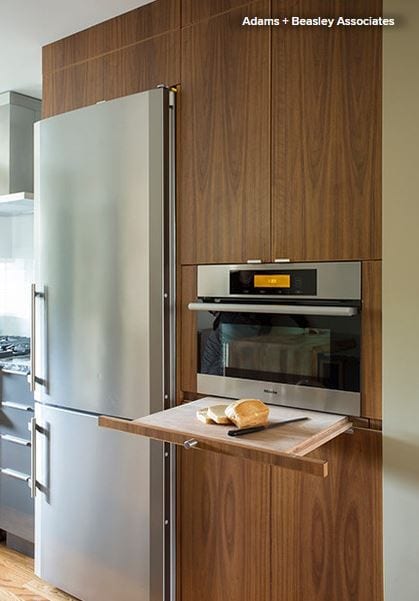
Choose clever details. There are heaps of clever space-saving elements that can be built into a new kitchen, so if you’re starting from scratch, look for things like slim spice jar storage, knife drawers,toe-kick drawers and integrated chopping boards that can be slid over a sink or pulled out from the wall.

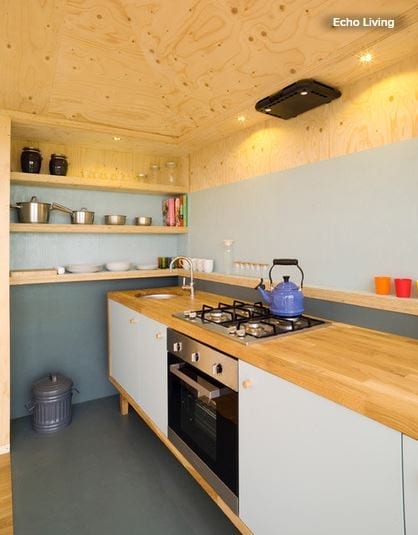
Try freestanding pieces. Freestanding furniture has its benefits in a small kitchen too. If you take the view that where room is tight, it’s important to make every item you place in it shine, then suddenly there is a logic to not building everything in. A freestanding piece containing an oven, sink and cupboards, like this one, looks like a beautiful piece of furniture that fits elegantly into the space.

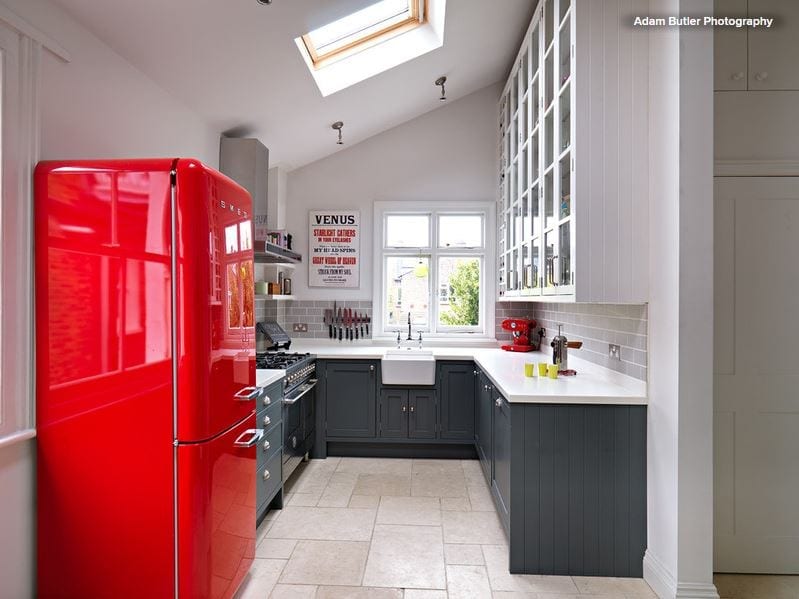
Raise the ceiling. Rethinking the dimensions of the room and having some architectural work done can make a huge difference to a small kitchen. If yours is in a single-story space, raising the ceiling to expose a sloping roofline would add a huge sense of light and airiness. It also would offer the opportunity to install skylights, which pull in more light than vertical windows. Plus it would create a tall wall against which you can fit cupboards or shelves for maximum storage.

Build up to the ceiling. Floor space may be limited, but vertical space is often the same in a tiny kitchen as in a huge one. So make the most of it by building units that stretch right up to the ceiling — or just nearly. A small gap above tall cabinets can offer just enough breathing room to help keep the room from feeling cramped. Keep infrequently used items on the upper shelves and try using sleek handle-less doors, so the units look streamlined and seamless and don’t dominate the room.

Integrate appliances. You may yearn for a huge, freestanding range complete with five burners, but a small-scale kitchen is not the place to install one. Instead, integrate your appliances for a more streamlined look and a space-savvy solution. Building the microwave into a cupboard will free up countertop space, and why not go for a boiling-water tap to dispense with the need for a kettle?

Work in a portable mini island. In addition to built-in units, a small, movable butcher’s block with shelves, like this one, can prove incredibly useful. It would take up very little room while supplying additional storage and prep space. It would also create the relaxed, freestanding look you may have been craving but thought you couldn’t pull off in a small kitchen.

12 Stylish Kitchen Counters That Seem to Float in Space

Want your kitchen countertop to be the hero of your new cooking zone rather than relegated to the background? One way to do that is to look beyond the basic block-like counter and incorporate a cantilevered, or floating, countertop into your kitchen design instead. Here are 12 cantilevered counters that not only offer showstopping style but also enhance functionality and create the illusion of more space.
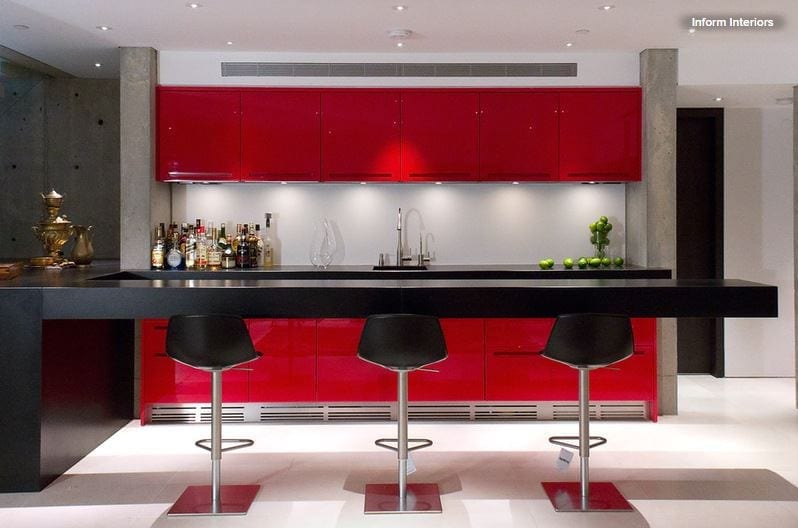
1. Suspended reality. This may look like an optical illusion, but there was no hocus-pocus involved when this striking, impressively long floating counter was built — that we know of, anyway. Its gravity-defying design is just one reason this cantilevered countertop commands attention. Its luxe, chunky look and sleek black color (which boldly contrasts the vibrant red cabinetry opposite) also ensure that the suspended structure exudes jaw-dropping appeal.

The expansive bar provides plenty of room for several people to sit and enjoy a drink or meal, while the open area beneath ensures that spills and crumbs can be cleaned up with ease, making this an ideal setup indoors or outdoors.

Tip: If your countertop is thick, opt for minimalist stools with a slim profile so the design doesn’t appear too heavy.
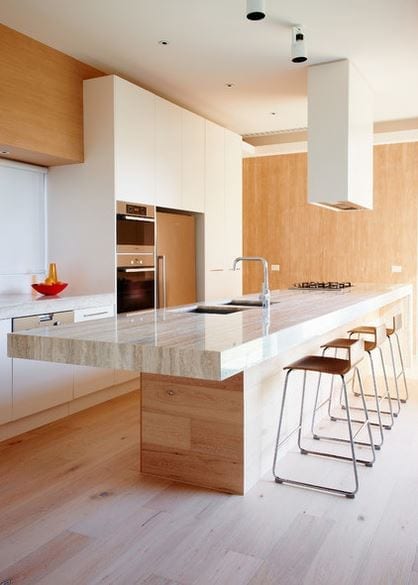
2. Natural wonder. If you want to infuse your kitchen with warmth, subtle sophistication and an air of luxury, consider a cantilevered-counter combo of natural stone and timber. Here the suspended style showcases the quiet beauty of the travertine top, while the wood cabinetry below softens the look and complements the stone’s neutral tones.

But style isn’t all this counter has to offer. The cantilevered top also provides additional workspace (which helps offset the area taken up by the double sink and stovetop farther down the island) and room for extra chairs, which comes in handy when entertaining.

Tip: When choosing wood to pair with your stone countertop, look for one that’s free of prominent knots or patterns that could clash with the veining of the natural stone.
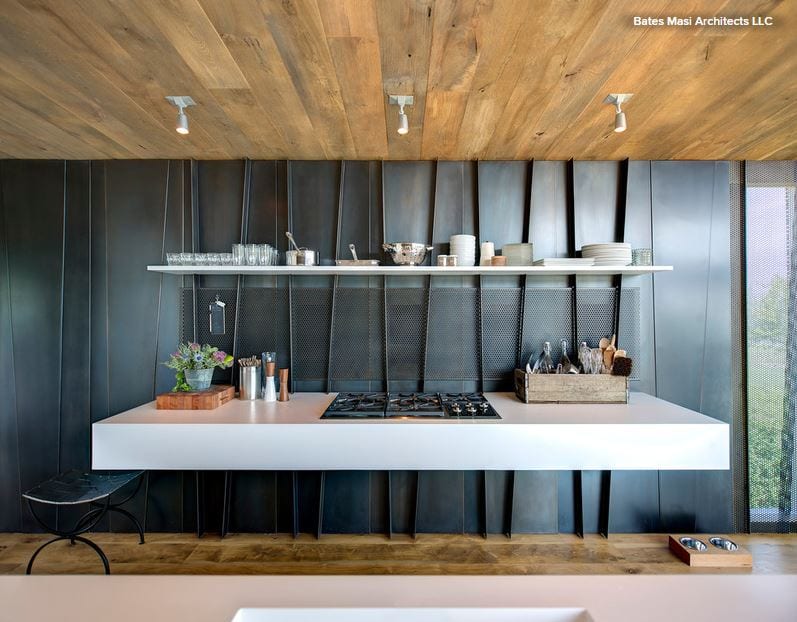
3. Minimalist chic. Although this cantilevered surface is a dedicated work zone, it also succeeds in injecting this modern rustic kitchen with a hearty dash of visual interest. The clever floating contraption is anchored to the wall by way of steel tabs that protrude from the metal surface and double as decorative elements that transform the vertical surface into an accent wall. Crisp white was a smart color choice for the surface, as it cuts through the room’s moody palette, while the thickness gives the space a clean, contemporary feel.
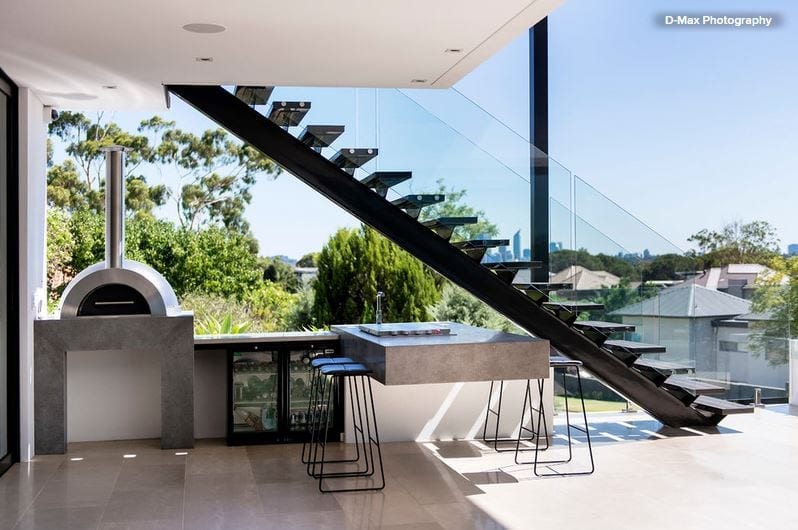
4. Cool and clean. If you hate being on cleanup duty after a family barbecue, a floating concrete counter like this one will make the chore a little easier to bear. Thanks to its suspended design, crumbs and spills can be swept or hosed away quickly. Polished cement also is durable, stain resistant and easy to clean, so it doesn’t require much effort to make the surface look as good as new after entertaining.

Also, note how the cool gray surface adds an industrial edge to the contemporary outdoor kitchen and entertaining area, while the countertop’s bold lines and streamlined look complement the sleek style of the space.
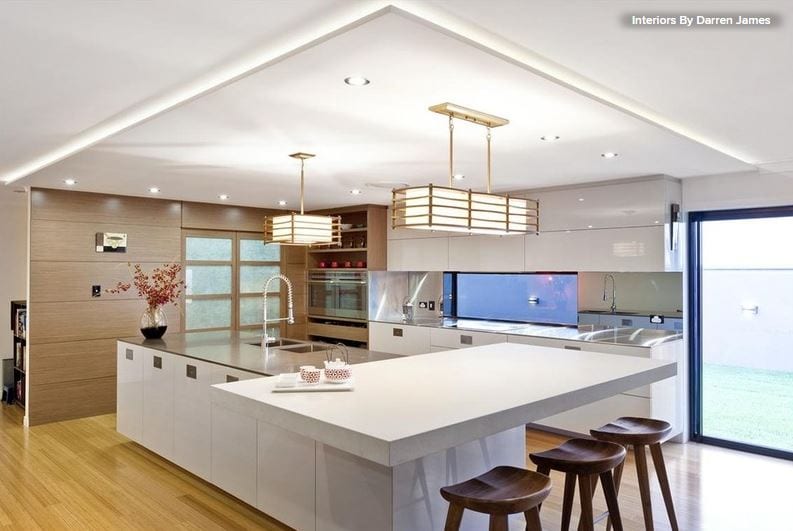
5. On the side. Now here’s a chic cantilevered counter with a twist. Rather than extending a section of the thin, neutral-toned countertop past the end of the island, designer Darren James placed a separate slab of stone (in a contrasting tone and thickness) on top and rotated it to sit across the width of the workspace. This not only helps define the cooking zone and visually separate it from the surrounding open-plan area, but also makes the space feel more communal, as the seating faces inward, fostering a sense of togetherness.

As you can see, the contrasting look and unique configuration of both counters also succeed in transforming a basic island top into a statement-making design feature.
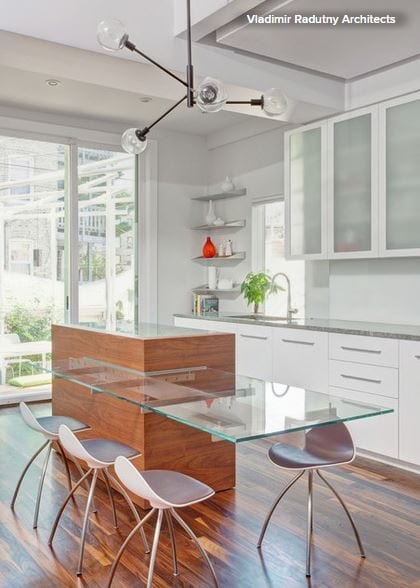
6. See-through style. Don’t be too hasty to say, “Nuh-uh; no way” to a floating glass countertop. Sure, they’re not for everyone (like those with young kids), but they can work for some in the right space.

Here an eye-catching glass countertop appears to jut out from the corner of a taller wood prep zone. It’s stabilized by a metal bracket that supports the see-through surface. The material was selected to enhance the airy, spacious feel of the kitchen, and coupled with the suspended design, it successfully does just that. Although it’s an unconventional choice for a kitchen countertop, the structure here was designed to be a eating area, rather than a food-prep space, so the material should hold up fine.
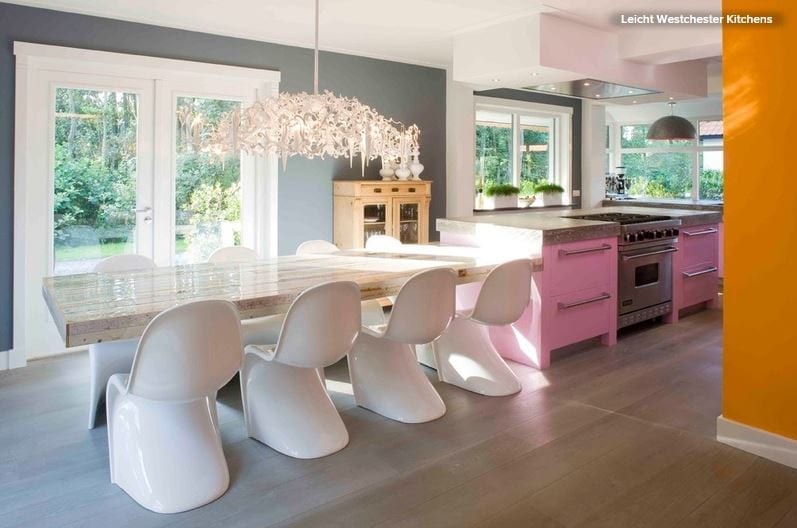
7. Family friendly. One design trend we’ve seen in the kitchen project section of Houzz is the integrated kitchen counter–dining table. This elegant transitional-style cooking and eating area shows how this concept takes shape with the help of a cantilevered countertop.

Here the floating counter has been lowered so that it stands at table height, rather than matching the height of the adjacent concrete counter. This allows for more comfortable and ergonomic seating (unlike bar stools, which can sometimes cause aches and pains in your back and legs after you’ve been perched on one for a while —or does that just happen to short people like me?). This means your family and friends won’t mind sitting around the table for long meals and lengthy catch-up sessions.

The long, cantilevered counter provides loads of visual appeal too. The rustic, reclaimed wood table contrasts beautifully with the contemporary pastel pink cabinetry and industrial-looking cement counter, creating a space that oozes subtle sophistication but still makes a strong style statement. White retro-style dining chairs complete the look and add another layer of interest to the eclectic scheme.
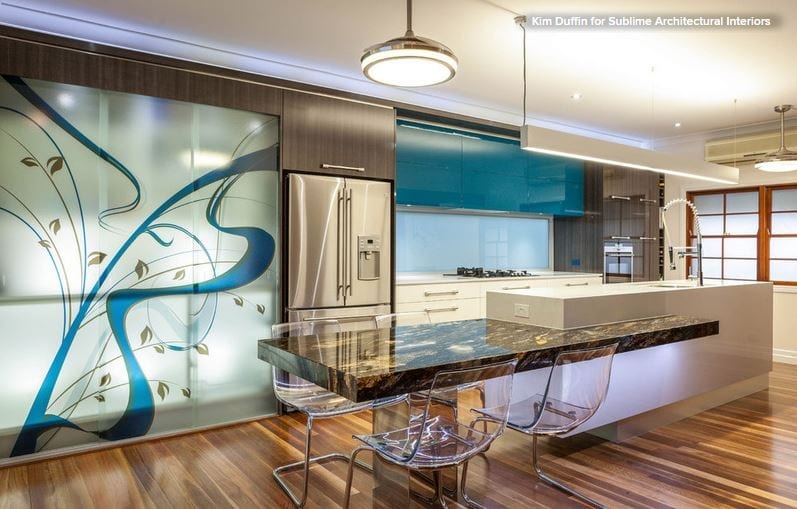
8. Optical illusion. This stunning counter may appear as if it’s floating, but if you look closely, you’ll see that there’s actually a mirror-finish post that supports the stunning granite countertop from below — how sneaky! Even so, this showstopping cantilevered-look counter still deserves a mention, since it achieves the same airy, space-enhancing look as a suspended countertop, albeit with some help from a supportive friend.

Here it’s not just the striking countertop material that makes a dramatic statement. The undercounter lighting and the way the granite appears to be embedded in the white Caesarstone island also take the stylish kitchen counter to new heights. The lowered height of the bench makes this casual dining area more practical and comfortable, too.

Tip: If you’re worried that a natural stone countertop may be too high maintenance for you, choose an engineered stone or a high-quality laminate instead.
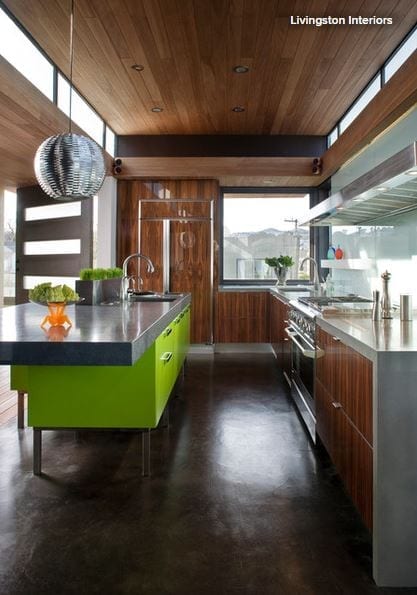
9. Green with envy. What was the first thing that caught our eye when we spied this cool cooking space? The striking island, of course — though the shimmering disco ball–like pendant light probably came in a close second. While the island’s eye-popping lime-green base immediately attracts the eye, the dramatic lines of the thick floating concrete top also command attention.

Polished concrete is a stylish and practical kitchen surface choice, as it not only injects any space with a cool, contemporary edge, but is also extremely low maintenance and environmentally friendly, making it ideal for those who desire an ecochic cooking zone that’s a breeze to clean. Did we mention the material is very affordable, too?
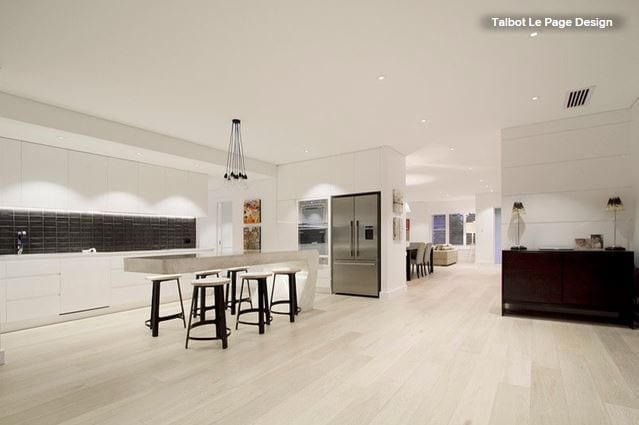
10. Space age. If you want to make a bold statement in your kitchen, opt for a cantilevered counter that’s fashioned from an interesting material in an unexpected shape, such as the cutting-edge, contoured design shown here. LED lights fitted underneath add to the freestanding form’s space-age vibe and help highlight the showstopping centerpiece.

Thanks to its tall height, there’s plenty of room to tuck several bar stools below the counter, which helps keep the pathways free of obstacles and ensures that the room maintains its clean, uncluttered look.

Tip: Install tinted LED strip lights below the floating countertop for a more dynamic and colorful look.
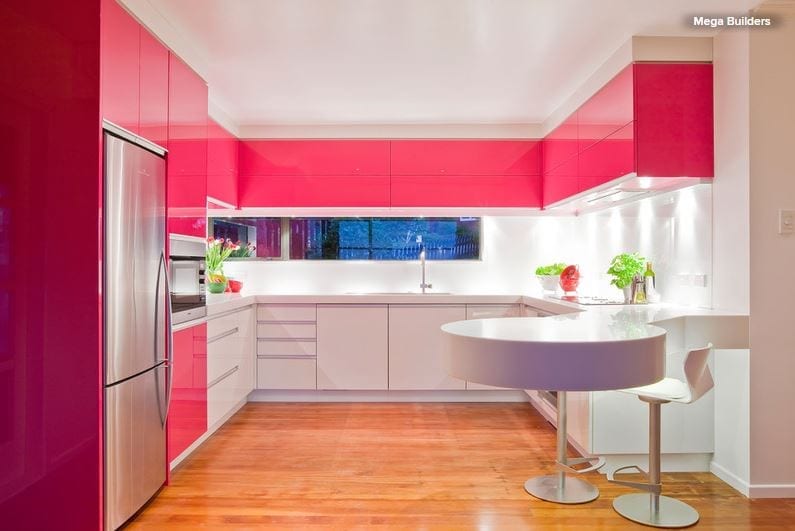
11. Going round. Worried that a suspended countertop won’t work in your spatially challenged cooking zone? This chic U-shaped kitchen shows how it’s done. Here a round floating bar is cantilevered out from the wall and floor cabinets, providing a spot for casual eats, an additional workspace and a social hub where family and friends can mingle when you’re entertaining. It also adds another layer of visual interest. Notice how the counter’s smooth, curved shape contrasts with the sharp lines and boxy forms that are used throughout the area.
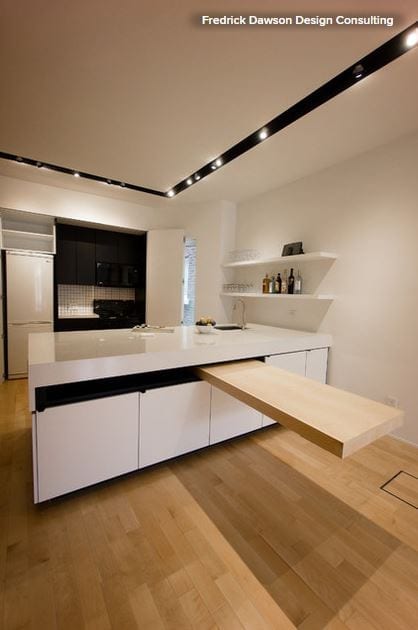
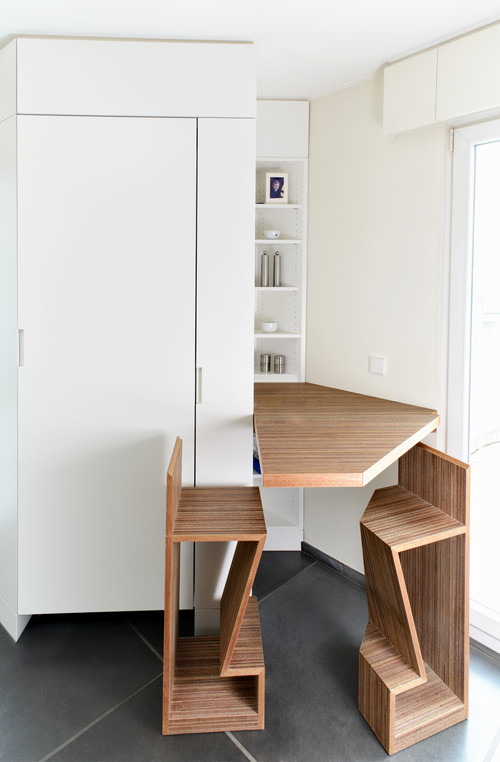
12. Hidden treasure. Now you see it; now you don’t! A space-savvy cantilevered pivot table like this one is a clever, creative addition that will boost the functionality of any compact cooking zone. When extended, the table enhances the visual appeal of the space, thanks to its sharp lines and striking silhouette, transforming the otherwise basic kitchen counter into an interesting design feature. Note how the blonde timber and subtle wood grain echo the timber used underfoot and add warmth to the cool white palette, too.
Kitchen Counters: Quartzite Offers Strength and Beauty

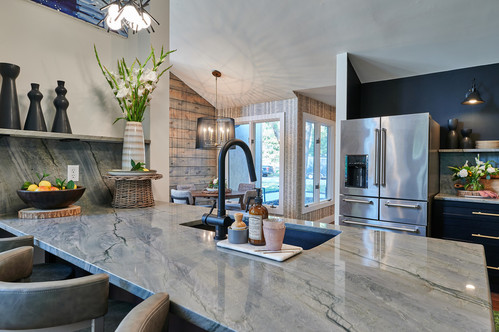
Natural Quartzite Countertop

When choosing a kitchen countertop material, many homeowners who might have gone with granite or marble are giving quartzite a second look. Before you bring this material into your kitchen, take the time to learn the pros, cons and special considerations to see if it’s right for you. 

The basics: Quartzite is a metamorphic rock formed from sandstone. The transformation happens when sandstone is heated within the earth’s crust and shifting tectonic plates supply pressure. The resulting stone has pleasing streaks, rich colors and eye-catching patterns. Colors range from white to black, with shades of blue, green, yellow and brown. 

Popular quartzite varieties include:

  • White Macaubas (has an elegant translucent gray or white background with darker gray or blue veining)
  • Mother of Pearl (has a similar look to marble, with gold, green and gray veining)
  • Taj Mahal (a natural-toned stone often described as having a translucent quality)
  • La Dolce Vita (a popular beige stone with moderate movement)

But be aware that the industry is loose about names and what is categorized as quartzite. “There are many varieties,” says stone fabricator Alex DiPietro. “You want to distinguish between the soft and hard quartzites. Ask your fabricator if they have worked with the specific stone before, and they will tell you their experience.”
And don’t confuse quartzite with quartz (also known as quartz composite), a manufactured product crafted from resin and quartz chips tinted with various colors.

Cost: Around $80 to $200 per square foot installed.

Advantages: “To me the greatest advantage is that it’s a beautiful stone with wonderful tone and variety,” says designer Sarah Robertson. “A vein-cut quartzite will have streaks that are very linear and have a contemporary vibe, while a cross-cut quartzite has diagonal lines with a more organic look to it.”

Quartzite stands up to heat, but prolonged heat exposure can cause problems. Using trivets for hot pots and pans is a smart way to protect your quartzite counters.

Disadvantages: While very strong, quartzite counters are costly and not indestructible. The quality of quartzite varies, and heavy use can cause etching, staining or scratching.

Maintenance: This varies depending on the type of quartzite you choose. There are varieties of quartzite that don’t have to be sealed every year, some that don’t have to be sealed at all and others that require regular sealing. Check with your stone fabricator for information on the quartzite of your choice. 

To keep your quartzite counters in top shape, clean up spills quickly and be careful with grease and acidic foods. You can use a damp, soft cloth to regularly clean the surface and use a mild spray disinfectant when needed. When in doubt, check with your stone fabricator for the best cleanser for your particular quartzite.  

Special considerations: Quartzite is a very heavy stone that requires professional installation by a licensed contractor. Looks vary from stone to stone, and since varieties often go by more than one name, make sure to examine and view each stone slab carefully. 

And consider asking for samples, says Robertson. “You can get a chunk of the stone from a fabricator and do the stain testing yourself at home. If you’re really concerned about what vinegar or lemon juice will do to the counter, try it out yourself.”

Get More From Your Kitchen Island

Article by:

Many kitchen islands open directly into another room. If you don’t require seating on that other side of your island, it’s a great opportunity to make the island serve purposes other than cooking and eating. When planning for an island, consider how it can be used to your advantage, whether it’s incorporating additional display space, extra storage or even strategically separating — or connecting — other spaces. Here’s how you can make your island work harder for you.

Get More Display and Storage

These open shelves wrap around the island to create display space on two sides. This makes for a much more eye-catching addition in an open floor plan. Can you imagine staring at solid planes of material here? Meanwhile, a small countertop at the opposite end still accommodates some island seating. 

Although this island also has shelves below, the real eye catcher is the ceiling-hung shelves, which create a bright, casual cookware display. What a visual feast for diners! 

Where seating is not required, think about incorporating bookshelves along the length of your island — perfect for all those cookbooks. 

Full-height cabinets block kitchen messes, provide storage and hold a TV here. 

Get a Divider or Transition

A simple, narrow dividing wall, which seemingly arises from the island, partially hides the cooking area and creates a stunning art wall. Notice how the sculpture niche is finished to match the cabinetry, creating the transition from kitchen to the living-dining area. 

This island does double duty with a working kitchen side and a buffet dining side, but it doesn’t stop there: The beautifully detailed end wall hides any mess and creates a lovely focal point. 

In this very open space, the island ends in a fabulous display area that looks like furniture. This concept blurs the line between cooking and living areas. 

Want to hide your dirty dishes but still converse with the guests? Use meticulously detailed cabinetry as a horizontal backdrop to your dining area — much more interesting than drywall. A narrow continuation of the countertop even serves as a buffet space. 

In the same space seen from the kitchen side, small cabinets actually form the top of the dining “wall” and provide storage — bonus! 

Get Table Seating

In this kitchen a working island is paired with a built-in banquette, making an attractive, handy spot for dining. This would work equally well with a rectangular island. 

Ease a Level Change

Many homes have a step or two from the kitchen to a living area, typically with a railing of some sort. Why not create a casual dining area as a buffer between the two instead, utilizing some great cabinetry?

Key Measurements to Help You Design Your Kitchen

Article by:

Whether you are moving into an existing kitchen, remodeling the one you have or building a new one, understanding a few key measurements and organizational guidelines can help your culinary life run more smoothly. 

Kitchens provide storage for your food and cookware, give you room for prep and cleanup, and of course also provide a place where you can cook and bake. When it’s thoughtfully arranged, these functions operate logically, making work in your kitchen a better experience. Here’s how to get the ideal setup.

Ideally, refrigeration and dry-goods storage should be located nearest to the kitchen’s entry point. The cooking area should be located toward the dining spaces, and the sink is best positioned between those two functions. This creates what’s called a work triangle. The best work triangle is less than 21 linear feet (6.4 meters). Work triangles that exceed 26 feet (7.9 meters) make moving from one function to another inefficient in most cases.

This cutaway plan illustrates arrangements and dimensions for a modest-size kitchen. Note that the preparation area is split between the island with the sink and the corner of the kitchen. The work triangle is compact. There will always be a few tradeoffs in any space. 

Let’s take a look at the three main functions of a kitchen:

1. Storage
2. Preparation
3. Cooking

Everyone has personal preferences for what works best, so consider this a guide and not a rulebook.


Storage. As noted, designers recommend putting refrigeration and dry-goods storage at the kitchen entry point. Putting your pantry on one side and a countertop that’s 15 to 24 inches (38 to 61 centimeters) on the other is a good idea. This will allow you to easily set down items that have been taken out of the freezer and refrigerator.

The pantry can hold dry goods plus brooms and supplies like paper towels. Use drawers in this area to hold plastic bags, foil and anything that can contain food to be stored. For the cabinets in this area, you will want to have mixing bowls, cake pans, measuring utensils and any other items that aid in assembling meals.

Preparation. Ideally, prep and cleaning space is best located around the sink. Within these areas will be everyday glasses and dishes, along with trash receptacles and the dishwasher. Allow 18 to 36 inches (45 to 92 centimeters) of countertop space on one or both sides of your sink.

Preparation areas are best kept clear of other items, since you will always be taking out bowls, plates and utensils there. Allow at least 36 inches (92 centimeters) of uncluttered countertop space for preparation in a small kitchen. Larger kitchens will have much more. This is one reason that islands are so popular. They provide broad and well-lit surfaces on which to perform the majority of kitchen tasks.

Cooking. The cooking centers should be arranged around the range, cooktop and wall ovens. Place pots, frying pans and baking sheets in the vicinity around your burners and ovens. It is a good idea to place small appliances such as toasters and coffeemakers in this area also, as it will leave your preparation areas unobstructed.

Allow 21 to 36 inches (53 to 92 centimeters) of countertop on either side of your cooktop. If possible, place wall ovens with a free countertop immediately next to them so that you can set down hot food immediately. Place seasonings, breadboards and potholders in nearby drawers and cupboards. Keep serveware toward the dining area.

Recommended Dimensions of Kitchen Elements

The dimensions of all the pieces in your kitchen are important to get right to make the best use of your space. A common refrigerator width is slightly less than 36 inches (92 centimeters). The problem is often the depth. In recent years some manufacturers have designed them to be much deeper than a 24-inch (61-centimeter) base cabinet. You can still buy shallower freestanding refrigerators, but you have to pay close attention to the dimensions listed in its specifications to be certain. The other option is built-in configurations, but they are significantly more expensive. 

Look for a depth of 30 inches (76 centimeters) or less, excluding handles, unless you can design your kitchen space to accept a deeper unit. Another thing to consider is the swing of the refrigerator door. Always examine the swing direction to see if it will meet an obstruction.


Here you can see how the height of the cabinets plays an important part in the configuration. Upper cabinets are normally positioned at 18 inches (46 centimeters) above the countertop and are 30 to 42 inches (76 to 107 centimeters) in height. Consider that your average maximum reach over and into an upper cabinet is 70 to 80 inches (178 to 203 centimeters) above the floor. Cabinets set at above 7 feet will likely need to be accessed with a step ladder. Cabinets above 8 feet are not practical for the majority of people; however, they may serve as storage for seasonal or decorative items, to be reached with step stools and ladders. 

The standard dimensions for base cabinets are 24 inches (61 centimeters) deep and 36 inches (92 centimeters) high. In general people are getting taller, so some homeowners are bumping up the counter height to 38 inches (97 centimeters).


Another important dimension to consider is the distance between cabinets. Entry points can be as little as 36 inches (92 centimeters) when there is a cabinet on only one side. Stay at least 42 inches (107 centimeters) from the face of a cabinet to the one on the other side; 48 inches (122 centimeters) is even better, but going beyond 60 inches (152 centimeters) is too wide in most cases. However, if it is a U-shaped kitchen, you could get away with up to 96 inches (244 centimeters).