FREE DESIGNS AND ESTIMATES

Tricky Basement Bathroom? Cool Design Opportunity!

Article By: Mark Clement

Small spaces, outbuildings and basement bathrooms can be some of the toughest projects on the bathroom remodeling spectrum. With so much happening in so little space, you’ve got to plan a lot in advance. Not only do you have to route plumbing and ventilation, but you have to think about the space you’re building in. Is it a hundred-year-old home with a stone foundation that might be a design wow? Or is it a modern building with a poured-concrete structure? You also have to think about what’s happening on both sides of the door, which affects, well, everything. 

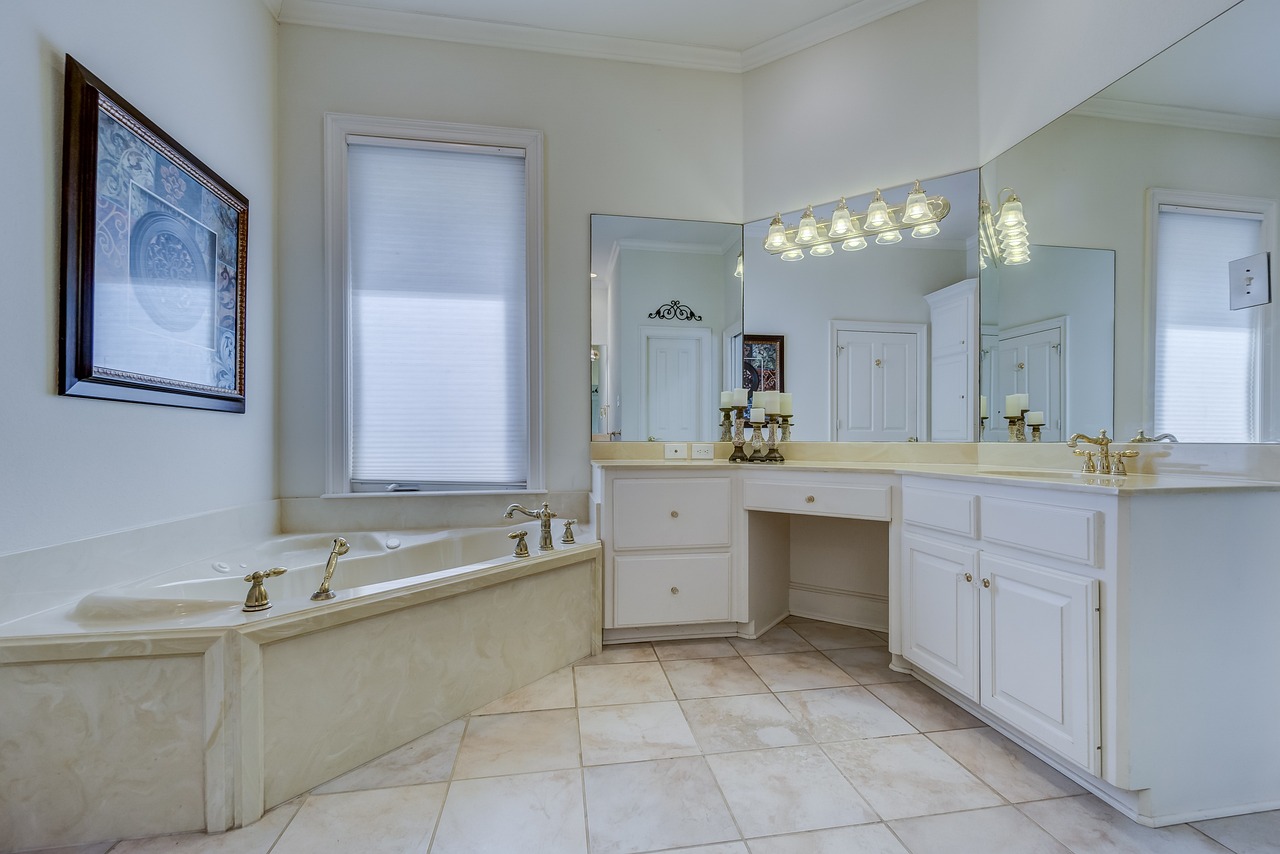
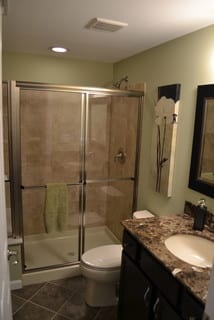
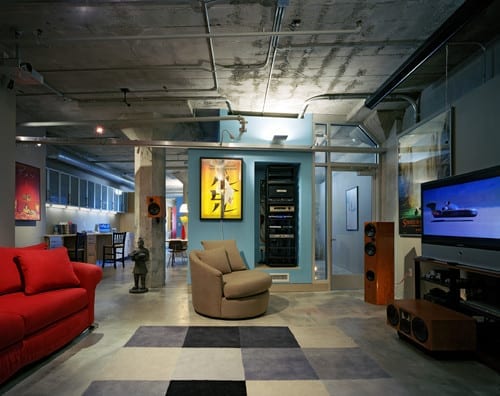
Be bold. The typical strategy for a bathroom in a basement is to hide it, but sometimes there’s just no way to pull that design move off that isn’t boring. The reason: Basement bathrooms need to compete for space with the furnace, water softener, hot-water heater, stairs etc. And sometimes after I lay out the bar, bedroom and whatever else makes the space awesome, there’s no place awesome left for the bathroom. 

In that case it’s often best to run hard in the other design direction and celebrate it in plain sight, make the bathroom part of the plan and a piece of the experience. Celebrating “unwanted” things is one of my favorite design tricks. 

Always vent. One of the most important parts of a bathroom in a basement is a sufficiently powerful ceiling fan to evacuate the moisture — not letting it go into the ceiling or utility room, but outside. Like, where the sky is. Steam is just a little cloud while you’re showering. But after you’ve left, the water falls back to the baseboards and turns back into water. Then it becomes that gross stuff you don’t want to clean.

A vent fan is the way to get the moisture out of the house. I repeat, out of the house. Don’t get me started on how many times I’ve seen bathrooms vented into the attic or another hidden space. Your attic may be hot or cold, but it’s still technically inside. Get that moisture outside with the rest of the clouds!


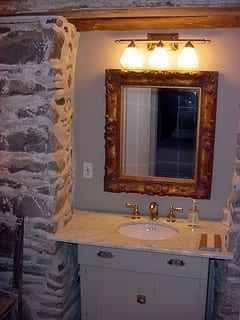
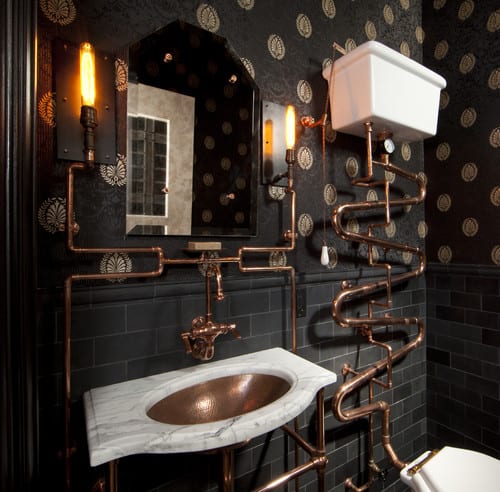
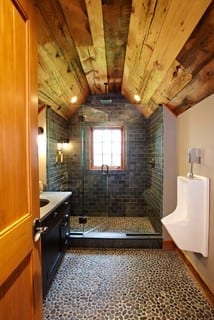
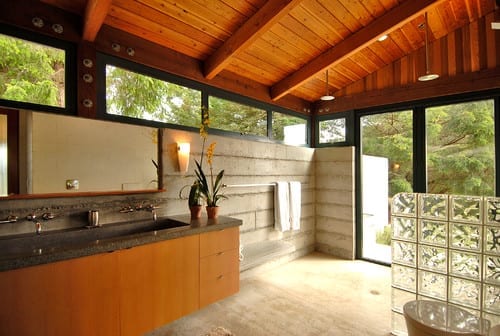
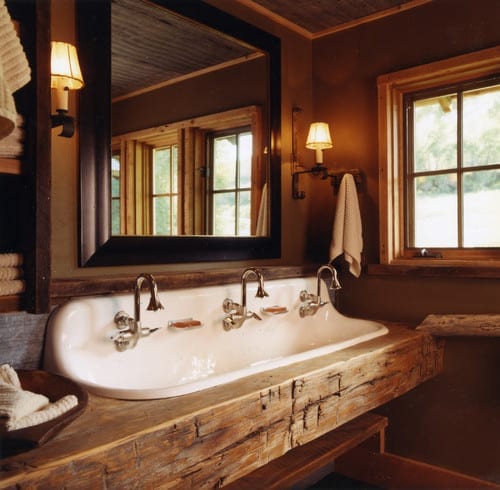
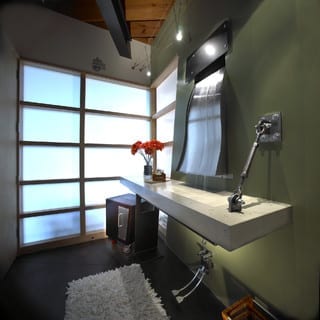
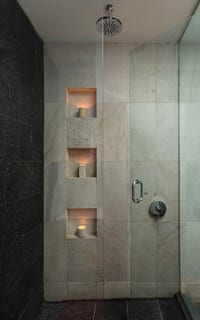
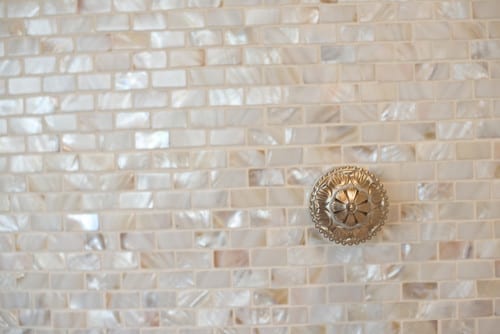
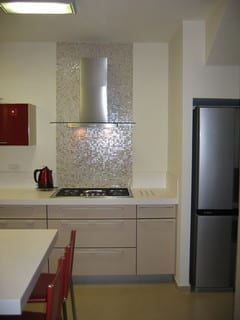
Expose the structure. A basement bathroom offers abundant opportunities to use the existing raw structure of the home. Rubble foundations, for example, are essentially structures. Why cover their powerful looks with drywall?

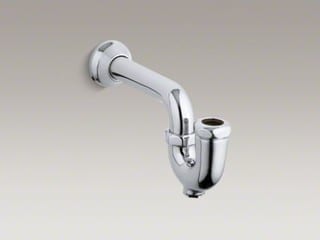
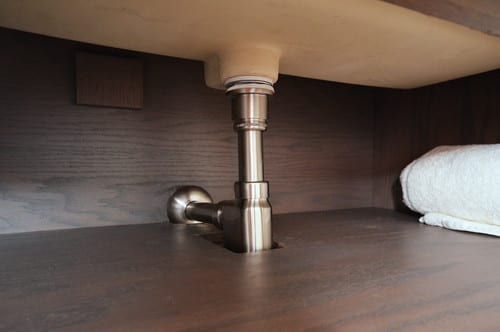
And consider the plumbing, too. While drain lines and electrical services aren’t all that cool to look at, copper supply lines (water lines) can be gorgeous. If you’ve got an open structure, it’s sometimes easiest — and awesome-est — to make the most of what you’ve got. 

Exposing pipes can be a cool way to make a basement space feel industrial or like a man cave. It’s also way easier than building soffits and bulkheads to hide everything. If you’re a building geek like me, it’s best to design a space where you can see the working parts.


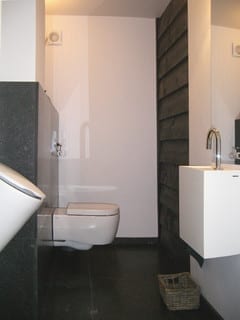
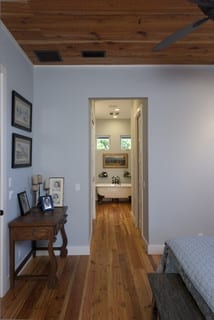
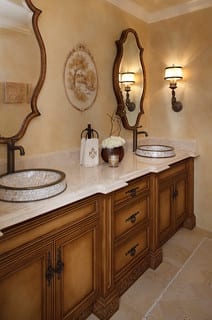
Boost privacy. Many builder-grade houses contain hollow-core doors. These doors have a real-looking wood grain but are made up only of ¼-inch-thick parts, and are essentially cardboard and air inside. 

While hollow-core doors can be fine for certain rooms, I try to use solid-core doors for the bathroom to keep the bathroom experience as much of a one-person affair as possible. Solid-core doors deaden the sounds created in the bathroom. So if you’re having a book club meeting or poker night down there, a solid door and insulated wall framing that both deaden sound are nice for everybody.


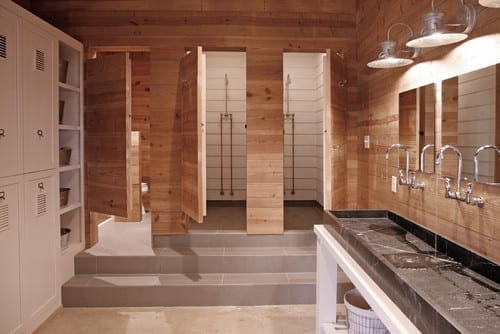
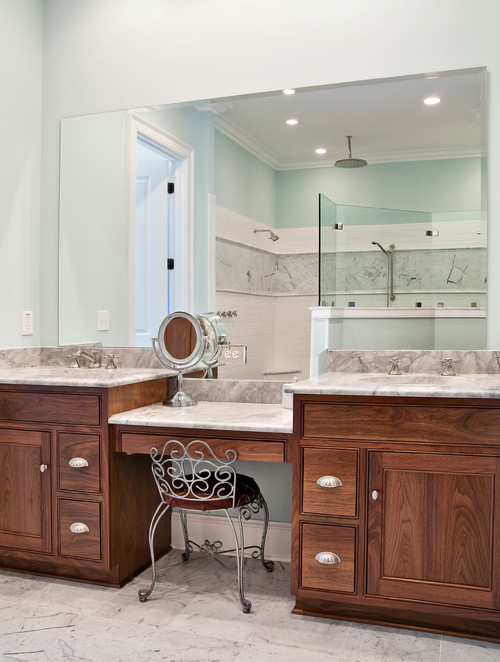
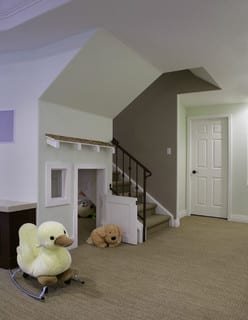
Build up. Small-space remodels can often be harder than big-space overhauls. So much has to happen in such a tiny space, it’s like dancing on the head of a pin. 

So when I go into a small space, I’m always thinking about how I can use it smartly, use it vertically and make everything look like it’s supposed to be there.


Be one with nature. Basements aren’t always underground. When designing or building a bath, think about the approach from the outside, as well as the windows, egress and view, from inside and outside the john.

A Crash Course in Bathroom Faucet Finishes

Article By: Michelle Gann

Choosing a bathroom faucet finish often stumps people. What’s the difference between brushed and polished nickel? What are the benefits of satin brass versus satin bronze? Fear not. Here’s a crash course in faucet finishes that will elevate your knowledge in less time than it takes you to brush your teeth. 


Keep in mind that most faucets have a lifetime warranty when it comes to finishes, so if you have an old favorite faucet that’s looking drab, try calling the manufacturer to see what the warranty policy is.

If you’re new to selecting finishes, it’s a good idea to get all the other fixtures and accessories in a matching color. Some finishes are a standard color, such as chrome and most brushed-nickel finishes, but not all finishes from different companies look the same. 

To ensure you are getting the exact same finish, buy all the fixtures and accessories from the same company. When shopping for additional fixtures, take a sample with you to match.

Polished Brass

An all-time favorite. A polished brass faucet helps give the bathroom shown here a vintage look. 

Advantages: Easy to clean and easy to find. A durable finish. Easy to match with accessories and other fixtures.

Disadvantages: More expensive than other finishes, such as chrome and brushed nickel.

Styles it works with: Polished brass is actually coming back in style, so it looks great in modern, traditional and eclectic settings.

Contemporary Bathroom

Satin Brass

A nice twist on polished brass, the brushed-gold look has a lot of class. It’s bold without being too showy. Don’t be surprised if you see a lot more of this color in bathroom remodeling. 

Advantages: Offers a nice accent color without the polished look. Durable. Being a matte finish, it won’t show fingerprints and water spots.

Disadvantages: It’s hard to find and more expensive. It’s also difficult to match accessories and other fixtures to satin brass.

Styles it works with: Piggybacking off the success of polished brass, this satin counterpart is going to be increasingly popular. Great settings for it are traditional, modern and contemporary.

Traditional Bathroom

by

New York Interior Designers & Decorators

Shane D. Inman

Oil-Rubbed Bronze

A great aesthetic alternative to standard chrome and brushed nickel, oil-rubbed bronze gives the bathroom a more traditional look and feel. 

Working on a budget? if you don’t want to purchase all the matching accessories and you have other brass items in your bathroom, such as an old light switch plate or cabinet knobs, you can always use a brass darkening solution to make all the hardware match.

Advantages: Durable, easy to clean and easy to find. It’s also easy to match oil-rubbed bronze with accessories and other fixtures. It won’t show water spots or fingerprints.

Disadvantages: More expensive than other finishes, such as chrome and brushed nickel.

Styles it works with:Oil-rubbed bronze goes hand in hand with traditional and Tuscan or Mediterranean settings.

Eclectic Bathroom

by

San Francisco Architects & Designers

Andre Rothblatt Architecture

Copper

Copper is unmistakable and bold. It gives the bathroom a rich feeling, especially when mixed with a subtler material, such as marble on a countertop. 

Advantages: Copper has natural antibacterial properties. It’s fairly easy to find and also has the ability to “heal” itself. Over a short period of time, a scratch in copper will become darker and eventually blend with the patina.

Disadvantages: A shiny copper finish might require a little more maintenance than brushed nickel, oil-rubbed bronze and chrome, but if you let it age naturally, copper will develop a beautiful patina. It’s harder to match accessories and other fixtures to copper, and it’s not as durable as other finishes.

Styles it works with:Tuscan and farmhouse. And, of course, steampunk.

Industrial Bathroom

by

San Francisco Interior Designers & Decorators

Artistic Designs for Living, Tineke Triggs

Satin Bronze

Satin bronze has a nice, smooth finish that’s in between copper and oil-rubbed bronze. Having a subtler color gives this finish more flexibility for different bathroom styles and settings.

Advantages: Durable and easy to clean and maintain, this is a great alternative to copper and a lighter option than oil-rubbed bronze. Water spots and fingerprints won’t show.

Disadvantages: Hard to find and more expensive. It’s hard to match accessories and other fixtures to satin bronze.

Styles it works with: Traditional, eclectic and Mediterranean.

Eclectic Bathroom

by

Fairburn Kitchen & Bath Remodelers

Change Your Bathroom, Inc.

Polished Nickel

If you like a smooth, shiny finish but are tired of chrome, try polished nickel. It’s darker than chrome, and with different levels of lighting, it can appear to change in color. 

Advantages: Easy to clean. A durable finish. A great alternative to brushed nickel.

Disadvantages: More expensive. It’s hard to find matching accessories or fixtures for it.

Styles it works with:Like chrome, it looks great in a variety of settings: modern, contemporary, traditional and eclectic.

Modern Bathroom

by

Edison Kitchen and Bath Fixtures

VIGO

Brushed Nickel

The soft metallic look of brushed nickel has stood the test of time. 

Advantages: This is one of the most durable finishes; it has a tendency to keep its finish longer than oil-rubbed bronze and chrome. It doesn’t show wear, fingerprints or water spots.It’s easy to clean, easy to find and easy to match with accessories and other fixtures. It’s relatively inexpensive. Brushed nickel tends to be pricier than chrome but does not cost as much as oil-rubbed bronze.

Disadvantages: Does not coordinate well with stainless steel; it blends in instead of being a statement piece.

Styles it works with: Almost every style.

Contemporary Bathroom

by

Saint Paul Interior Designers & Decorators

Indicia Interior Design

Chrome

Chrome is currently one of the most popular finishes because of its versatility. 

Advantages: It’s generally the most inexpensive finish. It’s a very easy finish to clean and maintain. It’s durable, easy to find and easy to match with accessories and other fixtures. 

Disadvantages: Shows water spots and fingerprints. 

Styles it works with:Almost every style.

Contemporary Bathroom

by

La Canada Flintridge Window Treatments

The Art of Room Design

Matte Black

Black faucets are becoming increasingly more popular in the bathroom, because of their ability to match other items, such as vanities and accent pieces.If you want to make a classy statement, or you are just doing a small renovation that doesn’t involve changing all aspects of your bathroom, matte black may be the perfect finish for you.

Advantages: Easy to clean. Does not show dirt, fingerprints or water spots. It’s easy to coordinate a matte black faucet with bathroom accessories.

Disadvantages: It’s hard to match other fixtures to it, hard to find and expensive compared with more popular finishes, such as chrome and brushed nickel. 

Styles it works with: Modern and eclectic.

Modern Bathroom

by

Phoenix Interior Designers & Decorators

Red Egg Design Group

White

Looking for a clean, brilliant finish? Go with a white faucet as a contrasting statement piece or something that blends beautifully in an all-white bathroom. The white finish comes from durable plastic or porcelain. 

Advantages: Easy to clean. Does not show water spots or fingerprints.

Disadvantages: Porcelain fixtures are more fragile than metal, which makes them more prone to chipping. Porcelain can be expensive, too.

Styles it works with: Farmhouse and modern.

Wood in the Bathroom? Absolutely!

Article By: Mark Clement

The conventional wisdom is that tile is the go-to for bathroom surfaces. We see tile everywhere, from the bathroom at work to the subway, to everybody’s house.

I love tile, but just because it’s so popular doesn’t mean we have to design with it. And tile and grout aren’t as impervious as you might think and are not required for looks, durability or cleanliness in wet areas like kitchens and baths. 

In fact, you can do amazing things with wood, even in the bathroom. The way it feels, sounds and even reflects light is wonderful. It also offers color and depth, and can soften the look of hard ceramic finishes. 

While wood is a durable choice for bathroom floors, it’s also fantastic on the ceiling. It adds a sense of natural warmth in a space where, well, most of us are au naturel. 

Yes, this ceiling is above a shower. You can imagine the potential moisture problems. I always recommend using a fan in the bathroom, but adding a second barrier between the steam rising from the shower and what’s behind the ceiling might be smart here. I recommend sealing the wood surface with boiled linseed oil and/or urethane. I also recommend sheeting the ceiling joists with 15-pound tar paper (the black paper you see under roof shingles) before installing the wood. 

Tar paper is water resistant and will keep moisture that does make it through the ceiling (not much, if any) inside the room. The moisture will evaporate back into the room and dry with the rest of the air, especially if you’re using planks instead of a tongue and groove material.


Wood on an accent wall — in this case, beveled siding — softens and adds texture. Moisture is always a concern in a wet area, and the usual go-to bathroom coating is semigloss paint. 

When it comes to wood, I like the texture to be the star, so I prime the base coat with oil (it’s smelly, so do it outside) and make sure the end grains and backs get coated to thoroughly seal the wood. 

Installing wood is often easy, fast and cleaner than sanding drywall.


When you’re remodeling a bathroom, there are many materials you can use for the walls that’ll help battle ever-present moisture. Water-resistant drywall (often called green board) and cement board are popular, but they’re not necessary or any more durable than natural softwood planks like eastern white pine. 

Bare wood will stain, but coating it with a water-based urethane will help keep all that natural wood grain vibrant. And having different-colored wood cabinets and storage is a nice touch, with clean, horizontal lines drywall can’t touch. 

I recommend tongue and groove stock, as opposed to planks, to create a continuous barrier to minimize moisture migration into the walls. 

Think creatively. Wood is used on decks and docks, where it is constantly shifting between wet and dry (and getting snowed on). So why not use it the shower floor or another bathroom area?

This pallet floor is custom detailed for this shower assembly. An easily customizable pallet built from any number of widely available lumber species — pine, cedar, Douglas fir — could be designed for a standard shower with a poured and sealed shower pan in place of tile. Or it could cover tile, which is my preference, because I find it easier to clean. 

I also like the idea of creating a simpler element inspired by this design: a wooden bath mat. Wood is easy to seal and clean with basic household detergents, and it’s much less slippery than glazed tile.  

Using wood in the bathroom enables a mix of materials to create depth and warmth across different materials and styles. This concrete wall might have appeared cold and heartless were it not for the soaring rafters and V-joint roof decking above. Scale this feature down to convey the same effect in a smaller space. 

I’ve installed wood flooring in bathrooms. Not only does it deliver a sweet style, but it’s durable, in large part because urethane finishes are fantastic. I always put 15-pound tar paper down to protect the floor from any water that does get through.


Other reasons to use wood floors in the bathroom, besides looks, are ease and continuity. It’s easier to run flooring that exists in the other rooms of the house through to the bathroom. And it creates a flow, a feeling of continuity, that I find calming.


8 Fabulous Faucets for All Kinds of Bathrooms

Article By: Michelle Gann

Bathroom sink faucet options are limitless, and choosing one can be overwhelming. There are lot of different factors to consider, and every house has different needs. Do you need a faucet that’s easy to use for all ages? Is space an issue? Or perhaps budget?

Check out these eight types of faucets to get an idea of what to look for when you’re shopping for your bathroom. 

1. Waterfall faucet. With its clean lines and minimalist approach, this faucet lends itself to a more modern style. It’s most commonly constructed out of metal and glass.

Some waterfall faucets have beautiful colored designs throughout the glass, which give the bathroom a cheery feel. Others have LED lights, creating a colorful display when the water is flowing. 

2. Four-inch-spread faucet. A great budget option, 4-inch-spread faucets (measured from the center of one handle to the center of the other) offer value and functionality. Not only do they come in almost every shape, size and color, but they are also a good space-saving option for smaller vanity areas and can be used in almost any application.


3. Eight-inch-spread faucet. One of the most popular styles today, the 8-inch-spread faucet (also measured from one handle center to the other) comes in many styles and materials. From metal to marble to crystal, the options are almost endless. 

You can find an 8-inch-spread faucet in popular finishes (such as brushed nickel, oil-rubbed bronze and the ever-popular gold) and some not-so-popular ones (such as polished nickel and matte black).


4. Single-lever faucet.Single-lever faucets are very easy to use and are a great option for all styles of bathrooms. They come in a variety of designs from traditional to contemporary. 


Single-lever faucets are a popular option because of their simple design and the multitude of colors and styles available.


5. Wall-mounted faucet. Wall-mounted faucets offer the same functionality as countertop-mounted faucets without taking up any counter space. They also provide a great focal point whether you are mounting them on a sink or a backsplash. 

Wall faucet styles range from minimalist to traditional, and many different colors and finishes are available.

Spaces by Other Metro bornrich.org 

6. Digital faucet. Want a faucet that will always give you the perfect temperature? Digital faucets aren’t all about the sleek looks; they can detect each user and adjust the temperature according to preset comfort levels. Not to mention you can also check the weather and your email while washing your hands.


7. Motion-sensor faucet.Many faucets can be installed to work with a motion sensor. This not only frees up your hands, but it’s a great way to keep the faucet sanitary and to prevent water waste. Motion-sensing faucets aregreat for children as well; setting the faucet to a comfortable temperature will ensure that children never burn themselves. Also, this option is neat to show off at parties.


8. Foot-controlled faucet. Looking for a little convenience in the morning? This faucet operates without hands; foot pedals mounted underneath the sink area control it. Step on the left side for hot, the right side for cold or both at the same time for warm water. Foot controls are a handy option no matter the application and can work with many kinds of faucets.

Bathroom Details: Show Off Your Sink Line

Article By: John Whipple

Many modern and classic sink designs expose our waste and water supply lines. If your new sink is going to show off your plumbing, you’ll want to choose a good sink trap — specifically a P-trap, named for its shape, like the letter “P” — and matching sink fittings.

There are two basic kinds of P-traps: A European-style P-trap has no U-shaped pipe, while the North American style does. Regardless of which shape you choose, you can find a sink trap in all kinds of materials — including nickel, oil-rubbed bronze, stainless steel, brass and copper — to coordinate with your bathroom’s style.

Your sink trap holds back a little water after each use to keep air from your sewer pipes from coming back into your home. Consistent sink use, from simply running the tap to washing your hands, keeps the system working well.

In seldom-used bathrooms, water in the trap slowly evaporates. If you have a guest bath you don’t use very often, get into the habit of sending a little water down the sink from time to time to maintain the proper water level in the P-trap.

Toilets need this same care; make sure you flush toilets in seldom-used bathrooms once every one to three weeks.

Kohler Adjustable P-trap With Tubing Outlet, 1¼ by 1½ Inches – $126.15 »
This shot of a Kohler adjustable P-trap (North American style) shows where the trap got its name; if you tilt your head to the right, the pipe looks a lot like the letter “P.” The curved part of the trap retains a small amount of water after the sink is used.

This shot shows a European-style sink trap, which doesn’t have the same P shape and can actually save a little more room under your sink. The water in these traps acts the same way as in the previous trap. This clever installation has a shelf notched around the well-placed trap, creating great towel storage under the sink.

Here’s a shot of the same sink in the previous photo. The installer did a great job with this setup. If you have a small vanity and need extra storage, consider using one of these European-style P-traps to save room under your sink.

Most sink traps are installed perfectly centered on the sink with the pipe running from the front of the sink to the back …

… while some installations show off the curve with the pipe run parallel to the wall, allowing you to see the full P shape.

Plan your fittings to fit the space and feel of the room. This bathroom has loads of old-home charm, and the exposed plumbing is part of that look. A sleek, modern pipe would look out of place with this sink.

If you’re planning for your golden years and want a more universal bathroom design, understand that Americans with Disability Act–compliant bathrooms have room to roll under a bathroom sink with a wheelchair. This means choosing a pipe that won’t bang anyone’s legs or knees.

Make sure the front of your sink is no higher than 34 inches off your finished flooring to comply with theNational Kitchen and Bath Association‘s planning guidelines for accessibility.

Tip: If you want more room under your sink, ask your plumber to send the sink waste line to the back wall and install the P-trap in the wall or right up against it.

Contemporary Bathroom by Other Metro Interior Designers & Decorators FOC Design 

Some of today’s sink designs don’t need a P-trap, like the one in this photo. This sink doesn’t even have a waste line; the water simply slides down into the shower drain!

Tip: Today a sink’s graywater (wastewater) can be used to fill the toilet and cut down on water use. If you want your home to save on natural resources, this is a great ecofriendly option.

Bathroom Design: Getting Tile Around the Vanity Right

Bathroom Tile Around The Vanity

Article By: John Whipple, Houzz

Tiling under your new vanity or custom cabinets can prevent shower or sink water from finding its way into your house. Extending tile all the way under freestanding or floating vanities can make a room look and feel larger, too. These vanities are popular choices in today’s bathrooms, so it’s important to understand the pros and cons of bringing tile all the way under your bathroom storage. 

See how these bathrooms combine vanities and floor tiles, and learn what you should specify when working with your bathroom contractor. 

Photo by ChaletLook for bathroom pictures

Traditional Bathroom by Denver Architects & Designers Chalet 

Making sure the floor is perfectly level is an important step for a vanity like this. Trying to level a vanity after tile installation can be a real chore. If you’re having a vanity custom built, designing adjustable legs can help get your vanity and vanity top perfectly level. 

Tip: Consider omitting extra legs in custom vanity designs and securing the vanity to the wall if needed. Getting eight legs to sit perfectly flat is much harder than four! 

Photo by Cinder Creek ConstructionDiscover bathroom design inspiration

If your bathroom floor is a little unlevel and you don’t want to spend the money or time making it perfectly level, a little shoe molding (the small strip of molding at the bottom of the vanity toe kick in this photo) on your vanity can visually even things up. Shoe moldings add a lot of charm to a vanity’s look and help protect the vanity from water damage. 

Tip: If you are going to use a shoe molding, plan to shim the vanity off the ground by about ⅛ inch or so, so that the only wood in contact with the floor is the shoe molding. If there’s ever a leak in your bathroom, the shoe molding, rather than the bottom of your vanity, will absorb the damage. It’s much easier (and more affordable) to replace shoe than the entire vanity.

Photo by Erica George Dines PhotographySearch bathroom design ideas

I love how this vanity has higher legs and extra foot room. Traditional bathroom and kitchen cabinets often have a smaller kick space (the little recess below the bottom drawers) with little to no room for your toes. If you like to get up close to your vanity and lean toward the mirror when getting ready, a freestanding vanity with extra leg height is a great idea. 

Tip: If you’re installing radiant floor heating, you’ll want it to go all the way under your vanity with a design like this. That way your feet will still stay warm when you’re up close to the mirror. We prefer cable heating systems rather than heating maps for this very reason; they allow for greater heat placement control.

Photo byLook for bathroom pictures

If you love open space, a floating vanity can help visually expand your room. Sometimes a vanity needs to float due to a room’s heating needs. In-floor heating requires a freestanding or floating vanity (rather than a fixed vanity) to avoid overheating.

Photo by ROSEMARY MERRILL DESIGN – More bathroom photos

Tiling under your vanity can help seal up any voids that might collect water and harm your home’s construction. Sink and drain lines can leak if not properly installed or prepared, and often this leak runs down the back side of a vanity and into the floor. 

Tip: Make sure all your water supply lines have trim collars inside the vanity. These collars act like little water deflectors and can keep water from running back along a pipe and into the wall. 

Photo by USI Design & RemodelingBrowse bathroom ideas

In a larger bathroom, the high cost of tile could be a big factor when you’re deciding whether or not to tile under a vanity. Usually we order a 10 percent overage in bathrooms, but for some large bathrooms I’ll just order 5 percent and use the off cuts under the vanity. This allows the client to get the benefits of tile under their vanity without added cost.

Tip: If your tile is crazy expensive, consider using a cheaper, similar tile under the vanity. No one will know but you.

Photo by REFINED LLCBrowse bathroom photos

Larger vanities with a solid countertop like this can add a lot of weight to a tiled floor. If you’re aiming for a similar look and style, considered the added weight your vanity will bring to the room and make sure your contractor prepares the floor for this kind of installation.

Tip: Curious if your floor is strong enough? Try this simple test for excessive floor deflection: Fill a drinking glass to the top with water, place it in the room before tiling and walk around the room. Move the glass to a few different locations and walk around each time. If the water spills from the glass anywhere, the floor most likely has too much bounce and might not be suitable for a heavier vanity.

Photo by RW Anderson HomesSearch bathroom design ideas

Adding some light under a vanity makes for a great night feature and brings another layer of lighting to the room. Some tile is so shiny that it acts like a mirror under the vanity, so make sure that the bottom of your vanity is not littered with job tags, addresses or overspray from finishing.

Tip: If you want a more even glow from the lighting, consider shining the light toward the back wall instead of straight down. This creates a little less light but a more even glow.

More:Bathroom Design: How to Pick Out a Vanity

See more from Houzz.

9 Features to Consider for Your Dream Bathroom

Article By: Gabrielle Di Stefano

Bathrooms were originally designed to be no-frills, functional, hardworking rooms. But today’s endless design layouts and fixture choices provide us with the opportunity to create a space that we can actually enjoy being in. Now, the challenge is to design a bathroom that offers the functionality of yesteryear while reflecting our personal style. 

No matter what size or shape of bathroom you’re working with, these tips can help you add personality and luxury to your space, without compromising on practicality. 

Narrow bathrooms can have plenty of personality. Have fun with a smaller space like this with over-the-top wallpaper and glamorous fixtures and fittings. Custom vanities, like the ones in the photo, offer ample storage and style. 

Tip: Installing mirrored glass on at least one wall creates the illusion of space. Mirrors on opposing walls work even better. If your towel rail is on a wall where you want a mirror, work with your glass manufacturer to install the mirror around the rail.


Modern Bathroom by Other Metro Interior Designers & Decorators Goldfish-Interiors 

Double-duty bathrooms work hard, so put effort into designing a workable space. This bathroom makes good use of existing plumbing fixtures with acompact washer/dryer. Additional storage for cleaning products and clothes would be valuable, too. 
 
Tip: A standard washing machine is often deeper than standard cabinetry. Keep this in mind if you are buying a flat pack vanity and you want to hide your appliances behind a hinged door.


Comfortable seating is very nice for giving yourself a pedicure or enjoying some sun and solitude.

Tip: Upholstered seating fabric in bathrooms works best if it is mold resistant, so choose an outdoor fabric for these areas. 

If you’re blessed with an extra-large bathroom, you have the opportunity to work in a healthy mix of natural and artificial lighting, zoning of major wet areas, plenty of storage and a place to sit.

Tip: Try a mix of darker timbers and soft furnishings in a large space to prevent it from looking and feeling too much like a public bathroom.

shower niche is a practical and stylish vessel for all our necessities. A permanent tiled niche not only looks great, it won’t gather mold, as a plastic hanging storage unit can.

Tip: Tiling can make or break a bathroom. If you want a contemporary-looking shower, employ a craftsman tiler to miter the tiles, rather than installing prefabricated edging — this will create a seamless-looking niche.


Of course, privacy is always important in a bathroom. Unlike other rooms, bathroom window treatments need to let in natural light while keeping prying eyes out. Sheer blinds are a practical option, while opaque film is a cost-effective solution.


Tip: If you have the space for a luxurious bath under a window like this one, install window shades with a top-down optionto let light in without sacrificing privacy.


Dual sinks are more of a necessity than a luxury in a family bathroom. They help avoid arguments and keep the morning ritual moving.

Tip: A minimum of 6 feet of overall counter space is best if you are installing two sinks. 

Traditional Bathroom by Atlanta Architects & Designers Mark WIlliams Design Associates 

Shower seating doesn’t need to look like it belongs in a hospital. If you are renovating your shower, ask the builder to frame out a seat ready for tiling. In smaller showers, a corner seat will take less room. 

Tip: If you don’t have the room or budget for built-in seating, a small stool constructed from a waterproof material like stone is a thoughtful addition to any shower.


Bathroom by Other Metro Interior Designers & Decorators Décoration et provence 

Floor heating is a popular and energy efficient way to warm bathrooms. This heating method provides an even temperature throughout the room and offers programmable thermostats. Reducing the air flow from the outside is perfect for people with allergies. 

Tip: Even if you’re not renovating or building a new bathroom, you can put in floor heating. Some manufacturers have heat mats that can be stapled onto the subfloor or up between the joists.

Go for the Glow: Mother-of-Pearl Shines Around the Home

Article By: Ines Hanl

Mother-of-pearl has been used since ancient times to make people and their homes more beautiful, but today’s manufacturing techniques have made this product even more accessible and economical. “Mother-of-pearl” is the common name for iridescent nacre, a blend of minerals secreted by oysters and other mollusks and deposited inside their shells; it coats and protects them from parasites and foreign objects. 

Now we can use this wonderful material in our homes in a wide range of products. Mother-of-pearl tiles, wallpaper and countertops can adorn a space with the same elegance that a pearl necklace adds to an outfit. It’s not cheap (mother-of-pearl tile starts at about $30 per square foot), but it can be just the splurge you need to set your project apart from the crowd.

Mediterranean Bathroom by Calgary Interior Designers & Decorators www.hughesdesines.com

Mosaic tile. Available in a wide range of natural hues, mother-of-pearl tile and mosaic blends are made from the nacre on shells like capiz, black lip, brown lip, paua and violet oyster.

White mother-of-pearl appears iridescent naturally, but it can be artifically tinted to almost any (sometimes shocking) color.

Contemporary Kitchen by Tel Aviv Architects & Designers Rina Magen

This is a beautiful example of mother-of-pearl on a kitchen backsplash. This shell tile is often thin, unless it’s mounted to a thicker substrate, so if it’s combined with another tile, it’ll need to be built up to look flush.

If you’re not sold on a shell product but love the iridescent look, look for manufacturers that produce iridescent glass mosaics. White iridescent glass can look quite similar to mother-of-pearl tiles.

Traditional Bathroom by Tampa Tile, Stone & Countertops Europa Stone

Flooring. What a elegant mix of natural stone and mother-of-pearl! This application is a great example of layering textures in a white-on-white application. Note how the simple act of creating a border around a well-proportioned floor tile strengthens the grid pattern.

Mother-of-pearl can be used for walls, floor surfaces (make sure to check with the manufacturer) and sometimes outdoor applications.

Contemporary Bathroom by Charleston Interior Designers & Decorators Melissa Lenox Design

Accents. If you are craving the glow but don’t have the budget for a full iridescent wall, use mother-of-pearl mosaic tile to add a bit of sparkle to an accent. Mirror frames, side tables and table lamps can all shine with mother-of-pearl tile.

Mediterranean Living Room by Miami Furniture and Accessories Jalan Jalan Collection

Inlay. Mother of pearl is a very suitable product to be cut into shapes. The cut shapes, called tesserae, are often used as inlay on furniture and other decorative home accessories.

Traditional Bathroom by Belmont Interior Designers & Decorators Julie Mifsud

Sinks. Shown here as a semivessel model, a mother-of-pearl mosaic sink, like those fromLinkaSink, can be cleaned with mild household cleaner or soap and water. The grout can be cleaned with grout cleaner; it should be sealed once or twice a year for maintenance.

Contemporary Dining Room by Hillsborough Interior Designers & Decorators Lisa Silverman/ Decorator Guru

Furnishings. Mother-of-pearl cabinetry faces utilize shell panels, rather than tile. These panels are laminated shell tiles and come in a variety of shell types, colors and sizes

Contemporary Buffets And Sideboards by Los Angeles Furniture and Accessories Nusa Furniture Penida Nusa Furniture

 often uses mother-of-pearl in combination with coconut on its furniture. The dark chocolate of the rough textured coconut and mother-of-pearl’s creamy iridescence make for a delicious mix on this storage cabinet!

Contemporary Dining Room by San Francisco Interior Designers & Decorators Kendall Wilkinson Design

Wall coverings.Maya Romanoff, who specializes in luxurious wall products, offers a flexible tile that can be applied like a wallpaper. The tile is a thin capiz shell veneer applied to backing paper with a topcoat for easy maintenance. York Wallcoverings and Franco Ferrucci offer similar products.

Maya Romanoff’s wallpaper starts at $45 per square foot (plus installation). Candice Olson’s mother-of-pearl wallpaper starts at about $110 per double roll (about 60 feet of wallpaper).

Kitchen Countertops by Brooklyn Design-Build Firms IceStone IceStone Hot Colors

Countertops.

Icestone uses mother-of-pearl as one ingredient in its countertop products. A cementitious base product mixed with recycled glass shards and mother-of-pearl creates beautiful color blends

Contemporary Spaces by Seattle Architects & Designers Beley Design, pllc

Mother-of-pearl accents bring a wonderful glow to Icestone countertops, enlivening a space in a calm way. The use of small pieces of glass doesn’t feel as aggressive as in some other products. 

From personal experience, I recommend using Icestone only in areas where there’s no risk of staining the surface. I’ve used Icestone quite successfully in bathrooms and laundry areas.

Icestone countertops are comparable to mid- to high-end granite in cost. Allow for about $150 per square foot (including installation) in you.

Go for the Glow: Mother-of-Pearl Shines Around the Home

Contemporary Bathroom by Charleston Interior Designers & Decorators Melissa Lenox Design

Get Grout Magically Clean – Stains and All

tile grout

If your grout is grossing you out, this deep-cleaning method will help it look new again!

by Meg Padgett, Houzz

Tile – whether it’s used as flooring, in the kitchen as a backsplash or for counters, or in the bathroom – has one great downfall: grout. Since grout is porous in nature, unsealed grout absorbs all kinds of stains, from mildew to coffee and everything in between. To say it’s a headache to keep grout clean is an understatement.

NOTE: Be wary of using too much lemon juice with marble, since it can etch or damage the stone if left on too long. Hydrogen peroxide can be a safe alternative.

We inherited marble tile counters when we purchased our home. It’s pretty clear that the grout was never properly sealed, so it soaks up stains like crazy. It makes our kitchen feel gross and grimy, even if it was just cleaned. While I’d love to replace the counters with a solid surface like quartz, it’s just not in out budget – plus, we just can’t justify getting rid of something that’s perfectly fine otherwise.

Luckily, I have a foolproof method that will lift most household stains from that pesky grout. 

What you’ll need:

  • Oxygenated bleach (like OxyClean)
  • Warm water
  • Coarse scrubbing brush (like an old toothbrush)
  • Towel
  • Lemon
  • Grout sealer

TIP: Cleaning colored grout should be done with special care. Bleaching agents (like chlorine bleach) can discolor and harm the colored grout. Fortunately, oxygenated bleach does not contain corrosive chemicals and is safe to use on all grout. 

1). Clean the surface thoroughly, removing any surface residue or debris. Let the grout dry fully.

2). Dissolve 2 tablespoons of oxygenated bleach in 2 cups of warm water. Wet the brush in the mixture and apply it to the grout. Let is soak in, then scrub the grout in a circular motion, which will loosen the stain more effectively than a front-and-back motion. If needed, dip the wet brush into the oxygenated bleach to make a paste. Wipe clean, then let dry.

TIP: To lift extra dark stains, squeeze lemon juice onto the stain, let it soak in, then scrub, wipe clean and let the grout dry. Use lemon juice sparingly, since it can damage some tile finishes.

3). Spray the tiles and grout with an ecofriendly cleaning spray and wipe them clean. Let the grout dry fully before making a final decision on whether your hard work paid off – damp grout looks darker than dry grout. 

4). Apply grout sealer after the grout has fully dried to avoid any future stains. Be sure to reapply it each year. 

Still having trouble getting that grout clean? For those impossible-to-remove stains, you might want to consider:

  • A commercial tile and grout cleaner
  • A coarser brush (avoid using metal bristles, though, as they can erode the grout)
  • Grout Renew

If after you’ve tried all three, the stain is still hanging strong, you may have to resort to removing the old grout and replacing it with new. 

TIP: An electric multitool, like the Dremel Mult-Max, helps to make quick and safe work of removing the old grout. 

Houzz: et Grout Magically Clean — Stains and All

Holiday Home Improvement Projects


Happy Holidays.jpg

The run-up to the holiday season is a good time to be taking care of home improvement projects. Friends and family will be dropping by a bit more frequently, so they’ll be able to see the fruit of your labors.

Even if your home isn’t a major social setting, if you’re like most of us, you tend to spend a bit more time indoors in the winter, so you might as well be making the most of your home for the people living in it: you.

Seal the driveway and fix those cracks in the sidewalk

Salt on the roads and frequent temperature changes can break down your entrance ways. Make a good impression on the outside of your home and avoid curious looks from guests thinking “was that crack always there?”

Home theatre area

You’ve got a big screen television and a great sound system. But what about the stand the TV rests on? How about the decor? You may want to look at custom cabinets or storage for your DVDs and related items. Is the couch your guests will be sitting on looking a bit worn? Upgrade and replace as needed. You may also want to consider mounting your flat screen television on a wall for more effective use of space and a sophisticated look. 

The kitchen: the most used room in the house

When you’ve got company over for the holidays, even if the main event may be in the living room, people naturally gravitate towards the kitchen for an extra cup of cocoa or a gingerbread cookie from the pantry. Think about new cabinets, solid slab countertops or a coat of paint that brightens up the room can create a welcoming feel. And if you’ve upgraded your kitchen utilities like your dishwasher, you’ll have an easier time after the party is done.

Bathroom fix-ups

New tiles and re-grouting can add a fresh look to your bathroom. Maybe it’s also time to add touches like a new mirror, shower curtain or bathroom mat.

Designer fireplace and maintenance

A lot of holiday parties tend to center around the fireplace. Custom fireplaces that double as art installations are becoming more popular. More homes are also including them in other parts of the house besides the living room, such as in the kitchen or master bedroom.

If installation is a bigger job than you were thinking and you’ve already got a working fireplace, at least get your maintenance done, cleaning it up, checking connections and ventilation and ensuring cracks in the mantle or other areas get sealed properly.

Give yourself a home improvement schedule

You’re not going to want to deal with dust and packaging from home improvement projects while your guests are arriving. Give yourself plenty of time to work through your improvements, and don’t bit off more than you can chew. Give yourself a realistic list to accomplish and if you can’t get it done before New Year’s Eve, well, there’s always next year.