FREE DESIGNS AND ESTIMATES

10 Storage Solutions for Kitchens With Character

Article by: Joanna Simmons

Kitchens are all about storage, but it can become rather predictable: Think rows of built-in cupboards and wall cabinets, with an emphasis on practicality over personality. So how can your cooking space ingeniously accommodate everything you need while also looking original and exciting? These 10 great solutions offer some fresh ideas — not to mention storage eye-candy!


Cabinet Storage Solutions 1

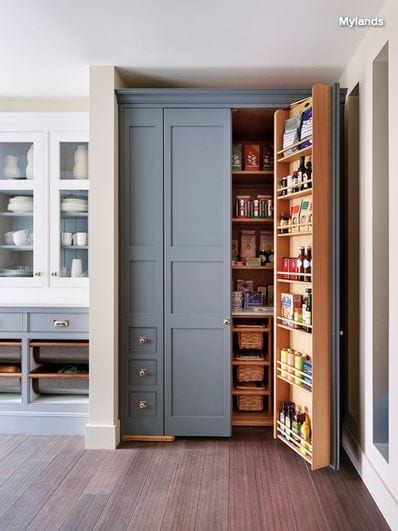
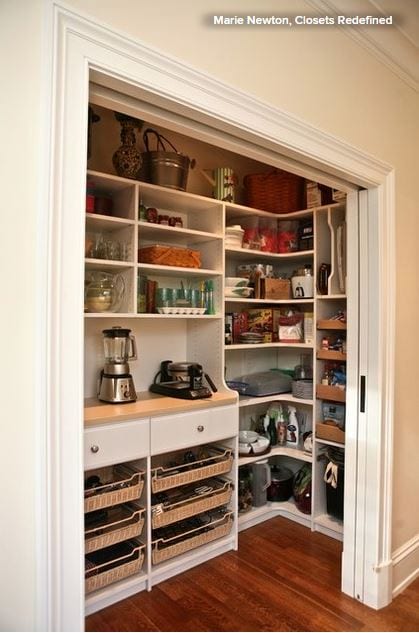
Go full-size. Pantries are huge news in kitchen storage and for good reason. While a conventional base unit requires you to get down on your knees with a flashlight to find that last can of beans, anything stored in a tall pantry like this one is easily visible and accessible. 

Typically fitted with drawers, racks, baskets and even lighting — and performing valiantly even when ultra-slender — these modern beauties offer plenty to love.


Cabinet Storage Solutions 2

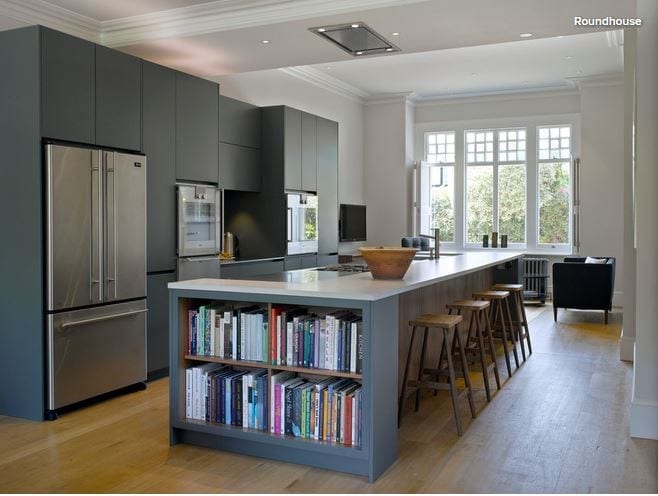
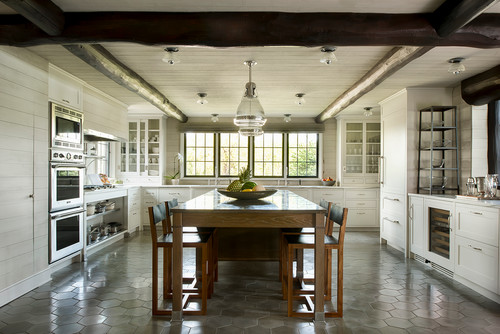
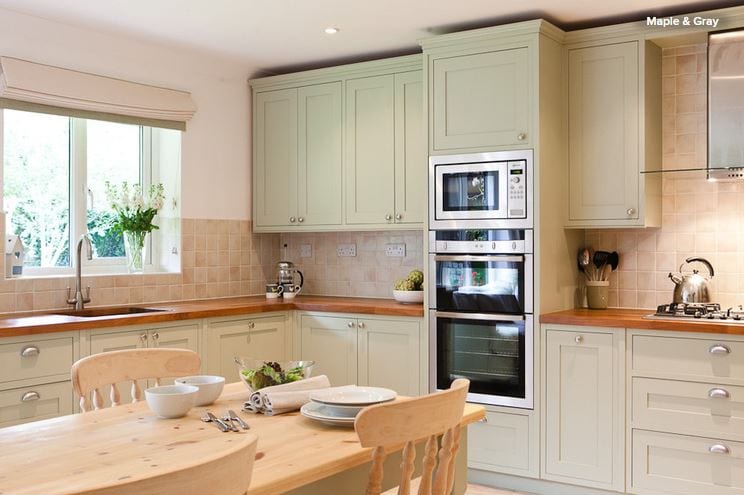
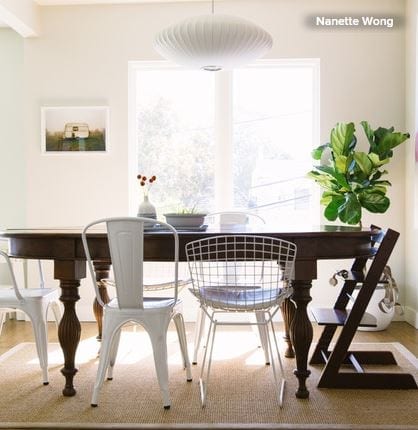
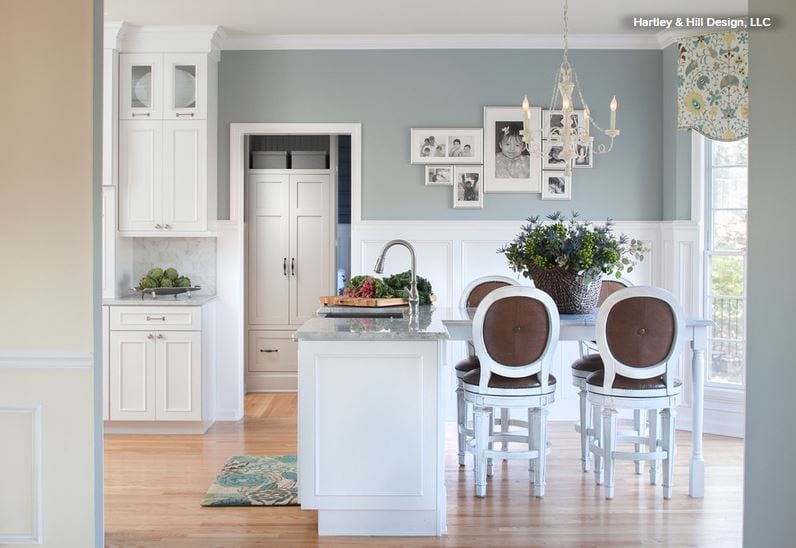
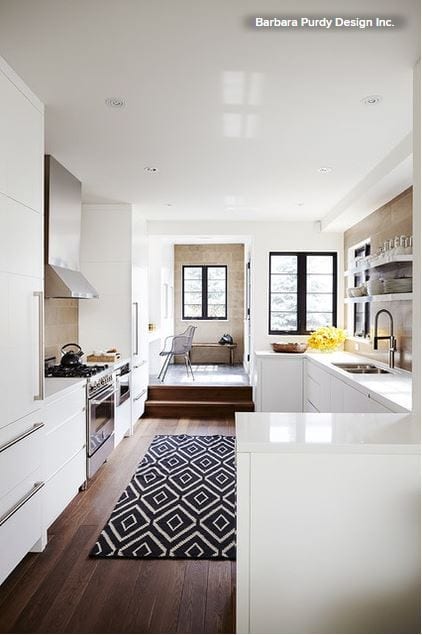
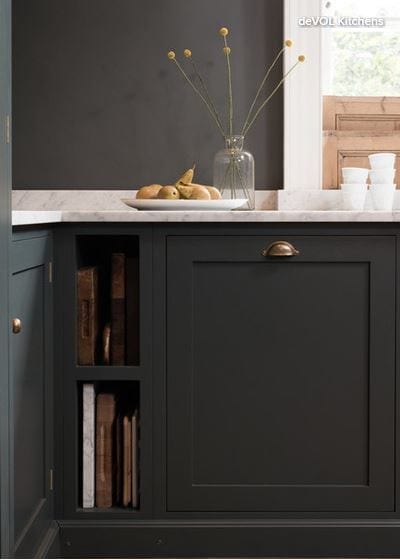
Create an island library. Passionate home chefs accumulate lots of cookbooks over the years, but not always the space to store them. Volumes kept near the stove can become scruffy and grease-spattered and perhaps don’t merit being displayed prominently. 

How about this, though: neat shelves on the end of an island? The books are visible — and add color — without being central to the design of the kitchen, and they’re easy to grab when you’re searching for a recipe.


Cabinet Storage Solutions 3

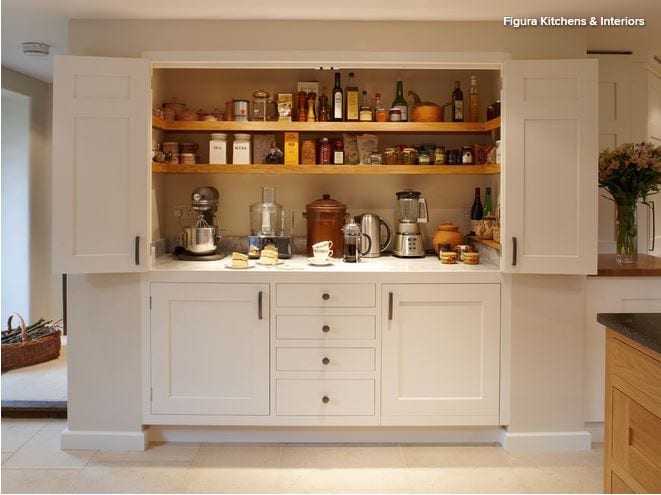
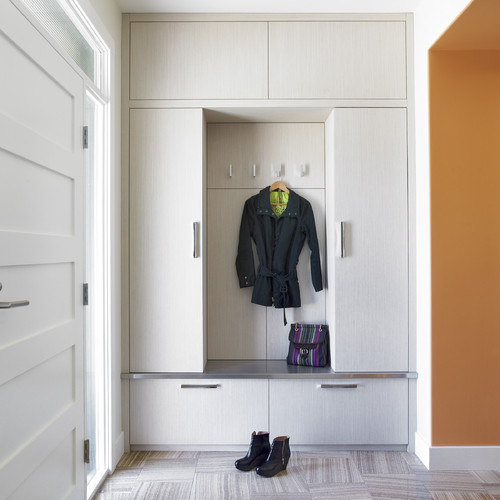
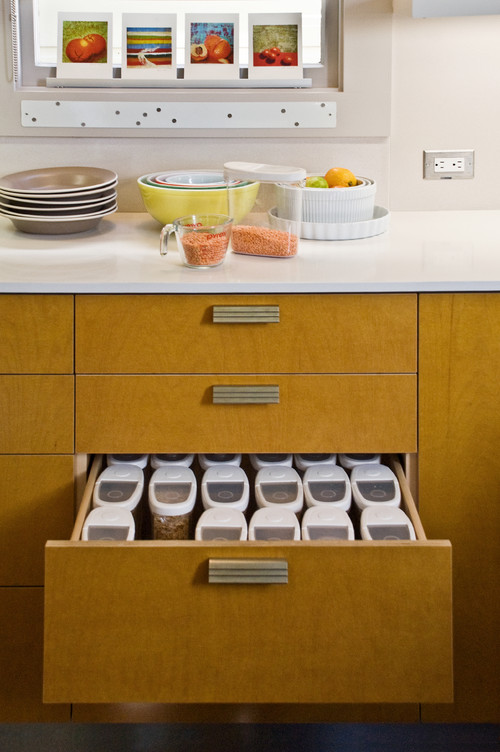
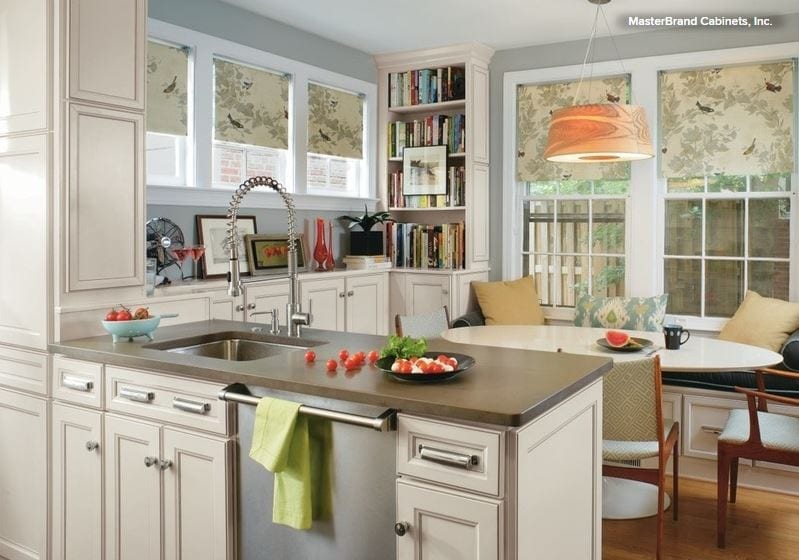
Scale up. A pantry that’s also a breakfast station is sure to set any storage fanatic’s pulse racing. This is perhaps the ultimate piece of kitchen furniture, one most of us can only dream about. 

It combines oodles of storage with a dedicated space where you can prepare your coffee and toast. You can then stand and gaze at your neatly arranged shelves while you eat. Life doesn’t get much better than that, does it?

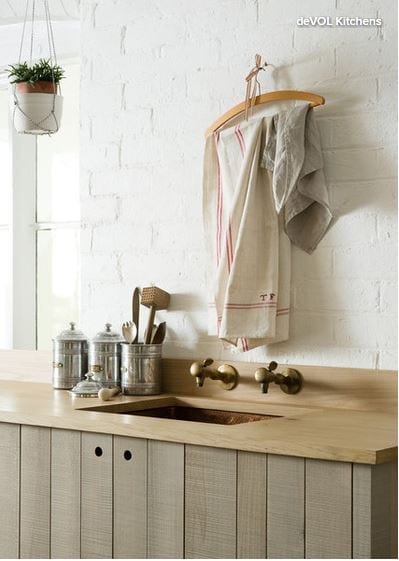
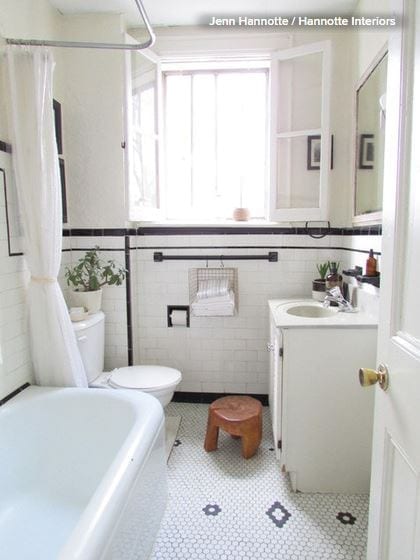
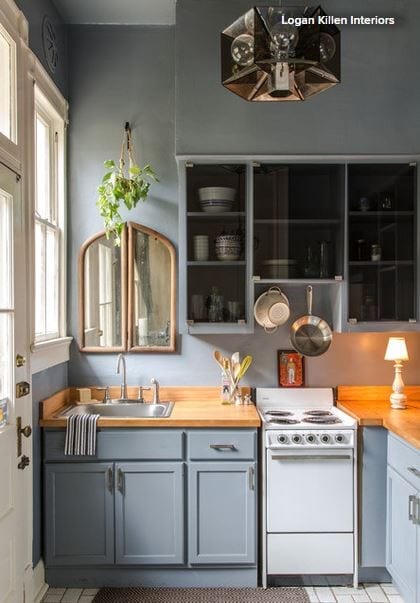
Repurpose a hanger. Dish towels go on a cupboard or oven door handle, right? Wrong. You can hang them on a hanger that is hanging on the wall! Original, quirky, inexpensive storage.


Cabinet Storage Solutions 5

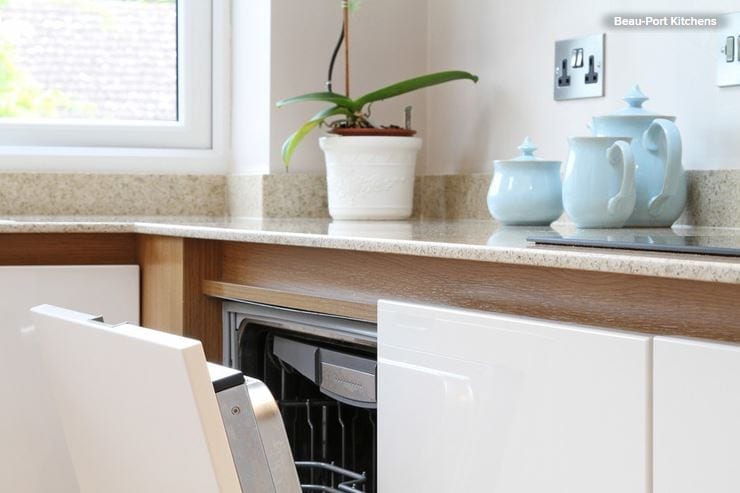
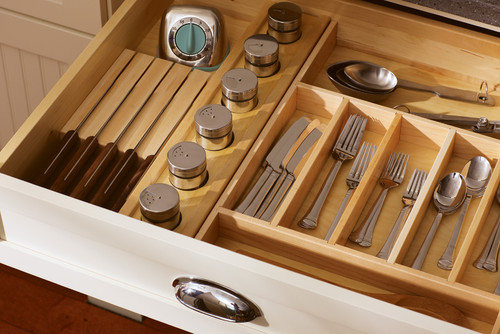
Carve out space for the unwieldy. Chopping boards and trays are sizable, often heavy pieces that benefit from a dedicated home like this compartment incorporated into a run of cabinets. It’s such a simple little storage detail, but so invaluable.


Cabinet Storage Solutions 6

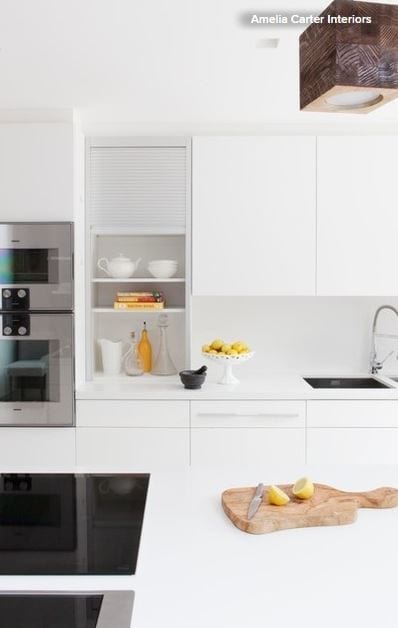
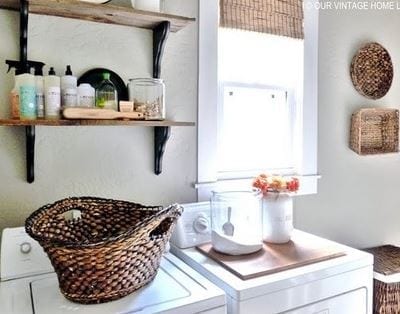
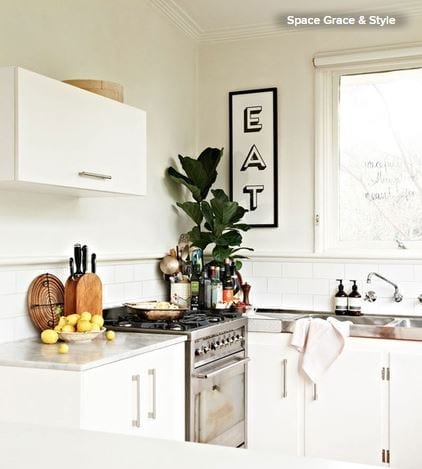
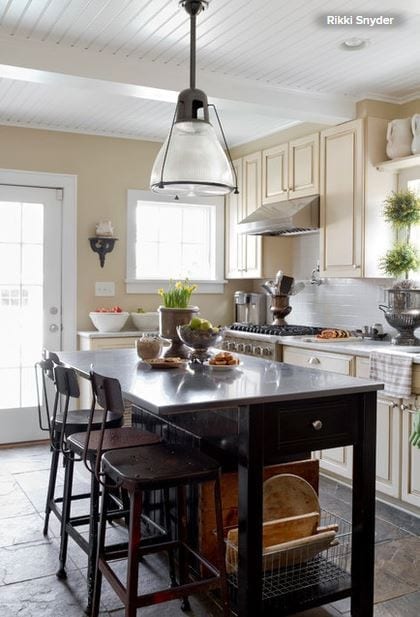
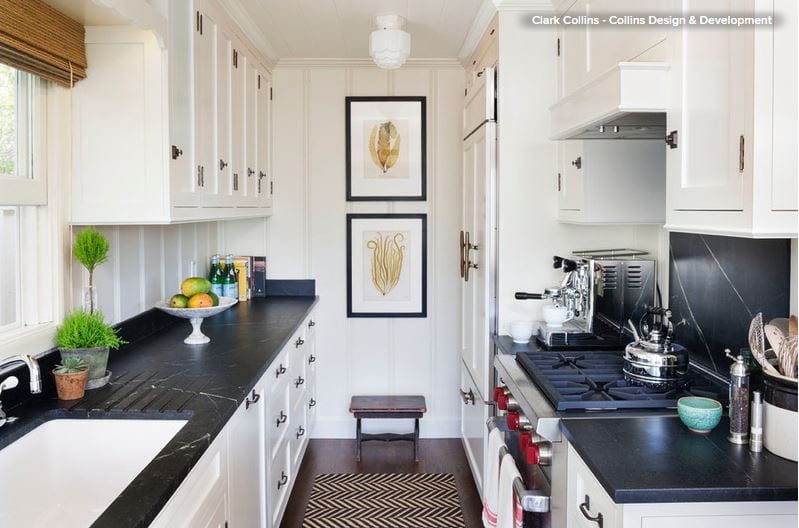
Ditch convention. This pale and unpretentious kitchen may not be to a neat freak’s taste, but there’s something to be admired in its anything-goes approach to storage. 

Superficially cluttered though it may appear, I suspect its owner knows exactly where everything is and that all the essentials are within a quick grab from the stove.

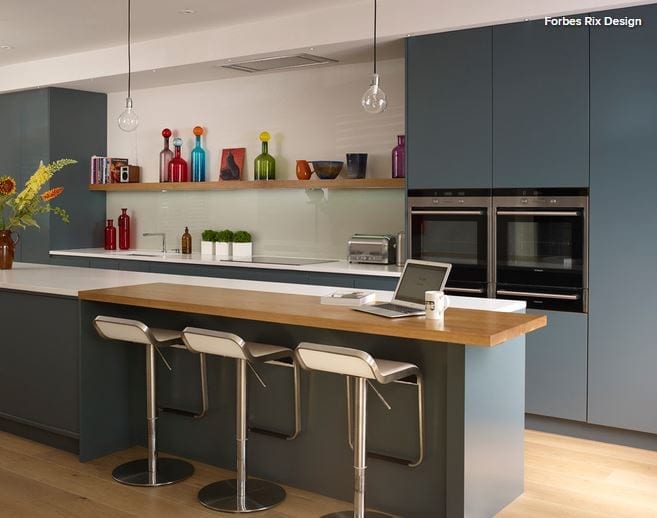
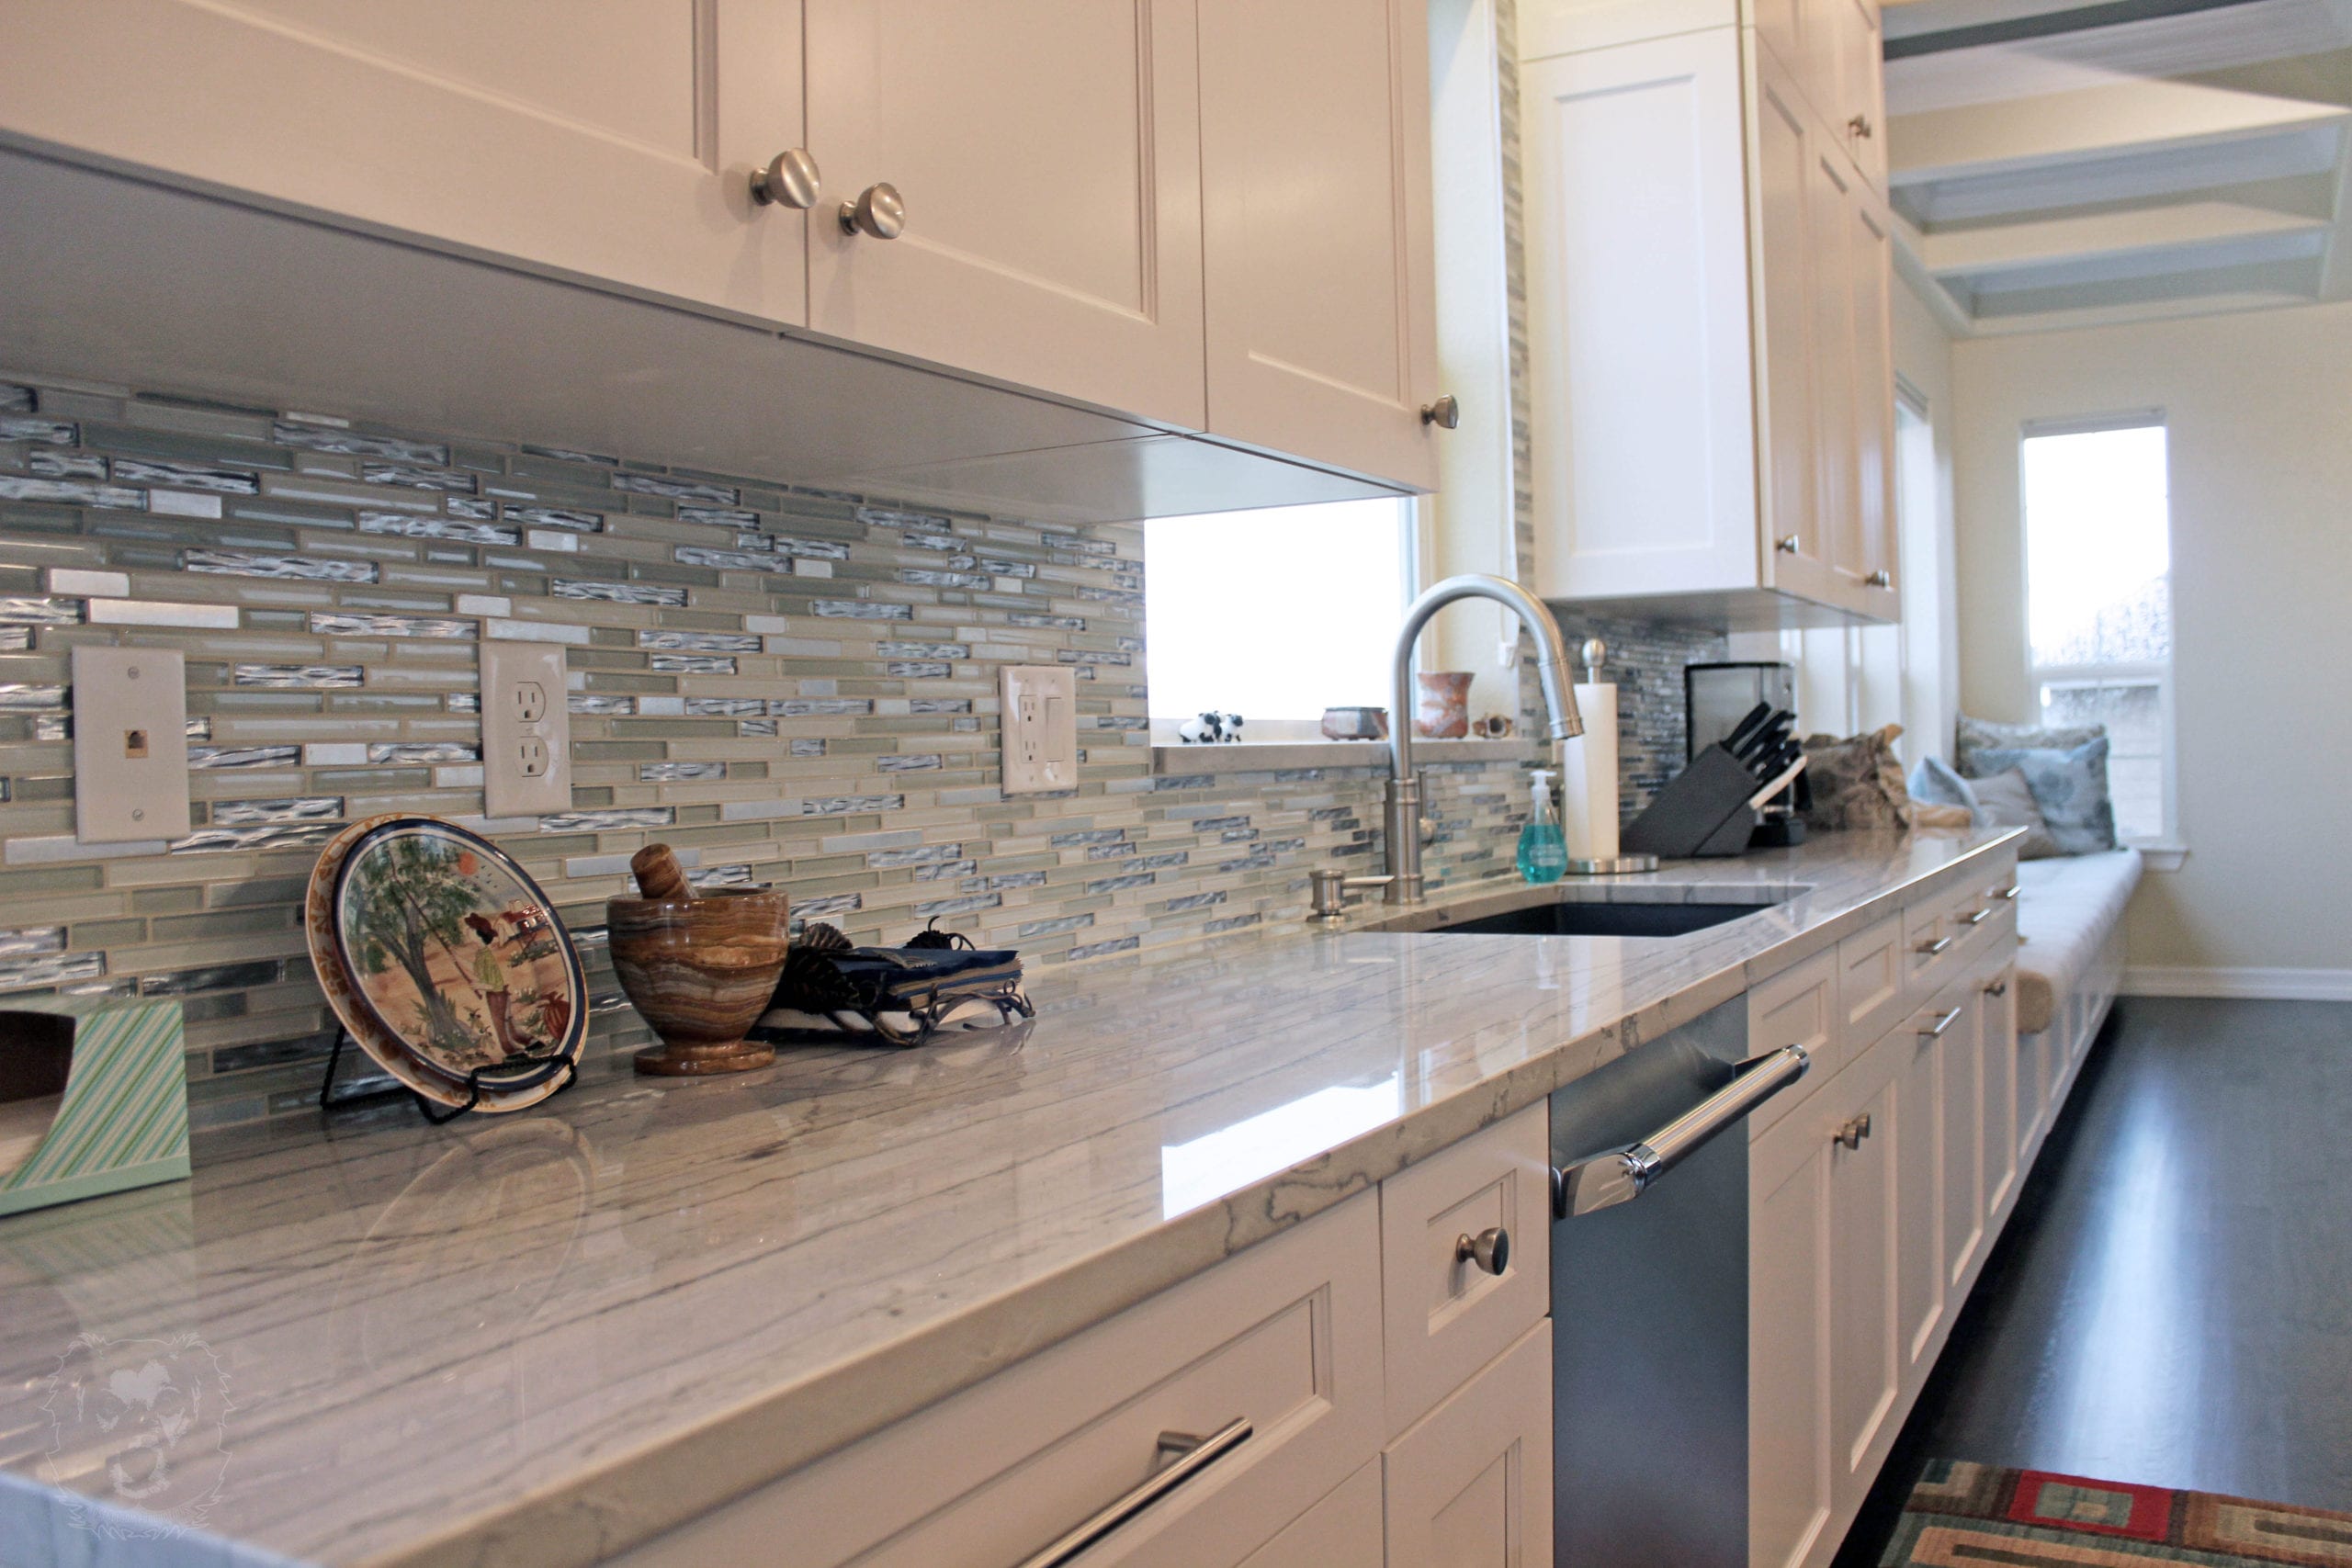
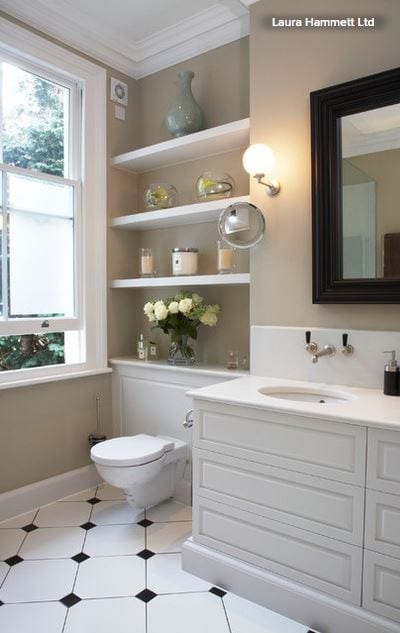
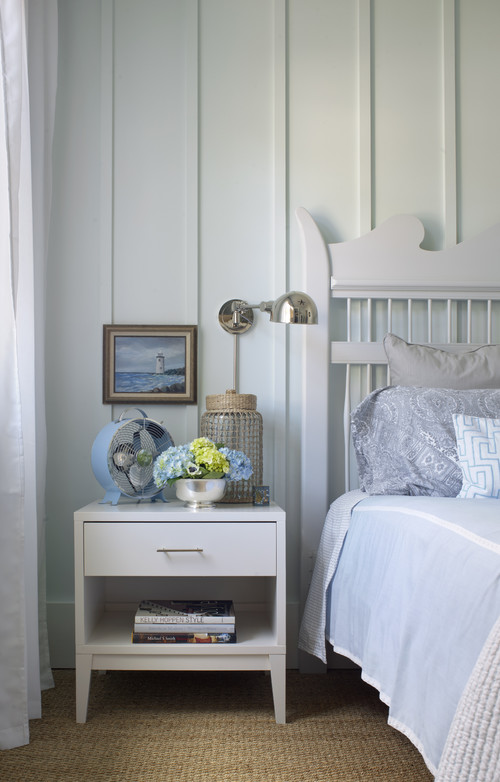
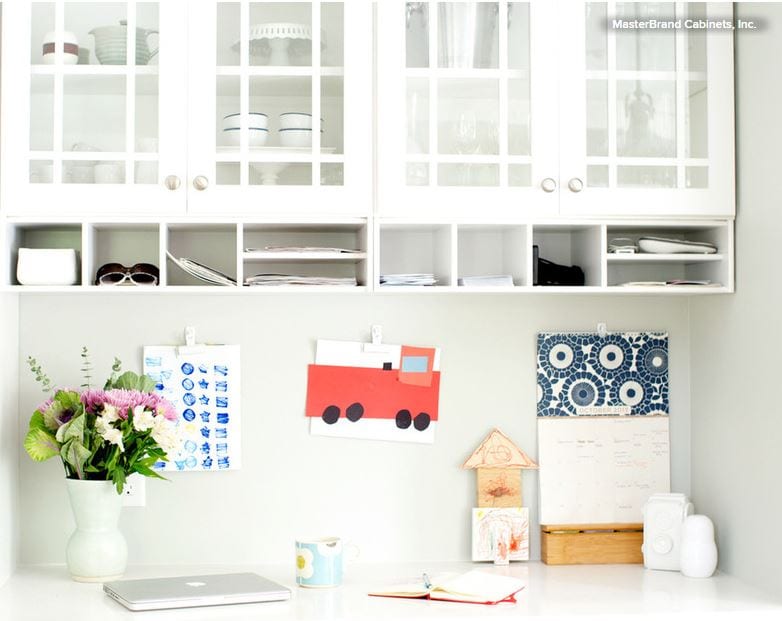
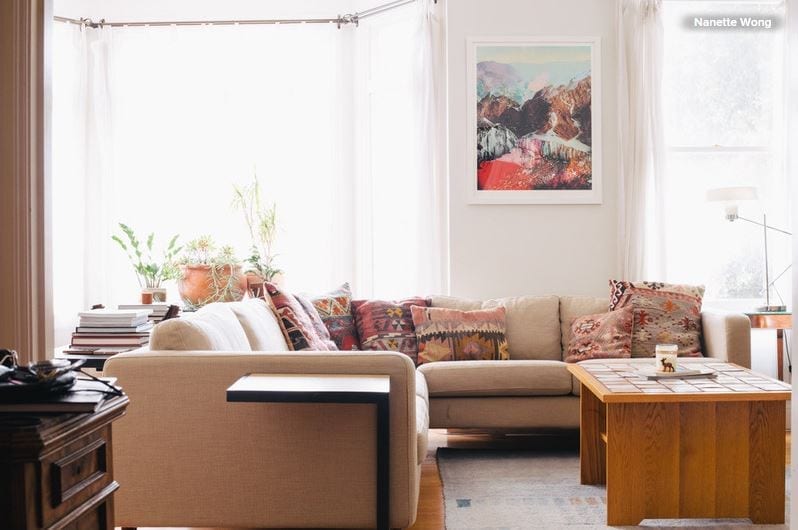
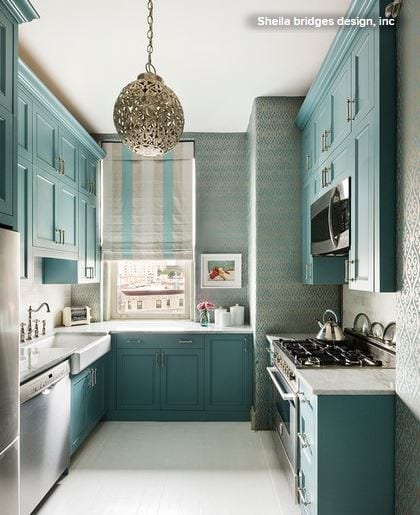
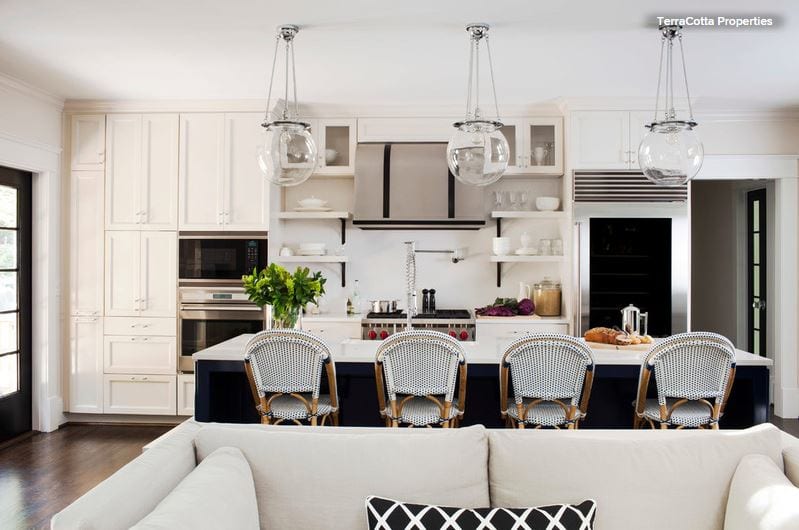
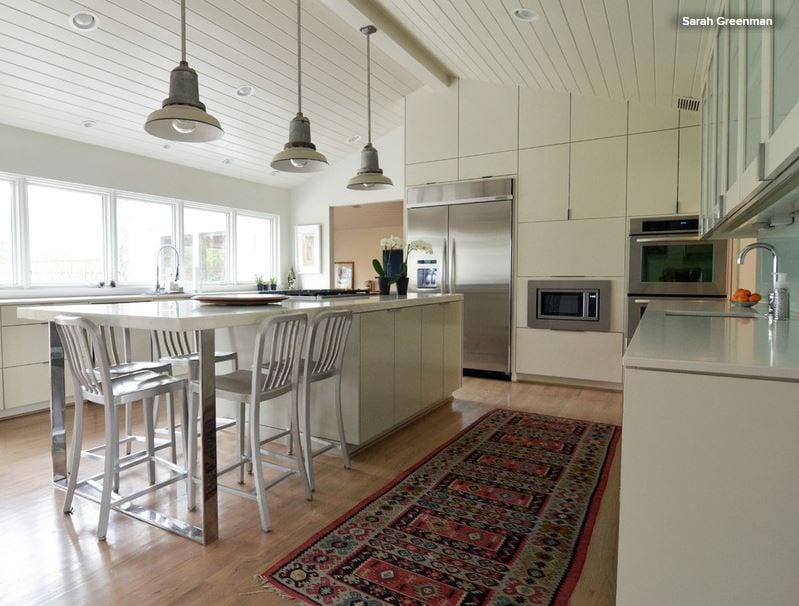
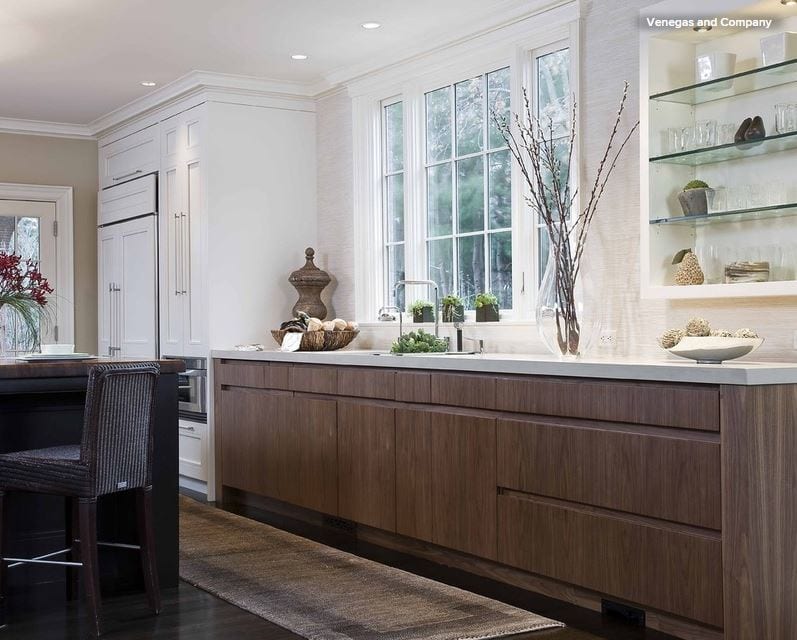
Opt for a lovely long shelf. There’s a growing trend for long shelves that simply break up a run of units rather than provide workaday storage. They can become home to beautiful objects or the odd cookbook or plant, helping to personalize a built-in design and lighten its look.


StorageSolution8.JPG

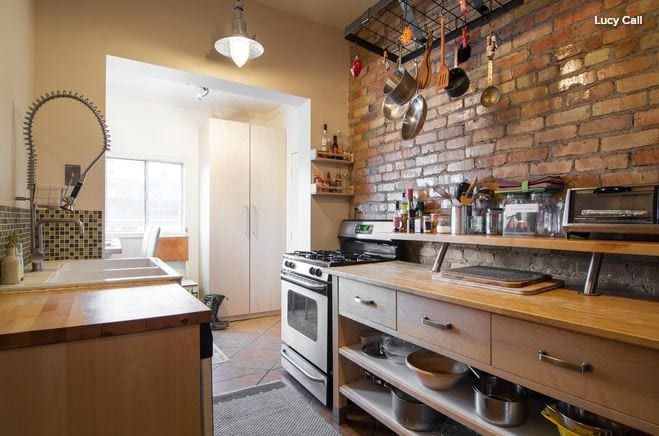
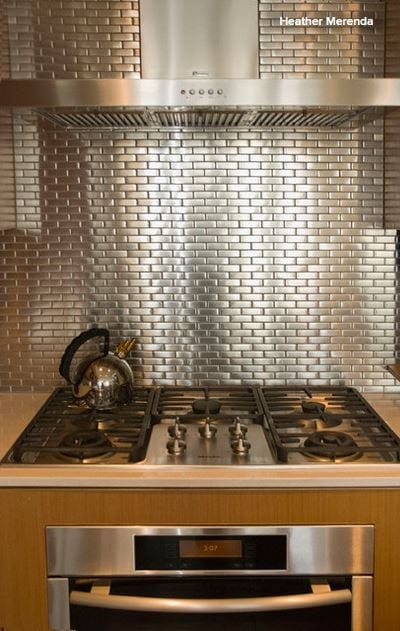
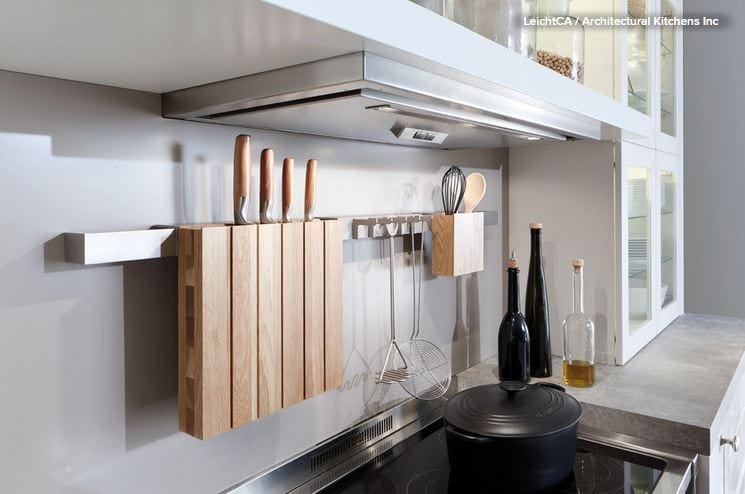
Hang it high. Making use of vertical space is a smart move in a kitchen, where storage often has to be worked into a small footprint. This space features a metal rack that was probably never intended for a kitchen but works beautifully holding pans and utensils. 

It’s attached high on the wall to reduce the risk of banging a head against a frying pan!

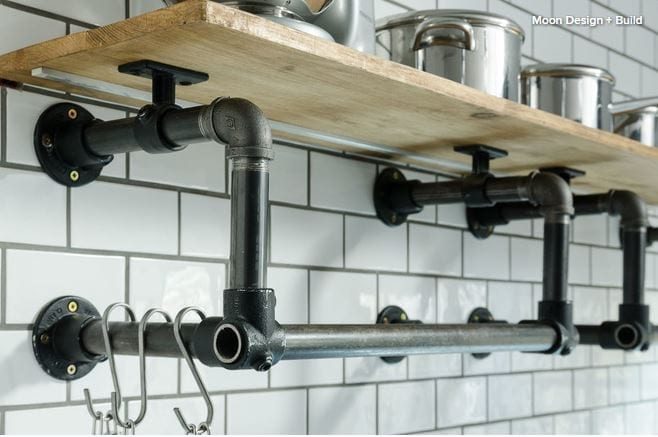
Resist the sleek. Kitchen design often tends toward the sleek and efficient, but it can also rock a more edgy, homemade look while still packing in tons of practical storage. So think laterally and use old piping and boards to make some shelving — you’ll get storage and original style at the same time.

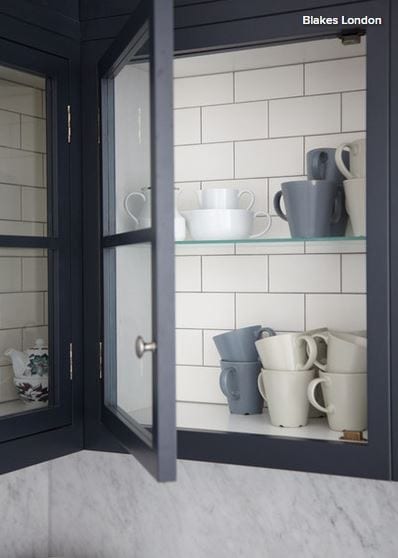
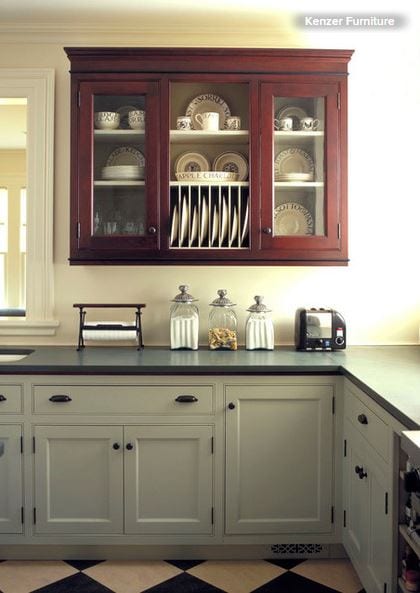
Add a twist to the typical.Kitchen storage needs to be well-designed and abundant enough to hold everything from mugs to marmalade. But really great kitchen storage does it while adding a twist of unique style. 

These glass-fronted cupboards are fairly basic, but the tiling on the interior adds detail and interest and contributes to the kitchen’s industrial feel.

All the Details on 3 Single-Sink Vanities

Article by: Becky Harris, Houzz

There are more decisions that go into planning a bathroom vanity than you might think. Since January is the month when the most people go in search of the right vanity, we decided to take a closer look at them. In this story we focus on three single-sink vanities designed for three different situations. We chose three fairly modest full bathrooms, ranging from 50 to 74 square feet, and looked at each vanity’s style and dimensions, sinks, faucets, color, materials, hardware, storage, countertops and lighting.

Read more

3 Kitchens With Hardworking Storage Walls

Article by: Mitchell Parker

Storage is on everyone’s mind when creating a kitchen. But when smartly planned, storage can do a lot more than store your dishes, cookware and food. A multipurpose storage wall can free up room for an airier design that allows for a large island with plenty of work and eating space. These three kitchens show how it’s done.

Read more

CREATING ECO SUSTAINABILITY IN COUNTERTOP FABRICATION

Granite Countertop in Denver Kitchen

When it comes to construction of any kind, environmental concerns are more important than ever. This is why The Top Shop Inc (AC&F) partnering with VT Industries, is committed to providing sustainable products and using environmentally friendly manufacturing methods.

Our production facility located in Denver, Colorado works hard to keep emissions and waste to a minimum, conserve natural resources, and protect local ecosystems. This strategically located facility, allows The Top Shop Inc. (AC&F) to provide the shortest lead times available but more importantly, reduce harmful vehicle emissions that contribute to air pollution and ozone depletion.

Every post form countertop we offer is GREENGUARD Indoor Air Quality Certified®. The Top Shop Inc. (AC&F) partnering with VT Industries, is the first and only laminate countertop product to receive this low-emitting certification, ensuring our product will contribute to healthy indoor air and building occupant wellness.

With EQcountertops, The Top Shop Inc. (AC&F) takes the sustainability of our countertops to the next level. Manufactured using 100% pre-consumer recycled particleboard, water-based adhesives and GREENGUARD Certified laminate, EQcountertops meet multiple green building standards, including Leadership in Energy and Environmental Design (LEED®) and NAHB’s green building guidelines.

Best of all at The Top Shop Inc. (AC&F), we’re continually adapting our manufacturing techniques and providing innovative products to ensure environmental responsibility. All employees—from production to accounting—are involved and encouraged to find innovative ways to make our business efficient and effective.

How to Keep Your Stainless Steel Clean

Article by: Bonnie McCarthy

For the past few years, designers have debated whether or not stainless steel will continue to reign supreme in kitchens across America or lose its popularity to glossy black or white appliances boasting sleek, smooth finishes.

While the trendsetters debate, however, millions of us continue to choose to live with the commercially cool look and functionality of stainless steel. Whether you have a little or a lot of the shiny stuff, here’s what experts suggest we do about those fingerprints, and how to care for and clean one of the hardest-working surfaces in the house.

Keeping Stains off the Stainless. Aside from looking great and having a smooth, nonporous surface that hinders the growth of bacteria and other microorganisms, one of the reasons stainless steel is so widely used in professional kitchens is that it won’t rust easily in spite of daily wear and tear. 

Unfortunately, that doesn’t mean rust and stains can’t happen.The experts at the North American Association of Food Equipment Manufacturers say that if the protective film on stainless surfaces is scratched with a steel pad or wire brush, comes into contact with hard water that is allowed to puddle or sit, or is exposed to chlorides from household cleansers, it becomes vulnerable to damage.

Safety first. For safe care and cleaning, start with the right tools. The European Stainless Steel Development Association, or ESDA, suggests using soft sponges and microfiber cloths as the first line of defense.

Don’t clean with steel scouring pads, which can scratch. Instead choose plastic scrubbing pads for tough jobs.

Go with the grain. On stainless steel surfaces with brushed or polished finishes, always wipe and scrub in the same direction as the “grain” lines in the metal.

Better with age. The ESDA says in addition to the availability of an increasing number of fingerprint-proof finishes, regular stainless steel shows fewer fingerprints over time. Patience is a virtue.

Stainless solutions. When it comes to choosing cleaning products, Mindi DiNunno, owner of Polished 2 Perfection, says whatever you decide, the key to cleaning is sticking to it. “Stay consistent,” she says. “Most cleansers don’t blend together well, and it makes it much harder to keep perfect. For appliances, we use CLR [Stainless Steel Cleaner]. It will clean off any hard-water stains from the water and ice dispenser and any drips or food.” 

Like the other experts, she says to make sure to go with the grain.

Since products containing chloride can be harmful to the protective finish on stainless steel, the ESDA advises using the following:

  • Diluted vinegar (for cleaning limescale)
  • Baking soda (to remove coffee deposits)
  • Alcoholic solvents, such as acetone (for removing adhesives)
  • Chloride-free glass sprays (especially efficient for polished, mirror-like surfaces)
  • Commercially manufactured pastes and sprays that specify use on stainless steel

Naturally clean. For a DIY approach to cleaning using pantry items, the sustainable-living team at Eartheasy advises dampening a cloth with undiluted white vinegar or olive oil and wiping in the direction of the grain.

To clean a stainless sink, it suggests pouring club soda on an absorbent cloth to scrub, then wiping dry.

Shine on. Spray cleansers made specifically for cleaning decorative stainless steel surfaces usually contain silicone oil, and although they will remove fingerprints and smudges, they will not prevent them. The ESDA says the silicone oil can be completely removed by washing with mild soap and water. 

Using a polishing paste is another way to keep stainless sparkling. Commercially sold pastes, such as 3M Marine Metal Restorer and Polish, will create a microscopic wax layer on the surface that will make it easy to clean. Since the pastes are resistant to detergents, treatment with a polishing paste may last several months. It can be removed using alcohol on a soft cloth.

It’s important to note that pastes and sprays meant for cleaning decorative stainless steel elements — refrigerator doors, kitchen backsplashes — should not be used on pots, pans or surfaces where food is prepared.

Do not use silver dip polishes, like the ones used for cleaning jewelry, because they are corrosive to stainless steel.

10 Ecofriendly Tips and Tricks for Cleaning Your Home

Article by: Luisa Rollenhagen

Chemical based cleaning products have drawbacks: They’re pricey, they may trigger health issues and their manufacture, use and disposal can harm the environment. So if you’re approaching a spring cleaning of your home this year, why not consider these effective all-natural cleaning alternatives?

Lemon

Lemons are nature’s cleaning wunderkind. They have powerful antiseptic and antibacterial properties and are a natural deodorizer due to their high acidic content. Here are some suggestions for how to use lemons in your home: 
Have your copper pans lost their shine? Dip half a lemon in salt or baking powder to scour your pans to their former glory.Mix a bit of lemon juice with baking soda to remove stains from plastic containers. Combine lemon peel and white vinegar in a jar, allow to marinate for a few days, then strain out the peel to use the vinegar as a cleaner. A small dish containing vinegar and lemon juice will absorb odors.Rub a slice of lemon across your chopping board to disinfect the surface.

Baking Soda

Baking soda, like lemon, is another one of nature’s cleaners. Also known as sodium bicarbonate, this mildly alkaline substance functions as a gentle abrasive, deodorant and more. 

A thick paste of baking soda and water can be useful in removing surface rust. A more liquid mixture of baking soda and water can function as an all-purpose light cleaner that’s particularly effective on grease. 

Clean your oven. A thick paste of baking soda and water can be applied to the bottom of the oven to clean it. Let it sit for a couple of hours or overnight before scraping it off and wiping the surface.

Brighten the bowl. Baking soda also is a winner in the bathroom. Throw a cup of baking soda into the toilet bowl and let it sit for more than an hour. Then add a cup of white vinegar, let the mixture sit for a while longer, and flush.


Safely clean your clothes. Baking soda also is a great addition to your laundry room. When added to your washing machine, it can soften your clothes and remove any unpleasant odors.

Fun fact: If your clothes happen to be contaminated with uranium, add a cup of baking soda to the wash to get rid of that pesky nuclear radiation. This sounds like a joke, but it’s not. Apparently scientists have discovered that sodium bicarbonate will bind with depleted uranium dust and remove it from clothes, which chemical detergents can’t manage. Talk about an all-purpose cleaner. Nonetheless, don’t go playing in uranium dust anytime soon, kids.

White Vinegar

Mentioned a couple of times already, white vinegar is a weak acetic acid that can be used in almost all aspects of home cleaning, as it has strong antibacterial properties. 

Vinegar diluted in water is an effective stain remover for various textiles. It’s also a great natural deodorizer, and can be combined with various other natural products, such as lemon juice, to absorb odors. Simmer vinegar with water on the stove while cooking to prevent cooking odors. Vinegar can help remove strong scents left over from fish, onion and garlic too.

Refresh your dishwasher. If your dishwasher could use a thorough cleaning, ditch the expensive chemical tabs and instead fill a dishwasher-safe bowl with two cups of white vinegar and set it on the top rack. Let the otherwise empty dishwasher run one cycle to get rid of any odors and bacteria.

Descale your kettle. Vinegar is your friend again here, although you can use lemon juice, too. Pour a 50/50 mixture of white vinegar and water into your kettle, allow it to boil, then rinse the kettle out once it cools down a little but is still warm.

Make your windows shine. Vinegar to the rescue again. Fill an empty spray bottle with a 50/50 mixture of white vinegar and water and use a microfiber cloth to wipe down your windows and avoid any streaking. This also works wonders for mirrors.

Keep those tiles sparkly. The grout between tiles in the bathroom can quickly accumulate mold, which is both unsightly and unhealthy. Remove it by mixing one part carbonated water with one part white vinegar and spray it on the moldy areas. 

If the grime still doesn’t scrub off, add two parts baking soda to the vinegar-water mix to make a thick paste. Let the mixture sit on the grout for at least 15 minutes before scrubbing it off. 

Got a Disastrously Messy Area? Try Triage

Article by: Alison Hodgson

For those of us who are Not Naturally Organized, running a household can be overwhelming. “I don’t even know where to begin” is a common lament. We look at our Naturally Organized family members and friends and wonder how they do it. How do they stay on top of everything? 

The short (and terrible) answer is, they never allow things to get out of hand. 

“Well, that’s not helpful,” you may be thinking. What if — asking for a friend — your house is completely out of hand and has been for some time? Where do you even start?

You start with a system designed especially for disasters: triage.

In medical terms, triage is the process of sorting victims of a battle or disaster into three categories:

  • Those who will probably live whether or not they receive care
  • Those who will probably die whether or not they receive care
  • Those whose lives may be saved by immediate care

But we were talking about houses! What does triage have to do with cleaning?

Consider a personal example. My home (which is not the one pictured here) has an open-concept plan. The front door opens into a small entry, and from there you can see it all: kitchen to the left, living room to the right and a long harvest table straight ahead. 

I told you before how I ignored one end of our dining room table while I focused on keeping our kitchen island clear. The north end of our table was dead to me while I worked to save our island and, really, our entire kitchen. The living room was never in any danger; I had that well in hand from the very beginning. 

Triage worked. I focused my energy on keeping the kitchen counters clean and cleared and allowed my family’s mess to accumulate on the table. Once maintaining the kitchen became habitual, I turned my attention to the table. We’re still building our housekeeping muscle there, but more often than not it’s clear.

In my kitchen I prioritized using the triage system: Everything on the outside (counters, sink, cabinets, appliances) is kept neat and clean, but a few of my cabinets aren’t well organized. My baking cupboard is a jumble, and so is one of the cabinets where I store food storage containers. For the first I need to buy containers to decant my dried goods, and for the other, adding another shelf would probably solve the problem. For now these cabinets are in the first category of triage: They’ll live. I’ll get to them later. 

If my desk met this desk at a party and tried to strike up a conversation based on commonalities, “I too am a wooden and horizontal surface” is pretty much all it would have to say.

On the other end of the spectrum is my desk. I have a small study just off the living room, accessible by French doors. There’s just enough room for a daybed, bookshelves and my desk. I keep the daybed neatly made, and it’s a favorite spot where my kids read. The desk is a hellhole, pure and simple, and forever it’s been in the most dire category of triage: as good as dead. I have been willing to shove piles of paper around until I noticed that my Naturally Organized husband (who often brings work home on the weekends) always sets up at our dining room table. I asked him if he would like to work on the desk in the study if I cleared it up, and he said yes, so the desk is getting moved up to the life-saving category.

If you would like to try triage for your own disaster relief, here are a few things to consider: 

Start with what’s visible. This is obvious, but it can go against the instincts of those of us who are Not Naturally Organized. How many times have you said, “We’re getting this place all cleaned up!” and then dumped out drawers, taken everything out of cupboards scrubbed them and then collapsed half-way through sorting everything and ended up with an even bigger mess? Yeah, me too. We tend to swing between perfection and squalor. 

If you’re cleaning the bathroom, just clean it. Scrub the sinks, tub and toilet; sweep the floor; wash the mirror; but do not clean out the cabinet under the sink. When cleaning has become habitual, then you can go for it.

Lower your standards. We love our pretty pictures, and there is a tender ache reserved for beautifully organized spaces. Show me a pantry with containers neatly labeled, and you have my heart. 

The day my house burned down, seemingly out of nowhere my arm shot in the air, and I shouted, “We’re getting a walk-in pantry!” Everyone attributed that to shock, but I was absolutely clear, and today I do have a walk-in pantry with shelves floor to ceiling. I love it. Is it swoonworthy? No. Does it store a ton of food, extra serving pieces, cleaning supplies and small appliances? Definitely, and it’s organized enough.

Don’t trust your instincts. Those of us who are Not Naturally Organized need to check our impulses when we decide to clean and organize. What we’re itching to do is rarely what we ought to do. For example, we have built-in bookcases flanking our fireplace. When we moved a year after the fire, the books I replaced numbered in the hundreds and not the thousands I once owned. As I continued to buy books, I simply set them on the shelves without a lot of organization, and that’s been fine. They’re routinely dusted and pulled forward so they’re always neat, and yet I have been longing to empty all the shelves and reorganize everything. 

This is a little tricky because this needs to be done, but not today. Before I tear into that project, I need to install some shelves in the study and really, of all the things I have going on, it’s a lower priority. My books are totally in category one. They’ll live without rearranging.

Organizing Secrets: It’s the Little Things

Article by: Laura Gaskill [Houzz]

Imagine walking into someone’s home, opening the junk drawer and seeing not a pile of junk, but neat little compartments holding necessary items. A pantry where the jars and cans are lined up like soldiers, shelves labeled and not even close to overflowing; a sock drawer where every sock has a mate. 

For a home to be kept thoroughly organized, you have to be mindful of the smallest habits, the tiniest motions and details — otherwise things rapidly descend into chaos. But is all that mindfulness possible for a mere mortal? I am beginning to think that what separates the truly organized from the rest of us is how the little things are handled. What if, by starting with a commitment to keep one small area of your house ultra tidy, you were able to create a domino effect that eventually affects every room? 

Here we’ll take a look at eight small areas that can be problems and ways to transform them into beacons of an organized life. 

The bedside table. 

I admit it; I have been known to carry huge stacks of books, magazines and notebooks — more than any human could possibly read in a week, let alone in one sitting — to bed with me. 

The teetering mass flows over the bedside table onto the floor, tumbles under the bed and inevitably spreads onto the adjacent radiator cover. And really, that’s fine … for a short time. But if you have a similar problem, and the mess stays (or grows) all week long, it may be time for an intervention. 

I plan to start by adding a small vase of fresh flowers, a candle and a small piece of art beside the bed. Having something lovely to wake up to seems like a positive motivation to take that extra minute in the evening, before shutting off the light, to put the books, tablet or magazines away. This seems like such an easy fix, I may start with this as my first new habit.

The entry. 

The main problem here tends to be the habit of leaving lots of things out because you may want them at some point during the week. 

To transform this area, start thinking about only the next day. Will you wear those boots again tomorrow? What about the jacket, scarf and bag? If not, put them away in a main closet instead of letting them pile up by the front door. 

Set out just what you need, and not only will your entry look neater, but you’ll get out the door more quickly and easily in the morning.

The utensil drawer. 

We all have that one main kitchen drawer that houses utensils — no problem there. But it isn’t just utensils, it it? It also likely holds a random assortment of cooking tools, cookie cutters, various thermometers, broken chopsticks and a few stray rubber bands … at least mine does. 

The problem here, I think, is that the utensils don’t quite fill the drawer completely, which leaves ample room for marauders like leftover skewers from the barbecue last July. I suggest we start thinking of this drawer as the kitchen workhorse drawer: Let it contain your everyday flatware, plus any other small tools you reach for constantly (measuring cups and spoons, an extra timer), and that’s it.

The pantry. 

Containers are a problem in the pantry— they look messy, and the jumble of sizes and shapes makes it hard to find things. 

Decanting the things you buy constantly into airtight containers is definitely something a highly organized person would do. Don’t, however, fall into the slightly less organized person’s trap of buying all of those special containers, decanting everything into them one time and then continuing to buy regular packages and shoving them in on top of the pretty ones, which then tumble over, completely ignored and neglected.

I suggest starting instead by making it a routine to go through the pantry every time you go to the market. Consolidate containers, clear out old stuff and wipe down the shelves. Add a few nice wire baskets if you want to corral wayward boxed goods. 

And if you do want to upgrade to pretty matching containers, remember to label their contents.

The junk drawer. Let’s begin by not calling this the junk drawer  call it the “really useful stuff” drawer instead. Batteries, scissors, stamps … this is stuff you need! No actual junk belongs in there. If there is any junk, get it out. If it’s still crammed too full, you probably have some not-so-useful stuff in there, like old birthday cards and that dead cell phone you’ve been meaning to take to the e-waste center. Get that out, too. Now add neat little dividers and give yourself a great big pat on the back.

The bathroom sink. Clutter problems in this area tend to come from a combination of a) being short on time in the mornings, and b) having too many products. Also, it may be necessary to face the fact that you just do not like getting things in and out of a medicine cabinet. 

Try keeping your daily essential toiletries in one or two nice-looking baskets, lidded or not, set atop the sink or toilet. Should you buy another toiletry product that doesn’t fit in your allotted bins, get rid of something else. 

As for time in the mornings, if you make it a habit to put everything back in its place when you are done using it, your getting-ready area will be neat as a pin the next morning, actually making it quicker to get out the door.

The sock drawer. What is it about socks, for heaven’s sake? I’ve given up on always finding every sock’s mate, but I have committed to giving each lone sock an ultimatum: lone socks no longer live in my drawer. They are immediately booted back to the laundry room, where they will remain until another cycle of wash has gone through. If no mate has been found by that time, it goes in the trash. 

This works amazingly well, and I’ve found that my family has lost very few socks since putting this system in place. To take it to the next level, you will need some sort of drawer dividers to give each pair of socks and tights their own cozy little home. I think just peeking into a drawer this organized would make me feel more positive about life in general.

The coffee table. The coffee table was never much of a problem in my house until we had a child. Now we rarely see the top of it. It does seem unnecessary to get too regimented about keeping surfaces perfectly cleared throughout the day, but a once- or twice-daily clearing of the decks can help keep this area neat. Having a nice tray to place on top can help give you something to aspire to — knowing your coffee table has the potential to look cute may be enough motivation to get you to keep it that way.

Read more from Houzz: The 5 Decisions That Can Lead to Clutter

To-Dos: Your January Home Checklist

Article by: Laura Gaskill

With the shortest days (and longest nights) of the year, midwinter can certainly live up to its bleak reputation— but this season also encourages slowing down, simplifying and getting cozy. This January, take advantage of the momentum a new year brings to clear out clutter, start a healthy habit and make plans for the year ahead. Here are 15 ideas for a refreshed and revived home.

1. Do the postholiday cleanup. Pack up holiday decorations carefully for next year and give your living space a thorough cleaning to pick up stray pine needles. Break down cardboard boxes, gather wrapping materials to recycle and find homes for holiday gifts.

2. Buy flowers and light candles. Boost spirits on short winter days by lighting candles (real or battery powered), and indulge in cut flowers from the market or a new potted houseplant to freshen the air.

3. Create space to get some exercise indoors. Especially if winters are cold where you live, making a workout zone in the house can be a great help in staying healthy when you can’t get outside. Even a corner of a room cleared of furniture can be enough space for rolling out a yoga mat or working out with weights.

4. Give your command center a reboot. The spot where you drop items as you walk in the door can be a clutter magnet. Make a fresh start for the new year by clearing away the paper, old pens, rubber bands and other random items that have migrated into your command center. Clean the surface, remove old notices from the bulletin board and put up a new calendar.

5. Sharpen knives. Cooking with sharp knives cuts down on prep time and is safer, too. Take your kitchen knives to a pro to be sharpened, and maintain them between sharpening sessions with a honing tool at home.

6. Give your kitchen a healthy makeover. Making a resolution to eat more healthfully? Start by clearing those less-healthy options out of your pantry and fridge. Place fresh fruits and vegetables front and center, and put healthy-food prep aids, like a juicer or blender, on the counter where you are more likely to use them.

7. Check smoke and carbon monoxide detectors. With more heater use and wood fires in the fireplaceand less opening of windows, winter is an especially important time to make sure those smoke and carbon monoxide detectors are working. Use the test button on each device and change batteries as needed.

8. Clear clutter responsibly. If you are doing a new year’s purge of unwanted items, keep things out of the landfill and help others by donating gently used items to a good cause. For other items be sure to recycle responsibly — try the Earth 911 recycle search to find a recycling center that accepts electronics, paint, clothing and more in your area.

9. Gather home inspiration and set goals. Whether you’re thinking of remodeling or simply picking a new paint color for the living room, use downtime in January to do some research and make plans.

10. Plan your spring garden. Scoop up a stack of seed catalogs, a notepad and a pencil, and pour yourself a mug of tea — it’s time to sketch out ideas for this year’s garden. Drawing your plans on paper is a good way to keep things realistic (can you really fit five kinds of tomatoes?) and plan paths and hardscaping components at the same time.

11. Rest, relax and appreciate what you have. Take a cue from the natural world in winter and slow down this season. Get cozy at home and embrace simple pleasures like reading a good book, making a big pot of soup or indulging in an afternoon nap.

12. Protect pipes from freezing if you leave. For trips away from home in cold weather, leave your thermostat turned up enough to keep the house from freezing — the American Red Cross recommends setting the thermostat no lower than 55 degrees and leavingbathroom and kitchen cabinet doors open to warm exposed pipes. For longer trips away when the weather is expected to dip below freezing, have a friend or neighbor check on your home regularly, and show the person where the water shutoff valve is, just in case.

13. Inspect your home after winter storms. Make a habit of taking a walk around your property after big winter storms to check for damage from fallen tree limbs, ice and snow.

14. Take down and store exterior holiday decorations. Pack away the holiday lights and decorations for next year — use dividers to separate strands of lights to prevent them from becoming hopelessly tangled.

15. Help out the birds. Non-migrating birds have it tough in winter. Keep those bird feeders filled with seed, and set out water regularly (or invest in a heated water dish) to provide a water source when most of the water they would normally have access to is frozen.

10 Upgrades for a Touch of Kitchen Elegance

Article by:

“Elegant” “sophisticated,” “simply beautiful” — are these words you would use to describe your dream kitchen? Even just adding a coat of paint, new lighting and carefully chosen decorative details can bring your current kitchen a bit closer to that dream. Here are 10 upgrades to consider.

1. Roman shades. Covering the window with a classic Roman shade gives the kitchen a finished look. Go with a color and a pattern that coordinate with your cabinet and wall color, or stick with natural linen, which goes with everything.

2. Topiary. A pair of topiaries flanking the sink is an elegant finishing touch. Use a vintage champagne bucket as a cachepot, or wrap a simple pot in burlap and tie on a velvet bow. If your kitchen gets a good amount of natural light, by all means get real plants — but if not, there’s no shame in picking up a couple of high-quality fakes.


3. Pendant lighting. Swapping out a plain ceiling light fixture for something with more style can be done quickly — and your new pendant light can become the focal point of the room. Don’t be afraid to go big; even in a small kitchen like the one shown here, a sizable pendant looks striking, not overpowering.

4. A rich cabinet color. Whether you paint your cabinets or stain them a natural wood tone, a rich color is a high-impact, low cost way to change the look of your kitchen. Try a saturated hue like the blue-green shown here, or a chic gray or slate on just the lower cabinets.


5. Wall paint. If you don’t want to repaint or restain your cabinets, another way to bring in color is by painting the walls. With all of the appliances and cabinetry, kitchen wall space is often fairly limited — which means not only is it quicker to paint, but the color is less likely to overwhelm than in, say, the living room. Try a smoky blue, rich “greige” or warm mocha.

6. Upscale counter stools. There are so many options when it comes to kitchen counter seating that there’s no reason to stick with plain bar stools, unless you want to. Try classic bistro stools (like the ones shown here), sculptural wooden stools or sleek Lucite ones.

Also notice the pendant lights in this kitchen — if you have a long counter, placing a row of three large-scale pendant lights above is a great way to bring focus to the space. Glass pendants like the ones shown here are elegant and maximize light.

7. Glass cabinet fronts. Update old cabinets by having several of the doors replaced with glass fronts. This costs far less than replacing full cabinets and can completely change the look and feel of your kitchen. Remember, whatever is in the new glass-front cabinets will be visible at all times, so choose just a few cabinet fronts to replace and commit to keeping the interiors orderly.


8. A chic rug. If you’ve shied away from using a rug in the kitchen for fear of spills and stains, try a chic indoor-outdoor version. These rugs come in beautiful colors and patterns now, and no one has to know about the stain-fighting powers.


If you’re not frightened of spills, lay down a beautiful (but not priceless) Oriental carpet. Rugs made from wool and other natural materials are quite forgiving when it comes to stain removal, as long as you act promptly.

9. Branches in a tall vase. Branches last far longer than cut flowers — but more than that, they exude elegance. An armful of seasonal branches plunked in a tall vessel is an easy way to instantly boost the ambience in your kitchen.

10. Decorative details. Framed artwork on the wall — and not just “kitchen” art but art you could just as easily hang in another room — can add polish to any kitchen.

Mirrors are unexpected in the kitchen, and just like in other spaces, they can be a wonderful way to boost light. A small table lamp tucked onto the counter brings a warm glow that makes a kitchen feel more welcoming.