FREE DESIGNS AND ESTIMATES

All the Details on 3 Single-Sink Vanities

Article by: Becky Harris, Houzz

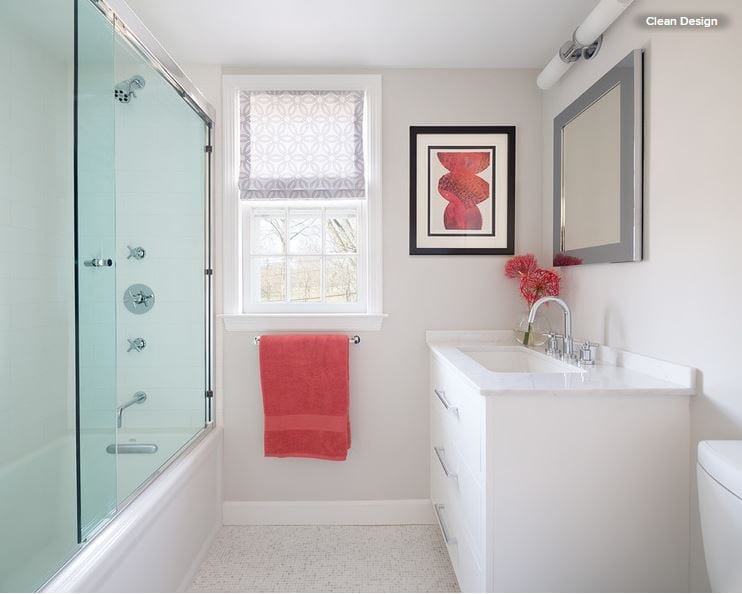
There are more decisions that go into planning a bathroom vanity than you might think. Since January is the month when the most people go in search of the right vanity, we decided to take a closer look at them. In this story we focus on three single-sink vanities designed for three different situations. We chose three fairly modest full bathrooms, ranging from 50 to 74 square feet, and looked at each vanity’s style and dimensions, sinks, faucets, color, materials, hardware, storage, countertops and lighting.

Read more

How to Work With Cabinet Designers and Cabinetmakers

Article by: Matt Clawson

When selecting cabinets for your home, there are questions to ask your cabinet designer and questions to ask yourself. Today we take you through that process, helping you define and communicate your vision while sharing tips on working with design professionals.

In the first two installments of this series, we reviewed cabinet basics. We determined the purpose of your cabinet project and its scope, and provided an overview of your cabinet options. You should at least have a cursory grasp of these concepts before you proceed to the next step: choosing your cabinet designer and beginning work.

Once you have a basic understanding of the cabinet possibilities, you’re ready to firm up your cabinet vision. If stock, ready-to-install cabinets work for you, you may not need a cabinet designer, and you will probably save considerable time and money. But for most projects, and certainly all custom and semicustom cabinet installations, the cabinet design and construction processes should be thoroughly planned and examined.


Finding Inspiration

This goes beyond the scope of your project, and cuts more to the picture in your mind of how the installed cabinets should look and operate. You do not need to have all the answers, but you should at least conceptualize what your finished picture might look like. Be prepared for this vision to morph a bit as you get into the design phase, but take the time to form a picture in your mind. 

Is style important to you? If so, find inspiration among the plenitude of cabinet ideas available on Houzz, or you can emulate something you saw at a friend’s home, on television or in a magazine. The point is, find a specific example that shows a cabinet style that attracts you.

Also, it’s important to decide the primary function. Is it display, storage or improved day-to-day efficiency and livability? 

And if you have to prioritize one over the other, is your primary concern style, or is it simply maximizing cabinet function? You should weigh your priorities, though the hope is, with a good designer and proper preparation, you won’t have to totally settle on one element over the other.

Defining the Details

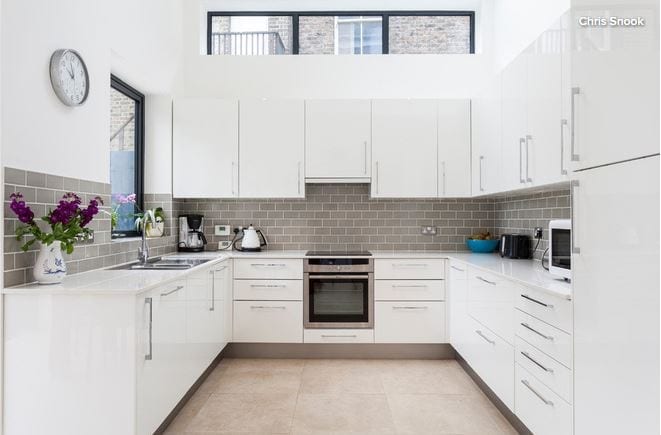
Now let’s take a look at that picture of your project. For the sake of our little exercise, say the photo above is the one you picked. The first question to answer is, why did you pick this one? 

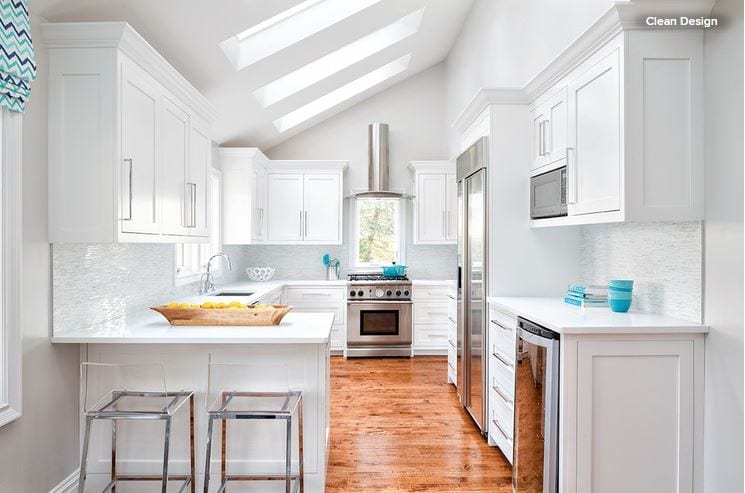
Make sure what you love about this room is in fact the cabinets themselves. These are some of the simplest cabinets you will ever see. There is no display space and there are no visible frills, like crown molding or paneled ends. The cabinets possess a nice high gloss and a stark white finish, and are Euro style (with no visible face frame). They have flat-panel doors and drawer panels, and oversized chrome hardware pulls. They are modern and spartan. 

Do you like all of that? Perhaps what really attracted you to this space was its utilitarian, U-shaped layout, with a full backsplash of uniform beige subway tiles. Maybe you admire the lofty ceiling with a high-set, horizontal window. These parts of the picture relate, of course, only if you too can achieve those elements in your space. Try to look closely just at the cabinets themselves and determine why you like them and what, if any, element you might want to change.

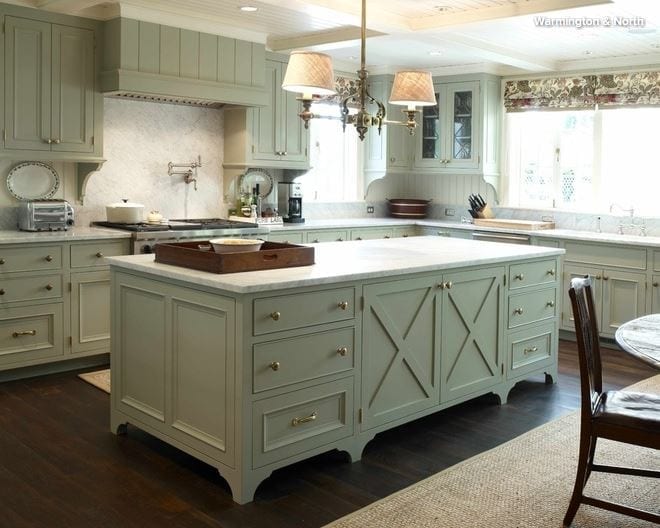
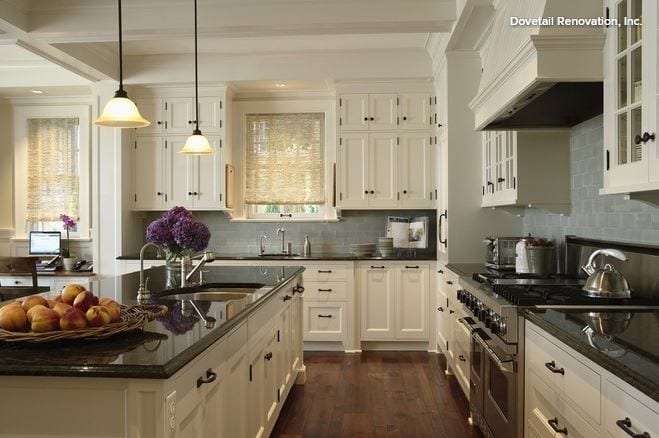
We can also closely examine the more traditional kitchen cabinets seen here, providing another possible example of your vision.

These cabinets are certainly custom-built, constructed with inset construction and using some well-thought-out design techniques to make the space unique. For instance, the drawer banks have two types of drawers. Note the look of the two upper drawers in each base-drawer section — they are not paneled, while the lower drawer beneath them is paneled. This technique produces a freshly elegant effect.

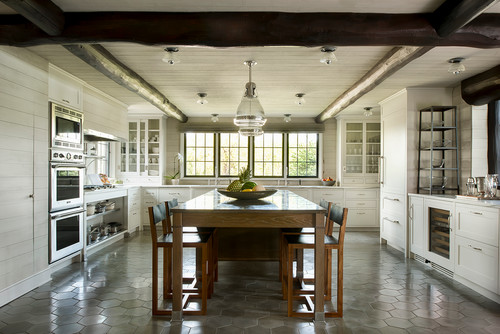
There are also barn-style doors on the island, upper display cabinets flanking the sink and fully paneled cabinet ends. The paneled range hood mirrors the beadboard ceiling and backsplash treatment, and the green painted cabinet finish nicely contrasts the gray-white granite top.

If this look is the one that strikes your fancy, be sure to really investigate each of these features, and try to specifically determine why the cabinets themselves suit you. Do you like the way the corbel details below the upper cabinets precisely relate to the backsplash transition between slab and wood paneling? Do you like the dark floors and the white paneled ceiling? Do you appreciate the brass hardware and fixtures, which might be a resurgent finish choice? Every specific feature of the design that is your inspiration must be examined carefully, so you can properly communicate to your designer exactly what you like about just the cabinets themselves.

Picking Your Cabinet Designer

When it comes to designing cabinets, the usual suspects are architects, designers, builders, specialty cabinet designers and cabinetmakers. Any of these folks might be the right person to design your cabinets, but how do you know which one to choose?

Job title is not really the critical criteria here — expertise is. You need to find out from the person you are considering how many projects he or she has designed. You need to see examples of his or her work. You need to determine if those examples closely match the vision you have for your own project. You need to interview past clients about their satisfaction with both the working experience and the final product. 

You should ask all potential designers to explain the process of working with them. Be sure they expect plenty of communication, and expect to give you the opportunity to review plans and make changes or comments.

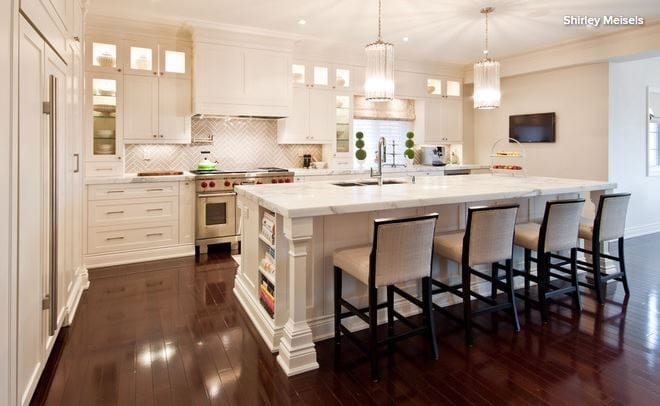
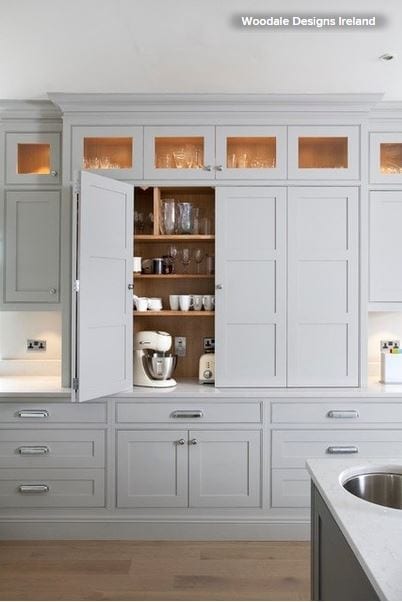
When you’re reviewing past work, unique design ideas can show that a designer is willing to give your project the time it deserves. In the photo shown here, the display cabinetry with wine storage above is a nice example of a small cabinet that maximizes its potential. 

When you share your vision with a prospective designer, how receptive does he or she seem? Do you feel like the designer strikes the right balance between giving advice and listening to your ideas?

Listen. Once you have selected your designer and shared your vision, it is time to listen hard to his or her ideas. All of that experience is worth something, and it’s possible that some of your ideas are flawed in some manner. That’s where a designer can help.

Ask for your designer’s advice, given what he or she knows about your vision and your needs. A good designer will have a method, and you need to be willing to let him or her take the lead, and to listen to this pro on the path to creation. Given your basic understanding of cabinets after reading this series, you will have a head start understanding the decision-making process, and in conceptualizing all the options your designer is sure to present.

Take Your Time Reviewing the Design

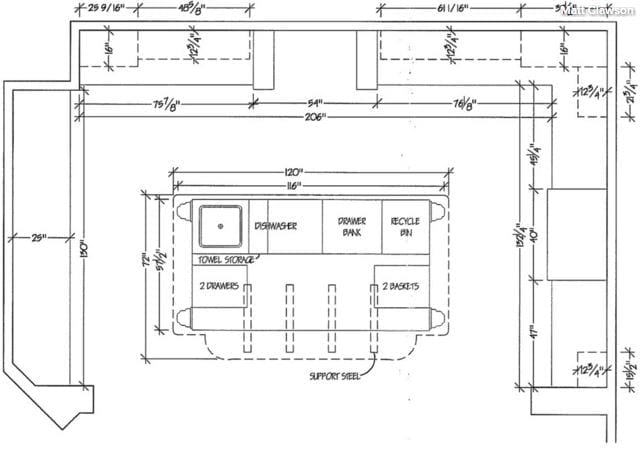
A common mistake customers make is not taking the necessary time to thoroughly review the design before signing an approval. In most cases, your cabinet designer will take a week or more to complete the first design draft after meeting with you. Once you’ve received a set of drawings for sign-off, you should spend time studying each cabinet section. At the very least, the design will include a floor plan (layout), as shown here, and elevations (the cabinet view from straight on). Some designers will also provide a 3-D rendering, which can help you visualize the way the cabinets relate to your space.

If possible, you should walk the room with a tape measure and try to visualize each section. You should make sure nothing is left off that you might have discussed, and you should try to get a feel for how the cabinets will affect your space functionally and aesthetically. Don’t just assume your designer got it right. Your satisfaction matters most, and it is you who must take the time to confirm that the design really is all you want it to be.

Communicate Concerns

You may come up with some concerns, and some of those concerns are likely to be well-founded while others are not. If your designer deviated from some of your expectations, find out why. There may be good reason, or it may be an oversight. Take the time to explain anything that seems amiss to you, and give your designer a chance to explain his or her thoughts before you get worked up.

After the first draft, there are supposed to be changes. A good designer will expect this and be prepared to offer insight while listening to your thoughts.

If, heaven forbid, you find yourself working with a designer who resists changes or does not seem to really hear you, then you may need to get another party involved in the discussion. Sometimes it can be a good idea to involve the builder or architect more actively to smooth out the process.

Compromise

I don’t mean this as a bad thing, but almost all designs are a compromise among competing elements, such as cost, a spouse with different opinions than yours (who knew?) or the style-versus-function dilemma. There almost certainly needs to be some sort of compromise in your plan, and if you have a clear understanding of your priorities, you can properly weigh the few hard choices that are sure to arise.

Get 2 Recommendations and 2 Bids From Cabinetmakers

When working with a cabinetmaker, my advice is to trust your designer and builder. Good builders and designers, who have completed hundreds of jobs for satisfied clients, want to satisfy you too. They know good cabinetmakers, and they have probably developed a good working rapport with more than one. I recommend getting two recommendations, and then two bids for the cabinet construction once the designs are completed.

Your job is to pick the bid that’s best for you. Consider price as well as the advice of your designer and builder. Ultimately it’s a gut decision, but as long as both bids come from reputable cabinetmakers your builder knows and trusts, you have done all you can to ensure a quality finished project.

Patience

Custom cabinets can take two months or more to construct, plus a week or more to install. Once you have made all your design and finish choices, you will have to wait. The installation process can be an exciting time, when you actually see the tangible shapes you painstakingly pored over fill your room. 

Don’t panic during this period. It seems like a long time, and worries can fester, but if you took the time to study this and the other cabinet stories in this series, and found an experienced designer and cabinetmaker to work with, you have done all you can.
3 Kitchens With Hardworking Storage Walls

Article by: Mitchell Parker

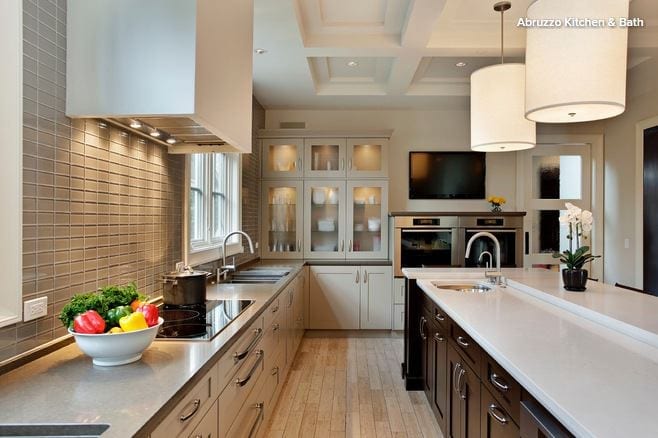
Storage is on everyone’s mind when creating a kitchen. But when smartly planned, storage can do a lot more than store your dishes, cookware and food. A multipurpose storage wall can free up room for an airier design that allows for a large island with plenty of work and eating space. These three kitchens show how it’s done.

Read more

10 Tips for Planning a Galley Kitchen

Article by: Graeme Wilson

A galley kitchen consists of two parallel runs of units forming a central corridor in which to work. The galley layout works well for all kitchen styles; it’s also the preferred design of many professional chefs, who love it because it enhances safety and efficiency during cooking. Just like the compact galley on ships, for which the layout is named, galley designs optimize space by packing in an abundance of storage and work area, making them ideal for small kitchens. If you’re considering a galley layout or revamping one you have, here’s what you need to know.

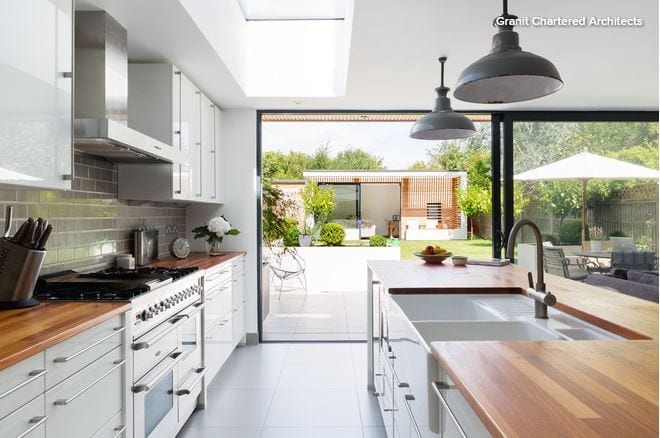
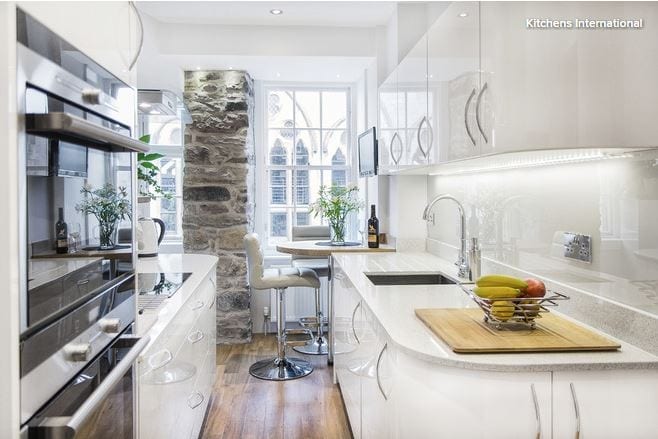
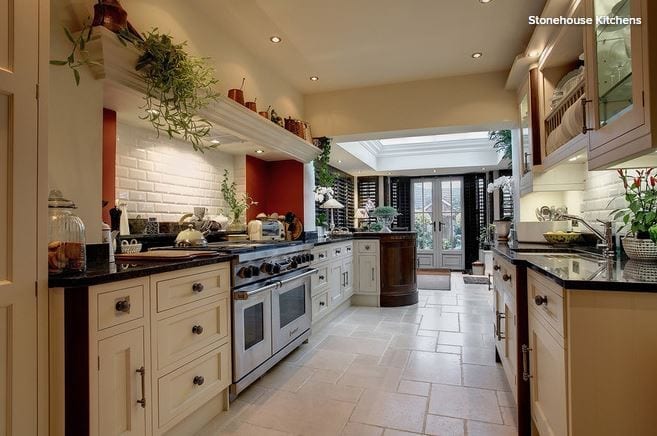
1. Assess your space. Though galley kitchens work best in small spaces, they can also be good for medium-sized kitchens, such as the one pictured here. However, be aware that if the opposing runs are too far apart, the kitchen will lose its efficiency. (This kitchen gets it right.) 

Also know that a galley layout, while ideal on a professional level, is usually an enclosed space without a dining area. That means that if there’s no possibility of opening up the space, it’s potentially not the most sociable of arrangements. On the other hand, a galley layout in an open-plan space can offer the best of both worlds. (Read on for details about galley kitchens with islands.) 

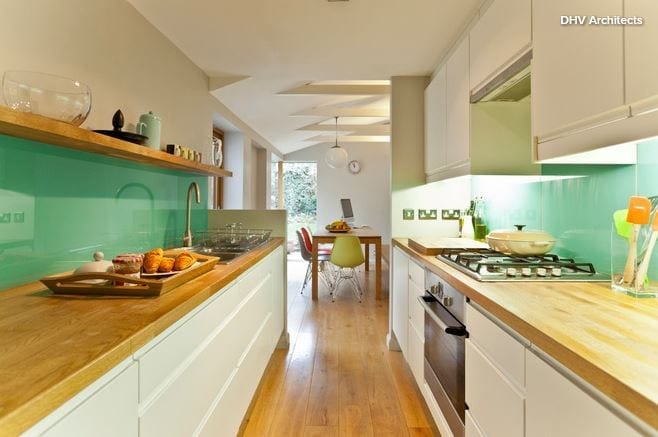
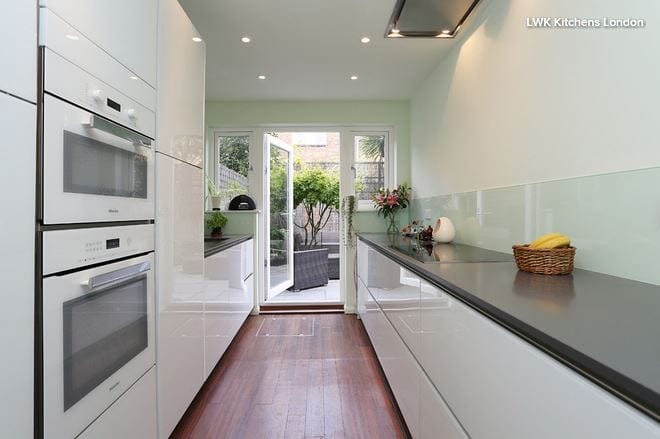
2. Choose your galley look: Symmetrical … When it comes to galley kitchens, there are two layout preferences. The first is relatively symmetrical, as seen here. This usually means the length of the runs and the arrangement of units on each side mirror each other as much as possible — or as much as you want.… or asymmetrical. You can opt for an asymmetrical layout instead, using various approaches. One involves focusing tall cabinets or a bank of appliances on one side of the room, with base and wall units on the other (as seen in the next image). Or you can go with a mix of tall and wall units along one side, with a single run of base units on the other if, for example, you have an open-plan space, as pictured here.

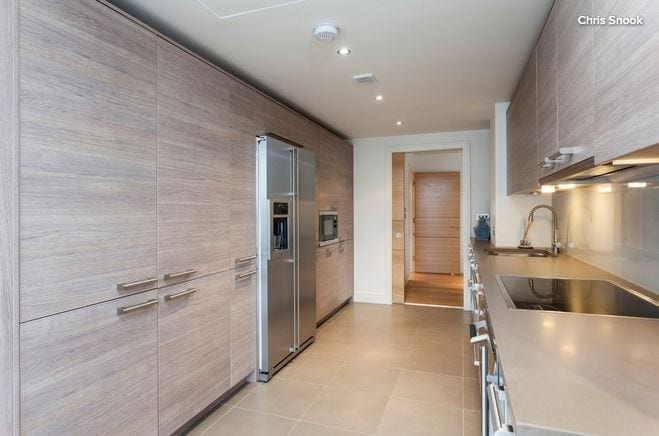
3. Put tall cabinets on one wall. If you’re designing a galley kitchen as described above, it’s preferable to go for a wall length of at least 12 feet so the sink and cooktop can be placed far enough away from each other. For safety, these should be at least a foot apart, but since that wouldn’t leave any work space, we always try to site them more than 3 feet apart. In this arrangement, a run of 12 feet allows for sufficient sink capacity, with cabinets or drawers beneath the range — occasionally adaptation is required for top drawers in this scenario — and it ensures that all the major appliances fit. 

Finally, 12 feet allows space for the units on the opposite run — the fridge, oven housing and pantry storage, for example. This arrangement provides ample storage space, helping keep the kitchen tidy and the countertops free of clutter.

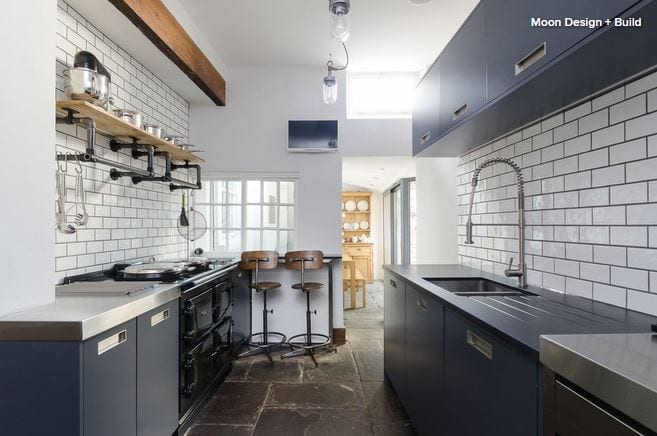
4. Or break up the runYou might prefer an asymmetrical layout with tall and base units along the same wall. For example, if a wall is just over 12 feet long, it’s likely to have three tall housings at one end and three base units at the other. Typically, there would be wall units, floating shelving or a window above the base units. Along the opposite side you could have wall units, shelving, a window or even a clear wall. 

This arrangement works really well if the kitchen is quite narrow, since without a tall bank of units as you enter the kitchen, the space will feel more open.

5. Work with a galley corridor.Depending on the layout of your home, galley kitchens may or may not be closed off at one end. If the far end leads to another room or the garden, it will see heavy traffic because it will become a thoroughfare.

Depending on the number of people in your household, this may not be a problem, but if you have small children or pets, you won’t want them charging through the kitchen while you’re holding a sharp knife or a pan of boiling water. 

You can enhance the safety of your layout — particularly where the corridor is very narrow — by planning your kitchen with the sink and cooktop on the same run. Though less efficient than having those features opposite each other, this arrangement focuses your appliances in one area, so you won’t have to turn to the opposing run with potentially dangerous items in your hands.

6. Enhance a closed-off kitchen wall. A galley kitchen closed off at one end can be a safer layout, because there’s only one entrance, giving the cook greater awareness of others coming and going. But how to make good use of this wall space? It might be there’s a window here, in which case it’s important not to block your kitchen’s natural light. Adding a stool would let you sit at the far end to write out shopping lists or chat on the phone. 

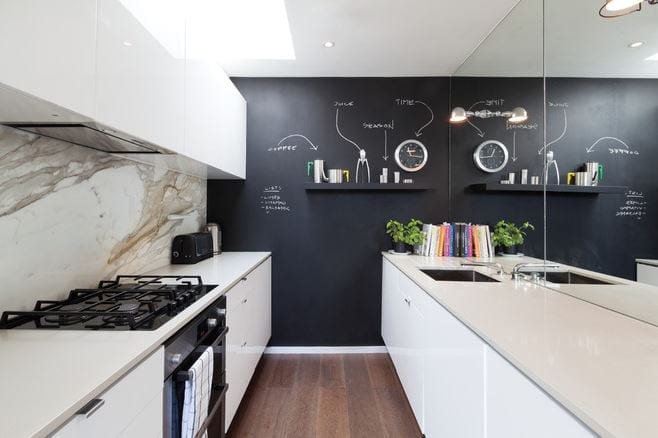
Alternatively, there might be room for some open shelving, a nice painting or perhaps a family-friendly chalkboard wall, as seen here, which can be used for playful drawings and notes or for shopping or to-do lists.

The clever use of the mirror in this compact kitchen is also worth noting; it creates the impression of a bigger space.

7. Create a galley with an island. I’ve mentioned that enclosed galley kitchens may not be the most sociable setting for the cook. A popular adaptation, when space allows, is the inclusion of an island. 

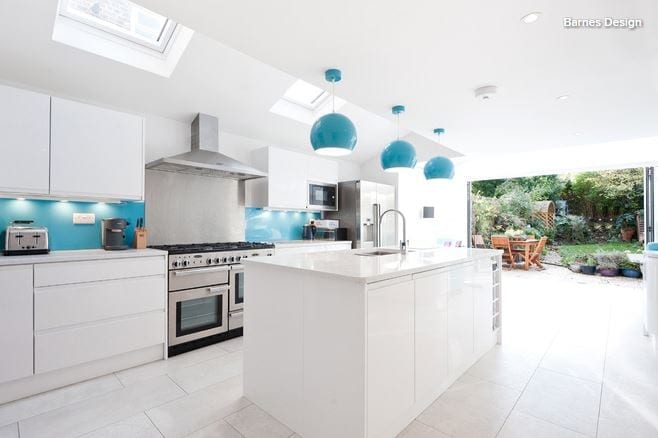
In this kitchen, the island replaces one of the runs to become part of the kitchen layout and functionality. It sits parallel to the longer run of units and typically houses either the range or the sink. Whichever of those is not positioned in the island would be staggered on the opposing run rather than directly opposite. This staggering is safer and more efficient during cooking, because it reduces the amount of turning required between the sink and stove.

8. Make your galley sociable. Some homeowners want to add an island to a galley layout yet intend to keep the additional work surface clear. This is often the case with bakers, who like to use the space for rolling out pastry. 

This was part of the goal for the kitchen seen here, which was designed for a professional recipe developer who worked from home. Her kitchen also had to accommodate the needs of her husband and two young children, and the seating on the far side of the island helps with this, keeping the kids safely clear of the cooking area but ensuring a more sociable arrangement than a standard galley would have.

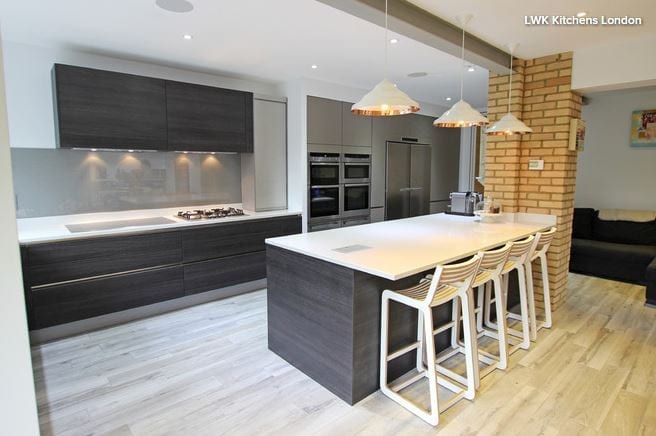
9. Add seating. Sometimes there’s space for a small peninsula or breakfast bar in a galley kitchen, providing additional storage as well as dining space. Here, the peninsula at the far end of the kitchen is fully clear of the cooking zone and has seating on the far side. (It also doubles as a butcher block.)

If there’s space to add a table between the opposing runs of your galley kitchen, this can sometimes work. However, you need to be careful when planning the space, because if it pushes your work surfaces too far apart, they’ll be much less efficient. 

Adding a small cart as an extra work surface might be an effective alternative, although in most cases there’s sufficient counter space in a galley to eliminate the need for this — unless it’s a specialized addition such as a butcher block.

10. Enhance a sense of space. When considering a galley layout, homeowners are keen to avoid a “corridor” effect, in which the kitchen feels small and enclosed. But even in small spaces, there are ways to avoid this. 

As already mentioned, losing the continuity of tall units in favor of wall units or shelving will help open up the space. The choice of furniture also helps: High-gloss finishes in pale colors are best for reflecting light and enhancing a sense of space. Similarly, doors and drawers without handles give a clean look and take up less physical space than handled ones. 

Finally, lighting is key. Well-placed and oversized lighting will soften the kitchen’s look and create the impression of more space.

New This Week: 2 Ways to Rethink Kitchen Seating

Article by: Mitchell Parker, Houzz

Kitchen seating seems simple enough. Scoot in a few bar stools around an island or a peninsula and you’re done. But when you’re trying to create something flexible for small and large gatherings, accommodate a view or make the most of a compact layout, it’s time for something a little more outside the box. Here, two designers explain how they rethought mealtime in the kitchen.

Read more

10 Ideas for a Breezy Coastal Kitchen

Article by: Laura Gaskill

Whether you live at the coast or just love beach style, this fresh-as-a-summer-breeze look can make just about any kitchen feel a bit closer to the sea. From remodeling projects (hello, aqua appliances!) to smaller accents (striped bar stools) see which of these 10 ideas would be at home in your kitchen.

1. Striped stools. You can’t get much more classic coastal than blue and white stripes — pull up to your island a set of bar stools upholstered in striped fabric for a quick kitchen update. If you’re worried about spills and stains in this high-traffic zone, choose a stain-resistant indoor-outdoor fabric for easier cleanup.

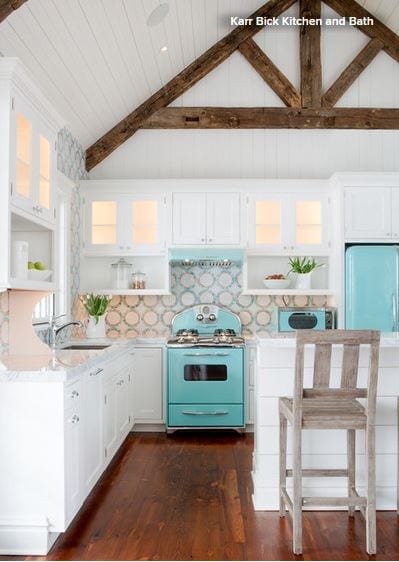
2. Aqua appliances. Who says appliances have to be boring? Colorful vintage-inspired new appliances make a bold (and very fun) statement. Aqua and turquoise are beachy hues that look great in a crisp white kitchen. 

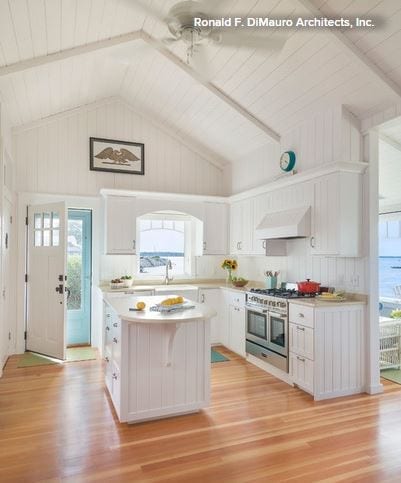
3. Shiplap or tongue and groove paneling.Covering plain drywall with shiplap or tongue and groove paneling (either horizontal or vertical) is a clever way to bring character to a newer build that lacks architectural detail. Continue the shiplap on the ceiling and cabinetry, and paint it all fresh white for a seamless look.

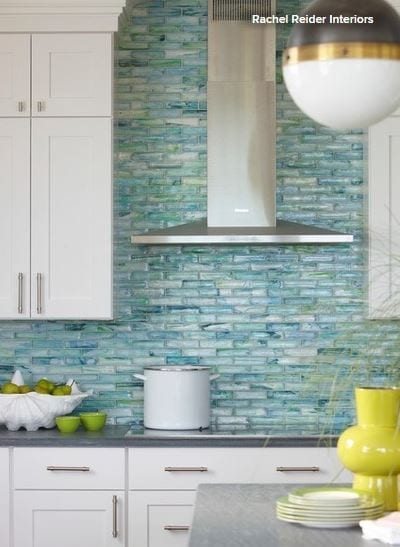
4. Iridescent tile. The shimmer of an iridescent tile backsplash calls to mind the glint of sun on crystal-clear water and pearly shells beneath the waves. Even a small tiled area can make a big impact when it’s this gorgeous, so consider splurging on the tile you really want, even if it must be in a smaller area.

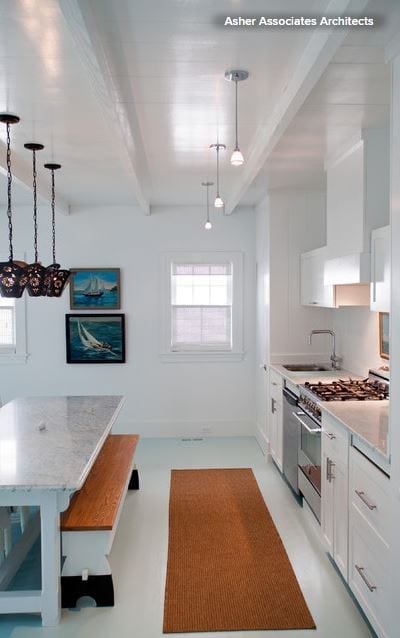
5. Painted floors. If the wood floors in your kitchen have seen better days, a painted finish can revive them and give your room a fresh beach-house look at the same time. If you’re concerned about wear and tear, consider using marine paint — the type made for boat decks. It’s designed to stand up to saltwater, so it can certainly handle a few cooking spills. 

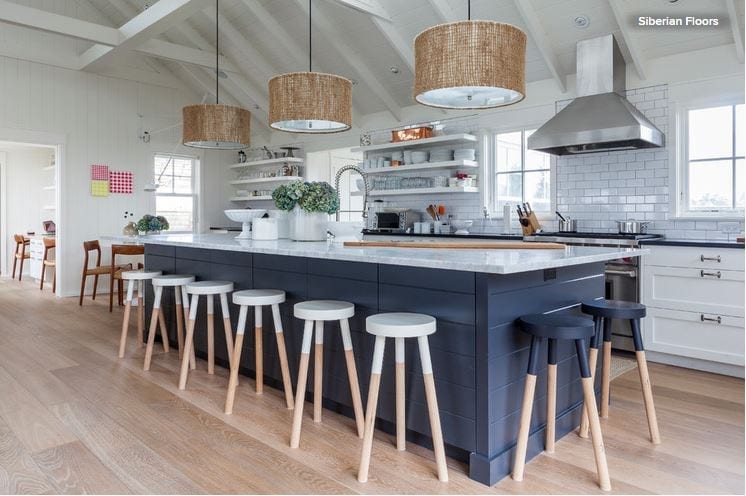
6. Textured pendant lights. Using natural-fiber textiles in the kitchen brings an earthy, casual vibe perfect for a beach-style space. Using pendant lights, like the ones shown here, is more practical in the kitchen than using a natural-fiber rug, since crumbs and spills can be nearly impossible to completely remove from a textured rug. For the best ambience, choose pendants with a filter to diffuse the light on the bottom.

7. Bicolor stools. Color blocking brings to mind nautical flags — navy and white is a classic (and more subdued) combo, or go bolder with yellow or red. If you can’t find counter stools already painted, buy plain ones and paint just the upper (or lower) third yourself.

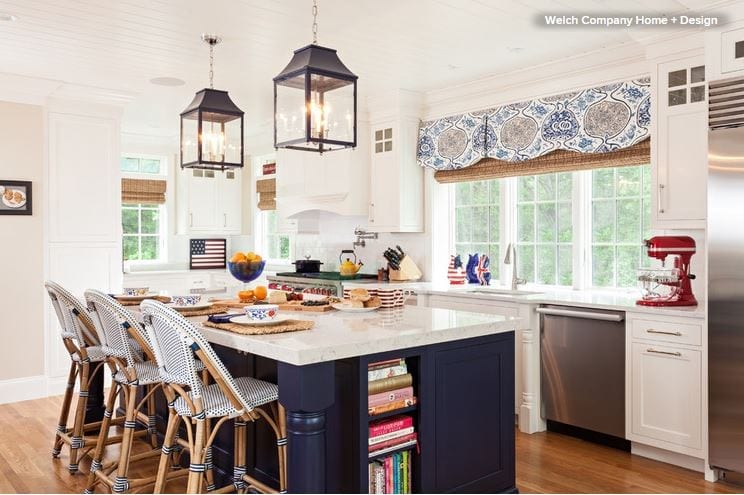
8. Bistro stools. For a French Riviera take on the coastal look, go for counter-height versions of classic navy and white bistro chairs. They are chic, comfortable, lightweight and easy to clean.
9. Navy island. White may be the standard for a beachy kitchen, but navy isn’t far behind. For a moderate kitchen makeover, consider painting just the base of your island a rich navy blue — it’s a small area, so it won’t take too long or cost too much, but the impact can be huge.

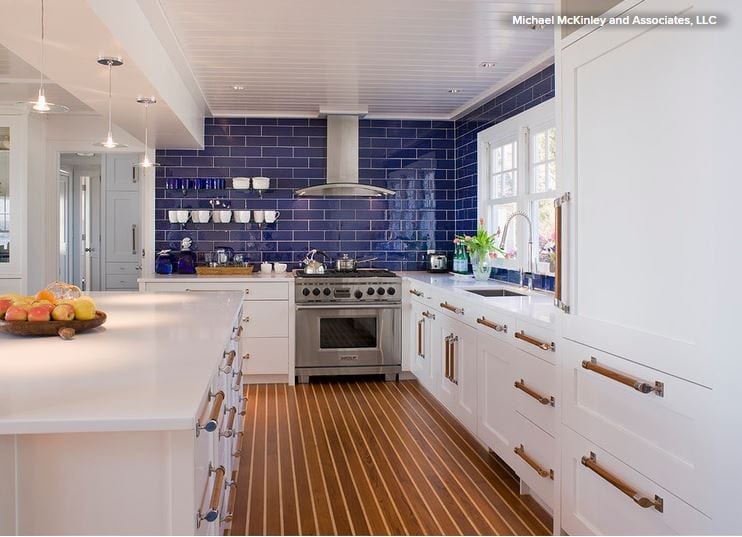
10. Yacht-inspired details. Inspired by the boats in the harbor outside their coastal Connecticut home, these homeowners went with holly and teak flooring reminiscent of a ship deck. The cabinet hardware is custom made from boat handrail stanchions and teak dowels, creating a designer look at a fraction of the cost. 

12 Breakfast Nooks Cool Enough for a Dinner Party

Article by: Susan Redman

Nothing brings a family or group of friends closer together than sharing a meal. It’s even better when they are comfortably rubbing shoulders as well. Kitchen nooks and dining alcoves are ideal for such intimacy, making the dining experience especially enjoyable. Here are 12 inspiring kitchen nook designs to install in your dream home.

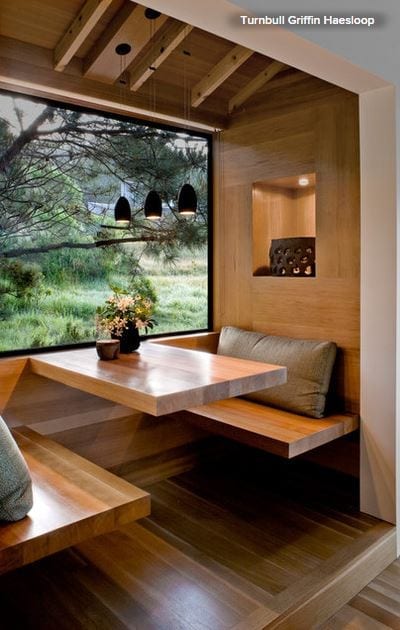
1. First-class compartment. In keeping with the warm, minimalist elements featured elsewhere in this California ranch house, this nook has cedar ceilings, Sheetrock walls,exposed timber framing and structural steelwindows. The site for the house is edged with mature evergreen trees and opens to a field with views out to the Pacific Ocean. With its panoramic-size window and glorious outlook to a countryside vista, this sleek dine-in nook is a stylish way to eat at home. 
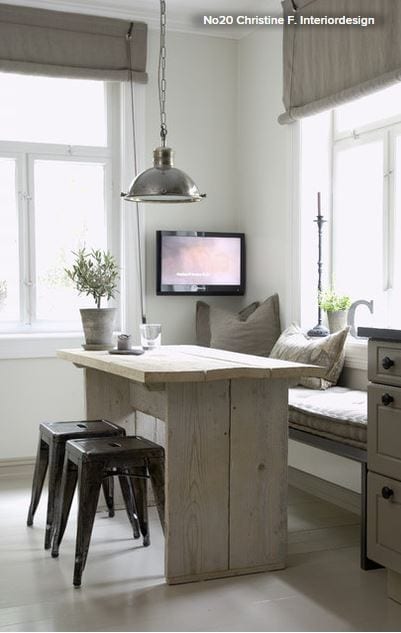
2. Norwegian wood. In this country kitchen, designed by architect Christine Fikseaunet, a simple window seat with an upholstered banquette cushion is paired with a wood table to create a casual dining setting. With the addition of a small screen in the corner of the nook, it also allows for communal television viewing among family members or friends.

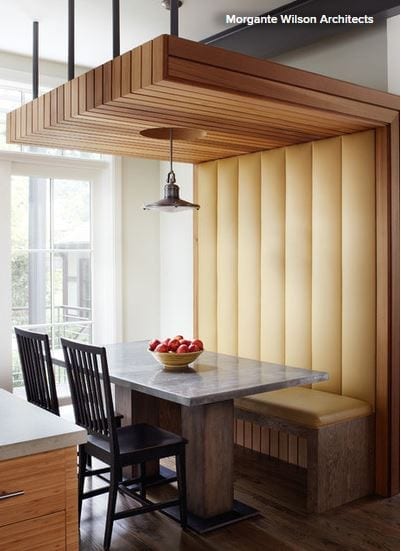
3. Covered dining. This dining space has a wood alcove built up and over a table, creating an elegant dining space that looks like a private dining booth in an upscale bistro. The mix of materials, from the timber paneling to the channeled upholstery and stone table, adds sophistication to the alcove’s slick urban look.

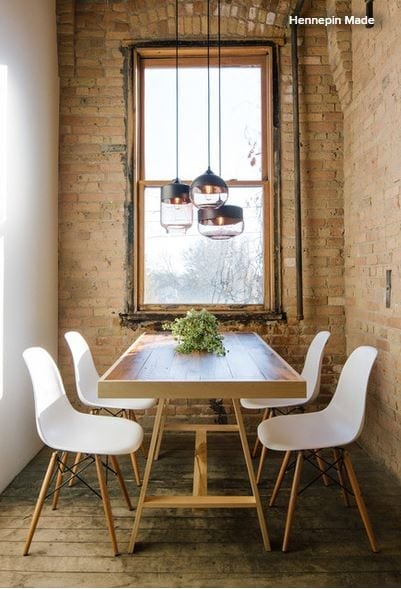
4. Rough hewn. This industrial-style dining arrangement is easy to copy. Find a wood trestle table and some midcentury modern chairs, and fit them into a small area of your home, preferably with a window view. The tight space and brick and plaster walls give the dining area a congenial air.

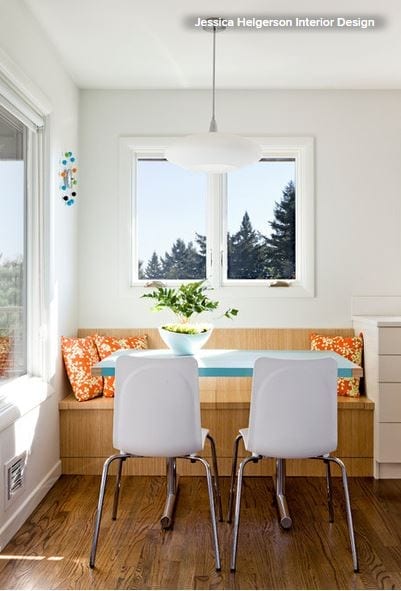
5. Bright and breezy. This built-in banquette needs little more than a small table and a couple of light-colored chairs to complete a fine-looking and functional kitchen nook. The window bench extends from the end of the kitchen cabinets to create an ideal space between two big windows. The banquette can also double as storage with a hinged lid seat covered by cushions.

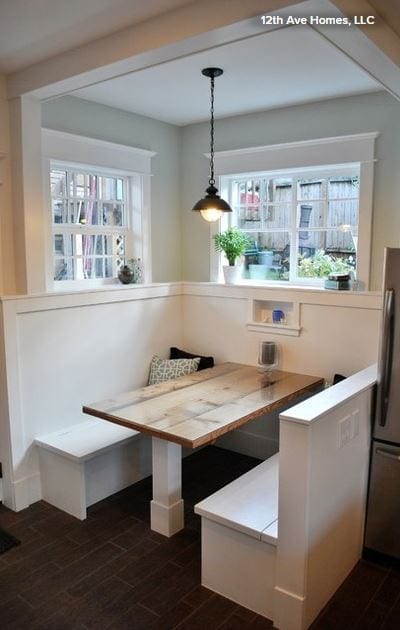
6. Budget box. Make the most of a breakfast nook by installing a complete compartment that keeps diners out of the way of the cooking action in the kitchen. Additionally, those on a budget will benefit from copying the style of the boxed-in nook pictured here. Inexpensive wood can be painted white to make the area bright. To add value, choose a more expensive tabletop and treat it with a good sealant oil to keep it looking good with use.

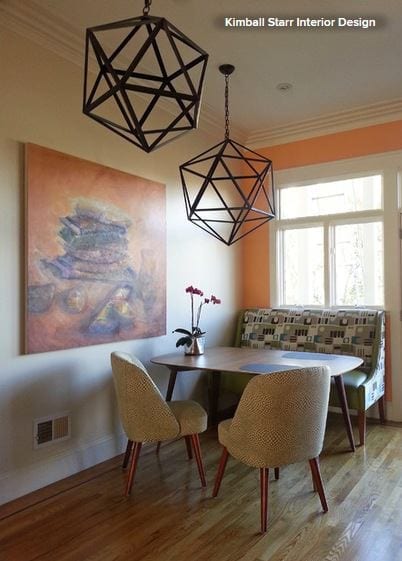
7. Geometric play. This small dining nook was designed by Kimball Starr Interior Design in San Francisco. Starr says her clients wanted the area off the kitchen to be used as an activity nook for playing board games with friends; she added a touch of grown-up glamour with impressive geometric pendants and a custom banquette upholstered in a playful fabric.

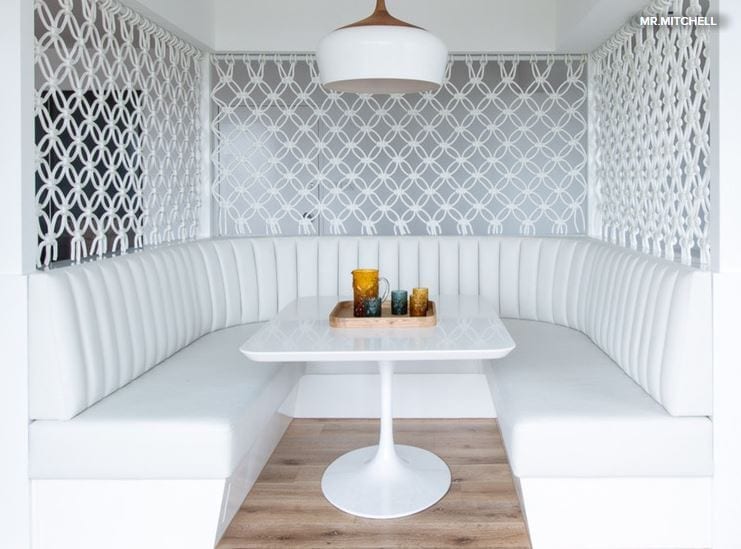
8. Cool and clean. This spectacular dining banquette is sited in the middle of a living space in a renovated 1960s apartment in Melbourne. It was decorated by interior design company Mr. Mitchell within a stand-alone, all-white cube. This “allowed us to introduce the macramé screen, which is a fun reference to the retro era of the apartment,” says Mr. Mitchell director Andrew Mitchell. 

The banquette is a focal point of the home, providing an intimate place for family gatherings or a quiet place for reading or working.

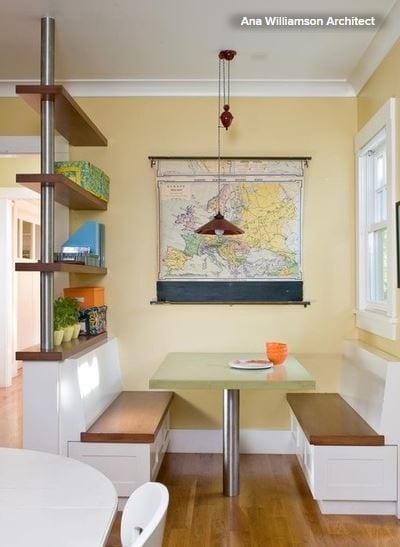
9. Retro kitchen and dining nook. This small eating nook would work well in a house with midcentury aspirations. It’s plain and simple but has been well decorated with a set of shelves that also acts as a divider. 

The wall map is a retro classroom touch that can encourage guests to share after-dinner stories of their world travels. Decorating the area with fun travel posters from faraway places can also encourage the exchange of personal travel stories and tips for future adventures.

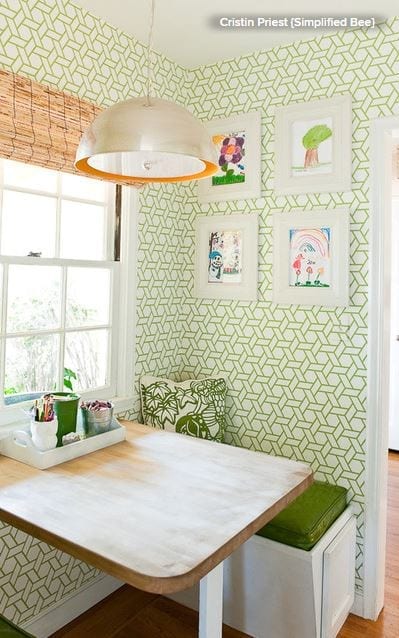
10. Garden fresh. Children’s colorful artwork has been framed and hung to personalize this charming nook. This is a great idea for families, especially when a kitchen nook is also used as a homework and craft center. 

Installing a small U-shaped nook is a clever way to divide a kitchen with a generous expanse of floor. Take advantage of the extra room and install a nook big enough to accommodate plenty of dinner party guests.

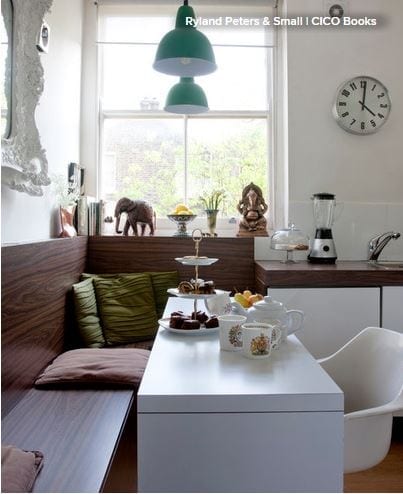
11. Corner nook. Custom woodwork and banquette seating can create a sophisticated corner nook in the kitchen. In this L-shaped arrangement, the wood grain of the built-in banquette is matched to the kitchen countertops and complemented by a white table and cabinets. To add color and interest, it has been decorated with a variety of flea market finds.

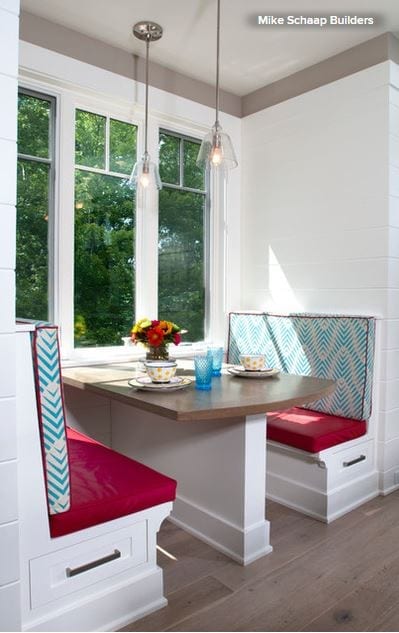
12. Dramatic flair. In an all-white kitchen, introduce color and texture with bold and cheerfully patterned upholstery. Brighten up the nook with glass pendants, a colorful table setting and freshly picked flowers. Note how the pullout drawers under the benches provide storage — a perfect place in which to keep all your board, card and trivia games for after-dinner fun. 

The Case for Hidden Storage

Article by: Laura Gaskill

It’s easy to fall in love with beautifully styled open shelves, and to feel swayed by the convenience of keeping frequently used items sitting on the kitchen counter, bathroom sink and desk — but are these methods of storing your belongings really helpful? While there’s certainly nothing wrong with keeping things out in the open, I’ve recently been discovering that making fuller use of hidden storage makes for a cleaner, neater, more peaceful and easier-to-maintain space. Read on and see if you become convinced to give the surfaces in your home a clean sweep.

Gain more useful, usable space. It seems innocent enough at first with a simple canister of wooden spoons beside the stove, a knife rack, an attractive cutting board — after all, isn’t it nice to have things within reach? But when the coffeepot, teakettle, mixer, blender, toaster and dish drying rack are all vying for space, it can be hard to carve out enough room to prepare much more than a bowl of cereal. Imagine how luxurious it would feel to start dinner prep with the counters wide open and clear.

Keep items dust free. Open shelves (when carefully maintained) can be gorgeous, but they also collect dust, and in the kitchen, this is made worse by the addition of cooking oil spattering from the stovetop. If you have open shelving that you don’t plan to change, try keeping a small number of everyday dishes on the shelves, and protect the rest of your kitchen items behind closed doors.

Have less to hide when company is on the way. I recently discovered that by simply cleaning out the medicine cabinet and adjusting the shelving so it could fit some taller items inside, I can easily contain all of the toiletries and toothbrushes behind closed doors instead of on the sink. With only a pretty container of soap and vase of flowers at the sink, a quick swipe with a cloth is often all that needs to be done to get the bathroom party-ready.

Make cleaning quicker and easier. With countertops and surfaces clear, dusting and cleaning take far less time and effort than when those same surfaces are filled with items that need to be cleared off, then returned. Floors free of clutter are ready for a quick sweep or vacuuming, and you’re more likely to get into every corner when nothing is blocking the way.

Make it simpler to avoid accumulating more clutter. When piling stuff on any available surface is the storage method, there is almost no limit to the amount of stuff you can add to the teetering towers of laundry, books and papers. But when putting away is the rule, and you’ve gotten into the habit of keeping surfaces clean and clear, it’s actually easier to maintain a clutter-free home.

Find a place for everything and put everything in its place. If you come home and toss things onto the kitchen table or pile up to-dos on your desk, the clusters of items quickly run into one another, making it harder to find what you need when you need it. By dedicating a certain drawer (or section of a drawer) to each thing you own, you’ll know exactly where to get it and where to put it back when you’re done.

Tame the chaos. You know those perfectly styled photos of busy family mudrooms with cute little backpacks on hooks and rain boots lined up by the door? The reality is often much less attractive. Think muck-covered soccer cleats tossed unceremoniously in the middle of the hall, bags with their contents spilling out and hooks overflowing with all manner of rain gear and sweatshirts. Hide all of this behind neat closet and cupboard doors, and you can at least gain a visual rest from the mess.

Enjoy a more peaceful feeling at home. Even if you choose to clear off only one area in your home — your bedside table, kitchen counter, desk or bathroom sink — the head-clearing, peaceful effect might surprise you. Waking up and coming home each day to a perfectly cleared area is calming and pleasant, and makes everyday tasks and routines easier to handle.

A Laundry Room With Bunk Beds and a Shower for Muddy Dogs

Article by: Mitchell Parker

Tom and Jamie Pumpelly’s four dogs like to get dirty. A lot. The couple and their dogs — two blonde Labs, a bichon and a rat terrier–Chihuahua mix — live on acreage along the Occoquan and Potomac Rivers in northern Virginia, and the dogs are always showing up at the side entrance wet and muddy. 

So during an extensive remodel of their home, the couple incorporated plenty of functional space for washing and drying their animals, and for containing them when guests arrive. Using a former bedroom suite vacated once their kids moved away from home, the couple worked with Leroy Johnson of Four Brothers to create a dog-washing station, laundry room, mudroom and dog-bed area.

Read more