FREE DESIGNS AND ESTIMATES

The Kitchen Storage Space That Hides at Floor Level

The humble toe kick is an often-overlooked design detail, and maybe for good reason: It stands practically underfoot, serving in fact only to give our feet a place to rest while we’re working at the counters and cupboards above. However, whether in the kitchen, bathroom or elsewhere, there is much you can do with a toe kick, so it’s worth taking a moment to think about this small design detail. Here are a few helpful design tips for the last place you’d ever think about looking.

Toe kicks are, as a rule, typically 3 to 4 inches high, and recessed 3 inches underneath a cabinet. This gives you room for your feet — or your toes, anyway — while you’re standing at the counter without wasting cabinet space or creating a pocket that’s too deep to clean.


However, a toe kick doesn’t have to be wasted space. Drawers for extra storage are the perfect use for this overlooked space.


They work great for wide, flat items, like specialty pans you don’t use every day …

… or a stepladder for when you need to reach those tall upper cabinets.

A toe-kick drawer can also house your pet food if you prefer to keep it out of the way between meals — or if your pet is a bit of an overeater!

Get a clean, classic look by matching the cabinets to avoid a visual break (especially perfect with statement wood floors).


For a richer, traditional look, add faux feet to the cabinet fronts to give built-ins a furniture-inspired feel.


Stainless steel (especially with stainless steel appliances) will let your toe kicks make a subtly modern statement.

Or you can use a hint of color or repeat a beautiful tile — both work great in darker spaces to add some life.

Underlighting isn’t just for cabinets. Glowing toe kicks look great in a space with other modern LED light sources (like in a ceiling alcove).


To make toe kicks disappear, try painting them black or using a dark material …

… or give them a mirrored finish, and your cabinets will appear to float.

Want other uses for your toe kick? Try a modern central vacuum system. You can incorporate a hidden suction port in the toe kick so crumbs and dust can be swept away without your even bending over.


And a toe-kick heat vent will keep you toasty during a meal in your breakfast nook or banquette.

Your guests (and you) will appreciate the extra effort, even if they have no idea that your toe kick packs such a design punch!

Kitchen Counters: Quartzite Offers Strength and Beauty

Natural Quartzite Countertop

When choosing a kitchen countertop material, many homeowners who might have gone with granite or marble are giving quartzite a second look. Before you bring this material into your kitchen, take the time to learn the pros, cons and special considerations to see if it’s right for you. 

The basics: Quartzite is a metamorphic rock formed from sandstone. The transformation happens when sandstone is heated within the earth’s crust and shifting tectonic plates supply pressure. The resulting stone has pleasing streaks, rich colors and eye-catching patterns. Colors range from white to black, with shades of blue, green, yellow and brown. 

Popular quartzite varieties include:

  • White Macaubas (has an elegant translucent gray or white background with darker gray or blue veining)
  • Mother of Pearl (has a similar look to marble, with gold, green and gray veining)
  • Taj Mahal (a natural-toned stone often described as having a translucent quality)
  • La Dolce Vita (a popular beige stone with moderate movement)

But be aware that the industry is loose about names and what is categorized as quartzite. “There are many varieties,” says stone fabricator Alex DiPietro. “You want to distinguish between the soft and hard quartzites. Ask your fabricator if they have worked with the specific stone before, and they will tell you their experience.”

And don’t confuse quartzite with quartz (also known as quartz composite), a manufactured product crafted from resin and quartz chips tinted with various colors.

Cost: Around $80 to $200 per square foot installed.

Advantages: “To me the greatest advantage is that it’s a beautiful stone with wonderful tone and variety,” says designer Sarah Robertson. “A vein-cut quartzite will have streaks that are very linear and have a contemporary vibe, while a cross-cut quartzite has diagonal lines with a more organic look to it.”

Quartzite stands up to heat, but prolonged heat exposure can cause problems. Using trivets for hot pots and pans is a smart way to protect your quartzite counters.

Disadvantages: While very strong, quartzite counters are costly and not indestructible. The quality of quartzite varies, and heavy use can cause etching, staining or scratching.

Maintenance: This varies depending on the type of quartzite you choose. There are varieties of quartzite that don’t have to be sealed every year, some that don’t have to be sealed at all and others that require regular sealing. Check with your stone fabricator for information on the quartzite of your choice. 

To keep your quartzite counters in top shape, clean up spills quickly and be careful with grease and acidic foods. You can use a damp, soft cloth to regularly clean the surface and use a mild spray disinfectant when needed. When in doubt, check with your stone fabricator for the best cleanser for your particular quartzite.  

Special considerations: Quartzite is a very heavy stone that requires professional installation by a licensed contractor. Looks vary from stone to stone, and since varieties often go by more than one name, make sure to examine and view each stone slab carefully. 

And consider asking for samples, says Robertson. “You can get a chunk of the stone from a fabricator and do the stain testing yourself at home. If you’re really concerned about what vinegar or lemon juice will do to the counter, try it out yourself.”

Bathroom Workbook: 8 Elements of Farmhouse Style

The American “farmhouse bathroom” is a bit of an oxymoron. Most original farmhouses were built at a time when the only bathroom was an outhouse. And when farmhouse owners did eventually bring plumbing inside, they didn’t actually build a bathroom; they took over a spare bedroom or other room and put a toilet, sink and stand alone tub in the space. This focus on practicality and function continues to drive the style’s popularity today. 

Here are eight elements of a modern-day bath with farmhouse style. 

Read more

How to Recycle Your Kitchen

Article by:

If you like getting your hands dirty, demolition can be one of the most fun and satisfying parts of a kitchen remodel. But whether you’re going the DIY route or hiring a pro, you’re likely to end up with at least one Dumpster full of trash. The Environmental Protection Agency estimates that about 170 million tons of construction and demolition waste were generated in 2003 (the last year for which figures are available), with most of it ending up in landfills.

The sad part is that much of what ends up as waste could have been reused or recycled. While recycling building materials can take longer than simply whacking them with a sledgehammer, construction company SOD Builderssays some things — such as large appliances and granite countertops — can be easily recycled with the right charity or facility.

Here you’ll learn more about what you can recycle and who might want it.

Who to hire: Green demolition is mandatory in some cities, and contractors may not get their permit deposit back if they don’t recycle a certain percentage of their construction and demolition waste.

Your general contractor (GC) may already be skilled in green demolition, or may hire a green demolition company that already has ties to local charities and can remove building materials and finishes according to their specifications. If your remodel is a DIY project, check with your municipality to find out whether any local recycling regulations apply.

Whether it’s your city or your conscience that motivates you to recycle, you may decide to hire a green demolition company yourself to keep things easy and ensure that all recyclable materials are removed properly. If you do decide to go this route, choose a reputable firm for which no complaints have been registered with the Better Business Bureau, and get references.

If you’re looking to recycle a handful of items — your appliances, countertops and cabinets, for example — you can likely handle the process yourself.

Cost range: Because it takes more time to carefully remove building materials than to smash them with a sledgehammer, hiring a green demolition company can be more costly — up to $10,000 more per job than a regular demolition company, depending on scale and size. Fortunately, some of the extra cost can be offset by avoiding landfill charges and with tax credits earned by donating materials.

Many GCs, however, now recycle materials automatically. Oren Dagan of SOD Builders recycles many materials during a typical project. For an average kitchen, he says he usually incurs a cost of only $150 at the county recycling plant; he donates many materials for a tax write-off or reuses them in the same home.

Typical project length: About a week.

Project considerations: If you’re working with professionals, they’re already equipped to deal with the proper removal of building materials, but if you’re doing it yourself, it’s smart to take an inventory of what you’d like to recycle and talk to local charities to determine what condition they need items to be in.

Some groups will accept only still-assembled cabinetry and countertops, while recycling plants will take scraps, remnants and small pieces. You might also consider doing a second sweep after you’re finished the remodel to donate any large remnants or unused materials instead of throwing them away.

Here’s are some materials you can likely recycle or donate:

  • Kitchen appliances of all sizes
  • Cabinetry
  • Granite countertops
  • Steel, copper and brass elements — and don’t forget about plumbing
  • Lumber and plywood
  • Hardware
  • Fixtures (Including lighting, electrical and the sink)
  • Unused ceramic or vinyl tile
  • Drywall
  • New carpet and linoleum
  • Doors
  • Furnishings

Getting started: Reach out to local charities about two weeks before you start the actual demo to find out which items they’ll accept and in what condition.

Dagan donates almost all large appliances to The Salvation Army, as it accepts nonworking appliances as long as they are fixable. “I’ve never had an appliance they couldn’t fix,” says Dagan. He offers smaller appliances to Goodwill, although he doesn’t have any specific reason for splitting things up that way other than a wish to share the wealth among multiple charities.

Habitat for Humanity also accepts a wide variety of kitchen items, from fixtures to appliances to cabinetry, although it relies on specific donation guidelines to ensure that the families who move into the homes it builds won’t get stuck with substandard materials. You can review the guidelines here.

Dagan also likes to recycle kitchen cabinets within the same home, and points out that old cabinetry can create great, practical storage space for a garage or workshop. If you’re getting rid of an old or damaged granite countertop, or end up with leftover pieces, Dagan says fabricators are often happy to take them off your hands.

As for the rest, call your municipal recycling plant to find out what it accepts, whether there are fees and how those charges are calculated.

Your Guide to a Smooth-Running Construction Project

Construction and craft tools

Imagine walking into your newly built or remodeled home and seeing it exactly as you had imagined it at the start of construction: the windows are all in the right places, the flooring is the right color, and the kitchen cabinets are a perfect fit.

Now allow me to pinch you on the arm, because for most people, reality is often different from that idyllic scenario. You might see missing trim around the bedroom doors or wonder why that small change in the kitchen cost so much. Looking back, you might ask, “And why did we have to hire another subcontractor to finish the bathroom?” 

Of course, there are things you just can’t plan for, but there’s plenty that you can. Costly changes and additional time-consuming work can be kept to a minimum if you fully understand what you are building before you start. By understanding the construction process, being part of the team and keeping a firm grip on the budget, your construction project can result in the home of your dreams. 

Read more

7 Steps to Pantry Perfection

Article by:

When we installed pullout pantry cabinets during our kitchen remodel last year, I thought my organizational problems were solved. I envisioned rows of neatly stacked spices and easy-to-see bins of pasta just waiting to be whipped into something delicious.

The reality is that my pantry has turned into a game of spice-and-go-seek that generally ends in frustration and guilt. The bins I bought for my pasta are there, but there aren’t enough of them, and they aren’t the right size. Worse, the myriad packages, from cans to cellophane-wrapped cookie boxes, create chaotic clutter in the rest of my pantry. So I’m taking time out this weekend for a thoughtful organization project based on my real life, not something I saw on a cooking show.

Here’s my seven-step plan for pantry perfection. 

1. Install a spice shelf. I love my roll-out pantry, but my spices are getting lost in the mix. Because they’re stacked one behind the other, they waste space, and it’s hard to see what I have. To remedy this problem, I’ll install door-mounted spice shelves inside the cabinet where I keep my cookbooks. 

The trick will be finding a rack that doesn’t require heavy mounting hardware that might poke through to the outside of the cabinet. So while I would absolutely love a wooden rack like this one, I’ll likely need to find one made of wire.

2. Keep go-to items at eye level. Judging by where these cereal boxes are kept, I’d guess that a couple of self-directed kids hit this pantry for breakfast every morning. I’m taking a cue from this smart parent and organizing my pantry based on how often my family uses individual items. 

I’ll reserve eye-level shelves for cereal, pasta and other staples while keeping baking supplies and treats higher up. 

3. Optimize containers. When I first organized my pantry, I figured that every bulk, pourable item belonged in an airtight container. So I went to my local wholesaler and got container sets that featured boxes in various sizes. Big mistake. Because really there are only two sizes I use: large and medium. 

Not only that, but I didn’t think carefully enough about what went into the containers. We don’t buy our cereals or snacks in bulk, so trading a slim box for a clear container did nothing for improving my organization.

Instead, I’ll take a cue from this pantry and use containers only for items that need to stay fresh and come in messy bags, like baking supplies. 

I’ll also pay attention to the shapes of the containers I add to my collection. I love the look of mason jars, but rectangular containers like the ones in this pantry nestle together more neatly, conserving precious shelf space within my narrow pullouts. 

4. Invest in pretty labels. Every time I pull out a container of a white, powdery baking product, I have to taste it to see if it’s corn starch, flour or confectioner’s sugar. I put all three in containers, but I didn’t like the business-like look of the labels from my label maker, so I simply stopped marking them.

So now I’m hunting for pretty kitchen labels like the ones here so I’ll know what everything is, when I bought it and when it’s ready to be tossed. 

5. Use baskets for anything round. I usually keep round, nonperishable items like onions and potatoes in their bags on the lowest shelf of my pantry, but as the shelves roll, a few veggies inevitably escape and make a mess. Baskets like those used in this pantry keep food organized and still allow air to circulate, preventing the food from getting prematurely moldy. 

6. Keep awkwardly shaped items down low. At my house a search for an afternoon snack inevitably ends in an avalanche of chips, trail mix and other bagged foods. By moving the packages to a lower shelf, as this homeowner did, I’ll be able to see how they’re shifting and prevent potato chip rainstorms and other messes.

And when I do come home from the grocery store, I’ll think about not just where I put things away but how they’re put away, taking care to face containers with the labels out and align similar items. 

Because, yes, some people’s spaces actually do look like the one shown here. And I intend to be one of those people.

8 Kitchen Design Tips for Foodies

Article by:

I cut my culinary teeth in a tiny apartment where a janky oven meant that cookies took twice as long to bake, and seared scallops nearly sent dinner guests home with smoke inhalation.

The upside of all that making-do meant I knew exactly what I wanted when the time finally came to move to a larger space and remodel the kitchen. I spent hours poring over solutions for everything from pot storage to dishwasher space, and while not every idea worked for our space, the fixes I found heavily influenced the end result.

Here are eight great tips to help your dream kitchen work beautifully.

1. Buy the right vent hood. Vent hoods are rated by the cubic feet per minute (CFM) of air they can suck from a room. While formulas for determining how much power you’ll need vary, you’ll want to start by acquainting yourself with the basics. 

  • There’s no point in buying a hood that’s larger than your range. It won’t really suck more smoke out, and it won’t look right either.
  • Gas ranges generate more heat than electric ones, and thus require more powerful vent hoods.
  • Maxxing out the CFMs isn’t always a good thing. For example, a 1,000-CFM vent hood will suck the air from a 10-by-10-by-10 room in about a minute, then will lose suction unless you have an HVAC system or an open window. So have your room dimensions handy to show the vendor when it’s time to buy.

2. Invest in proper knife storage. If you love to cook, chances are that you’ve spent a pretty penny on at least one good kitchen knife. But leaving it to rattle loosely in a cutlery drawer will dull and damage its blade – and pose a serious threat to your fingers.

Kitchen knives should be stored in a way that keeps them separate and organized, with their blades horizontally oriented so the knife never rests on its blade. 

While my knives are currently housed in the block they came in, I plan to commandeer a little-used drawer and add a knife block like this one.

3. Pull out your pans. This ingenious pullout eliminates messy stacks of pots.

4. Stash pot lids in a rollout. Pot lids can be the bane of any home chef’s existence, jamming drawers and preventing pots from stacking properly. To solve this problem, use a shallow rolling drawer to neatly stash lids for the pots below.

5. Keep cooking utensils off your countertop. Keeping spatulas and whisks in a countertop jar may make storing these awkwardly shaped utensils easy, but it also creates clutter. Consider replacing a narrow cabinet near your stove with a custom pullout to keep utensils close at hand.

6. Create extra prep space. This small San Francisco kitchen was in desperate need of extra prep space. The solution: a custom rolling cutting board and base cabinet that can be pulled out should the sous-chef need some extra elbow room.

7. Make your faucet a soaker. I was wary of a soaker hose’s high profile poking up above our breakfast bar, but my husband talked me into it. And boy, am I glad he did! It blasts water off dirty dishes, cools pasta in no time flat and ensures that every corner of our sink is sparkling clean.

8. Consider a dishwasher with a utensil drawer. The last thing I want to do when I entertain is to disturb guests with the clatter of hand washing dishes, but I don’t want to wake up to a mess either.

Choosing a dishwasher that can comfortably accommodate a heavy load was very important to me. The model I chose has a narrow utensil drawer that slides out above the top rack, freeing space below for unwieldy pots and large stacks of dishes. A year later I can definitely say this was one of the best decisions we made.

10 Ways to Open a Kitchen to the Outdoors

Article by:

The kitchen is often the heart of the home, but in summer it can feel like a bit of a bummer to be cooped up by a hot stove. If you’re considering some updates to your kitchen and live in a climate that’s friendly to outdoor living, consider opening up your kitchen to light, air and outdoor entertaining with glass doors or pass-through windows. See if one of these 10 ideas for opening up the kitchen gets your imagination flowing. 

1. Create a focal point with glass-paned barn doors. Go glamorous with the barn door trend by installing glass-paned barn-style sliding doors across one kitchen wall. The ample expanses of glass will let in light and views, and the doors themselves will provide a beautiful focal point, even after the sun goes down. 

2. Go for sliders. Sliding glass doors and screens that slide into pockets take up no extra space, but have the potential to vastly expand the square footage of a kitchen during nice weather. 

3. Add classic charm with French doors to the garden. The allure of a set of French doors simply cannot be beat. It’s a great choice for traditional homes where sliding glass doors would look out of character. To make the most of your French doors, design a special garden feature (trimmed hedges, a fountain) to line up with the view from inside. 

4. Try folding windows. NanaWall windows fold up, allowing you to completely open up the kitchen windows to let in the breeze and sun. With their minimal frames, they are a good choice for modern and contemporary homes. 

5. Add an outdoor bar. From the outside, folding windows provide an ideal spot to create an outdoor bar with pass-through access to the kitchen. 

Positioning your outdoor bar beneath a wide eave, as shown here, will help provide some cover from the sun. 

6. Add major light to an otherwise dark space. In a kitchen or an open-plan space without windows (such as in a row house), adding light at the end of the room is essential. Here accordion-style glass doors completely fold away at the end of the long kitchen to reveal a garden patio. 

When you see the space from the outside, you can imagine how dark the interior would have been if the end of the kitchen had a solid door. With glass doors, both the kitchen and patio feel more spacious and welcoming. 

7. Open up a galley kitchen. Glass doors at the end of a narrow galley kitchen offer an enticing view of the backyard, and can be flung open to allow easy access to an outdoor dining area. Even when the doors are closed, the additional light and view make the narrow space feel larger. 

8. Try a small swap with a big payoff. Even a small change, like swapping a solid kitchen door for a glass version, can completely change the feel of the room, letting in extra light and giving you an eye on the outdoors. Bonus points for painting the frame a bright hue.

9. Open an entire side of your house. This may not be in your budget or even architecturally possible for your house, but if you can swing it, why not go for it? Glass doors that fold away, opening as much (or as little) of your home to the outdoors as you wish could completely change the way you live at home.

10. Install airplane-hangar-style doors. These are garage-style doors taken to the next level. The pro who worked on this project customized a set of doors by adding a hinge in the middle, giving them a striking look. The doors also save interior space when open (they fold up instead of sliding into the space).

Get More From Your Kitchen Island

Article by:

Many kitchen islands open directly into another room. If you don’t require seating on that other side of your island, it’s a great opportunity to make the island serve purposes other than cooking and eating. When planning for an island, consider how it can be used to your advantage, whether it’s incorporating additional display space, extra storage or even strategically separating — or connecting — other spaces. Here’s how you can make your island work harder for you.

Get More Display and Storage

These open shelves wrap around the island to create display space on two sides. This makes for a much more eye-catching addition in an open floor plan. Can you imagine staring at solid planes of material here? Meanwhile, a small countertop at the opposite end still accommodates some island seating. 

Although this island also has shelves below, the real eye catcher is the ceiling-hung shelves, which create a bright, casual cookware display. What a visual feast for diners! 

Where seating is not required, think about incorporating bookshelves along the length of your island — perfect for all those cookbooks. 

Full-height cabinets block kitchen messes, provide storage and hold a TV here. 

Get a Divider or Transition

A simple, narrow dividing wall, which seemingly arises from the island, partially hides the cooking area and creates a stunning art wall. Notice how the sculpture niche is finished to match the cabinetry, creating the transition from kitchen to the living-dining area. 

This island does double duty with a working kitchen side and a buffet dining side, but it doesn’t stop there: The beautifully detailed end wall hides any mess and creates a lovely focal point. 

In this very open space, the island ends in a fabulous display area that looks like furniture. This concept blurs the line between cooking and living areas. 

Want to hide your dirty dishes but still converse with the guests? Use meticulously detailed cabinetry as a horizontal backdrop to your dining area — much more interesting than drywall. A narrow continuation of the countertop even serves as a buffet space. 

In the same space seen from the kitchen side, small cabinets actually form the top of the dining “wall” and provide storage — bonus! 

Get Table Seating

In this kitchen a working island is paired with a built-in banquette, making an attractive, handy spot for dining. This would work equally well with a rectangular island. 

Ease a Level Change

Many homes have a step or two from the kitchen to a living area, typically with a railing of some sort. Why not create a casual dining area as a buffer between the two instead, utilizing some great cabinetry?

Key Measurements to Help You Design Your Kitchen

Article by:

Whether you are moving into an existing kitchen, remodeling the one you have or building a new one, understanding a few key measurements and organizational guidelines can help your culinary life run more smoothly. 

Kitchens provide storage for your food and cookware, give you room for prep and cleanup, and of course also provide a place where you can cook and bake. When it’s thoughtfully arranged, these functions operate logically, making work in your kitchen a better experience. Here’s how to get the ideal setup.

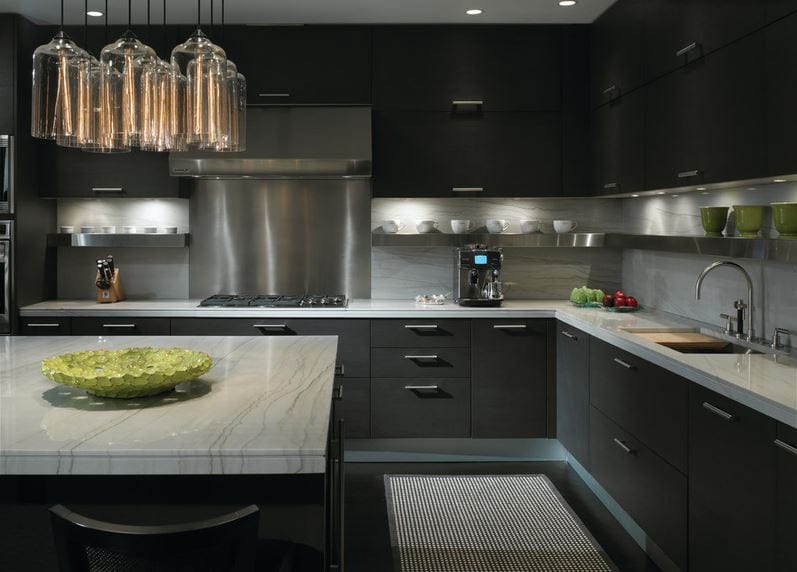
Ideally, refrigeration and dry-goods storage should be located nearest to the kitchen’s entry point. The cooking area should be located toward the dining spaces, and the sink is best positioned between those two functions. This creates what’s called a work triangle. The best work triangle is less than 21 linear feet (6.4 meters). Work triangles that exceed 26 feet (7.9 meters) make moving from one function to another inefficient in most cases.

This cutaway plan illustrates arrangements and dimensions for a modest-size kitchen. Note that the preparation area is split between the island with the sink and the corner of the kitchen. The work triangle is compact. There will always be a few tradeoffs in any space. 

Let’s take a look at the three main functions of a kitchen:

1. Storage
2. Preparation
3. Cooking

Everyone has personal preferences for what works best, so consider this a guide and not a rulebook.


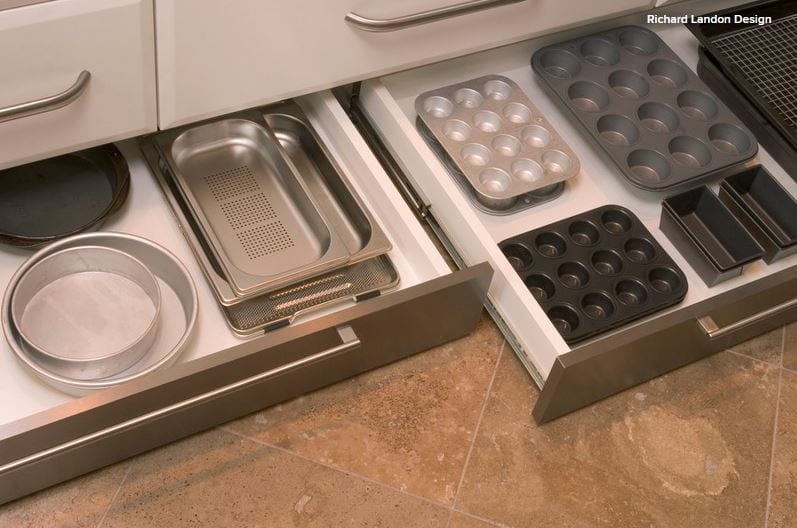
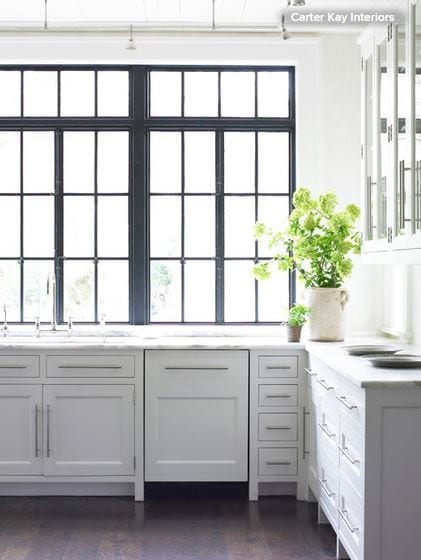
Storage. As noted, designers recommend putting refrigeration and dry-goods storage at the kitchen entry point. Putting your pantry on one side and a countertop that’s 15 to 24 inches (38 to 61 centimeters) on the other is a good idea. This will allow you to easily set down items that have been taken out of the freezer and refrigerator.

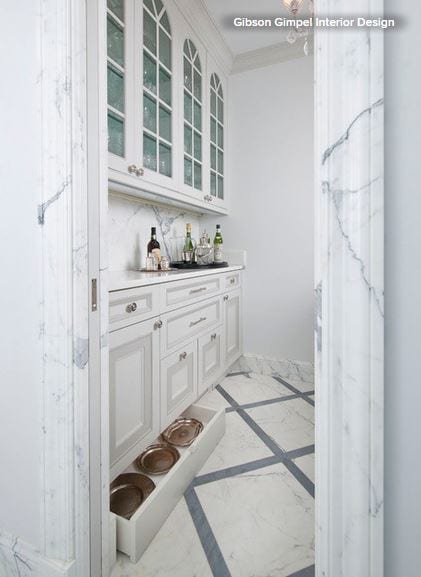
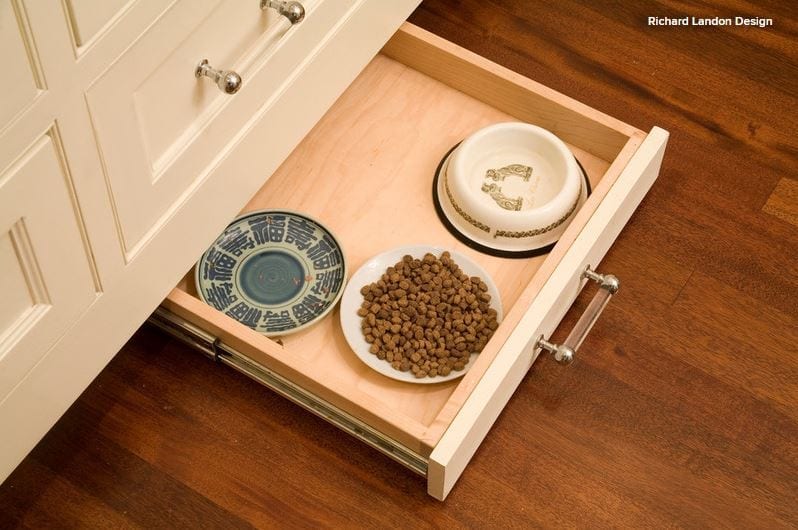
The pantry can hold dry goods plus brooms and supplies like paper towels. Use drawers in this area to hold plastic bags, foil and anything that can contain food to be stored. For the cabinets in this area, you will want to have mixing bowls, cake pans, measuring utensils and any other items that aid in assembling meals.

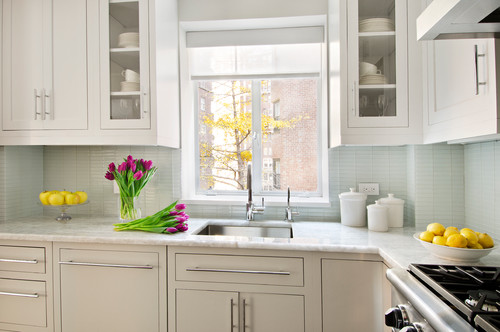
Preparation. Ideally, prep and cleaning space is best located around the sink. Within these areas will be everyday glasses and dishes, along with trash receptacles and the dishwasher. Allow 18 to 36 inches (45 to 92 centimeters) of countertop space on one or both sides of your sink.

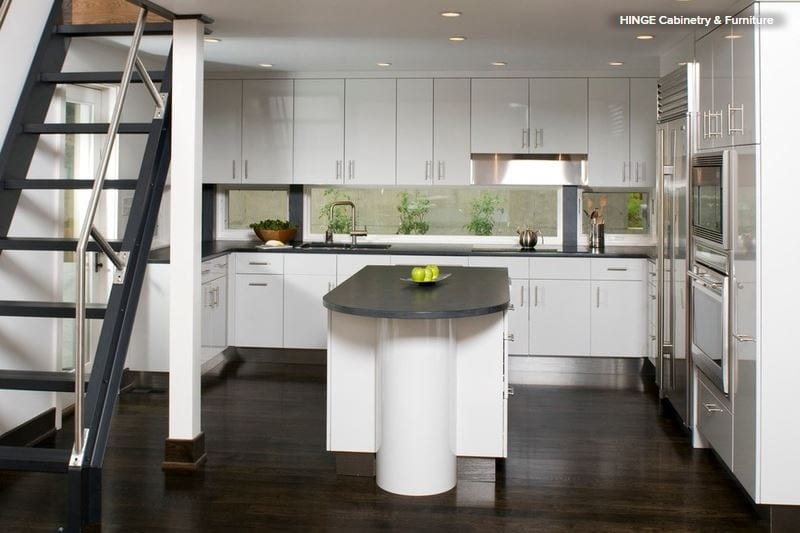
Preparation areas are best kept clear of other items, since you will always be taking out bowls, plates and utensils there. Allow at least 36 inches (92 centimeters) of uncluttered countertop space for preparation in a small kitchen. Larger kitchens will have much more. This is one reason that islands are so popular. They provide broad and well-lit surfaces on which to perform the majority of kitchen tasks.

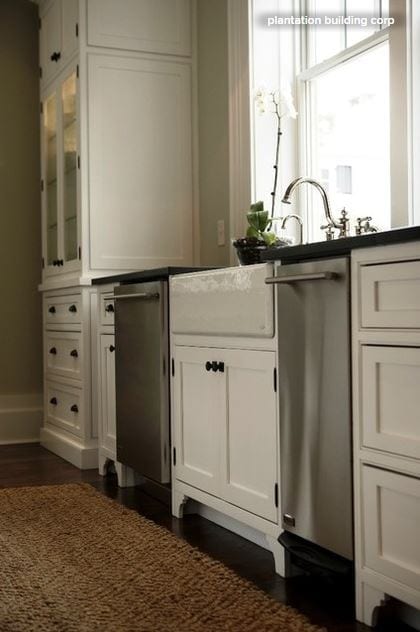
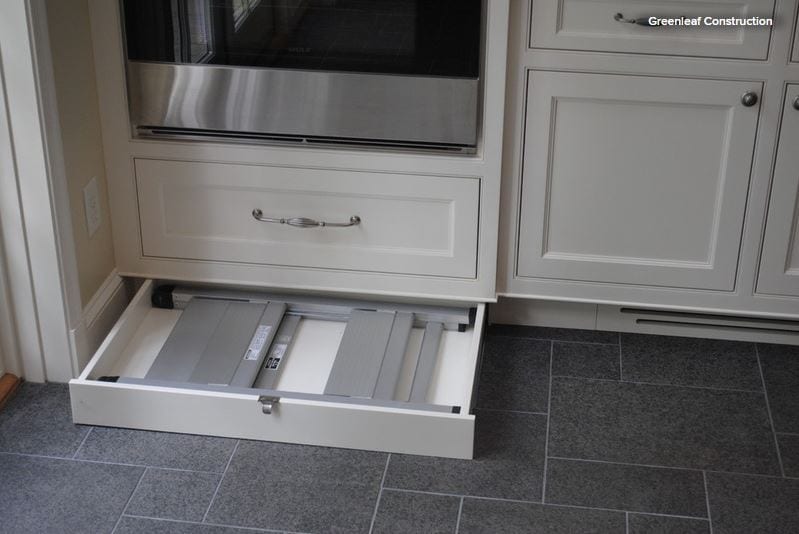
Cooking. The cooking centers should be arranged around the range, cooktop and wall ovens. Place pots, frying pans and baking sheets in the vicinity around your burners and ovens. It is a good idea to place small appliances such as toasters and coffeemakers in this area also, as it will leave your preparation areas unobstructed.

Allow 21 to 36 inches (53 to 92 centimeters) of countertop on either side of your cooktop. If possible, place wall ovens with a free countertop immediately next to them so that you can set down hot food immediately. Place seasonings, breadboards and potholders in nearby drawers and cupboards. Keep serveware toward the dining area.

Recommended Dimensions of Kitchen Elements

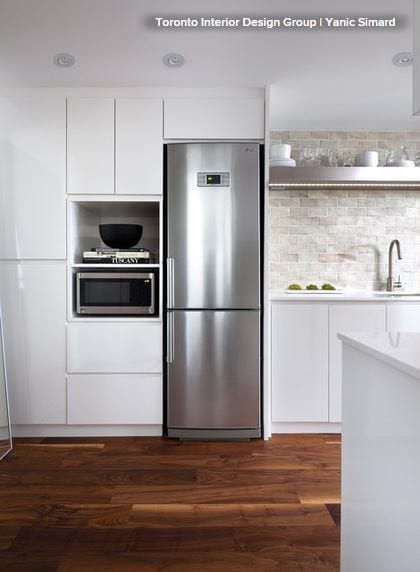
The dimensions of all the pieces in your kitchen are important to get right to make the best use of your space. A common refrigerator width is slightly less than 36 inches (92 centimeters). The problem is often the depth. In recent years some manufacturers have designed them to be much deeper than a 24-inch (61-centimeter) base cabinet. You can still buy shallower freestanding refrigerators, but you have to pay close attention to the dimensions listed in its specifications to be certain. The other option is built-in configurations, but they are significantly more expensive. 

Look for a depth of 30 inches (76 centimeters) or less, excluding handles, unless you can design your kitchen space to accept a deeper unit. Another thing to consider is the swing of the refrigerator door. Always examine the swing direction to see if it will meet an obstruction.


Here you can see how the height of the cabinets plays an important part in the configuration. Upper cabinets are normally positioned at 18 inches (46 centimeters) above the countertop and are 30 to 42 inches (76 to 107 centimeters) in height. Consider that your average maximum reach over and into an upper cabinet is 70 to 80 inches (178 to 203 centimeters) above the floor. Cabinets set at above 7 feet will likely need to be accessed with a step ladder. Cabinets above 8 feet are not practical for the majority of people; however, they may serve as storage for seasonal or decorative items, to be reached with step stools and ladders. 

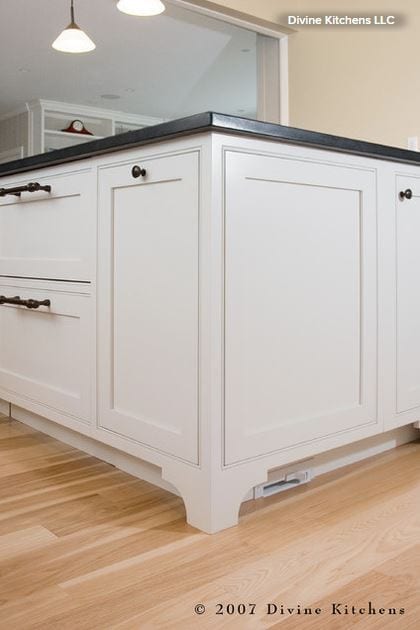
The standard dimensions for base cabinets are 24 inches (61 centimeters) deep and 36 inches (92 centimeters) high. In general people are getting taller, so some homeowners are bumping up the counter height to 38 inches (97 centimeters).


Another important dimension to consider is the distance between cabinets. Entry points can be as little as 36 inches (92 centimeters) when there is a cabinet on only one side. Stay at least 42 inches (107 centimeters) from the face of a cabinet to the one on the other side; 48 inches (122 centimeters) is even better, but going beyond 60 inches (152 centimeters) is too wide in most cases. However, if it is a U-shaped kitchen, you could get away with up to 96 inches (244 centimeters).